

Braun Clean & Charge, Flex XP, Contour, 5722, 5735-Clean & Charge (Flex XP, Contour) - 5790, Flex XP II System UK, FR, ES (USA, CDN, MEX)
Braun Clean & Charge, Flex XP, Contour, 5722, 5735-Clean & Charge (Flex XP, Contour) - 5790, Flex XP II System UK, FR, ES (USA, CDN, MEX)
Braun Clean & Charge, Flex XP, Contour, 5722, 5735-Clean & Charge (Flex XP, Contour) - 5790, Flex XP II System UK, FR, ES (USA, CDN, MEX)

You also want an ePaper? Increase the reach of your titles
YUMPU automatically turns print PDFs into web optimized ePapers that Google loves.
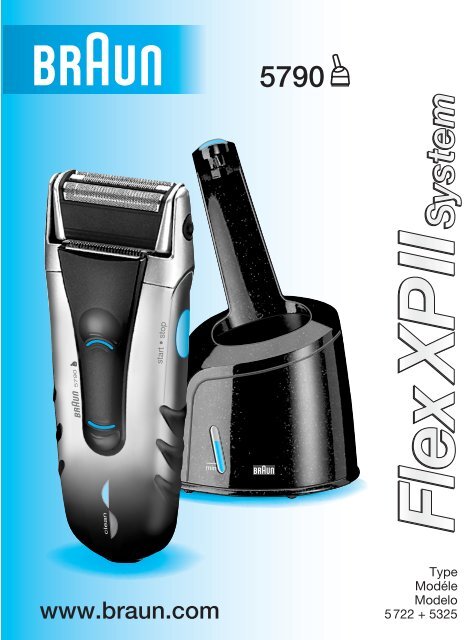
<strong>5790</strong><br />
start • stop<br />
<strong>5790</strong><br />
min<br />
clean<br />
www.braun.com<br />
Type<br />
Modéle<br />
Modelo<br />
<strong>5722</strong> + 5325
English 6<br />
Français 12<br />
Español 18<br />
Thank you for purchasing a <strong>Braun</strong> product.<br />
We hope you are completely satisfied with<br />
your new <strong>Braun</strong> shaver.<br />
If you have any questions, please call:<br />
US residents<br />
1-800-BRAUN-11<br />
1-800-272-8611<br />
Canadian residents 1-800-387-6657<br />
Merci d’avoir fait l’achat d’un produit <strong>Braun</strong>.<br />
Nous espérons que vous serez pleinement<br />
satisfait de votre nouveau rasoir <strong>Braun</strong>.<br />
Si vous avez des questions, veuillez appeler<br />
<strong>Braun</strong> Canada : 1-800-387-6657<br />
Gracias por haber comprado un producto<br />
<strong>Braun</strong>.<br />
Esperamos que Ud. quede completamente<br />
satisfecho con su nueva afeitadora <strong>Braun</strong>.<br />
Si Ud. tiene alguna duda, por favor llame al:<br />
01(800) 508-5800<br />
Internet<br />
www.braun.com<br />
5-722-300/00/VI-05/G2<br />
<strong>USA</strong> / <strong>CDN</strong> / <strong>MEX</strong><br />
Printed in Germany<br />
Imprimé en Allemagne<br />
Impreso en Alemania
A <strong>5790</strong><br />
1<br />
2<br />
5000<br />
6000<br />
Series<br />
100%<br />
2<br />
start • stop<br />
3<br />
1<br />
<strong>Flex</strong> Integral / <strong>Flex</strong> <strong>XP</strong><br />
5<br />
<strong>5790</strong><br />
start • stop<br />
4<br />
5000<br />
6000<br />
Series<br />
6<br />
7<br />
clean<br />
8<br />
rt • stop<br />
oil
B <strong>Clean</strong> & Renew<br />
1<br />
2<br />
new<br />
3<br />
2<br />
1<br />
4<br />
5<br />
new<br />
old
English<br />
IMPORTANT SAFETY<br />
INSTRUCTIONS<br />
When using an electrical appliance, basic precautions should always be<br />
followed, including the following:<br />
Read all instructions before using this appliance.<br />
DANGER<br />
To reduce the risk of electric shock:<br />
1. Do not reach for an appliance that has fallen into water.<br />
Unplug immediately.<br />
2. Do not use while bathing or in a shower when the appliance is connected to<br />
an electrical outlet.<br />
3. Do not place, store or charge the appliance where it can fall or be pulled<br />
into a tub or sink. Do not place in or drop into water or other liquid.<br />
4. When not using for a longer period of time, unplug this appliance from the<br />
electrical outlet.<br />
5. Unplug this appliance before cleaning.<br />
6. This appliance is provided with a special cord set with integrated Safety Extra<br />
Low Voltage power supply. Therefore, you must not exchange or manipulate<br />
any part of it.<br />
FOR HOUSEHOLD USE<br />
SAVE TH<strong>ES</strong>E INSTRUCTIONS<br />
6
WARNING<br />
To reduce the risk of burns, fire, electric shock, or injury to persons:<br />
1. Close supervision is necessary when this appliance is used by, on, or near<br />
children or invalids.<br />
2. Use this appliance only for its intended use as described in this manual.<br />
Do not use attachments not recommended by the manufacturer.<br />
3. The appliance should never be exposed to temperatures of less than<br />
32 ºF / 0 ºC and more than 105 ºF/+ 40 ºC for longer than a few hours.<br />
Be sure to completely dry appliance after use. Keep cord and adapter dry at<br />
all times. Do not store in a d<strong>amp</strong> environment. To avoid damage do not wind<br />
the cord around the appliance. It is important to check the cord for damage<br />
periodically particularly at each end where the cord enters the plug.<br />
4. Never operate this appliance if it has a damaged cord or plug, if it is not working<br />
properly, if it has been dropped or damaged, or dropped into water.<br />
Return the appliance to a service center for examination and repair.<br />
5. Keep the cord away from heated surfaces.<br />
6. Never drop or insert any object into any opening.<br />
7. Do not use outdoors or operate where aerosol (spray) products are being<br />
used or where oxygen is being administered.<br />
8. Do not use this appliance with a damaged or broken foil, as serious facial<br />
injuries may occur.<br />
9. Always attach plug to appliance first, then to outlet.<br />
To disconnect, turn all controls to «off», then remove plug from outlet.<br />
7
A The Shaver<br />
Description<br />
1 Shaver foil<br />
2 Cutter block<br />
3 Release button<br />
4 On/off switch<br />
5 Long hair trimmer<br />
6 Charging light (green)<br />
7 <strong>Clean</strong>ing light (yellow)<br />
8 Special cord set<br />
Charging the shaver<br />
• Using the special cord set, connect the<br />
shaver to an electrical outlet. Allow it to<br />
charge for at least 8 hours. During charging<br />
shaver and special cord set might get<br />
warm.<br />
• With normal use the shaver will be charged<br />
automatically after every cleaning in the<br />
<strong>Clean</strong>&Renew (see section B).<br />
• The green charging light indicates that the<br />
shaver is being charged.<br />
• A full charge will give up to 40 minutes of<br />
cordless shaving time depending on your<br />
beard growth. However, the maximum<br />
battery capacity will only be reached after<br />
several charging/discharging cycles.<br />
• Best environmental temperature range for<br />
charging is 60 °F to 95 °F / 15 °C to 35 °C.<br />
• When fully discharged, you may also shave<br />
with the shaver connected to an electrical<br />
outlet via the special cord set.<br />
Shaving<br />
Turn on the shaver («start»):<br />
The pivoting cutting system automatically<br />
adjusts to every contour of your face.<br />
Trimmer:<br />
When the long hair trimmer is activated, it<br />
allows the controlled trimming of moustache<br />
or sideburns.<br />
8<br />
Tips for the perfect shave<br />
• It can take up to 14-21 days for your beard<br />
to adjust to the new shaving system.<br />
• Shave before washing your face or taking a<br />
shower, as skin tends swell after washing.<br />
• The dryer the skin, the closer the shaving<br />
results will be.<br />
• Hold the shaver at right angles (90°) to the<br />
skin. Stretch your skin and shave against<br />
the direction of beard growth.<br />
• To maintain 100% shaving performance,<br />
replace your foil and cutterblock every<br />
18 months or when worn.<br />
Keeping your shaver in top<br />
shape<br />
<strong>Clean</strong>ing indicator<br />
Your shaver should be cleaned daily in the<br />
<strong>Clean</strong>&Renew, and certainly when the yellow<br />
cleaning light shines constantly after shaving. If<br />
this is not done, the yellow light will go out after<br />
some time. The shaver‘s electronics will then<br />
assume it has been cleaned manually and a<br />
new calculation of the time when the next<br />
cleaning is required will be started.<br />
During the cleaning process in the<br />
<strong>Clean</strong>&Renew the yellow light will flash and<br />
go off after approx. 4 hours when cleaning is<br />
finished.<br />
Automatic cleaning<br />
Once the shaver is put into in the<br />
<strong>Clean</strong>&Renew, it is cleaned automatically<br />
(see section B). Manual cleaning is<br />
recommended only when the <strong>Clean</strong>&Renew<br />
is not available, e.g. when traveling.<br />
Manual cleaning<br />
Remove the shaver foil (shaver head must be<br />
in central position) and, using the brush, clean<br />
the cutter block and the inner area of the<br />
shaver head. Do not clean the shaver foil with<br />
the brush.<br />
When cleaning the shaver under running<br />
water, make sure it is completely dry before<br />
putting it into the <strong>Clean</strong>&Renew.
B <strong>Clean</strong>&Renew<br />
Replacing the shaving parts<br />
To maintain 100% shaving performance,<br />
replace your foil and cutterblock every 18<br />
months or when worn. Change both parts at<br />
the same time for a closer shave with less skin<br />
irritation.<br />
Preserving the batteries<br />
In order to maintain the optimum capacity of<br />
the rechargeable batteries, once every six<br />
months fully discharge the shaver by shaving.<br />
During the time of discharging, clean only<br />
manually and not in the <strong>Clean</strong>&Renew. Then<br />
recharge the shaver in the <strong>Clean</strong>&Renew to<br />
full capacity again.<br />
Accessories<br />
Available at your dealer or <strong>Braun</strong> Service<br />
Centers:<br />
Shaver foil and cutter block<br />
(part no. 5000/6000)<br />
Environmental notice<br />
This appliance is provided with<br />
nickel-cadmium batteries. To<br />
protect the environment, do not<br />
dispose of this appliance in the<br />
household waste at the end of its useful life.<br />
Disposal can take place at a <strong>Braun</strong> Service<br />
Center or appropriate collection sites.<br />
<strong>Braun</strong> <strong>Clean</strong>&Renew has been developed<br />
for cleaning, charging and storing your shaver.<br />
<strong>Clean</strong> your shaver daily in the<br />
<strong>Clean</strong>&Renew.<br />
During the automated cleaning process,<br />
the shaver is switched on and off at intervals<br />
to obtain best cleaning results. Since the<br />
specially formulated cleaning fluid contains a<br />
small amount of oil, the cleaning procedure<br />
also fulfills the shaver's lubrication needs.<br />
Important<br />
• Only use the special cord set supplied with<br />
the shaver.<br />
• In order to avoid any leakage of the cleaning<br />
fluid, place the appliance on a flat, stable<br />
surface. Do not tip, move suddenly or<br />
transport in any way if a cleaning cartridge<br />
is installed.<br />
• Do not place the appliance in a mirror cabinet,<br />
nor store it over radiators, nor place it<br />
on polished or laquered surfaces. Do not<br />
expose to direct sunlight.<br />
• The appliance contains highly flammable<br />
liquid. Keep it away from<br />
sources of ignition. No smoking.<br />
Keep out of reach of children. Do not refill<br />
cartridge. Use only original <strong>Braun</strong> refill<br />
cartridge.<br />
• When cleaning the shaver, its protection<br />
cap should be removed.<br />
Description<br />
1 Lift button for cartridge exchange<br />
2 Contact bow<br />
3 Start/release button<br />
4 Level indicator<br />
5 <strong>Clean</strong>ing cartridge<br />
9
Before using <strong>Clean</strong>&Renew<br />
Installing the cartridge<br />
• Press the lift button (1) to open the housing.<br />
• Hold the cartridge down on a flat, stable<br />
surface (e.g. table). Carefully remove the lid<br />
from the cartridge. Slide the cartridge into<br />
the base as far as it will go.<br />
• Slowly close the housing by pushing it<br />
down until it locks.<br />
Replacing the cartridge<br />
After having pressed the lift button to open the<br />
housing, wait for a few seconds before<br />
removing the used cartridge.<br />
Before discarding the used cartridge, make<br />
sure to close the openings using the lid of the<br />
new cartridge, since the used cartridge will<br />
contain contaminated cleaning solution.<br />
You may dispose of the used cartridge in the<br />
normal household waste.<br />
Operating your<br />
<strong>Clean</strong>&Renew<br />
• Using the special cord set, connect your<br />
<strong>Clean</strong>&Renew to an electrical outlet. The<br />
special socket at the back is adjustable to<br />
save space. After each shave, switch the<br />
shaver off and put it into the<br />
<strong>Clean</strong>&Renew, upside down and with the<br />
front showing.<br />
• Push the start/release button (3) to lock and<br />
connect the shaver. The cleaning process<br />
will start. The yellow light on the shaver will<br />
flash during the complete process (approx.<br />
5 minutes cleaning, 4 hours drying).<br />
A cleaning cartridge should be sufficient<br />
for about 30 cleaning cycles. When the level<br />
indicator (4) has reached the «min» mark,<br />
the remaining fluid in the cartridge is<br />
sufficient for about 5 more cleaning cycles.<br />
After those 5 cycles, the cleaning performance<br />
will be reduced and the cartridge<br />
should be replaced.<br />
When used daily, the cleaning cartridge<br />
should be replaced approx. every 4 weeks.<br />
• The hygienic cleaning solution cartridge<br />
contains alcohol which, once opened,<br />
will naturally evaporate slowly into the<br />
surrounding air. Each cartridge, if not<br />
used daily should be replaced after approx.<br />
8 weeks.<br />
• <strong>Clean</strong> the housing from time to time with a<br />
d<strong>amp</strong> cloth, especially the opening where<br />
the shaver rests.<br />
Accessories<br />
Available at your dealer or <strong>Braun</strong> Service<br />
Centers:<br />
Refill cartridge (double pack) CCR 2, (#5331)<br />
Subject to change without notice.<br />
Electric specifications see printing on the<br />
special cord set.<br />
• Do not interrupt the cleaning process, as it<br />
leaves the shaver wet and not fit for use. If<br />
interruption is needed nonetheless, press<br />
the start/release button(3).<br />
• When cleaning is finished, the yellow light<br />
will go off and the shaver is ready for use.<br />
To release it, push the start/release button.<br />
10
FOR <strong>USA</strong> ONLY<br />
2 year limited warranty (foil<br />
and cutter block excluded)<br />
<strong>Braun</strong> warrants this <strong>Braun</strong> shaver (except foil<br />
and cutter block) to be free of defects in<br />
material and workmanship for a period of two<br />
years from the date of original purchase.<br />
If the shaver exhibits such a defect, <strong>Braun</strong> will,<br />
at its option, either repair or replace it for the<br />
consumer without charge.<br />
Please call 1-800-<strong>Braun</strong> 11 (800-272-8611) to<br />
be referred to the authorized <strong>Braun</strong> Service<br />
Center closest to you.<br />
This warranty does not cover foils, cutter blocks<br />
or damage resulting from accident, misuse,<br />
abuse, dirt, water, t<strong>amp</strong>ering, unreasonable<br />
use, normal wear, servicing performed or<br />
attempted by unauthorized service agencies or<br />
failure to provide reasonable and necessary<br />
maintenance, including recharging.<br />
ALL IMPLIED WARRANTI<strong>ES</strong>, INCLUDING ANY<br />
IMPLIED WARRANTY OF MERCHANTABILITY<br />
OR FITN<strong>ES</strong>S FOR ANY PARTICULAR<br />
PURPOSE, ARE LIMITED IN DURATION<br />
TO 2 YEARS <strong>FR</strong>OM DATE OF ORIGINAL<br />
PURCHASE.<br />
IN NO EVENT WILL BRAUN BE R<strong>ES</strong>PONSIBLE<br />
FOR CONSEQUENTIAL DAMAG<strong>ES</strong><br />
R<strong>ES</strong>ULTING <strong>FR</strong>OM THE USE OF THIS<br />
PRODUCT.<br />
FOR CANADA<br />
ONLY<br />
2 year limited warranty (foil<br />
and cutter block excluded)<br />
In the event a <strong>Braun</strong> Shaver fails to function<br />
within 2 years from date of purchase, because<br />
of defects in material or workmanship, and the<br />
consumer returns the unit to an authorized<br />
service center, <strong>Braun</strong> Canada, will, at its<br />
option, either repair or replace the unit without<br />
additional charge to the consumer.<br />
This guarantee does not cover any product,<br />
which has been damaged by dropping,<br />
t<strong>amp</strong>ering, wrong current, servicing performed<br />
or attempted by unauthorized service<br />
agencies, misuse or abuse, kinks in the<br />
shaver foil as well as the normal wear of the<br />
shearing parts.<br />
Exclusion of Warranties: The foregoing<br />
warranty is the sole warranty offered by <strong>Braun</strong><br />
Canada. <strong>Braun</strong> Canada hereby disclaims any<br />
implied warranty or merchantability or fitness<br />
for any particular purpose. In no event will<br />
<strong>Braun</strong> Canada be responsible for consequential<br />
damages resulting from the use of<br />
this product.<br />
Some states do not allow the exclusion or<br />
limitation of incidental or consequential<br />
damages, so the above limitation or exclusion<br />
may not apply to you.<br />
This warranty gives you specific legal rights,<br />
and you may also have other legal rights<br />
which vary from state to state.<br />
11
Français<br />
PRÉCAUTIONS IMPORTANT<strong>ES</strong><br />
Lors de l’utilisation d’appareils électriques, toujours prendre les mesures de<br />
précaution suivantes :<br />
Lire toutes les directives avant d’utiliser cet appareil.<br />
DANGER<br />
Pour réduire les risques de choc électrique, suivre les directives suivantes :<br />
1. Ne pas toucher l’appareil s’il est entré en contact avec de l’eau.<br />
Le débrancher immédiatement.<br />
2. Ne pas utiliser pendant le bain ou la douche lorsque l’appareil est branché sur<br />
une prise de courant.<br />
3. Ne pas placer ni ranger ni recharger l’appareil à un endroit d’où il peut tomber<br />
ou glisser dans une baignoire ou un lavabo. Ne pas immerger dans l’eau ni<br />
aucun autre liquide.<br />
4. Débrancher l’appareil de la prise de courant s’il n’est pas utilisé pendant une<br />
période prolongée.<br />
5. Débrancher l’appareil avant le nettoyage.<br />
6. Cet appareil comprend un cordon spécial muni d’un dispositif de sécurité<br />
intégré assurant une alimentation très basse tension. Par conséquent, il faut<br />
éviter d’échanger ou de manipuler les pièces.<br />
POUR <strong>USA</strong>GE DOM<strong>ES</strong>TIQUE<br />
CONSERVER C<strong>ES</strong> DIRECTIV<strong>ES</strong><br />
12
AVERTISSEMENT<br />
Pour réduire les risques de brûlure, d’incendie, de choc électrique ou de<br />
blessure, suivre les directives suivantes :<br />
1. Exercer une surveillance attentive lorsque l’appareil est utilisé par ou pour<br />
des enfants ou des personnes invalides, ou près de ceux-ci.<br />
2. Ne pas utiliser cet appareil à des fins autres que celles indiquées dans ce<br />
manuel. Ne pas employer d’accessoires non recommandés par le fabricant.<br />
3. L’appareil ne doit en aucun cas être soumis à des températures inférieures à<br />
0 ºC (32 ºF) ou supérieures à 40 ºC (105 ºF) pour plus de quelques heures.<br />
S’assurer de sécher entièrement l’appareil après l’emploi. Après l’utilisation,<br />
s’assurer que l’appareil et le cordon sont secs en tout temps. Ne pas ranger<br />
dans un endroit humide. Pour éviter les dommages, ne pas enrouler le<br />
cordon autour de l’appareil. Il est essentiel de vérifier périodiquement l’état du<br />
cordon, surtout les extrémités qui entrent dans la fiche.<br />
4. Ne jamais faire fonctionner un appareil dont la fiche ou le cordon est abîmé,<br />
qui n’est pas en bon état de fonctionnement, est tombé, a été endommagé<br />
ou mis en contact avec de l’eau. Retourner l’appareil à un centre de service<br />
pour inspection et réparation.<br />
5. Ne pas laisser le cordon entrer en contact avec des surfaces chaudes.<br />
6. Ne jamais laisser tomber ni insérer d’objets dans les orifices de l’appareil.<br />
7. Ne pas utiliser à l’extérieur, dans un endroit où des produits en aérosol<br />
(vaporisateurs) sont utilisés ni là où l’on administre de l’oxygène.<br />
8. Ne pas utiliser un appareil dont la grille est endommagée ou brisée ; cela<br />
pourrait entraîner des blessures graves au visage.<br />
9. Toujours relier la fiche à l’appareil avant de brancher sur la prise de courant.<br />
Pour débrancher l’appareil, placer tous les interrupteurs à « arrêt », puis<br />
retirer la fiche de la prise.<br />
13
A Le rasoir<br />
Description<br />
1 Grille du rasoir<br />
2 Bloc de coupe<br />
3 Bouton de déclenchement<br />
4 Interrupteur marche/arrêt<br />
5 Tondeuse pour poils longs<br />
6 Témoin de charge (vert)<br />
7 Témoin de nettoyage (jaune)<br />
8 Cordon spécial<br />
<strong>Charge</strong> du rasoir<br />
• À l’aide du cordon spécial, brancher le rasoir<br />
sur une prise de courant. <strong>Charge</strong>r pendant au<br />
moins huit heures. Il se peut que le rasoir et le<br />
cordon spécial deviennent chauds durant la<br />
charge.<br />
• Au cours d’une utilisation normale, le rasoir<br />
sera chargé automatiquement après chaque<br />
nettoyage dans le système <strong>Clean</strong>&Renew<br />
(voir la séction B).<br />
• Le témoin de charge vert indique que le rasoir<br />
est en cours de charge.<br />
• Une charge complète procure jusqu’à<br />
40 minutes de rasage sans cordon selon la<br />
longueur de la barbe. Toutefois, la capacité<br />
optimale des piles ne sera atteinte qu’après<br />
plusieurs cycles de charge et de décharge.<br />
• La gamme idéale de températures ambiantes<br />
pour la charge est de 15 ºC à 35 ºC / 60 ºF<br />
à 95 ºF.<br />
• Lorsque le rasoir est entièrement déchargé, il<br />
est possible de se raser en le branchant sur une<br />
prise de courant à l’aide du cordon spécial.<br />
Rasage<br />
Mettre le rasoir sous tension (« marche ») :<br />
Le système de coupe pivotant s’adapte<br />
automatiquement aux contours de votre<br />
visage.<br />
Tondeuse :<br />
Lorsque la tondeuse pour poils longs est<br />
activée, elle permet de tailler avec précision la<br />
moustache et les favoris.<br />
Conseils pour un rasage parfait<br />
• Prévoir une période de transition pouvant<br />
aller de 14 à 21 jours pour permettre à la<br />
barbe de s’adapter au nouveau système<br />
de rasage.<br />
• Se raser avant de laver son visage ou de<br />
prendre une douche, car la peau tend à<br />
enfler après la toilette.<br />
• Plus la peau est sèche, plus le rasage est<br />
précis.<br />
• Tenir le rasoir à angle droit (90°) par<br />
rapport à la peau. Étirer la peau et raser<br />
dans le sens opposé à la repousse.<br />
• Pour un rasage optimal, remplacer la grille<br />
et le bloc de coupe tous les 18 mois, ou<br />
lorsque les pièces sont usées.<br />
Pour garder le rasoir en<br />
parfait état<br />
Indicateur de nettoyage<br />
Nettoyer le rasoir tous les jours dans le<br />
système <strong>Clean</strong>&Renew, particulièrement<br />
lorsque le témoin de nettoyage jaune s’allume<br />
constamment après le rasage. Si le rasoir<br />
n’est pas nettoyé, le témoin jaune s’éteindra<br />
après un certain temps. Le dispositif électronique<br />
du rasoir passera à l’étape qui suit un<br />
nettoyage manuel et commencera un nouveau<br />
calcul du temps pour déterminer le<br />
moment où le prochain nettoyage sera requis.<br />
Au cours du processus de nettoyage dans le<br />
système <strong>Clean</strong>&Renew, le témoin jaune<br />
clignote puis s’éteint après environ quatre<br />
heures une fois que le nettoyage est terminé.<br />
Nettoyage automatique<br />
Lorsque le rasoir est placé dans le système<br />
<strong>Clean</strong>&Renew, il est nettoyé automatiquement<br />
(voir la séction B).<br />
Le nettoyage manuel est recommandé seulement<br />
si le système <strong>Clean</strong>&Renew n’est pas<br />
accessible, par exemple en voyage.<br />
14
B <strong>Clean</strong>&Renew<br />
Nettoyage manuel<br />
Enlever la grille du rasoir (la tête de rasage doit<br />
être en position centrale), et utiliser la brosse<br />
pour nettoyer le bloc de coupe et l’intérieur de<br />
la tête de rasage. Ne pas nettoyer la grille du<br />
rasoir avec la brosse.<br />
Après le nettoyage à l’eau du robinet, s’assurer<br />
que le rasoir est entièrement sec avant<br />
de le mettre dans le système <strong>Clean</strong>&Renew.<br />
Remplacement des pièces du rasoir<br />
Pour un rasage optimal, remplacer la grille et<br />
le bloc de coupe tous les 18 mois, ou lorsque<br />
les pièces sont usées. Pour un rasage plus<br />
précis causant moins d’irritation, remplacer<br />
les deux pièces en même temps.<br />
Conservation des piles<br />
Afin de conserver la capacité optimale des<br />
piles rechargeables, le rasoir doit être entièrement<br />
déchargé une fois tous les six mois au<br />
cours d’une utilisation normale. Durant la<br />
décharge, nettoyer le rasoir à la main seulement<br />
et non dans le système <strong>Clean</strong>&Renew.<br />
Recharger ensuite complètement le rasoir<br />
dans le système <strong>Clean</strong>&Renew.<br />
Accessoires<br />
Offerts chez les distributeurs et aux centres de<br />
service après-vente <strong>Braun</strong> :<br />
Grille du rasoir et bloc de coupe<br />
(pièces nos 5000 / 6000)<br />
<strong>Braun</strong> <strong>Clean</strong>&Renew a été mis au point pour<br />
nettoyer, charger et ranger votre rasoir.<br />
Nettoyez votre rasoir tous les jours dans le<br />
système <strong>Clean</strong>&Renew.<br />
Au cours du processus de nettoyage<br />
automatisé, le rasoir est mis sous et hors<br />
tension par intervalles pour assurer un<br />
nettoyage optimal. Le liquide nettoyant<br />
spécialement formulé contenant une petite<br />
quantité d’huile, le processus de nettoyage<br />
lubrifie également le rasoir.<br />
Important<br />
• Utiliser uniquement le cordon spécial fourni<br />
avec le rasoir.<br />
• Afin d’éviter toute fuite de liquide nettoyant,<br />
placer l’appareil sur une surface plane et<br />
stable. Ne pas incliner, déplacer brusquement<br />
ni transporter de quelque façon que<br />
ce soit si une cartouche de nettoyage est<br />
installée.<br />
• Ne pas ranger l’appareil dans une armoire à<br />
miroir ou sur un radiateur, ni le placer sur<br />
une surface polie ou laquée. Ne pas exposer<br />
à la lumière directe du soleil.<br />
• L’appareil contient un liquide hautement<br />
inflammable. Tenir loin des sources d’inflammation.<br />
Ne pas fumer. Garder hors de<br />
la portée des enfants. Ne pas recharger la<br />
cartouche. N’utiliser qu’une cartouche de<br />
rechange fabriquée par <strong>Braun</strong>.<br />
• Enlever le capot de protection pour le<br />
nettoyage du rasoir.<br />
Avis environnemental<br />
Cet appareil est muni de piles au<br />
nickel-cadmium. Pour protéger<br />
l’environnement, ne pas jeter cet<br />
appareil dans les ordures ménagères<br />
lorsqu’il n’est plus utilisable, mais le<br />
retourner à un centre de service après-vente<br />
<strong>Braun</strong> ou à un centre de collecte approprié.<br />
Description<br />
1 Bouton d’ouverture pour changer la<br />
cartouche<br />
2 Archet<br />
3 Bouton de marche / déclenchement<br />
4 Indicateur de niveau<br />
5 Cartouche de nettoyage<br />
15
Avant l’utilisation de<br />
<strong>Clean</strong>&Renew<br />
Installation de la cartouche<br />
• Appuyer sur le bouton d’ouverture (1) pour<br />
ouvrir le boîtier.<br />
• Tenir la cartouche à plat sur une surface<br />
plane et stable (par exemple une table).<br />
Retirer délicatement le couvercle de la<br />
cartouche. Glisser la cartouche le plus loin<br />
possible dans la base.<br />
• Fermer lentement le boîtier en appuyant<br />
jusqu’à ce qu’il s’enclenche.<br />
Remplacement de la cartouche<br />
Après avoir appuyé sur le bouton d’ouverture<br />
pour ouvrir le boîtier, attendre quelques<br />
secondes avant d’enlever la cartouche usée.<br />
Avant de jeter la cartouche usée, s’assurer de<br />
fermer les ouvertures à l’aide du couvercle de<br />
la cartouche neuve, car la cartouche usée<br />
contient de la solution de nettoyage contaminée.<br />
La cartouche usée peut être jetée dans les<br />
ordures ménagères ordinaires.<br />
Fonctionnement de<br />
<strong>Clean</strong>&Renew<br />
• À l’aide du cordon spécial, brancher<br />
<strong>Clean</strong>&Renew sur une prise de courant.<br />
La prise spéciale au dos est réglable pour<br />
économiser de l’espace. Après chaque<br />
rasage, mettre le rasoir hors tension et le<br />
placer dans le système <strong>Clean</strong>&Renew, à<br />
l’envers, de façon que le devant soit<br />
exposé.<br />
• Appuyer sur le bouton de marche / déclenchement<br />
(3) pour verrouiller et brancher le<br />
rasoir. Le processus de nettoyage débute.<br />
Le témoin jaune situé sur le rasoir clignote<br />
tout au long du processus (environ cinq<br />
minutes de nettoyage et quatre heures de<br />
séchage).<br />
• Ne pas interrompre le processus de<br />
nettoyage, car il laisse le rasoir mouillé et<br />
non fonctionnel. Si une interruption s’avère<br />
absolument nécessaire, appuyer sur le<br />
bouton de marche / déclenchement (3).<br />
• Au terme du nettoyage, le témoin jaune<br />
s’éteint et le rasoir est prêt à l’emploi. Pour<br />
le déclencher, appuyer sur le bouton de<br />
marche / déclenchement.<br />
• Une cartouche de nettoyage devrait<br />
suffire pour assurer environ 30 cycles de<br />
nettoyage. Lorsque l’indicateur de niveau<br />
(4) atteint le repère « min », le liquide qui<br />
reste dans la cartouche suffit pour assurer<br />
environ cinq autres cycles de nettoyage.<br />
Après ces cinq cycles, le pouvoir nettoyant<br />
est réduit et la cartouche doit être<br />
remplacée.<br />
• Si la cartouche de nettoyage est utilisée<br />
tous les jours, il est recommandé de la<br />
remplacer toutes les quatre semaines<br />
environ.<br />
• La cartouche de solution de nettoyage<br />
hygiénique contient de l’alcool qui, dès<br />
l’ouverture, s’évapore naturellement et<br />
lentement dans l’air environnant. Toutes les<br />
cartouches non utilisées quotidiennement<br />
devraient être remplacées après environ<br />
huit semaines.<br />
• Nettoyer le boîtier de temps à autre à l’aide<br />
d’un chiffon humide, particulièrement<br />
l’ouverture où le rasoir est appuyé.<br />
Accessoires<br />
Offerte chez les distributeurs et aux centres<br />
de service après-vente <strong>Braun</strong> :<br />
Cartouche de rechange<br />
(emballage double) CCR 2, (n o 5331)<br />
Sous réserve de modifications sans préavis.<br />
Spécifications électriques imprimées sur le<br />
cordon spécial.<br />
16
POUR<br />
LE CANADA<br />
SEULEMENT<br />
Garantie restreinte de deux<br />
ans (grille et bloc de coupe<br />
exclus)<br />
Advenant un défaut de fonctionnement d’un<br />
rasoir <strong>Braun</strong> survenant au cours de la période<br />
de deux ans suivant la date d’achat, en raison<br />
d’un vice de matière ou de fabrication, et<br />
pourvu que le consommateur retourne l’appareil<br />
à un centre de service après-vente<br />
agréé, <strong>Braun</strong> Canada se réserve le choix de le<br />
réparer ou de le remplacer, sans aucuns frais<br />
supplémentaires pour le consommateur.<br />
La présente garantie ne couvre pas tout<br />
produit endommagé par une chute, une<br />
modification, l’utilisation d’un courant inapproprié,<br />
un entretien ou des tentatives<br />
d’entretien par des centres de service aprèsvente<br />
non agréés, un usage impropre ou<br />
abusif, des anomalies dans la grille de<br />
rasage ou par l’usure normale des pièces<br />
de la tondeuse.<br />
Exclusion des garanties : La présente<br />
garantie est la seule garantie offerte par <strong>Braun</strong><br />
Canada. Par la présente, <strong>Braun</strong> Canada<br />
rejette toute garantie implicite à l’égard de la<br />
qualité marchande ou de l’aptitude à des fins<br />
particulières. En aucun cas <strong>Braun</strong> ne sera<br />
tenue responsable des dommages indirects<br />
résultant de l’utilisation de ce produit.<br />
17
Español<br />
PRECAUCION<strong>ES</strong> IMPORTANT<strong>ES</strong><br />
DE SEGURIDAD<br />
Cuando utilice productos eléctricos, deben seguirse siempre ciertas<br />
precauciones de seguridad, incluyendo las siguientes:<br />
Lea cuidadosamente las instrucciones antes de usar este aparato.<br />
PELIGRO<br />
Para reducir el riesgo de una descarga eléctrica:<br />
1. No tome el aparato si éste se ha caído al agua.<br />
Desconéctelo inmediatamente.<br />
2. Cuando la afeitadora esté conectada a la red électrica, no utilizarla mientras<br />
se esté bañanado o duchando.<br />
3. No coloque o guarde el aparato en algún lugar de donde pueda caerse al<br />
lavabo o a la tina.<br />
No lo coloque en el agua u otro líquido, ni lo deje caer en ellos.<br />
4. Cuando no lo utilice por un largo período de tiempo, desconecte el producto<br />
del toma corriente.<br />
5. Desconecte el aparato antes de limpiarlo.<br />
6. Este aparato está provisto de un cable especial de conexión a red integrado<br />
con un suministro eléctrico de bajo voltaje extra seguro. Por lo tanto, usted no<br />
debe intercambiar o manipular ningunA pieza del mismo.<br />
PARA USO DOM<strong>ES</strong>TICO<br />
CONSERVE <strong>ES</strong>TAS<br />
INSTRUCCION<strong>ES</strong><br />
18
ADVERTENCIA<br />
Para reducir el riesgo de quemaduras, descarga eléctrica, fuego o lesiones<br />
personales:<br />
1. Se debe supervisar detenidamente el uso de este aparato cuando sea<br />
empleado por o cerca de niños o invalidos.<br />
2. Este aparato debe ser utilizado solo y únicamente para los fines descritos en<br />
este manual. No utilice accesorios que no hayan sido recomendados por el<br />
fabricante.<br />
3. El aparato no deber ser expuesto durante largos períodos de tiempo<br />
(máximo algunas pocas horas), a temperaturas inferiores a 0 °C ni superiores<br />
a + 40 °C. Asegúrese de que la afeitadora este seca luego de cada uso.<br />
Después del uso, aseguresé que tanto el aparato como el cables, permanezcan<br />
siempre secos. No lo guarde en ambientes húmedos. Para evitar<br />
daños, no enrolle el cable alrededor del aparato. Es importante controlar<br />
periódicamente daños en el cable, particularmente en los extremos donde<br />
entra la clavija.<br />
4. Nunca use este aparato si el cable ha sufrido algún daño, si no esta funcionando<br />
adecuadamente, si el aparato esta dañado o lo ha dejado caer, o si lo<br />
ha sumergido en agua.<br />
Lleve su aparato a cualquier Centro de Servicio <strong>Braun</strong> para su revisión y<br />
reparación.<br />
5. Mantenga el cable lejos de superficies calientes.<br />
6. Nunca inserte ningún tipo de objeto en las ranuras del aparato.<br />
7. No usar al aire libre u operar cuando se estén usando productos en aerosol<br />
o cuando se administra oxígeno.<br />
8. No use este aparato si se ha dañado o roto la lámina, pues puede sufrir<br />
graves lesiones en la cara.<br />
9. Conecte siempre primero el cable al aparato y después la clavija al enchufe.<br />
Para desconectarlo apague el aparato y luego desenchufe la clavija.<br />
19
A La Afeitadora<br />
Description<br />
1 Lámina de la afeitadora<br />
2 Bloque de cuchillas<br />
3 Botón para extracción de lámina<br />
4 Botón encendido/apagado<br />
5 Cortapatillas extensible/recortador de<br />
pelo largo<br />
6 Luz de carga (verde)<br />
7 Luz de limpieza (amarillo)<br />
8 Cable especial<br />
Precaución<br />
No permita que el aparato se moje.<br />
Proceso de Carga<br />
• Utilizando el cable especial provisto,<br />
conecte la afeitadora a la red eléctrica.<br />
Permita que cargue por al menos, 8 horas.<br />
Durante la carga, la afeitadora y el cable<br />
especial pueden llegar a calentarse.<br />
• Con el uso normal, la afeitadora será<br />
recargada automáticamente luego de cada<br />
limpieza que sé realize en el<br />
<strong>Clean</strong>&Renew (vea la sección B).<br />
• La luz verde indica que la afeitadora se<br />
encuentra cargándose.<br />
• Un carga completa le brindará aproximadamente<br />
hasta 40 minutos de afeitado sin<br />
cable, el cuál podrá variar en función del<br />
crecimiento de su barba. Sin embargo, la<br />
capacidad máxima de la batería se alcanzará<br />
solo luego de varios procesos de<br />
carga/descarga.<br />
• El rango de temperatura ambiente ideal<br />
para el proceso de carga es de 60°F to<br />
95°F/15°C to 35°C.<br />
• Cuando este completamente descargada,<br />
Usted puede afeitarse conectando la afeitadora<br />
a la red eléctrica medianto el cable<br />
especial provisto.<br />
Afeitado<br />
Encienda la afeitadora («start»):<br />
El sistema de cabezal basculante, permite a la<br />
afeitadora ajustarse automáticamente a todos<br />
los contornos de su cara.<br />
20<br />
Cortapatillas:<br />
Cuando el cortapatillas es activado, permite<br />
una precisa delineación y recorte de las<br />
patillas o del bigote.<br />
Consejos para un afeitado perfecto<br />
• Puede tomarle 14-21 días a su barba,<br />
acostumbrarse al nuevo sistema de<br />
afeitado.<br />
• Aféitese antes de lavarse la cara o<br />
bañarse, ya que la piel tiende a hincharse<br />
ligeramente después de lavarse.<br />
• Entre más seca esté la piel, serán mejores<br />
los resultados del afeitado.<br />
• Mantenga la afeitadora en ángulos rectos<br />
(90°) con la piel. Estire la piel y deslice la<br />
afeitadora en la dirección contraria al<br />
crecimiento de la barba.<br />
• Para mantener al 100% la performance<br />
de afeitado, recomendamos reemplazar<br />
la lámina y el bloque de cuchillas cada<br />
18 meses o cuando se hayan deteriorado.<br />
Manteniendo su afeitadora<br />
en óptimo estado<br />
Indicador de limpieza<br />
Su afeitadora debería ser higienizada en<br />
forma diaria en el centro <strong>Clean</strong>&Renew, y<br />
ciertamente cuando la luz amarilla, destelle en<br />
forma constante luego de afeitarse. Si esto no<br />
sé hiciera, al cabo de un tiempo, la luz amarilla<br />
se apagará. La electrónica de la afeitadora,<br />
asumirá que ha sido lavada manualmente y un<br />
nuevo período de tiempo, será calculado<br />
hasta que sea solicitada la próxima limpieza.<br />
Durante el proceso de limpieza en el<br />
<strong>Clean</strong>&Renew, la luz amarilla destellará<br />
hasta apagarse aproximádamente luego de<br />
4 horas que haya finalizado la limpieza.<br />
Limpieza automática<br />
Una vez que la afeitadora es introducida en<br />
el <strong>Clean</strong>&Renew, la misma es lavada automáticamente<br />
(vea la sección B).<br />
El lavado manual es solamente recomendado
B <strong>Clean</strong>&Renew<br />
cuando el centro <strong>Clean</strong>&Renew no está disponible<br />
– ej. de viaje.<br />
Limpieza manual<br />
Remueva la lámina de la afeitadora (el cabezal<br />
debe estar centralizado) y utilizando un cepillo,<br />
limpie el bloque de cuchillas y el área<br />
interior del cabezal de la afeitadora. No limpie<br />
la lámina de la afeitadora con el cepillo.<br />
Cuando limpie la afeitadora bajo el agua del<br />
grifo, asegúrese antes de introducirla en el<br />
<strong>Clean</strong>&Renew, que la misma se encuentra<br />
perfectamente seca.<br />
Recambio de componentes<br />
Para mantener al 100% la performance del<br />
afeitado, reemplaze su lámina y el bloque de<br />
cuchillas cada 18 meses o cuando se haya<br />
deteriorado. Cambie ambas partes al mismo<br />
tiempo para un afeitado más al rás, con una<br />
menor irritación de piel.<br />
Preservando las baterías<br />
Para optimizar la capacidad y vida útil de las<br />
baterías, cada seis meses descargue por<br />
completo su afeitadora. Durante el tiempo de<br />
descarga, sólo limpie manualmente la afeitadora<br />
y no en el centro <strong>Clean</strong>&Renew. Luego<br />
recargue la afeitadora a su máxima capacidad<br />
en el centro <strong>Clean</strong>&Renew.<br />
Accesorios<br />
Disponibles en su comercio habitual o en los<br />
Servicios de Asistencia Técnica <strong>Braun</strong>:<br />
Lámina y bloque de cuchillas<br />
(parte n° 5000/6000)<br />
Aviso ecológico<br />
Este aparato esta provisto con baterías de<br />
níquel-cadmio. Para protejer el medio ambiente,<br />
al final de la vida útil, no disponga de<br />
las mismas en los desechos domésticos.<br />
Pueden ser entregados en los Servicios de<br />
Asistencia Técnica <strong>Braun</strong> o en lugares<br />
adecuados de recolección.<br />
El <strong>Braun</strong> <strong>Clean</strong>&Renew ha sido desarrollado<br />
para la limpieza, carga y depósito de afeitadora.<br />
Limpie su afeitadora diariamente en el<br />
<strong>Clean</strong>&Renew.<br />
Durante el proceso automático de limpieza,<br />
para conseguir mejores resultados de limpieza,<br />
la afeitadora se enciende y se apaga<br />
durante intervalos. Dado que el exclusivo<br />
líquido contiene una pequeña cantidad de<br />
aceite, además de cumplir con la función de<br />
limpieza, también satisface las necesidades<br />
de lubricación.<br />
Importante<br />
• Utilice solamente el cable especial que se<br />
adjunta con la máquina.<br />
• Para evitar cualquier fuga del líquido de<br />
limpieza, sitúe el aparato sobre una superficie<br />
lisa y estable. No vuelque, mueva<br />
repentinamente o transporte el aparato, si<br />
el cartucho de limpieza está instalado.<br />
• No situé el aparato en vitrinas con espejos,<br />
sobre radiadores/calentadores, ni en superficies<br />
pulidas. No lo exponga a la luz<br />
directa del sol.<br />
• Este aparato contiene líquido altamente<br />
inflamable. Manténgalo alejado de fuentes<br />
de ignición. No fume. Manténgalo fuera del<br />
alcance de los niños. No rellene el cartucho.<br />
Utilice sólo los cartuchos orginales de<br />
<strong>Braun</strong>.<br />
• Cuando limpie la afeitadora, previamente<br />
extraiga el protector de la lámina.<br />
Descripción<br />
1 Botón de extracción, para la sustitución de<br />
cartuchos<br />
2 Montura de contacto<br />
3 Botón de comienzo / liberación<br />
4 Indicador de nivel<br />
5 Cartucho de limpieza<br />
21
Antes de usar el<br />
<strong>Clean</strong>&Renew<br />
Instalación del cartucho<br />
• Presione el botón de extracción (1) para<br />
abrir la carcasa exterior.<br />
• Mantenga el cartucho sobre una superficie<br />
estable y lisa (ej. una mesa).<br />
Cuidadosamente retire la tapa del cartucho.<br />
Deslice el cartucho hacia el interior de la<br />
base.<br />
• Cierre la carcasa exterior, presionando la<br />
misma con cuidado hacia abajo, hasta que<br />
quede perfectamente ajustada.<br />
Sustitución del cartucho<br />
Tras haber presionado el botón de extracción<br />
(1) para abrir la carcasa exterior, espere unos<br />
segundos antes de retirar el cartucho usado.<br />
Antes de descartar el cartucho usado, asegúrese<br />
de cerrar sus orificios de salida con la<br />
tapa del nuevo cartucho, ya que el cartucho<br />
usado contendrá ahora una solución limpiadora<br />
sucia.<br />
Puede tirar el cartucho usado junto con los<br />
desperdicios domésticos.<br />
Utilización de su<br />
<strong>Clean</strong>&Renew<br />
• Utilizando el cable especial, conecte su<br />
<strong>Clean</strong>&Renew a la red eléctrica. La parte<br />
trasera del enchufe especial, es ajustable<br />
para ahorrar espacio. Después de cada<br />
afeitado, apague la afeitadora y colóquela<br />
en forma invertida en el interior del<br />
<strong>Clean</strong>&Renew, con el frente mirando<br />
hacia Usted.<br />
• Presione el botón de comienzo / liberación<br />
(3) para asegurar y conectar la afeitadora.<br />
El proceso de limpieza comenzará. La luz<br />
amarilla destellará durante el todo el proceso<br />
(aprox. 5 minutos de limpieza, 4 horas<br />
de secado).<br />
• No interrumpa el proceso de limpieza, ya<br />
que la afeitadora aún no estará seca, ni en<br />
condiciones de uso. No obstante, si la<br />
interrupción fuese necesaria, presione el<br />
botón de comienzo / liberación (3).<br />
• Cuando el proceso termina, la luz amarilla<br />
se apagará y la afeitadora estará lista para<br />
su uso. Para retirarla, presione el botón de<br />
comienzo / liberación.<br />
• Un cartucho de limpieza debería ser<br />
suficiente para alrededor de 30 ciclos de<br />
limpieza. Cuando el indicador de nivel (4)<br />
ha alcanzado la marca «min», el líquido<br />
restante debería ser suficiente para 5 procesos<br />
más de limpieza. Luego de esos 5<br />
procesos, la performance de limpieza se<br />
verá reducida, y el cartucho deberá ser<br />
reemplazado.<br />
• Usado en forma diaria, el cartucho de<br />
limpieza debería ser reemplazado aprox.<br />
cada 4 semanas.<br />
• La solución de limpieza contiene alcohol,<br />
por lo que una vez abierto, se irá evaporando<br />
lentamente. Cada cartucho, si no se<br />
utiliza en forma diaria, debería ser reemplazado<br />
cada 8 semanas.<br />
• Limpie la carcasa exterior de vez en cuando<br />
con un trapo húmedo, especialmente el<br />
orificio donde descansa la afeitadora.<br />
Accesorios<br />
Disponibles en su comercio habitual o en los<br />
Servicios de Asistencia Técnica <strong>Braun</strong>:<br />
Cartuchos de limpieza (pack doble) CCR 2,<br />
(#5331)<br />
Sujeto a cambios sin previo aviso.<br />
Especificaciones técnicas:<br />
Consumo: 7 W<br />
Alimentación a través de conexión a red:<br />
100-240 V/ 50 o 60 Hz (se adapta automáticamente)<br />
Voltaje de la afeitadora: 12 V<br />
22
Importado y/o distribuído por:<br />
Gillette Manufactura, S.A. de C.V. /<br />
Gillette Distribuidora, S.A. de C.V.<br />
Atomo No. 03<br />
Parque Industrial Naucalpan<br />
Naucalpan de Juarez<br />
Estado de México<br />
C.P. 53370<br />
R.F.C. GMA 940301 MV7 /<br />
R.F.C. GDI 930 706 NZ1<br />
SÓLO PARA<br />
<strong>MEX</strong>ICO<br />
2 años de garantía limitada<br />
<strong>Braun</strong> de México garantiza que este producto<br />
está libre de cualquier defecto de fabricación<br />
o mano de obra por un período de un año a<br />
partir de la fecha de compra. Si llegara a<br />
mostrar algún defecto, <strong>Braun</strong> de México,<br />
salvo propia opinión, reparará o reemplazará<br />
el aparato sin cargo alguno.<br />
1.Comuníquese con nuestro Centro de<br />
Atención al Consumidor:<br />
01-800-508-5800 o devuelva el aparato por<br />
correo (gastos de envío y seguro pagados)<br />
indicando las razones de la devolución a:<br />
Departamento de Servicio, Gillette<br />
Distribuidora, S.A. de C.V.<br />
Atomo No. 03, Parque Industrial Naucalpan,<br />
53370 Naucalpan de Juarez,<br />
Estado de México.<br />
2.Adjunte nota de compra fechada.<br />
Esta garantía no <strong>amp</strong>ara defectos<br />
ocasionados por: accidente, falta de uso,<br />
abuso, falta de aseo, agua, pizotones, mal<br />
uso, intervención de centros de servicio no<br />
autorizados o falta de mantenimiento.<br />
TODAS LAS GARANTIAS IMPLICITAS<br />
INCLUYENDO CUALQUIER GARANTIA<br />
IMPLICITA COMERCIABLE O ADECUACION<br />
PARA CUALQUIER PROPOSITO<br />
PARTICULAR <strong>ES</strong>TAN LIMITADAS A UNA<br />
DURACION DE 2 AÑOS A PARTIR DE LA<br />
FECHA DE COMPRA. DE NINGUNA MANERA<br />
BRAUN DE <strong>MEX</strong>ICO SERA R<strong>ES</strong>PONSABLE<br />
POR DAÑOS INDIRECTOS QUE R<strong>ES</strong>ULTEN<br />
DEL USO DE <strong>ES</strong>TE PRODUCTO.<br />
23


