

Brother TD-4100N - Additional Operation Guide (Connecting a Barcode Scanner)
Brother TD-4100N - Additional Operation Guide (Connecting a Barcode Scanner)
Brother TD-4100N - Additional Operation Guide (Connecting a Barcode Scanner)

Create successful ePaper yourself
Turn your PDF publications into a flip-book with our unique Google optimized e-Paper software.
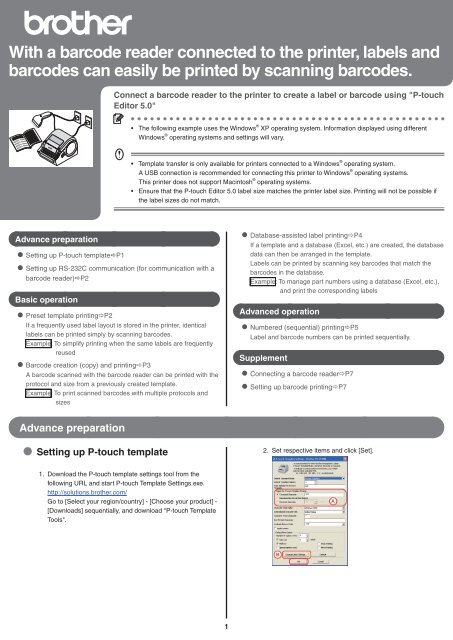
With a barcode reader connected to the printer, labels and<br />
barcodes can easily be printed by scanning barcodes.<br />
Connect a barcode reader to the printer to create a label or barcode using "P-touch<br />
Editor 5.0"<br />
• The following example uses the Windows ® XP operating system. Information displayed using different<br />
Windows ® operating systems and settings will vary.<br />
• Template transfer is only available for printers connected to a Windows ® operating system.<br />
A USB connection is recommended for connecting this printer to Windows ® operating systems.<br />
This printer does not support Macintosh ® operating systems.<br />
• Ensure that the P-touch Editor 5.0 label size matches the printer label size. Printing will not be possible if<br />
the label sizes do not match.<br />
Advance preparation<br />
• Setting up P-touch templateP1<br />
• Setting up RS-232C communication (for communication with a<br />
barcode reader)P2<br />
Basic operation<br />
• Preset template printingP2<br />
If a frequently used label layout is stored in the printer, identical<br />
labels can be printed simply by scanning barcodes.<br />
Example: To simplify printing when the same labels are frequently<br />
reused<br />
• <strong>Barcode</strong> creation (copy) and printingP3<br />
A barcode scanned with the barcode reader can be printed with the<br />
protocol and size from a previously created template.<br />
Example: To print scanned barcodes with multiple protocols and<br />
sizes<br />
• Database-assisted label printingP4<br />
If a template and a database (Excel, etc.) are created, the database<br />
data can then be arranged in the template.<br />
Labels can be printed by scanning key barcodes that match the<br />
barcodes in the database.<br />
Example: To manage part numbers using a database (Excel, etc.),<br />
and print the corresponding labels<br />
Advanced operation<br />
• Numbered (sequential) printingP5<br />
Label and barcode numbers can be printed sequentially.<br />
Supplement<br />
• <strong>Connecting</strong> a barcode readerP7<br />
• Setting up barcode printingP7<br />
Advance preparation<br />
• Setting up P-touch template<br />
2. Set respective items and click [Set].<br />
1.<br />
Download the P-touch template settings tool from the<br />
following URL and start P-touch Template Settings.exe.<br />
http://solutions.brother.com/<br />
Go to [Select your region/country] - [Choose your product] -<br />
[Downloads] sequentially, and download "P-touch Template<br />
Tools".<br />
1
Advance preparation<br />
In the default setting, printing starts when the ^FF code is scanned<br />
by the barcode reader. (This can be changed in A.)<br />
Select the [Received Data Size] check box and specify the number<br />
of bytes to print automatically when a barcode with the specifi ed<br />
number of bytes is scanned.<br />
The above settings are reset if you print from a computer even once<br />
after specifying settings.<br />
If you have printed from a computer, reapply the above settings.<br />
• Setting up RS-232C communication<br />
(communication with a barcode reader)<br />
Default printer settings<br />
Baud Rate: 9600<br />
Bit Length: 8<br />
Parity: None<br />
Busy Control: DTR<br />
Stop bit: 1 (Fixed)<br />
Click B in Setting up P-touch template<br />
If there are no problems, click the [Set] button.<br />
Note: The above settings may differ depending on the<br />
scanner.<br />
Ask the scanner manufacturer for details.<br />
Basic operation<br />
• Preset template printing<br />
• Procedure overview<br />
Create a labelTransfer label data to printerPrint label<br />
• Procedure<br />
1.<br />
Example:<br />
Create a label template<br />
1.<br />
Start P-touch Editor 5.0, and then create and edit the label<br />
to be printed.<br />
2.<br />
Ensure that the printer is connected to a computer<br />
and then transfer the label data to the printer.<br />
1. Click [File]-[Transfer Template...] to start the P-touch Transfer<br />
Manager.<br />
Select the label data from the list and right-click to display the<br />
menu.<br />
Select [Key Assign] to assign the key number.<br />
This number becomes the label template number when printing.<br />
2.<br />
Select the text on the created label, and then right-click to<br />
open [Properties]. Select the [Expanded] tab.<br />
Note : - In the example, the "Key Assign" number is 2.<br />
- When printing preset templates, specify a number between<br />
1 and 10.<br />
2.<br />
Click [Transfer] to transfer the label data to the printer.<br />
3.<br />
Select the [Text Cannot Be Edited] check box and then click<br />
[OK].<br />
Note: If this check box is not selected, the data will be<br />
replaced and normal printing may not be possible.<br />
3.<br />
Connect a barcode reader to the printer.<br />
Refer to "<strong>Connecting</strong> a barcode reader" on P.7 for more<br />
details.<br />
2
Basic operation<br />
4.<br />
Print a label<br />
Scan the barcode below, and then scan the barcode<br />
that corresponds to the "Key Assign" number used when<br />
transferring the data, referring to the preset template<br />
numbers below.<br />
2.<br />
Create a label template (barcode)<br />
1.<br />
2.<br />
Start P-touch Editor 5.0.<br />
Press [Insert] [<strong>Barcode</strong>] to open the barcode properties, and<br />
enter the data.<br />
Note: In the example, the following number is used to create<br />
a template.<br />
• Preset template<br />
<br />
<br />
Example:<br />
(EAN13)<br />
The template created in step 1 is printed.<br />
In the example,scan the preset template 2 to print the TOM<br />
label<br />
Note: The barcodes shown above integrate selection and<br />
printing of templates.<br />
For information about preset template numbers other than<br />
the above, refer to the "Preset template number" list on P9.<br />
3.<br />
3.<br />
Save the data.<br />
Note : - The label will be printed using the protocol of the<br />
barcode previously specifi ed in the template.<br />
- Specify the label length in accordance with the<br />
maximum number of barcodes to be used.<br />
Ensure that the printer is connected to a computer<br />
and then transfer the label data to the printer.<br />
1. Click [File]-[Transfer Template...] to start the Transfer<br />
Manager.<br />
If you want to print a template with a template number<br />
of 10 or above, refer to "List of barcodes for specifying<br />
settings" on page 9 and the following pages to scan<br />
"Select template"(^TS)/"Entering numbers"(for number<br />
15, scan barcodes in the order of 0, 1, and 5) and "Begin<br />
printing"(^FF).<br />
Select the label data from the list and right-click to display the<br />
menu.<br />
Select [Key Assign] to assign the key number.<br />
This number becomes the label template number when printing.<br />
• <strong>Barcode</strong> creation (copy) and printing<br />
• Procedure overview<br />
Prepare the label to be copiedCreate barcode label<br />
Transfer label dataScan barcode label to be copiedPrint<br />
label<br />
Note: Prepare the barcode label to be created (copied).<br />
• Procedure<br />
Note: In the example, the "Key Assign" number is 3.<br />
1.<br />
Prepare the label to be copied.<br />
Example: Product barcode, etc.<br />
4.<br />
2. Click [Transfer] to transfer the label data to the printer.<br />
Connect a barcode reader to the printer.<br />
Refer to "<strong>Connecting</strong> a barcode reader" on P.7 for more<br />
details.<br />
3
Basic operation<br />
5.<br />
Print a barcode<br />
1. Scan the "P-touch template command (Initialize + begin<br />
specifying settings)" barcode below.<br />
• P-touch template command (Initialize + begin specifying<br />
settings)<br />
2.<br />
(3) Price<br />
Create a database containing the above data.<br />
Start P-touch Editor 5.0, connect to the database, and<br />
create the linked data.<br />
2.<br />
Scan the template that corresponds to the "Key Assign"<br />
number.<br />
Example: If the "Key Assign" number is 3.<br />
• Select template<br />
Click [File] – [Database] – [Connect], and specify the<br />
database location to connect to the database.<br />
Click [Insert] – [Database fi eld], and specify any additional<br />
object formatting.<br />
Select the fi elds to be added from the available database<br />
fi elds.<br />
^TS003<br />
Note: The above barcode integrates ^TS,00,3 and three<br />
barcodes. For details on each barcode, refer to "List of<br />
barcodes for specifying settings" on P.8.<br />
3.<br />
Scan the barcode label prepared in step 1.<br />
Example: Product barcode, etc.<br />
4. Scan the "Begin printing" barcode below.<br />
• Begin printing<br />
Note: For details on how to link to a database, refer to the<br />
P-touch Editor Help.<br />
The label scanned in step 5-3 above is printed.<br />
• Database-assisted label printing<br />
• Procedure overview<br />
Create database-linked dataTransfer label dataPrint<br />
label<br />
In the following example, a label is created containing a<br />
product barcode (1), a product name (2), and a price (3).<br />
The required label can be printed by scanning the product<br />
barcode.<br />
Example:<br />
•<br />
•<br />
•<br />
•<br />
•<br />
2.<br />
Compatible Excel database formats: *.xls, *.mdb, *.csv, and *.txt.<br />
Save the P-touch Editor data (*.lbx) and database data in the<br />
same folder.<br />
An item title entered in the fi rst line of the database can be used<br />
as the fi eld name when linked.<br />
The fi eld name can be specifi ed on the [Database] and [Connect]<br />
wizards.<br />
Enter the barcode number in the fi rst line of the database.<br />
This setting enables you to print the label that corresponds with<br />
the barcode number scanned in step 4-3.<br />
Ensure that the printer is connected to a computer<br />
and then transfer the data linked to the database<br />
to the printer.<br />
1. Click [File]-[Transfer Template...] and start the P-touch<br />
Transfer Manager.<br />
Note: Create in advance the key barcode to be used in step<br />
4-3.<br />
Select the label data from the list and right-click to display the<br />
menu. Select [Key Assign] to assign the key number.<br />
This number becomes the label template number when printing.<br />
• Procedure<br />
1.<br />
Create database-linked (Excel, etc.) data.<br />
1. Create an Excel database (list).<br />
When creating the label in the example<br />
(1) Items to be contained in the barcode section (control<br />
number, etc.) = key barcode<br />
(2) Product name<br />
2. Click [Transfer] to transfer the database data to this printer.<br />
4
Basic operation<br />
3.<br />
Connect a barcode reader to the printer.<br />
Refer to "<strong>Connecting</strong> a barcode reader" on P.7 for more<br />
details.<br />
3.<br />
Scan the barcode to be printed from the database sent<br />
together with the template.<br />
Example: 2222222222222 barcode<br />
4.<br />
Print a label.<br />
1. Scan the "P-touch template command (Initialize + begin<br />
specifying settings)" barcode below.<br />
• P-touch template command (Initialize + begin specifying<br />
settings)<br />
4.<br />
5.<br />
Scan the "Delimiter" barcode below.<br />
• Delimiter<br />
Scan the "Begin printing" barcode below.<br />
• Begin printing<br />
2.<br />
Scan the template that corresponds to the "Key Assign"<br />
number.<br />
Example: If the "Key Assign" number is 4<br />
• Select template<br />
^TS004<br />
Print<br />
example:<br />
In the following example, a product name (Black) and<br />
price ($1.55) label is printed that corresponds to the same<br />
barcode(2222222222222) line.<br />
Note: The above barcode integrates ^TS,00,4 and three<br />
barcodes. For details on each barcode, refer to "List of<br />
barcodes for specifying settings" on P.8.<br />
Advanced operation<br />
• Numbered (sequential) printing<br />
Label and barcode numbers can be printed while<br />
automatically counting up.<br />
• Text labels<br />
• Procedure overview<br />
Create text labelTransfer label dataPrint label<br />
• Procedure<br />
1.<br />
Example:<br />
Create a text label.<br />
1.<br />
2.<br />
Start P-touch Editor 5.0.<br />
Enter text.<br />
4. Right-click and select [Numbering (sequential)].<br />
• For each template, numbering ranges can be specifi ed for up to<br />
9 objects.<br />
• Up to 15 characters can be specifi ed in a numbering range.<br />
2.<br />
Ensure that the printer is connected to a computer<br />
and then transfer the label data to the printer.<br />
1. Click [File]-[Transfer Template...] to start the P-touch Transfer<br />
Manager.<br />
Select the label data from the list and right-click to display the<br />
menu.<br />
Select [Key Assign] to assign the key number.<br />
This number becomes the label template number when printing.<br />
3.<br />
"Hold down the left mouse button and highlight the entered<br />
text."<br />
2. Click [Transfer] to transfer the label data to the printer.<br />
5
Advanced operation<br />
3.<br />
4.<br />
Connect a barcode reader to the printer.<br />
Refer to "<strong>Connecting</strong> a barcode reader" on P.7 for more<br />
details.<br />
Print a label<br />
1. Scan the "P-touch template command (Initialize + begin<br />
specifying settings)" barcode below.<br />
2. "Find the relevant "Key Assign" numbers on P.9, and scan."<br />
Example:If the "Key Assign" number is 5<br />
• Select template<br />
• <strong>Barcode</strong> labels<br />
• Procedure overview<br />
Create barcode label Transfer label data Print label<br />
• Procedure<br />
1.<br />
Example:<br />
Create a barcode label.<br />
1.<br />
2.<br />
Start P-touch Editor 5.0.<br />
Click [Insert]-[Bar Code] to open the barcode properties<br />
and then enter data.<br />
^TS005<br />
3.<br />
Scan the "Number of copies for numbered (sequential)<br />
printing" command.<br />
3.<br />
"Hold down the left mouse button and highlight the entered<br />
data."<br />
4.<br />
^NN<br />
Specify the number of labels to be printed.<br />
Refer to "Entering numbers" on P.8 and scan the barcodes<br />
to specify the number of labels to be printed in the 3-digit<br />
format.<br />
Example: To print 5 labels<br />
005<br />
4.<br />
Click the [Numbering (sequential)] button, and then click<br />
[OK].<br />
5.<br />
Scan the "Begin printing" barcode below.<br />
• For each template, numbering ranges can be specifi ed for up to<br />
9 objects.<br />
• Up to 15 characters can be specifi ed in a numbering range.<br />
•<br />
•<br />
In the example, labels 1234567890 to 1234567894 are<br />
printed.<br />
Labels are counted up one at a time as each label is printed.<br />
The number of labels printed is retained by the printer even when<br />
the power is turned OFF.<br />
To reset the counter, scan the following "Initialize template data"<br />
barcode.<br />
•<br />
^ID<br />
2.<br />
Ensure that the printer is connected to a computer<br />
and then transfer the label data to the printer.<br />
1. Click [File]-[Transfer Template...] to start the P-touch Transfer<br />
Manager.<br />
Select the label data from the list and right-click to display the<br />
menu.<br />
Select [Key Assign] to assign the key number.<br />
This number becomes the label template number when printing.<br />
6
Advanced operation<br />
3.<br />
2. Click [Transfer] to transfer the label data to the printer.<br />
Connect a barcode reader to the printer.<br />
Refer to "<strong>Connecting</strong> a barcode reader" on P.7 for more<br />
details.<br />
4.<br />
Specify the number of labels to be printed.<br />
Refer to "Entering numbers" on P.8 and scan the barcodes to<br />
specify the number of labels to be printed in the 3-digit format.<br />
Example: To print 5 labels<br />
4.<br />
Print a label<br />
1. Scan the "P-touch template command (Initialize + begin<br />
specifying settings)" barcode below.<br />
5.<br />
005<br />
Scan the "Begin printing" barcode below.<br />
2. "Find the relevant "Key Assign" numbers on P.9, and scan."<br />
Example: If the "Key Assign" number is 6.<br />
• Select template<br />
3.<br />
^TS006<br />
Scan the "Number of copies for numbered (sequential)<br />
printing" command.<br />
•<br />
•<br />
•<br />
In the example, labels 1234567890 to 1234567894 are<br />
printed.<br />
Labels are counted up one at a time as each label is printed.<br />
The number of labels printed is retained by the printer even when<br />
the power is turned OFF.<br />
To reset the counter, scan the following "Initialize template data"<br />
barcode.<br />
^ID<br />
^NN<br />
Supplement<br />
• <strong>Connecting</strong> a barcode reader<br />
1. Set the barcode reader with no prefi x or suffi x.<br />
Settable functions differ depending on the type of barcode reader.<br />
2.<br />
3.<br />
For serial connection (RS-232C) only.<br />
Execute that the communication settings of this printer and<br />
the barcode reader match.<br />
For more details on the communication settings for this<br />
printer, refer to "Setting up RS-232C communication<br />
(communication with a barcode reader)".<br />
Connect a barcode reader.<br />
• Setting up barcode printing<br />
Printing can be setup or specifi ed on the barcode reader.<br />
• Changing the basic settings<br />
<br />
1.<br />
2.<br />
Scan the "P-touch template command" barcode. Refer to<br />
"List of barcodes for specifying settings" on P.8.<br />
From the "Basic settings" barcodes, scan the barcode for<br />
the specifi ed parameter.<br />
Precautions when specifying the number of<br />
copies to be printed.<br />
1.<br />
2.<br />
3.<br />
Scan the "P-touch template command" barcode. Refer to<br />
"List of barcodes for specifying settings" on P.8.<br />
Scan "Number of copies" barcode. Refer to "List of barcodes<br />
for specifying settings" on P.8.<br />
Scan the barcodes for number of copies to be triple digits.<br />
Refer to "List of barcodes for specifying settings" and<br />
"Entering numbers" on P.8.<br />
Example: 7[00][7] 15[0][1][5]<br />
7
Supplement<br />
• List of barcodes for specifying settings<br />
Request:<br />
When using this list of barcodes for specifying settings, set the P-touch Template control and prefi x character command initial settings.<br />
• P-touch template command (Initialize + begin specifying settings)<br />
• Basic settings<br />
Cut Every 1 <br />
Cut Every 2<br />
^CO1010<br />
Cut at end setting<br />
Cutter Off<br />
^CO1020<br />
^CO0001<br />
<br />
^CO0000<br />
• Entering numbers *2<br />
Always scan as a three-digit number.<br />
<br />
<br />
<br />
<br />
<br />
<br />
<br />
<br />
<br />
<br />
<br />
8
Supplement<br />
• Preset template number<br />
Preset template 1 Preset template 2<br />
Preset template 3 Preset template 4<br />
Preset template 5 Preset template 6<br />
Preset template 7 Preset template 8<br />
Preset template 9 Preset template 10<br />
• Select template *2<br />
• Delimiter<br />
• Begin printing<br />
*1 Default settings.<br />
*2 Used when specifying the number of copies and selecting the template number. Scan as 3-digits, such as [007] or [015].<br />
Numbers are set automatically when scanned as 3-digits. To change settings, scan "Number of copies" or "Select template"<br />
accordingly, and then re-scan the 3-digit number.<br />
9
Supplement<br />
• FAQ<br />
Q How can the transferred data be deleted?<br />
Q<br />
A<br />
What is the built-in memory capacity?<br />
It's 2MByte.<br />
A<br />
Connect the printer to a computer USB<br />
port and open P-touch Transfer Manager.<br />
Right click the items to be deleted from the<br />
transferred data list.<br />
Q<br />
A<br />
What is the maximum number of templates that can be<br />
entered?<br />
Up to 99 templates can be entered.<br />
However, it may not be possible to enter 99<br />
templates if the maximum memory capacity<br />
(2MB) is exceeded.<br />
Q<br />
A<br />
How can "Key Assign" be checked?<br />
Hold down the feed button to check "Key<br />
Assign" along with the transferred templates.<br />
It is also possible to check easily on a<br />
computer using P-touch Transfer Manager.<br />
Q<br />
Is it possible to link multiple databases to one template?<br />
Q<br />
A<br />
Is it possible to check templates transferred to the printer?<br />
Yes.<br />
Hold down the feed button to print a list of<br />
transferred templates.<br />
A<br />
No.<br />
Multiple databases cannot be linked to one<br />
template.<br />
Q<br />
Is it possible to print the date and time automatically?<br />
Q<br />
A<br />
Q<br />
A<br />
Is there a tool to easily specify P-touch template settings?<br />
Refer to "Setting up P-touch templates" in<br />
"Advance preparation" on page 1 of this<br />
manual.<br />
Is it possible to change the numbering of transferred<br />
templates?<br />
Yes.<br />
Edit the original template with P-touch Editor<br />
to create a template with the numbers to be<br />
changed.<br />
After editing, transfer to the printer.<br />
A<br />
Q<br />
No.<br />
The printer does not have a clock function,<br />
and so it is not possible to automatically print<br />
the date and time.<br />
Note: Our QL-650<strong>TD</strong> features a clock<br />
function.<br />
What kind of barcode scanners can be used?<br />
A It is possible to use a scanner with a RS-232C<br />
(serial) connection and its own power supply.<br />
Note: The printer cannot supply power to a<br />
scanner.<br />
Q<br />
A<br />
Q<br />
A<br />
Is it possible to initialize the numbering?<br />
Yes.<br />
Scan the ^ID command on P7 to initialize the<br />
numbering.<br />
What is the maximum number of digits for numbering?<br />
Up to 15 digits can be used.<br />
Q<br />
What should I do if there's no response after following all<br />
the setting and scanning steps?<br />
A The settings are reset if you print from a<br />
computer even once. Specify the settings<br />
again, referring to "Advance preparation" on<br />
P1.<br />
10


