

BlackandDecker Trapano Percussione- Kd562 - Type 1 - Instruction Manual
BlackandDecker Trapano Percussione- Kd562 - Type 1 - Instruction Manual
BlackandDecker Trapano Percussione- Kd562 - Type 1 - Instruction Manual

Create successful ePaper yourself
Turn your PDF publications into a flip-book with our unique Google optimized e-Paper software.
®<br />
2<br />
1<br />
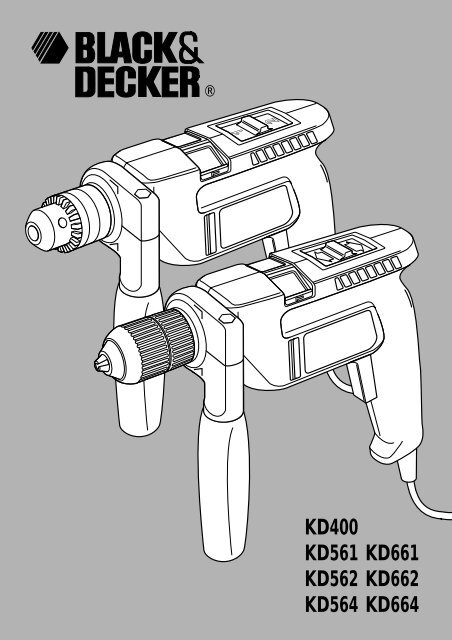
KD400<br />
KD561 KD661<br />
KD562 KD662<br />
KD564 KD664<br />
1
Congratulations!<br />
On the purchase of your<br />
Black & Decker corded drill.<br />
To ensure the best results from your corded drill<br />
please read these safety and usage instructions<br />
carefully. If you have any questions or queries<br />
after reading this manual please do not hesitate<br />
to call your local service and information centre<br />
(the number is towards the back of this manual).<br />
2
Contents<br />
Page 4<br />
Page 5<br />
Page 6<br />
Page 7<br />
Page 8<br />
Safety instructions<br />
Double insulation<br />
Electrical safety<br />
Mains plug replacement<br />
Extension cables<br />
Unwanted tools and the environment<br />
The Black & Decker guarantee<br />
After sales service for your Black & Decker product<br />
Our after sales service policy<br />
Accessories<br />
Technical data<br />
Features<br />
Fitting the drill bit<br />
Removing the chuck<br />
Fitting the side handle<br />
Preparing your drill for operation<br />
Using your drill<br />
Handy hints<br />
Cooling down<br />
Overload<br />
EC declaration of conformity<br />
Black & Decker phone numbers and addresses<br />
Guarantee card<br />
3
Corded drills user manual<br />
SAFETY INSTRUCTIONS<br />
Warning! When using electric tools, the following<br />
basic safety precautions should always be taken to<br />
reduce the risk of fire, electric shock and personal<br />
injury. Read all these instructions before attempting to<br />
operate the product and save this booklet.<br />
For safe operation:<br />
• Keep the work area clean. Cluttered areas and<br />
benches invite injuries.<br />
• Consider the work area environment. Do not expose<br />
the power tool to rain and do not use in damp or wet<br />
locations. Keep the work area well lit. Do not use<br />
the power tool where there is a risk to cause fire<br />
or explosion.<br />
• Guard against electric shock. Avoid body contact,<br />
where possible, with earthed or grounded surfaces<br />
(e.g. pipes, radiators, ranges and refrigerators).<br />
• Keep children away. Do not let visitors touch the<br />
tool or extension cord. All visitors should be kept<br />
away from the work area.<br />
• Store idle tools. When not in use, tools should be<br />
stored in a dry, high or locked place, out of reach<br />
of children.<br />
• Do not force the tool. It will do the job better and<br />
more safely at the rate for which it was intended.<br />
• Use the right tool. Do not force small tools or<br />
attachments to do the job of a heavy duty tool.<br />
Do not use the tool for purposes not intended; for<br />
example, do not use a circular saw to cut tree<br />
limbs or logs.<br />
• Dress properly. Do not wear loose clothing or<br />
jewellery as they can be caught in moving parts.<br />
Rubber gloves and non-skid footwear are<br />
recommended when working outdoors. Wear<br />
protective hair covering to contain long hair.<br />
• Use safety glasses. Use a face or dust mask as well,<br />
if the operation is dusty or if the tool is being used in<br />
enclosed spaces.<br />
• Connecting dust extraction equipment. If devices<br />
are provided for the connection of dust extraction<br />
and collection ensure these are connected and<br />
properly used, especially in confined areas.<br />
• Do not abuse the cord. Never carry the tool by its<br />
cord or yank it to disconnect it from the socket. Keep<br />
the cord away from heat, oil and sharp edges.<br />
• Secure the work. Use clamps or a vice to hold the<br />
work. It is safer than using a hand and it frees both<br />
hands to operate the tool.<br />
• Do not overreach. Keep proper footing and balance at<br />
all times.<br />
• Maintain the tool with care. Keep a cutting tool<br />
sharp and clean for better and safer performance.<br />
Follow the instructions for lubricating and changing<br />
accessories. Inspect the tools cord periodically and,<br />
if damaged, have repaired by an authorised service<br />
facility. Inspect the extension cord periodically and<br />
replace if damaged. Keep the handles dry, clean and<br />
free from oil and grease.<br />
• Disconnect the tool when not in use, before<br />
servicing and when changing accessories such as<br />
blades, bits and cutters.<br />
• Remove adjusting keys and wrenches. Form the<br />
habit of checking to see that keys and adjusting<br />
wrenches are removed from the tool and replaced in<br />
the storage area before switching on.<br />
• Avoid unintentional starting. Do not carry a<br />
plugged-in tool with a finger on the switch.<br />
Ensure the switch is off when plugging in.<br />
• Use an outdoor extension cord. When a tool is used<br />
outdoors, only use an extension cord intended for<br />
outdoor use and so marked.<br />
• Stay alert. Watch what you are doing, use common<br />
sense and do not operate the tool when tired.<br />
• Check damaged parts. Before further use of the tool,<br />
a guard or other part that is damaged should be<br />
carefully checked to determine whether it will<br />
operate properly and perform its intended function.<br />
Check for alignment of moving parts, free running of<br />
moving parts, breakage of parts, mounting and any<br />
other conditions that may affect its operation. A<br />
guard or other part that is damaged should be<br />
properly repaired or replaced by an authorised<br />
service centre unless otherwise indicated in the<br />
product booklet. Have defective switches replaced<br />
by an authorised service centre. Do not use the tool<br />
if the switch does not turn it on and off.<br />
• Warning! The use of any accessory or attachment,<br />
other than recommended in the product booklet,<br />
may present a risk of personal injury.<br />
• Have the tool repaired by a qualified person. The<br />
electrical tool is in accordance with the relevant<br />
safety requirements. Repairs should only be carried<br />
out by qualified persons using original spare parts,<br />
otherwise, this may result in considerable danger to<br />
the user.<br />
Save these instructions!<br />
DOUBLE INSULATION<br />
The tool is double insulated. This means that all<br />
the external metal parts are electrically insulated<br />
4
ENGLISH<br />
from the mains power supply. This is done by<br />
placing insulation barriers between the<br />
electrical and mechanical components making<br />
it unnecessary for the tool to be earthed.<br />
Note: Double insulation does not take the place<br />
of normal safety precautions when operating the<br />
tool. The insulation system is for added protection<br />
against injury resulting from a possible electrical<br />
insulation failure within the tool.<br />
ELECTRICAL SAFETY<br />
Be sure the supply is the same as the voltage given on<br />
the rating plate. The tool is fitted with a two-core cable<br />
and plug.<br />
MAINS PLUG REPLACEMENT (UK ONLY)<br />
Should the mains plug need replacing and you are<br />
competent to do this, proceed as instructed below.<br />
If you are in doubt, contact a Black & Decker service<br />
centre or a qualified electrician.<br />
• Disconnect the plug from the power supply.<br />
• Cut off the plug and dispose of safely. A plug with<br />
bared copper conductors is very dangerous if<br />
engaged in a live socket outlet.<br />
• Only fit BS1363A approved plugs fitted with the<br />
correctly rated fuse.<br />
Note: Fuses do not give personal protection against<br />
electric shock.<br />
• The cable wire colours, or a letter, will be marked at<br />
the connection point of most good quality plugs.<br />
Attach the wires to their respective points in the plug<br />
(see diagram). Brown is L (live) and blue is N (neutral).<br />
Fit a plug<br />
approved<br />
to BS1363A<br />
Connect<br />
blue to<br />
N (neutral)<br />
N<br />
Make sure that<br />
the outer sheath<br />
of the cable is held<br />
firmly by the clamp<br />
L<br />
E<br />
Fit a 5 amp fuse<br />
Connect<br />
brown to<br />
L (live)<br />
240 volts AC<br />
only. Never use<br />
a light socket<br />
• Before replacing the top cover of the plug ensure<br />
that the cable restraint is holding the outer sheath of<br />
the cable firmly and that the two leads are correctly<br />
fixed at the terminal screws. If the fuse cover is<br />
missing or damaged do not use the plug. For<br />
replacement or detachable fuse covers, contact a<br />
Black & Decker service centre.<br />
Warning! Never connect live or neutral wires to the<br />
earth pin marked E or .<br />
MAINS PLUG REPLACEMENT<br />
(AUSTRALIA AND NEW ZEALAND ONLY)<br />
Should the mains plug or cordset of the product be<br />
damaged, it must only be replaced by an authorised<br />
Black & Decker service agent because special<br />
purpose tools are required.<br />
EXTENSION CABLES<br />
Up to 30m (100ft) of Black & Decker 2-core extension<br />
cable (or 3-core extension cordset, in Australia and<br />
New Zealand) can be used without undue loss of power.<br />
Note: An extension cable should not be used unless<br />
absolutely necessary. Use of an improper extension<br />
cable could result in a risk of fire and electric shock.<br />
If an extension cable must be used, make sure it is<br />
properly wired, contains the correct rated fuse as<br />
recommended in its literature and is in good<br />
electrical condition.<br />
UNWANTED TOOLS AND THE ENVIRONMENT<br />
Should you find one day that the tool needs<br />
replacement or is of no further use, think of the<br />
protection of the environment. Black & Decker<br />
service centres will accept old tools and will<br />
dispose of them in an environmentally safe way.<br />
THE BLACK & DECKER GUARANTEE<br />
(UK, AUSTRALIA AND NEW ZEALAND ONLY)<br />
If the Black & Decker product becomes defective due<br />
to faulty materials and workmanship, within 24 months<br />
from the date of purchase, we guarantee to either<br />
replace all defective parts or at our discretion, replace<br />
the unit free of charge provided that:<br />
• The product is returned to us or our authorised<br />
repairers with evidence of date of purchase.<br />
• The product has not been used for trade,<br />
professional or hire purposes.<br />
• The product has not been subjected to misuse<br />
or neglect.<br />
• The product has not sustained any damage through<br />
foreign objects, substances or accidents.<br />
• Repairs have not been attempted by anyone other<br />
than our own service staff or authorised repair<br />
distributors.<br />
5
ENGLISH<br />
This guarantee is offered as an extra benefit and is<br />
additional to the customers statutory rights.<br />
AFTER SALES SERVICE FOR THE BLACK & DECKER<br />
PRODUCT (UK, AUSTRALIA AND NEW ZEALAND ONLY)<br />
Black & Decker offers a nationwide after sales service<br />
through our company operated service centres and<br />
concessionaries on the Channel Islands and Isle of Man.<br />
It is our aim to offer excellent service, fast repairs,<br />
extensive parts availability and full accessory support.<br />
The use of other than genuine Black & Decker<br />
accessories and parts may damage or reduce the<br />
performance of your Black & Decker product and may<br />
also endanger the user. The terms and conditions of<br />
the warranty may also be effected.<br />
THE AFTER SALES SERVICE POLICY<br />
(UK, AUSTRALIA AND NEW ZEALAND ONLY)<br />
It is our aim that all Black & Decker customers should be<br />
totally satisfied with their Black & Decker product and<br />
after sales service, but if help or advice is needed<br />
please contact the local Black & Decker service centre<br />
manager who will be happy to help. Full details of our<br />
unique after sales service can be obtained from any of<br />
our Black & Decker service centres.<br />
ACCESSORIES<br />
The performance of any power tool is dependant upon<br />
the accessory used. Black & Decker accessories are<br />
engineered to high quality standards and are designed<br />
to enhance the performance of your tool. Buying a<br />
Black & Decker accessory will ensure that you get the<br />
very best from your Black & Decker tool.<br />
TECHNICAL DATA<br />
The level of sound pressure of the tool is in accordance<br />
with EEC legislation. It is recommended that you take<br />
appropriate measures for the protection of your hearing<br />
if the sound level seems uncomfortable. This normally<br />
equates to a sound pressure in excess of 85dB (A).<br />
Note: This user manual also covers catalogue numbers<br />
ending in K, G or A. Refer to your carton for details of<br />
your product.<br />
FEATURES<br />
1. On/off switch<br />
2. Speed control<br />
3. Lock-on button<br />
4. Side handle<br />
5. Chuck jaws<br />
6. Chuck<br />
7. Hammer/drill switch<br />
8. Forward/reverse switch<br />
2/8<br />
7<br />
6<br />
5<br />
4<br />
•<br />
•<br />
•<br />
•<br />
•<br />
Your drill includes some or all of these features:<br />
• The on/off switch is used to operate your drill in all<br />
modes of operation.<br />
• The variable speed control provides optimal control<br />
of your drill for a wide range of tasks.<br />
• On two-speed drills, the speed switch permits<br />
selection of the appropriate drilling speed.<br />
• The lock-on button provides continuous operation<br />
of your drill.<br />
• The side handle (where provided) gives a secondary<br />
gripping position for your drill.<br />
• Your drill can operate as a hammer drill or as a<br />
rotary drill depending on the setting of the hammer/<br />
drill switch.<br />
• The forward/reverse switch controls the direction of<br />
rotation when your drill is used as a screwdriver, or<br />
when clearing a jammed drill bit.<br />
FITTING THE DRILL BIT (KEYLESS CHUCKS)<br />
Proceed as follows:<br />
Disconnect the plug from the electricity supply.<br />
While holding the<br />
rear section of<br />
the chuck, rotate<br />
the front section<br />
until the jaws of<br />
the chuck are<br />
sufficiently open.<br />
Insert the drill bit<br />
in the jaws of the chuck. Hold the rear section of the<br />
chuck while tightening the front section. Twist the two<br />
sections firmly in opposite directions to securely grip<br />
the drill bit.<br />
1<br />
• 3<br />
6
FITTING THE DRILL BIT (KEYED CHUCKS)<br />
Proceed as follows:<br />
Disconnect the plug from the electricity supply.<br />
Rotate the barrel<br />
of the chuck until<br />
the jaws are<br />
sufficiently open.<br />
Insert the drill bit<br />
in the jaws of the<br />
chuck. Insert the<br />
chuck key with<br />
the end of the chuck key in one of the three holes in the<br />
body of the chuck and the head of the chuck key<br />
engaged with the barrel of the chuck. Turn the chuck<br />
key clockwise to tighten the jaws and securely grip the<br />
drill bit. Remove the chuck key.<br />
REMOVING THE CHUCK (KEYLESS CHUCKS)<br />
Proceed as follows:<br />
To remove the chuck,<br />
open the jaws, hold<br />
it firmly in one hand<br />
and with a screwdriver<br />
held in the other hand,<br />
turn the set-screw in<br />
the chuck clockwise<br />
approximately one<br />
turn, to loosen it.<br />
Place an allen key in<br />
the chuck and tighten the jaws. Give the allen key a<br />
short powerful blow in an anti-clockwise direction with<br />
a hammer to loosen the chuck on the spindle. Remove<br />
the allen key. Use the screwdriver to turn the setscrew<br />
clockwise until it totally disengages from the<br />
spindle. Remove the chuck from the spindle by rotating<br />
it anti-clockwise. To fasten the chuck, put it on the<br />
thread and turn it clockwise until it stops. Put in the<br />
screw and turn it anti-clockwise until absolutely firm.<br />
REMOVING THE CHUCK (KEYED CHUCKS)<br />
Proceed as follows:<br />
To remove the chuck,<br />
open the jaws of the<br />
chuck with the chuck<br />
key. Hold the chuck<br />
firmly in one hand, and<br />
with a screwdriver<br />
turn the screw set in<br />
the chuck clockwise<br />
with the other hand<br />
until it comes out.<br />
ENGLISH<br />
Use only the correct chuck key. Place the chuck key<br />
into the chuck, and hold the drill firmly in one hand with<br />
the chuck pointing away from you. Rotate the chuck so<br />
that the chuck key is just above the horizontal position<br />
on the right hand side of the machine. Give the<br />
crossbar end of the key a sharp downward blow with a<br />
mallet or light hammer. The chuck should now be<br />
sufficiently loose to be unscrewed by hand.<br />
FITTING THE SIDE HANDLE<br />
Proceed as follows:<br />
To assemble the<br />
side handle, fit the<br />
bolt in the clamp<br />
and the nut in the<br />
handle. Loosely<br />
assemble the<br />
handle and clamp.<br />
Position the side<br />
handle on the<br />
body of your drill.<br />
Rotate the handle<br />
around the body<br />
of your drill until it<br />
is in the desired<br />
position. Tighten the handle by turning clockwise.<br />
PREPARING YOUR DRILL FOR OPERATION<br />
Proceed as follows:<br />
Fit the correct<br />
accessory for the job.<br />
Set the speed of your<br />
drill. On two-speed<br />
drills, set the twospeed<br />
switch to ‘1’<br />
(low-speed) or ‘2’<br />
(high-speed), or set<br />
the variable speed<br />
control to the desired<br />
speed. As a general<br />
rule, for large size drill bits use low speeds and for<br />
smaller drill bits use high speeds.<br />
Set the forward/<br />
reverse switch to the<br />
desired direction of<br />
rotation. Never change<br />
the setting of the<br />
hammer switch, the<br />
speed switch or the<br />
forward/reverse when<br />
your drill is operating.<br />
7
ENGLISH<br />
USING YOUR DRILL<br />
To switch your<br />
drill on, depress<br />
the on/off switch.<br />
Your drill stops<br />
when the on/off<br />
switch is released.<br />
If continuous<br />
operation is<br />
required, depress<br />
the lock-on button<br />
while the on/off<br />
switch is depressed.<br />
To stop your drill<br />
when operation is<br />
continuous, depress<br />
the on/off switch<br />
again and release.<br />
While your drill is in operation, do not touch the chuck.<br />
HANDY HINTS<br />
• Fit the correct size and type of drill or screwdriver bit.<br />
• Set the correct drill speed.<br />
• Always hold your drill using the handle and the<br />
side handle.<br />
• Always hold your drill at right-angles to your work.<br />
When drilling<br />
wood and metal,<br />
set the hammer<br />
switch to the drill<br />
mode .<br />
When drilling<br />
masonry, set the<br />
hammer switch<br />
to the hammer<br />
mode .<br />
When screwdriving,<br />
set the hammer<br />
switch to the drill<br />
mode .<br />
• Set the forward/reverse switch to the correct direction.<br />
• Never change the direction of rotation when your<br />
drill is in operation.<br />
• After use, remove the drill bit and gently tap the side<br />
of the chuck with a soft-faced hammer to remove<br />
the dust. This will extend the life of the chuck.<br />
COOLING DOWN<br />
If your drill becomes too hot in use, set the speed<br />
control to its highest setting and allow your drill to<br />
operate without load for 2 minutes.<br />
OVERLOAD<br />
Never use excessive force when using your drill. Too<br />
much pressure can reduce the speed of your drill and<br />
reduce its efficiency. This can result in an overload<br />
which can cause damage to the motor of your drill.<br />
EC DECLARATION OF CONFORMITY<br />
We declare that units: KD400, KD561, KD562, KD564RE,<br />
KD564CRE, KD661, KD662, KD664RE, KD664CRE<br />
conform to 89/392/EEC, 89/336/EEC, EN55014,<br />
73/23/EEC, EN55104, EN50144<br />
A weighted sound pressure 100dB (A)<br />
A weighted sound power 113dB (A)<br />
Hand/arm weighted vibration 8.7m/s 2<br />
Brian Cooke - Director of Engineering<br />
Black & Decker Ltd, Spennymoor, County Durham<br />
DL16 6JG United Kingdom<br />
The Black & Decker policy is one of continuous<br />
improvement to our product and as such we reserve<br />
the right to change the product specification without<br />
prior notice.<br />
8
9
Australia Black & Decker (A’asia) Pty Ltd Tel: 03 9213 8200<br />
286-288 Maroondah Highway Fax: 03 9726 7150<br />
North Croydon, Victoria 3136<br />
New Zealand Black & Decker Tel: 09 579 7600<br />
483 Great South Road, Penrose, Auckland Fax: 09 579 8200<br />
South Africa Powerdek Tool Distributors Tel: 011 493 4000<br />
22 Inglestone Road, Village Deep Fax: 011 493 6391<br />
Johannesburg, South Africa<br />
United Kingdom Black & Decker Tel: 0345 230230<br />
210 Bath Road Tel: 01753 511234<br />
Slough Tlx: 848317 BAND MH<br />
Berkshire SL1 3YD Fax: 01753 551155<br />
10Part no: 808378-42 5/98.2
Address of the dealer where your corded drill was purchased: Date of your purchase:<br />
Yes No<br />
Name:<br />
Was your corded drill a gift?<br />
House number or name and street:<br />
Was your corded drill your first purchase?<br />
Was your corded drill bought as a replacement?<br />
Town:<br />
What was the price of your corded drill?<br />
County or state:<br />
Postcode:<br />
Address of the dealer where your corded drill was purchased:<br />
Country:<br />
Product catalogue number: KD____/___<br />
Data protection act: Tick this box if you prefer not to receive<br />
information from Black & Decker or other companies.<br />
11
GUARANTEE CARD<br />
South Africa: Black & Decker South Africa (Pty) Ltd, Suite no 107, PostNet X65, Halfway House 1685<br />
United Kingdom & Ireland: PO Box 821, Slough, Berkshire, SL1 3AR<br />
Please complete this section immediately after the purchase of your corded drill<br />
and post it to the Black & Decker address in your country (above).<br />
If you live in Australia or New Zealand, please register your purchase by using<br />
the alternative guarantee card supplied.<br />
12Part no: 808378-42 5/98.2


