

KitchenAid JLG61P - Cooker - JLG61P - Cooker EN (F084155) Istruzioni per l'Uso
KitchenAid JLG61P - Cooker - JLG61P - Cooker EN (F084155) Istruzioni per l'Uso
KitchenAid JLG61P - Cooker - JLG61P - Cooker EN (F084155) Istruzioni per l'Uso

Create successful ePaper yourself
Turn your PDF publications into a flip-book with our unique Google optimized e-Paper software.
Care and Cleaning<br />
GB<br />
BURNER MAINTANANCE INSTRUCTIONS<br />
Before cleaning the burners ensure the appliance<br />
is switch off and isolated from the electriacl supply<br />
and the appliance is cold.<br />
MAIN OV<strong>EN</strong><br />
When the main oven is used regularly, its burner is<br />
susceptible to being covered with grease and dirt.<br />
This might result in problems with the burner’s<br />
ignition as well as the uneven or disappearing<br />
flame.<br />
To solve the problem clean the burner with a small<br />
amount of water- diluted cleaner (e.g. CIF) using a<br />
small brush (e.g. a toothbrush). After cleaning wipe<br />
the burner with a cloth to remove the detergent<br />
waste and let it dry for at least 2 hours.<br />
WARNING!<br />
1. Brush the burner in the directions indicated<br />
below.<br />
2. DO NOT re-ignite the burner with the<br />
detergent residue.<br />
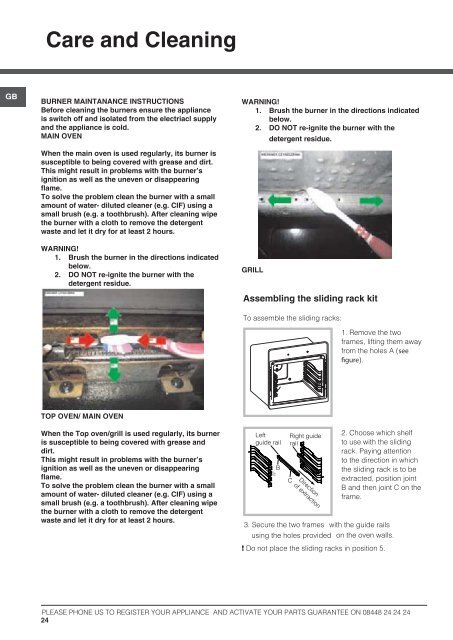
WARNING!<br />
1. Brush the burner in the directions indicated<br />
below.<br />
2. DO NOT re-ignite the burner with the<br />
detergent residue.<br />
GRILL<br />
Assembling the sliding rack kit<br />
To assemble the sliding racks:<br />
1. Remove the two<br />
frames, lifting them away<br />
from the holes A (see<br />
figure).<br />
A<br />
A<br />
TOP OV<strong>EN</strong>/ MAIN OV<strong>EN</strong><br />
When the Top oven/grill is used regularly, its burner<br />
is susceptible to being covered with grease and<br />
dirt.<br />
This might result in problems with the burner’s<br />
ignition as well as the uneven or disappearing<br />
flame.<br />
To solve the problem clean the burner with a small<br />
amount of water- diluted cleaner (e.g. CIF) using a<br />
small brush (e.g. a toothbrush). After cleaning wipe<br />
the burner with a cloth to remove the detergent<br />
waste and let it dry for at least 2 hours.<br />
Left<br />
guide rail<br />
B<br />
Right guide<br />
rail<br />
C<br />
Direction<br />
of extraction<br />
2. Choose which shelf<br />
to use with the sliding<br />
rack. Paying attention<br />
to the direction in which<br />
the sliding rack is to be<br />
extracted, position joint<br />
B and then joint C on the<br />
frame.<br />
3. Secure the two frames with the guide rails<br />
using the holes provided on the oven walls.<br />
! Do not place the sliding racks in position 5.<br />
PLEASE PHONE US TO REGISTER YOUR APPLIANCE AND ACTIVATE YOUR PARTS GUARANTEE ON 08448 24 24 24<br />
24


