

KitchenAid MAF7510AW MM - Washing machine - MAF7510AW MM - Washing machine (852120463100) Installazione
KitchenAid MAF7510AW MM - Washing machine - MAF7510AW MM - Washing machine (852120463100) Installazione
KitchenAid MAF7510AW MM - Washing machine - MAF7510AW MM - Washing machine (852120463100) Installazione

You also want an ePaper? Increase the reach of your titles
YUMPU automatically turns print PDFs into web optimized ePapers that Google loves.
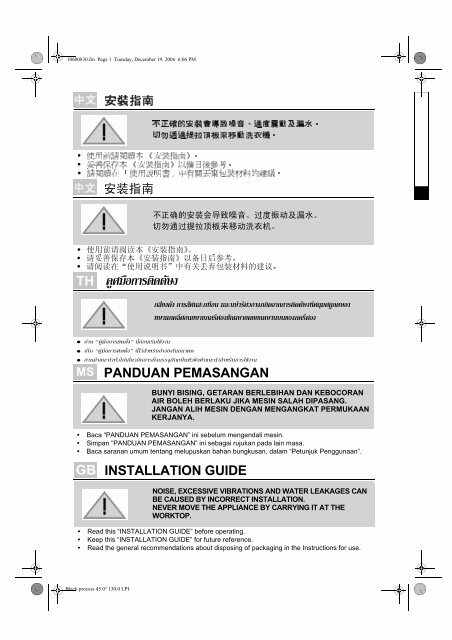
10600830.fm Page 1 Tuesday, December 19, 2006 6:06 PM<br />
TH<br />
MS<br />
PANDUAN PEMASANGAN<br />
BUNYI BISING, GETARAN BERLEBIHAN DAN KEBOCORAN<br />
AIR BOLEH BERLAKU JIKA MESIN SALAH DIPASANG.<br />
JANGAN ALIH MESIN DENGAN MENGANGKAT PERMUKAAN<br />
KERJANYA.<br />
• Baca “PANDUAN PEMASANGAN” ini sebelum mengendali mesin.<br />
• Simpan “PANDUAN PEMASANGAN” ini sebagai rujukan pada lain masa.<br />
• Baca saranan umum tentang melupuskan bahan bungkusan, dalam “Petunjuk Penggunaan”.<br />
GB INSTALLATION GUIDE<br />
NOISE, EXCESSIVE VIBRATIONS AND WATER LEAKAGES CAN<br />
BE CAUSED BY INCORRECT INSTALLATION.<br />
NEVER MOVE THE APPLIANCE BY CARRYING IT AT THE<br />
WORKTOP.<br />
• Read this “INSTALLATION GUIDE” before operating.<br />
• Keep this “INSTALLATION GUIDE” for future reference.<br />
• Read the general recommendations about disposing of packaging in the Instructions for use.<br />
Black process 45.0° 130.0 LPI
10600830.fm Page 2 Tuesday, December 19, 2006 6:06 PM<br />
BAHAGIAN YANG DIBEKALKAN<br />
PARTS SUPPLIED<br />
•<br />
Pakej mengandungi barang-barang kecil<br />
Package with small items<br />
•<br />
A<br />
Petunjuk penggunaan<br />
Instruction for use<br />
•<br />
B<br />
4 tukup plastik (untuk model tertentu, tukup<br />
plastiknya disertakan di bahagian belakang<br />
perkakas)<br />
4 plastic caps (for certain models, the plastic caps<br />
are attached to the back of the appliance)<br />
•<br />
C<br />
Perengkuh<br />
Wrench<br />
•<br />
D<br />
Hos air masuk (dalam mesin atau siap dipasang)<br />
Inlet hose (inside the <strong>machine</strong> or already installed)<br />
•<br />
E<br />
Penyangkut “U” (dalam mesin atau siap dipasang)<br />
“U”-bend (inside the <strong>machine</strong> or already installed)<br />
2<br />
Black process 45.0° 130.0 LPI
10600830.fm Page 3 Tuesday, December 19, 2006 6:06 PM<br />
TANGGALKAN BOLT PENGANGKUTAN!<br />
REMOVE TRANSPORT BOLTS!<br />
Penting: Bolt pengangkutan jika tidak ditanggalkan boleh merosakkan mesin.<br />
Important: Not removed transport bolts cause damages to the appliance.<br />
1<br />
Tanggalkan empat skru (lihat anak panah) dengan perengkuh C yang dibekalkan.<br />
Unscrew the four screws (see arrows) with the wrench C supplied.<br />
2<br />
Hanya jika kedudukan bolt pengangkutan kelihatan seperti lakaran di sebelah kiri di bawah:<br />
Alihkan skru ke kanan lubang.<br />
Only if the transport bolts' positions look as on the left sketch below: Move the screws to the<br />
center of the holes.<br />
3<br />
Keluarkan skru bersama peruang plastik berwarna.<br />
Pull out the screws together with the coloured plastic spacer.<br />
3<br />
Black process 45.0° 130.0 LPI
10600830.fm Page 4 Tuesday, December 19, 2006 6:06 PM<br />
4<br />
Untuk menutup lubangnya, sama ada<br />
- masukkan tukup plastik B yang disediakan di dalam bahagian besar lubang dan<br />
luncurkannya ke arah anak panah sehingga ia klik ke tempatnya (lihat rajah I)<br />
ATAU (bergantung pada model):<br />
- tolak tukup plastik yang disertakan di bahagian belakang perkakas pada lubangnya (lihat rajah II).<br />
To seal the holes, either<br />
- insert the supplied plastic caps B supplied in the wide part of the hole and slide them in the<br />
direction of the arrow until they click into place (see picture I)<br />
OR (depending on the model):<br />
- push the plastic caps attached on the back of the appliance on the holes (see picture II).<br />
I<br />
II<br />
Penting: Jika anda mempunyai mesin basuh dengan hos salirannya di dalam perkakas (lihat<br />
“SAMBUNGKAN HOS SALIRAN”, rajah 10 / II), tarikh keluar hos saliran SEBELUM<br />
mengeluarkan bolt pengangkutan, jika tidak anda menghadapi risiko hos saliran rosak di<br />
dalam mesin semasa mengalihkan perkakas ke kedudukan akhirnya.<br />
Simpan bolt pengangkutan dan perengkuh untuk mengangkut lagi perkakas dan dalam<br />
keadaan ini, pasang semula bolt pengangkutan dalam susunan yang terbalik.<br />
Important:If you have a washing <strong>machine</strong> with the drain hose inside the appliance (see “CONNECT<br />
THE DRAIN HOSE”, picture 10 / II), pull out the drain hose BEFORE removing the transport<br />
bolts, otherwise you risk to damage the drain hose inside the <strong>machine</strong> while moving the<br />
appliance to its final position.<br />
Keep the transport bolts and the wrench for further transporting of the appliance and in this<br />
case refit the transport bolts in reverse order.<br />
4<br />
Black process 45.0° 130.0 LPI
10600830.fm Page 5 Tuesday, December 19, 2006 6:06 PM<br />
MELARAS KAKI MESIN<br />
ADJUSTMENT OF THE FEET<br />
Pasang mesin di permukaan lantai yang tegap dan rata (kalau perlu, gunakan pengaras spirit).<br />
Jika mesin diletakkan pada lantai kayu, alaskan sekeping papan lapis 60 x 60 cm, tebal<br />
sekurang-kurangnya 3 cm dan disematkan pada lantai, supaya berat mesin diagih sama rata.<br />
Jika lantai tidak rata, laraskan empat kakinya seberapa perlu; jangan selitkan kayu, dsb,<br />
untuk mengaraskannya.<br />
The appliance must be installed on a solid and level floor surface (if necessary use a spirit<br />
level). If the appliance is to be installed on a wooden floor, distribute the weight by placing<br />
it on a 60 x 60 cm sheet of plywood at least 3 cm in thickness and secure it to the floor.<br />
If the floor is uneven, adjust the 4 levelling feet as required; do not insert pieces of wood etc.<br />
under the feet.<br />
5<br />
Longgarkan nat kunci ikut arah jam (lihat anak panah) dengan perengkuh C yang<br />
dibekalkan.<br />
Slacken the locknut clockwise (see arrow) using the wrench C supplied.<br />
6<br />
Angkat mesin sedikit kemudian araskan tinggi kaki dengan memutarnya.<br />
Lift slightly the <strong>machine</strong> and adjust the height of the foot revolving it.<br />
5<br />
Black process 45.0° 130.0 LPI
10600830.fm Page 6 Tuesday, December 19, 2006 6:06 PM<br />
7<br />
Penting: ketatkan semula nat kunci dengan memutarnya arah lawan jam ke arah badan mesin.<br />
Important: tighten the locknut by turning it anti-clockwise towards the appliance casing.<br />
8<br />
SAMBUNGKAN HOS AIR MASUK!<br />
CONNECT THE WATER SUPPLY INLET HOSE!<br />
Jika hos air masuk belum dipasang, skrukan pada mesin.<br />
If the water inlet hose is not already installed, it must be screwed to the appliance.<br />
9<br />
6<br />
Black process 45.0° 130.0 LPI
10600830.fm Page 7 Tuesday, December 19, 2006 6:06 PM<br />
Skrukan hos air masuk dengan tangan pada pili, dan ketatkan nat.<br />
Perhatian:<br />
• Hos jangan dibiarkan terpiuh!<br />
• Jangan sambungkan mesin pada pili air campuran daripada pemanas air tanpa<br />
tekanan.<br />
• Buka pili air sepenuhnya dan pastikan sambungan semuanya kalis air.<br />
• Jika hos terlalu pendek, gantikan dengan hos yang cukup panjang, jenis kalis<br />
tekanan (minimum 1000 kPa, jenis diluluskan EN 50084).<br />
• Dari masa ke masa, periksa hos kalau-kalau rapuh atau retak dan gantikan jika perlu.<br />
• Mesin basuh ini boleh disambungkan tanpa injap sehala.<br />
Bagi model yang dilengkapi hos Hentian Air:<br />
Jika hos fleksibel terlalu pendek, gantikan dengan hos Hentian Air 3 m (boleh didapati<br />
daripada Bahagian Servis Lepas Jualan atau pihak penjual). Mesti diganti oleh juruelektrik<br />
yang terlatih sahaja.<br />
Bergantung pada model, hos air masuk dan lekapan plastik pada sambungan pili mungkin<br />
mengandungi komponen elektrik. Jangan potong hos dan jangan rendam lekapan plastik<br />
dalam air. Jika hos rosak, matikan bekalan elektrik dengan serta merta.<br />
Screw by hand the inlet hose onto the tap tightening the nut.<br />
Attention:<br />
• no kinks in the hose!<br />
• The appliance must not be connected to the mixing tap of an un-pressurized<br />
water heater.<br />
• Check water-tightness of connections by turning the tap completely on.<br />
• If the hose is too short, replace it with a suitable length of pressure resistant hose<br />
(1000 kPa min, EN 50084 approved type).<br />
• Check the inlet hose regularly for brittleness and cracks and replace if necessary.<br />
• The washing <strong>machine</strong> can be connected without a non-return valve.<br />
For models with Water Stop hose:<br />
If the flexible hose is too short, replace it with a 3 m Water Stop hose (available from After-Sales<br />
Service or from your dealer). This replacement is only to be carried out by a trained electrician.<br />
Depending on the model, the inlet hose and the plastic enclosure at the tap connection contain<br />
electrical components. Do not cut the hose and do not immerse the plastic enclosure in<br />
water. Isolate the appliance from the mains immediately if the hose is damaged.<br />
7<br />
Black process 45.0° 130.0 LPI
10600830.fm Page 8 Tuesday, December 19, 2006 6:06 PM<br />
I.<br />
10<br />
SAMBUNGKAN HOS SALIRAN<br />
CONNECT THE DRAIN HOSE<br />
Sekiranya hos saliran dipasang seperti yang ditunjukkan pada model di bawah:<br />
Buka klip dari pemegang yang ditandakan dengan anak panah.<br />
In case the drain hose is installed as shown on the models below:<br />
Unclip it from the holders marked with arrows.<br />
II.<br />
a<br />
Sekiranya hos saliran dipasang di bahagian dalam mesin basuh:<br />
Tarik keluar sepenuhnya pemegang dan tutup bukaan dengan tukup a.<br />
JANGAN MULAKAN MESIN BASUH SEBELUM MENARIK KELUAR DAN<br />
MENYAMBUNGKAN HOS SALIRAN!<br />
In case the drain hose is installed inside the washing <strong>machine</strong>:<br />
Pull the hose completely out of the holder and close the opening with cap a.<br />
DO NOT START THE WASHING MACHINE BEFORE HAVING PULLED OUT AND<br />
CONNECTED THE DRAIN HOSE!<br />
1<br />
2<br />
8<br />
Black process 45.0° 130.0 LPI
10600830.fm Page 9 Tuesday, December 19, 2006 6:06 PM<br />
III.<br />
Sekiranya hos saliran dipasang di bahagian atas mesin basuh:<br />
Buka klip dari kedua-dua pemegang (lihat anak panah)<br />
In case the drain hose is installed in the upper part of the washing <strong>machine</strong>:<br />
Unclip it from both holders (see arrows)<br />
11<br />
Sambungkan hos saliran pada sifon atau sangkutkan pada bibir sink dengan menggunakan<br />
penyangkut “U”.<br />
Pasangkan penyangkut “U” E, jika belum dipasang, di bahagian hujung hos saliran.<br />
Penting: Jangan pasang penyangkut “U” di kedudukan lain hos saliran, jika tidak<br />
berkemungkinan berlaku pengisian dan penyaliran sekali gus mesin.(“kesan sifon”).<br />
Connect the drain hose to the siphon or hook it over the edge of a sink by means of the “U” bend.<br />
Fit the “U” bend E, if not already installed, at the very end of the drain hose.<br />
Important: Do not fix the “U” bend to another position of the drain hose, otherwise there<br />
might be the risk of simultaneous filling and draining of the <strong>machine</strong> (“siphoning effect”).<br />
E<br />
9<br />
Black process 45.0° 130.0 LPI
10600830.fm Page 10 Tuesday, December 19, 2006 6:06 PM<br />
Nota:<br />
• Pastikan hos saliran tidak terpiuh.<br />
• Pasang hos dengan kukuh agar ia tidak terjatuh.<br />
• Besen basuh tangan yang kecil adalah tidak sesuai.<br />
• Untuk membuat pemanjangan dengan menggunakan hos daripada jenis yang sama dan<br />
pasang kukuh dengan menggunakan klip.<br />
• Panjang hos saliran Keseluruhan Maksimum: 2,50 m (dalam keadaan ini, panjang<br />
maksimum untuk pemasangan - lihat rajah di bawah - adalah 90 cm).<br />
Notes:<br />
• Make sure there are no kinks in the drain hose.<br />
• Secure the hose so that it cannot fall down.<br />
• Small hand basins are not suitable.<br />
• To make an extension use a hose of the same type and secure the connections with<br />
clips.<br />
• Max. Overall drain hose length: 2.50 m (in this case, the maximum height for fixation -<br />
see picture below - is 90 cm).<br />
10<br />
Black process 45.0° 130.0 LPI
10600830.fm Page 11 Tuesday, December 19, 2006 6:06 PM<br />
SAMBUNGAN ELEKTRIK<br />
ELECTRICAL CONNECTION<br />
Gunakan soket dengan sambungan bumi.<br />
Jangan gunakan wayar sambungan atau soket berbilang.<br />
Kabel bekalan elektrik hendaklah diganti oleh teknisyen berlesen sahaja.<br />
Sambungan elektrik mesti dibuat mengikut peraturan tempatan.<br />
Use a socket with an earth connection.<br />
Do not use extension leads or multi sockets.<br />
The electrical power cable must be replaced exclusively by a licensed electrician.<br />
Electrical connections must be made in accordance with local regulations.<br />
5019 106 00830<br />
Black process 45.0° 130.0 LPI


