

Samsung HT-BD7200 - User Manual_18.87 MB, pdf, ENGLISH
Samsung HT-BD7200 - User Manual_18.87 MB, pdf, ENGLISH
Samsung HT-BD7200 - User Manual_18.87 MB, pdf, ENGLISH

Create successful ePaper yourself
Turn your PDF publications into a flip-book with our unique Google optimized e-Paper software.
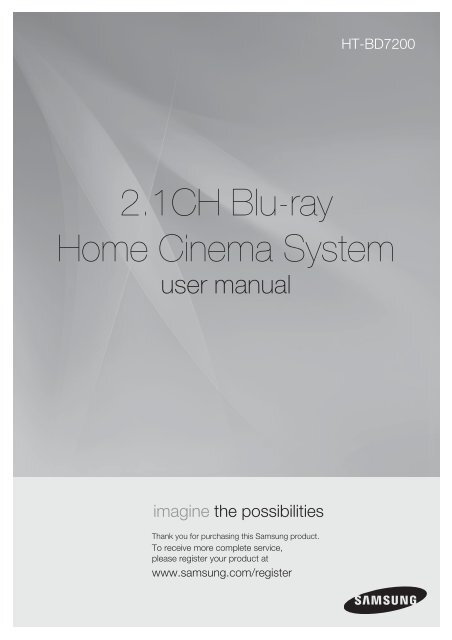
<strong>HT</strong>-<strong>BD7200</strong><br />
2.1CH Blu-ray<br />
Home Cinema System<br />
user manual<br />
imagine the possibilities<br />
Thank you for purchasing this <strong>Samsung</strong> product.<br />
To receive more complete service,<br />
please register your product at<br />
www.samsung.com/register
Key features of your new<br />
Blu-ray Home Cinema<br />
PLAYER FEATURES<br />
Playback of many disc types, plus an FM Tuner<br />
The <strong>HT</strong>-<strong>BD7200</strong> allows you to play various discs, including BD-ROM, DVD-VIDEO, DVD-RW/-R(V mode), CD,<br />
MP3-CD, DivX and CD-R/RW, with a sophisticated FM tuner, all in a single player.<br />
Full HD Audio Decoding Support (DD,DD+,DOLBY TRUE-HD,DTS,DTS-HD HRA, DTS-HD MA Essential)<br />
Please refer to www.DOLBY.COM and DTS.COM for more detail.<br />
TV Screen Saver Function<br />
If the main unit remains in stop mode for 10 minutes, the logo appears on TV screen. The <strong>HT</strong>-<strong>BD7200</strong> automatically<br />
switches itself into the power saving mode after 30 minutes in the Screen Saver mode.<br />
Power Saving Function<br />
The <strong>HT</strong>-<strong>BD7200</strong> automatically shuts itself off after 40 minutes in Stop mode.<br />
USB Host support<br />
You can connect and play files from external USB storage devices such as MP3 players, USB flash memory, etc.<br />
using the Home Cinema's USB HOST function.<br />
HDMI<br />
HDMI transmits Blu-Ray/DVD video and audio signals simultaneously, and provides a clearer picture.<br />
The 1080p(Full HD) resolution provides even clearer pictures.<br />
AV SYNC Function<br />
Video may lag behind the audio if the unit is connected to a digital TV.<br />
To compensate for this, you can adjust the audio delay time to sync up with the video.<br />
Anynet+(HDMI-CEC) Function<br />
Anynet+ is a function that can be used to operate the main unit of this system using a <strong>Samsung</strong> TV remote control,<br />
by connecting the Blu-ray Home Cinema to a SAMSUNG TV using an HDMI Cable. (This is only available with<br />
SAMSUNG TVs that support Anynet+.)<br />
Bluetooth Function<br />
You can use a Bluetooth device to enjoy music with high quality stereo sound, all without wires!<br />
iPod & iPhone support<br />
You can enjoy music files by connecting your iPod to the home cinema with the supplied<br />
iPod dock.<br />
BD Wise<br />
BD Wise automatically adjusts BD Wise-compliant <strong>Samsung</strong> products to the optimal settings between them. This<br />
feature is enabled only if BD Wise-compliant <strong>Samsung</strong> products are connected to each other using an HDMI cable.
BLU-RAY DISC FEATURES<br />
Blu-ray Discs support the highest quality HD video available in the industry - Large capacity means no compromise<br />
on video quality. Furthermore, a Blu-ray Disc has the same familiar size and look as a DVD.<br />
* The following Blu-ray Disc features are disc dependant and will vary. Appearance and navigation of features will<br />
also vary from disc to disc. Not all discs will have the features described below.<br />
ENG<br />
Video highlights<br />
The BD-ROM format for movie distribution<br />
supports three highly advanced video codecs,<br />
including AVC, VC-1, and MPEG-2.<br />
HD video resolutions are also available:<br />
~<br />
~<br />
1920 x 1080 HD<br />
1280 x 720 HD<br />
For High-Definition Playback<br />
To view high-defi nition contents on a Blu-ray disc,<br />
an HDTV (High Defi nition Television) is required.<br />
Some discs may require using the player's HDMI HD Video<br />
OUT to view high-defi nition content. The ability to<br />
view high-defi nition content on Blu-ray disc may be limited<br />
depending on the resolution of your TV.<br />
Subtitles<br />
You may be able to select different font styles, sizes and colours for the<br />
subtitles, Subtitles may also be animated, scrolled or faded in and out,<br />
depending on what is contained on the Blu-ray Disc.<br />
BD-LIVE<br />
You can use a Blu-ray Disc supporting BD-LIVE through network<br />
connection to enjoy various contents provided by the disc<br />
manufacturer.<br />
PLAY MOVIE LANGUAGES SCENE SELECTIONS PREVIEWS<br />
%<br />
3 4 5 6 7 8 9 10 11 12 13 14 15<br />
PLAY MOVIE LANGUAGES SCENE SELECTIONS PREVIEWS<br />
%<br />
3 4 5 6 7 8 9 10 11 12 13 14 15<br />
Graphic<br />
Planes<br />
3
Key features of your new<br />
Blu-ray Home Cinema<br />
What’s included<br />
Check for the supplied accessories below.<br />
Video Cable FM Antenna Speaker Wire (3 EA) Toroidal Ferrite Core<br />
iPod Dock<br />
<strong>User</strong>'s <strong>Manual</strong><br />
Remote Control<br />
/ Batteries (AAA size)
Safety information<br />
Safety Warnings<br />
TO REDUCE THE RISK OF ELECTRIC SHOCK, DO NOT REMOVE THE COVER(OR BACK).<br />
NO USER-SERVICEABLE PARTS ARE INSIDE. REFER SERVICING TO QUALIFIED SERVICE PERSONNEL.<br />
CAUTION<br />
RISK OF ELECTRIC SHOCK<br />
DO NOT OPEN<br />
This symbol indicates “dangerous voltage”<br />
inside the product that presents a risk of<br />
electric shock or personal injury.<br />
This symbol indicates important instructions<br />
accompanying the product.<br />
EnG<br />
CLASS 1 LASER PRODUCT<br />
KLASSE 1 LASER PRODUKT<br />
LUOKAN 1 LASER LAITE<br />
KLASS 1 LASER APPARAT<br />
PRODUCTO LASER CLASE 1<br />
CLASS 1 LASER PRODUCT<br />
This Compact Disc player is classified as a CLASS 1<br />
LASER product.<br />
Use of controls, adjustments or performance of<br />
procedures other than those specified herein may<br />
result in hazardous radiation exposure.<br />
CAUTION : INVISIBLE LASER RADIATION WHEN<br />
OPEN AND INTERLOCKS DEFEATED,<br />
AVOID EXPOSURE TO BEAM.<br />
WARNING : To reduce the risk of fire or electric shock, do not expose this appliance to rain or moisture.<br />
CAUTION : TO PREVENT ELECTRIC SHOCK, MATCH WIDE BLADE OF PLUG TO WIDE SLOT, FULLY INSERT.<br />
~ This apparatus shall always be connected to a AC outlet with a protective grounding connection.<br />
~ To disconnect the apparatus from the mains, the plug must be pulled out from the mains socket, therefore the<br />
mains plug shall be readily operable.<br />
CAUTION<br />
~ Apparatus shall not be exposed to dripping or splashing and no objects filled with liquids, such as vases, shall be<br />
placed on the apparatus.<br />
~ The Mains plug is used as a disconnect device and shall stay readily operable at any time.<br />
Wiring the Main Power Supply Plug (UK Only)<br />
IMPORTANT NOTICE<br />
The mains lead on this equipment is supplied with a moulded plug incorporating a fuse. The value of the fuse is indicated on<br />
the pin face of the plug and if it requires replacing, a fuse approved to BS1362 of the same rating must be used.<br />
Never use the plug with the fuse cover removed. If the cover is detachable and a replacement is required, it must be of the<br />
same colour as the fuse fitted in the plug. Replacement covers are available from your dealer.<br />
If the fitted plug is not suitable for the power points in your house or the cable is not long enough to reach a power point, you<br />
should obtain a suitable safety approved extension lead or consult your dealer for assistance.<br />
However, if there is no alternative to cutting off the plug, remove the fuse and then safely dispose of the plug. Do not connect<br />
the plug to a mains socket as there is a risk of shock hazard from the bared flexible cord.<br />
Never attempt to insert bare wires directly into a mains socket. A plug and fuse must be used at all times.<br />
IMPORTANT<br />
The wires in the mains lead are coloured in accordance with the following code:– BLUE = NEUTRAL BROWN = LIVE<br />
As these colours may not correspond to the coloured markings identifying the terminals in your plug, proceed as follows:–<br />
The wire coloured BLUE must be connected to the terminal marked with the letter N or coloured BLUE or BLACK.<br />
The wire coloured BROWN must be connected to the terminal marked with the letter L or coloured BROWN or RED.<br />
WARNING : DO NOT CONNECT EITHER WIRE TO THE EARTH TERMINAL WHICH IS MARKED WITH THE<br />
LETTER E OR BY THE EARTH SY<strong>MB</strong>OL , OR COLOURED GREEN OR GREEN AND YELLOW.
PRECAUTIONS<br />
Ensure that the AC power supply in your house complies with the identification sticker located on the back of your player. Install your<br />
player horizontally, on a suitable base (furniture), with enough space around it for ventilation (7.5~10cm). Make sure the ventilation slots<br />
are not covered. Do not stack anything on top of the player. Do not place the player on amplifiers or other equipment which may<br />
become hot. Before moving the player, ensure the Disc Insert slot is empty. This player is designed for continuous use. Switching off<br />
the Blu-ray Home Cinema to the stand-by mode does not disconnect the electrical supply. In order to disconnect the player<br />
completely from the power supply, remove the main plug from the wall outlet, especially when left unused for a long period of time.<br />
During thunderstorms, disconnect the AC main plug from the<br />
wall outlet. Voltage peaks due to lightning could damage the unit.<br />
Do not expose the unit to direct sunlight or other heat sources.<br />
This could lead to overheating and malfunction of the unit.<br />
Protect the player from moisture (i.e. vases) , and excess heat<br />
(e.g.fireplace) or equipment creating strong magnetic or electric fields<br />
(i.e.speakers...). Disconnect the power cable from the AC supply if the<br />
player malfunctions. Your player is not intended for industrial use. Use of<br />
this product is for personal use only.<br />
Condensation may occur if your player or disc has been stored in<br />
cold temperatures. If transporting the player during the winter,<br />
wait approximately 2 hours until the unit has reached room temperature<br />
before using.<br />
The batteries used with this product contain chemicals that are harmful to<br />
the environment.<br />
Do not dispose of batteries in the general household trash.<br />
6
Contents<br />
key features of your new<br />
Blu-ray Home Cinema<br />
2<br />
2 Player Features<br />
3 Blu-ray Disc Features<br />
4 What’s Included<br />
EnG<br />
safety information<br />
5<br />
5<br />
getting started<br />
10<br />
10<br />
description<br />
14<br />
14<br />
remote control<br />
16<br />
16<br />
connections<br />
20<br />
20<br />
basic functions of your<br />
Blu-ray Home Cinema<br />
31<br />
system setup<br />
35<br />
35<br />
Safety Warnings<br />
6 Precautions<br />
Before Reading the <strong>User</strong>’s <strong>Manual</strong><br />
11 Disc Type and Characteristics<br />
Front Panel<br />
15 Rear Panel<br />
Tour of the Remote Control<br />
18 Setting the Remote Control<br />
Connecting the Speakers<br />
22 Connecting the Video Out to Your TV<br />
24 Connecting an iPod<br />
26 Connecting Audio from External<br />
Components<br />
28 Connecting to the Network<br />
30 Connecting the FM Antenna<br />
30 Cooling Fan<br />
30 Attaching the Toroidal Ferrite Core to the<br />
Power Cord of the Main Unit<br />
31 Before Playing<br />
32 On-Screen Menu Navigation<br />
32 Playing a Disc<br />
33 Setting the Sound<br />
33 Using the Search and Skip Functions<br />
34 Slow Motion Play/Step Motion Play<br />
Setting the Clock<br />
language setup<br />
36<br />
36<br />
Setting up the Language Options
Contents<br />
audio setup<br />
37<br />
37<br />
display setup<br />
40<br />
40<br />
HDMI setup<br />
44<br />
44<br />
parental setup<br />
47<br />
47<br />
Setting up the Speaker Options<br />
Setting up the Display Options<br />
42 Setting up the Video Display/Output Options<br />
Setting up the HDMI Setup Options<br />
Setting up the Parental Lock<br />
network setup<br />
49<br />
49<br />
Setting up the Network Setup Options<br />
BD data management<br />
54<br />
54<br />
system upgrade<br />
55<br />
55<br />
watching a movie<br />
58<br />
58<br />
System Device Management<br />
Firmware Upgrade<br />
57 System Information<br />
57 Firmware Upgrade Notification<br />
57 DivX (R) Registration<br />
Using the Display Function<br />
59 Using the Disc Menu & Popup/Title Menu<br />
60 Repeat Play<br />
61 Selecting the Audio Language<br />
61 Selecting the Subtitle Language<br />
62 Changing the Camera Angle<br />
63 PIP (Picture In Picture) Settings<br />
63 BD-LIVE<br />
64 DivX Playback
listening to music<br />
66<br />
66<br />
Buttons on the Remote Control Used for<br />
Audio CD(CD-DA)/ MP3 Disc Playback<br />
66 Repeat Audio CD(CD-DA) & MP3<br />
67 Playing an Audio CD(CD-DA)/MP3<br />
EnG<br />
Viewing a Picture<br />
69<br />
69<br />
Viewing a Picture<br />
69 Slide Show/Speed<br />
69 Rotate<br />
70 Zoom<br />
70 Go To Photo List<br />
using the usb function<br />
71<br />
71<br />
radio<br />
73<br />
73<br />
Playing Media Files Using the USB Host<br />
Feature<br />
Listening to Radio<br />
73 Presetting Stations<br />
74 About RDS Broadcasting<br />
using bluetooth<br />
76<br />
76<br />
using an iPod<br />
78<br />
78<br />
pc streaming function<br />
81<br />
81<br />
convenient function<br />
83<br />
83<br />
troubleshooting<br />
84<br />
appendix<br />
86<br />
86<br />
What is Bluetooth?<br />
76 To connect the Blu-ray Home Cinema to a<br />
Bluetooth device<br />
Listening to Music<br />
80 Watching a Movie<br />
Connecting to a Pc and Playing Mp3, Jpeg<br />
or Divx Content<br />
Sleep Timer Function<br />
83 Adjusting Display Brightness<br />
83 Mute Function<br />
Cautions on Handling and Storing Discs<br />
87 Specifications
Getting started<br />
Before Reading the <strong>User</strong>’s <strong>Manual</strong><br />
Make sure to check the following terms before reading the user manual.<br />
Icons that will be used in manual<br />
Icon Term Definition<br />
h<br />
BD-ROM This involves a function available on a BD-ROM.<br />
g BD-RE This involves a function available on the BD-RE.<br />
f<br />
Z DVD-VIDEO<br />
C<br />
V<br />
A<br />
G<br />
BD-R This involves a function available on the BD-R.<br />
This involves a function available on DVD-Video or DVD-RW/-R discs that have been recorded<br />
and finalized in Video Mode.<br />
DVD-RW This involves a function available on DVD-RW. (V mode and finalized only)<br />
DVD-R This involves a function available on DVD-R. (V mode and finalized only)<br />
Audio CD<br />
This involves a function available on an audio CD-RW/CD-R (CD-DA format).<br />
MP3 This involves a function available on DVD-RW/-R, CD-RW/CD-R discs and USB storage devices.<br />
JPEG This involves a function available on DVD-RW/-R, CD-RW/CD-R discs and USB storage devices.<br />
D DivX This involves a function available with MPEG4 discs.<br />
(DVD-R/RW, CD-R/RW)<br />
F<br />
M<br />
USB storage<br />
device<br />
Caution<br />
This involves a function available on USB storage device.<br />
This involves a case where a function does not operate or settings may be<br />
cancelled.<br />
Note This involves tips or instructions on the page that help each function operate.<br />
About the use of this user’s manual<br />
1) Be sure to be familiar with Safety Information before using this product. (See pages 5~6)<br />
2) If a problem occurs, check the Troubleshooting. (See pages 84 ~85)<br />
Copyright<br />
©2009 <strong>Samsung</strong> Electronics Co.,Ltd.<br />
All rights reserved; No part or whole of this user’s manual may be reproduced or copied without the<br />
prior written permission of <strong>Samsung</strong> Electronics Co.,Ltd.<br />
10
Disc Type and Characteristics<br />
Disc types that can be played<br />
Disc Types Disc Logo Recorded content Disc Shape Max. Playing minute<br />
BD-ROM<br />
BD-RE/BD-R<br />
DVD-VIDEO<br />
AUDIO-CD<br />
DivX<br />
DVD-RW<br />
(V mode and finalized only)<br />
DVD-R<br />
(V mode and finalized only)<br />
AUDIO + VIDEO<br />
AUDIO + VIDEO<br />
AUDIO<br />
AUDIO + VIDEO<br />
AUDIO + VIDEO<br />
AUDIO + VIDEO<br />
Single sided<br />
Playing time depends<br />
on the Title<br />
Single sided(12 cm) 240<br />
Double sided(12 cm) 480<br />
Single sided(8 cm) 80<br />
Double sided(8 cm) 160<br />
Single sided(12 cm) 74<br />
Single sided(8 cm) 20<br />
12 cm -<br />
8 cm -<br />
12 cm (4.7GB)<br />
12 cm (4.7GB)<br />
480<br />
(EX : Extended Play)<br />
480<br />
(EX : Extended Play)<br />
EnG ● Getting Started<br />
~ This player is compatible with the PAL colour system only.<br />
~ NTSC discs will not play.<br />
Logos of Discs that can be played<br />
Blu-ray Disc Dolby Digital Plus DTS-HD High Resolution Audio<br />
PAL broadcast system in<br />
U.K, France, Germany, etc.<br />
Dolby TrueHD<br />
DTS-HD Master Audio | Essential<br />
Digital Audio MP3 Stereo Java BD-LIVE<br />
M `<br />
Manufactured under licence from Dolby Laboratories. “Dolby” and the double-D symbol are<br />
trademarks of Dolby Laboratories.<br />
11
Getting started<br />
Discs that cannot be played<br />
~ HD DVD Disc<br />
~ DVD-RAM<br />
~ 3.9 GB DVD-R Disc for Authoring.<br />
~ DVD-RW(VR mode)<br />
~ DVD-ROM/PD/MV-Disc, etc<br />
~ CVD/CD-ROM/CDV/CD-G/CD-I/LD<br />
~ 8cm MD (mini disc)<br />
M `<br />
`<br />
Some commercial discs and DVD discs purchased outside your region may not be playable with this<br />
product. When these discs are played, either “No disc.” or “Please check the regional code of the disc.”<br />
will be displayed.<br />
If a DVD-R/-RW disc has not been recorded properly in DVD video format, it will not be playable.<br />
Region code<br />
Both the Blu-ray Home Cinema and the discs are coded by region. These regional codes must match in<br />
order to play the disc. If the codes do not match, the disc will not play. The Region Number for this Bluray<br />
Home Cinema is described on the rear panel of the Blu-ray Home Cinema.<br />
BD Region Code<br />
A<br />
B<br />
C<br />
Area<br />
North America, Central America, South America, Korea, Japan, Taiwan, Hong Kong and South East Asia.<br />
Europe, Greenland, French territories, Middle East, Africa, Australia and New Zealand.<br />
India, China, Russia, Central and South Asia.<br />
DVD-Video<br />
DVD-Video<br />
Area<br />
Region Code<br />
Region Code<br />
Area<br />
1 USA, Canada 6 China<br />
2<br />
Japan, Europe, South Africa, Middle East,<br />
Greenland<br />
7 Unspecified Special Use<br />
3<br />
Korea, Taiwan, Hong Kong, parts of South<br />
East Asia<br />
8 Airlines/Cruise Ships (including Mexico)<br />
4<br />
Australia, New Zealand, Latin America<br />
(including Mexico)<br />
9 Region free<br />
5 Eastern Europe, Russia, India, Africa<br />
Blu-ray Disc Compatibility<br />
Blu-ray Disc is a new and evolving format. Accordingly, disc compatibility issues are possible. Not all discs are<br />
compatible and not every disc will play back. For additional information, refer to the Compliance and Compatibility<br />
Notice section of this <strong>Manual</strong>. If you encounter compatibility problems, please contact the SAMSUNG customer care<br />
centre at 1-800 SAMSUNG.<br />
M `<br />
`<br />
`<br />
`<br />
Playback may not work for some types of discs, or when specific operations, such as angle change and aspect<br />
ratio adjustment, are being performed. Information about the discs is written in detail on the box. Please refer to<br />
this if necessary.<br />
Do not allow the disc to become dirty or scratched. Fingerprints, dirt, dust, scratches or deposits of cigarette<br />
smoke on the recording surface may make it impossible to use the disc for playback.<br />
Discs with NTSC programs recorded on them cannot be played using this product.<br />
When a BD-Java title is played, loading may take longer than a normal title, or some functions may perform slowly.<br />
12
Disc Types<br />
❖ BD-RE/BD-R<br />
Blu-ray Disc Rewritable/Blu-ray Disc Recordable. BD-RE/BD-R is the ideal format for making backups,<br />
or recording personal video.<br />
❖ BD-ROM<br />
Blu-ray Disc Read Only Memory. A BD-ROM disc contains pre-recorded data. Although a BD-ROM<br />
may contain any form of data, most BD-ROM discs will contain movies in High Definition format, for<br />
playback on Blu-ray Home Cinemas. This unit can play back pre-recorded commercial BD-ROM discs.<br />
❖ DVD-Video<br />
~ A digital versatile disc (DVD) can contain up to 135-minutes of images, 8 audio languages and 32<br />
subtitle languages. It is equipped with MPEG-2 picture compression and Dolby Digital surround,<br />
allowing you to enjoy vivid and clear theatre quality images.<br />
~ When switching from the first layer to the second layer of a dual-layered DVD Video disc, there may be<br />
momentary distortion in the image and sound. This is not a malfunction of the unit.<br />
~ Once a DVD-RW/-R recorded in Video Mode is finalized, it becomes DVD-Video. Pre-recorded (prestamped)<br />
commercial DVDs with movies are also referred to as DVD-Videos. This unit can play back<br />
pre-recorded commercial DVD discs (DVD-Video discs) with movies.<br />
❖ Audio CD<br />
~ An audio disc on which 44.1kHz PCM Audio is recorded.<br />
~ This unit can play back CD-DA format audio CD-R and CD-RW discs.<br />
~ The unit may not be able to play some CD-R or CD-RW discs due to the condition of the recording.<br />
❖ CD-R/-RW<br />
~ Use a 700<strong>MB</strong>(80 minutes) CD-R/-RW disc. If possible, do not use a 800<strong>MB</strong>(90 minutes) or above<br />
disc, as the disc may not play back.<br />
~ If the CD-R/-RW disc was not recorded as a closed session, you may experience delays when playing<br />
back the beginning of the disc or all recorded files may not play.<br />
~ Some CD-R/-RW discs may not be playable with this unit, depending on the device which was used<br />
to burn them. For contents recorded on CD-R/-RW media from CDs for your personal use, playability<br />
may vary depending on contents and discs.<br />
❖ DVD-R Disc Playback<br />
~ Once a DVD-R recorded in Video Mode is finalized, it becomes DVD-Video.<br />
~ This unit can play back DVD-R discs recorded and finalized with a <strong>Samsung</strong> DVD video recorder. It<br />
may not be able to play some DVD-R discs depending on the disc and the condition of the recording.<br />
❖ DVD-RW Disc Playback<br />
~ Playback can be performed with DVD-RW discs in the Video Mode and finalized only.<br />
~ Once a DVD-RW recorded in Video Mode is finalized, it becomes DVD-Video. Ability to play back may<br />
depend on recording conditions.<br />
Disc Format<br />
EnG ● Getting Started<br />
❖ Using MP3 disc<br />
~ CD-R/-RW, DVD-RW/-R recorded with UDF, ISO9660 or JOLIET format can be played back.<br />
~ Only MP3 files with the “.mp3” or “.MP3” extension can be played.<br />
~ Playable bit-rate range is from 56 Kbps to 320 Kbps.<br />
~ Playable sample-rate is 32KHz to 48KHz.<br />
~ The unit can handle a maximum of 1500 files and folders under a parent folder. For MP3 files recorded<br />
with a VBR(Variable Bit Rates), the sound may cut in and out.<br />
❖ Using JPEG disc<br />
~ CD-R/-RW, DVD-RW/-R recorded with UDF, ISO9660 or JOLIET format can be played back.<br />
~ Only JPEG files with the ".jpg", ".JPG", ".jpeg" or "JPEG" extension can be displayed.<br />
~ Progressive JPEG is supported.<br />
❖ DVD-RW/-R (V)<br />
~ This is a format that is used for recording data on a DVD-RW or DVD-R disc. The disc can be played<br />
by this Blu-ray Home Cinema once it has been finalized.<br />
~ If a disc that has been recorded in Video Mode by a different maker’s recorder but has not been<br />
finalized, it cannot be played by this Blu-ray Home Cinema.<br />
13
Description<br />
FRONT PANEL<br />
1 3 6 <br />
<br />
10<br />
11<br />
POWER BUTTON<br />
FUNCTION BUTTON<br />
TUNING DOWN &<br />
SKIP ( ) BUTTON<br />
STOP BUTTON<br />
PLAY/PAUSE BUTTON<br />
TUNING UP &<br />
SKIP( ) BUTTON<br />
Volume Control BUTTON<br />
EJECT BUTTON<br />
HEADPHONE JACK<br />
10 USB HOST<br />
Turns the Blu-ray Home Cinema on and off.<br />
The mode switches as follows :<br />
BD/DVD ➞ D.IN ➞ AUX ➞ BT AUDIO ➞ FM.<br />
Goes back to the previous title/chapter/track.<br />
Tunes down the FM frequency band.<br />
Stops disc playback.<br />
Plays a disc or pauses playback.<br />
Goes to the next title/chapter/track.<br />
Tunes up the FM frequency band.<br />
Volume adjustment.<br />
Eject a disc.<br />
Connect a headphone.<br />
A USB storage device can be connected here and used as storage when connected to<br />
BD-LIVE. It can also be used for fi rmware upgrades and MP3/JPEG playback.<br />
11 DISC SLOT Accept a disc.<br />
M `<br />
You must use the USB HOST on the rear panel of the Blu-ray Home Cinema to connect a wireless LAN Adapter.<br />
1
REAR PANEL<br />
<br />
10<br />
1 3 6 <br />
11<br />
ENG ● DESCRIPTION<br />
2.1 CHANNEL SPEAKER OUTPUT<br />
CONNECTORS<br />
FM 75Ω COAXIAL JACK<br />
Connect the front, subwoofer speakers.<br />
Connect the FM antenna.<br />
iPod JACK<br />
Connect the iPod dock connector here.<br />
EXTERNAL DIGITAL OPTICAL INPUT JACK<br />
HDMI OUT JACK<br />
COMPONENT VIDEO OUTPUT JACKS<br />
VIDEO OUTPUT JACK<br />
AUX IN JACKS<br />
LAN TERMINAL<br />
10 WIRELESS LAN JACK<br />
11 COOLING FAN<br />
Use this to connect external equipment capable of digital output.<br />
Use the HDMI cable, connect this HDMI output terminal to the HDMI input<br />
terminal on your TV for the best quality picture.<br />
Connect a TV with Component video inputs to these jacks.<br />
Connect your TV's Video Input jack (VIDEO IN) to the VIDEO OUT Jack on<br />
this unit.<br />
Connect to the 2CH analogue output of an external device (such as a VCR)<br />
Can be used for connection to BD-LIVE.<br />
It can be also used for fi rmware upgrades.<br />
A USB storage device can be connected here and used as storage when<br />
connected to BD-LIVE. It can also be used for fi rmware upgrades and<br />
MP3/JPEG playback, as well as for connecting to BD-Live with a wireless<br />
LAN adapter.<br />
The fan always revolves when the power is on. Ensure a minimum of<br />
10cm of clear space on all sides of the fan when installing the product.<br />
M `<br />
Oversized USB drives may not be able to be inserted when a LAN or HDMI cable is connected.<br />
1
Remote control<br />
Tour of the Remote Control<br />
1<br />
2<br />
3<br />
4<br />
21<br />
22<br />
23<br />
24<br />
25<br />
5<br />
6<br />
7<br />
8<br />
9<br />
10<br />
11<br />
26<br />
27<br />
28<br />
29<br />
30<br />
12<br />
13<br />
14<br />
15<br />
16<br />
17<br />
18<br />
19<br />
20<br />
31<br />
32<br />
33<br />
34<br />
35<br />
36<br />
37<br />
16
1<br />
2<br />
3<br />
4<br />
5<br />
6<br />
7<br />
8<br />
POWER button<br />
BD RECEIVER button<br />
TV button<br />
Number (0~9) buttons<br />
AUDIO button<br />
STEP button<br />
Tuning Preset/CD Skip buttons<br />
PLAY button<br />
STOP button<br />
SEARCH buttons<br />
9 VOLUME button<br />
19 MO/ST button<br />
20 DISC MENU button<br />
21 EJECT button<br />
22 DIMMER button<br />
23<br />
BD button<br />
TUNER button<br />
AUX button<br />
24 SOURCE button<br />
25 RDS Selection buttons<br />
26 SUBTITLE button<br />
27 PAUSE button<br />
EnG ● remote control<br />
10 V-SOUND button<br />
11 MENU button<br />
12 Cursor/Enter button<br />
13 INFO button<br />
14<br />
COLOUR Buttons : RED(A),<br />
GREEN (B), YELLOW(C), BLUE(D)<br />
15 POPUP MENU, TITLE MENU button<br />
16 TUNER MEMORY, MARKER button<br />
17 CANCEL button<br />
18 SLEEP button<br />
28 MUTE button<br />
29 TUNING/CH button<br />
30 RETURN button<br />
31 EXIT button<br />
32 ZOOM button<br />
33 PIP button<br />
34 REPEAT button<br />
35 DSP button<br />
36 REPEAT A-B button<br />
37 SLOW button<br />
Installing batteries in the Remote Control<br />
1. Lift the cover at the back of<br />
the remote control upward<br />
as shown.<br />
2. Install two AAA size batteries.<br />
Make sure to match the “+” and “–” ends of the<br />
batteries with the diagram inside the compartment.<br />
3. Replace the cover.<br />
Assuming typical TV usage,<br />
the batteries last for about one<br />
year.<br />
17
Remote control<br />
SETTING THE REMOTE CONTROL<br />
You can control certain functions of your TV with this remote control.<br />
When operating a TV with the remote control<br />
1. Press the TV button to set the remote to TV mode.<br />
2. Press the POWER button to turn on the TV.<br />
3. While holding down the POWER button, enter the code<br />
corresponding to your brand of TV.<br />
~ If there is more than one code listed for your TV in the able,<br />
enter one at a time to determine which code works.<br />
Example : For a <strong>Samsung</strong> TV<br />
While holding down the POWER button, use the number<br />
buttons to enter 00, 15, 16, 17 and 40.<br />
4. If the TV turns off, the setting is complete.<br />
~ You can use the TV POWER, VOLUME, CHANNEL, and<br />
Numeric buttons (0~9).<br />
M `<br />
`<br />
The remote control may not work on some brands of TVs. Also, some operations may not<br />
be possible depending on your brand of TV.<br />
If you do not set the remote control with the code for your brand of TV, the remote control<br />
will work on a <strong>Samsung</strong> TV by default.<br />
Operation range of the remote Control<br />
The remote control can be used up to approximately 7 meters<br />
in a straight line. It can also be operated at a<br />
horizontal angle of up to 30° from the remote control sensor.<br />
1
TV Brand Code List<br />
No. Brand Code No. Brand Code<br />
1<br />
2<br />
3<br />
4<br />
5<br />
6<br />
7<br />
8<br />
9<br />
10<br />
11<br />
12<br />
13<br />
14<br />
15<br />
16<br />
17<br />
18<br />
19<br />
20<br />
21<br />
22<br />
23<br />
24<br />
25<br />
26<br />
27<br />
28<br />
29<br />
30<br />
31<br />
32<br />
33<br />
34<br />
35<br />
36<br />
37<br />
38<br />
39<br />
40<br />
41<br />
42<br />
43<br />
Admiral (M.Wards)<br />
A Mark<br />
Anam<br />
AOC<br />
Bell & Howell (M.Wards)<br />
Brocsonic<br />
Candle<br />
Cetronic<br />
Citizen<br />
Cinema<br />
Classic<br />
Concerto<br />
Contec<br />
Coronado<br />
Craig<br />
Croslex<br />
Crown<br />
Curtis Mates<br />
CXC<br />
Daewoo<br />
Daytron<br />
Dynasty<br />
Emerson<br />
Fisher<br />
Funai<br />
Futuretech<br />
General Electric (GE)<br />
Hall Mark<br />
Hitachi<br />
Inkel<br />
JC Penny<br />
JVC<br />
KTV<br />
KEC<br />
KMC<br />
LG (Goldstar)<br />
Luxman<br />
LXI (Sears)<br />
Magnavox<br />
Marantz<br />
Matsui<br />
MGA<br />
Mitsubishi/MGA<br />
56, 57, 58<br />
01, 15<br />
01, 02, 03, 04, 05, 06, 07, 08, 09, 10, 11,<br />
12, 13, 14<br />
01, 18, 40, 48<br />
57, 58, 81<br />
59, 60<br />
18<br />
03<br />
03, 18, 25<br />
97<br />
03<br />
18<br />
46<br />
15<br />
03, 05, 61, 82, 83, 84<br />
62<br />
03<br />
59, 61, 63<br />
03<br />
02, 03, 04, 15, 16, 17, 18, 19, 20, 21, 22, 23, 24,<br />
25, 26, 27, 28, 29, 30, 32, 34, 35, 36, 48, 59, 90<br />
40<br />
03<br />
03, 15, 40, 46, 59, 61, 64, 82, 83, 84, 85<br />
19, 65<br />
03<br />
03<br />
06, 40, 56, 59, 66, 67, 68<br />
40<br />
15, 18, 50, 59, 69<br />
45<br />
56, 59, 67, 86<br />
70<br />
59, 61, 87, 88<br />
03, 15, 40<br />
15<br />
01, 15, 16, 17, 37, 38, 39, 40, 41, 42, 43, 44<br />
18<br />
19, 54, 56, 59, 60, 62, 63, 65, 71<br />
15, 17, 18, 48, 54, 59, 60, 62, 72, 89<br />
40, 54<br />
54<br />
18, 40<br />
18, 40, 59, 60, 75<br />
44<br />
45<br />
46<br />
47<br />
48<br />
49<br />
50<br />
51<br />
52<br />
53<br />
54<br />
55<br />
56<br />
57<br />
58<br />
59<br />
60<br />
61<br />
62<br />
63<br />
64<br />
65<br />
66<br />
67<br />
68<br />
69<br />
70<br />
71<br />
72<br />
73<br />
74<br />
75<br />
76<br />
77<br />
78<br />
79<br />
80<br />
81<br />
82<br />
83<br />
84<br />
85<br />
86<br />
MTC<br />
NEC<br />
Nikei<br />
Onking<br />
Onwa<br />
Panasonic<br />
Penney<br />
Philco<br />
Philips<br />
Pioneer<br />
Portland<br />
Proton<br />
Quasar<br />
Radio Shack<br />
RCA/Proscan<br />
Realistic<br />
Sampo<br />
<strong>Samsung</strong><br />
Sanyo<br />
Scott<br />
Sears<br />
Sharp<br />
Signature 2000 (M.Wards)<br />
Sony<br />
Soundesign<br />
Spectricon<br />
SSS<br />
Sylvania<br />
Symphonic<br />
Tatung<br />
Techwood<br />
Teknika<br />
TMK<br />
Toshiba<br />
Vidtech<br />
Videch<br />
Wards<br />
Yamaha<br />
York<br />
Yupiteru<br />
Zenith<br />
Zonda<br />
Dongyang<br />
18<br />
18, 19, 20, 40, 59, 60<br />
03<br />
03<br />
03<br />
06, 07, 08, 09, 54, 66, 67, 73, 74<br />
18<br />
03, 15, 17, 18, 48, 54, 59, 62, 69, 90<br />
15, 17, 18, 40, 48, 54, 62, 72<br />
63, 66, 80, 91<br />
15, 18, 59<br />
40<br />
06, 66, 67<br />
17, 48, 56, 60, 61, 75<br />
18, 59, 67, 76, 77, 78, 92, 93, 94<br />
03, 19<br />
40<br />
00, 15, 16, 17, 40, 43, 46, 47, 48, 49,<br />
59, 60, 98<br />
19, 61, 65<br />
03, 40, 60, 61<br />
15, 18, 19<br />
15, 57, 64<br />
57, 58<br />
50, 51, 52, 53, 55<br />
03, 40<br />
01<br />
18<br />
18, 40, 48, 54, 59, 60, 62<br />
61, 95, 96<br />
06<br />
18<br />
03, 15, 18, 25<br />
18, 40<br />
19, 57, 63, 71<br />
18<br />
59, 60, 69<br />
15, 17, 18, 40, 48, 54, 60, 64<br />
18<br />
40<br />
03<br />
58, 79<br />
01<br />
03, 54<br />
EnG ● remote control<br />
19
Connections<br />
This section involves various methods of connecting the Blu-ray Home Cinema to other external components.<br />
Before moving or installing the product, be sure to turn off the power and disconnect the power cord.<br />
Connecting the Speakers<br />
Position of the Blu-ray Home Cinema<br />
Place it on a stand or cabinet shelf, or under the TV stand.<br />
Selecting the Listening Position<br />
The listening position should be located about 2.5 to 3 times the distance of the TV's screen size away from the TV.<br />
Example : For 32" TVs 6~8feet (2~2.4m)<br />
For 55" TVs 11~13feet (3.5~4m))<br />
Front Speakersei<br />
Place these speakers in front of your listening position, facing inwards (about 45°) toward you.<br />
Place the speakers so that their tweeters will be at the same height as your ear.<br />
Subwoofer<br />
The position of the subwoofer is not so critical. Place it anywhere you like.<br />
How to assemble the speaker and the stand<br />
Components<br />
How to detach<br />
the stand from<br />
the speaker<br />
A : SPEAKER<br />
B : STAND<br />
~ Connect the stand to ~ This is the successfully ~ Strike down the front of<br />
the SPEAKER(A). assembled speaker. stand by first.<br />
20
Connecting The Speakers<br />
1. Press down the terminal tab on the back of the speaker.<br />
.<br />
3.<br />
Insert the black wire into the black terminal (–) and the red wire into<br />
the red (+) terminal, and then release the tab.<br />
Connect the connecting plugs to the back of the Blu-ray Home<br />
Cinema by matching the colours of the speaker plugs to the speaker<br />
jacks.<br />
Front Speaker (R)<br />
Front Speaker (L)<br />
Black<br />
Red<br />
ENG ● CONNECTIONS<br />
Subwoofer Speaker<br />
`<br />
`<br />
`<br />
`<br />
Do not let children play with or near the speakers. They could get hurt if a speaker falls.<br />
When connecting the speaker wires to the speakers, make sure that the polarity (+/ –) is<br />
correct.<br />
Keep the subwoofer speaker out of reach of children so as to prevent children from<br />
inserting their hands or alien substances into the duct (hole) of the subwoofer speaker.<br />
Do not hang the subwoofer on the wall through the duct (hole).<br />
M `<br />
If you place a speaker near your TV set, screen colour may be distorted because of the<br />
magnetic fi eld generated by the speaker. If this occurs, place the speaker away from your<br />
TV set.<br />
1
Connections<br />
CONNECTING THE VIDEO OUT TO YOUR TV<br />
Choose one of the three methods for connecting to a TV.<br />
METHOD1<br />
METHOD3<br />
(supplied)<br />
METHOD2<br />
METHOD 1 : HDMI (BEST)<br />
Connect the HDMI cable (not supplied) from the HDMI OUT jack on the back of the Blu-ray Home Cinema<br />
to the HDMI IN jack on your TV.<br />
M `<br />
`<br />
`<br />
`<br />
`<br />
`<br />
Certain HDMI output resolutions may not work, depending on your TV.<br />
If an HDMI cable is connected from the player to a TV, the Blu-ray Home Cinema’s output is set to<br />
HDMI automatically within 10 seconds.<br />
If you are using the Anynet + feature (see page 44) and Component and HDMI are both<br />
connected, HDMI mode is automatically selected.<br />
When you connect the player to the TV using the HDMI cable for the fi rst time or to a new TV, the<br />
HDMI output resolution will automatically be set to the highest provided by the TV.<br />
If you connect a <strong>Samsung</strong> TV to the Blu-ray Home Cinema using an HDMI cable, the player can<br />
be easily operated using the TV remote control. (This is only available with <strong>Samsung</strong> TVs that<br />
support the Anynet+ feature.) (See page 44)<br />
After making the video connection, set the Video input source on your TV to match the<br />
corresponding Video output (HDMI, Component or Composite) on your Blu-ray Home Cinema.<br />
See your TV owner's manual for more information on how to select the TV's Video Input source.<br />
HDMI Auto Detection Function<br />
The player's video output will automatically change to HDMI mode when connecting an HDMI cable<br />
while power is on. For possible HDMI resolutions, see page 41.<br />
~<br />
HDMI (High Definition Multimedia Interface)<br />
HDMI is an interface that enables the digital transmission of video and audio data with just a single connector.<br />
Using HDMI, the Blu-ray Home Cinema transmits a digital video and audio signal and displays a vivid picture on a<br />
TV having an HDMI input jack.
~<br />
~<br />
~<br />
~<br />
~<br />
HDMI connection description<br />
HDMI connector - Supports video and digital audio data.<br />
- HDMI outputs only a pure digital signal to the TV.<br />
- If your TV does not support HDCP (High-bandwidth Digital Content Protection), random noise appears on the screen.<br />
Why does <strong>Samsung</strong> use HDMI?<br />
Analogue TVs require an analogue video/audio signal. However, when playing a BD/DVD, the data<br />
transmitted to a TV is digital. Therefore either a digital-to-analogue converter (in the Blu-ray Home Cinema) or an<br />
analogue-to-digital converter (in the TV) is required. During this conversion, the picture quality is degraded due to<br />
noise and signal loss. HDMI technology is superior because it requires no D/A conversion and is a pure digital<br />
signal from the player to your TV.<br />
What is the HDCP?<br />
HDCP (High-band width Digital Content Protection) is a system for protecting BD/DVD content outputted via HDMI<br />
from being copied. It provides a secure digital link between a video source (PC, DVD. etc) and a display device (TV,<br />
projector. etc). Content is encrypted at the source device to prevent unauthorized copies from being made.<br />
What is Anynet+?<br />
Anynet+ is a convenient function that offers linked operation of this unit through <strong>Samsung</strong> TVs with the Anynet+ feature.<br />
- If your <strong>Samsung</strong> TV has an logo, then it supports the Anynet+ function.<br />
-If you turn on the player and insert a disc, the player will start playing the disc, and the TV will turn on<br />
automatically and switch to HDMI mode.<br />
- If you turn on the player and press the Play button with a disc already inserted, the TV will immediately turn on<br />
and switch to HDMI mode.<br />
What is BD Wise?<br />
BD Wise is <strong>Samsung</strong>'s latest inter-connectivity feature.<br />
- When you connect <strong>Samsung</strong> products with BD-Wise to each other via HDMI, the optimum resolution will be set<br />
automatically.<br />
EnG ● connections<br />
METHOD 2 : Component Video (BETTER)<br />
If your television is equipped with Component Video inputs, connect a Component video cable (not<br />
supplied) from the Component Video Output (Pr, Pb and Y) Jacks on the back of the Blu-ray Home<br />
Cinema to the Component Video Input Jacks on your TV.<br />
M `<br />
`<br />
`<br />
`<br />
You can select from a variety of resolution settings such as 1080i, 720p, 576p/480p and 576i/480i,<br />
depending on the disc type. (See page 42)<br />
The actual resolution may differ from the setting in the SETUP menu if both Component and HDMI<br />
cables are connected. The resolution may also be different depending on the disc. (See page 42)<br />
After making the video connection, set the Video input source on your TV to match the<br />
corresponding Video output (HDMI, Component or Composite) on your Blu-ray Home Cinema.<br />
See your TV owner's manual for more information on how to select the TV's Video Input source.<br />
In DVD playback, if both HDMI and Component jacks are connected and you select the<br />
Component 1080p, 1080i or 720p mode, the Display Setup menu will show the output resolution<br />
as 1080p, 1080i or 720p in the menu.<br />
The resolution is actually 576i/480i.<br />
METHOD 3 : Composite Video (GOOD)<br />
Connect the supplied Video cable from the VIDEO OUT jack on the back of the Blu-ray Home Cinema<br />
to the VIDEO IN jack on your TV.<br />
M `<br />
`<br />
`<br />
The VIDEO source is always output in 576i/480i resolution regardless of the resolution set in the<br />
SETUP menu. (See page 42)<br />
After making the video connection, set the Video input source on your TV to match the<br />
corresponding Video output (HDMI, Component or Composite) on your Blu-ray Home Cinema.<br />
See your TV owner's manual for more information on how to select the TV's Video Input source.<br />
Do not connect the unit through a VCR. Video signals fed through VCRs may be affected by<br />
copyright protection systems and the picture will be distorted on the television.<br />
23
Connections<br />
CONNECTING AN iPod<br />
You can enjoy music, video fi les from an iPod through the main unit. For iPod operation with this Blu-ray home<br />
cinema, see pages 25 and 78 ~ 80.<br />
(supplied)<br />
1.<br />
Connect the iPod Dock to the iPod Jack on the rear side of the main unit.<br />
.<br />
Place the iPod in the dock.<br />
~ “iPod Connected” message appears on the TV screen.<br />
M `<br />
`<br />
`<br />
`<br />
`<br />
`<br />
You must have the VIDEO output connected to your TV to view iPod video (See page 25).<br />
As the cable ports are close together, be sure to remove the USB memory drive before<br />
disconnecting the ipod docking cable.<br />
Adjust the volume to a moderate level before you connect your iPod and Blu-ray home cinema.<br />
When the unit is powered on and you connect an iPod, the unit will charge your iPod's battery.<br />
Make sure to connect the dock connector so that the label “SAMSUNG” faces upward.<br />
“Made for iPod” means that an electronic accessory has been designed to connect<br />
specifi cally to iPod and has been certifi ed by the developer to meet Apple performance<br />
standards.
iPod models that can be used with the <strong>HT</strong>-<strong>BD7200</strong><br />
EnG ● connections<br />
M `<br />
`<br />
`<br />
“Made for iPod” means that an electronic accessory has been designed to connect specifically to<br />
iPod and has been certified by the developer to meet Apple performance standards.<br />
“Works with iPhone” means that an electronic accessory has been designed to connect<br />
specifically to an iPhone and has been certified by the developer to meet Apple performance<br />
standards.<br />
Apple is not responsible for the operation of this device or its compliance with safety and<br />
regulatory standards.<br />
iPod is a trademark of Apple Inc., registered in the U.S. and other countries. iPhone is a<br />
trademark of Apple Inc.<br />
25
Connections<br />
CONNECTING AUDIO FROM EXTERNAL COMPONENTS<br />
OPTICAL : Connecting an External Digital Component<br />
Digital signal components such as a Cable Box/Satellite receiver (Set-Top Box).<br />
1.<br />
Connect the Digital Input (OPTICAL) on the main unit to the Digital Output of the external digital<br />
component.<br />
. Press the FUNCTION button on the main unit to select D.IN input.<br />
~ The mode switches as follows : BD/DVD ➞ D.IN ➞ AUX ➞ BT AUDIO ➞ FM.<br />
Optical Cable<br />
(not supplied)<br />
M `<br />
`<br />
`<br />
To see video from your Cable Box/Satellite receiver, you must connect it's video output<br />
to a TV.<br />
This system supports Digital sampling frequencies of 32 kHz of higher from external digital<br />
components.<br />
This system supports only DTS and Dolby digital audio, MPEG audio which is bitstream<br />
cannot be supported.<br />
6
AUX : Connecting an External Analogue Component<br />
Analogue signal components such as a VCR.<br />
1. Connect AUX IN (Audio) on the main unit to the Audio Out of the external analogue component.<br />
~ Be sure to match connector colours.<br />
. Press the AUX button on the remote control to select AUX input.<br />
~ You can also use the FUNCTION button on the main unit.<br />
The mode switches as follows : BD/DVD ➞ D.IN ➞ AUX ➞ BT AUDIO ➞ FM.<br />
ENG ● CONNECTIONS<br />
Audio Cable (not supplied)<br />
If the external analogue component has<br />
only one Audio Out, connect either left<br />
or right.<br />
M `<br />
You can connect the Video Output jack of your VCR to the TV, and connect the Audio<br />
Output jacks of the VCR to this product.
Connections<br />
CONNECTING TO THE NETWORK<br />
To access network service or upgrade the current fi rmware, you must make one of the following connections.<br />
By connecting to a network, you can access the BD-LIVE service and software upgrades from <strong>Samsung</strong>’s update<br />
server.<br />
Case 1 : Connecting a Direct LAN Cable to your Modem<br />
1.<br />
Using the Direct LAN Cable (UTP cable, not supplied), connect the LAN terminal of the Blu-ray Disc<br />
Player to the LAN terminal of your modem.<br />
Broadband modem<br />
(with integrated router)<br />
To LAN port<br />
Router<br />
Connecting using a router<br />
(e.g. DSL)<br />
Broadband modem<br />
Broadband<br />
service<br />
To LAN port<br />
Or<br />
To LAN port<br />
Broadband<br />
service<br />
PC connection to Router<br />
for PC streaming<br />
M <br />
<br />
<br />
To use the PC streaming function (see pages 81~82), please make a network between your<br />
PC and router.<br />
Internet access to <strong>Samsung</strong>’s update server may not be allowed, depending on the router you<br />
use or the ISP’s policy.<br />
For more information, contact your ISP (Internet Service Provider).<br />
For DSL users, please use a router to make a network connection.<br />
28
Case 2 : Connecting to a Wireless IP sharer<br />
You can connect to network with a Wireless IP sharer. See page 50 for Wireless Network Setup.<br />
Modem Port<br />
Wireless iP sharer<br />
ENG ● CONNECTIONS<br />
Modem cable<br />
Wireless lan<br />
adapter<br />
(not supplied)<br />
M `<br />
`<br />
`<br />
`<br />
This unit is compatible with only <strong>Samsung</strong> Wireless LAN Adapter. (not supplied)<br />
(Model name: WIS09ABGN).<br />
- The <strong>Samsung</strong> Wireless LAN Adapter is sold separately.<br />
- Contact a <strong>Samsung</strong> Electronics agent or service centre for purchasing.<br />
You must use a wireless IP sharer that supports IEEE 802.11 a/b/g/n. (n is recommended<br />
for stable operation of the wireless network.)<br />
Wireless LAN, in its nature, may cause interference, depending on the use condition (AP<br />
performance, distance, obstacle, interference by other radio devices, etc).<br />
Set the wireless IP sharer to Infrastructure mode. Ad-hoc mode is not supported.<br />
` When applying the security key for the AP (wireless IP sharer), only the following is<br />
supported.<br />
1) Authentication Mode : WEP, WPAPSK, WPA2PSK<br />
2) Encryption Type : WEP, TKIP, AES
Connections<br />
CONNECTING THE FM ANTENNA<br />
1.<br />
.<br />
Connect the FM antenna supplied to the FM 75Ω COAXIAL Jack.<br />
Slowly move the antenna wire around until you fi nd a location where reception is good, then fasten it<br />
to a wall or other rigid surface.<br />
FM Antenna<br />
(supplied)<br />
M `<br />
This unit does not receive AM broadcasts.<br />
COOLING FAN<br />
The cooling fan supplies cool air to the unit to prevent overheating.<br />
Please observe the following cautions for your safety.<br />
~<br />
~<br />
Make sure the unit is well-ventilated. If the unit has poor ventilation, the temperature inside the unit may rise<br />
and may damage it.<br />
Do not obstruct the cooling fan or ventilation holes. (If the cooling fan or ventilation holes are covered with a<br />
newspaper or cloth, heat may build up inside the unit and fi re may result.)<br />
ATTACHING THE TOROIDAL FERRITE CORE TO THE POWER CORD<br />
OF THE MAIN UNIT<br />
If you attach a Toroidal ferrite core to the power cord of the man unit, it will prevent help to prevent RF<br />
interference from radio signals.<br />
1.<br />
.<br />
3.<br />
Pull the fi xing tab of the Toroidal ferrite core to open it.<br />
Make a loop twice in the main unit power cord.<br />
Attach the Toroidal ferrite core to the main unit power cord as the fi gure shows and press it until it clicks.<br />
30
Basic functions of your Blu-ray Home Cinema<br />
This section introduces basic playback functions and playback by disc type.<br />
BEFORE PLAYING<br />
~ Turn on your TV and set it to the correct Video Input (the input the Blu-ray Home Cinema is connected to).<br />
~ If you connected an external Audio System, turn on your Audio System and set it to the correct Audio Input.<br />
After plugging in the player, the fi rst time you press the<br />
POWER button, this screen comes up:<br />
If you want to select a language, press a NU<strong>MB</strong>ER button.<br />
(This screen will only appear when you plug in the player for<br />
the fi rst time.) If the language for the startup screen is not set,<br />
the settings may change whenever you turn the power on or<br />
off. Therefore, make sure that you select the language you<br />
want to use. Once you select a menu language, you can<br />
change it by pressing the STOP (@) button on the front panel<br />
of the unit for more than 5 seconds with no disc in the unit.<br />
Then the MENU LANGUAGE SELECTION window appears<br />
again where you can reset your preferred language.<br />
MENU LANGUAGE SELECTION<br />
Press 1 for English<br />
Pulsar 2 para Español<br />
Touche 3 pour Français<br />
Macrovision : BSS41<br />
ENG ● BASIC FUNCTIONS<br />
M `<br />
`<br />
`<br />
Discs which can be played on this player (For the following discs, the ability to play back<br />
may depend on recording conditions.)<br />
• BD-ROM • BD-RE • BD-R<br />
• DVD-R • DVD-RW (V mode) • CD-RW/CD-R<br />
• The unit may not play certain CD-RW/CD-R and DVD-R due to the disc type or<br />
recording conditions.<br />
Discs which cannot be played on this player.<br />
• HD DVD • DVD+RW • DVD+R<br />
• DVD-ROM • DVD-RAM • CDV<br />
• CD-ROM • CVD • CD-I<br />
• Super Audio CD(except CD layer)<br />
• CDGs play audio only, not graphics.<br />
Blu-ray is a new and evolving format. Accordingly, disc compatibility issues with new and<br />
existing format discs are possible. Not all discs are compatible and not every disc will<br />
playback.<br />
For additional information, refer to the Disc Type and Characteristics and Compliance and<br />
Compatibility Notice sections of this <strong>Manual</strong>. If you encounter compatibility problems,<br />
please contact SAMSUNG customer care centre.<br />
31
Basic functions of your Blu-ray Home Cinema<br />
On-Screen Menu NavigatioN<br />
System Setup<br />
System Information<br />
Time Zone<br />
Video<br />
Music<br />
Photo<br />
Language Setup<br />
Audio<br />
Subtitle<br />
DivX Subtitle<br />
Disc Menu<br />
Menu<br />
Clock Set<br />
Power On/Off sound<br />
BD Data Management<br />
DivX(R) Registration<br />
System Update<br />
Setup<br />
Audio Setup<br />
Dynamic Compression<br />
Display Setup<br />
TV Aspect<br />
Movie Frame (24 Fs)<br />
Resolution<br />
Progressive Mode<br />
AV Sync<br />
Test Tone<br />
Speaker Distance<br />
Sound Edit<br />
Still Mode<br />
Screen Message<br />
HDMI Setup<br />
Anynet + (HDMI-CEC)<br />
Network Setup<br />
Network Selection<br />
Cable Network<br />
Wireless Network<br />
Proxy<br />
HDMI Format<br />
BD Wise<br />
Picture Mode<br />
HDMI Audio<br />
NTP Server<br />
Network Connection Test<br />
BD-LIVE Internet Connection<br />
Parental Setup<br />
Parental Lock<br />
Rating Level<br />
New Password<br />
Playing a Disc<br />
1. Load a disc.<br />
~ Place a disc gently into the tray with the disc’s label facing up.<br />
2. Close the compartment by pressing the PLAY button.<br />
~ Playback starts automatically.<br />
32<br />
M `<br />
`<br />
`<br />
`<br />
`<br />
When you stop disc play, the player remembers where you stopped, so when you press<br />
PLAY button again, it will pick up where you left off. This is called the "Resume" function.<br />
With some Blu-ray discs(BD-J), this function may not work.<br />
Press the STOP button twice during playback to disable the Resume function.<br />
To pause the playback, press the PAUSE button during playback.<br />
To resume, press the PLAY button.<br />
If the player is left in the stop mode more than 5 minutes without any user interface, a<br />
screen saver will appear on your TV. If the player is left in the screen saver mode for more<br />
than 30 minutes, the power will automatically turn off except during playback of an CD-DA<br />
(Automatic Power-Off Function).<br />
If no buttons are pressed on the unit or remote control for more than 5 minutes when the<br />
unit is in Pause mode, operation will stop (except for some Blu-ray Discs).
sETTing THE sOUnD<br />
setting the Power On / Off Melody sound<br />
A Melody sound can be set so it is heard each time you turn the player on or off.<br />
1. With the unit in Stop mode, press the MENU button.<br />
2. Press the $% buttons to select Setup, then press the<br />
ENTER or + button.<br />
3. Press the $% buttons to select System Setup, then<br />
press the ENTER or + button.<br />
4. Press the $% buttons to select Power On/Off sound,<br />
then press the ENTER or + button.<br />
5. Press the $% buttons to select On or Off, then press the<br />
ENTER or + button.<br />
6. Press the MENU button to exit the setup menu.<br />
Music<br />
Photo<br />
DVD setup system setup _<br />
language setup<br />
audio setup<br />
Display setup<br />
HDMi setup<br />
network setup<br />
Parental setup<br />
System Information<br />
Time Zone<br />
Clock Set<br />
Power On/Off sound : On +<br />
On<br />
BD Data Management<br />
Off<br />
DivX(R) Registration<br />
System Update<br />
ENG ● BASIC FUNCTIONS<br />
Using THE sEaRcH anD sKiP FUncTiOns<br />
During play, you can search quickly through a chapter or track, and use the skip function to jump to the next selection.<br />
searching through a chapter or Track<br />
hgfZCV<br />
During playback, press the SEARCH ( ) button.<br />
Each time you press the SEARCH button, the playback speed will change as follows.<br />
BD-ROM, BD-RE, BD-R, DVD-VIDEO,<br />
DVD-RW, DVD-R<br />
) X 2 ) X 4 ) X 8 ) X 16 ) X 32 ) X 128<br />
( X 2 ( X 4 ( X 8 ( X 16 ( X 32 ( X 128<br />
~ You can scan the program in reverse.<br />
~ To return to normal speed playback, press the PLAy button.<br />
M `<br />
No sound is heard during search mode.<br />
skipping Tracks<br />
hgfZCV<br />
During playback, press the SKIP ( ) button.<br />
When playing a Blu-ray Disc/DVD, if you press the SKIP ( ) button, it moves to the next chapter.<br />
If you press the SKIP ( ) button, it moves to the beginning of the chapter. One more press makes it<br />
move to the beginning of the previous chapter.<br />
33
Basic functions of your Blu-ray Home Cinema<br />
slOW MOTiOn Play/sTEP MOTiOn Play<br />
slow Motion Play<br />
hgfZCV<br />
In pause or step mode, press the SLOW button on the<br />
remote control for Slow Motion play.<br />
~ If you press the SLOW button, * 1/8 * 1/4 * 1/2<br />
~ To return to normal speed playback, press the<br />
PLAY ( ) button.<br />
M `<br />
`<br />
`<br />
This (<br />
) icon indicates an invalid button press.<br />
No sound is heard during slow mode.<br />
Slow motion operates only in the forward direction.<br />
step Motion Play<br />
hgfZCV<br />
Press the STEP button on the remote control during play for Step<br />
Motion play.<br />
~<br />
~<br />
~<br />
Each time the button is pressed a new frame will appear.<br />
When the STEP button is pressed, the next frame will be<br />
activated.<br />
Press the PLAY (<br />
) button to resume normal play.<br />
M `<br />
`<br />
No sound is heard during step mode.<br />
Step motion operates only in the forward direction.<br />
3
System setup<br />
Setting the CloCK<br />
Choose your time zone<br />
1. With the unit in Stop mode, press the Menu button.<br />
2. Press the ▲▼ buttons to select Setup, then press the<br />
enteR or ► button.<br />
3. Press the ▲▼ buttons to select System Setup, then press<br />
the enteR or ► button.<br />
4. Press the ▲▼ buttons to select time Zone, then press the<br />
enteR or ► button.<br />
Music<br />
Photo<br />
dVd Setup System Setup ◄<br />
Language Setup<br />
Audio Setup<br />
Display Setup<br />
HDMI Setup<br />
Network Setup<br />
Parental Setup<br />
System Information<br />
Time Zone<br />
Clock Set<br />
Power On/Off sound : On<br />
BD data management<br />
DivX(R) Registration<br />
System Update<br />
►<br />
eng ● SySteM Setup<br />
5. Use the ◄ ► button to place the cursor to the appropriate<br />
time zone for your area and press the enteR button.<br />
dVd System Setup ◄<br />
Music<br />
Time Zone<br />
Photo<br />
System Information<br />
Setup<br />
Time Zone<br />
Language Setup Clock Set<br />
Audio Setup Power On/Off sound : On<br />
Display Setup Touch Key Sound : On<br />
HDMI Setup BD Data Management<br />
◄ GMT + 00:00 ►<br />
Network Setup System Update<br />
Parental Setup London, Lisbon<br />
►<br />
Save<br />
Return<br />
M <br />
To set the time automatically, set the NTP server to On (see page 53).<br />
Set the clock<br />
To setup, follow steps 1 through 3 above.<br />
4. Press the ▲▼ buttons to select Clock Set, then press the<br />
enteR or ► button.<br />
Music<br />
Photo<br />
dVd Setup System Setup ◄<br />
Language Setup<br />
System Information<br />
Time Zone<br />
Clock Set<br />
Power On/Off sound : On<br />
►<br />
Audio Setup<br />
BD data management<br />
Display Setup<br />
DivX(R) Registration<br />
HDMI Setup<br />
System Update<br />
Network Setup<br />
Parental Setup<br />
5. Press the ◄ ► buttons to move to “da.”(date), “hr” (hour),<br />
“min” (minute). Set the date and time by pressing the ▲▼<br />
buttons, then press the enteR button.<br />
Music<br />
System Information<br />
Photo<br />
Time Zone<br />
Clock Set<br />
dVd Setup System Setup ◄ Clock Set<br />
da. hr. min.<br />
Language Setup Power On/Off sound : On<br />
Audio Setup JAN/01/2009 Touch 01Key Sound 01 : On<br />
Display Setup Thursday BD Data Management<br />
HDMI Setup System Update<br />
Network Setup Save<br />
Return<br />
Parental Setup<br />
►<br />
35
Language setup<br />
SETTING UP THE LANGUAGE OPTIONS<br />
Once you set the audio, subtitle, disc menu and player menu language options, they will be applied automatically<br />
every time you watch a movie.<br />
M <br />
If you want to choose a different audio and subtitle language while playing a disc, you can<br />
also use the disc menu to make the selection.<br />
1. With the unit in Stop mode, press the MENU button.<br />
2. Press the ▲▼ buttons to select Setup, then press the<br />
ENTER or ► button.<br />
dVd<br />
Music<br />
Photo<br />
Setup<br />
System Setup<br />
◄<br />
Language Setup<br />
Audio Setup<br />
◄<br />
Display Setup<br />
HDMI Setup<br />
Network Setup<br />
Parental Setup<br />
3. Press the ▲▼ buttons to select Language Setup, then<br />
press the ENTER or ► button.<br />
Language setup menu will be displayed.<br />
dVd<br />
Music<br />
Photo<br />
Setup<br />
System Setup<br />
Language Setup ◄<br />
Audio : Original ►<br />
Audio Setup<br />
Subtitle<br />
: Auto<br />
Display Setup<br />
DivX Subtitle<br />
: Western<br />
HDMI Setup<br />
Disc Menu<br />
: English<br />
Network Setup<br />
Menu<br />
: Auto<br />
Parental Setup<br />
4. Press the ▲▼ buttons to select the desired language<br />
option, press the ENTER or ► button.<br />
Music<br />
Photo<br />
System Setup<br />
• Audio : For the disc audio language.<br />
• Subtitle : For the disc subtitles.<br />
• DivX Subtitle : For the DivX subtitles.<br />
• Disc Menu : For the disc menu contained on the disc<br />
• Menu : For the on-screen menu of your Blu-ray Home<br />
Cinema.<br />
dVd<br />
Setup<br />
Language Setup ◄<br />
Audio Setup<br />
Display Setup<br />
HDMI Setup<br />
Network Setup<br />
Parental Setup<br />
Audio Original<br />
: Original ►<br />
English<br />
Subtitle<br />
: Auto<br />
Français<br />
DivX Subtitle<br />
: Western<br />
Deutsch<br />
Disc Menu<br />
: English<br />
español<br />
Menu<br />
: Auto<br />
Italiano<br />
5. Press the ▲▼ buttons to select the desired language, then press the ENTER button.<br />
M <br />
<br />
Press the RETURN or ◄ button to return to the previous menu. Press the MENU button to<br />
exit the menu.<br />
The selected language will only appear if it is supported on the disc.<br />
36
Audio setup<br />
Setting up the SpeaKeR optionS<br />
dynamic Compression<br />
This is only active when a Dolby Digital signal is detected.<br />
• on : When Movie soundtracks are played at low volume or<br />
from smaller speakers, the system can apply appropriate<br />
compression to make low-level content more intelligible<br />
and prevent dramatic passages from getting too loud.<br />
• off : You can enjoy the movie with the standard Dynamic<br />
Range.<br />
dVd<br />
Music<br />
Photo<br />
Setup<br />
System Setup<br />
Language Setup<br />
Audio Setup ◄<br />
Display Setup<br />
HDMI Setup<br />
Network Setup<br />
Parental Setup<br />
Dynamic Compression : On On<br />
aV Sync<br />
: 50msec Off<br />
test tone<br />
Speaker distance<br />
Sound edit<br />
►<br />
eng ● audio Setup<br />
aV Sync<br />
Video may look slower than the audio when the player is<br />
connected to a digital TV. If this occurs, adjust the audio<br />
delay time to match the video.<br />
• You can set the audio delay time between 0 ms and 300<br />
ms. Set it to the optimal status.<br />
dVd<br />
Music<br />
Photo<br />
Setup<br />
System Setup<br />
Language Setup<br />
Audio Setup ◄<br />
Display Setup<br />
HDMI Setup<br />
Network Setup<br />
Parental Setup<br />
Dynamic Compression : On<br />
aV Sync<br />
test tone<br />
Speaker distance<br />
Sound edit<br />
: 50msec 0msec<br />
25msec<br />
50msec<br />
75msec<br />
100msec<br />
125msec<br />
Setting the test tone<br />
Use the Test Tone feature to check the speaker connections.<br />
1. With the unit in Stop mode, press the Menu button.<br />
2. Press the ▲▼ buttons to select Setup, then press the<br />
enteR or ► button.<br />
3. Press the ▲▼ buttons to select audio Setup, then press<br />
the enteR or ► button.<br />
• Audio setup menu will be displayed.<br />
dVd<br />
Music<br />
Photo<br />
Setup<br />
System Setup<br />
Language Setup<br />
Audio Setup ◄<br />
Display Setup<br />
HDMI Setup<br />
Network Setup<br />
Parental Setup<br />
Dynamic Compression : On<br />
aV Sync<br />
: 50msec<br />
test tone<br />
Speaker distance<br />
Sound edit<br />
►<br />
4. Press the ▲▼ buttons to select test tone, then press<br />
the enteR or ► button.<br />
5. Press the Red(a) button<br />
• A test tone will be sent to l R lFe in order so you<br />
can make sure the speakers are set up correctly.<br />
6. To end the test tone, press the Red (a) button again.<br />
dVd<br />
Music<br />
Photo<br />
Setup<br />
System Setup<br />
Language Setup<br />
Audio Setup<br />
Display Setup<br />
HDMI Setup<br />
Network Setup<br />
Parental Setup<br />
◄<br />
Dynamic Compression : On<br />
aV Sync<br />
: 50msec<br />
test tone<br />
Speaker distance<br />
Sound edit<br />
►<br />
M <br />
<br />
<br />
<br />
Press the RETURN button to return to the previous menu.<br />
When playing a BD/DVD or CD, this will work only in Stop mode.<br />
Use this function to check that each speaker is correctly connected and that there is no<br />
problem.<br />
When HDMI AUDIO is on (audio is produced through TV speakers), the TEST TONE function is<br />
not available.<br />
37
Audio setup<br />
Setting up the SpeaKeR optionS<br />
Setting the Speaker distance<br />
If the speakers cannot be placed at equal distances from the listening position, you can adjust the delay<br />
time of the audio signals from the front, subwoofer speakers.<br />
1. With the unit in Stop mode, press the Menu button.<br />
2. Press the ▲▼ buttons to select Setup, then press the<br />
enteR or ► button.<br />
3. Press the ▲▼ buttons to select audio Setup,<br />
then press the enteR or ► button.<br />
• Audio setup menu will be displayed.<br />
dVd<br />
Music<br />
Photo<br />
Setup<br />
System Setup<br />
Language Setup<br />
Audio Setup ◄<br />
Display Setup<br />
HDMI Setup<br />
Network Setup<br />
Parental Setup<br />
Dynamic Compression : On<br />
aV Sync<br />
: 50msec<br />
test tone<br />
Speaker distance<br />
Sound edit<br />
►<br />
4. Press the ▲▼ buttons to select Speaker distance,<br />
then press the enteR or ► button.<br />
5. Press the ▲▼ buttons to select the desired Speaker,<br />
then press the ◄► buttons to set the Speaker Distance.<br />
• You can set the Speaker Distance between 0.3m and 9m.<br />
6. When done, use the ▲▼◄► buttons to select Save,<br />
then press the enteR button.<br />
If you don’t want to save your settings, use the ▲▼◄►<br />
buttons to select Cancel, then press the enteR button.<br />
dVd<br />
Music<br />
Photo<br />
Setup<br />
System Setup<br />
Language Setup<br />
Audio Setup ◄<br />
Display Setup<br />
HDMI Setup<br />
Network Setup<br />
Parental Setup<br />
Dynamic Compression : On<br />
aV Sync<br />
: 50msec<br />
test tone<br />
Speaker distance<br />
Sound edit<br />
►<br />
M <br />
Press the RETURN button to return to the previous menu.<br />
Setting the Sound edit<br />
You can adjust the balance and level for each speaker.<br />
1. With the unit in Stop mode, press the Menu button.<br />
2. Press the ▲▼ buttons to select Setup, then press the<br />
enteR or ► button.<br />
3. Press the ▲▼ buttons to select audio Setup, then<br />
press the enteR or ► button.<br />
• Audio setup menu will be displayed.<br />
dVd<br />
Music<br />
Photo<br />
Setup<br />
System Setup<br />
Language Setup<br />
Audio Setup ◄<br />
Display Setup<br />
HDMI Setup<br />
Network Setup<br />
Parental Setup<br />
Dynamic Compression : On<br />
aV Sync<br />
: 50msec<br />
test tone<br />
Speaker distance<br />
Sound edit<br />
►<br />
38
Setting the Sound edit<br />
4. Press the ▲▼ buttons to select Sound edit,<br />
then press the enteR or ► button.<br />
5. Press the ▲▼ buttons to select the desired Speaker,<br />
then press the ◄► button to adjust the settings.<br />
6. When done, use the ▲▼◄► buttons to select Save,<br />
then press the enteR button.<br />
If you don’t want to save your settings, use the ▲▼◄►<br />
buttons to select Cancel, then press the enteR button.<br />
M <br />
Press the RETURN butt on to return to the previous menu.<br />
adjusting Front Speaker Balance<br />
• You can select between 0, -6, and OFF.<br />
• The volume decreases as you move closer to –6.<br />
dVd<br />
Music<br />
Photo<br />
Setup<br />
System Setup<br />
Language Setup<br />
Audio Setup<br />
Display Setup<br />
HDMI Setup<br />
Network Setup<br />
Parental Setup<br />
◄<br />
aV Sync<br />
test tone<br />
Speaker distance<br />
Sound edit<br />
: 50msec<br />
►<br />
eng ● audio Setup<br />
adjusting Subwoofer Speaker level<br />
• The volume level can be adjusted in steps from +6dB to 6dB.<br />
• The sound gets louder as you move closer to +6dB and quieter as you get closer to -6dB.<br />
V-Sound (Virtual Sound)<br />
Produces realistic sound through 2-channel audio with the aid<br />
of virtual effects, this gives the user the feeling they are<br />
listening to 5.1 channel audio.<br />
Press the V-Sound button.<br />
• Each time the button is pressed, the selection changes as<br />
follows :<br />
V.Sound on ➝ V.Sound oFF<br />
dSp Function<br />
Press the dSp button.<br />
• Each time the button is pressed, the selection changes as<br />
follows:<br />
SMaRt Sound ➝ audio upSCaling<br />
➝ poWeR BaSS ➝ dSp Mode oFF<br />
• SMART SOUND : This will regulate and stabilize the<br />
volume level against a drastic volume change when<br />
changing channels or during a scene transition.<br />
• AUDIO UPSCALING : This also helps enhance your sound experience (ex. mp3 music).<br />
You can upscale your MP3 level sound(24 kHz, 8bit) to CD level sound(44.1 kHz, 16bit).<br />
• POWER BASS : POWER BASS function stresses low tones providing thudding sound effects.<br />
39
◄<br />
►<br />
Display setup<br />
SETTING UP THE DISPLAY OPTIONS<br />
This function allows you to setup the TV screen settings. This function depends on the disc or TV type. It may not<br />
work with some discs or TVs.<br />
1. With the unit in Stop mode, press the MENU button.<br />
2. Press the ▲▼ buttons to select Setup, then press the<br />
ENTER or ► button.<br />
3. Press the ▲▼ buttons to select Display Setup, then press<br />
the ENTER or ► button.<br />
Video setup menu will be displayed.<br />
4. Press the ▲▼ buttons to select the desired display option<br />
from the options on the following pages.<br />
5. Press the ▲▼ buttons to select the desired sub-menu<br />
item from a video display option, then press the ENTER<br />
button.<br />
6. Each video option is described in detail below.<br />
M <br />
Press the RETURN or ◄ button to return to the previous<br />
menu. Press the MENU button to exit the menu.<br />
dVd<br />
dVd<br />
Music<br />
Photo<br />
Setup<br />
Music<br />
Photo<br />
Setup<br />
System Setup<br />
Language Setup<br />
Audio Setup<br />
Display Setup<br />
HDMI Setup<br />
Network Setup<br />
Parental Setup<br />
System Setup<br />
Language Setup<br />
Audio Setup<br />
Display Setup<br />
HDMI Setup<br />
Network Setup<br />
Parental Setup<br />
◄<br />
TV Aspect : 16:9 Normal ►<br />
Movie Frame (24 Fs) : Off<br />
Resolution<br />
Progressive Mode<br />
Still Mode<br />
Screen Message<br />
: 1080p<br />
: Auto<br />
: Auto<br />
: On<br />
tV aspect<br />
You may want to adjust the screen setting, depending on the type of television you have. (aspect ratio)<br />
• 4:3 Letter Box :<br />
Select when you want to see the total 16:9<br />
ratio screen a Blu-ray Disc/DVD supplies,<br />
even though you have a TV with a 4:3 ratio<br />
screen. Black bars will appear at the top<br />
and bottom of the screen.<br />
• 4:3 Pan-Scan :<br />
Select when you want to see the 16:9 video<br />
supplied by the Blu-ray Disc/DVD without the<br />
black bars on top and bottom, even though you<br />
have a TV with a 4:3 ratio screen(extreme left and<br />
right portion of the movie picture will be cut off).<br />
• 16:9 Wide :<br />
You can view the full 16:9 picture on your widescreen TV.<br />
dVd<br />
Music<br />
Photo<br />
Setup<br />
System Setup<br />
Language Setup<br />
Audio Setup<br />
Display Setup<br />
HDMI Setup<br />
Network Setup<br />
Parental Setup<br />
◄<br />
TV Aspect : 16:9 Normal ►<br />
4:3 letter Box<br />
Movie Frame (24 Fs) : Off 4:3 pan-Scan<br />
Resolution<br />
: 1080p<br />
16:9 Wide<br />
16:9 Normal<br />
Progressive Mode<br />
: Auto<br />
Still Mode<br />
Screen Message<br />
: Auto<br />
: On<br />
• 16:9 Normal :<br />
Certain movies(4:3 source) will be displayed in 4:3 Pillarbox (black bars on sides of picture)<br />
if 16:9 normal is selected.<br />
M <br />
<br />
Some aspect ratios may not be available, depending on the disc type.<br />
If you select an aspect ratio which is different than the aspect ratio of your TV screen, then<br />
the picture might appear to be distorted.<br />
40
Movie Frame (24 Fs)<br />
Movies are usually fi lmed at 24 frames per second. Some<br />
Blu-ray Discs have the capability of playing back at this frame<br />
rate. Setting the Movie Frame (24Fs) feature to ON allows you<br />
to adjust the Blu-ray Home Cinema's HDMI output to 24<br />
frames per second for improved picture quality.<br />
You can enjoy the Movie Frame (24Fs) feature only on a TV<br />
supporting this frame rate.<br />
This menu can only be selected in 1080i or 1080p HDMI<br />
output resolution modes.<br />
Two types of frame rates may be included, depending on the disc: Movie material (24 frame) and Video<br />
material (30 frame). When the setting switches between Movie (24 frame) and Video (30 frame),<br />
the screen may blink for a few seconds.<br />
Resolution<br />
dVd<br />
Music<br />
Photo<br />
Setup<br />
System Setup<br />
Language Setup<br />
Audio Setup<br />
Display Setup<br />
HDMI Setup<br />
Network Setup<br />
Parental Setup<br />
◄<br />
TV Aspect<br />
: 16:9 Normal<br />
Movie Frame (24 Fs) : Off On<br />
Resolution<br />
Progressive Mode<br />
Still Mode<br />
Screen Message<br />
: 1080p<br />
Off<br />
: Auto<br />
: Auto<br />
: On<br />
►<br />
eng ● diSplay Setup<br />
Sets the output resolution of the HDMI and Component video<br />
Music<br />
signal.<br />
Photo<br />
• The number in 576i/480i, 576p/480p, 720p, 1080p and<br />
dVd Setup<br />
1080i indicates the number of lines of video. The i and p<br />
indicate interlace and progressive scan, respectively.<br />
- BD Wise : Automatically sets the optimal resolution when<br />
connected via HDMI to a TV with the BD Wise<br />
feature.(The BD Wise menu item appears only if<br />
BD Wise is set to On.)<br />
- 1080p : Outputs 1080 lines of progressive video (HDMI only).<br />
- 1080i : Outputs 1080 lines of interlaced video.<br />
- 720p : Outputs 720 lines of progressive video.<br />
- 576p/480p : Outputs 576/480 lines of progressive video.<br />
- 576i/480i : Outputs 576/480 lines of interlaced video (Component only).<br />
System Setup<br />
Language Setup<br />
Audio Setup<br />
Display Setup ◄<br />
HDMI Setup<br />
Network Setup<br />
Parental Setup<br />
TV Aspect<br />
: 16:9 Normal<br />
Movie Frame (24 Fs) : Off<br />
Resolution<br />
: 1080p 1080p<br />
Progressive Mode<br />
: Auto 1080i<br />
Still Mode<br />
: Auto 720p<br />
Screen Message<br />
: On<br />
576p/480p<br />
576i/480i<br />
If the connected TV does not support Movie Frame or the<br />
selected resolution, you will see the following message:<br />
If you select Yes and the resolution is not supported, the TV's<br />
screen will be blank. Please wait for 15 seconds and<br />
the resolution will revert to the previous value automatically.<br />
dVd<br />
Music<br />
Photo<br />
Setup<br />
►<br />
System Setup<br />
Language Setup<br />
TV Aspect<br />
: 16:9 Normal<br />
Audio Setup<br />
if no pictures are shown Movie<br />
after Frame<br />
the (24<br />
selection,<br />
Fs) : Off<br />
Display please Setup wait for ◄ 15 Resolution seconds. and then,<br />
: 1080p<br />
the resolution will be reverted<br />
HDMI Setup<br />
Progressive Mode<br />
: Auto<br />
to the previous value automatically.<br />
Network Setup<br />
Still Mode<br />
: Auto<br />
Would you like to make a selection?<br />
Parental Setup<br />
Screen Message<br />
: On<br />
Yes<br />
No<br />
M <br />
<br />
If the screen is blank, press and hold the STOP () button on the front of the player for<br />
more than 5 seconds (no disc inserted). All settings are restored to the factory default.<br />
Follow the steps on the previous page to access each mode and select the Display Setup<br />
that your TV will support.<br />
When the factory default settings are restored, all the user data stored in the BD data will<br />
be deleted.<br />
41
Display setup<br />
Setting up the Video display/output Options<br />
Resolution according to the output mode<br />
• Blu-ray Disc playback<br />
Setup<br />
Output<br />
1080p, Movie Frame(24Fs)<br />
off<br />
1080p/1080i, Movie<br />
Frame (24Fs) on<br />
1080i, Movie Frame (24Fs)<br />
off<br />
• DVD playback<br />
HDMI<br />
Component<br />
(HDMI&Comp. connected / Comp.<br />
connected only)<br />
Video<br />
1080p@60F 1080i 576i/480i<br />
1080p@24F 576i(480i) / 1080i 576i/480i<br />
1080i 1080i 576i/480i<br />
720p 720p 720p 576i/480i<br />
576p/480p 576p/480p 576p/480p 576i/480i<br />
576i/480i 576p/480p 576i/480i 576i/480i<br />
Setup<br />
Output<br />
HDMI<br />
Component<br />
(HDMI&Comp. connected / Comp.<br />
connected only)<br />
Video<br />
1080p 1080p@60F 576i(480i) / 576p(480p) 576i/480i<br />
1080i 1080i 576i(480i) / 576p(480p) 576i/480i<br />
720p 720p 576i(480i) / 576p(480p) 576i/480i<br />
576p/480p 576p/480p 576i(480i) / 576p(480p) 576i/480i<br />
576i/480i 576p/480p 576i/480i 576i/480i<br />
M <br />
<br />
<br />
<br />
In DVD playback, if both HDMI and Component jacks are connected and you select the<br />
Component 1080p, 1080i or 720p mode, the Display Setup menu will show the output<br />
resolution as 1080p, 1080i or 720p in the menu.<br />
The resolution is actually 576i/480i.<br />
This player has the HDMI Auto Detect Feature. When the player is first connected to a TV<br />
via HDMI, the player's output will be set automatically to HDMI.<br />
If the HDMI Auto Detection feature does not work, you can't select the 1080p resolution or<br />
Movie Frame (24Fs).<br />
The Blu-ray Disc must have the 24 frame feature in order to use the Movie Frame (24Fs)<br />
mode.<br />
42
►<br />
Progressive Mode<br />
The Progressive Mode helps to improve picture quality when<br />
viewing 576i/480i resolution DVD discs.<br />
• Auto : Select this to have the player automatically set the<br />
best picture for the DVD you're watching.<br />
• Video : Select this for the best picture from Concert or TV<br />
show DVDs.<br />
Frame & Field bar<br />
Still Mode<br />
Set the Auto, Field or Frame setting for the best possible still<br />
picture (pause mode) from a DVD.<br />
• Auto: Select this setting to have the player automatically<br />
display the best Still picture depending on the content.<br />
• Field Mode: Select this when pausing a scene with a lot of<br />
action.<br />
• Frame Mode: Select this to increase the resolution of the<br />
Still picture.<br />
dVd<br />
dVd<br />
Music<br />
Photo<br />
Setup<br />
Music<br />
Photo<br />
Setup<br />
System Setup<br />
Language Setup<br />
Audio Setup<br />
Display Setup ◄<br />
HDMI Setup<br />
Network Setup<br />
Parental Setup<br />
System Setup<br />
Language Setup<br />
Audio Setup<br />
Display Setup ◄<br />
HDMI Setup<br />
Network Setup<br />
Parental Setup<br />
tV aspect : 16:9 normal<br />
Movie Frame (24 Fs) :<br />
off<br />
Resolution : 1080p<br />
progressive Mode : pCM auto<br />
Still Mode : autoVideo<br />
Screen Message : on<br />
Movie Frame (24 Fs) : Off<br />
Resolution : 1080p<br />
Progressive Mode : Auto<br />
Still Mode<br />
: Auto Auto<br />
Screen Message : OnField<br />
Frame<br />
eng ● diSplay Setup<br />
Screen Message<br />
• On : Displays messages related to operation mode.<br />
• Off : Does not display messages related to operation mode.<br />
Music<br />
Photo<br />
System Setup<br />
Language Setup<br />
Audio Setup<br />
Resolution<br />
Progressive Mode<br />
Still Mode<br />
: 1080p<br />
: Auto<br />
: Auto<br />
dVd<br />
Setup<br />
Display Setup<br />
◄<br />
Screen Message<br />
: On On<br />
HDMI Setup<br />
Off<br />
Network Setup<br />
Parental Setup<br />
43
HDMI setup<br />
Setting up the hdMi Setup optionS<br />
1. With the unit in Stop mode, press the MENU button.<br />
2. Press the ▲▼ buttons to select Setup, then press the<br />
ENTER or ► button.<br />
3. Press the ▲▼ buttons to select HDMI Setup, then press<br />
the ENTER or ► button.<br />
HDMI setup menu will be displayed.<br />
4. Press the ▲▼ buttons to select the desired display option,<br />
then press the ENTER or ► button.<br />
dVd<br />
Music<br />
Photo<br />
Setup<br />
Language Setup<br />
Audio Setup<br />
Display Setup<br />
◄ HDMI Setup<br />
Network Setup<br />
Parental Setup<br />
◄<br />
M <br />
Press the RETURN or ◄ button to return to the previous menu. Press the MENU button to exit the menu.<br />
Anynet+ (HDMI-CEC)<br />
<strong>Samsung</strong> products only<br />
What is Anynet+?<br />
Anynet+ is a convenient function that offers linked operations with other <strong>Samsung</strong> products with the<br />
Anynet+ feature.<br />
You can operate this unit using a <strong>Samsung</strong> TV remote control or power on your <strong>Samsung</strong> TV and Home<br />
cinema and start disc playback simply by pressing the PLAY button on the TV’s remote.<br />
M <br />
This function is not available if the HDMI cable does not support CEC.<br />
To use Anynet+<br />
1. Connect the Blu-ray Home Cinema to a <strong>Samsung</strong> TV with an HDMI cable. (See pages 22~23)<br />
2.<br />
Set the Anynet+ function on your TV. (See the TV instruction manual for more information.)<br />
Anynet+ Functions<br />
• One touch play<br />
You can power on your <strong>Samsung</strong> TV and Home Cinema, and play the disc in this unit simply by<br />
pressing the PLAY button on the TV’s remote.<br />
• One touch watching<br />
Select “Watching Blu-ray Home Theater” or “Connected to Blu-ray Home Theater” (depending on<br />
your TV's menu) in the Anynet+ menu on the TV. The Blu-ray Home Cinema will automatically turn on<br />
and the TV will be switched to HDMI mode.<br />
• Remote control Link<br />
You can operate this player with your <strong>Samsung</strong> TV remote control.<br />
• Available buttons on the <strong>Samsung</strong> TV remote: These buttons work the same as this Blu-ray Home<br />
Cinema's remote control.<br />
- Playback control buttons :<br />
- Menu operation button :<br />
- Numeric buttons : ~<br />
- Colour buttons :<br />
44
TV Anynet+ Menu<br />
When you press the Anynet+ button on your <strong>Samsung</strong> TV's remote<br />
control, the following On-Screen Display (OSD) will be shown.<br />
• Blu-ray Home Cinema Menu<br />
View tV<br />
Select device<br />
- When playing a movie : brings up the disc’s menu (same<br />
Record<br />
as DISC MENU button on the Blu-ray Home Cinema’s<br />
Receiver<br />
remote control)<br />
Setup<br />
- In Stop mode : brings up the SETUP menu (same as the<br />
Move<br />
exit<br />
MENU button on the Blu-ray Home Cinema’s remote<br />
control.)<br />
• Blu-ray Home Cinema Operation Menu<br />
- When playing a DVD VIDEO, DVD-RW/-R, BD-ROM, BD-RE :<br />
shows INFO OSD (same as INFO button on the player's remote control)<br />
M <br />
Menu on device<br />
device operation<br />
These menus may look different depending on your <strong>Samsung</strong> TV.<br />
n<br />
: off<br />
Enter<br />
eng ● hdMi Setup<br />
HDMI Format<br />
You can optimize the HDMI output for connection to a TV or<br />
Monitor.<br />
• TV : Select if connected to a TV via HDMI.<br />
• Monitor : Select if connected to a Monitor via HDMI.<br />
If the player is connected to a TV, the Monitor<br />
option is unavailable.<br />
dVd<br />
Music<br />
Photo<br />
Setup<br />
Language Setup<br />
Audio Setup<br />
Display Setup<br />
HDMI Setup ◄<br />
Network Setup<br />
Parental Setup<br />
Anynet + (HDMI-CEC) : On<br />
HDMI Format : Tv TV<br />
BD Wise<br />
: OnMonitor<br />
Picture Mode : Dynamic<br />
HDMI Audio : Off<br />
M <br />
TV or monitor has to be connected to the player before you select this option.<br />
BD Wise<br />
<strong>Samsung</strong> products only<br />
BD Wise is <strong>Samsung</strong>'s latest inter-connectivity feature.<br />
When you connect <strong>Samsung</strong> products with BD-Wise to each<br />
other via HDMI, the optimum resolution will be set<br />
automatically.<br />
• On : The original resolution of the BD/DVD disc will be<br />
output to the TV direct.<br />
• Off : The output resolution will be fi xed according to the<br />
Resolution previously set, regardless of the resolution of the<br />
disc.<br />
dVd<br />
Music<br />
Photo<br />
Setup<br />
Language Setup<br />
Audio Setup<br />
Display Setup<br />
HDMI Setup ◄<br />
Network Setup<br />
Parental Setup<br />
Anynet + (HDMI-CEC) : On<br />
HdMi Format : tV<br />
►<br />
Bd Wise : pCM On<br />
picture Mode<br />
HDMI Audio<br />
: dynamic Off<br />
: Off<br />
M <br />
<br />
<br />
<br />
If you want to change the resolution when you set BD Wise on, you must set BD Wise to Off in advance.<br />
If you set BD Wise to off, the resolution of the connected TV will be automatically adjusted to its maximum<br />
resolution.<br />
If the player is connected to a device that does not support BD Wise, you can not use the BD wise function.<br />
For a proper operation of BD Wise, set BD Wise to ON in the menus of the player and the TV.<br />
45
HDMI setup<br />
Setting up the hdMi Setup optionS<br />
Picture Mode<br />
This function enables you to adjust video quality when you are<br />
connected to a TV via HDMI.<br />
• Dynamic : Choose this setting to increase Sharpness.<br />
• Normal : Choose this setting for most viewing applications.<br />
• Movie : This is the best setting for watching movies.<br />
dVd<br />
Music<br />
Photo<br />
Setup<br />
Language Setup<br />
Audio Setup<br />
Display Setup<br />
HDMI Setup ◄<br />
Network Setup<br />
Parental Setup<br />
Anynet + (HDMI-CEC) : On<br />
hdMi Format : tV<br />
Bd Wise<br />
: on<br />
picture Mode<br />
HDMI Audio<br />
: dynamic dynamic<br />
normal<br />
: Off<br />
Movie<br />
hdMi audio<br />
The audio signals transmitted over the HDMI Cable can be toggled ON/OFF.<br />
• on : Both video and audio signals are transmitted over the<br />
HDMI connection cable, and audio is output through<br />
your TV speakers only.<br />
• off : Video is transmitted over the HDMI connection cable<br />
only, and audio is output through the Blu-ray Home Cinema<br />
speakers only.<br />
Music<br />
Photo<br />
Setup<br />
dVd<br />
Language Setup<br />
Audio Setup<br />
Display Setup<br />
HDMI Setup ◄<br />
Network Setup<br />
Parental Setup<br />
hdMi Format<br />
Bd Wise<br />
picture Mode<br />
HDMI Audio<br />
: tV<br />
: on<br />
: dynamic<br />
: Off On<br />
Off<br />
M <br />
<br />
The default setting of this function is HDMI Audio Off.<br />
HDMI AUDIO is automatically down-mixed to 2ch for TV speakers.<br />
46
Parental setup<br />
SETTING UP THE PARENTAL LOCK<br />
The Parental Lock function works in conjunction with Blu-ray Disc/DVDs that have been assigned a rating which<br />
helps you control the types of Blu-ray Disc/DVDs that your family watches. There are up to 8 rating levels on a disc.<br />
1. With the unit in Stop mode, press the MENU button.<br />
2. Press the ▲▼ buttons to select Setup, then press the<br />
ENTER or ► button.<br />
dVd<br />
Music<br />
Photo<br />
Setup<br />
Display Setup<br />
HDMI Setup<br />
Network Setup<br />
Parental Setup<br />
◄<br />
hZ<br />
eng ● paRental Setup<br />
3. Press the ▲▼ buttons to select Parental Setup, then<br />
press the ENTER or ► button.<br />
When you operate your Blu-ray Home Cinema for the fi rst<br />
time, the “Enter New password.” message will be<br />
displayed.<br />
dVd<br />
Music<br />
Photo<br />
Setup<br />
Display Setup<br />
HDMI Setup<br />
Network Setup<br />
Parental Setup<br />
Parental Setup<br />
Enter New password.<br />
0.9 number<br />
Return<br />
4. Enter the 4-digit password using the number buttons on<br />
the remote control.<br />
The “Confi rm the password.” message will be displayed.<br />
Enter your password again.<br />
dVd<br />
Music<br />
Photo<br />
Setup<br />
Display Setup<br />
HDMI Setup<br />
Network Setup<br />
Parental Setup<br />
Parental Setup<br />
Confirm the password.<br />
0.9 number<br />
Return<br />
5. Press the ENTER or ► button to select Parental Lock.<br />
6. Press the ▲▼ buttons to select On or Off, then press the<br />
ENTER button.<br />
Display Setup<br />
Music<br />
HDMI Setup<br />
Photo<br />
Network Setup<br />
dVd Setup Parental Setup ◄ Parental Lock : Off ►<br />
Rating Level : 1(Kids)<br />
New Password<br />
M <br />
Press the RETURN or ◄ button to return to the previous menu. Press the MENU button to<br />
exit the menu.<br />
47
Parental setup<br />
SETTING UP THE PARENTAL LOCK<br />
If you forgot your password<br />
1. Remove the disc.<br />
2. Press and hold the STOP () button on the front panel for 5 seconds or more.<br />
• All settings will revert to the factory settings.<br />
M <br />
When the factory default settings are restored, all the user data stored in the BD data will<br />
be deleted.<br />
Setting the Rating Level<br />
1. Press the ▲▼ buttons to select Rating Level, then press<br />
the ENTER or ► button.<br />
2. Press the ▲▼ buttons to select the rating level you want,<br />
then press the ENTER button. For example, if you select<br />
up to Level 6, discs that contain Level 7, 8 will not play.<br />
A larger number indicates that the program is intended for<br />
adult use only.<br />
Level 1 is the most restrictive and Level 8 is the least.<br />
dVd<br />
Music<br />
Photo<br />
Setup<br />
Display Setup<br />
HDMI Setup<br />
Network Setup<br />
Parental Setup ◄<br />
Parental Lock : Off<br />
Rating Level : 1(Kids) 8(Adults) ►<br />
New Password<br />
7<br />
6<br />
5<br />
4<br />
3<br />
2<br />
1(Kids)<br />
Changing the Password<br />
1. Press the ▲▼ buttons to select New Password, then<br />
press the ENTER or ► button.<br />
Music<br />
Photo<br />
Display Setup<br />
HDMI Setup<br />
Network Setup<br />
Parental Lock<br />
Rating Level<br />
: Off<br />
: 1(Kids)<br />
dVd<br />
Setup<br />
Parental Setup<br />
◄<br />
New Password<br />
►<br />
2. Enter the 4-digit password using the number buttons on<br />
the remote control. The “Enter New password.” message<br />
will be displayed.<br />
dVd<br />
Music<br />
Photo<br />
Setup<br />
Display Setup<br />
HDMI Setup Parental Lock<br />
Network Setup Rating Level<br />
Parental Setup<br />
Parental Setup ◄ New Password<br />
: Off<br />
: 1(Kids)<br />
►<br />
Enter New password.<br />
0.9 number<br />
Return<br />
3. Enter your password again using the number buttons on<br />
the remote control.<br />
dVd<br />
Music<br />
Photo<br />
Setup<br />
Display Setup<br />
HDMI Setup Parental Lock<br />
Network Setup Rating Level<br />
Parental Setup<br />
Parental Setup ◄ New Password<br />
: Off<br />
: 1(Kids)<br />
►<br />
Confirm the password.<br />
0.9 number<br />
Return<br />
48
Network setup<br />
SETTING UP THE NETWORK SETUP OPTIONS<br />
To obtain information on the proper settings, check the network settings on your computer or contact<br />
your Internet provider.<br />
To set the network of your Blu-ray Home Cinema, follow the steps below.<br />
1. With the unit in Stop mode/No Disc mode, press the<br />
MENU button.<br />
2. Press the ▲▼ buttons to select Setup, then press the<br />
ENTER or ► button.<br />
3. Press the ▲▼ buttons to select Network Setup, then<br />
press the ENTER or ► button.<br />
4. Press the ▲▼ buttons to select the desired network<br />
option from the options described below, then press the<br />
ENTER or ► button.<br />
5. Press the ▲▼ buttons to select the desired item, then press the ENTER button.<br />
Each network option is described in detail below.<br />
Network Selection<br />
dVd<br />
Music<br />
Photo<br />
Setup<br />
Display Setup<br />
HDMI Setup<br />
Network Setup<br />
Parental Setup<br />
◄<br />
eng ● netWoRK Setup<br />
Select Cable or Wireless as the method to connect to<br />
network.<br />
To setup, follow steps 1~3 above.<br />
4. Press the ▲▼ buttons to select Network Selection, then<br />
press the ENTER or ► button.<br />
• Cable : Select this to connect to the network using a<br />
cable. (see page 28)<br />
• Wireless : Select this to connect to the network<br />
wirelessly. (see page 29)<br />
Music<br />
Photo<br />
Display Setup<br />
HDMI Setup<br />
Network Setup ◄<br />
dVd Setup<br />
Network Selection : Cable ▶<br />
Parental Setup<br />
Cable Network<br />
Wireless Network<br />
Proxy<br />
NTP Server : Off<br />
Network Connection Test<br />
BD-LIVE<br />
Connection<br />
: Allow (Valid Only)<br />
Cable Network<br />
To setup, follow steps 1~3 above.<br />
4. Press the ▲▼ buttons to select Cable Network, then<br />
press the ENTER or ► button.<br />
5. Press the ▲▼ buttons to select DHCP, then press the<br />
ENTER button.<br />
dVd<br />
Music<br />
Photo<br />
Setup<br />
Display Setup<br />
HDMI Setup<br />
Network Setup<br />
Parental Setup<br />
◄<br />
Network Selection : Cable<br />
Cable Network<br />
Wireless Network<br />
Proxy<br />
NTP Server : Off<br />
Network Connection Test<br />
BD-LIVE<br />
Connection<br />
: Allow (Valid Only)<br />
▶<br />
M <br />
<br />
If DHCP is set to On, you can't select IP Address,<br />
Subnet Mask or Gateway.<br />
If DNS is set to Auto, you can’t select Primary/<br />
Secondary DNS.<br />
dVd<br />
Music<br />
Photo<br />
Setup<br />
Audio Setup<br />
Display Setup Cable Network<br />
HDMI Setup Network Selection : Cable<br />
DHCP : On<br />
Network Setup ◄ Cable Network<br />
IP Address : 000 . 000 . 000 . 000<br />
Subnet Parental Mask Setup : 255 Wireless . 255 . 255 Network . 000<br />
►<br />
Gateway : 000 Proxy . 000 . 000 . 000<br />
DNS<br />
: Auto NTP Server<br />
: Off<br />
Primary DNS : 000 Network . 000 . 000 Connection . 000 Test<br />
Secondary DNS : 000 BD-LIVE . 000 . 000 Internet . 000<br />
: Allow (Vaild Only)<br />
Connection<br />
Save<br />
Cancel<br />
Select<br />
Return<br />
49
Network setup<br />
SETTING UP THE NETWORK SETUP OPTIONS<br />
6. Press the ▲▼ buttons to select a desired item, then<br />
press the ENTER button.<br />
• If DHCP is set to Off and, DNS to <strong>Manual</strong>, enter<br />
your IP Address, Subnet Mask, Gateway and<br />
Primary DNS settings (Secondary DNS is optional).<br />
dVd<br />
Music<br />
Photo<br />
Setup<br />
Audio Setup<br />
Display Setup<br />
Cable Network<br />
HDMI Setup<br />
Network Selection : Cable<br />
DHCP : Off<br />
Network Setup ◄<br />
Cable Network<br />
IP Address : 000 . 000 . 000 . 000<br />
Subnet Parental Mask Setup<br />
: 255 Wireless . 255 . 255 Network<br />
. 000<br />
Gateway : 000 Proxy<br />
. 000 . 000 . 000<br />
DNS<br />
: <strong>Manual</strong> NTP Server : Off<br />
Primary DNS : 000 Network . 000 . 000 Connection . 000 Test<br />
►<br />
Secondary DNS : 000 BD-LIVE . 000 . 000 Internet<br />
. 000<br />
: Allow (Vaild Only)<br />
Connection<br />
Yes<br />
No<br />
Select<br />
Return<br />
Setup available<br />
• If DHCP is set to On and, DNS to <strong>Manual</strong>, enter<br />
your Primary DNS setting (Secondary DNS is<br />
optional).<br />
dVd<br />
Music<br />
Photo<br />
Setup<br />
Audio Setup<br />
Display Setup Cable Network<br />
HDMI Setup Network Selection : Cable<br />
DHCP : On<br />
Network Setup ◄ Cable Network<br />
IP Address : 000 . 000 . 000 . 000<br />
Subnet Parental Mask Setup : 255 Wireless . 255 . 255 Network . 000<br />
►<br />
Gateway : 000 Proxy . 000 . 000 . 000<br />
DNS<br />
: <strong>Manual</strong> NTP Server<br />
: Off<br />
Primary DNS : 000 Network . 000 . 000 Connection . 000 Test<br />
Secondary DNS : 000 BD-LIVE . 000 . 000 Internet . 000<br />
: Allow (Vaild Only)<br />
Connection<br />
Yes<br />
No<br />
Select<br />
Return<br />
Setup available<br />
Setup not available<br />
• If DHCP is set to On and, DNS to Auto, you don’t<br />
need further or additional settings.<br />
dVd<br />
Music<br />
Photo<br />
Setup<br />
Audio Setup<br />
Display Setup Cable Network<br />
HDMI Setup Network Selection : Cable<br />
DHCP : On<br />
Network Setup ◄ Cable Network<br />
IP Address : 000 . 000 . 000 . 000<br />
Subnet Parental Mask Setup : 255 Wireless . 255 . 255 Network . 000<br />
►<br />
M <br />
<br />
When you select an item, use the number<br />
and ▲▼◄ ► buttons.<br />
If the automatic settings don’t work, contact<br />
your ISP.<br />
Gateway : 000 Proxy . 000 . 000 . 000<br />
DNS<br />
: Auto NTP Server : Off<br />
Primary DNS : 000 Network . 000 . 000 Connection . 000 Test<br />
Secondary DNS : 000 BD-LIVE . 000 . 000 Internet . 000<br />
: Allow (Vaild Only)<br />
Connection<br />
Yes<br />
No<br />
Select<br />
Return<br />
Setup not available<br />
7. When done, use the ▲▼ buttons to select Save, then press the ENTER button.<br />
8. If you don’t want to save your work, use the ▲▼◄ ► buttons to select Cancel, then press the<br />
ENTER button.<br />
M <br />
<br />
The IP address used in this manual is for illustrative purposes only. You must refer to your<br />
network settings for the actual IP address.<br />
To obtain settings for IP address, Subnet mask, Gateway and Primary DNS, check the<br />
network settings in your computer or contact your internet service provider.<br />
Wireless Network<br />
To setup, follow steps 1~3 on page 49.<br />
4. Press the ▲▼ buttons to select Wireless Network, then<br />
press the ENTER or ► button.<br />
dVd<br />
Music<br />
Photo<br />
Setup<br />
Audio Setup<br />
Display Setup<br />
HDMI Setup<br />
Network Setup<br />
Parental Setup<br />
◄<br />
Network Selection : Wireless<br />
Cable Network<br />
Wireless Network<br />
Proxy<br />
NTP Server : Off<br />
►<br />
Network Connection Test<br />
BD-LIVE Internet<br />
: Allow (Vaild Only)<br />
Connection<br />
50
5. Press the ▲▼ buttons to select DHCP, then press the<br />
ENTER button.<br />
M <br />
<br />
If DHCP is set to On, you can't select IP Address,<br />
Subnet Mask or Gateway.<br />
If DNS is set to Auto, you can’t select Primary/<br />
Secondary DNS.<br />
6. Press the ▲▼ buttons to select a desired item, then press<br />
the ENTER button.<br />
• Select an Access Point, and then press the ENTER<br />
button to display available list of APs.<br />
(It may take several seconds to search.)<br />
- When you select an AP and press the ENTER<br />
button, it tries to connect to the designated AP.<br />
- If successful, a notifi cation appears.<br />
(If selected AP shows a Lock icon, you may need to<br />
provide security authentication.)<br />
dVd<br />
dVd<br />
Music<br />
Photo<br />
Setup<br />
Music<br />
Photo<br />
Setup<br />
Audio Setup<br />
Display Setup Wireless Network<br />
HDMI Setup<br />
Access Point<br />
Network Setup<br />
DHCP<br />
HDMI Setup<br />
Access Point<br />
Network Setup<br />
DHCP<br />
Network Selection : Cable<br />
: Not Selected<br />
◄ Cable Network<br />
►<br />
: On<br />
IP Parental Address Setup : 000 Wireless . 000 . 000 Network . 000<br />
Subnet Mask : 255 Proxy . 255 . 255 . 000<br />
Gateway : 000 NTP . 000 Server . 000 . 000 : Off<br />
DNS<br />
: Auto Network Connection Test<br />
DNS Server : 000 BD-LIVE . 000 . 000 Internet . 000<br />
: Allow (Vaild Only)<br />
Connection<br />
Save<br />
Cancel<br />
Select<br />
Return<br />
Audio Setup<br />
Display Setup Wireless Network<br />
Network Selection : Cable<br />
: Not Selected<br />
◄ Cable Network<br />
►<br />
: On<br />
IP Parental Address Setup : 000 Wireless . 000 . 000 Network . 000<br />
Subnet Mask : 255 Proxy . 255 . 255 . 000<br />
Gateway : 000 NTP . 000 Server . 000 . 000 : Off<br />
DNS<br />
: Auto Network Connection Test<br />
DNS Server : 000 BD-LIVE . 000 . 000 Internet . 000<br />
: Allow (Vaild Only)<br />
Connection<br />
Save<br />
Cancel<br />
Select<br />
Return<br />
eng ● netWoRK Setup<br />
- Select your appropriate Security Access Point if it is<br />
known. If it is not, select WEP, WPAPSK or<br />
WPA2PSK from the list below and enter in the<br />
password. Keep trying each Security Access Point<br />
and enter the Password until a connection is made.<br />
dVd<br />
Music<br />
Photo<br />
Setup<br />
Audio Setup<br />
Display Access Setup Point – Security 1 2 3<br />
HDMI Setup Network Selection : Cable<br />
OPEN<br />
Network Setup ◄ Cable Network<br />
►<br />
WEP<br />
WPAPSK Parental Setup Wireless Network<br />
WPA2PSK Proxy<br />
NTP Server : Off<br />
Network Connection Test<br />
BD-LIVE Internet<br />
: Allow (Vaild Only)<br />
Connection<br />
Select<br />
Return<br />
- Enter in the Password then press the BLUE (D)<br />
button to connect to your access point (Router).<br />
dVd<br />
Audio Setup<br />
Music<br />
Display SetupPassword<br />
1 2 3<br />
Photo<br />
HDMI Setup Network Selection : Cable<br />
Setup Network Setup ◄ Cable Network<br />
_<br />
Parental Setup Wireless Network<br />
A B C D E F G H I J K L M N O P<br />
Q R S T U V W X Y Proxy Z a b c d e f<br />
g h i j k l m n o NTP p qServer<br />
r s t u v : Off<br />
w x y z 1 2 3 4 5 6 7 8 9 0 − _<br />
+ = . ~ ! @ # $ % Network ^ & ( Connection ) / ? | Test<br />
a Back Space b Space BD-LIVE Clear d Internet Save<br />
: Allow (Vaild Only)<br />
Connection<br />
►<br />
0-9 Number Select Return<br />
For further details on AP security, refer to the AP’s (Router)<br />
user manual.<br />
• If DHCP is set to Off and, DNS to <strong>Manual</strong>, enter your IP<br />
Address, Subnet Mask, Gateway and DNS Server.<br />
dVd<br />
Music<br />
Photo<br />
Setup<br />
Audio Setup<br />
Display Setup Wireless Network<br />
HDMI Setup<br />
Access Point<br />
Network Setup<br />
DHCP<br />
Network Selection : Cable<br />
: Not Selected<br />
◄ Cable Network<br />
: Off<br />
IP Parental Address Setup : 000 Wireless . 000 . 000 Network . 000<br />
Subnet Mask : 255 Proxy . 255 . 255 . 000<br />
Gateway : 000 NTP . 000 Server . 000 . 000 : Off<br />
►<br />
DNS<br />
: <strong>Manual</strong> Network Connection Test<br />
DNS Server : 000 BD-LIVE . 000 . 000 Internet . 000<br />
: Allow (Vaild Only)<br />
Connection<br />
Save<br />
Cancel<br />
Select<br />
Return<br />
Setup available<br />
51
Network setup<br />
SETTING UP THE NETWORK SETUP OPTIONS<br />
• If DHCP is set to On and, DNS to <strong>Manual</strong>, enter<br />
your DNS Server.<br />
dVd<br />
Music<br />
Photo<br />
Setup<br />
Audio Setup<br />
Display Setup Wireless Network<br />
HDMI Setup<br />
Access Point<br />
Network Setup<br />
DHCP<br />
◄<br />
Network Selection : Cable<br />
: Not Selected<br />
Cable Network<br />
: On<br />
IP Parental Address Setup : 000 Wireless . 000 . 000 Network . 000<br />
►<br />
Subnet Mask : 255 Proxy . 255 . 255 . 000<br />
Gateway : 000 NTP . 000 Server . 000 . 000<br />
: Off<br />
DNS<br />
: <strong>Manual</strong> Network Connection Test<br />
DNS Server : 000 BD-LIVE . 000 . 000 Internet . 000<br />
: Allow (Vaild Only)<br />
Connection<br />
Save<br />
Cancel<br />
Select<br />
Return<br />
Setup available<br />
Setup not available<br />
• If DHCP is set to On and, DNS to Auto, you don’t<br />
need further or additional settings.<br />
dVd<br />
Music<br />
Photo<br />
Setup<br />
Audio Setup<br />
Display Setup Wireless Network<br />
HDMI Setup<br />
Access Point<br />
Network Setup<br />
DHCP<br />
◄<br />
Network Selection : Cable<br />
: Not Selected<br />
Cable Network<br />
: On<br />
Parental IP Address Setup : 000 Wireless . 000 . 000 Network . 000<br />
►<br />
Subnet Mask : 255 Proxy . 255 . 255 . 000<br />
M <br />
<br />
When you select an item, use the number and<br />
▲▼◄ ► buttons.<br />
If the automatic settings don’t work, contact<br />
your ISP.<br />
Gateway : 000 NTP . 000 Server . 000 . 000<br />
DNS<br />
: Off<br />
: <strong>Manual</strong> Network Connection Test<br />
DNS Server : 000 BD-LIVE . 000 . Internet 000 . 000<br />
Connection<br />
Save<br />
Cancel<br />
Select<br />
Return<br />
: Allow (Vaild Only)<br />
Setup not available<br />
7. When done, use the ▲▼ buttons to select Save, then<br />
press the ENTER button.<br />
8. If you don’t want to save your work, use the ▲▼◄ ► buttons to select Cancel, then press the<br />
ENTER button.<br />
M <br />
<br />
The IP address used in this manual is for illustrative purposes only. You must refer to the<br />
your network settings for the actual IP address.<br />
To obtain settings for IP address, Subnet mask, Gateway and DNS Server, check the<br />
network settings in your computer or contact your internet service provider.<br />
Proxy Setting<br />
A proxy server services requests by forwarding them to other servers.<br />
If you are required to confi gure the proxy setting, enter the settings specifi ed by the ISP.<br />
To setup, follow steps 1~3 on page 49.<br />
4. Press the ▲▼ buttons to select Proxy, then press the<br />
ENTER or ► button.<br />
• Server<br />
• Port<br />
• <strong>User</strong><br />
• Password<br />
dVd<br />
Music<br />
Photo<br />
Setup<br />
Audio Setup<br />
Display Setup Proxy<br />
HDMI Setup<br />
Network Selection : Cable<br />
Proxy<br />
: Off<br />
Network Setup ◄<br />
Cable Network<br />
Server :<br />
Port Parental Setup : 8080<br />
Wireless Network<br />
<strong>User</strong> :<br />
Password :<br />
Save<br />
Proxy<br />
NTP Server<br />
: Off<br />
Network Connection Test<br />
BD-LIVE Internet<br />
Connection<br />
Cancel<br />
: Allow (Vaild Only)<br />
►<br />
Select<br />
Return<br />
M <br />
For more information, contact your ISP (Internet Service Provider).<br />
52
NTP Server (Used to Retrieve Time Information from NTP Server)<br />
To setup, follow steps 1~3 on page 49.<br />
4. Press the ▲▼ buttons to select NTP Server, then press<br />
the ENTER or ► button.<br />
• On : the player automatically connects to the Internet<br />
server in order to adjust the time setting.<br />
• Off : the player does not connect to the Internet server<br />
to adjust the time setting.<br />
Network Connection Test<br />
Use this menu to check whether your network connection is<br />
working or not.<br />
To setup, follow steps 1~3 on page 49.<br />
4. Press the ▲▼ buttons to select Network Connection<br />
Test, then press the ENTER or ► button.<br />
dVd<br />
dVd<br />
Music<br />
Photo<br />
Setup<br />
Music<br />
Photo<br />
Setup<br />
Audio Setup<br />
Display Setup<br />
HDMI Setup<br />
Network Setup<br />
Parental Setup<br />
Audio Setup<br />
◄<br />
Cable Network<br />
Wireless Network<br />
Proxy<br />
NTP Server : Off On<br />
►<br />
Off<br />
Network Connection Test<br />
BD-LIVE Internet<br />
Connection<br />
Wireless Network<br />
: Allow (Vaild Only)<br />
Display Setup<br />
Proxy<br />
Network Connection Test<br />
HDMI Setup<br />
NTP Server<br />
: Off<br />
✔ MaC address (00:10:18:00:00:70)<br />
Network Setup<br />
◄<br />
◄<br />
Network Connection Test<br />
✔ ip address.Subnet Mask.gateway.dnS Server<br />
Parental Setup<br />
BD-LIVE Internet<br />
✔ gateway ping<br />
: Allow (Vaild Only)<br />
Connection<br />
✔ internet Service test<br />
your network is operating properly<br />
►<br />
eng ● netWoRK Setup<br />
Return<br />
BD-LIVE Internet Connection<br />
The Blu-ray Home Cinema supports BD-LIVE which enables you to enjoy a variety of interactive service<br />
contents provided by the disc manufacturer through a network connection. To enjoy this feature, you<br />
must fi rst perform the LAN connection (see page 28) or Wireless Lan adapter connection to the USB slot.<br />
* You must have a minimum 1 GB USB Memory device inserted in one of the USB slots in order to<br />
download content from BD-LIVE.<br />
The Internet connection may be restricted while you are using BD-LIVE contents.<br />
To setup, follow steps 1~3 on page 49.<br />
4. Press the ▲▼ buttons to select BD-LIVE Internet<br />
Connection, then press the ENTER or ► button.<br />
• Allow (All) : The Internet connection will be allowed for<br />
all BD-LIVE contents.<br />
• Allow (Valid Only) : The Internet connection will be<br />
allowed only for BD-LIVE contents containing a valid<br />
certifi cate.<br />
• Prohibit : No Internet connection will be allowed for<br />
any BD-LIVE content.<br />
dVd<br />
Music<br />
Photo<br />
Setup<br />
Audio Setup<br />
Display Setup<br />
HDMI Setup<br />
Network Setup<br />
Parental Setup<br />
◄<br />
Proxy<br />
NTP Server<br />
Network Connection Test<br />
BD-LIVE Internet<br />
Connection<br />
: Off<br />
: Allow Allow(All) (Vaild Only)<br />
Allow(Valid Only)<br />
Prohibit<br />
M <br />
<br />
What is a valid certificate? When the Blu-ray Home Cinema uses BD-LIVE to send the disc<br />
data and request to the server to certify the disc, the server uses the transferred data to<br />
check if the disc is valid and sends the certifi cate back to the player.<br />
The Internet connection may be restricted while you are using BD-LIVE contents.<br />
53
BD data management<br />
BD Data (stored in external USB fl ash memory) is Blu-ray Disc content such as trailers and other<br />
special features downloaded from the BD-LIVE service or Blu-ray Discs.<br />
* You must have a minimum 1GB USB Memory device inserted in one of the USB slots in order to download<br />
content from BD-LIVE.<br />
SYSTEM DEVICE MANAGEMENT<br />
You can manage user data stored in BD data.<br />
1. With the unit in Stop mode, press the MENU button.<br />
2. Press the ▲▼ buttons to select Setup, then press the<br />
ENTER or ► button.<br />
3. Press the ▲▼ buttons to select System Setup, , then press<br />
the ENTER or ► button.<br />
4. Press the ▲▼ buttons to select BD Data Management,<br />
then press the ENTER or ► button.<br />
dVd<br />
Music<br />
Photo<br />
Setup<br />
System Setup ◄<br />
language Setup<br />
audio Setup<br />
display Setup<br />
hdMi Setup<br />
network Setup<br />
parental Setup<br />
time Zone<br />
Clock Set<br />
power on/off sound : on<br />
Bd data Management<br />
divX(R) Registration<br />
System update<br />
►<br />
- To delete the flash memory -<br />
1. Press the ENTER button to select BD Data Delete.<br />
The message "All BD data will be deleted. Do you want to<br />
continue?" will be displayed.<br />
2. Press the ◄► button to select Yes, then press the<br />
ENTER button.<br />
Description of Device(Storage) Information on the Player<br />
• Total Size : Total size of the Device(Storage).<br />
• Available Size : Available size of the Device(Storage).<br />
dVd<br />
Music<br />
Photo<br />
Setup<br />
time Zone<br />
Clock Set<br />
power on/off sound : on<br />
System Setup BD Data ◄ Management Bd data Management<br />
Current language Device Setup : External divX(R) Flash Registration Memory<br />
Total audio Size : Setup 953<strong>MB</strong> Available System update Size : 889<strong>MB</strong><br />
display Setup<br />
BD Data Delete<br />
hdMi Setup<br />
network Setup<br />
parental Setup Select<br />
Return<br />
►<br />
M <br />
<br />
<br />
<br />
Memory size information on the current device(storage) is located to the right of the BD<br />
Data Management menu.<br />
In the external memory mode, disc playback will be stopped if you disconnect the USB<br />
device in the middle of the playback.<br />
We recommend using an USB device that supports USB 2.0 protocols, FAT32 format and<br />
4<strong>MB</strong> or more read /write speed.<br />
The Resume Play function may not work after formatting the storage device.<br />
54
System upgrade<br />
<strong>Samsung</strong> may offer upgrades to your Blu-ray Home Cinema's fi rmware in the future. To upgrade this fi rmware you must :<br />
1. Go to samsung.com and refer to the ‘SUPPORT’ page to download the latest fi rmware.<br />
You can use a CD-R or a USB fl ash drive to perform the fi rmware upgrade. For more information, see “Upgrade<br />
<strong>Manual</strong>” at the website mentioned above.<br />
or<br />
2. Connect the network (see pages 28~29) and follow the steps below.<br />
FIRMWARE UPGRADE<br />
1. With the unit in Stop mode/No Disc mode, press the<br />
MENU button.<br />
2. Press the ▲▼ buttons to select Setup, then press the<br />
ENTER or + button.<br />
3. Press the ▲▼ buttons to select System Setup, then<br />
press the ENTER or + button.<br />
Music<br />
Photo<br />
DvD Setup _ System Setup _<br />
Language Setup<br />
Audio Setup<br />
Display Setup<br />
HDMI Setup<br />
Network Setup<br />
Parental Setup<br />
EnG ● SyStEm uPGRaDE<br />
4. Press the ▲▼ buttons to select System Update, then<br />
press the ENTER or + button.<br />
Music<br />
Photo<br />
Power On/Off sound<br />
BD Data Menagement<br />
DivX(R) Registration<br />
: On<br />
DvD Setup System Setup _<br />
System Update +<br />
5. The player will check the cable or network connection<br />
status automatically. The connection checking window will<br />
be displayed.<br />
Language Setup<br />
Audio Setup<br />
Display Setup<br />
HDMI Setup<br />
Network Setup<br />
Parental Setup<br />
Music<br />
Photo<br />
Power On/Off sound<br />
BD Data Menagement<br />
System Update DivX(R) Registration<br />
: On<br />
@ If the upgrade is possible : You will see information on the<br />
current and new versions of fi rmware in a message box.<br />
_<br />
Setup<br />
DvD System Setup<br />
1 3 2 4<br />
Language Setup<br />
Audio Setup<br />
Now, Checking.<br />
Display Setup Please wait...<br />
HDMI Setup<br />
Network Setup<br />
Parental Setup<br />
System Update +<br />
@ If the upgrade is not possible : You will see the following<br />
description in the message box.<br />
• If the cable is not connected :<br />
“Ethernet cable is not connected. Please, check the<br />
Ethernet cable”<br />
• If the network connection has failed :<br />
“This system can not connect to internet for update.<br />
Please, check the network setup”<br />
• If no latest version is released (the latest version has<br />
been already installed) :<br />
"The latest version of the fi rmware is already installed.<br />
There is no need to update."<br />
• If there is a disc in the player :<br />
"Please maintain "No Disc" state for network update."<br />
This indicates that you must remove all discs from the<br />
unit to perform the update.<br />
• If the server service is not available :<br />
“ Update Server is under maintenance. Please try again<br />
later.”<br />
Music<br />
Power On/Off sound<br />
: On<br />
BD Data Menagement<br />
Photo<br />
System Update DivX(R) Registration<br />
DvD Setup System Setup _<br />
1 2 3 4<br />
Language Setup<br />
Audio The new Setup update data was found.<br />
Current Version : XXXXX<br />
Display Setup<br />
New Version : XXXXX<br />
HDMI Setup<br />
Network Setup<br />
Parental StartSetup<br />
Cancel<br />
Power On/Off sound<br />
: On<br />
Music<br />
BD Data Menagement<br />
Photo<br />
System Update DivX(R) Registration<br />
_<br />
Setup<br />
DvD System Setup<br />
1 3 2 4<br />
Language Setup<br />
Audio This Setup system can not connect<br />
to internet for update.<br />
Display Setup<br />
Please, check the network setup.<br />
HDMI Setup<br />
Network Setup<br />
Parental Setup<br />
OK<br />
System Update +<br />
System Update +<br />
55
System upgrade<br />
FiRmwaRE uPGRaDE<br />
6. To perform the system upgrade, press the _ + buttons<br />
to select Start and then press the ENTER button.<br />
Music<br />
Photo<br />
Power On/Off sound<br />
BD Data Menagement<br />
System Update DivX(R) Registration<br />
: On<br />
DvD Setup System Setup _ 1 2 3 4<br />
Language Setup<br />
The new update data was found.<br />
Audio Setup<br />
Current Version : XXXXX<br />
Display New SetupVersion : XXXXX<br />
HDMI Setup<br />
Network Setup<br />
Start<br />
Cancel<br />
Parental Setup<br />
System Update +<br />
7. The system update gets started.<br />
Music<br />
Photo<br />
Power On/Off sound<br />
BD Data Menagement<br />
System Update DivX(R) Registration<br />
: On<br />
DvD Setup System Setup 1 2 _ 3 4<br />
System Update +<br />
Language Setup<br />
8. If you select Cancel during the download process, you are<br />
prompted to confi rm your selection in a message box.<br />
If you want to cancel the download, select Yes and press<br />
the ENTER button.<br />
Audio Downloading Setup update data...<br />
Please, do not turn off the power.<br />
Display Setup<br />
60%<br />
HDMI Setup<br />
Network Setup<br />
Cancel<br />
Parental Setup<br />
Music<br />
Photo<br />
Power On/Off sound<br />
BD Data Menagement<br />
System Update DivX(R) Registration<br />
: On<br />
9. Verifi cation will proceed. When download is done, the<br />
fi rmware update process will begin automatically.<br />
DvD Setup System Setup 1 2 _ 3 4<br />
Language Setup<br />
Audio Setup<br />
Do you want to cancel the update operation?<br />
Display Setup<br />
HDMI Setup<br />
Network Setup<br />
Yes<br />
No<br />
Parental Setup<br />
System Update +<br />
10. When the installation is done, the player will automatically<br />
turn off in 5 seconds.<br />
All settings will revert to the factory settings. The next<br />
time you start the system and you will see the menu<br />
language selection window.<br />
Power On/Off sound : On<br />
Music<br />
BD Data Menagement<br />
Photo<br />
System Update DivX(R) Registration<br />
DvD System _<br />
Setup<br />
2 Setup 1 3<br />
Language Setup<br />
Audio Setup Verifying update data<br />
Display Setup Please wait.<br />
HDMI Setup<br />
Network Setup<br />
Parental Setup<br />
System Update +<br />
4<br />
M <br />
<br />
<br />
<br />
<br />
<br />
If you want to cancel the upgrade in the process of<br />
downloading the upgrade data, press the ENTER<br />
button. You will see a confi rmation message.<br />
Selecting Yes will end the upgrade process, and<br />
selecting No will continue the upgrade process.<br />
When the system upgrade is done, check the<br />
fi rmware details in the System Upgrade menu.<br />
Do not turn off the player during the System Upgrade,<br />
as it may cause the player to not work properly.<br />
DvD System _<br />
Setup<br />
2 3<br />
Setup 1 4<br />
Language Firmware Setup Update.<br />
Now, Processing...<br />
Audio Setup<br />
Please, do not turn off the power.<br />
The Display power Setup will be off automatically<br />
HDMI after Setupupdate is finished.<br />
Network Setup<br />
Parental Setup<br />
Power On/Off sound<br />
BD Data Menagement<br />
System Update DivX(R) Registration<br />
You must use a USB Flash Drive to do software upgrades using the USB Host jack.<br />
Other USB devices(ex. MP3 player) are not guaranteed to work.<br />
There should be only one fi rmware upgrade fi le in USB fl ash drive for the player to properly<br />
perform an upgrade.<br />
Oversized USB drives may not be able to be inserted when a LAN or HDMI cable is connected.<br />
Music<br />
Photo<br />
: On<br />
System Update +<br />
56
SYSTEM INFORMATION<br />
When the fi rmware upgrade is done, check the fi rmware details by following the steps below.<br />
1. With the unit in Stop mode/No Disc mode, press the<br />
MENU button.<br />
2. Press the ▲▼ buttons to select Setup, then press the<br />
ENTER or + button.<br />
3. Press the ▲▼ buttons to select System Setup, then<br />
press the ENTER or + button.<br />
4. Press the ▲▼ buttons to select System Information,<br />
then press the ENTER or + button.<br />
You can see detailed information about the current<br />
fi rmware.<br />
DvD<br />
Music<br />
Photo<br />
Setup<br />
Music<br />
Photo<br />
_<br />
System Setup<br />
Language Setup<br />
Audio Setup<br />
Display Setup<br />
HDMI Setup<br />
Network Setup<br />
Parental Setup<br />
DvD Setup System Setup _<br />
Language Setup<br />
Audio Setup<br />
Display Setup<br />
HDMI Setup<br />
Network Setup<br />
Parental Setup<br />
_<br />
System Information +<br />
Time Zone<br />
Clock Set<br />
Power On/Off sound<br />
BD Data Management<br />
DivX(R) Registration<br />
System Update<br />
: On<br />
EnG ● SyStEm uPGRaDE<br />
5. Press the ENTER button to select OK.<br />
System Setup menu will be displayed.<br />
Music<br />
DvD<br />
_<br />
+<br />
Photo<br />
System Information<br />
Setup<br />
System Setup<br />
System Information Language Setup<br />
Time Zone<br />
Audio Setup S/W : XXXXXXX<br />
Clock Set<br />
Loader : XXXXXXX<br />
Display Setup<br />
Region : B/2 (BD/DVD)<br />
Power On/Off sound<br />
: On<br />
HDMI SetupESN : XXXX<br />
Network Setup<br />
Parental Setup<br />
BD Data Management<br />
DivX(R) Registration<br />
OK<br />
System Update<br />
FIRMWARE UPGRADE NOTIFICATION<br />
This popup menu appears when a newer fi rmware version is available<br />
from SAMSUNG's update server than what is currently on the Blu-ray<br />
Home Cinema.<br />
• Yes : Select this to upgrade now.<br />
• No : Select this if you plan to upgrade later.<br />
System Update<br />
New Firmware is available.<br />
Do you want to update now?<br />
Yes<br />
No<br />
DIVX (R) REGISTRATION<br />
Please use the Registration code to register this Home Cinema System with the DivX(R) Video On Demand format.<br />
For more information, visit www.divx.com/vod<br />
57
Watching a movie<br />
uSinG thE DiSPlay Function<br />
hZCV<br />
1. During playback, press the INFO button on the remote<br />
control.<br />
• If the Blu-ray Disc has the PIP feature, press the inFo<br />
button in the PIP section to display PIP-related<br />
information.<br />
2. Press the ▲▼ buttons to select the desired item.<br />
3. Press the _ + buttons to make the desired setup change<br />
and then press the ENTER button.<br />
• You may use the number buttons of the remote control<br />
to directly access a title, chapter or to start the playback<br />
from a desired time.<br />
4. To make the screen disappear, press the INFO button<br />
again.<br />
DvD-video<br />
title<br />
chapter<br />
Playing time : 00:04:17<br />
audio<br />
Subtitle<br />
angle<br />
change<br />
DvD-video<br />
title<br />
chapter<br />
: 001/006<br />
: 001/016<br />
: EnG multi ch<br />
: off<br />
: 01/01<br />
info<br />
<br />
Playing time : 00:04:17<br />
audio<br />
Subtitle<br />
angle<br />
PiP video<br />
PiP audio<br />
change<br />
: 001/006<br />
: 001/016<br />
Select<br />
: EnG multi ch<br />
: off<br />
: 01/01<br />
: 01/01<br />
: 1/1 EnG 2ch<br />
Select<br />
info<br />
M <br />
<br />
<br />
<br />
<br />
<br />
<br />
<br />
If you are playing contents from the info menu, some functions may not be enabled<br />
depending on the disc.<br />
Title : To access the desired title when there is more than one in the disc. For example, if<br />
there is more than one movie on a Blu-ray Disc/DVD, each movie will be identifi ed as a<br />
Title.<br />
Chapter: Most Blu-ray Disc/DVD discs are recorded in chapters so that you can quickly<br />
fi nd a specifi c chapter.<br />
Audio : Refers to the fi lm's soundtrack language. A Blu-ray Disc can contain up to 32<br />
audio languages and a DVD up to 8.<br />
Playing Time : Allows playback of the fi lm from a desired time. You must enter the starting<br />
time as a reference. The time search function does not operate on some discs.<br />
Subtitle : Refers to the subtitle languages available in the disc. You will be able to choose<br />
the subtitle languages or, if you prefer, turn them off from the screen. A Blu-ray Disc can<br />
contain up to 255 subtitle languages, and a DVD up to 32.<br />
Angle : When a Blu-ray Disc/DVD contains multiple angles of a particular scene, you can<br />
use the ANGLE function.<br />
PIP Video/ PIP Audio : You can make PIP Video or PIP Audio settings if the current title of<br />
a Blu-ray Disc appears in the PIP section. The PIP Video / PIP Audio options, however, will<br />
be disabled with a Blu-ray Disc that does not support the PIP feature.<br />
58
BD-RE CD<br />
uSinG thE DiSc mEnu & PoPuP/titlE mEnu<br />
using the Disc menu<br />
1. During playback, press the DISC MENU button on the<br />
remote control.<br />
2. Press the ▲▼_ + buttons to make the desired selection,<br />
then press the + or ENTER button.<br />
• The Disc menu setup items may vary from disc to disc.<br />
M The Disc Menu may not be available, depending on the disc.<br />
using the title menu<br />
hZ<br />
Play moviE lanGuaGES ScEnE SElEctionS PREviEwS<br />
▼<br />
3 4 5 6 7 8 9 10 11 12 13 14 15<br />
Z<br />
EnG ● watchinG a moviE<br />
1. During playback, press the TITLE MENU button on the remote control.<br />
2. Press the ▲▼_ + buttons to make the desired selection, then press the ENTER button.<br />
• The Title menu setup options may vary from disc to disc.<br />
M <br />
<br />
The Title Menu may not be available, depending on the disc.<br />
Title Menu will only be displayed if there are at least two titles on the disc.<br />
Playing the title list<br />
gf<br />
1. With the unit in Stop mode/Playback mode, press the<br />
DISC MENU or TITLE MENU button.<br />
2. Press the ▲▼ buttons to select an entry you want to play<br />
from Title List, then press the + or ENTER button.<br />
The selected entry (title) will be played back.<br />
- Go to Playlist -<br />
To go to the Playlist, press the RED(A) button.<br />
Video<br />
Music<br />
Photo<br />
Setup<br />
_<br />
title 008 00:04:36<br />
title 009 00:04:17<br />
title 010 00:04:11<br />
title 011 00:04:07<br />
title 012 00:04:46<br />
title 013 00:04:21<br />
title 014 00:03:43<br />
Page<br />
using the Popup menu<br />
h<br />
1. During playback, press the POPUP MENU button on the<br />
remote control.<br />
2. Press the ▲▼_ + buttons or ENTER button to select<br />
the desired menu.<br />
• The Popup menu setup options may vary from disc to<br />
disc.<br />
main mEnu auDio SEt uP SuBtitlES ScEnE SElEctionS<br />
▼<br />
3 4 5 6 7 8 9 10 11 12 13 14 15<br />
M <br />
The Popup Menu may not be available, depending on the disc.<br />
59
Watching a movie<br />
REPEat Play<br />
Repeat the current chapter or title.<br />
Repeat playback<br />
hgfZCV<br />
1. During playback, press the REPEAT button on the remote<br />
control. Repeat screen appears.<br />
2. Press the ▲▼ buttons to select Chapter or Title.<br />
• Blu-ray Disc/DVD repeats play by chapter or title.<br />
3. To return to normal play, press the REPEAT button again,<br />
then press the ▲▼ buttons to select Off.<br />
Repeat<br />
off<br />
M <br />
The Repeat function may not be available, depending on the disc.<br />
using the a-B Repeat function<br />
1. Press the REPEat a-B button on the remote control<br />
during playback.<br />
2. Press the REPEat a-B button at the point where you<br />
want repeat play to start (A).<br />
3. Press the REPEat a-B button at the point where you<br />
want repeat play to stop (B).<br />
4. To return to normal play, press the cancEl button.<br />
hgfZCV<br />
DVD<br />
▶ Repeat a-B<br />
00:18:41 / 01:34:37<br />
REPEAT A B Off Exit<br />
M <br />
Point B cannot be set until 5 seconds of playback has elapsed from point A.<br />
60
SElEctinG thE auDio lanGuaGE<br />
You can select a desired audio language quickly and easily with the AUDIO button.<br />
using the auDio button<br />
1. Press the AUDIO button during playback. The Audio<br />
changes when the button is pressed repeatedly.<br />
• The audio languages are represented by abbreviations.<br />
2. To remove the Audio bar, press the CANCEL or<br />
RETURN button.<br />
using the inFo button<br />
1. During playback, press the INFO button on the remote<br />
control.<br />
2.<br />
3.<br />
Press the ▲▼ buttons to select Audio language.<br />
Press the _ + buttons on the remote control to select the desired audio language.<br />
audio<br />
hgfZ<br />
1/4 EnG Dolby Digital multi ch<br />
EnG ● watchinG a moviE<br />
M <br />
<br />
<br />
<br />
<br />
This function depends on what audio languages are encoded on the disc and may not be<br />
available.<br />
A Blu-ray Disc can contain up to 32 audio languages and a DVD up to 8.<br />
You can use the AUDIO button to change the audio soundtrack as well as the audio<br />
language, depending on the disc type.<br />
Some Blu-ray Discs may allow you to select either the multi-channel LPCM or Dolby digital<br />
audio soundtrack in English.<br />
Information about the primary / secondary mode will be also displayed if the Blu-ray Disc<br />
has a PIP section.<br />
Use the _ + button to switch between primary and secondary audio modes.<br />
The _ + indicator will not be displayed on the screen if the PIP section does not contain<br />
any PIP audio settings.<br />
SElEctinG thE SuBtitlE lanGuaGE<br />
You can select a desired subtitle quickly and easily with the SuBtitlE button.<br />
using the SuBtitlE button<br />
hZ<br />
1. Press the SUBTITLE button. The subtitle changes when<br />
the button is pressed repeatedly. The subtitle languages<br />
are represented by abbreviations.<br />
2. To remove the Subtitle bar, press the CANCEL or<br />
RETURN button.<br />
Subtitle<br />
0/2 off<br />
61
Watching a movie<br />
SElEctinG thE SuBtitlE lanGuaGE<br />
using the inFo button<br />
1. During playback, press the INFO button on the remote control.<br />
2. Press the ▲▼ buttons to select Subtitle.<br />
3. Press the _ + buttons on the remote control to select the desired subtitle language.<br />
M <br />
<br />
<br />
<br />
<br />
<br />
You may be able to change the desired subtitle in the Disc Menu, depending on the<br />
Blu-ray Disc / DVD.<br />
Press the DISC MENU button.<br />
This function depends on what subtitles are encoded on the disc and may not be available<br />
on all Blu-ray Discs/DVDs.<br />
A Blu-ray Disc can contain up to 255 subtitle languages and a DVD up to 32.<br />
Information about the primary / secondary mode will be also displayed if the Blu-ray Disc<br />
has a PIP section.<br />
This function changes both the primary and secondary subtitles at the same time.<br />
The total number of subtitles is the sum of the primary and secondary ones.<br />
chanGinG thE camERa anGlE<br />
When a Blu-ray Disc/DVD contains multiple angles of a particular scene, you can use the ANGLE function.<br />
using the anGlE function<br />
hZ<br />
1. During playback, press the INFO button on the remote<br />
control.<br />
2. Press the ▲▼ buttons to select Angle.<br />
3. Press the _ + buttons or you can use the number buttons<br />
on the remote control to select the desired angle.<br />
DvD-vedio<br />
info<br />
title : 001/006<br />
chapter : 003/016<br />
Playing time : 00:11:14<br />
audio : EnG multi ch<br />
Subtitle : EnG<br />
angle : 01/01<br />
change<br />
Move<br />
M <br />
<br />
If the disc has only one angle, this feature won’t work. Currently, very few discs have this<br />
feature.<br />
These functions may not work, depending on the disc.<br />
62
PiP (PictuRE in PictuRE) SEttinGS<br />
The PIP feature allows you to view additional content (such as commentaries) in a small screen window while the<br />
movie is playing.<br />
using the PiP button<br />
1. If the current Blu-ray Disc features the PIP function, you<br />
can use the PiP button to turn PiP on or off.<br />
2. Each time you press the PiP button, you can toggle<br />
between PiP on and PiP off.<br />
h<br />
EnG ● watchinG a moviE<br />
M <br />
<br />
<br />
You can change detailed settings of the PIP feature in the INFO menu (see page 58:<br />
selection of secondary audio, video stream and subtitle etc.).<br />
If you switch from PIP Video, PIP Audio will change automatically in accordance with PIP<br />
Video.<br />
If the Blu-ray Disc supports only PIP Audio, you can just press the PIP button to turn the<br />
secondary audio on or off.<br />
BD-livE<br />
The Blu-ray Home Cinema supports BD-LIVE which enables you to enjoy a variety of interactive service contents<br />
provided by the disc manufacturer through network connection.<br />
using the BD-livE Disc<br />
1. Connect the network (see pages 30~31) and check the network setup (see pages 49~53).<br />
2. Insert a Blu-ray disc that supports BD-LIVE.<br />
3. Select the contents provided by the disc manufacturer to enjoy the BD-LIVE.<br />
M <br />
<br />
The way you use BD-LIVE and the features may differ, depending on the disc.<br />
To use BD-LIVE, you must insert a mimimum 1GB USB memory device into one of the<br />
USB slots.<br />
63
Watching a movie<br />
DivX PlayBack<br />
The functions discussed on this page apply to DivX disc playback only.<br />
Skip Forward/Back<br />
During playback, press the [, ] button.<br />
• Goes to the next fi le whenever you press the ] button,<br />
if there are over 2 fi les on the disc.<br />
• Goes to the previous fi le whenever you press the<br />
[ button, if there are over 2 fi les on the disc.<br />
Fast Playback<br />
D<br />
During playback, press the (, ) button.<br />
To play back the disc at a faster speed, press the ( or<br />
) button during playback.<br />
• Each time you press either button, the playback speed<br />
will change as follows:<br />
2x 4x 8x.<br />
audio Display<br />
Press the auDio button.<br />
• If there are multiple audio languages on a disc, you can<br />
toggle between them.<br />
• Each time you press the button, your selection will toggle<br />
between auDio (1/n, 2/n ...).<br />
D<br />
D<br />
Subtitle Display<br />
Press the SuBtitlE button.<br />
• Each time you press the button, your selection will toggle<br />
between SuBtitlE (1/n, 2/n ...) and SuBtitlE oFF.<br />
• If the disc has only one subtitle fi le, it will be played<br />
automatically.<br />
• See number 2 (Caption Function) below for more details<br />
concerning Subtitle usage with DivX discs.<br />
D<br />
64
DivX(Digital internet video express)<br />
DivX is a video file format developed by Microsoft and is based on MPEG4 compression technology to<br />
provide audio and video data over the Internet in real-time.<br />
MPEG4 is used for video encoding and MP3 for audio encoding so that the users can watch a movie at<br />
near DVD-quality video and audio.<br />
1. Supported Formats<br />
This product only supports the following media formats.If both video and audio formats are not<br />
supported, the user may experience problems such as broken images or no sound.<br />
Supported Video Formats<br />
Format<br />
Supported Versions<br />
Supported Audio Formats<br />
AVI<br />
DivX3.11 ~ DivX5.X, XviD<br />
Format MP3 AC3<br />
Bit Rate 56 ~ 320 kbps 128 ~384kbps<br />
Sampling Frequency 32 ~ 48kHz 44.1/48kHz<br />
EnG ● watching a movie<br />
• This product supports up to 720x480 pixels.<br />
• When you play a disc whose sampling frequency is higher than 48khz or 320kbps, you may<br />
experience shaking on the screen during playback.<br />
• Qpel and gmc is not supported.<br />
2.<br />
Caption Function<br />
• You must have some experience with video extraction and editing in order to use this feature<br />
properly.<br />
• To use the caption function, save the caption file (*.smi) in the same file name as that of the DivX<br />
media file (*.avi) within the same folder.<br />
Example. Root <strong>Samsung</strong>_007CD1.avi<br />
<strong>Samsung</strong>_007CD1.smi<br />
• ABOUT DIVX VIDEO: DivX® is a digital video format created by DivX, Inc.<br />
This is an official DivX Certified or DivX Ultra Certified device that plays DivX video.<br />
ABOUT DIVX VIDEO-ON-DEMAND: This DivX® Certified device must be registered in order to<br />
play DivX Video-on-Demand (VOD) content. First generate the DivX VOD registration code for your<br />
device and submit it during the registration process. [Important: DivX VOD content is protected by<br />
a DivX DRM (Digital Rights Management) system that restricts playback to registered DivX<br />
Certified devices. If you try to play DivX VOD content not authorized for your device, the message<br />
“Authorization Error” will be displayed and your content will not play.] Learn more at www.divx.<br />
com/vod<br />
DivX® is a registered trademark of DivX, Inc., and is used under licence<br />
65
Listening to music<br />
Buttons on the Remote Control used for Audio CD<br />
(CD-DA)/ MP3 disc playback<br />
MENU<br />
INFO<br />
0<br />
STOP PLAY<br />
ENTER<br />
RETURN<br />
RETURN<br />
EXIT<br />
A B C D<br />
1. PAUSE button : Pauses playback.<br />
2. SKIP ( ) button : During playback, moves to the next in the Music<br />
List or moves to the next track in the Playlist.<br />
3.<br />
4.<br />
5.<br />
PLAY button : Plays the currently selected track.<br />
▲▼ buttons : Selects a track(song) in the Music List or Playlist.<br />
COLOUR buttons<br />
• RED(A) button : Selects the Play Mode(Repeat) during playback.<br />
• GREEN(B) button : Go to Playlist from Music List.<br />
• YELLOW(C) button : Playlist play.<br />
6. _ + buttons<br />
_ : Plays the applicable track, according to the current position.<br />
+ : Moves to the menu.<br />
7.<br />
8.<br />
ENTER button : Plays the selected track (song).<br />
STOP button : Stops a track(song).<br />
9. SKIP ( ) button : If you pressed this button after three seconds of<br />
playback, the current track will be replayed from the beginning. But, if<br />
you pressed this button within three seconds after playback starts, the<br />
previous track will be played.<br />
Used to move to the previous page in the Music List or Playlist.<br />
Repeat Audio CD(CD-DA) & MP3<br />
During playback, press the REPEAT or RED(A) button repeatedly to select the repeat mode you want.<br />
When playing an Audio CD(CD-DA) : ; ; ;<br />
When playing an MP3 disc : ; ; ;<br />
• Normal (Audio CD(CD-DA)/MP3): Tracks on a disc are played in the order in which they were<br />
recorded on the disc.<br />
• Repeat Track (Audio CD(CD-DA)/MP3)<br />
• Repeat Folder (MP3)<br />
• Random (Audio CD(CD-DA)/MP3)<br />
- When playing an Audio CD(CD-DA): The random option plays a disc’s tracks in random order.<br />
- When playing an MP3 disc : The random option plays a folder’s file in random order.<br />
• Repeat All (Audio CD(CD-DA)): All tracks are repeated.<br />
- To return to normal playback -<br />
Press the REPEAT or RED(A) button repeatedly to return to normal playback.<br />
66
PlayinG an auDio cD(cD-Da)/mP3<br />
1. Insert an Audio CD(CD-DA) or an MP3 Disc into the disc<br />
tray.<br />
• For an Audio CD, the fi rst track will be played<br />
automatically.<br />
• For an MP3 disc, press the ▲▼ buttons to select<br />
music, then press the EntER button.<br />
(You can listen to mp3 fi les using a USB storage device)<br />
2. To move to the Music List, press the STOP or RETURN<br />
button.<br />
The Music List screen is displayed on your TV.<br />
3. Press the ▲▼ buttons to select the track you want to<br />
play, then press the ENTER button.<br />
AF<br />
► TRACK 001 1/18<br />
CD<br />
00:02:24 / 00:05:57<br />
A Play Mode<br />
Video<br />
_<br />
CD<br />
Music<br />
_<br />
cD<br />
TRACK 001 00:04:08 +<br />
Photo<br />
TRACK 002 00:03:41<br />
Setup<br />
TRACK 003 00:03:17<br />
TRACK 004 00:03:36<br />
TRACK 005 00:03:47<br />
TRACK 006 00:03:50<br />
TRACK 007 00:03:54<br />
EnG ● liStEninG to muSic<br />
B Playlist<br />
Page<br />
❖ audio cD(cD-Da)/mP3 Screen Elements<br />
CD<br />
► TRACK 001 1/18<br />
00:02:24 / 00:05:57<br />
Displays the media type.<br />
Current track (song)<br />
Displays the number of the track currently being played.<br />
Play Status Bar.<br />
Displays the repeat status.<br />
a Play mode<br />
Displays the current play index, total track number.<br />
Current /Total Play Time.<br />
Displays available COLOUR buttons.<br />
67
Listening to music<br />
Playlist<br />
AF<br />
You can create a playlist with up to 99 tracks.<br />
1. Insert an Audio CD(CD-DA) or an MP3 Disc into the disc<br />
tray.<br />
• For an Audio CD, the fi rst track will be played<br />
automatically.<br />
• For an MP3 disc, press the ▲▼ buttons to select<br />
music, then press the EntER button.<br />
(You can listen to mp3 fi les using a USB storage device)<br />
2. To move to the Music List, press the GREEN(B) or<br />
RETURN button.<br />
The Music List screen is displayed.<br />
3. Press the GREEN(B) button to go to the Playlist.<br />
_<br />
cD<br />
CD<br />
Video<br />
Music<br />
Photo<br />
Setup<br />
B Playlist<br />
Video<br />
_<br />
TRACK 001 00:04:08<br />
TRACK 002 00:03:41<br />
TRACK 003 00:03:17 +<br />
TRACK 004 00:03:36<br />
TRACK 005 00:03:47<br />
TRACK 006 00:03:50<br />
TRACK 007 00:03:54<br />
TRACK 008 00:03:57<br />
TRACK 009 00:03:59<br />
Page<br />
Original Playlist<br />
4. Press the ▲▼ buttons to select a track, then press the<br />
ENTER button to add it to the Playlist. Repeat this<br />
procedure to add additional tracks.<br />
5. If there is an undesired track in the playlist, press the<br />
+▲▼ button to select that track, and then press the<br />
ENTER button.<br />
• The selected track will be deleted.<br />
6. Press the YELLOW(C) button to play the selected tracks.<br />
When the track is fi nished, the next track will automatically<br />
play.<br />
7. To edit the Playlist, press the STOP or RETURN button.<br />
8. To go to the Music List, press the RETURN button.<br />
_<br />
_<br />
Music<br />
cD CD<br />
TRACK 001<br />
Photo<br />
TRACK 002<br />
Setup<br />
TRACK 003<br />
TRACK 004<br />
TRACK 005<br />
TRACK 006<br />
TRACK 007<br />
B Music List C Playlist play add Play<br />
Original Playlist<br />
TRACK 001<br />
Video<br />
TRACK 002<br />
01.TRACK 001<br />
Music<br />
TRACK 003<br />
_<br />
cD CD<br />
_<br />
Photo<br />
TRACK 004<br />
02.TRACK 002<br />
TRACK 005<br />
03.TRACK 003<br />
Setup<br />
TRACK 006<br />
TRACK 007<br />
B Music List C Playlist play add Play<br />
68
Viewing a picture<br />
viEwinG a PictuRE<br />
1. Insert a JPEG disc into the Disc Slot .<br />
• The Menu screen is displayed.<br />
2. Press the ▲▼ buttons to select Photo, then press the<br />
EntER button.<br />
• The Photo List is displayed.<br />
3. Press the ▲▼ buttons to select a picture.<br />
• To see the next page, press the SKIP ( ) button.<br />
• To see the previous page, press the SKIP ( ) button.<br />
SliDE Show/SPEED<br />
cD CD<br />
_<br />
Video<br />
Music<br />
Photo<br />
Setup<br />
..<br />
_ 176.JPG 08 JUL 2000 127 KB +<br />
BEACH.JPG 17 JUL 2000 27 KB<br />
KE.JPG 10 JUL 2000 194 KB<br />
KE2.JPG 10 JUL 2000 191 KB<br />
<strong>MB</strong>HONG.JPG 20 JUL 2000 30 KB<br />
NEW_BEE.JPG 08 JUL 2000 76 KB<br />
_______1_.JPG 18 JUL 2000 17 KB<br />
D Slide Show<br />
EnG ● viEwinG a PictuRE<br />
To setup, follow steps 1 and 2 above.<br />
3. Press the BluE(D) button.<br />
• The slide show starts.<br />
4. When the SlideShow starts, press the BluE(D) button to<br />
adjust the play speed.<br />
• Each time you press the button, the play speed will<br />
increase accordingly.<br />
CD<br />
+ KE.JPG 03/07<br />
D Speed<br />
➞<br />
➞<br />
- to stop the Slide Show -<br />
Press the StoP or REtuRn button.<br />
RotatE<br />
To setup, follow steps 1 and 3 above.<br />
# _____1_.JPG 03/07<br />
4. Press the EntER button.<br />
5.<br />
Use the RED(a) and GREEn(B) buttons to rotate the image in a<br />
desired direction.<br />
CD<br />
A<br />
y90° B u90° C Zoom D Speed Slide Show<br />
69
Viewing a picture<br />
Zoom<br />
To setup, follow steps 1 to 3 in "Viewing a Picture" on page 69.<br />
4. Press the EntER button.<br />
5. Press the yEllow(c) button.<br />
CD<br />
# _____1_.JPG 03/07<br />
6. Use the yEllow(c) or EntER button to zoom the image in/out.<br />
A<br />
y90° B u90° C Zoom D Speed Slide Show<br />
- to move the area -<br />
Press the ▲▼_ + buttons to the area you want to enlarge.<br />
C Zoom Move x2<br />
- to stop the Zoom -<br />
Press the yEllow(c) button.<br />
Go to Photo liSt<br />
To setup, follow steps 1 to 3 in "Viewing a Picture" on page 69.<br />
4. Press the EntER button.<br />
5. To go Photo List, press the REtuRn or StoP button.<br />
CD<br />
# BEACH.JPG 03/07<br />
A<br />
y90° B u90° C Zoom D Speed Slide Show<br />
cD CD<br />
_<br />
Video<br />
Music<br />
Photo<br />
Netflix<br />
Setup<br />
..<br />
176.JPG 08 JUL 2000 127 KB<br />
_ BEACH.JPG 17 JUL 2000 27 KB +<br />
KE.JPG 10 JUL 2000 194 KB<br />
KE2.JPG 10 JUL 2000 191 KB<br />
<strong>MB</strong>HONG.JPG 20 JUL 2000 30 KB<br />
NEW_BEE.JPG 08 JUL 2000 76 KB<br />
_______1_.JPG 18 JUL 2000 17 KB<br />
D Slide Show<br />
70
Using the USB function<br />
PlayinG mEDia FilES uSinG thE uSB hoSt FEatuRE<br />
You can enjoy media fi les such as pictures and music saved on an MP3 player, USB memory stick or digital camera.<br />
1.<br />
2.<br />
3.<br />
Connect the USB device to the USB port on<br />
the side of the unit.<br />
uSB connected appears on the display<br />
screen and then disappears.<br />
USB icon is displayed on the Setup Menu.<br />
EnG ● uSinG thE uSB Function<br />
Safe uSB Removal<br />
To prevent damage to the data stored in the USB device, perform safe removal before disconnecting<br />
the USB cable.<br />
• Press the yEllow(c) button. The display will show now. You can remove USB safely.<br />
• Remove the USB cable.<br />
Skip Forward/Back<br />
During playback, press the [, ] button.<br />
• When there is more than one fi le and you press the ] button,<br />
the next fi le is selected.<br />
• When there is more than one fi le and you press the [ button,<br />
the previous fi le is selected.<br />
71
Using the USB function<br />
USB Host Specification<br />
USB Host Specification<br />
Non-compliance<br />
Operational Limitations<br />
• Supports USB 1.1 or USB 2.0 compliant devices.<br />
• Supports devices connected using the USB A type cable.<br />
• Supports UMS (USB Mass Storage Device) V1.0 compliant devices.<br />
• Supports the device of which the connected drive is formatted in the FAT(FAT,<br />
FAT16, FAT32) file system.<br />
• Does not support a device that requires installing a separate driver on the PC (Windows).<br />
• Does not support connection to a USB hub.<br />
• A USB device that is connected using the USB extension cable may not be recognized.<br />
• A USB device requiring a separate power source needs to be connected to the<br />
player with the separate power connection.<br />
• If the connected device has multiple drives (or partitions) installed, only one drive<br />
(or partition) can be connected.<br />
• A device supporting USB 1.1 alone may cause a difference in the picture quality,<br />
depending on the device.<br />
USB Devices that can be used with the Home Cinema<br />
1.<br />
2.<br />
3.<br />
USB Storage Device<br />
MP3 Player<br />
Digital Camera<br />
4. Removable HDD<br />
• Removable HDDs equipped with less than 160 Gbytes are supported. Removable HDDs<br />
equipped with 160Gbytes or more may not be recognized, depending on the device.<br />
• If the connected device does not work due to insufficient power supply, you can use a separate<br />
power cable to supply power so that it can work properly. The connector of the USB cable may<br />
differ, depending on the manufacturer of the USB device.<br />
5.<br />
USB card Reader: One slot USB card reader and Multi slot USB card reader.<br />
• The USB card reader may not be supported, depending on the manufacturer.<br />
• If you install multiple memory devices into a multi card reader, you may experience problems.<br />
Supported file Formats<br />
Format<br />
File name<br />
File<br />
extension<br />
Bit rate Version Pixel<br />
Sampling<br />
Frequency<br />
Still Picture JPG JPG .JPEG – – 640x480 –<br />
Music MP3 .MP3 80~384kbps – – 44.1kHz<br />
• CBI (Control/Bulk/Interrupt) is not supported.<br />
• Digital Cameras that use PTP protocol or require additional program installation when connected to a<br />
PC are not supported.<br />
• A device using NTFS file system is not supported. (Only FAT 16/32 (File Allocation Table 16/32) file<br />
system is supported.)<br />
• Does not operate with Janus enabled MTP (Media Transfer Protocol) devices.<br />
72
Radio<br />
liStEninG to RaDio<br />
1.<br />
Press the tunER button to select the FM band.<br />
2. Tune in to the desired station.<br />
• Automatic Tuning 1 : When the SkiP ( ) button is<br />
pressed, a preset broadcast station is selected.<br />
• Automatic Tuning 2 : Press and hold the<br />
tuninG/ch ( ) button to automatically search for active<br />
broadcasting stations.<br />
• <strong>Manual</strong> Tuning : Briefl y press the tuninG/ch ( )<br />
button to increase or decrease the frequency incrementally.<br />
EnG ● RaDio<br />
main unit<br />
1.<br />
2.<br />
Press the Function button to select the FM band.<br />
Select a broadcast station.<br />
• Automatic Tuning 1 : Press the StoP ( ) button to select PRESEt and then press the<br />
SkiP ( ) button to select the preset station.<br />
• Automatic Tuning 2 : Press the StoP ( ) button to select manual and then press and hold<br />
the SkiP (<br />
) button to automatically search the band.<br />
• <strong>Manual</strong> Tuning : Press the StoP ( ) button to select manual and then briefl y press the<br />
SkiP (<br />
mono/Stereo<br />
) button to tune in to a lower or higher frequency.<br />
Press the mo/St button to listen in Mono/Stereo.<br />
• Each time the button is pressed, the sound switches<br />
between StEREo and mono.<br />
• In a poor reception area, select mono for a clear,<br />
interference-free broadcast.<br />
PRESEttinG StationS<br />
Example : Presetting FM 89.10 in the memory<br />
1.<br />
2.<br />
3.<br />
4.<br />
5.<br />
6.<br />
Press the tunER button to select the FM band.<br />
Press the tuninG/ch ( ) button to select .<br />
Press the tunER mEmoRy button.<br />
• numBER fl ashes in the display.<br />
Press the SkiP (<br />
) button to select preset number.<br />
• You can select between 1 and 15 presets.<br />
Press the tunER mEmoRy button again.<br />
• Press the tunER mEmoRy button before PRGm disappears from the display.<br />
• PRGm disappears from the display and the station is stored in memory.<br />
To preset another station, repeat steps 2 to 5.<br />
• To tune in to a preset station, press the SkiP (<br />
) button on the remote control to select a channel.<br />
73
Radio<br />
About RDS broadcasting<br />
Using the RDS (Radio Data System) to receive FM stations<br />
RDS allows FM stations to send an additional signal along with their regular program<br />
signals. For example, the stations send their station names, as well as information<br />
about what type of program they broadcast, such as sports or music, etc.<br />
When tuned to an FM station which provides the RDS service, the RDS<br />
indicator lights up on the display.<br />
Description on RDS function<br />
• PTY (Program Type) : Displays the type of programme currently being broadcast<br />
• PS NAME (Program Service Name) : Indicates the name of broadcasting station and is composed of 8<br />
characters.<br />
• RT (Radio Text) : Decodes the text broadcast by a station (if any) and is composed of maximum 64<br />
characters.<br />
• CT (Clock Time) : Decodes the real time clock from the FM frequency.Some stations may not transmit PTY, RT<br />
or CT information therefore this may not be displayed in all cases.<br />
• TA (Traffic Announcement) : When this symbol flashes it shows that the traffic<br />
announcement is in progress.<br />
`<br />
M <br />
RDS may not operate correctly if the station tuned is not transmitting RDS signal properly<br />
or if the signal strength is weak.<br />
To show the RDS signals<br />
You can see the RDS signals the station sends on the display.<br />
Press the RDS DISPLAY while listening to an FM station.<br />
Each time you press the button, the display change to show<br />
you the following information : PS NAME ; RT ; CT ;<br />
Frequency<br />
• PS (Program Service) : While searching, appears and then the station names will be displayed.<br />
appears if no signal is sent.<br />
• RT(RadioText) : while searching, appears and then text messages the station sends will be<br />
displayed. appears if no signal is sent.<br />
• Frequency : station frequency (non-RDS service)<br />
About characters shown in the display<br />
When the display shows PS,or RT signals,the following characters are used.<br />
• The display window cannot differentiate upper case and lower case letters and always uses upper case letters.<br />
• The display window cannot show accented letters, for instance, may stands for accented like<br />
<br />
74
PTY (Program Type) indication and PTY-SEARCH function<br />
One of the advantages of the RDS service is that you can locate a particular kind of program from the preset channels by<br />
specifying the PTY codes<br />
To search for a program using the PTY codes<br />
Before you start, remember...<br />
• The PTY Search is only applicable to preset stations.<br />
• To stop searching any time during the process, press PTY SEARCH while searching.<br />
• There is a time limit in doing the following steps. If the setting is cancelled before you finish, start from step 1 again.<br />
• When pressing the buttons on the primary remote control, make sure that you have selected the FM<br />
station using the primary remote control.<br />
EnG ● radio<br />
1. Press the PTY SEARCH while listening to an FM station.<br />
2. Press the PTY- or PTY+ until the PTY code you want appears<br />
on the display.<br />
• The display gives you the PTY codes described to the right.<br />
3. Press the PTY SEARCH again, while the PTY code selected<br />
in the previous step is still on the display.<br />
• The centre unit searches 15 preset FM stations, stops when it<br />
finds the one you have selected, and tunes in that station.<br />
Display<br />
Program Type<br />
Display<br />
Program Type<br />
NEWS<br />
News including an announced opinion<br />
and report<br />
LIG<strong>HT</strong> M<br />
Light classical music- Classical music<br />
and instrumental and chorus music<br />
AFFAIRS<br />
INFO<br />
SPORT<br />
EDUCATE<br />
DRAMA<br />
CULTURE<br />
SCIENCE<br />
VARIED<br />
POP M<br />
ROCK M<br />
M.O.R.M<br />
Several matters including a current<br />
incident, documentary, discussion and<br />
analysis.<br />
Information including weights and<br />
measures, returns and forecast, matters<br />
interesting the customer, medical information,<br />
etc.<br />
Sports<br />
Education<br />
Drama-Radio serial, etc.<br />
Culture-National or local culture<br />
including the religious problem, social<br />
science, language, cinema, etc.<br />
Natural science and technology<br />
Others-Speech, amusing program<br />
(quiz, game), interview, comedy and<br />
satirical play, etc.<br />
Pop music<br />
Rock music<br />
Current contemporary music considered<br />
to be “easy listening.”<br />
CLASSICS<br />
OTHER M<br />
WEATHER<br />
FINANCE<br />
CHILDREN<br />
SOCIAL A<br />
RELIGION<br />
PHONE IN<br />
TRAVEL<br />
LEISURE<br />
JAZZ<br />
COUNTRY<br />
NATION M<br />
OLDIES<br />
FOLK M<br />
DOCUMENT<br />
Heavy classical music-Orchestra music,<br />
symphony, chamber music and opera<br />
Other music - Jazz, R&B country<br />
music<br />
Weather<br />
Finance<br />
Children’s programmes<br />
Social affairs<br />
Religion<br />
Phone in<br />
Travel<br />
Leisure<br />
Jazz Music<br />
Country Music<br />
National Music<br />
Oldies Music<br />
Folk Music<br />
Documentary<br />
75
Using BLUETOOTH<br />
You can use a Bluetooth device to enjoy music with high quality stereo sound, all without wires!<br />
What is Bluetooth?<br />
Bluetooth is a new technology that enables Bluetooth-compliant devices to easily interconnect with each<br />
other using a short wireless connection.<br />
• A Bluetooth device may cause a noise or malfunction, depending on usage.<br />
• When a part of the body is in contact with the receiving/transmitting system of the Bluetooth device or the<br />
Blu-ray Home Cinema.<br />
• Electrical variation from obstructions caused by a wall, corner or office partitioning.<br />
• Electrical interference from same frequency-band devices including medical equipment, microwave oven and<br />
wireless LAN.<br />
• Pair the Blu-ray Home Cinema with the Bluetooth device while maintaining a close distance.<br />
• The further the distance is between Blu-ray Home Cinema and Bluetooth device, the worse the quality is. If the<br />
distance exceeds the Bluetooth operational range, the connection is lost.<br />
• The Blu-ray Home Cinema supports Middle Quality SBC data(237kbps@48kHz) and High Quality SBC<br />
data(328kbps@44.1kHz).<br />
• In poor reception-sensitivity areas, the Bluetooth connection may not work properly.<br />
• The Blu-ray Home Cinema has an effective reception range of up to 10 meters in all directions if there are no<br />
obstacles. The connection will be automatically cut off if the distance is out of this range. Even within this range,<br />
the sound quality may be deteriorated by obstacles such as walls or doors.<br />
To connect the Blu-ray Home Cinema to a Bluetooth device<br />
Check if the Bluetooth device supports the Bluetooth-compliant stereo headset function.<br />
1. Press the FUNCTION button on the front panel of the Blu-ray Home Cinema repeatedly until "BT AUDIO" appears.<br />
• The mode switches as follows :<br />
BD/DVD D.IN AUX BT AUDIO FM.<br />
• “READY” appears on the front display.<br />
2. Select the Bluetooth menu on Bluetooth device you want to connect.<br />
(refer to Bluetooth device's user manual)<br />
3. Select the Stereo headset menu on the Bluetooth device.<br />
• You will see a list of scanned devices.<br />
4. Select "<strong>Samsung</strong> BD Theater" from the searched list.<br />
• When the Blu-ray Home Cinema is connected to the Bluetooth<br />
device, the Blu-ray Home Cinema will display "CONN.." on the front<br />
display, followed by the device name of the connected Bluetooth<br />
device.<br />
Connect<br />
• The Blu-ray Home Cinema connection is complete.<br />
5. Play music on the connected device.<br />
• You can listen to the music playing on the connected Bluetooth<br />
Bluetooth devide<br />
device over the Blu-ray Home Cinema.<br />
M <br />
<br />
<br />
You may be required to enter a PIN code(password) when connecting the Bluetooth device to the<br />
Blu-ray Home Cinema. If the PIN code input window appears, enter .<br />
The Blu-ray Home Cinema may control play related function only when connected device supports<br />
the function.<br />
The Blu-ray Home Cinema supports Middle Quality SBC data(237kbps@48kHz) and High Quality<br />
SBC data(328kbps@44.1kHz).<br />
76
To disconnect the Bluetooth device from the Blu-ray Home Cinema<br />
You can disconnect the Blu-ray Home Cinema from the Bluetooth device.<br />
(refer to Bluetooth deivice's user's manual)<br />
• The Blu-ray Home Cinema will be disconnected.<br />
• When the Blu-ray Home Cinema is disconnected from the Bluetooth<br />
device, the Blu-ray Home Cinema will display "READY" on the front<br />
display.<br />
To disconnect the Blu-ray Home Cinema from the Bluetooth device<br />
Press the FUNCTION button on the front panel of the Blu-ray Home Cinema to switch from “BT AUDIO” to another<br />
mode.<br />
• The connected Bluetooth device will wait a certain time for response from the Blu-ray Home Cinema before<br />
terminating the connection. (Disconnection time may differ, depending on the Bluetooth device)<br />
• The currently connected device will be disconnected.<br />
EnG ● using BLUETOOTH<br />
M <br />
<br />
<br />
In Bluetooth connection mode, the Bluetooth connection will be lost if the distance between the<br />
Blu-ray Home Cinema and the Bluetooth device exceeds (10 m). If the distance is returned to the<br />
effective range or you restart the Bluetooth device, the Bluetooth connection can be restored.<br />
With some Bluetooth devices, some functions may not work properly.<br />
Operational specifications for corresponding devices such as mobile phones and MP3 players may<br />
differ when pressing the buttons -play, pause, stop, ff, rew, next, back- on the remote controller.<br />
77
CD<br />
Using an iPod<br />
You can enjoy playback of your iPod using the supplied remote control.<br />
liStEninG to muSic<br />
You can play music fi les stored in the iPod player by connecting it to the<br />
Blu-ray Home Cinema.<br />
1.<br />
2.<br />
3.<br />
4.<br />
5.<br />
6.<br />
7.<br />
8.<br />
Connect the iPod dock connector to the iPod jack on the Blu-ray<br />
Home Cinema.<br />
Place the iPod in the Dock.<br />
• Your iPod is automatically turned on.<br />
• “iPod Connected” message appears on the TV screen.<br />
Press the MENU button on the remote control.<br />
Press the , buttons on the remote control to select iPod mode.<br />
Press the ,, buttons on the remote control to select music and<br />
press the EntER button.<br />
• The music categories appear.<br />
Press the , buttons desired category and press the EntER button.<br />
• The music list appears on your TV.<br />
Press the , buttons to select the music fi le to play and<br />
press the EntER button.<br />
• The music will start with a new screen which shows the<br />
song title, time, artist, and progress bar.<br />
You can use the remote control or main unit to control<br />
simple playback functions such as Play, PauSE, StoP,<br />
/ , / and REPEat.<br />
• Press the RED(A) button to select a desired play mode.<br />
nodisc<br />
_<br />
Video<br />
Music<br />
Photo<br />
Setup<br />
+<br />
_<br />
TRACK 001 +<br />
TRACK 002<br />
TRACK 003<br />
TRACK 004<br />
TRACK 005<br />
TRACK 006<br />
TRACK 007<br />
B Playlist Page<br />
❖ iPod Playback Screen Elements<br />
Displays the media type.<br />
► My love ; 6/186<br />
00:00:11 / 00:03:34<br />
Current track (song)<br />
Displays the number of the track currently being played.<br />
Play Status Bar.<br />
Displays the repeat status.<br />
A Play Mode<br />
Displays the current play index, total track number.<br />
Current /Total Play Time.<br />
Displays available COLOUR buttons.<br />
78
To move to the Music List and select a track:<br />
1. Press the MENU or STOP button.<br />
• It stops playing and returns to the music list.<br />
2. Press the , buttons to select the file you want to play and press the ENTER button.<br />
• Press the RETURN or button to return to the parent menu.<br />
iPod Music categories<br />
File information including the artist name, album name, music title and genre will be displayed according<br />
to the ID3 Tag information on the appropriate music file.<br />
Now Playing : Plays a recently played file or moves to the playback screen of the current file.<br />
Artists : To play by artist.<br />
Songs : To play in numeric or alphabetical order<br />
Playlists : To play by Playlist.<br />
Albums : To play by album.<br />
Genres : To play by genre.<br />
Composer : To play by composer.<br />
EnG ● using an iPod<br />
M <br />
<br />
<br />
See page 24 for compatible iPods.<br />
Compatibility depends on the software version of your iPod.<br />
The category list may differ, depending on the iPod model.<br />
What is an ID3 Tag?<br />
This is what is attached to an MP3 to carry information relevant to the file such as<br />
the title, artist, album, year, genre and a comment fi eld.<br />
79
nodisc CD<br />
Using an iPod<br />
watchinG a moviE<br />
You can play video fi les stored in the iPod player by connecting it to the Blu-ray Home Cinema.<br />
1.<br />
2.<br />
3.<br />
4.<br />
5.<br />
6.<br />
Connect the iPod dock connector to the iPod jack on the Blu-ray<br />
Home Cinema.<br />
In the iPod screen, move to videos > Settings and set the tv out<br />
option to on.<br />
Place the iPod in the Dock.<br />
• “iPod Connected” message appears on the TV screen.<br />
Press the , buttons on the remote control to select iPod mode.<br />
Press the ,, buttons on the remote control to select video and<br />
press the EntER button.<br />
Press the , buttons on the remote control to select movies and press<br />
the EntER button.<br />
• The video list appears on your TV.<br />
7. Press the , buttons to select the video fi le to play and press the<br />
EntER button.<br />
• Video fi le of the iPod player will be played on the TV screen.<br />
8. You can use the remote control or main unit to control simple playback<br />
functions such as Play, PauSE, StoP, / and / .<br />
• If you press the PREv button within 2 seconds after the playback,<br />
the player will play previous fi le.<br />
If you press the PREv button 2 seconds or later after the playback, the player will move to the<br />
start screen of the current fi le.<br />
• Press the nEXt button to play next fi le.<br />
To move to the Video List and select a fi le:<br />
1. Press the MENU or STOP button.<br />
• It stops playing and returns to the video list.<br />
2. Press the , buttons to select the fi le you want to play<br />
and press the ENTER button.<br />
• Press the RETURN or button to return to the parent<br />
menu.<br />
+ Video +<br />
Music<br />
Photo<br />
Setup<br />
B Playlist<br />
_ MOVIE 001 +<br />
MOVIE 002<br />
MOVIE 003<br />
MOVIE 004<br />
MOVIE 005<br />
MOVIE 006<br />
MOVIE 007<br />
Page<br />
M <br />
<br />
<br />
<br />
<br />
<br />
See page 24 for compatible iPods.<br />
Compatibility depends on the software version of your iPod.<br />
You must have the VIDEO output connected to your TV to view iPod video (See page 23).<br />
If you want to iPod video via VIDEO output, if HDMI CEC is set to on, turn it off.<br />
When the current fi le is played to the end, the next fi le will be played automatically.<br />
To play the next fi le, select a fi le to play in the list screen of the iPod player.<br />
No other screen than the playback one will appear on the TV screen. Check other screens on<br />
the iPod player.<br />
If connected iPod does not support video playback, “Cannot play video fi les saved on this iPod”<br />
message appears when you select the Video menu.<br />
80
No disc<br />
No disc<br />
Pc streaming function<br />
CONNECTING TO A PC AND PLAYING MP3, JPEG OR DIVX CONTENT<br />
You can connect the Blu-ray Home Cinema to a PC and play mp3, jpeg or DivX fi le content in a shared folder.<br />
(Refer to pages 28~29 for the connection)<br />
1.<br />
2.<br />
3.<br />
4.<br />
5.<br />
Use a router and LAN cable or wireless LAN adapter to<br />
connect between the PC and Blu-ray Home Cinema.<br />
Create a shared folder in the PC and store desired mp3,<br />
jpeg or DivX fi les there.<br />
Press the MENU button.<br />
Press the RED(A) button.<br />
You will see a window where you can select a network search<br />
type.<br />
Use the ◄ ► button to select a network search type.<br />
A list of shared servers will appear.<br />
• Auto : Automatically searches for an available PC.<br />
• <strong>Manual</strong> : You must enter the IP address, folder name,<br />
windows user name and password before you can fi nd a<br />
desired PC.<br />
Nodisc ◄<br />
DISC<br />
a Network Search<br />
Nodisc ◄<br />
DISC<br />
Video<br />
Music<br />
Photo<br />
Setup<br />
Video Network Search Type<br />
Please Music select natwork search type<br />
Photo<br />
Auto<br />
<strong>Manual</strong><br />
Setup<br />
s Select<br />
² Return<br />
ENG ● PC STREAMING FUNCTION<br />
6. To search a shared folder<br />
a Network Search<br />
There are 2 methods to access shared folders on a PC. (If you<br />
search a folder in Auto mode. it must contain<br />
less than 12 characters. You must select manual to search for folders with 12 or more characters.)<br />
• Auto Mode<br />
1.<br />
Press the ▲▼ button to select a desired PC and press the<br />
ENTER button.<br />
(When fi rst connected, you must enter the window user<br />
name and password to display the shared folder.)<br />
Nodisc ◄<br />
DISC<br />
B<br />
C<br />
Music<br />
Photo<br />
Setup<br />
a Network Search<br />
2.<br />
Enter the PC’s user name in the window.<br />
DISC<br />
Music<br />
Photo<br />
<strong>User</strong><br />
►<br />
B<br />
C<br />
_<br />
Setup<br />
A B C D E F G H I J K L M N O P<br />
Q R S T U V W X Y Z a b c d e f<br />
g h i j k l m n o p q r s t u v<br />
w x y z 1 2 3 4 5 6 7 8 9 0 − _<br />
+ = . ~ ! @ # $ % ^ & ( ) / ? |<br />
a Back Space b Space Clear d Save<br />
« Number s Select ² Return<br />
a Network Search<br />
3.<br />
Enter the PC’s password in the window.<br />
The shared folder will be displayed.<br />
DISC<br />
►<br />
B<br />
C<br />
_<br />
Password<br />
A B C D E F G H I J K L M N O P<br />
Q R S T U V W X Y Z a b c d e f<br />
g h i j k l m n o p q r s t u v<br />
w x y z 1 2 3 4 5 6 7 8 9 0 − _<br />
+ = . ~ ! @ # $ % ^ & ( ) / ? |<br />
a Back Space b Space Clear d Save<br />
« Number s Select ² Return<br />
a Network Search<br />
81
no disc<br />
no disc<br />
no disc<br />
no disc<br />
no disc<br />
Pc streaming function<br />
4. Press the ▲▼ button to select a desired folder.<br />
DISC<br />
Select folder<br />
►<br />
b<br />
C<br />
ADMIN$<br />
CS<br />
DS<br />
FS<br />
GS<br />
print$<br />
SharedD<br />
s Save<br />
² Return<br />
a network Search<br />
• <strong>Manual</strong> Mode<br />
1.<br />
Enter in the IP address of the PC that has the shared<br />
folders.<br />
DISC<br />
<strong>Manual</strong> Search<br />
1<br />
2 3 4<br />
►<br />
b<br />
C<br />
Please input IP address<br />
0 . 0 . 0 . 0<br />
a network Search<br />
« Number s Select ² Return<br />
2.<br />
Type in the name of the shared folder in the window then<br />
press the bluE (d) button to Save.<br />
DISC<br />
<strong>Manual</strong> Search<br />
Please input shared folder name<br />
1<br />
2 3 4<br />
►<br />
b<br />
_<br />
C<br />
A B C D E F G H I J K L M N O P<br />
Q R S T U V W X Y Z a b c d e f<br />
g h i j k l m n o p q r s t u v<br />
w x y z 1 2 3 4 5 6 7 8 9 0 − _<br />
+ = . ~ ! @ # $ % ^ & ( ) / ? |<br />
a Back Space b Space Clear d Save<br />
a network Search<br />
« Number s Select ² Return<br />
3.<br />
Type in the PC’s password then press the bluE (d) button<br />
to Save.<br />
DISC<br />
Please input password<br />
<strong>Manual</strong> Search<br />
1<br />
2 3 4<br />
►<br />
b<br />
_<br />
C<br />
A B C D E F G H I J K L M N O P<br />
Q R S T U V W X Y Z a b c d e f<br />
g h i j k l m n o p q r s t u v<br />
w x y z 1 2 3 4 5 6 7 8 9 0 − _<br />
+ = . ~ ! @ # $ % ^ & ( ) / ? |<br />
a Back Space b Space Clear d Save<br />
a network Search<br />
« Number s Select ² Return<br />
7. Press the ► button, then press the ▲▼ button to select<br />
Video, Music or Photo.<br />
(For playing a Video, Music or Photo, refer to pages 66~68)<br />
Video<br />
Music<br />
Photo<br />
Setup<br />
M <br />
<br />
The PC name should be in English, excluding characters such as symbols.<br />
You can search up to 4 PCs connected to the network to play content over.<br />
You may experience connection problems depending on your PC environment.<br />
82
Convenient function<br />
SlEEP TiMER funCTiOn<br />
You can set the time that the Blu-ray Home Cinema will shut itself off.<br />
EnG<br />
Press the SlEEP button.<br />
• Each time the button is pressed, the preset time changes as follows :<br />
SLP 10 ➞ 20 ➞ 30 ➞ 60 ➞ 90 ➞ 120 ➞ 150 ➞ OFF.<br />
To confi rm the sleep timer setting, press the SlEEP button.<br />
• The remaining time before the Blu-ray Home Cinema will shut itself off<br />
is displayed.<br />
• Pressing the button again changes the sleep time from what you have<br />
set earlier.<br />
To cancel the sleep timer, press the SlEEP button until Off appears on the display.<br />
AdJuSTinG diSPlAY bRiGhTnESS<br />
You can adjust the brightness of the display on the main unit so it won't<br />
interfere with your movie viewing.<br />
Press the diMMER button.<br />
• Each time the button is pressed, the brightness of front display will be<br />
adjusted.<br />
MuTE funCTiOn<br />
This is useful when answering a doorbell or telephone call.<br />
Press the MuTE button.<br />
• MuTE appears in the display.<br />
• To restore the sound, press the MuTE button again.<br />
83
Troubleshooting<br />
Refer to the chart below when this unit does not function properly. If the problem you are experiencing is not listed<br />
below or if the instruction below does not help, turn off the unit, disconnect the power cord, and contact<br />
<strong>Samsung</strong> Electronics at 1-800-SAMSUNG.<br />
SYMPTOM<br />
I cannot eject the disc.<br />
The iPod fails to connect.<br />
Playback does not start.<br />
Playback does not start<br />
immediately when the<br />
Play/Pause button is pressed.<br />
Sound is not produced.<br />
Sound can be heard only from a few<br />
speakers and not all 3.<br />
The remote control does not work.<br />
• Disc is rotating but no<br />
picture is produced.<br />
• Picture quality is poor and<br />
picture is shaking.<br />
Audio language and subtitles do not work.<br />
Menu screen does not appear even<br />
when the menu function is selected.<br />
Check/Remedy<br />
• Is the power cord plugged securely into the outlet?<br />
• Turn off the power and then turn it back on.<br />
• Check the condition of the iPod connector and Dock.<br />
• Keep the iPod S/W version up to date.<br />
• Check the region number of the BD/DVD.<br />
BD/DVD discs purchased from abroad may not be playable.<br />
• CD-ROMs and DVD-ROMs cannot be played on this Blu-ray Home Cinema.<br />
• Make sure that the rating level is correct.<br />
• Are you using a deformed disc or a disc with scratches on the surface?<br />
• Wipe the disc clean.<br />
• No sound is heard during fast playback, slow playback, and step motion playback.<br />
• Are the speakers connected properly? Is the speaker setup correctly customized?<br />
• Is the disc severely damaged?<br />
• On certain BD/DVD discs, sound is output from the front speakers only.<br />
• Check if the speakers are connected properly.<br />
• Adjust the volume.<br />
• When listening to a CD or radio, sound is output to the front speakers only.<br />
• Is the remote control being operated within its operation range of angle and distance?<br />
• Are the batteries drained?<br />
• Have you selected the mode(TV/BD) functions of the remote control (TV or BD) correctly?<br />
• Is the TV power on?<br />
• Are the video cables connected properly?<br />
• Is the disc dirty or damaged?<br />
• A poorly manufactured disc may not be playable.<br />
• Audio language and subtitles will not work if the disc does not contain them.<br />
• Are you using a disc that does not contain menus?<br />
84
SYMPTOM<br />
Aspect ratio cannot be changed.<br />
• The main unit is not working.<br />
(Example: The power goes out or a<br />
strange noise is heard.)<br />
• The Blu-ray Home Cinema is not working<br />
normally.<br />
The password for rating level has been<br />
forgotten.<br />
Check/Remedy<br />
• You can play 16:9 BD/DVDs in 16:9 Wide mode, 4:3 Letter Box mode, or<br />
4:3 Pan - Scan mode, but 4:3 BD/DVDs can be seen in 4:3 ratio only.<br />
Refer to the Blu-ray Disc jacket and then select the appropriate function.<br />
• Turn off the power and hold the STOP ( ) button on the main unit for<br />
longer than 5 seconds.<br />
Using the RESET function will erase all stored settings.<br />
Do not use this unless necessary.<br />
• While (NO DISC) message appears on the display of main unit, hold the<br />
main unit's STOP ( ) button for longer than 5 seconds. INITIAL<br />
appears on the display and all settings will return to the default values.<br />
• Press the POWER button.<br />
Using the RESET function will erase all stored settings.<br />
Do not use this unless necessary.<br />
EnG ● troubleshooting<br />
Can't receive radio broadcasts.<br />
While listening to TV audio through the<br />
Blu-ray Home Cinema, no sound is<br />
heard.<br />
• Is the antenna connected properly?<br />
• If the antenna's input signal is weak, install an external FM antenna in an<br />
area with good reception.<br />
• If the EJECT button is pressed while listening to TV audio using the<br />
D.IN or AUX functions, the BD/DVD functions are turned on and this mutes<br />
the TV audio.<br />
The icon appears on screen. • The features or action cannot be completed at this time because:<br />
1. The BD/DVD’s software restricts it.<br />
2. The BD/DVD’s software doesn’t support the feature (e.g., angles)<br />
3. The feature is not available at the moment.<br />
4. You’ve requested a title or chapter number or search time that is out of range.<br />
If the HDMI output is set to a resolution your<br />
TV cannot support (for example, 1080p), you<br />
may not see a picture on your TV.<br />
No HDMI output.<br />
Abnormal HDMI output screen.<br />
• Press the STOP ( ) utton (in front panel) for more than 5 seconds with<br />
no disc inside. All settings will revert to the factory settings.<br />
• Check the connection between the TV and the HDMI jack of the Blu-ray<br />
Home Cinema.<br />
• Check if your TV supports 576p/480p/720p/1080i/1080p HDMI input<br />
resolution.<br />
• If random noise appears on the screen, it means that TV does not support<br />
HDCP (High-bandwidth Digital Content Protection).<br />
Cannot search for other access points<br />
using USB wireless<br />
• Check the Proxy is Off(Setup -> Network Setup -> Proxy)<br />
85
Appendix<br />
Cautions on Handling and Storing Discs<br />
Small scratches on the disc may reduce sound and picture quality or cause skipping.<br />
Be especially careful not to scratch discs when handling them.<br />
Handling discs<br />
Do not touch the playback side of the disc.<br />
Hold the disc by the edges so that fingerprints will not get on the surface.<br />
Do not stick paper or tape on the disc.<br />
Disc Storage<br />
Do not keep in direct sunlight<br />
Keep in a cool<br />
ventilated area<br />
Keep in a clean Protection jacket.<br />
Store vertically.<br />
M <br />
<br />
Do not allow the discs to become contaminated with dirt.<br />
Do not load cracked or scratched discs.<br />
Handling and Storing Discs<br />
When you get fingerprints or dirt on the disc, clean it with a mild detergent diluted in water and wipe with<br />
a soft cloth.<br />
• When cleaning, wipe gently from the inside to the outside of the disc<br />
M <br />
Condensation may form if warm air comes into contact with cold parts inside the player.<br />
When condensation forms inside the player, the player may not operate correctly. If this<br />
occurs, remove the disc and let the player stand for 1 or 2 hours with the power on.<br />
86
Specifications<br />
General<br />
FM Tuner<br />
Disc<br />
Video Output<br />
Video/Audio<br />
Amplifier<br />
Speaker<br />
Power Consumption<br />
100 W<br />
Weight<br />
3.2 Kg<br />
Dimensions<br />
461 (W) x 193 (D) x 109 (H) mm<br />
Operating Temperature Range +5°C to +35°C<br />
Operating Humidity Range 10 % to 75 %<br />
FM Frequency Range<br />
87.5 ~ 108.0 MHz<br />
Signal / noise ratio<br />
70 dB<br />
Usable sensitivity<br />
10 dB<br />
Total harmonic distortion 0.5 %<br />
BD (Blu-ray Disc)<br />
Reading Speed : 4.917m/sec<br />
DVD (Digital Versatile Disc)<br />
Reading Speed : 3.49 ~ 4.06 m/sec.<br />
Approx. Play Time (Single Sided, Single Layer Disc) : 135 min.<br />
CD : 12 cm (COMPACT DISC)<br />
Reading Speed : 4.8 ~ 5.6 m/sec.<br />
Maximum Play Time : 74 min.<br />
CD : 8 cm (COMPACT DISC)<br />
Reading Speed : 4.8 ~ 5.6 m/sec.<br />
Maximum Play Time : 20 min.<br />
Composite Video<br />
1 channel : 1.0 Vp-p (75 Ω load)<br />
Blu-ray Disc : 576i/480i<br />
DVD : 576i/480i<br />
Y : 1.0 Vp-p (75 Ω load)<br />
Component Video<br />
Pr : 0.70 Vp-p (75 Ω load)<br />
Pb : 0.70 Vp-p (75 Ω load)<br />
Blu-ray Disc : 1080i, 720p, 576p/480p, 576i/480i DVD : 576p/480p, 576i/480i<br />
HDMI<br />
1080p, 1080i, 720p, 576p/480p<br />
PCM multichannel audio, Bitstream audio, PCM audio<br />
Front speaker output<br />
133W x 2(3Ω)<br />
Subwoofer speaker output<br />
134W(3Ω)<br />
Frequency response<br />
Analogue input<br />
20Hz~20kHz (±3dB)<br />
Digital input<br />
20Hz~44kHz (±3dB)<br />
S/N Ratio<br />
70dB<br />
Channel separation<br />
60dB<br />
Input sensitivity<br />
(AUX)500mV<br />
Speaker system<br />
2.1CH speaker system<br />
Front<br />
Subwoofer<br />
Impedance<br />
3 Ω<br />
3 Ω<br />
Frequency range<br />
140Hz~20kHz<br />
40Hz~160Hz<br />
Output sound pressure level 88dB/W/M<br />
90dB/W/M<br />
Rated input<br />
133W<br />
134W<br />
Maximum input<br />
266W<br />
268W<br />
Dimensions (W x H x D)<br />
Front : 185.4 x 624.8 x 185.4 mm<br />
Subwoofer : 256.5 x 256.5 x 297.2 mm<br />
EnG ● appendix<br />
Weights<br />
*: Nominal specification<br />
- <strong>Samsung</strong> Electronics Co., Ltd reserves the right to change the specifications without notice.<br />
- Weight and dimensions are approximate.<br />
Front : 1.8 Kg <br />
Subwoofer : 4.4 Kg<br />
87
❖<br />
❖<br />
❖<br />
❖<br />
This product uses parts of the software from the Independent JPEG Group.<br />
This product uses parts of the software owned by the Freetype Project (www.freetype.org).<br />
This product uses some software programs which are distributed under the GPL/LGPL license.<br />
This Product uses some software programs which are distributed under the OpenSSL license.<br />
Accordingly, the following GPL and LGPL software source codes that have been used in this product can be<br />
provided after asking to vdswmanager@samsung.com.<br />
GPL software: Linu Kernel, Busybox, Binutilis<br />
LGPL software: uClibc, directfb<br />
The GNU General Public License (GPL)<br />
Version 2, June 1991<br />
Copyright (C) 1989, 1991 Free Software Foundation, Inc.<br />
59 Temple Place, Suite 330, Boston, MA 02111-1307 USA<br />
Everyone is permitted to copy and distribute verbatim copies of this license document, but changing it is not allowed.<br />
Preamble<br />
The licenses for most software are designed to take away your freedom to share and change it. By contrast, the<br />
GNU General Public License is intended to guarantee your freedom to share and change free software--to make<br />
sure the software is free for all its users. This General Public License applies to most of the Free Software<br />
Foundation’s software and to any other program whose authors commit to using it. (Some other Free Software<br />
Foundation software is covered by the GNU Library General Public License instead.) You can apply it to your<br />
programs, too.<br />
When we speak of free software, we are referring to freedom, not price. Our General Public Licenses are designed<br />
to make sure that you have the freedom to distribute copies of free software (and charge for this service if you wish),<br />
that you receive source code or can get it if you want it, that you can change the software or use pieces of it in new<br />
free programs; and th at you know you can do these things.<br />
To protect your rights, we need to make restrictions that forbid anyone to deny you these rights or to ask you to<br />
surrender the rights. These restrictions translate to certain responsibilities for you if you distribute copies of the<br />
software, or if you modify it.<br />
For example, if you distribute copies of such a program, whether gratis or for a fee, you must give the recipients all<br />
the rights that you have. You must make sure that they, too, receive or can get the source code. And you must<br />
show them these terms so they know their rights.<br />
We protect your rights with two steps: (1) copyright the software, and (2) offer you this license which gives you legal<br />
permission to copy, distribute and/or modify the software.<br />
Also, for each author’s protection and ours, we want to make certain that everyone understands that there is no<br />
warranty for this free software. If the software is modified by someone else and passed on, we want its recipients to<br />
know that what they have is not the original, so that any problems introduced by others will not reflect on the original<br />
authors’ reputations.<br />
Finally, any free program is threatened constantly by software patents. We wish to avoid the danger that<br />
redistributors of a free program will individually obtain patent licenses, in effect making the program proprietary. To<br />
prevent this, we have made it clear that any patent must be licensed for everyone’s free use or not licensed at all.<br />
The precise terms and conditions for copying, distribution and modification follow.<br />
TERMS AND CONDITIONS FOR COPYING, DISTRIBUTION AND MODIFICATION<br />
0. This License applies to any program or other work which contains a notice placed by the copyright holder saying<br />
it may be distributed under the terms of this General Public License. The “Program”, below, refers to any such<br />
program or work, and a “work based on the Program” means either the Program or any derivative work under<br />
copyright law: that is to say, a work containing the Program or a portion of it, either verbatim or with modifications<br />
and/or translated into another language. (Hereinafter, translation is included without limitation in the term<br />
“modification”.) Each licensee is addressed as “you”.<br />
Activities other than copying, distribution and modification are not covered by this License; they are outside its<br />
scope. The act of running the Program is not restricted, and the output from the Program is covered only if its<br />
contents constitute a work based on the Program (independent of having been made by running the Program).<br />
Whether that is true depends on what the Program does.
Activities other than copying, distribution and modification are not covered by this License; they are outside its<br />
scope. The act of running the Program is not restricted, and the output from the Program is covered only if its<br />
contents constitute a work based on the Program (independent of having been made by running the Program).<br />
Whether that is true depends on what the Program does.<br />
1. You may copy and distribute verbatim copies of the Program’s source code as you receive it, in any<br />
medium, provided that you conspicuously and appropriately publish on each copy an appropriate copyright<br />
notice and disclaimer of warranty; keep intact all the notices that refer to this License and to the absence of<br />
any warranty; and give any other recipients of the Program a copy of this License along with the Program.<br />
You may charge a fee for the physical act of transferring a copy, and you may at your option offer warranty<br />
protection in exchange for a fee.<br />
2. You may modify your copy or copies of the Program or any portion of it, thus forming a work based on<br />
the Program, and copy and distribute such modifications or work under the terms of Section 1 above,<br />
provided that you also meet all of these conditions:<br />
a) You must cause the modified files to carry prominent notices stating that you changed the files and the date of<br />
any change.<br />
b) You must cause any work that you distribute or publish, that in whole or in part contains or is derived from the<br />
Program or any part thereof, to be licensed as a whole at no charge to all third parties under the terms of this<br />
License.<br />
c) If the modified program normally reads commands interactively when run, you must cause it, when started<br />
running for such interactive use in the most ordinary way, to print or display an announcement including an<br />
appropriate copyright notice and a notice that there is no warranty (or else, saying that you provide a warranty)<br />
and that users may redistribute the program under these conditions, and telling the user how to view a copy of<br />
this License. (Exception: if the Program itself is interactive but does not normally print such an announcement,<br />
your work based on the Program is not required to print an announcement.)<br />
These requirements apply to the modified work as a whole. If identifiable sections of that work are not derived from<br />
the Program, and can be reasonably considered independent and separate works in themselves, then this License,<br />
and its terms, do not apply to those sections when you distribute them as separate works. But when you distribute<br />
the same sections as part of a whole which is a work based on the Program, the distribution of the whole must be<br />
on the terms of this License, whose permissions for other licensees extend to the entire whole, and thus to each<br />
and every part regardless of who wrote it.<br />
Thus, it is not the intent of this section to claim rights or contest your rights to work written entirely by you; rather,<br />
the intent is to exercise the right to control the distribution of derivative or collective works based on the Program.<br />
In addition, mere aggregation of another work not based on the Program with the Program (or with a work based on<br />
the Program) on a volume of a storage or distribution medium does not bring the other work under the scope of this<br />
License.<br />
3. You may copy and distribute the Program (or a work based on it, under Section 2) in object code or<br />
executable form under the terms of Sections 1 and 2 above provided that you also do one of the following:<br />
a) Accompany it with the complete corresponding machine-readable source code, which must be distributed<br />
under the terms of Sections 1 and 2 above on a medium customarily used for software interchange; or,<br />
b) Accompany it with a written offer, valid for at least three years, to give any third party, for a charge no more<br />
than your cost of physically performing source distribution, a complete machine-readable copy of the<br />
corresponding source code, to be distributed under the terms of Sections 1 and 2 above on a medium<br />
customarily used for software interchange; or,<br />
c) Accompany it with the information you received as to the offer to distribute corresponding source code. (This<br />
alternative is allowed only for noncommercial distribution and only if you received the program in object code or<br />
executable form with such an offer, in accord with Subsection b above.)<br />
The source code for a work means the preferred form of the work for making modifications to it. For an executable<br />
work, complete source code means all the source code for all modules it contains, plus any associated interface<br />
definition files, plus the scripts used to control compilation and installation of the executable. However, as a special<br />
exception, the source code distributed need not include anything that is normally distributed (in either source or<br />
binary form) with the major components (compiler, kernel, and so on) of the operating system on which the<br />
executable runs, unless that component itself accompanies the executable.
If distribution of executable or object code is made by offering access to copy from a designated place, then offering<br />
equivalent access to copy the source code from the same place counts as distribution of the source code, even<br />
though third parties are not compelled to copy the source along with the object code.<br />
4. You may not copy, modify, sublicense, or distribute the Program except as expressly provided under this<br />
License. Any attempt otherwise to copy, modify, sublicense or distribute the Program is void, and will<br />
automatically terminate your rights under this License. However, parties who have received copies, or<br />
rights, from you under this License will not have their licenses terminated so long as such parties remain in<br />
full compliance.<br />
5. You are not required to accept this License, since you have not signed it. However, nothing else grants<br />
you permission to modify or distribute the Program or its derivative works. These actions are prohibited by<br />
law if you do not accept this License. Therefore, by modifying or distributing the Program (or any work<br />
based on the Program), you indicate your acceptance of this License to do so, and all its terms and<br />
conditions for copying, distributing or modifying the Program or works based on it.<br />
6. Each time you redistribute the Program (or any work based on the Program), the recipient automatically<br />
receives a license from the original licensor to copy, distribute or modify the Program subject to these<br />
terms and conditions. You may not impose any further restrictions on the recipients’ exercise of the rights<br />
granted herein. You are not responsible for enforcing compliance by third parties to this License.<br />
7. If, as a consequence of a court judgment or allegation of patent infringement or for any other reason (not<br />
limited to patent issues), conditions are imposed on you (whether by court order, agreement or otherwise)<br />
that contradict the conditions of this License, they do not excuse you from the conditions of this License. If<br />
you cannot distribute so as to satisfy simultaneously your obligations under this License and any other<br />
pertinent obligations, then as a consequence you may not distribute the Program at all. For example, if a<br />
patent license would not permit royalty-free redistribution of the Program by all those who receive copies<br />
directly or indirectly through you, then the only way you could satisfy both it and this License would be to<br />
refrain entirely from distribution of the Program.<br />
If any portion of this section is held invalid or unenforceable under any particular circumstance, the balance of the<br />
section is intended to apply and the section as a whole is intended to apply in other circumstances.<br />
It is not the purpose of this section to induce you to infringe any patents or other property right claims or to contest<br />
validity of any such claims; this section has the sole purpose of protecting the integrity of the free software<br />
distribution system, which is implemented by public license practices. Many people have made generous<br />
contributions to the wide range of software distributed through that system in reliance on consistent application of<br />
that system; it is up to the author/donor to decide if he or she is willing to distribute software through any other<br />
system and a licensee cannot impose that choice.<br />
This section is intended to make thoroughly clear what is believed to be a consequence of the rest of this License.<br />
8. If the distribution and/or use of the Program is restricted in certain countries either by patents or by<br />
copyrighted interfaces, the original copyright holder who places the Program under this License may add<br />
an explicit geographical distribution limitation excluding those countries, so that distribution is permitted<br />
only in or among countries not thus excluded. In such case, this License incorporates the limitation as if<br />
written in the body of this License.<br />
9. The Free Software Foundation may publish revised and/or new versions of the General Public License<br />
from time to time. Such new versions will be similar in spirit to the present version, but may differ in detail to<br />
address new problems or concerns.<br />
Each version is given a distinguishing version number. If the Program specifies a version number of this License<br />
which applies to it and “any later version”, you have the option of following the terms and conditions either of that<br />
version or of any later version published by the Free Software Foundation. If the Program does not specify a version<br />
number of this License, you may choose any version ever published by the Free Software Foundation.<br />
10. If you wish to incorporate parts of the Program into other free programs whose distribution conditions<br />
are different, write to the author to ask for permission. For software which is copyrighted by the Free<br />
Software Foundation, write to the Free Software Foundation; we sometimes make exceptions for this. Our<br />
decision will be guided by the two goals of preserving the free status of all derivatives of our free software<br />
and of promoting the sharing and reuse of software generally.
NO WARRANTY<br />
11. BECAUSE THE PROGRAM IS LICENSED FREE OF CHARGE, THERE IS NO WARRANTY FOR THE<br />
PROGRAM, TO THE EXTENT PERMITTED BY APPLICABLE LAW. EXCEPT WHEN OTHERWISE STATED IN<br />
WRITING THE COPYRIG<strong>HT</strong> HOLDERS AND/OR OTHER PARTIES PROVIDE THE PROGRAM “AS IS”<br />
WITHOUT WARRANTY OF ANY KIND, EITHER EXPRESSED OR IMPLIED, INCLUDING, BUT NOT LIMITED<br />
TO, THE IMPLIED WARRANTIES OF MERCHANTABILITY AND FITNESS FOR A PARTICULAR PURPOSE.<br />
THE ENTIRE RISK AS TO THE QUALITY AND PERFORMANCE OF THE PROGRAM IS WITH YOU. SHOULD<br />
THE PROGRAM PROVE DEFECTIVE, YOU ASSUME THE COST OF ALL NECESSARY SERVICING, REPAIR<br />
OR CORRECTION.<br />
12. IN NO EVENT UNLESS REQUIRED BY APPLICABLE LAW OR AGREED TO IN WRITING WILL ANY<br />
COPYRIG<strong>HT</strong> HOLDER, OR ANY OTHER PARTY WHO MAY MODIFY AND/OR REDISTRIBUTE THE<br />
PROGRAM AS PERMITTED ABOVE, BE LIABLE TO YOU FOR DAMAGES, INCLUDING ANY GENERAL,<br />
SPECIAL, INCIDENTAL OR CONSEQUENTIAL DAMAGES ARISING OUT OF THE USE OR INABILITY TO<br />
USE THE PROGRAM (INCLUDING BUT NOT LIMITED TO LOSS OF DATA OR DATA BEING RENDERED<br />
INACCURATE OR LOSSES SUSTAINED BY YOU OR THIRD PARTIES OR A FAILURE OF THE PROGRAM<br />
TO OPERATE WITH ANY OTHER PROGRAMS), EVEN IF SUCH HOLDER OR OTHER PARTY HAS BEEN<br />
ADVISED OF THE POSSIBILITY OF SUCH DAMAGES.<br />
END OF TERMS AND CONDITIONS<br />
How to Apply These Terms to Your New Programs<br />
If you develop a new program, and you want it to be of the greatest possible use to the public, the best way to<br />
achieve this is to make it free software which everyone can redistribute and change under these terms.<br />
To do so, attach the following notices to the program. It is safest to attach them to the start of each source file to<br />
most effectively convey the exclusion of warranty; and each file should have at least the “copyright” line and a<br />
pointer to where the full notice is found.<br />
One line to give the program’s name and a brief idea of what it does.<br />
Copyright (C) <br />
This program is free software; you can redistribute it and/or modify it under the terms of the GNU General Public<br />
License as published by the Free Software Foundation; either version 2 of the License, or (at your option) any<br />
later version.<br />
This program is distributed in the hope that it will be useful, but WITHOUT ANY WARRANTY; without even the<br />
implied warranty of MERCHANTABILITY or FITNESS FOR A PARTICULAR PURPOSE. See the GNU General<br />
Public License for more details.<br />
You should have received a copy of the GNU General Public License along with this program; if not, write to the<br />
Free Software Foundation, Inc., 59<br />
Temple Place, Suite 330, Boston, MA 02111-1307 USA<br />
Also add information on how to contact you by electronic and paper mail.<br />
If the program is interactive, make it output a short notice like this when it starts in an interactive mode:<br />
Gnomovision version 69, Copyright (C) year name of author Gnomovision comes with ABSOLUTELY NO<br />
WARRANTY; for details type `show w’. This is free software, and you are welcome to redistribute it under certain<br />
conditions; type `show c’ for details.<br />
The hypothetical commands `show w’ and `show c’ should show the appropriate parts of the General Public<br />
License. Of course, the commands you use may be called something other than `show w’ and `show c’; they could<br />
even be mouse-clicks or menu items--whatever suits your program.<br />
You should also get your employer (if you work as a programmer) or your school, if any, to sign a “copyright<br />
disclaimer” for the program, if necessary. Here is a sample; alter the names:<br />
Yoyodyne, Inc., hereby disclaims all copyright interest in the program `Gnomovision’ (which makes passes at<br />
compilers) written by James Hacker.<br />
signature of Ty Coon, 1 April 1989<br />
Ty Coon, President of Vice<br />
This General Public License does not permit incorporating your program into proprietary programs. If your program<br />
is a subroutine library, you may consider it more useful to permit linking proprietary applications with the library. If<br />
this is what you want to do, use the GNU Library General Public License instead of this License.
GNU Lesser General Public License (LGPL)<br />
Version 2.1, February 1999<br />
Copyright (C) 1991, 1999 Free Software Foundation, Inc. 59 Temple Place, Suite 330, Boston, MA 02111-1307<br />
USA Everyone is permitted to copy and distribute verbatim copies of this license document, but changing it is<br />
not allowed.<br />
[This is the first released version of the Lesser GPL. It also counts as the successor of the GNU Library Public<br />
License, version 2, hence the version number 2.1.]<br />
Preamble<br />
The licenses for most software are designed to take away your freedom to share and change it. By contrast, the<br />
GNU General Public Licenses are intended to guarantee your freedom to share and change free software--to make<br />
sure the software is free for all its users.<br />
This license, the Lesser General Public License, applies to some specially designated software packages--typically<br />
libraries--of the Free Software Foundation and other authors who decide to use it. You can use it too, but we<br />
suggest you first think carefully about whether this license or the ordinary General Public License is the better<br />
strategy to use in any particular case, based on the explanations below.<br />
When we speak of free software, we are referring to freedom of use, not price. Our General Public Licenses are<br />
designed to make sure that you have the freedom to distribute copies of free software (and charge for this service if<br />
you wish); that you receive source code or can get it if you want it; that you can change the software and use pieces<br />
of it in new free programs; and that you are informed that you can do these things.<br />
To protect your rights, we need to make restrictions that forbid distributors to deny you these rights or to ask you to<br />
surrender these rights. These restrictions translate to certain responsibilities for you if you distribute copies of the<br />
library or if you modify it.<br />
For example, if you distribute copies of the library, whether gratis or for a fee, you must give the recipients all the<br />
rights that we gave you. You must make sure that they, too, receive or can get the source code. If you link other<br />
code with the library, you must provide complete object files to the recipients, so that they can relink them with the<br />
library after making changes to the library and recompiling it. And you must show them these terms so they know<br />
their rights.<br />
We protect your rights with a two-step method: (1) we copyright the library, and (2) we offer you this license, which<br />
gives you legal permission to copy, distribute and/or modify the library.<br />
To protect each distributor, we want to make it very clear that there is no warranty for the free library. Also, if the<br />
library is modified by someone else and passed on, the recipients should know that what they have is not the<br />
original version, so that the original author’s reputation will not be affected by problems that might be introduced by<br />
others.<br />
Finally, software patents pose a constant threat to the existence of any free program. We wish to make sure that a<br />
company cannot effectively restrict the users of a free program by obtaining a restrictive license from a patent<br />
holder. Therefore, we insist that any patent license obtained for a version of the library must be consistent with the<br />
full freedom of use specified in this license.<br />
Most GNU software, including some libraries, is covered by the ordinary GNU General Public License. This license,<br />
the GNU Lesser General Public License, applies to certain designated libraries, and is quite different from the<br />
ordinary General Public License. We use this license for certain libraries in order to permit linking those libraries into<br />
non-free programs.<br />
When a program is linked with a library, whether statically or using a shared library, the combination of the two is<br />
legally speaking a combined work, a derivative of the original library. The ordinary General Public License therefore<br />
permits such linking only if the entire combination fits its criteria of freedom.<br />
The Lesser General Public License permits more lax criteria for linking other code with the library.<br />
We call this license the “Lesser” General Public License because it does Less to protect the user’s freedom than the<br />
ordinary General Public License. It also provides other free software developers Less of an advantage over<br />
competing non-free programs. These disadvantages are the reason we use the ordinary General Public License for<br />
many libraries. However, the Lesser license provides advantages in certain special circumstances.<br />
For example, on rare occasions, there may be a special need to encourage the widest possible use of a certain<br />
library, so that it becomes a de-facto standard. To achieve this, non-free programs must be allowed to use the<br />
library. A more frequent case is that a free library does the same job as widely used non-free libraries. In this case,<br />
there is little to gain by limiting the free library to free software only, so we use the Lesser General Public License.
In other cases, permission to use a particular library in non-free programs enables a greater number of people to<br />
use a large body of free software. For example, permission to use the GNU C Library in non-free programs enables<br />
many more people to use the whole GNU operating system, as well as its variant, the GNU/Linux operating system.<br />
Although the Lesser General Public License is Less protective of the users’ freedom, it does ensure that the user of<br />
a program that is linked with the Library has the freedom and the wherewithal to run that program using a modified<br />
version of the Library.<br />
The precise terms and conditions for copying, distribution and modification follow. Pay close attention to the<br />
difference between a “work based on the library” and a “work that uses the library”. The former contains code<br />
derived from the library, whereas the latter must be combined with the library in order to run.<br />
TERMS AND CONDITIONS FOR COPYING, DISTRIBUTION AND MODIFICATION<br />
0. This License Agreement applies to any software library or other program which contains a notice placed by the<br />
copyright holder or other authorized party saying it may be distributed under the terms of this Lesser General Public<br />
License (also called “this License”). Each licensee is addressed as “you”.<br />
A “library” means a collection of software functions and/or data prepared so as to be conveniently linked with<br />
application programs (which use some of those functions and data) to form executables.<br />
The “Library”, below, refers to any such software library or work which has been distributed under these terms. A<br />
“work based on the Library” means either the Library or any derivative work under copyright law: that is to say, a<br />
work containing the Library or a portion of it, either verbatim or with modifications and/or translated straightforwardly<br />
into another language. (Hereinafter, translation is included without limitation in the term “modification”.)<br />
“Source code” for a work means the preferred form of the work for making modifications to it. For a library,<br />
complete source code means all the source code for all modules it contains, plus any associated interface definition<br />
files, plus the scripts used to control compilation and installation of the library.<br />
Activities other than copying, distribution and modification are not covered by this License; they are outside its<br />
scope. The act of running a program using the Library is not restricted, and output from such a program is covered<br />
only if its contents constitute a work based on the Library (independent of the use of the Library in a tool for writing<br />
it). Whether that is true depends on what the Library does and what the program that uses the Library does.<br />
1. You may copy and distribute verbatim copies of the Library’s complete source code as you receive it, in<br />
any medium, provided that you conspicuously and appropriately publish on each copy an appropriate<br />
copyright notice and disclaimer of warranty; keep intact all the notices that refer to this License and to the<br />
absence of any warranty; and distribute a copy of this License along with the Library.<br />
You may charge a fee for the physical act of transferring a copy, and you may at your option offer warranty<br />
protection in exchange for a fee.<br />
2. You may modify your copy or copies of the Library or any portion of it, thus forming a work based on the<br />
Library, and copy and distribute such modifications or work under the terms of Section 1 above, provided<br />
that you also meet all of these conditions:<br />
a) The modified work must itself be a software library.<br />
b) You must cause the files modified to carry prominent notices stating that you changed the files and the date of<br />
any change.<br />
c) You must cause the whole of the work to be licensed at no charge to all third parties under the terms of this<br />
License.<br />
d) If a facility in the modified Library refers to a function or a table of data to be supplied by an application<br />
program that uses the facility, other than as an argument passed when the facility is invoked, then you must<br />
make a good faith effort to ensure that, in the event an application does not supply such function or table, the<br />
facility still operates, and performs whatever part of its purpose remains meaningful.<br />
(For example, a function in a library to compute square roots has a purpose that is entirely well-defined<br />
independent of the application. Therefore, Subsection 2d requires that any application-supplied function or table<br />
used by this function must be optional: if the application does not supply it, the square root function must still<br />
compute square roots.)
These requirements apply to the modified work as a whole. If identifiable sections of that work are not derived from<br />
the Library, and can be reasonably considered independent and separate works in themselves, then this License,<br />
and its terms, do not apply to those sections when you distribute them as separate works. But when you distribute<br />
the same sections as part of a whole which is a work based on the Library, the distribution of the whole must be<br />
on the terms of this License, whose permissions for other licensees extend to the entire whole, and thus to each<br />
and every part regardless of who wrote it.<br />
Thus, it is not the intent of this section to claim rights or contest your rights to work written entirely by you; rather,<br />
the intent is to exercise the right to control the distribution of derivative or collective works based on the Library.<br />
In addition, mere aggregation of another work not based on the Library with the Library (or with a work based on<br />
the Library) on a volume of a storage or distribution medium does not bring the other work under the scope of this<br />
License.<br />
3. You may opt to apply the terms of the ordinary GNU General Public License instead of this License to a<br />
given copy of the Library. To do this, you must alter all the notices that refer to this License, so that they refer<br />
to the ordinary GNU General Public License, version 2, instead of to this License. (If a newer version than<br />
version 2 of the ordinary GNU General Public License has appeared, then you can specify that version instead<br />
if you wish.) Do not make any other change in these notices.<br />
Once this change is made in a given copy, it is irreversible for that copy, so the ordinary GNU General Public License<br />
applies to all subsequent copies and derivative works made from that copy.<br />
This option is useful when you wish to copy part of the code of the Library into a program that is not a library.<br />
4. You may copy and distribute the Library (or a portion or derivative of it, under Section 2) in object code or<br />
executable form under the terms of Sections 1 and 2 above provided that you accompany it with the complete<br />
corresponding machine-readable source code, which must be distributed under the terms of Sections 1 and<br />
2 above on a medium customarily used for software interchange.<br />
If distribution of object code is made by offering access to copy from a designated place, then offering equivalent<br />
access to copy the source code from the same place satisfies the requirement to distribute the source code, even<br />
though third parties are not compelled to copy the source along with the object code.<br />
5. A program that contains no derivative of any portion of the Library, but is designed to work with the Library<br />
by being compiled or linked with it, is called a “work that uses the Library”. Such a work, in isolation, is not a<br />
derivative work of the Library, and therefore falls outside the scope of this License.<br />
However, linking a “work that uses the Library” with the Library creates an executable that is a derivative of the Library<br />
(because it contains portions of the Library), rather than a “work that uses the library”. The executable is therefore<br />
covered by this License. Section 6 states terms for distribution of such executables.<br />
When a “work that uses the Library” uses material from a header file that is part of the Library, the object code for the<br />
work may be a derivative work of the Library even though the source code is not. Whether this is true is especially<br />
significant if the work can be linked without the Library, or if the work is itself a library. The threshold for this to be true<br />
is not precisely defined by law.<br />
If such an object file uses only numerical parameters, data structure layouts and accessors, and small macros and<br />
small inline functions (ten lines or less in length), then the use of the object file is unrestricted, regardless of whether it<br />
is legally a derivative work. (Executables containing this object code plus portions of the Library will still fall under<br />
Section 6.)<br />
Otherwise, if the work is a derivative of the Library, you may distribute the object code for the work under the terms of<br />
Section 6. Any executables containing that work also fall under Section 6, whether or not they are linked directly with<br />
the Library itself.<br />
6. As an exception to the Sections above, you may also combine or link a “work that uses the Library” with<br />
the Library to produce a work containing portions of the Library, and distribute that work under terms of your<br />
choice, provided that the terms permit modification of the work for the customer’s own use and reverse<br />
engineering for debugging such modifications.<br />
You must give prominent notice with each copy of the work that the Library is used in it and that the Library and its<br />
use are covered by this License. You must supply a copy of this License. If the work during execution displays<br />
copyright notices, you must include the copyright notice for the Library among them, as well as a reference directing<br />
the user to the copy of this License. Also, you must do one of these things:
a) Accompany the work with the complete corresponding machine-readable source code for the Library including<br />
whatever changes were used in the work (which must be distributed under Sections 1 and 2 above); and, if the<br />
work is an executable linked with the Library, with the complete machinereadable “work that uses the Library”, as<br />
object code and/or source code, so that the user can modify the Library and then relink to produce a modified<br />
executable containing the modified Library. (It is understood that the user who changes the contents of definitions<br />
files in the Library will not necessarily be able to recompile the application to use the modified definitions.)<br />
b) Use a suitable shared library mechanism for linking with the Library. A suitable mechanism is one that (1) uses<br />
at run time a copy of the library already present on the user’s computer system, rather than copying library<br />
functions into the executable, and (2) will operate properly with a modified version of the library, if the user installs<br />
one, as long as the modified version is interface-compatible with the version that the work was made with.<br />
c) Accompany the work with a written offer, valid for at least three years, to give the same user the materials<br />
specified in Subsection 6a, above, for a charge no more than the cost of performing this distribution.<br />
d) If distribution of the work is made by offering access to copy from a designated place, offer equivalent access<br />
to copy the above specified materials from the same place.<br />
e) Verify that the user has already received a copy of these materials or that you have already sent this user a<br />
copy.<br />
For an executable, the required form of the “work that uses the Library” must include any data and utility programs<br />
needed for reproducing the executable from it. However, as a special exception, the materials to be distributed<br />
need not include anything that is normally distributed (in either source or binary form) with the major components<br />
(compiler, kernel, and so on) of the operating system on which the executable runs, unless that component itself<br />
accompanies the executable.<br />
It may happen that this requirement contradicts the license restrictions of other proprietary libraries that do not<br />
normally accompany the operating system. Such a contradiction means you cannot use both them and the Library<br />
together in an executable that you distribute.<br />
7. You may place library facilities that are a work based on the Library side-by-side in a single library<br />
together with other library facilities not covered by this License, and distribute such a combined library,<br />
provided that the separate distribution of the work based on the Library and of the other library facilities is<br />
otherwise permitted, and provided that you do these two things:<br />
a) Accompany the combined library with a copy of the same work based on the Library, uncombined with any<br />
other library facilities. This must be distributed under the terms of the Sections above.<br />
b) Give prominent notice with the combined library of the fact that part of it is a work based on the Library, and<br />
explaining where to find the accompanying uncombined form of the same work.<br />
8. You may not copy, modify, sublicense, link with, or distribute the Library except as expressly provided<br />
under this License. Any attempt otherwise to copy, modify, sublicense, link with, or distribute the Library is<br />
void, and will automatically terminate your rights under this License. However, parties who have received<br />
copies, or rights, from you under this License will not have their licenses terminated so long as such parties<br />
remain in full compliance.<br />
9. You are not required to accept this License, since you have not signed it. However, nothing else grants<br />
you permission to modify or distribute the Library or its derivative works. These actions are prohibited by<br />
law if you do not accept this License. Therefore, by modifying or distributing the Library (or any work based<br />
on the Library), you indicate your acceptance of this License to do so, and all its terms and conditions for<br />
copying, distributing or modifying the Library or works based on it.<br />
10. Each time you redistribute the Library (or any work based on the Library), the recipient automatically<br />
receives a license from the original licensor to copy, distribute, link with or modify the Library subject to<br />
these terms and conditions. You may not impose any further restrictions on the recipients’ exercise of the<br />
rights granted herein. You are not responsible for enforcing compliance by third parties with this License.<br />
11. If, as a consequence of a court judgment or allegation of patent infringement or for any other reason<br />
(not limited to patent issues), conditions are imposed on you (whether by court order, agreement or<br />
otherwise) that contradict the conditions of this License, they do not excuse you from the conditions of this<br />
License. If you cannot distribute so as to satisfy simultaneously your obligations under this License and any<br />
other pertinent obligations, then as a consequence you may not distribute the Library at all. For example, if<br />
a patent license would not permit royalty-free redistribution of the Library by all those who receive copies<br />
directly or indirectly through you, then the only way you could satisfy both it and this License would be to<br />
refrain entirely from distribution of the Library.
If any portion of this section is held invalid or unenforceable under any particular circumstance, the balance of the<br />
section is intended to apply, and the section as a whole is intended to apply in other circumstances.<br />
It is not the purpose of this section to induce you to infringe any patents or other property right claims or to contest<br />
validity of any such claims; this section has the sole purpose of protecting the integrity of the free software<br />
distribution system which is implemented by public license practices. Many people have made generous<br />
contributions to the wide range of software distributed through that system in reliance on consistent application of<br />
that system; it is up to the author/donor to decide if he or she is willing to distribute software through any other<br />
system and a licensee cannot impose that choice.<br />
This section is intended to make thoroughly clear what is believed to be a consequence of the rest of this License.<br />
12. If the distribution and/or use of the Library is restricted in certain countries either by patents or by<br />
copyrighted interfaces, the original copyright holder who places the Library under this License may add an<br />
explicit geographical distribution limitation excluding those countries, so that distribution is permitted only<br />
in or among countries not thus excluded. In such case, this License incorporates the limitation as if written<br />
in the body of this License.<br />
13. The Free Software Foundation may publish revised and/or new versions of the Lesser General Public<br />
License from time to time. Such new versions will be similar in spirit to the present version, but may differ in<br />
detail to address new problems or concerns.<br />
Each version is given a distinguishing version number. If the Library specifies a version number of this License which<br />
applies to it and “any later version”, you have the option of following the terms and conditions either of that version<br />
or of any later version published by the Free Software Foundation. If the Library does not specify a license version<br />
number, you may choose any version ever published by the Free Software Foundation.<br />
14. If you wish to incorporate parts of the Library into other free programs whose distribution conditions are<br />
incompatible with these, write to the author to ask for permission. For software which is copyrighted by the<br />
Free Software Foundation, write to the Free Software Foundation; we sometimes make exceptions for this.<br />
Our decision will be guided by the two goals of preserving the free status of all derivatives of our free<br />
software and of promoting the sharing and reuse of software generally.<br />
NO WARRANTY<br />
15. BECAUSE THE LIBRARY IS LICENSED FREE OF CHARGE, THERE IS NO WARRANTY FOR THE<br />
LIBRARY, TO THE EXTENT PERMITTED BY APPLICABLE LAW. EXCEPT WHEN OTHERWISE STATED IN<br />
WRITING THE COPYRIG<strong>HT</strong> HOLDERS AND/OR OTHER PARTIES PROVIDE THE LIBRARY “AS IS”<br />
WITHOUT WARRANTY OF ANY KIND, EITHER EXPRESSED OR IMPLIED, INCLUDING, BUT NOT LIMITED<br />
TO, THE IMPLIED WARRANTIES OF MERCHANTABILITY AND FITNESS FOR A PARTICULAR PURPOSE.<br />
THE ENTIRE RISK AS TO THE QUALITY AND PERFORMANCE OF THE LIBRARY IS WITH YOU. SHOULD<br />
THE LIBRARY PROVE DEFECTIVE, YOU ASSUME THE COST OF ALL NECESSARY SERVICING, REPAIR<br />
OR CORRECTION.<br />
16. IN NO EVENT UNLESS REQUIRED BY APPLICABLE LAW OR AGREED TO IN WRITING WILL ANY<br />
COPYRIG<strong>HT</strong> HOLDER, OR ANY OTHER PARTY WHO MAY MODIFY AND/OR REDISTRIBUTE THE LIBRARY<br />
AS PERMITTED ABOVE, BE LIABLE TO YOU FOR DAMAGES, INCLUDING ANY GENERAL, SPECIAL,<br />
INCIDENTAL OR CONSEQUENTIAL DAMAGES ARISING OUT OF THE USE OR INABILITY TO USE THE<br />
LIBRARY (INCLUDING BUT NOT LIMITED TO LOSS OF DATA OR DATA BEING RENDERED INACCURATE<br />
OR LOSSES SUSTAINED BY YOU OR THIRD PARTIES OR A FAILURE OF THE LIBRARY TO OPERATE WITH<br />
ANY OTHER SOFTWARE), EVEN IF SUCH HOLDER OR OTHER PARTY HAS BEEN ADVISED OF THE<br />
POSSIBILITY OF SUCH DAMAGES.<br />
END OF TERMS AND CONDITIONS<br />
How to Apply These Terms to Your New Libraries<br />
If you develop a new library, and you want it to be of the greatest possible use to the public, we recommend making<br />
it free software that everyone can redistribute and change. You can do so by permitting redistribution under these<br />
terms (or, alternatively, under the terms of the ordinary General Public License).<br />
To apply these terms, attach the following notices to the library. It is safest to attach them to the start of each source<br />
file to most effectively convey the exclusion of warranty; and each file should have at least the “copyright” line and a<br />
pointer to where the full notice is found.
Copyright (C) <br />
This library is free software; you can redistribute it and/or modify it under the terms of the GNU Lesser General<br />
Public License as published by the Free Software Foundation; either version 2.1 of the License, or (at your<br />
option) any later version.<br />
This library is distributed in the hope that it will be useful, but WITHOUT ANY WARRANTY; without even the<br />
implied warranty of MERCHANTABILITY or FITNESS FOR A PARTICULAR PURPOSE. See the GNU Lesser<br />
General Public License for more details.<br />
You should have received a copy of the GNU Lesser General Public License along with this library; if not, write<br />
to the Free Software Foundation, Inc., 59<br />
Temple Place, Suite 330, Boston, MA 02111-1307 USA<br />
Also add information on how to contact you by electronic and paper mail.<br />
You should also get your employer (if you work as a programmer) or your school, if any, to sign a “copyright<br />
disclaimer” for the library, if necessary. Here is a sample; alter the names:<br />
Yoyodyne, Inc., hereby disclaims all copyright interest in the library `Frob’ (a library for tweaking knobs) written by<br />
James Random Hacker.<br />
signature of Ty Coon, 1 April 1990<br />
Ty Coon, President of Vice<br />
That’s all there is to it!<br />
OpenSSL License<br />
Copyright (c) 1998-2007 The OpenSSL Project. All rights reserved.<br />
Redistribution and use in source and binary forms, with or without modification, are permitted provided that the<br />
following conditions are met:<br />
1. Redistributions of source code must retain the above copyright notice, this list of conditions and the<br />
following disclaimer.<br />
2. Redistributions in binary form must reproduce the above copyright notice, this list of conditions and the<br />
following disclaimer in the documentation and/or other materials provided with the distribution.<br />
3. All advertising materials mentioning features or use of this software must display the following<br />
acknowledgment:<br />
"This product includes software developed by the OpenSSL Project for use in the OpenSSL Toolkit. (http://<br />
www.openssl.org/)"<br />
4. The names "OpenSSL Toolkit" and "OpenSSL Project" must not be used to endorse or promote products<br />
derived from this software without prior written permission. For written permission, please contact opensslcore@openssl.org.<br />
5. Products derived from this software may not be called "OpenSSL" nor may "OpenSSL" appear in their<br />
names without prior written permission of the OpenSSL Project.<br />
6. Redistributions of any form whatsoever must retain the following acknowledgment: "This product<br />
includes software developed by the OpenSSL Project for use in the OpenSSL Toolkit (http://www.openssl.<br />
org/)"<br />
THIS SOFTWARE IS PROVIDED BY THE OpenSSL PROJECT ``AS IS'' AND ANY EXPRESSED OR IMPLIED<br />
WARRANTIES, INCLUDING, BUT NOT LIMITED TO, THE IMPLIED WARRANTIES OF MERCHANTABILITY AND<br />
FITNESS FOR A PARTICULAR PURPOSE ARE DISCLAIMED. IN NO EVENT SHALL THE OpenSSL PROJECT OR<br />
ITS CONTRIBUTORS BE LIABLE FOR ANY DIRECT, INDIRECT, INCIDENTAL, SPECIAL, EXEMPLARY, OR<br />
CONSEQUENTIAL DAMAGES (INCLUDING, BUT NOT LIMITED TO, PROCUREMENT OF SUBSTITUTE GOODS<br />
OR SERVICES; LOSS OF USE, DATA, OR PROFITS; OR BUSINESS INTERRUPTION) HOWEVER CAUSED AND<br />
ON ANY THEORY OF LIABILITY, WHETHER IN CONTRACT, STRICT LIABILITY, OR TORT (INCLUDING<br />
NEGLIGENCE OR OTHERWISE) ARISING IN ANY WAY OUT OF THE USE OF THIS SOFTWARE, EVEN IF<br />
ADVISED OF THE POSSIBILITY OF SUCH DAMAGE.
Contact SAMSUNG WORLD WIDE<br />
If you have any questions or comments relating to <strong>Samsung</strong> products, please contact the SAMSUNG customer<br />
care centre.<br />
Region Country Customer Care Centre Web Site<br />
North America<br />
Latin America<br />
Europe<br />
CIS<br />
Asia Pacific<br />
Middle East &<br />
Africa<br />
CANADA 1-800-SAMSUNG(726-7864) www.samsung.com/ca<br />
MEXICO 01-800-SAMSUNG(726-7864) www.samsung.com/mx<br />
U.S.A 1-800-SAMSUNG(726-7864) www.samsung.com/us<br />
ARGENTINE 0800-333-3733 www.samsung.com/ar<br />
BRAZIL 0800-124-421, 4004-0000 www.samsung.com/br<br />
CHILE 800-SAMSUNG(726-7864) www.samsung.com/cl<br />
NICARAGUA 00-1800-5077267 www.samsung.com/latin<br />
HONDURAS 800-7919267 www.samsung.com/latin<br />
COSTA RICA 0-800-507-7267 www.samsung.com/latin<br />
ECUADOR 1-800-10-7267 www.samsung.com/latin<br />
EL SALVADOR 800-6225 www.samsung.com/latin<br />
GUATEMALA 1-800-299-0013 www.samsung.com/latin<br />
JAMAICA 1-800-234-7267 www.samsung.com/latin<br />
PANAMA 800-7267 www.samsung.com/latin<br />
PUERTO RICO 1-800-682-3180 www.samsung.com/latin<br />
REP. DOMINICA 1-800-751-2676 www.samsung.com/latin<br />
TRINIDAD & TOBAGO 1-800-SAMSUNG(726-7864) www.samsung.com/latin<br />
VENEZUELA 0-800-100-5303 www.samsung.com/latin<br />
COLO<strong>MB</strong>IA 01-8000112112 www.samsung.com.co<br />
BELGIUM 02 201 2418<br />
www.samsung.com/be (Dutch)<br />
www.samsung.com/be_fr (French)<br />
CZECH REPUBLIC 800-SAMSUNG(800-726786) www.samsung.com/cz<br />
DENMARK 8-SAMSUNG(7267864) www.samsung.com/dk<br />
FINLAND 30-6227 515 www.samsung.com/fi<br />
FRANCE 01 4863 0000 www.samsung.com/fr<br />
GERMANY 01805 - SAMSUNG(726-7864 € 0,14/Min) www.samsung.de<br />
HUNGARY 06-80-SAMSUNG(726-7864) www.samsung.com/hu<br />
ITALIA 800-SAMSUNG(726-7864) www.samsung.com/it<br />
LUXE<strong>MB</strong>URG 02 261 03 710 www.samsung.com/lu<br />
NETHERLANDS 0900-SAMSUNG (0900-7267864) (€ 0,10/Min) www.samsung.com/nl<br />
NORWAY 3-SAMSUNG(7267864) www.samsung.com/no<br />
POLAND 0 801 1SAMSUNG(172678), 022-607-93-33 www.samsung.com/pl<br />
PORTUGAL 80820-SAMSUNG(726-7864) www.samsung.com/pt<br />
SLOVAKIA 0800-SAMSUNG(726-7864) www.samsung.com/sk<br />
SPAIN 902-1-SAMSUNG (902 172 678) www.samsung.com/es<br />
SWEDEN 075-SAMSUNG(726 78 64) www.samsung.com/se<br />
U.K 0845 SAMSUNG (7267864) www.samsung.com/uk<br />
EIRE 0818 717 100 www.samsung.com/ie<br />
AUSTRIA 0810-SAMSUNG(7267864, € 0.07/min) www.samsung.com/at<br />
SWITZERLAND 0848-SAMSUNG(7267864, CHF 0.08/min) www.samsung.com/ch<br />
RUSSIA 8-800-555-55-55 www.samsung.ru<br />
KAZAKHSTAN 8-10-800-500-55-500 www.samsung.com/kz_ru<br />
UZBEKISTAN 8-10-800-500-55-500 www.samsung.com/kz_ru<br />
KYRGYZSTAN 00-800-500-55-500<br />
TADJIKISTAN 8-10-800-500-55-500<br />
UKRAINE 8-800-502-0000 www.samsung.ua<br />
LITHUANIA 8-800-77777 www.samsung.com/lt<br />
LATVIA 8000-7267 www.samsung.com/lv<br />
ESTONIA 800-7267 www.samsung.com/ee<br />
AUSTRALIA 1300 362 603 www.samsung.com/au<br />
NEW ZEALAND 0800 SAMSUNG (0800 726 786) www.samsung.com/nz<br />
CHINA 800-810-5858, 400-810-5858, 010-6475 1880 www.samsung.com/cn<br />
HONG KONG 3698-4698 www.samsung.com/hk<br />
INDIA 3030 8282, 1800 110011, 1-800-3000-8282 www.samsung.com/in<br />
INDONESIA 0800-112-8888 www.samsung.com/id<br />
JAPAN 0120-327-527 www.samsung.com/jp<br />
MALAYSIA 1800-88-9999 www.samsung.com/my<br />
PHILIPPINES<br />
1-800-10-SAMSUNG(726-7864)<br />
1-800-3-SAMSUNG(726-7864), 02-5805777<br />
www.samsung.com/ph<br />
SINGAPORE 1800-SAMSUNG(726-7864) www.samsung.com/sg<br />
THAILAND 1800-29-3232, 02-689-3232 www.samsung.com/th<br />
TAIWAN 0800-329-999 www.samsung.com/tw<br />
VIETNAM 1 800 588 889 www.samsung.com/vn<br />
TURKEY 444 77 11 www.samsung.com/tr<br />
SOUTH AFRICA 0860-SAMSUNG(726-7864 ) www.samsung.com/za<br />
U.A.E 800-SAMSUNG (726-7864), 8000-4726 www.samsung.com/ae
Correct disposal of batteries in this product<br />
(Applicable in the European Union and other European countries with separate battery return systems.)<br />
This marking on the battery, manual or packaging indicates that the batteries in this product should not be disposed<br />
of with other household waste at the end of their working life. Where marked, the chemical symbols Hg, Cd or Pb<br />
indicate that the battery contains mercury, cadmium or lead above the reference levels in EC Directive 2006/66. If<br />
batteries are not properly disposed of, these substances can cause harm to human health or the environment.<br />
To protect natural resources and to promote material reuse, please separate batteries from other types of waste and<br />
recycle them through your local, free battery return system.<br />
Correct Disposal of This Product (Waste Electrical & Electronic Equipment)<br />
(Applicable in the European Union and other European countries with separate collection systems)<br />
This marking on the product, accessories or literature indicates that the product and its electronic accessories (e.g.<br />
charger, headset, USB cable) should not be disposed of with other household waste at the end of their working life.<br />
To prevent possible harm to the environment or human health from uncontrolled waste disposal, please separate<br />
these items from other types of waste and recycle them responsibly to promote the sustainable reuse of material<br />
resources.<br />
Household users should contact either the retailer where they purchased this product, or their local government office,<br />
for details of where and how they can take these items for environmentally safe recycling.<br />
Business users should contact their supplier and check the terms and conditions of the purchase contract.<br />
This product and its electronic accessories should not be mixed with other commercial wastes for disposal.<br />
Code No. AH68-02196B (0.0)


