

H.Koenig > ROBOT PETRIN MULTIFONCTIONS KM65(Italiano) - manuale d'Istruzioni
H.Koenig > ROBOT PETRIN MULTIFONCTIONS KM65(Italiano) - manuale d'Istruzioni
H.Koenig > ROBOT PETRIN MULTIFONCTIONS KM65(Italiano) - manuale d'Istruzioni

You also want an ePaper? Increase the reach of your titles
YUMPU automatically turns print PDFs into web optimized ePapers that Google loves.
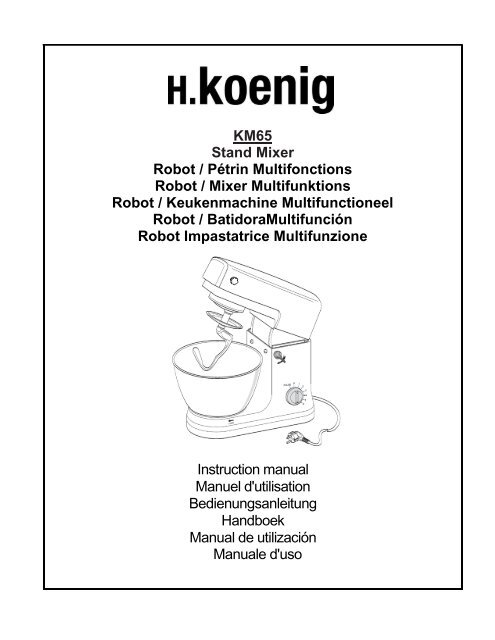
<strong>KM65</strong><br />
Stand Mixer<br />
Robot / Pétrin Multifonctions<br />
Robot / Mixer Multifunktions<br />
Robot / Keukenmachine Multifunctioneel<br />
Robot / BatidoraMultifunción<br />
Robot Impastatrice Multifunzione<br />
Instruction manual<br />
Manuel d'utilisation<br />
Bedienungsanleitung<br />
Handboek<br />
Manual de utilización<br />
Manuale d'uso
Stand Mixer with Meat Grind<br />
Keep this manual for future reference<br />
and pass it on with the equipment to any future users.<br />
Technical Data<br />
Rated voltage: 220-240V~, 50/60Hz<br />
Power consumption: 600W<br />
Protection class: II<br />
Short operation time: 10 Min.<br />
This device has been tested according to all relevant current CE guidelines, such as electromagnetic compatibility<br />
and low voltage directives, and has been constructed in accordance with the latest safety regulations.<br />
Subject to technical changes without prior notice!<br />
General Safety Instructions<br />
Read the operating instructions carefully before putting the appliance into operation and keep the instructions<br />
including the warranty, the receipt and, if possible, the box with the internal packing. If you give this device to other<br />
people, please also pass on the operating instructions.<br />
The appliance is designed exclusively for private use and for the envisaged purpose. This appliance is not fit<br />
for commercial use. Do not use it outdoors (except if it is designed to be used outdoors). Keep it away from<br />
sources of heat, direct sunlight, humidity (never dip it into any liquid) and sharp edges. Do not use the<br />
appliance with wet hands. If the appliance is humid or wet, unplug it immediately.<br />
When cleaning or putting it away, switch off the appliance and always pull out the plug from the socket (pull on<br />
the plug, not the cable) if the appliance is not being used and remove the attached accessories.<br />
Do not operate the machine without supervision. If you should leave the workplace, always switch the machine<br />
off or remove the plug from the socket (pull the plug itself, not the lead).<br />
Check the appliance and the cable for damage on a regular basis. Do not use the appliance if it is damaged.<br />
Do not try to repair the appliance on your own. Always contact an authorized technician. To avoid the exposure<br />
to danger, always have a faulty cable be replaced only by the manufacturer, by our customer service or by a<br />
qualified person and with a cable of the same type.<br />
Use only original spare parts.<br />
Pay careful attention to the following “Special Safety Instructions”.<br />
Children and Frail Individuals<br />
In order to ensure your children‘s safety, please keep all packaging (plastic bags, boxes, polystyrene etc.) out<br />
of their reach.<br />
Caution! Do not allow small children to play with the foil as there is a danger of suffocation!<br />
In order to protect children or frail individuals from the hazards of electrical equipment, please ensure that this<br />
device is only used under supervision. This device is not a toy. Do not allow small children to play with it.<br />
Special safety Instructions for this Machine<br />
Only operate this machine under supervision.<br />
Do not interfere with any safety switches.<br />
Do not insert anything into the rotating hooks while the machine is working.<br />
Place the machine on a smooth, fl at and stable working surface.
• Do not insert the mains plug of the machine into the power socket without having installed all the necessary<br />
accessories.<br />
• Only the pusher should be used for refilling the mincer.<br />
• Danger of overloading! Please use the device either as a mincer or mixer, but never both functions at the<br />
same time.<br />
Overview of the Components<br />
Main Components:<br />
1 Drive shaft 6 Power Cord<br />
2 Helix drive cover 7 Pulse operation and level regulator<br />
3 Mixing bowl 8a Kneading hook<br />
4 Top Cover with Screw 8b Whisk<br />
5 Lever for raising and lowering the arm 8c Stirrer
Accessories:<br />
9 Slide 15b Sausage attachment, small<br />
10 Spiral Housing 15c Adapter for 15<br />
11 Spiral 16 Filling Tray<br />
12 Blades 17 Presser Meat Mincer<br />
13 Sieve 19 Biscuit Attachment<br />
14 Lock 19 Biscuit Attachment<br />
15a Sausage attachment, large 20 Biscuit Attachment<br />
Using the Mixing Bowl<br />
1. Place the mixing dish into its holding device and turn the dish in the direction of LOCK until it locks into place.<br />
2. In order to lift the arm, press the lever (5) downwards in the direction of the arrow. The arm will now move<br />
upwards.<br />
3. Mount the required utensil by inserting the top into the drive shaft and locking the cotter pin in the shaft by<br />
turning to the right.<br />
4. Now fill in your ingredients.<br />
Do not overfill the machine - the maximum quantity of ingredients is 2 kg.<br />
5. Lower the arm using the lever (5).
6. Insert the mains plug into a properly installed 230 V/50 Hz safety power socket.<br />
7. Switch the machine using the level regulator to a speed between 1 and 6 (corresponding to the mixture).<br />
8. For pulse operation (kneading at short intervals), turn the switch to the “PULSE” position. The switch has to be<br />
held in this position according to the desired interval len<strong>gt</strong>h. When the switch is released it returns<br />
automatically to the “0” position.<br />
Adjusting the Levels and Using the Hook for not more than 2 kg of Mixture<br />
Levels Use<br />
Type of Mixture<br />
1-2 Kneading hook Heavy mixtures(e.g. bread or short pastry)<br />
3-4 Stirrer Medium-heavy mixtures(e.g. crepes or sponge mixture)<br />
5-6 Whisk Light mixtures (e.g. cream, egg white, blancmange)<br />
Pulse Whisk Interval (e.g. for mixing under sponge, egg white)<br />
NOTE:<br />
• Short operation time: With heavy mixtures, do not operate the machine for more<br />
than ten minutes, and then allow it to cool down for a further ten minutes.<br />
• Use the splash guard to protect against liquid mixtures.<br />
9. After kneading/stirring turn the switch (7) back to the “0” position as soon as the mixture has formed a ball.<br />
Then remove the mains plug.<br />
10. Press the lever (5) downwards and the arm will be raised.<br />
11. The mixture can now be released with the help of a spatula and removed from the mixing bowl.<br />
12. The mixing bowl can now be removed by turning to the left.<br />
13. Clean the parts as described under “Cleaning” .<br />
Suggested Recipes<br />
Sponge Mixture (Basic Recipe), Level 3-4<br />
Ingredients:<br />
250grams soft butter or margarine, 250grams sugar, 1 packet vanilla sugar or 1 bag Citro-Back, 1 pinch of salt, 4<br />
eggs, 500grams wheat fl our, 1 packet baking powder, approx. 1/8 litre milk.<br />
Preparation:<br />
Transfer the wheat fl our and the remaining ingredients to the mixing bowl, stir with the stirrer for 30 seconds on<br />
level 1, then for approximately 3 minutes on level 3. Grease a tin or cover with baking paper. Fill in the mixture and<br />
bake. Before the cake is removed from the oven, test to see if it is done. With a sharp wooden stick pierce the<br />
centre of the cake. If no mixture sticks to it, the cake is cooked. Turn the cake on to a cake grid and allow to cool.<br />
Traditional Oven<br />
Insertion height: 2<br />
Heating: electric oven, top and bottom heat 175-200° Celsius; gas oven: level 2-3<br />
Baking time: 50-60 minutes<br />
Depending on taste, this recipe can be changed, for example with 100g raisins or 100g nuts or 100g grated<br />
chocolate. In fact, the possibilities are endless.<br />
Linseed Bread Rolls, Level 1-2<br />
Ingredients:<br />
500-550g wheat fl our, 50g linseed, 3/8 litre water, 1 cube of yeast (40g), 100g low-fat curds, well drained, 1 tsp
salt. For coating: 2 tbsp of water<br />
Preparation:<br />
Soak the linseed in 1/8 litre of lukewarm water. Transfer the remaining lukewarm water (1/4 litre) into the mixing<br />
bowl, crumble in the yeast, add the curds and mix with the kneading hook on level 2. The yeast must be completely<br />
dissolved. Put the flour with the soaked linseed and the salt into the mixing bowl. Knead thoroughly on level 1, then<br />
switch to level 2 and continue kneading for 3-5 minutes. Cover the mixture and allow to rise in a warm place for<br />
45-60 minutes. Knead thoroughly once more, remove from the bowl and form sixteen rolls. Cover the baking tin<br />
with wet baking paper. Place the rolls on this and allow to rise for 15 minutes. Coat with lukewarm water and bake.<br />
Traditional Oven:<br />
Insertion height: 2<br />
Heating: electric oven: top and bottom heat 200-220°C (preheated for 5 minutes),gas oven level 2-3<br />
Baking time: 30-40 minutes<br />
Chocolate Cream, Level 5-6<br />
Ingredients:<br />
200ml sweet cream, 150g semi-bitter chocolate coating, 3 eggs, 50-60g sugar, 1 pinch of salt, 1 packet of vanilla<br />
sugar, 1 tablespoon cognac or rum, chocolate flakes.<br />
Preparation:<br />
Beat the cream in the mixing bowl with the whisk until stiff. Remove from the bowl and place somewhere to cool.<br />
Melt the chocolate coating in accordance with the instructions on the packet or in the microwave at 600W for 3<br />
minutes. In the meantime, beat the eggs, sugar, vanilla sugar, cognac or rum and salt in the mixing bowl with the<br />
whisk on level 3 to form a foam. Add the melted chocolate and stir in evenly on level 5-6. Leave a little of the cream<br />
for decoration. Add the remaining cream to the creamy mixture and stir in briefl y using the pulse function.<br />
Decorate the chocolate cream and serve well cooled.<br />
Meat mincer<br />
Initial Operation - General<br />
1. Remove the cover (2) from the helix drive and take out the screw (16).<br />
2. Place the spiral housing (10) with the filler neck facing upwards into the spiral drive and turn the screw (16)<br />
clockwise until it is closed.<br />
3. Place the filling tray on the filler neck in such a way that the receptacle of the tray is positioned under the arm.<br />
4. Push the spiral into the horizontal section of the spiral housing until the axle locks in place. Please see the<br />
sections on “Operating the Mincer” and “Sausage Attachment”.
Operation Meat Mincer (see illustration A)<br />
NOTE:<br />
• Cut the meat into pieces of about 2.5 cm. Please take care that the<br />
meat does not contain any bones or sinews.<br />
1. First place the blade on the end of the helix and then a screen of your choice. Please pay attention to the<br />
screen and the recesses on the helix housing. Screw the lock (14) on until it is “hand tight”.<br />
2. Put the pieces of meat on to the fi lling tray (17) and into the fi ller neck.<br />
3. Place a vessel under the exit.<br />
4. Please ensure that the function switch (7) is turned to “Off”.<br />
5. Connect the device to a 230 V, 50 Hz safety contact power socket.<br />
6. Turn the mincer on by the switch (7).<br />
7. If necessary push the meat with the presser (18). Please do not follow this up with your fingers.<br />
Operation Sausage Attachment (see illustration B/C)
1. Place the adapter (15c) on the axle of the spiral auger.<br />
2. Insert a sausage attachment (15a or b) into the lock. Attachment is a for thick sausages, attachment b for<br />
thin sausages.<br />
3. Turn the lock “hand tight” on to the spiral housing.<br />
4. Push the sausage skin (using either real or synthetic skin) over the sausage skin and knot the end.<br />
5. Fill the sausage paste on to the filling tray and into the filler neck.<br />
6. Repeat steps 4 to 7 as described in “Operation Meat Mincer”.<br />
7. The sausage mixture is pressed through the sausage attachment and filled into the sausage skin.<br />
8. When the first sausage has reached the desired len<strong>gt</strong>h, squeeze it together with your fingers at the end of<br />
the sausage top. Turn the sausage around its own axis once or twice.<br />
NOTE:<br />
• Cut Levels 1 to 4 are suitable for mincer operation.<br />
• Do not operate the device for more than 10 minutes and then allow it to cool down for a further 10<br />
minutes.<br />
• You can turn off the device after each single sausage len<strong>gt</strong>h until you are more experienced.<br />
• Carry out step 8 as described. Then turn on the meat mincer again.<br />
• If you decide to use real skin, let it soak in water for a while before use.<br />
• Take care that the sausage skin is filled „loosely“ as during boiling or frying the sausage expands<br />
and the skin might tear.<br />
Operation with Biscuit Attachment (see illustration D)<br />
1. Please follow points 1 to 4 as described under “Initial Operation”.<br />
2. Unscrew the biscuit attachment and select the desired biscuit cutter.<br />
3. Put the mixture on to the filling tray and the filler neck.<br />
4. Please ensure that the function switch (7) is turned to “Off”.<br />
5. Connect the device to a 230 V, 50 Hz safety contact power socket.<br />
6. Turn the mincer on by the screw (7).<br />
7. If necessary, push the mixture further down with the pusher (18). Do not touch with your fingers.<br />
8. Hold the elongated mixture at the exit and cut it off at the desired len<strong>gt</strong>h.
Cleaning<br />
• Before cleaning remove the mains lead from the socket.<br />
• Never immerse the housing with motor in water!<br />
• Do not use any sharp or abrasive detergents.<br />
Motor Housing<br />
• Only a damp rinsing cloth should be used to clean the outside of the housing.<br />
Mixing Bowl, Mixing Equipment and Components of the Mincer<br />
CAUTION:<br />
• The components are not suitable for cleaning in a dishwasher. If exposed to heat or caustic<br />
cleaners they might become misshapen or discolored.<br />
• Components that have come into contact with food can be cleaned in soapy water.<br />
WARNING:<br />
• The blade of the mincer is very sharp!<br />
• Danger of injury!<br />
• Allow the parts to dry thoroughly before reassembling the device.<br />
• Please apply a small quantity of vegetable oil likely to the screens after they have dried.<br />
ENVIRONMENT<br />
CAUTION:<br />
Do not dispose of this product as it has with other household products. There is a separation of this<br />
waste product into communities, you will need to inform your local authorities about the places where<br />
you can return this product. In fact, electrical and electronic products contain hazardous substances<br />
that have harmful effects on the environment or human health and should be recycled. The symbol here<br />
indicates that electrical and electronic equipment should be chosen carefully, a wheeled waste container is<br />
marked with a cross.<br />
Manufactured and imported: Adeva SAS 8 rue Marc Seguin 77290 Mitry-Mory FRANCE<br />
www.hkoenig.com - contact@hkoenig.com - Tel 01 64 67 00 01
FRANCAIS<br />
Données techniques<br />
Modèle : <strong>KM65</strong><br />
Tension nominale : 220-240V, 50/60Hz<br />
Puissance maximale : 1000W<br />
Classe de protection : II<br />
Afin de prolonger la durée de vie de l’appareil, nous vous conseillons des utilisations par tranches de : 10 min maxi<br />
Cet appareil a été testé selon toutes les directives CE actuelles applicables, comme les directives de compatibilité<br />
électromagnétiques et les directives basses tensions, et a été construit en conformité avec les dernières législations<br />
de sécurité en date.<br />
Sujet à changements techniques sans préavis !<br />
Instructions générales de sécurité<br />
Lisez ce manuel d'instructions avec attention avant d'utiliser l'appareil, et conservez ces instructions, y compris la<br />
garantie, le reçu et, si possible, la boîte avec l'emballage intérieur. Si vous donnez l'appareil à quelqu'un d'autre,<br />
transmettez aussi les instructions d'utilisation.<br />
• L'appareil est conçu exclusivement pour un usage privé et pour le but envisagé. Cet appareil ne convient pas à<br />
un usage commercial. Ne l'utilisez pas à l'extérieur (sauf s'il est conçu pour ça). Tenez-le loin des sources de<br />
chaleur, de l'éclairage direct du soleil, de l'humidité (ne le plongez jamais dans un liquide) et des angles aigus.<br />
N'utilisez pas l'appareil avec les mains mouillées. Si l'appareil est humide ou mouillé, débranchez-le<br />
immédiatement.<br />
• Quand vous le nettoyez ou le rangez durablement, éteignez l'appareil et débranchez-le (tirez sur la prise, pas<br />
sur le cordon) si l'appareil ne doit pas être utilisé et enlevez les accessoires qui lui sont rattachés.<br />
• Ne faites pas fonctionner l'appareil sans surveillance. Si vous devez quitter l'espace de travail, éteignez<br />
toujours la machine ou débranchez-le (tirez sur la prise, pas sur le cordon).<br />
• Vérifiez régulièrement que l'appareil et le câble ne sont pas endommagés. N'utilisez pas l'appareil s'il est<br />
endommagé.<br />
• N'essayez pas de réparer l'appareil vous-même. Contactez toujours un technicien habilité. Pour éviter de vous<br />
exposer à un éventuel danger, ne faites remplacer un câble endommagé que par le fabricant, par notre service<br />
après-vente ou par une personne qualifiée, et avec un câble du même type.<br />
• Si le cordon d'alimentation est endommagé, il doit être remplacé auprès d'un Service après-vente afin d'éviter<br />
tout danger.<br />
• N'utilisez que des pièces de rechange d'origine.<br />
• Faites particulièrement attention aux "Instructions spéciales de sécurité" qui suivent.<br />
Enfants et personnes vulnérables<br />
• Pour garantir la sécurité de vos enfants, conservez tous les emballages (sacs en plastique, boîtes, polystyrène,<br />
etc.) hors d'atteinte.<br />
Attention ! Ne laissez pas les jeunes enfants jouer avec le sac : il y a un risque de suffocation !<br />
• Cet appareil n’est pas prévu pour être utilisé par des personnes (y compris les enfants) dont les capacités<br />
physiques, sensorielles ou mentales sont réduites, ou des personnes dénuées d’expérience ou de<br />
connaissance, sauf si elles ont pu bénéficier, par l’intermédiaire d’une personne responsable de leur sécurité,<br />
d’une surveillance ou d’instructions préalables concernant l’utilisation de l’appareil.<br />
• Il convient de surveiller les enfants pour s’assurer qu’ils ne jouent pas avec l’appareil.<br />
• N'utilisez cette machine que sous surveillance.
• Ne manipulez aucun interrupteur de sécurité.<br />
• Ne rien insérer dans les crochets tournants quand la machine fonctionne.<br />
• Disposez la machine sur une surface de travail lisse, plane et stable.<br />
• Ne branchez pas la machine sur le secteur sans avoir installé tous les accessoires nécessaires.<br />
• Seul le poussoir doit servir à remplir le hachoir.<br />
• Risque de surcharge ! Utilisez l'appareil comme un hachoir ou un mixer, mais jamais les deux à la fois.<br />
Aperçu des composants<br />
Principaux composants :<br />
1 Arbre d'entraînement 6 Câble d'alimentation<br />
2 Protection 7 Régulateur de vitesse<br />
3 Bol de mélange 8a Crochet de malaxage<br />
4 Protection supérieure avec vis 8b Fouet<br />
5 Levier pour lever et abaisser le bras 8c Batteur
Accessoires:<br />
9 Accessoire pour biscuit 15b Tube pour saucisses (petit format)<br />
10 Support 15c Adaptateur pour 15a et 15b<br />
11 Hélice 16 Vis<br />
12 Lame 17 Plateau<br />
13 Accessoire pour hachoir 18 Poussoir<br />
14 Fixation de sécurité 19 Accessoire pour saucsisses<br />
15a Tube pour saucisses (grand format) 20 Accessoire pour biscuit
Utilisation du bol de mélange<br />
1. Disposez le bol de mélange sur son support et tournez-le dans la direction de verrouillage (marquée LOCK)<br />
jusqu'à ce qu'il se verrouille.<br />
2. Pour soulever le bras, appuyez sur le levier (5) vers le bas dans le sens de la flèche. Le bras s'élève.<br />
3. Montez l'ustensile requis en insérant le haut sur l'arbre d'entraînement et en verrouillant la goupille dans l'arbre<br />
en le tournant vers la droite.<br />
4. Versez vos ingrédients.<br />
La machine ne doit pas déborder – la quantité maximale d'ingrédients est de 2 kg.<br />
5. Abaissez le bras avec le levier (5).<br />
6. Branchez sur une prise sécurisée convenablement installée 230 V / 50 Hz.<br />
7. Activez la machine en utilisant le régulateur de niveau à une vitesse entre 1 et 6 (en fonction du mélange).<br />
8. Pour un fonctionnement par impulsions (malaxage sur de courts intervalles), tournez l'interrupteur en position<br />
“PULSE”. L'interrupteur doit être maintenu dans cette position en fonction de l'intervalle de temps désiré. Quand<br />
on le relâche, l'interrupteur retourne automatiquement en position “0”.<br />
Réglage des niveaux et utilisation du crochet pour moins de 2 kg de mélange<br />
Niveaux Utilisation<br />
Type de mélange<br />
1-2 Crochet de malaxage Mélanges lourds (ex. pain ou pâtisserie)<br />
3-4 Batteur Mélanges mi-lourds (ex. crêpes ou biscuits)<br />
5-6 Fouet Mélanges légers (ex. crème, blancs d'œufs, blanc-manger)<br />
Pulse Fouet Battage par intervalles (ex. pour mélanger de consistance<br />
inférieure à l'éponge, blanc d'œuf)<br />
NOTE :<br />
• Durée de fonctionnement brève : Avec des mélanges lourds, ne faites pas<br />
fonctionner la machine plus de dix minutes, puis laissez-la refroidir dix minutes.<br />
• Utilisez la protection anti-éclaboussures pour vous protéger des mélanges liquides.<br />
9. Après le malaxage/mélangeage, ramenez l'interrupteur (7) en position “0” dès que le mélange a formé une<br />
boule. Puis débranchez l'appareil.<br />
10. Abaissez le levier (5) : le bras se lève.<br />
11. Maintenant, vous pouvez déverser le mélange hors du bol de mélange à l'aide d'une spatule.<br />
12. Puis vous pouvez enlever le bol de mélange en le tournant vers la gauche.<br />
13. Nettoyez les pièces comme décrit au chapitre “Nettoyage”.
Hachoir<br />
Installation<br />
1. Retirez la protection (2) du <strong>KM65</strong> et retirez la vis sur le hachoir (4).<br />
2. Placer le support (10) sur le <strong>KM65</strong> puis remettez la vis pour plus de sécurité.<br />
3. Placer ensuite le plateau de remplissage (17) sur le haut du support (voir visuel ci-dessous).<br />
Assemblage du hachoir (voir illustration A)<br />
NOTE:<br />
• Coupez la viande en morceaux de 2,5 cm max et véréfiez que<br />
celle-ce ne contienne pas d'os ou de nerfs.<br />
1. Premièrement placez la lame (12) sur l'extrémité de l'hélice (11) puis choisissez l'accessoire pour hachoir que<br />
vous préférez (13). Vissez ensuite la fixation de sécurité (14).<br />
2. Mettez les morceaux de viande sur le plateau (17).<br />
3. Placez un récipient sous la sortie.<br />
4. Assurez vous que le régulateur de vitesse soit sur la position 0.<br />
5. Branchez l'appareil.<br />
6. Mettez en route le robot (7).<br />
7. Si nécessaire pousser la viande avec le poussoir (18). Ne jamais pousser la viande avec vos doi<strong>gt</strong>s.
Installation des accessoires pour saucsisses (voir illustrations B/C)<br />
1. Placez l'adaptateur (15c) sur l'hélice (11).<br />
2. Insérez l'accessoire pour saucisse (15a ou 15b) sur l'adaptateur. L'accessoire 15a pour les saucisses<br />
épaisses, le 15b pour les fines.<br />
3. Tournez le tout à la main sur le support (10) pour verrouiller.<br />
4. Placez de la peau à saucisse (réelle ou synthétique) sur l'extrémité du tube et nouez-la.<br />
5. Placez de la chaire à saucisse sur le plateau et inserez-là à l'aide du poussoir.<br />
6. Répétez les étapes 4 à 7 de la notice pour hacher.<br />
7. Le mélange à saucisse est pressé à travers l'accessoire à saucisse et remplie la peau.<br />
8. Lorsque la première saucisse a atteint la longueur désirée, pressez son extrémité et tournez-la une fois ou<br />
deux pour la refermer.<br />
NOTE:<br />
• Utilisez les vitesses 1 à 4 pour la réalisation de saucisses.<br />
• Ne pas faire fonctionner l'appareil plus de 10 minutes consécutives.<br />
• Vous pouvez éteindre l'appareil après chaque saucisse pour vous entrainer jusqu'à ce que vous<br />
soyez plus expérimenté.<br />
• Effectuez l'étape 8 comme décris ci-dessus puis rallumez le hachoir à viande.<br />
• Si vous décidez d'utiliser de la vraie peau pour vos saucisses laissez la tremper quelques instants<br />
avant de l'utiliser.<br />
• Vérifiez que la peau soit bien rempli pour que lors de la cuisson les saucisses ne se déchirent<br />
pas.
Installation des accessoires pour biscuits (voir illustrations D)<br />
D<br />
1. Assemblez les éléments comme sur l'illustration ci-dessus.<br />
2. Mettre votre préparation pour biscuit sur le plateau.<br />
3. Vérifiez que le régulateur de vitesse soit sur la position 0.<br />
4. Branchez l'appareil.<br />
5. Mettre l'appareil en marche.<br />
6. Si nécessaire pousser la préparation avec le poussoir (18). Ne jamais utiliser vos doi<strong>gt</strong>s.<br />
7. Maintenez la préparation à la sortie de l'appareil et coupez de smorceaux de la taille désirée.<br />
Nettoyage<br />
• Avant de nettoyer l'appareil, débranchez-le.<br />
• Ne plongez jamais l’appareil dans l'eau !<br />
• N'utilisez aucun outil pointu ni aucun détergent abrasif.<br />
Carter du moteur<br />
• On ne doit utiliser qu'un linge humide pour nettoyer l'extérieur du carter.<br />
Bol de mélange, équipement de mélange et composants du hachoir<br />
ATTENTION :<br />
• Les composants ne conviennent pas au nettoyage au lave-vaisselle. S'ils sont exposés à la<br />
chaleur ou à des produits nettoyants caustiques, ils risquent de se déformer ou de se<br />
décolorer.<br />
• Les composants qui sont entrés en contact avec la nourriture peuvent se laver dans l'eau savonneuse.<br />
DANGER :<br />
• La lame du hachoir est très acérée !<br />
• Risque de blessures !<br />
• Laissez les pièces bien sécher avant de remonter l'appareil.
• Appliquez une petite quantité d'huile végétale sur les tamis quand ils ont séché.<br />
Suggestions de recettes<br />
Biscuit (recette de base), niveau 3-4<br />
Ingrédients :<br />
250 g de beurre doux ou de margarine, 250 g de sucre, 1 paquet de sucre vanillé ou 1 sac de citro-back, 1 pincée de<br />
sel, 4 œufs, 500g de farine de blé, 1 paquet de levure chimique, env. 12,5 cl de lait<br />
Préparation :<br />
Versez la farine de blé et les autres ingrédients dans le bol de mélange, agitez avec le fouet pendant 30 secondes<br />
au niveau 1 puis, pendant environ 3 minutes, au niveau 3. Beurrez un moule ou couvrez-le avec du papier sulfurisé.<br />
Versez le mélange et cuisez-le. Avant d'enlever le gâteau du four, testez pour voir s'il est terminé : avec un bout de<br />
bois, percez le milieu du gâteau. Si le mélange ne colle pas, le gâteau est cuit. Placez le gâteau sur une grille à<br />
pâtisserie et laissez-le refroidir.<br />
Four traditionnel :<br />
Hauteur d'insertion : 2<br />
Cuisson : four électrique : chauffage haut et bas 175-200°C ; four à gaz : thermostat 2-3<br />
Durée de cuisson : 50-60 minutes<br />
Selon les goûts, vous pouvez modifier cette recette, par exemple en y ajoutant 100 g de raisins, 100 g de noix ou<br />
100 g de chocolat en poudre. En fait, les possibilités sont infinies.<br />
Petits pains aux graines de lin, niveau 1-2<br />
Ingrédients :<br />
500-550 g de farine de blé, 50 g de graines de lin, 37,5 cl d'eau, 1 cube de levure (40 g), 100 g de lait écrémé caillé<br />
bien égoutté, 1 cuillérée à café de sel. Pour le glaçage : 2 cuillérées à café d'eau<br />
Préparation :<br />
Trempez les graines de lin dans 12,5 cl d'eau tiède. Transférez le reste de l'eau tiède (0,25 l) dans le bol de mélange,<br />
saupoudrez-y la levure, ajoutez le lait caillé et mélangez avec le crochet de malaxage au niveau 2. La levure doit<br />
complètement se dissoudre. Versez la farine avec les graines de lin humides et le sel dans le bol de mélange.<br />
Malaxez longuement au niveau 1, puis passez au 2 et continuez à malaxer pendant 3-5 minutes. Couvrez le<br />
mélange et laissez-le lever dans un endroit chaud pendant 45-60 minutes. Malaxez à nouveau longuement, enlevez<br />
du bol et formez seize rouleaux. Couvrez le moule avec du papier sulfurisé humide. Placez les rouleaux dessus et<br />
laissez-les lever pendant 15 minutes. Couvrez-les d'eau tiède et passez à la cuisson.<br />
Four traditionnel :<br />
Hauteur d'insertion : 2<br />
Cuisson : four électrique : chauffage haut et bas 200-220°C (préchauffage 5 minutes), four à gaz : thermostat 2-3<br />
Durée de cuisson : 30-40 minutes<br />
Crème au chocolat, niveau 5-6<br />
Ingrédients :<br />
200 ml de crème douce, 150 g de glaçage au chocolat mi-amer, 3 œufs, 50-60 g de sucre, 1 pincée de sel, 1 paquet<br />
de sucre vanillé, 1 cuillérée à café de cognac ou de rhum, chocolat en flocons<br />
Préparation :<br />
Battez la crème dans le bol de mélange avec le fouet jusqu'à obtenir une consistance dure. Enlevez-la du bol et<br />
disposez-la dans un endroit où refroidir. Faites fondre le glaçage au chocolat en suivant les instructions sur le<br />
paquet ou dans un four à micro-ondes à 600 W pendant 3 minutes. Dans le même temps, battez les œufs, le sucre,
le sucre vanillé, le cognac ou le rhum, et le sel dans le bol de mélange avec le fouet au niveau 3 pour obtenir une<br />
mousse. Ajoutez le chocolat fondu et agitez de façon régulière au niveau 5-6. Gardez un peu de crème pour la<br />
décoration. Ajoutez le reste de la crème au mélange crémeux et agitez brièvement en utilisant la fonction Pulse.<br />
Décorez la crème au chocolat et servez-la fraîche.<br />
ENVIRONNEMENT<br />
Fabriqué pour et importé par : Adeva SAS 8 rue Marc Seguin 77290 Mitry-Mory FRANCE<br />
www.hkoenig.com - contact@hkoenig.com - Tél. 01 64 67 00 01
Deutsch<br />
Technische Daten<br />
Modell: <strong>KM65</strong><br />
Nennspannung: 220-240V 50/60Hz<br />
Maximal leistung: 1000W<br />
Schutzklasse: II<br />
Um die Lebensdauer des Geräts zu verlängern, ist es Verwendungen von maximal 10 Minuten<br />
empfohlen.<br />
Dieses Gerät wurde in Übereinstimmung mit allen geltenden EU-Richtlinien in Kraft, wurde<br />
getestet, wie von EMV und Niederspannungsrichtlinie gerichtet und wurde in Übereinstimmung<br />
mit den neuesten Sicherheits-Gesetzgebung bis heute gemacht.<br />
Änderungen ohne vorherige Ankündigung ändern.<br />
Allgemeine Sicherheitshinweise<br />
Lesen Sie die Gebrauchsanweisung sorgfältig, bevor Sie das Gerät, und halten, einschließlich<br />
der Garantieschein, Kassenbon und, wenn möglich, deren Verpackung. Wenn Sie das Gerät an<br />
eine andere Person geben, geben sie auch mit dieser Anleitung.<br />
<br />
<br />
<br />
<br />
<br />
<br />
<br />
<br />
Das Gerät ist ausschließlich für den privaten Gebrauch und zu den vorgesehenen<br />
Zwecken konzipiert. Dieses Gerät eignet sich nicht für den kommerziellen Einsatz. Nicht<br />
im Freien verwenden (es sei denn, das ist für konzipiert, dass). Fernhalten von<br />
Wärmequellen, direkter Sonneneinstrahlung, Feuchtigkeit (nicht in Flüssigkeiten tauchen)<br />
und spitzen Winkeln. Verwenden Sie nicht das Gerät mit nassen Händen. Wenn das<br />
Gerät feucht oder nass werden, trennen Sie es sofort.<br />
Bei der Reinigung oder Aufbewahrung über einen längeren Zeitraum, ausschalten und<br />
von (Stecker ziehen, nicht am Kabel) wenn das Gerät nicht zu benutzen ist und entfernen<br />
Sie alle Zubehörteile befesti<strong>gt</strong>.<br />
Verwenden Sie nicht das Gerät nicht unbeaufsichti<strong>gt</strong>. Wenn Sie Arbeitsbereich verlassen<br />
haben, immer das Gerät ausschalten und ziehen (ziehen Sie am Stecker und nicht am<br />
Kabel).<br />
Regelmäßig kontrollieren, ob das Gerät und das Kabel nicht beschädi<strong>gt</strong> sind. Nicht<br />
verwenden, wenn beschädi<strong>gt</strong> ist.<br />
Versuchen Sie nicht, das Gerät selbst zu reparieren. Kontaktieren Sie einen qualifizierten<br />
Techniker. Um die Exposition gegenüber möglichen Gefahren zu vermeiden, dann<br />
ersetzen Sie einfach das beschädi<strong>gt</strong>e Kabel Hersteller, unserem Kundendienst oder von<br />
einer qualifizierten Person, und ein Kabel des gleichen Typs.<br />
Wenn das Netzkabel beschädi<strong>gt</strong> ist, muss es von einem Post-Sale-Service ersetzt<br />
werden, um Gefährdungen zu vermeiden.<br />
Verwenden Sie nur Original-Ersatzteile.<br />
Achten Sie besonders auf "Spezielle Sicherheitshinweise."
Kinder und gefährdete Personen<br />
<br />
<br />
<br />
<br />
<br />
<br />
<br />
<br />
<br />
<br />
Um die Sicherheit ihrer Kinder zu gewährleisten, halten Sie das gesamte<br />
Verpackungsmaterial (Plastiktüten, Kartons, Styropor, usw.). Außer Reichweite.<br />
Achtung! Lassen Sie Kinder nicht mit dem Beutel spielen: es gibt Erstickungsgefahr!<br />
Dieses Gerät ist nicht für die Verwendung durch Personen (einschließlich Kinder) mit<br />
eingeschränkten physischen, sensorischen oder geistigen Fähigkeiten konzipiert. Oder<br />
Mangel an Erfahrung oder Wissen, sofern sie nicht über die Verwendung des Gerätes<br />
wurden durch eine verantwortliche Person für ihre Sicherheit angewiesen.<br />
Sollten Kinder zu überwachen, um sicherzustellen, dass sie nicht mit dem Gerät spielen.<br />
Kontrollieren Sie stets das Gerät während des Gebrauchs.<br />
Nicht mit einem Sicherheitsschalter manipulieren.<br />
Stecken Sie nichts in den Zapfen, während das Gerät in Betrieb ist.<br />
Stellen Sie das Gerät auf eine ebene Arbeitsfläche, flach und stabil.<br />
Stecken Sie das Gerät ohne Installation alle notwendigen Zubehörteile.<br />
Nur die Taste sollte verwendet werden, um die Blätter zu füllen.<br />
Gefahr der Überlastung! Verwenden Sie das Gerät zum Schneiden oder Vermischung,<br />
aber nie beides gleichzeitig.<br />
Beschreibung der Komponenten
Hauptkomponenten<br />
1 Antriebswelle 6 Schnur<br />
2 Schutz 7 Tempomat<br />
3 Rührschüssel 8a Haken Mischung<br />
4 Überlegener Schutz mit Schraube 8b Mischer<br />
5 Hebel zum Anheben und Absenken des<br />
Auslegers<br />
8c Mixer<br />
Zubehör :<br />
9 Zubehör für die Kekse 15b Tube für Würstchen (Kleines<br />
Format)<br />
10 Halter 15c Adapter 15a und 15b<br />
11 Propeller 16 Schrauben<br />
12 Blatt 17 Tablett<br />
13 Zubehör-Klingen 18 Taste<br />
14 Beheben von Sicherheitsrisiken 19 Zubehör für Würstchen<br />
15a Tube für Würstchen (Großformat) 20 Zubehör für die Kekse<br />
Verwenden Sie die Rührschüssel<br />
1. Legen Sie die Rührschüssel an der Basis und das Lenkrad (LOCK), bis sie einrastet.<br />
2. Heben des Armes, Drücken des Hebels (5) nach unten in Richtung des Pfeils. Der Arm<br />
angehoben wird.<br />
3. Einsetzen der notwendigen Utensilien, um an der Spitze in der Antriebswelle montieren<br />
und sichern Sie den Stecker auf der Achse nach rechts.<br />
4. Gießen Zutaten. Die Maschine darf nicht vergossen werden - die maximale Menge an<br />
Zutaten beträ<strong>gt</strong> 2 kg.<br />
5. Senken Sie den Hebelarm (5).
6. Stecker in eine 230 V / 50 Hz<br />
7. Überprüfen Sie die Maschine mit dem Niveau-Controller mit einer Rate von 1 bis 6 (je<br />
nach Version).<br />
8. Für Puls-Betrieb (schlä<strong>gt</strong> in kurzen Abständen), drehen Sie den Schalter auf "PULSE".<br />
Der Schalter muss in dieser Position für den gewünschten Zeitraum beibehalten werden.<br />
Beim Loslassen der Schalter automatisch wieder auf "0".<br />
9. Einstellen der Pegel und Verwendung von Haken Mischungen von weniger als 2 kg.<br />
Levels Verwenden Art der Mischung<br />
1-2 Haken Mischung Schwerer Mischungen (Brot oder Nudeln)<br />
3-4 Mixer Semi-schwere Mischungen (Pfannkuchen oder Kekse)<br />
5-6 Mischer Mischlicht (Sahne, Ei, Mandeln und Sahne)<br />
Pulse Mischer Schütteln Sie ein und aus (zu mischen Konsistenzen<br />
niedriger als die Eiweiß)<br />
HINWEIS:<br />
Der Betrieb von kurzer Dauer: Mischungen mit schweren, nicht länger als 10 Minuten<br />
benutzen, dann lassen Sie zehn Minuten lang kühlen.<br />
Verwenden Sie den Spritzschutz gegen flüssige Mischungen zu schützen.<br />
1. Nach dem Mischen stellen Sie den Schalter (7) auf "0", wenn die Mischung hat eine<br />
Kugel geformt. Als nächstes trennen Sie das Gerät.<br />
2. Heben Sie den Hebel (5): der Arm gehoben wird.<br />
3. Jetzt können Sie die Mischung aus der Schüssel gießen mit einem Spatel.<br />
4. Kann dann entfernen Sie den Mischbehälter, Drehen nach links.<br />
5. Teile reinigen, wie unter "Reinigung" beschrieben.<br />
ZUSCHNEIDER<br />
Aufstellung<br />
1. Entfernen Sie den Schreibschutz (2) des <strong>KM65</strong> und entfernen Sie die Schraube Cutter (4).<br />
2. Setzen Sie die Halterung (10) in der <strong>KM65</strong> und ersetzen Sie dann die Schraube für<br />
zusätzliche Sicherheit.<br />
3. Dann legen Sie die Füllung Schale (17) in der Spitzengruppe (siehe Bild unten).
Cutter-Baugruppe (siehe Abbildung A)<br />
HINWEIS:<br />
<br />
Schneiden Sie das Fleisch in kleine Stücke von 2,5 cm. Maximale und stellen Sie sicher,<br />
diese enthält keine Knochen oder Nerven.<br />
1. Legen Sie die Klinge (12) auf das Ende der Spirale (11) und wählen Sie die gewünschte<br />
Schneidwerkzeug (13). Anschließend schrauben Sie den Sicherheits-Union (14).<br />
2. Legen Sie das Fleisch in der Schale (17).<br />
3. Stellen Sie ein Gefäß unter den Auslauf.<br />
4. Vergewissern Sie sich, die Drosselklappe auf 0 gesetzt ist.<br />
5. Enchufe el dispositivo.<br />
6. Schalten Sie den Roboter (7)<br />
7. Bei Bedarf schieben Sie das Fleisch mit dem Druckknopf (18). Stecken Sie niemals das<br />
Fleisch mit den Fingern.
Montagezubehör für Wurst (siehe Abbildung B/C)<br />
ABB. B<br />
ABB. C<br />
1. Setzen Sie den Adapter (15c) auf die Schraube (11).<br />
2. Setzen Sie das Zubehör für die Wurst (15a oder 15b) auf den Adapter. Zubehör 15a für die<br />
grobe Wurst. Zubehör 15b für die feine Wurst.<br />
3. Drehen Sie alles mit der Hand auf das Gestell um es zu verriegeln (10).<br />
4. Legen Sie die Wursthaut (echt oder synthetisch) auf das Ende der Röhre und verknoten Sie<br />
es.<br />
5. Legen Sie die Wurst in das Fach und legen Sie dann die Taste.<br />
6. Wiederholen Sie die Schritte 4-7 der Anleitung zum Zerhacken.<br />
7. Die Wurstmasse wird durch das Zubehör in die Wursthaut gepresst und gefüllt.<br />
8. Wenn die erste Wurst die gewünschte Länge erreicht hat, drücken Sie das Ende zu und biegen<br />
Sie es ein-oder zweimal zum verschließen.<br />
HINWEIS:<br />
Für Würstchen verwenden der Gänge 1 bis 4.<br />
Verwenden Sie nicht das Gerät für mehr als 10 Minuten hintereinander.<br />
Sie können das Gerät zwischen jeder Wurst ausschalten um zu üben, bis Sie etwas<br />
erfahrener sind.<br />
Führen Sie Schritt 8 aus, wie oben beschrieben und stellen dann den Fleischwolf an.<br />
Wenn Sie sich entscheiden Echtpelz für Inlays erlauben, ein paar Minuten vor Gebrauch<br />
einweichen.<br />
Achten Sie darauf, die Haut ist gut gepolstert, so dass beim Kochen die Würste nicht<br />
brechen.
Montagezubehör für Kekse (siehe Bild D)<br />
ABB.D<br />
1. Montieren Sie Elemente wie oben gezei<strong>gt</strong>.<br />
2. Setzen Sie Ihre Kekse in Vorbereitung für das Fach ein.<br />
3. Vergewissern Sie sich, die Drosselklappe auf 0 gesetzt ist.<br />
4. Stecken Sie das Gerät.<br />
5. Schalten Sie das Gerät ein.<br />
6. Wenn nötig, drücken Sie die Taste Vorbereitung (18). Verwenden Sie niemals Ihre Finger.<br />
7. Pflegen die Herstellung am Ausgang der Vorrichtung und geschnittene Stücke der<br />
gewünschten Größe.<br />
Reinigung<br />
<br />
<br />
<br />
Bevor Sie das Gerät reinigen, ziehen Sie es.<br />
Tauchen Sie nicht das Gerät in Wasser.<br />
Verwenden Sie keine spitzen Werkzeuge oder Scheuermittel.<br />
Motorblock<br />
<br />
Sie sollten nur ein feuchtes Tuch zur Reinigung verwenden.<br />
Mischbehälter, Misch-Geräte und Komponenten des Cutters.<br />
WARNUNG:<br />
<br />
<br />
Nicht waschen Teile in der Spülmaschine. Wenn sie Hitze oder ätzenden Reiniger<br />
können verformen oder verfärben ausgesetzt.<br />
Die Komponenten, die mit Lebensmitteln in Berührung kommen können mit Wasser und<br />
Seife gewaschen werden.<br />
GEFAHR:<br />
<br />
<br />
Die Klinge ist sehr stark<br />
Verletzungsgefahr<br />
<br />
<br />
Lassen Sie die Teile vollständig trocknen, bevor der Montage des Geräts.<br />
Tragen Sie eine kleine Menge Pflanzenöl auf dem Bildschirm, wenn sie trocken.
Rezeptvorschläge<br />
Kekse (Rezept), Level 3-4<br />
Zutaten:<br />
250 g ungesalzene Butter oder Margarine, 250 g Zucker, 1 Päckchen Vanillezucker oder 1 Beutel<br />
Citro-back, eine Prise Salz, 4 Eier, 500 g Mehl, 1 Päckchen Backpulver, ca. . 12,5 ml Milch.<br />
Vorbereitung:<br />
Das Mehl und anderen Zutaten in eine Schüssel geben, mit dem Mixer für 30 Sekunden auf Stufe<br />
1 dann für ca. 3 Minuten, mit Level 3. Butter eine Form. Gießen Sie die Mischung und kochen.<br />
Vor dem Entfernen der Mischung aus dem Ofen, versuchen zu sehen, wenn es fertig ist, bohren<br />
Sie ein Stück Holz mit der Mitte des Kuchens. Wenn die Mischung nicht klebt, ist die<br />
Vorbereitung bereit. Lassen Sie den Kuchen abkühlen.<br />
Backofen:<br />
Höhe Insertion: 2<br />
Kochen: Elektro-Backofen: Ober-/Unterhitze 175-200 ° C, Gas-Ofen: Thermostat 2-3<br />
Backzeit: 50-60 Minuten<br />
Sie können dieses Rezept ganz nach Ihrem Geschmack zu modifizieren, zum Beispiel durch<br />
Zugabe von 100 g getrocknete oder 100 g Nüssen oder Kakao-Pulver, die Möglichkeiten sind<br />
endlos.<br />
Brötchen mit gemahlener Leinsamen, Level 1-2<br />
Zutaten:<br />
500-550 g Weizenmehl, 50 g Leinsamen, 37,5 ml Wasser, einen Würfel Hefe (40 g), 100 g<br />
Magermilch Quark, 1 Teelöffel Salz. Für die Glasur: 2 Esslöffel Wasser.<br />
Vorbereitung:<br />
Einweichen Leinsamen in 125 ml warmem Wasser. Übertragen Sie die verbleibenden warmen<br />
Wasser (0,25 l) in die Schüssel, streuen die Hefe, fügen Sie den Quark mischen und mit dem<br />
Haken-Mix auf der Ebene 2. Die Hefe sollte vollständig gelöst werden. Das Mehl mit Leinsamen<br />
feuchte und Salz in Schüssel geben. Kneten Sie für eine gute Zeit auf Stufe 1, dann auf Stufe 2<br />
gehen und weiterhin Kneten für 3-5 Minuten. Zugedeckt an einem warmen Ort für 45-60 Minuten.<br />
Kneten Sie erneut, entfernen Sie den Behälter und machen 16 Rollen. Decken Sie die Pfanne mit<br />
Backpapier nass. Legen Sie die Brötchen und lassen Sie sie 15 Minuten lang wachsen. Mit<br />
warmem Wasser bedecken und weiter kochen.<br />
Backofen:<br />
Einbautiefe: 2<br />
Kochen: Elektro-Backofen: Ober-und Unterhitze 200-220 ° C (vorheizen 5 Minuten), Gas-Ofen:<br />
Thermostat 2-3<br />
Backzeit: 30-40 Minuten<br />
Schokoladencreme, Stufe 5-6<br />
Zutaten:
200 ml Sahne, 150 g dunkle Schokolade, 3 Eier, 50-60 g Zucker, eine Prise Salz, 1 Päckchen<br />
Vanillezucker, 1 Esslöffel Weinbrand oder Rum, Schokolade Flocken.<br />
Vorbereitung:<br />
Die Sahne in einer Schüssel mit Mixer bis die Mischung stimmt. Aus der Pfanne nehmen und in<br />
einen kühlen Ort aufbewahren. Schmelzen Sie die Schokolade nach Packungsanweisung oder in<br />
der Mikrowelle bei 600 W für 3 Minuten. Unterdessen schlagen Eier, Zucker, Vanillezucker mit<br />
dem Weinbrand oder Rum und Salz in Schüssel Stufe 3 für Schaum. Fügen Sie die<br />
geschmolzene Schokolade rühren und regelmäßig in Level 5-6. Halten Sie ein wenig Creme für<br />
die Dekoration. Fügen Sie die restliche Sahne auf die Mischung und rühren Sie kurz mit Pulse-<br />
Funktion. Garnieren Sie mit Schokoladencreme und servieren frisch.<br />
UMWELT<br />
ACHTUNG:<br />
Werfen Sie nicht dieses Produkt, wie es mit anderen Haushaltsprodukten hat.<br />
Es gibt eine Mülltrennungs von diesem Produkt in Gemeinden, Sie müssen<br />
Ihre lokalen Behörden über die Orte, wo man dieses Produkt zurückgeben können zu<br />
informieren. In der Tat enthalten elektrische und elektronische Produkte gefährliche<br />
Stoffe, die schädliche Auswirkungen auf die Umwelt oder die menschliche Gesundheit<br />
haben und sollte recycelt werden. Das Symbol hier darauf hinweisen, dass elektrische<br />
oder elektronische Geräte sollten sorgfältig ausgewählt werden, ist ein fahrbarer<br />
Abfallbehälter mit einem Kreuz markiert.<br />
Hergestellt und importiert: Adeva SAS 8 rue Marc Seguin 77290 Mitry-Mory FRANCE<br />
www.hkoenig.com - contact@hkoenig.com - Tel. 01 64 67 00 01
NEDERLANDS<br />
Model : <strong>KM65</strong><br />
Nominale spanning : 220-240V, 50/60Hz<br />
Maximaal vermogen : 1000W<br />
Beschermingsklasse : II<br />
Om de levensduur van het apparaat te verlengen, raden wij aan het apparaat in stappen van 10 minuten max te<br />
gebruiken.<br />
Dit apparaat is volgens alle huidige richtlijnen van toepassing van de CE getest, zoals voorgeschreven door de<br />
compatibiliteit richtlijnen van elektromagnetische laagspanning, en werd in overeenstemming met de nieuwste<br />
zekerheidswetgeving gebouwt.<br />
Technische verandering worden zonder voorafgaande kennisgeving uitgevoerd!<br />
Algemene Veiligheidsinstructies<br />
Lees deze handleiding voordat u het apparaat voor het eerst gaat gebruiken en bewaar deze instructies,<br />
inklusiefe de garantie, de kassabon en indien mogelijk de doos. Als u het apparaat aan iemander anders geeft,<br />
zorg ervoor dat de gebruiksaanwijzing aanwezig is.<br />
• Het apparaat is uitsluitend voor prive.gebruik bedoeld. Dit apparaat is nit geschikt voor commercieel gebruik.<br />
Gebruik het niet buitens huis (tenzij het daarvoor is ontworpen). Houd het uit de buurt van hitte, direct<br />
zonlicht, vocht (nooit in water of andere vloeistof onderdompelen) en scherpe hoeken. Gebruik het apparaat<br />
niet met natte handen. Als het apparaat vochtig of nat is, trek de stekker onmiddelijk uit het stopcontact.<br />
• Wanneer je het apparaat schoon gaat maken of voor langere tijd op gaat slaan, schakel het uit en verwijder<br />
de stekker (niet aan het kabel trekken) als u het niet gaat gebruiken en verwijder de accessoires die eraan<br />
verbonden zijn.<br />
• Zet het apparaat niet aan als het niet onder toezicht wordt gehouden. Als je de werkruimte moet verlaten,<br />
schakel het apparaat uit en verwijder de stekker (trek aan de stekker, niet het kabel).<br />
• Controleer het apparaat en het kabel regelmatig voor schade. Gebruik het apparaat niet als deze of het kabel<br />
beschadigd is.<br />
• Probeer niet het apparaat zelf te repareren. Neem contact op met een gekwalificeerde technicus. Om gevaar<br />
te voorkomen, moet het kabel door de fabrikant, onze klanten service of door een bevoegd persoon met<br />
hetzelfde type van kabel worden vervangen.<br />
• Als het kabel beschadigd is, moet het door de klantenservice vervangen worden om gevaar te vermijden.<br />
• Gebruik alleen originele reserveonderdelen.<br />
• Let vooral op de « speciale veiligheidsinstructies » die hieronder worden beschreven.<br />
Kinderen en kwetsbare mensen<br />
• Om de veiligheid van uw kinderen te waarborgen, houd alle verpakkingen (plastic zakken, dozen,<br />
polystyreen, enz.) buiten bereik.<br />
AttentiE ! Laat kinderen niet met plastic zakken spelen:verstikkingsgevaar !<br />
• Dit apparaat is niet bestemd voor personen met verminderde lichamelijk of psychische capaciteiten of gebrek<br />
aan ervaring of kennis (met inbegrip van kinderen), behalve als van hun wordt gevraagd om het apparaat op<br />
het oog te houden of ze de instructies betreffend het apparaat hebben gekregen door een verantwoordelijke<br />
persoon. Kinderen moeten weten dat dit apparaat geen speeltuig is.<br />
• Kinderen moeten onder toezicht worden gehouden en u moet ervoor zorgen dat zij niet met het apparaat<br />
gaan spelen.<br />
• Gebruik dit apparaat alleen onder toezicht.<br />
• Raak de veiligheids schakelaar niet aan.
• Steek nooit iets in de beugels terwijl de machine aan is.<br />
• Plaats het apparaat op een glad, stabiel werkvlak.<br />
• Sluit het apparaat niet aan zonder alle benodigde accessoires te hebben geinstalleerd.<br />
• De drukknop wordt alleen gebruikt om het hakmes te vullen.<br />
• Risico van overbelasting! Gebruik het apparaat als hakmachine of blender maar nooit beide tegelijk.<br />
Overzicht van componenten<br />
Principaux composants :<br />
1 Andrijf As 6 Kabel<br />
2 Bescherming 7 Snelheids regelaar<br />
3 Mengkom 8a Hakmes<br />
4 Superieure bescherming met schroef 8b Gesel<br />
5 Lever om de arm te verhogen/verlagen 8c Batteur
Accessoires :<br />
9 Accessoire voor biscuit 15b Buis voor worsten (klein formaat)<br />
10 Ondersteuning 15c Adapter 15a en 15b<br />
11 Helix 16 Schroef<br />
12 Mes 17 Plateau<br />
13 Accessoire voor het hakmes 18 Drukknop<br />
14 Veiligheid bevestiging 19 Accessoire voor worsten<br />
15a Buis voor worsten (groot formaat) 20 Accessoire voor biscuit
Aanwending van de mengbeker<br />
1. Plaats de mengkom in de ondersteuning en draai deze na rechts totdat deze vergrendeld is (gemarkeert als<br />
LOCK).<br />
2. Om de arm op te tillen drukt u de hendel (5) in de richting van de pijl. De arm gaat opheffen.<br />
3. Monteer het vereiste toebehoor op de bovenkant van de aandrijfas en draai deze na rechts om te blokkeren.<br />
4. Plaats uw ingrediënten in de beker.<br />
Het apparaat mag niet tot boven aangevult worden - de maximale hoeveelheid van ingrediënten is 2 kg.<br />
5. Verlag de arm met de hendel (5).<br />
6. Sluit de stekker aan op een veilige, goed geïnstalleerde stekdoos van 230 V / 50 Hz.<br />
7. Het apparaat kan met behulp van de snelheidsregelaar een snelheiden tussen 1 en 6 bereiken (afhankelijk van<br />
het mengsel).<br />
8. Voor het mixen in korte intervallen zet u de schakelaar op « PULSE ». De schakelaar dient ervoor het<br />
gewenste tijdsinterval te volgen. Als u de schakelaar los laat, keert deze automatisch terug op « 0 ».<br />
Niveau regelaar voor het gebruik van de hakmachine, voor minder dan 2 kg in mengsel<br />
Niveau Aanwending<br />
Type van mengsel<br />
1-2 Hakmes Zware mengsels (bijvoorbeeld brood of gebak)<br />
3-4 Batteur Medium mengsels (bijv. Pannenkoeken of koekjes)<br />
5-6 Gesel Lichte mengsels (bijv. Room, eiwit, enz.)<br />
Pulse Gesel Mix in intervallen (bijv. Voor het mengen van eidotter en<br />
eiwit)<br />
NOTA :<br />
• Korte bedrijfstijd: Bedien het apparaat niet meer dan tien minuten als u zware<br />
mengsels gebruikt. Laat het apparaat tien minuten afkoelen.<br />
• Gebruik het spatscherm om u eigen tegen spatters van vloeibare mengsels te<br />
beschermen.<br />
9. Na het haken/mengen, schuif de schakelaar (7) op « 0 », zodra het mengsel een bal heeft gevormd. Verwijder<br />
dan het stekker uit het apparaat.<br />
10. Duw de hendel (5) : de arm wordt verhoogd.<br />
11. Nu kunt u het mengsel met behulp van een spatel uit de kom gieten.<br />
12. U kunt dan de mengkom verwijderen door naar links te draaien.<br />
13. Reinig alle onderdelen zoals beschreven in « Reiniging »
Hakmes<br />
Installatie<br />
1. Verwijder de bescherming (2) van de <strong>KM65</strong> en verwijder de schroef op het hakmes (4).<br />
2. Plaats de beugel (10) op de <strong>KM65</strong> en draai de schroef vast voor extra veiligheid.<br />
3. Plaats het plateau (17) op de bovenkant van de beugel (zie beeld).<br />
Het monteren van het hakmes (zie afbeelding A)<br />
NOTA:<br />
• Snij het vlees in stukken van 2,5 cm en vergewis u eigen dat het<br />
geen bot of zenuwen bevat.<br />
1. Plaats eerst het mes (12) op het einde van de helix (11) en kies de hakmes (13) voor uw vlees. Draai dan de<br />
veiligheid bevestiging (14).<br />
2. Leeg het vlees op het plateau (17).<br />
3. Plaats een bakje onder de uitloop.<br />
4. Zorg ervoor dat de snelheids regelaar op 0 staat.<br />
5. Sluit het apparaat aan.<br />
6. Zet de snelheids regelaar (7) aan.<br />
7. Indien nodig kunt u het vlees met de drukknop (18) aanduwen. Duw het vlees nooit me je fingers in het<br />
apparaat.
Installatie van worsten accessoires (zie afbeelding B/C)<br />
1. Plaats de adapter (15c) op de schroef (11).<br />
2. Plaats de accessoire voor worst (15a of 15b) op de adapter. Accessoire 15a voor dikke worsten. 15b voor<br />
gastronomische worsten.<br />
3. Draai met de hand om deze op de drager te vergrendelen.<br />
4. Plaats de worst darm (echt of synthetisch) op het uiteinde van de buis en bind deze vast.<br />
5. Plaats de worst op het plateau en zet deze met de drukknop goed vast.<br />
6. Herhaal de stappen 4-7 van de handleiding voor het hakken.<br />
7. Het worst mengsel wordt door het apparaat gedrukt en vult de worst darm.<br />
8. Als de eerste worst de gewenste len<strong>gt</strong>e heeft bereikt, drukt u op het einde van de worst en draait u deze<br />
twee keer rond om deze te af te sluiten.<br />
NOTA:<br />
• Gebruik de snelheiden 1 tot 4 voor de productie van worst.<br />
• Gebruik het apparaat niet continu voor meer dan 10 minuten.<br />
• U kunt het apparaat tussen elke worst die u draait stopzetten, totdat je ervaren genoeg bent het<br />
apparaat te laten lopen.<br />
• Stap 8 uitvoeren zoals hierboven staat beschreven en laat de vleesmolen draaien.<br />
• Als u besluit om de huid van de worst te gebruiken, laat het eerst een paar minuten weken.<br />
• Zorg ervoor dat de huid goed is gevuld zodat het tijdens het koken niet kan scheuren.
Installatie van de biscuit accessoires (zie afbeelding D)<br />
D<br />
1. Monteer het toebehor zoals hierboven aangegeven.<br />
2. Plaats uw voorbereiding op het plateau.<br />
3. Controleer dat de snelheid regelaar op 0 staat.<br />
4. Sluit het apparaat aan.<br />
5. Schakel het apparaat in.<br />
6. Indien nodig kunt u het mengsel met de drukknop (18) aanduwen. Gebruik nooit uw vingers.<br />
7. Haal de bereiding uit de machine en snijd alles in de gewenste grootte.<br />
Reiniging<br />
• Verwijder de stekker voordat u het apparaat schoonmaakt.<br />
• Dompel het apparaat nooit onder water!<br />
• Gebruik geen scherpe voorwerpen of aggressieve schoonmaakmiddelen.<br />
Aandrijving van de motor<br />
• Gebruik een vochtige doek om de buitenkant van de behuizing schoon te maken.<br />
Mengkom, materialen voor het mengen en componenten van de hakmachine<br />
ATTENTIE :<br />
• De componenten zijn niet geschikt voor de vaatwasmachine. Bij blootstelling aan hitte of<br />
bijtende reingingsmiddelen, kunnen ze kromtrekken of verkleuren.<br />
• Componenten die met voedsel in aanraking zijn gekomen, kunnen met in warm water gewassen worden.<br />
GEVAAR :<br />
• Het hakmes is zeer scherp!<br />
• Risico van verwondingen!<br />
• Breng een kleine hoeveelheid plantaardige olie op het scherm aan als ze gedroogd zijn.
Recept suggesties<br />
Biscuit (recept), niveau 3-4<br />
Ingrediënten :<br />
250g ongezouten boter of margarine, 250g suiker, 1 pakje vanillesuiker, een snufje zout, 4 eieren, 500g bloem, 1<br />
pakje bakpoeder, ca. 12,5 ml melk.<br />
Voorbereiding :<br />
Giet de bloem en de rest van de ingrediënten in de kom, en roer deze gedurende 30 seconden op niveau 1, dan<br />
voor ongeveer 2 minuten op niveau 3. Vet een vorm in of bedek het met bakpapier. Giet het mengsel in de vorm<br />
en bak het. Voordat u de biscuit uit de oven haalt, kunt u testen of het klaar is: boor het midden van de biscuit met<br />
een stuk hout. Als het mengsel niet blij<strong>gt</strong> plakken, is de biscuit klaar. Plaats de biscuit op een rooster en laat deze<br />
afkoelen.<br />
Oven:<br />
Hoo<strong>gt</strong>e: 2<br />
Bakken : elektrische oven : opwarmen op 175-200°C ; gas oven : thermostaat 2-3<br />
Baktijd : 50-60 minuten<br />
U kunt het recept volgens uw smaal wijzigen. U kunt bijvoorbeeld 100g rozijnen. 100G noten of chocolade poeder<br />
toevoegen. In feite zijn de mogelijkheden eindeloos.<br />
Broodjes met lijnzaad, niveau 1-2<br />
Ingrediënten :<br />
500-550g bloem, 50g lijnzaad, 37,5 ml water, 1 blokje gist (40g), 100g melk creme, 1 theelepel zout. Voor het<br />
glazur: 2 theelepes water.<br />
Voorbereiding :<br />
Week de zaden in 125 ml warm water. Giet de rest van het water (0,25 l) in de mengkom, samen met het gist en<br />
de creme en kneedhak het mengsel op niveau 2. De gist moet volledig worden opgelost.Giet de bloem en de<br />
vochtige lijnzaadjes met het zout in de mengkom. Kneedhak een tijdje en ga dan over op niveau 2 en blijf<br />
gedurende 3-5 minuten kneden. Bedek het mengsel het laate her op een warme plaats gedurende 45-60 minuten<br />
gaaren. Verwijder de schaal, kneed op len<strong>gt</strong>e en vorm zestien rollen. Dek de pan af met vochtig bakpapier. Leg<br />
de broodjes erop en laat ze gedurende 15 minuten rijzen. Bedek deze met war water en laat ze bakken.<br />
Oven :<br />
Hoo<strong>gt</strong>e : 2<br />
Bakken : elektrische oven : opwarmen op 200-220°C (voorverwarmen), gas oven : thermostaat 2-3<br />
Baktijd : 30-40 minuten<br />
Chocolade creme, niveau 5-6<br />
Ingrediënten :<br />
200ml zoete room, 150g pure chocolate glazuur, 3 eieren, 50-60g suiker, een snufje zout, 1 pakje vanillesuiker, 1<br />
theelepel cognac of run, chocolate schilfers.<br />
Voorbereiding :<br />
Klop room in een mengkom met een garde tot dat het mengsel consistent wordt. Haal het uit de kom en plaats<br />
deze op een koele plaats. Smelt de chocolade glazuur volgende de instructies op de verpakking of in een
magnetron gedurende 3 minuten. Klop ondertussen eieren, suiker, vanillesuiker, cognac of rum, en zout met een<br />
garde in de mengkom op niveau 3, tot het mengsel tot schuim wordt. Voed ge gesmolten chocolate bij en roer<br />
regelmatig op 5-6. Houde voor de decoratie een beetje room over. Voeg de resterende room creme bij het<br />
mengsel en roer kort met Pulse. Versier de chocolade creme met room en serveer het fris.<br />
MILIEU<br />
ATTENTIE:<br />
Dit apparaat mag niet met uw ander huishoudelijke toestellen worden verwijdert. Dit product moet op een<br />
geselecteerde stortplaats verwijdert worden. U kunt bij de gemeente een indiceerde plaats aanvragen.<br />
Elektrisch en elektronische producten kunnen gevaarlijke stoffen inhouden die schadelijk zijn voor<br />
mensen en het milieu en moet recycled worden. Het symbool aan de kant geeft aan dat het een<br />
elektrisch en elektronisch toestel is en zijn dus artikelen van een selectieve collectie. Het beeld geeft een afvalbak<br />
met een X teken aan.<br />
Geproduceerd en geïmporteerd door : Adeva SAS 8, Rue Marc Seguin 77290, Mitry-Mory FRANKRIJK<br />
www.hkoenig.com - contact@hkoenig.com – Telefoon: 01 64 67 00 01
Español<br />
Datos técnicos<br />
Modelo: <strong>KM65</strong><br />
Tensión nominal: 220-240V 50/60Hz<br />
Potencia máxima: 1000W<br />
Clase de protección: II<br />
Para prolongar la vida útil del dispositivo, se recomienda usos de 10 minutos como máximo.<br />
Este dispositivo ha sido probado de acuerdo con todas las directivas comunitarias vigentes<br />
aplicables, según las indicaciones de compatibilidad electromagnética y las directivas de baja<br />
tensión y fue hecho cumpliendo la legislación de seguridad más reciente a la fecha.<br />
Sujeto a cambios sin previo aviso.<br />
Instrucciones generales de seguridad<br />
Lea atentamente las instrucciones antes de usar el dispositivo, y consérvelas, incluyendo la<br />
garantía, el recibo y, si es posible, la caja de embalaje. Si usted da el dispositivo a otra persona,<br />
déselo también con estas instrucciones.<br />
<br />
<br />
<br />
<br />
<br />
<br />
<br />
<br />
La unidad está diseñada exclusivamente para uso privado y para los fines previstos. Este<br />
dispositivo no es adecuado para uso comercial. No lo use fuera (a no ser que se haya<br />
diseñado para eso). Manténgalo alejado de fuentes de calor, de la luz directa del sol, de<br />
la humedad (no lo sumerja en líquidos) y de ángulos agudos. No utilice el dispositivo con<br />
las manos mojadas. Si el dispositivo está húmedo o mojado, desenchúfelo<br />
inmediatamente.<br />
Al limpiarlo o almacenarlo por un largo periodo, apagarlo y desenchufarlo (jale del<br />
enchufe, no del cable) si el dispositivo no se va a usar y quite los accesorios<br />
incorporados.<br />
No utilice el dispositivo sin vigilancia. Si tiene que dejar el espacio de trabajo, siempre<br />
apague el dispositivo y desenchúfelo (jale del enchufe, no del cable).<br />
Compruebe regularmente que el dispositivo y el cable no estén dañados. No lo utilice si<br />
está dañado.<br />
No intente reparar la unidad usted mismo. Póngase en contacto con un técnico<br />
calificado. Para evitar exponerse a un posible peligro, sólo haga reemplazar un cable<br />
dañado por el fabricante, nuestro servicio al cliente o por una persona calificada, y por un<br />
cable del mismo tipo.<br />
Si el cable de alimentación está dañado, debe ser sustituido por un servicio post-venta<br />
con el fin de evitar todo peligro.<br />
Utilice sólo piezas de repuesto originales.<br />
Preste especial atención a "las instrucciones especiales de seguridad".<br />
Niños y personas vulnerables<br />
<br />
Para garantizar la seguridad de sus hijos, mantener el embalaje (bolsas de plástico,<br />
cajas, poliestireno, etc.) Fuera de su alcance.<br />
¡Atención! No deje que los niños jueguen con la bolsa: ¡hay riesgo de asfixia!
Este dispositivo no está diseñado para ser utilizado por personas (incluidos niños) con<br />
capacidades físicas, sensoriales o mentales reducidas, o con falta de experiencia o<br />
conocimiento, a menos que se les haya dado instrucciones relativas al uso del<br />
dispositivo por una persona responsable de su seguridad.<br />
Se debe supervisar a los niños para asegurarse de que no jueguen con el dispositivo.<br />
Siempre vigile el dispositivo mientras está en uso.<br />
No manipule ningún interruptor de seguridad.<br />
No introduzca nada en los soportes giratorios mientras el dispositivo esté en uso.<br />
Coloque el dispositivo sobre una superficie de trabajo lisa, plana y estable.<br />
No enchufe el dispositivo sin haber instalado todos los accesorios necesarios.<br />
Sólo el pulsador se debe usar para llenar el recipiente.<br />
¡Riesgo de sobrecarga! Use el dispositivo para cortar o mezclar, pero nunca para ambas<br />
funciones a la vez.<br />
Descripción de los componentes<br />
Componentes principales<br />
1 Eje de accionamiento 6 Cable de alimentación<br />
2 Protección 7 Regulador de velocidad<br />
3 Recipiente de mezcla 8a Gancho de mezcla
4 Protección superior con tornillo 8b Batidor<br />
5 Palanca para subir y bajar el brazo 8c Mezclador<br />
Accesorios:<br />
9 Accesorio para galletas 15b Tubo para salchichas (Pequeño<br />
formato)<br />
10 Soporte 15c 15a y 15b Adaptador<br />
11 Hélice 16 Tornillo<br />
12 Hoja 17 Bandeja<br />
13 Accesorio para las cuchillas 18 Pulsador<br />
14 Fijación de seguridad 19 Accesorio para salchichas<br />
15a Tubo para salchichas (De gran<br />
formato)<br />
20 Accesorio para galletas<br />
Uso del Recipiente de mezcla<br />
1. Coloque el recipiente de mezcla en la base y gírelo en la dirección de bloqueo (LOCK)<br />
hasta que encaje.<br />
2. Para levantar el brazo, presionar la palanca (5) hacia abajo en la dirección de la flecha.<br />
El brazo se eleva.<br />
3. Montar el utensilio necesario insertándolo en la parte superior en el eje de accionamiento<br />
y asegurando la clavija en el eje girando hacia la derecha.<br />
4. Verter los ingredientes. El contenido del dispositivo no se debe derramar – la cantidad<br />
máxima de ingredientes es de 2 kg.<br />
5. Baje el brazo con la palanca (5).<br />
6. Enchufe a una toma de 230 V / 50 Hz.
7. Active la máquina utilizando el controlador de nivel a una velocidad de entre 1 y 6<br />
(dependiendo de la mezcla).<br />
8. Para un funcionamiento por impulsos (batiendo a intervalos cortos), gire el interruptor a<br />
"PULSE". El interruptor debe ser mantenido en esa posición por el intervalo de tiempo<br />
deseado. Cuando se suelta, el interruptor vuelve automáticamente a "0".<br />
Ajuste de los niveles y uso del gancho para mezclas de menos de 2 kg<br />
Niveles Uso<br />
Tipo de mezcla<br />
1-2 Gancho de mezcla Mezclas pesadas (pan o pastas)<br />
3-4 Batidora Mezclas semi-pesadas (crepes o galletas)<br />
5-6 Mezclador Mezclas ligeras (cremas, clara de huevos, manjar blanco)<br />
Pulse Mezclador Batido por intervalos (para mezclar consistencias<br />
inferiores a la clara de huevo)<br />
NOTA:<br />
Funcionamiento de duración breve: con mezclas pesadas, no utilice durante más de<br />
diez minutos, luego deje enfriar el dispositivo durante diez minutos.<br />
Utilice la protección contra salpicaduras para proteger contra mezclas líquidas.<br />
9. Después de la mezcla, coloque el interruptor (7) en la posición"0" cuando la mezcla haya<br />
formado una bola. A continuación, desconecte el dispositivo.<br />
10. Levante la palanca (5): el brazo se levanta.<br />
11. Ahora usted puede verter la mezcla del tazón con una espátula.<br />
12. A continuación, puede quitar el recipiente de mezcla, girándolo a la izquierda.<br />
13. Limpie las piezas como se describe en "Limpieza".<br />
Cortador<br />
Instalación<br />
1. Quite la protección (2) del <strong>KM65</strong> y quite el tornillo del cortador (4).<br />
2. Coloque el soporte (10) en el <strong>KM65</strong> y luego vuelva a colocar el tornillo para mayor<br />
seguridad.<br />
3. A continuación, coloque la bandeja de llenado (17) en la parte superior del soporte (vea la<br />
siguiente imagen).
Ensamblaje del cortador (Ver ilustración A)<br />
NOTA:<br />
<br />
Corte la carne en pedazos pequeños de 2,5 cm. Como máximo y asegúrese de que esta<br />
no contenga huesos o nervios.<br />
1. Coloque la hoja (12) sobre el extremo de la hélice (11) y elija el accesorio para cortar que<br />
desee (13). A continuación, atornille la unión de seguridad (14).<br />
2. Ponga la carne en la bandeja (17).<br />
3. Coloque un recipiente debajo de la salida.<br />
4. Asegúrese de que el regulador de velocidad está en la posición 0.<br />
5. Enchufe el dispositivo.<br />
6. Encienda el robot (7).<br />
7. Si es necesario empuje la carne con el pulsador (18). Nunca introduzca la<br />
carne con los dedos.
Instalación de los accesorios para salchichas (ver dibujo B/C)<br />
Dibujo B<br />
Dibujo C<br />
1. Coloque el adaptador (15c) sobre la hélice. (11).<br />
2. Coloque el accesorio para salchichas (15a o 15b), el accesorio 15a para las salchichas<br />
aagruesas y el 15b para las salchichas finas.<br />
3. Gire todo con las manos sobre el soporte (10) para asegurarlo.<br />
4 Coloque la piel para la salchicha (real o sintética) en el extremo del tubo y átela.<br />
5. Coloque la salchicha en la bandeja y luego insértela con el pulsador.<br />
6. Repita las etapas 4 a 7 del manual para picar.<br />
7. La mezcla para la salchicha rellena la piel de la salchicha a través del accesorio para<br />
salchichas.<br />
8. Cuando la primera salchicha ha alcanzado la longitud deseada, presione el extremo y dele una<br />
o dos vueltas para cerrarla.<br />
NOTA:<br />
Para las salchichas use las velocidades 1 a 4.<br />
No use el dispositivo por más de 10 min consecutivos.<br />
Usted puede apagar el dispositivo cuando haya terminado de hacer cada salchicha en sus<br />
primeros intentos hasta que adquiera experiencia manejando el dispositivo.<br />
Siga la etapa 8 como se describe anteriormente y luego vuelva a encender el dispositivo.<br />
Si usted decide utilizar piel real para los embutidos déjela en remojo unos minutos antes de<br />
usarla.<br />
Asegúrese de que la piel está bien rellenada, para que al cocinar las salchichas no se rompa.
Instalación de accesorios para galletas (ver dibujo D)<br />
Dibujo D<br />
1. Montar los elementos como se muestra arriba.<br />
2. Ponga su preparación para galletas en la bandeja.<br />
3. Asegúrese de que el regulador de velocidad está en la posición 0.<br />
4. Enchufe el dispositivo.<br />
5. Encienda el dispositivo.<br />
6. Si es necesario presione la preparación con el pulsador (18). Nunca use los dedos.<br />
7. Mantener la preparación a la salida del dispositivo y corte pedazos del tamaño deseado.<br />
Limpieza<br />
<br />
<br />
<br />
Antes de limpiar el dispositivo, desenchúfelo.<br />
No sumerja el dispositivo en agua.<br />
No utilice herramientas afiladas ni limpiadores abrasivos.<br />
Base del motor<br />
<br />
Se debe utilizar sólo un paño húmedo para limpiarla.<br />
Recipiente para mezcla, equipo de mezcla y componentes del cortador<br />
ADVERTENCIA:<br />
<br />
<br />
No lavar los componentes en el lavavajillas. Cuando se exponen al calor o<br />
productos de limpieza cáusticos se pueden deformar o decolorar.<br />
Los componentes que entran en contacto con los alimentos se pueden lavar con agua y<br />
jabón.<br />
PELIGRO:<br />
<br />
<br />
La hoja del cortador es muy fuerte<br />
Hay riesgo de lesiones
Deje que las partes se sequen completamente antes de volver a montar la<br />
unidad.<br />
Aplicar una pequeña cantidad de aceite vegetal en el tamiz cuando se seque.<br />
Sugerencias de recetas<br />
Galletas (receta), nivel 3-4<br />
Ingredientes:<br />
250 g de mantequilla sin sal o margarina, 250 g de azúcar, 1 paquete de azúcar sabor a vainilla o<br />
1 bolsa de citro-back, una pizca de sal, 4 huevos, 500 g de harina, 1 sobre de levadura en polvo,<br />
aprox. 12,5 ml de leche.<br />
Preparación:<br />
Vierta la harina de trigo y otros ingredientes en el recipiente, revuelva con el mezclador durante<br />
30 segundos en el nivel 1 a continuación, durante unos 3 minutos con el nivel 3. Unte con<br />
mantequilla un molde. Vierta la mezcla y cocine. Antes de sacar la mezcla del horno, pruebe<br />
para ver si está lista: perfore con un trozo de madera el centro de la torta. Si la mezcla no se<br />
pega, la preparación está lista. Deje que el pastel se enfríe.<br />
Horno tradicional:<br />
Altura inserción: 2<br />
Cocción: horno eléctrico: parte superior e inferior de calentamiento 175-200 ° C; horno a gas:<br />
termostato 2-3<br />
Tiempo de horneado: 50-60 minutos<br />
Puede modificar esta receta de acuerdo a su gusto, por ejemplo, añadiendo 100 g de pasas ó<br />
100 g de frutos secos o chocolate en polvo, las posibilidades son infinitas.<br />
Rollos de pan con granos de lino, el nivel 1-2<br />
Ingredientes:<br />
500-550 g de harina de trigo, 50 g de semillas de lino, 37,5 ml de agua, 1 cubo de levadura (40<br />
g), 100 g de leche desnatada cuajada, 1 cucharadita de sal. Para el glaseado: 2 cucharaditas de<br />
agua.<br />
Preparación:<br />
Remoje las semillas de lino en 125 ml de agua tibia. Transferir el resto del agua tibia (0,25 l) al<br />
recipiente, espolvorear la levadura, añadir la leche cuajada y mezclar con el gancho de mezcla<br />
en el nivel 2. La levadura se debe disolver completamente. Vierta la harina con las semillas de<br />
lino húmedo y la sal en el recipiente de mezcla. Amase por buen tiempo en el nivel 1, luego pase<br />
al nivel 2 y siga amasando durante 3-5 minutos. Cubra la mezcla y déjela crecer en un lugar<br />
cálido durante 45-60 minutos. Amasar de nuevo, retire del recipiente y haga 16 rollos. Cubra la<br />
cacerola con papel encerado húmedo. Coloque los rollos y déjelos crecer durante 15 minutos.<br />
Añada agua tibia y continúe con la cocción.<br />
Horno tradicional:
Altura de inserción: 2<br />
Cocción: horno eléctrico: calentamiento superior e inferior 200-220 ° C (precalentamiento de 5<br />
minutos), horno a gas: termostato 2-3<br />
Tiempo de horneado: 30-40 minutos<br />
Crema de chocolate, nivel 5-6<br />
Ingredientes:<br />
200 ml de crema dulce, 150 g de chocolate amargo, 3 huevos, 50-60 g de azúcar, una pizca de<br />
sal, 1 paquete de azúcar sabor a vainilla, 1 cucharada de brandy o ron, copos de chocolate.<br />
Preparación:<br />
Batir la crema en el recipiente con el mezclador hasta obtener una mezcla consistente. Retírela<br />
del recipiente y colóquela en un lugar fresco. Derrita la crema de chocolate siguiendo las<br />
instrucciones del envase o en un horno microondas a 600 W durante 3 minutos. Mientras tanto,<br />
bata los huevos, el azúcar, el azúcar con sabor a vainilla, el coñac o ron y la sal en el recipiente<br />
de mezcla en el nivel 3 para obtener espuma. Añada el chocolate derretido y revuelva con<br />
regularidad en el nivel 5-6. Guarde un poco de crema para la decoración. Agregue la crema<br />
restante a la mezcla anterior y agite brevemente con la función Pulse. Decore con crema de<br />
chocolate y sirva fresco.<br />
MEDIO AMBIANTE<br />
ATENCIÓN:<br />
No se deshaga de este producto como lo hace con otros productos del hogar. Existe un<br />
sistema selectivo de colecta de este producto puesto en marcha por las comunidades,<br />
debe de informarse en su ayuntamiento acerca de los lugares en los que puede depositar este<br />
producto. De hecho, los productos eléctricos y electrónicos pueden contener substancias<br />
peligrosas que tienen efectos nefastos para el medio ambiente o para la salud humana y deben<br />
ser reciclados. El símbolo aquí presente indica que los equipos eléctricos o electrónicos deben<br />
de ser cuidadosamente seleccionados, representa un recipiente de basura con ruedas marcado<br />
con una X.<br />
Fabricado e importado por : Adeva SAS 8 rue Marc Seguin 77290 Mitry-Mory FRANCE<br />
www.hkoenig.com - contact@hkoenig.com - Tel. 01 64 67 00 01
<strong>Italiano</strong><br />
Dati tecnici<br />
Modello: <strong>KM65</strong><br />
Tensione nominale: 220-240V, 50/60Hz<br />
Consumo elettrico: 600W<br />
Potenza massimale: 1000W<br />
Classe di protezione : II<br />
Per prolungare la durata del robot, si consiglia utilizzarlo a intervalli di 10 minuti.<br />
Questo apparecchio è stato testato secondo tutte le attuali direttive comunitarie (CE) applicabili, come la<br />
compatibilità elettromagnetica e la direttiva sulla bassa tensione, ed è stato costruito nel rispetto delle normative di<br />
sicurezza più recenti.<br />
Soggetto a modifiche tecniche senza preavviso!<br />
Istruzioni generali sulla sicurezza<br />
Leggere attentamente questo <strong>manuale</strong> prima di utilizzare il dispositivo e conservare queste istruzioni, comprese la<br />
garanzia, la ricevuta e, se possibile, anche la scatola e l’imballaggio interno della confezione. Se si dovesse cedere<br />
il robot a terzi, consegnare anche questo <strong>manuale</strong>.<br />
• Il robot è progettato esclusivamente per uso privato e per lo scopo previsto e non è adatto per scopi<br />
commerciale. Non utilizzare all'aperto. Tenere lontano da: fonti di calore, luce diretta del sole, umidità (non<br />
immergere mai in nessun liquido) e spigoli. Non utilizzare l'apparecchio con le mani bagnate. Se il robot è<br />
umido o bagnato, staccare immediatamente la spina.<br />
• Durante la pulizia o quando si conserva il robot per un lungo periodo, spegnere e staccare la spina (staccare<br />
direttamente dalla spina e non dal cavo) e smontare gli accessori installati.<br />
• Non lasciare l'apparecchio incustodito quando è in funzione. Se si deve lasciare l'area di lavoro, spegnere<br />
sempre la macchina e staccare la spina (staccare direttamente dalla spina e non dal cavo).<br />
• Controllare regolarmente che sia il robot, sia il cavo, non siano danneggiati. Non utilizzare l'apparecchio quando<br />
è danneggiato.<br />
• Non tentare di riparare l'apparecchio personalmente. Sempre rivolgersi a un tecnico qualificato.<br />
• Per evitare di esporsi a possibili pericoli, far sostituire il cavo danneggiato con uno dello stesso tipo, solo dal<br />
produttore, dal nostro servizio clienti o da un tecnico qualificato.<br />
• Utilizzare solo ricambi originali.<br />
• Prestare particolare attenzione alle istruzioni di sicurezza sotto riportate.<br />
Bambini e persone vulnerabili<br />
• Per garantire la sicurezza ai bambini, conservare tutti gli imballaggi (sacchetti di plastica, scatole, polistirolo,<br />
ecc.) lontano dalla loro portata.<br />
Attenzione! Mai lasciare che i bambini giochino con l’imballaggio: si rischia il soffocamento!<br />
• Questo dispositivo non è destinato all'uso da parte di persone con capacità fisiche, mentali o sensoriali ridotte,<br />
o da persone con scarsa conoscenza (inclusi i bambini), salvo che una persona responsabile della loro<br />
sicurezza non abbia fornito loro le dovute indicazioni. Sorvegliare sempre i bambini in prossimità<br />
dell’apparecchio per accertarsi che non giochino. Si raccomanda di sorvegliare i bambini per assicurarsi che<br />
non giochino con l'apparecchio.<br />
• Utilizzare sempre la macchina sotto controllo.<br />
• Non interferire con gli interruttori di sicurezza.<br />
• Non inserire nulla nelle fruste in rotazione, mentre la macchina è in esecuzione.
• Collocare la macchina su una superficie di lavoro liscia, piana e stabile.<br />
• Non inserire la spina nella presa elettrica senza aver precedentemente installato tutti gli accessori necessari.<br />
• Servirsi sempre del pestello quando si utilizza il tritatutto.<br />
• Rischio di surriscaldamento! Utilizzare il robot come tritatutto o come mixer, ma mai contemporaneamente.<br />
Descrizione dei componenti<br />
Componenti principali:<br />
1 Supporto per accessori 6 Cavo di alimentazione<br />
2 Protezione 7 Manopola di controllo della velocità<br />
3 Recipiente 8a Frusta per impasto<br />
4 Protezione superiore con vite 8b Frusta multiuso<br />
5 Pulsante di elevazione del braccio 8c Sbattitore
Accessori :<br />
9 Accessorio per biscotti 15b Tubo per insaccati (piccolo formato)<br />
10 Supporto 15c 15a e 15b Adapter<br />
11 Elica 16 Vite<br />
12 Lama 17 Piatto<br />
13 Accessorio per tritatutto 18 Pestello<br />
14 Blocco di sicurezza 19 Accessorio per insaccati<br />
15a Tubo per insaccati (grande formato) 20 Accessorio per biscotti
Come utilizzare il recipiente<br />
1. Posizionare il contenitore nell’apposito settore e ruotarlo in direzione del blocco (segnato con il segno BLOCK)<br />
finché non si blocca.<br />
2. Per alzare il braccio, premere il pulsante (5). Il braccio si alza verso l’alto.<br />
3. Montare l'utensile necessario, inserire la parte superiore dell'albero motore e bloccare il perno nell'asse, in<br />
senso orario. Versare gli ingredienti.<br />
4. Ora inserire gli ingredienti. Non riempire troppo il contenitore; la quantità massima degli ingredienti è di 2 kg.<br />
5. Abbassare il braccio con il tasto (5).<br />
6. Collegare il dispositivo, verificando sempre che la tensione dell’apparecchio corrisponda a quella della vostra<br />
casa 230 V / 50 Hz.<br />
7. Attivare il robot utilizzando la manopola per il controllo della velocità da 1 a 6 (in funzione dell’impasto).<br />
8. Per la funzione a intermittenza (miscelazione a brevi intervalli di tempo), girare l'interruttore su "PULSE".<br />
L'interruttore deve essere mantenuto in tale posizione per l’intervallo di tempo desiderato. Quando viene<br />
rilasciato, l'interruttore ritorna automaticamente su "0".<br />
Le fruste sono regolate per impastare un quantitativo complessivo degli ingredienti di max 2kg<br />
Livelli Utilizzo Tipo di impasto<br />
1-3 Frusta per impasto Impasti pesanti (es.: pane, pasta per dolci)<br />
3-4 Sbattitore Impasti medio - pesanti (es.: crepes o biscotti)<br />
5-6 Frusta multiuso Impasti leggeri (es.: crema, albume d’uovo)<br />
Intermittenza Frusta multiuso<br />
Piccole miscele<br />
NOTE:<br />
• Tempo di funzionamento corto: con impasti pesanti, non utilizzare la<br />
macchina per più di dieci minuti consecutivi. Lasciar raffreddare per una<br />
decina di minuti prima di riutilizzare l’apparecchio.<br />
• Utilizzare il paraschizzi per proteggersi da miscele liquide.<br />
1. Dopo l'uso girare la manopola di controllo della velocità (7) posizionandola su "0" non appena l’imposto<br />
prende la forma di una palla. Poi togliere la spina.<br />
2. Premere il tasto (5) per alzare il braccio.<br />
3. L’impasto può essere rimosso dal recipiente con l’aiuto di una spatola.<br />
4. Quindi rimuovere il contenitore ruotandolo verso sinistra.<br />
5. Pulire i componenti come descritto sotto nella sezione "Pulizia e Manutenzione".
Tritatutto<br />
Installazione<br />
1. Togliere la protezione (2) dal robot <strong>KM65</strong> e togliere la vite sul tritatutto (4).<br />
2. Installare il supporto (10) sul robot <strong>KM65</strong> e poi girare la vite per una maggiore sicurezza.<br />
3. Quindi posizionare il vassoio di riempimento (17) sulla parte superiore del supporto (vedi figura sottostante).<br />
Assemblaggio del tritatutto (vedi figura A)<br />
Figura A<br />
NOTA:<br />
• Tagliare la carne in pezzi da max 2,5 cm e assicurarsi che non<br />
contengano ossa o nervi.<br />
1. Installare prima la lama (12) sull'estremità dell'elica (11) e poi scegliere l'accessorio tritatutto che si<br />
preferisce (13). Quindi avvitare l’attacco di sicurezza (14).<br />
2. Mettere la carne sul piatto (17).<br />
3. Collocare un recipiente sotto la bocca di uscita.<br />
4. Assicurarsi che la manopola per il controllo della velocità sia in posizione 0.<br />
5. Collegare l’apparecchio.<br />
6. Accendere il robot (7).<br />
7. Se necessario spingere la carne con il pestello (18). Non spingere la carne con le dita!
Installazione degli accessori per insaccati (vedi figura B/C)<br />
Figura B<br />
Figura C<br />
1. Posizionare l'adattatore (15c) sull'elica (11).<br />
2. Inserire l'accessorio per la salsiccia (15a o 15b) sull'adattatore. L'accessorio 15a serve per le salsicce<br />
spesse mentre il 15b per le salsicce sottili.<br />
3. Girare tutto il supporto (10) finché non si blocca.<br />
4. Posizionare la pelle per la salsiccia (reale o sintetica) sull'estremità del tubo e legarla.<br />
5. Mettete gli alimenti che si desidera insaccare nel supporto e pressarli con l’aiuto del pestello.<br />
6. Ripetere i passaggi 4-7 del <strong>manuale</strong> per tritare.<br />
7. L'impasto viene premuto con l'apposito accessorio in modo da riempire la pelle della salsiccia.<br />
8. Quando la prima salsiccia ha raggiunto la lunghezza desiderata, premere la sua estremità e girare una o<br />
due volte per chiuderla.<br />
NOTE:<br />
• Utilizzare le velocità da 1 a 4 per la produzione di insaccati.<br />
• Non utilizzare il dispositivo a più di 10 minuti consecutivi.<br />
• All'inizio, è anche possibile spegnere il dispositivo tra una salsiccia e l'altra finché non si<br />
raggiunge un determinato livello di esperienza.<br />
• Eseguire il passaggio 8 come descritto sopra e poi girare il tritacarne.<br />
• Se si decide di utilizzare pelle vera per insaccare le salsicce, lasciare in ammollo per pochi<br />
minuti prima dell'uso.<br />
• Assicurarsi che la pelle sia ben riempita in modo che durante la cottura le salsicce non si<br />
rompano.
Installazione degli accessori per biscotti (vedi figura D)<br />
Figura D C<br />
Pulizia<br />
1. Montare gli elementi come indicato nella figura qui sopra (figura D).<br />
2. Mettere l’impasto per biscotti sul piatto.<br />
3. Assicurarsi che la manopola per il controllo della velocità sia in posizione 0.<br />
4. Collegare l’apparecchio.<br />
5. Accendere il robot (7).<br />
6. Se necessario spingere l’impasto con il pestello (18). Non spingere l’impasto con le dita!<br />
7. Quando dalla bocca della macchina fuoriesce l’impasto, tagliarlo in pezzi della dimensione<br />
desiderata.<br />
Prima di pulire l'apparecchio, assicurarsi di staccare la spina.<br />
Non immergere in acqua!<br />
Non utilizzare prodotti abrasivi per la pulizia.<br />
Struttura del robot<br />
Pulire solo con un panno morbido e umido.<br />
Recipiente, accessori per impastare e componenti del tritatutto<br />
ATTENZIONE:<br />
• I componenti non sono adatti per la pulizia in lavastoviglie. Quando sono esposti al calore<br />
o a detergenti caustici, possono deformarsi o scolorire.<br />
• I componenti che entrano in contatto con gli alimenti possono essere lavati in acqua e sapone.<br />
PERICOLO:<br />
• La lama del tritatutto è estremamente tagliente!<br />
• Rischio di lesioni!<br />
• Assicurarsi che tutti i componenti siano completamente asciutti prima di rimontarli nell’apparecchio.<br />
• Applicare una piccola quantità di olio vegetale sui componenti setaccio quando sono secchi.<br />
Alcune ricette
Biscotti (ricetta di base), livello 3-4<br />
Ingredienti:<br />
250 g di burro o margarina, 250 g di zucchero, 1 bustina di zucchero vanigliato o 1 sacchetto di Citro-back, un<br />
pizzico di sale, 4 uova, 500g di farina, 1 bustina di lievito in polvere, ca. 12,5 ml di latte.<br />
Preparazione:<br />
Versate la farina e gli altri ingredienti nel recipiente, mescolare con una frusta per 30 secondi a livello 1 e poi, per<br />
circa 3 minuti, a velocità 3. Imburrare uno stampo o coprire con carta da forno. Versare l’impasto e far cuocere.<br />
Prima di rimuovere dal forno, fare un piccolo test per vedere se è cotto a sufficienza: con uno stecchino, forare il<br />
centro. Se l’impasto non si attacca allo stecchino significa che la cottura è terminata. Sfornare e lasciar raffreddare.<br />
Forno tradizionale:<br />
Altezza di inserimento: 2<br />
Cottura: forno elettrico: superiore e inferiore riscaldamento 175-200 ° C, forno a gas: termostato 2-3<br />
Tempo di cottura: 50-60 minuti<br />
Secondo i gusti, è possibile modificare questa ricetta, per esempio aggiungendo 100 g di uvetta, oppure 100 g di<br />
noci, cioccolato in polvere. In realtà, le possibilità sono infinite.<br />
Panini ai semi di lino, livello 1-2<br />
Ingredienti:<br />
500-550 g di farina, 50 g di semi di lino, 37,5 ml di acqua, 1 cubetto di lievito (40 g), 100 g di latte scremato 1<br />
cucchiaino di sale. Per la glassa: 2 cucchiaini di acqua<br />
Preparazione:<br />
Mettere a bagno i semi di lino in 125ml di acqua tiepida. Trasferire la restante acqua tiepida (0,25 l) nel recipiente,<br />
cospargere il lievito, aggiungere il latte e mescolare con il gancio impastatore a livello 2 di velocità. Il lievito deve<br />
essere sciolto completamente. Versare la farina umida con semi di lino e sale nel recipiente. Impastare a lungo a<br />
velocità 1 e poi passare a 2 e continuare a impastare per 3-5 minuti. Coprire l'impasto e lasciare lievitare in un luogo<br />
caldo per 45-60 minuti. Impastare di nuovo a lungo, togliere l’impasto dalla ciotola e formare sedici rotoli. Coprire la<br />
padella con carta da forno bagnata. Posizionare i rotoli sopra e lasciar lievitare per 15 minuti. Coprire con acqua<br />
calda e continuare la cottura.<br />
Forno tradizionale:<br />
Altezza di inserimento: 2<br />
Cottura: forno elettrico: superiore e inferiore riscaldamento 200-220 ° C (preriscaldare per 5 minuti), forno a gas:<br />
termostato 2-3<br />
Tempo di cottura: 30-40 minuti<br />
Crema al cioccolato, livello 5-6<br />
Ingredienti:<br />
200 ml di panna dolce, 150 g di glassa al cioccolato fondente, 3 uova, 50-60 g di zucchero, un pizzico di sale, 1<br />
bustina di zucchero vanigliato, 1 cucchiaino di brandy o rum, scaglie di cioccolato.<br />
Preparazione:<br />
Sbattere la crema nel recipiente di miscelazione con la frusta fino a quando l’impasto prende consistenza. Togliere<br />
l’impasto dalla ciotola e metterla in luogo fresco. Sciogliere la glassa al cioccolato seguendo le istruzioni riportate<br />
sulla confezione o in un forno a microonde a 600 W per 3 minuti. Nel frattempo, sbattere uova, zucchero, zucchero<br />
vanigliato, brandy o rum e il sale nel recipiente di miscelazione con la frusta a velocità 3 per ottenere una mousse.<br />
Aggiungere il cioccolato fuso e mescolare regolarmente a velocità 5-6. Conservare un po' di crema di cioccolato per<br />
la decorazione. Aggiungere la crema di cioccolato restante e mescolare brevemente utilizzando la funzione a<br />
intermittenza. Decorare con crema di cioccolato e servire fresco.
AMBIANTE<br />
ATTENZIONE:<br />
Non gettare quest’ apparecchio tra i rifiuti domestici. Per questo tipo di prodotti è fornito dai<br />
comuni un sistema di raccolta e ritiro in zona ed è quindi un dovere informarsi per conoscere il<br />
giusto smistamento del rifiuto. Infatti, i prodotti elettrici ed elettronici possono contenere sostanze<br />
pericolose che hanno effetti dannosi sull’ambiente o sulla nostra salute e quindi devono essere riciclati. Il<br />
simbolo al lato indica che le apparecchiature elettriche ed elettroniche fanno parte di una raccolta selettiva<br />
e differenziata (rappresentata da un bidone su due ruote sbarrato da una croce.<br />
Prodotto e importato da : Adeva SAS 8 rue Marc Seguin 77290 Mitry-Mory FRANCE<br />
www.hkoenig.com - contact@hkoenig.com - Tel. 01 64 67 00 01


