

Sony LMP-H130 - LMP-H130 Istruzioni per l'uso
Sony LMP-H130 - LMP-H130 Istruzioni per l'uso
Sony LMP-H130 - LMP-H130 Istruzioni per l'uso

Create successful ePaper yourself
Turn your PDF publications into a flip-book with our unique Google optimized e-Paper software.
Projector Lamp<br />
<br />
4-091-899-09 (1)<br />
<br />
<br />
<br />
<br />
<br />
<br />
<br />
© 2002 <strong>Sony</strong> Corporation Printed in Japan<br />
<br />
<br />
<br />
<br />
<br />
<br />
<br />
<br />
<br />
<br />
<br />
<br />
<br />
<br />
<br />
<br />
<br />
<br />
<br />
<br />
<br />
<br />
<br />
<br />
<br />
<br />
<br />
<br />
<br />
<br />
<br />
<br />
<br />
<br />
<br />
<br />
<br />
<br />
<br />
<br />
<br />
/ <br />
<br />
<br />
<br />
<br />
<br />
<br />
<br />
<br />
<br />
<br />
<br />
<br />
<br />
<br />
<br />
<br />
<br />
<br />
<br />
<br />
<br />
<br />
<br />
<br />
<br />
<br />
<br />
<br />
<br />
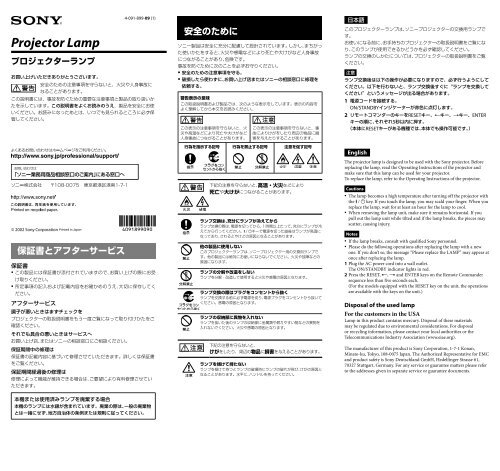
1 <br />
ON/STANDBY<br />
2 RESETENTER<br />
5<br />
RESET<br />
English<br />
The projector lamp is designed to be used with the <strong>Sony</strong> projector. Before<br />
replacing the lamp, read the O<strong>per</strong>ating Instructions of the projector and<br />
make sure that this lamp can be used for your projector.<br />
To replace the lamp, refer to the O<strong>per</strong>ating Instructions of the projector.<br />
<br />
<br />
Cautions<br />
The lamp becomes a high tem<strong>per</strong>ature after turning off the projector with<br />
the / key. If you touch the lamp, you may scald your finger. When you<br />
replace the lamp, wait for at least an hour for the lamp to cool.<br />
When removing the lamp unit, make sure it remains horizontal. If you<br />
pull out the lamp unit while tilted and if the lamp breaks, the pieces may<br />
scatter, causing injury.<br />
Notes<br />
If the lamp breaks, consult with qualified <strong>Sony</strong> <strong>per</strong>sonnel.<br />
Please do the following o<strong>per</strong>ations after replacing the lamp with a new<br />
one. If you don’t so, the message “Please replace the LAMP” may appear at<br />
once after replacing the lamp.<br />
1 Plug the AC power cord into a wall outlet.<br />
The ON/STANDBY indicator lights in red.<br />
2 Press the RESET, , and ENTER keys on the Remote Commander<br />
sequence less than five seconds each.<br />
(For the models equipped with the RESET key on the unit, the o<strong>per</strong>ations<br />
are available with the keys on the unit.)<br />
Disposal of the used lamp<br />
For the customers in the USA<br />
Lamp in this product contains mercury. Disposal of these materials<br />
may be regulated due to environmental considerations. For disposal<br />
or recycling information, please contact your local authorities or the<br />
Telecommunications Industry Association (www.eiae.org).<br />
The manufacturer of this product is <strong>Sony</strong> Corporation, 1-7-1 Konan,<br />
Minato-ku, Tokyo, 108-0075 Japan. The Authorized Representative for EMC<br />
and product safety is <strong>Sony</strong> Deutschland GmbH, Hedelfinger Strasse 61,<br />
70327 Stuttgart, Germany. For any service or guarantee matters please refer<br />
to the addresses given in separate service or guarantee documents.
Français<br />
La lampe du projecteur est conçue pour être utilisée avec le projecteur<br />
<strong>Sony</strong>. Avant de remplacer la lampe, lisez attentivement le mode d’emploi du<br />
projecteur pour vérifier que celle-ci peut être utilisée avec votre projecteur.<br />
Pour remplacer la lampe, reportez-vous au mode d’emploi du projecteur.<br />
<br />
<br />
Attentions<br />
La lampe est encore brûlante après que vous avez mis le projecteur hors<br />
tension à l’aide de la touche / . Si vous touchez la lampe, vous risquez<br />
de vous brûler les doigts. Lorsque vous voulez remplacer la lampe,<br />
attendez au moins une heure qu’elle ait refroidi.<br />
Pour retirer le module de lampe, maintenez-le bien à l’horizontale. Si vous<br />
extrayez le module de lampe en l’inclinant et si la lampe se brise, il se peut<br />
que vous vous blessiez avec les éclats.<br />
Remarques<br />
Si la lampe se brise, consultez le <strong>per</strong>sonnel <strong>Sony</strong> qualifié.<br />
Veuillez exécuter les opérations suivantes après avoir remplacé la lampe<br />
par une neuve. Sinon le message « Remplacer la lampe » risque de<br />
s’afficher tout de suite après le remplacement de la lampe.<br />
1 Branchez le cordon d’alimentation secteur sur une prise murale.<br />
Le témoin ON/STANDBY s’allume en rouge.<br />
2 Appuyez pendant moins de cinq secondes sur chacune des touches<br />
RESET, , , et ENTER de la télécommande, en respectant cet ordre.<br />
(Pour les modèles équipés de la touche RESET sur l’appareil, les opérations<br />
peuvent être effectuées à l’aide des touches sur l’appareil.)<br />
Mettre à disposition de la lampe usagée<br />
Pour les clients aux États-Unis<br />
La lampe dans ce produit contient du mercure. La disposition de<br />
ces matériaux peut être réglementée suite à des considérations<br />
environnementales. Pour obtenir des informations de disposition ou<br />
de recyclage, veuillez communiquer avec vos autorités locales ou la<br />
Telecommunications Industry Association (www.eiae.org).<br />
Le fabricant de ce produit est <strong>Sony</strong> Corporation, 1-7-1 Konan, Minato-ku,<br />
Tokyo, 108-0075 Japon. Le représentant autorisé pour EMC et la sécurité<br />
des produits est <strong>Sony</strong> Deutschland GmbH, Hedelfinger Strasse 61, 70327<br />
Stuttgart, Allemagne. Pour toute question concernant le service ou la<br />
garantie, veuillez consulter les adresses indiquées dans les documents de<br />
service ou de garantie séparés.<br />
Deutsch<br />
Die Projektorbirne ist für einen Projektor von <strong>Sony</strong> konzipiert. Lesen Sie<br />
vor dem Austauschen der Birne in der Bedienungsanleitung zum Projektor<br />
nach und vergewissern Sie sich, dass diese Birne mit Ihrem Projektor<br />
verwendet werden kann. Wenn Sie die Birne austauschen wollen, schlagen<br />
Sie bitte in der Bedienungsanleitung zum Projektor.<br />
<br />
<br />
Vorsicht<br />
Die Birne bleibt noch längere Zeit heiß, wenn Sie den Projektor mit<br />
der Taste / ausschalten. Wenn Sie die Birne berühren, besteht<br />
Verbrennungsgefahr. Wenn Sie die Birne austauschen wollen, warten Sie<br />
mindestens eine Stunde, bis die Birne abgekühlt ist.<br />
Achten Sie beim Entfernen der Birneneinheit darauf, die Birneneinheit<br />
waagerecht zu halten. Wenn Sie die Birneneinheit nicht waagerecht halten<br />
und die Birne bricht, können die Splitter Verletzungen verursachen.<br />
Hinweise<br />
Wenn die Birne kaputt geht, wenden Sie sich bitte an qualifiziertes<br />
Fach<strong>per</strong>sonal von <strong>Sony</strong>.<br />
Führen Sie bitte die folgenden Schritte aus, nachdem Sie die alte durch<br />
die neue Birne ersetzt haben. Andernfalls erscheint möglicherweise<br />
unmittelbar nach dem Auswechseln der Birne die Meldung<br />
„Lampentausch erforderlich“.<br />
1 Stecken Sie das Netzkabel in eine Netzsteckdose.<br />
Die Anzeige ON/STANDBY leuchtet rot.<br />
2 Drücken Sie innerhalb von je fünf Sekunden nacheinander die Tasten<br />
RESET, , und ENTER auf der Fernbedienung.<br />
(Bei Modellen, die am Gerät eine Taste RESET aufweisen, können die<br />
Schritte mit den Tasten am Gerät ausgeführt werden.)<br />
Der Hersteller dieses Produkts ist <strong>Sony</strong> Corporation, 1-7-1 Konan,<br />
Minatoku, Tokyo, 108-0075 Japan. Der autorisierte Repräsentant für EMV<br />
und Produktsicherheit ist <strong>Sony</strong> Deutschland GmbH, Hedelfinger Strasse 61,<br />
70327 Stuttgart, Deutschland. Bei jeglichen Angelegenheiten in Bezug auf<br />
Kundendienst oder Garantie wenden Sie sich bitte an die in den separaten<br />
Kundendienst- oder Garantiedokumenten aufgeführten Anschriften.<br />
Español<br />
La lámpara del proyector se ha diseñado para utilizarse con el proyector<br />
<strong>Sony</strong>. Antes de sustituir la lámpara, consulte el manual de instrucciones del<br />
proyector y asegúrese de que dicha lámpara es la adecuada para el proyector.<br />
Para sustituir la lámpara, consulte el manual de instrucciones del proyector.<br />
<br />
<br />
Precauciones<br />
La lámpara alcanza una tem<strong>per</strong>atura alta después de apagar el proyector<br />
con la tecla / . Si toca la lámpara, puede quemarse el dedo. Antes de<br />
sustituir la lámpara, es<strong>per</strong>e al menos una hora para que se enfríe.<br />
Cuando extraiga la unidad de lámpara, asegúrese de que la mantiene<br />
en posición horizontal. Si tira de la unidad de lámpara para extraerla<br />
mientras está inclinada y si la lámpara se rompe, los trozos pueden<br />
esparcirse, causando heridas.<br />
Notas<br />
Si la lámpara se rompe, consulte con <strong>per</strong>sonal <strong>Sony</strong> especializado.<br />
Realice las siguientes o<strong>per</strong>aciones tras la sustitución de la lámpara por<br />
otra nueva. De lo contrario, podría aparecer el mensaje “Por favor cambie<br />
la lámpara” inmediatamente después de reemplazarla.<br />
1 Conecte el cable de alimentación de ca a una toma de pared.<br />
El indicador ON/STANDBY se ilumina en rojo.<br />
2 Pulse las teclas RESET, , y ENTER del mando a distancia en<br />
secuencia durante menos de cinco segundos cada una.<br />
(En los modelos que disponen de la tecla RESET en la unidad, las<br />
o<strong>per</strong>aciones se pueden realizar con las teclas de la unidad.)<br />
El fabricante de este producto es <strong>Sony</strong> Corporation, con dirección en 1-7-1<br />
Konan, Minato-ku, Tokio, 108-0075 Japón. El Representante autorizado para<br />
EMC y seguridad del producto es <strong>Sony</strong> Deutschland GmbH, Hedelfinger<br />
Strasse 61, 70327 Stuttgart, Alemania. Para asuntos relacionados con el<br />
servicio y la garantía, consulte las direcciones entregadas por separado para<br />
los documentos de servicio o garantía.<br />
Italiano<br />
La lampada del proiettore è stata concepita <strong>per</strong> l’uso con il proiettore <strong>Sony</strong>.<br />
Prima di sostituire la lampada, leggere le istruzioni <strong>per</strong> l’uso del proiettore<br />
e assicurarsi che la lampada sia compatibile con il proiettore acquistato. Per<br />
sostituire la lampada, fare riferimento alle istruzioni <strong>per</strong> l’uso del proiettore.<br />
<br />
<br />
Attenzione<br />
Dopo aver spento il proiettore con il tasto / , la tem<strong>per</strong>atura della<br />
lampada è elevata. Non toccare la lampada, onde evitare di scottarsi le<br />
dita. Per sostituire la lampada, attendere almeno un’ora che questa si<br />
raffreddi.<br />
Quando si estrae la lampada, assicurarsi che rimanga in posizione<br />
orizzontale. Se viene estratta in posizione inclinata e si rompe, i pezzi<br />
potrebbero essere causa di ferite.<br />
Note<br />
Se la lampada si rompe, consultare il <strong>per</strong>sonale qualificato <strong>Sony</strong>.<br />
Dopo avere sostituito la lampada con una lampada nuova, effettuare<br />
le o<strong>per</strong>azioni riportate di seguito. Diversamente, è possibile che venga<br />
visualizzato il messaggio “Sostituire la lampada”.<br />
1 Collegare il cavo di alimentazione CA a una presa di rete.<br />
L’indicatore ON/STANDBY si illumina in rosso.<br />
2 Premere i tasti RESET, , e ENTER sul telecomando <strong>per</strong> meno di<br />
cinque secondi ciascuno.<br />
(Per i modelli che dispongono del tasto RESET sull’apparecchio, è possibile<br />
eseguire le varie o<strong>per</strong>azioni mediante i tasti dell’apparecchio stesso.)<br />
Il fabbricante di questo prodotto è la <strong>Sony</strong> Corporation, 1-7-1 Konan,<br />
Minato-ku, Tokyo, 108-0075 Giappone. La rappresentanza autorizzata <strong>per</strong><br />
EMC e la sicurezza dei prodotti è la <strong>Sony</strong> Deutschland GmbH, Hedelfinger<br />
Strasse 61, 70327 Stoccarda, Germania. Per qualsiasi questione riguardante<br />
l’assistenza o la garanzia, si prega di rivolgersi agli indirizzi riportati nei<br />
documenti sull’assistenza o sulla garanzia a parte.<br />
<br />
<br />
<br />
<br />
<br />
<br />
<br />
<br />
<br />
<br />
<br />
<br />
<br />
<br />
<br />
<br />
<br />
<br />
1<br />
<br />
2 <br />
<br />
<br />
<br />
<br />
<br />
<br />
<br />
<br />
<br />
<br />
<br />
<br />
<br />
<br />
<br />
<br />
<br />
<br />
<br />
<br />
<br />
<br />
<br />
2016 3


