

KitchenAid 900 162 33 CFS 616 S - 900 162 33 CFS 616 S EN (853940901000) Istruzioni per l'Uso
KitchenAid 900 162 33 CFS 616 S - 900 162 33 CFS 616 S EN (853940901000) Istruzioni per l'Uso
KitchenAid 900 162 33 CFS 616 S - 900 162 33 CFS 616 S EN (853940901000) Istruzioni per l'Uso

You also want an ePaper? Increase the reach of your titles
YUMPU automatically turns print PDFs into web optimized ePapers that Google loves.
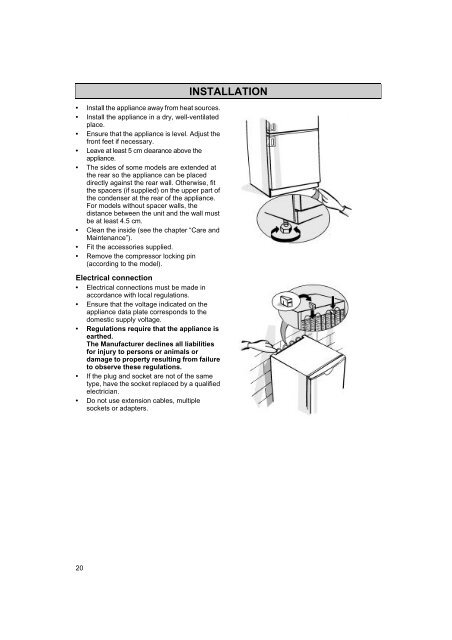
• Install the appliance away from heat sources.<br />
• Install the appliance in a dry, well-ventilated<br />
place.<br />
• Ensure that the appliance is level. Adjust the<br />
front feet if necessary.<br />
• Leave at least 5 cm clearance above the<br />
appliance.<br />
• The sides of some models are extended at<br />
the rear so the appliance can be placed<br />
directly against the rear wall. Otherwise, fit<br />
the spacers (if supplied) on the up<strong>per</strong> part of<br />
the condenser at the rear of the appliance.<br />
For models without spacer walls, the<br />
distance between the unit and the wall must<br />
be at least 4.5 cm.<br />
• Clean the inside (see the chapter “Care and<br />
Maintenance”).<br />
• Fit the accessories supplied.<br />
• Remove the compressor locking pin<br />
(according to the model).<br />
Electrical connection<br />
• Electrical connections must be made in<br />
accordance with local regulations.<br />
• Ensure that the voltage indicated on the<br />
appliance data plate corresponds to the<br />
domestic supply voltage.<br />
• Regulations require that the appliance is<br />
earthed.<br />
The Manufacturer declines all liabilities<br />
for injury to <strong>per</strong>sons or animals or<br />
damage to pro<strong>per</strong>ty resulting from failure<br />
to observe these regulations.<br />
• If the plug and socket are not of the same<br />
type, have the socket replaced by a qualified<br />
electrician.<br />
• Do not use extension cables, multiple<br />
sockets or adapters.<br />
INSTALLATION<br />
20


