

KitchenAid 10456GF - 10456GF EN (F064459) Istruzioni per l'Uso
KitchenAid 10456GF - 10456GF EN (F064459) Istruzioni per l'Uso
KitchenAid 10456GF - 10456GF EN (F064459) Istruzioni per l'Uso

Create successful ePaper yourself
Turn your PDF publications into a flip-book with our unique Google optimized e-Paper software.
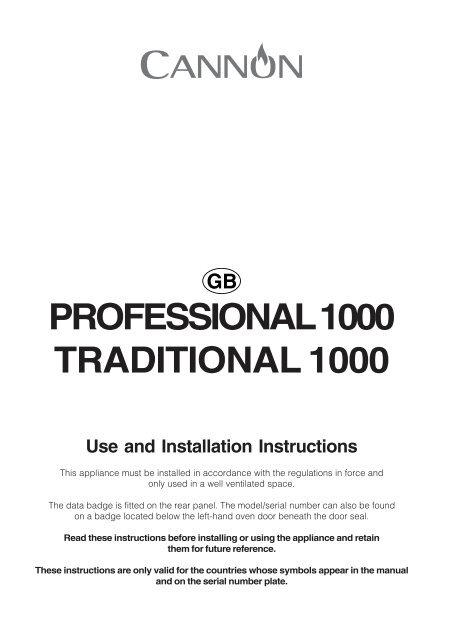
PROESSIONAL 1000<br />
TRADITIONAL 1000<br />
Use and Installation Instructions<br />
This appliance must be installed in accordance with the regulations in force and<br />
only used in a well ventilated space.<br />
The data badge is fitted on the rear panel. The model/serial number can also be found<br />
on a badge located below the left-hand oven door beneath the door seal.<br />
Read these instructions before installing or using the appliance and retain<br />
them for future reference.<br />
These instructions are only valid for the countries whose symbols appear in the manual<br />
and on the serial number plate.
CONT<strong>EN</strong>TS<br />
PAGE<br />
Introduction 3<br />
or Your Safety 4<br />
Oven Timer O<strong>per</strong>ation 6<br />
Hotplate 12<br />
Griddle 14<br />
Some recipe ideas for your griddle 15<br />
Twin Grill 16<br />
an Oven 17<br />
Conventional Oven 19<br />
Oven Cooking Chart 20<br />
The “Slow Cook” Setting 22<br />
Care and Cleaning 23<br />
Something wrong with your Cooker? 25<br />
Installation Instructions 27<br />
Guarantee Information 35<br />
Service Information 36<br />
2
INTRODUCTION<br />
To help you make the best use of your cooker, PLEASE READ THIS BOOKLET CAREULLY.<br />
Your new cooker is guaranteed and will give lasting service. The guarantee is only applicable if the cooker has<br />
been installed in accordance with the Installation Instructions.<br />
The cooker is designed specifically for domestic use and responsibility will not be accepted for use in any other<br />
installation.<br />
When first using the cooker ensure that the room is well ventilated (e.g. open a window or use an extractor fan)<br />
and that <strong>per</strong>sons who may be sensitive to the odour avoid any fumes. It is suggested that any pets be removed<br />
from the room until the smell has ceased. This odour is due to any temporary finish and also any moisture<br />
absorbed by the insulation.<br />
Our policy is one of continual improvement in design and development, therefore strict accuracy of illustrations<br />
and descriptions cannot be guaranteed.<br />
This appliance conforms to the following EEC directives:<br />
Gas Appliances<br />
- 90/396/EEC<br />
Low Voltage Equipment<br />
- 2006/95/EEC<br />
- 93/68/EEC<br />
Electromagnetic Compatibility;<br />
- 89/336/EEC<br />
- 92/31/EEC<br />
- 93/68/EEC<br />
3
OR YOUR SAETY<br />
Please read the precautions below before using your cooker.<br />
ALWAYS . . .<br />
ALWAYS<br />
ALWAYS<br />
ALWAYS<br />
ALWAYS<br />
ALWAYS<br />
ALWAYS<br />
ALWAYS<br />
ALWAYS<br />
ALWAYS<br />
ALWAYS<br />
ALWAYS<br />
ALWAYS<br />
ALWAYS<br />
ALWAYS<br />
ALWAYS<br />
ALWAYS<br />
make sure you understand the controls before using the cooker.<br />
check that all controls on the cooker are turned off after use.<br />
stand back when opening an oven door to allow heat to dis<strong>per</strong>se.<br />
use dry, good quality oven gloves when removing items from the ovens.<br />
take care when removing items from the top oven/grill when the main oven is on, as the contents may<br />
be hot.<br />
keep the oven and grill doors closed when the cooker is not in use.<br />
place pans centrally over the hotplate burners and position them so that the handles cannot accidentally<br />
be caught or knocked or become heated by other burners.<br />
keep the cooker clean, as a build up of grease or fat from cooking can cause a fire.<br />
allow the cooker to cool before cleaning.<br />
follow the basic principles of food handling and hygiene to prevent the possibility of bacterial growth.<br />
keep ventilation slots clear of obstructions.<br />
turn off the electricity supply before cleaning or replacing an oven lamp.<br />
refer servicing to CORGI registered appliance service engineers.<br />
ACCESSIBLE PARTS MAY BECOME HOT WH<strong>EN</strong> THE GRILL IS USED. YOUNG CHILDR<strong>EN</strong> SHOULD<br />
BE KEPT AWAY.<br />
Children should be su<strong>per</strong>vised to ensure that they do not play with the appliance<br />
During use the appliance becomes hot. Care should be taken to avoid touching heating elements<br />
inside the oven<br />
4
OR YOUR SAETY<br />
NEVER . . .<br />
NEVER<br />
NEVER<br />
NEVER<br />
NEVER<br />
NEVER<br />
NEVER<br />
NEVER<br />
NEVER<br />
NEVER<br />
NEVER<br />
NEVER<br />
NEVER<br />
NEVER<br />
NEVER<br />
NEVER<br />
leave children unsu<strong>per</strong>vised where the cooker is installed as all surfaces will get hot during and after<br />
use.<br />
allow anyone to sit or stand on any part of the cooker.<br />
store items that children may attempt to reach above the cooker.<br />
heat up unopened food containers as pressure can build up causing the container to burst.<br />
store chemicals, food stuffs, pressurised containers in or on the cooker, or in cabinets immediately<br />
above or next to the cooker.<br />
fill a deep fat frying pan more than 1/3 full of oil, and never use a lid. DO NOT LEAVE UNATT<strong>EN</strong>DED<br />
WHILE COOKING.<br />
place flammable or plastic items on or near the hotplate.<br />
use proprietary spillage collectors on the hotplate.<br />
use the cooker as a room heater.<br />
dry clothes or place other times over or near to the hotplate or oven/gril doors.<br />
wear garments with long flowing sleeves whilst cooking.<br />
o<strong>per</strong>ate the grill with the grill doors closed. This may cause overheating of your cooker.<br />
line the shelves, floor or sides of the oven or grill with aluminium foil as over heating and damage can<br />
result.<br />
use steam cleaners.<br />
touch the heating elements inside the oven or grill even when off.<br />
NOTE: The use of a gas cooking appliance results in the production of heat and moisture in the room in which it<br />
is installed. Always ensure that the kitchen is well ventilated; keep natural ventilation holes open or install a<br />
mechanical ventilation device (mechanical extractor hood).<br />
In particular when using the grill or more than one hotplate burner, open a window if a mechanical ventilation<br />
device is not o<strong>per</strong>ating.<br />
! The appliance should not be o<strong>per</strong>ated by people (including children) with reduced physical, sensory or mental<br />
capacities, by inex<strong>per</strong>ienced individuals or by anyone who is not familiar with the product. These individuals<br />
should, at the very least, be su<strong>per</strong>vised by someone who assumes responsibility for their safety or receive<br />
preliminary instructions relating to the o<strong>per</strong>ation of the appliance.<br />
5
OV<strong>EN</strong> TIMER OPERATION<br />
The oven timer (only ventilated Oven) offers you the following features:<br />
1. Time of Day<br />
2. Automatic Cooking<br />
3. Minute Minder<br />
AUTOMATIC COOKING<br />
The main oven can be controlled automatically.<br />
GUIDANCE ON AUTOMATIC COOKING<br />
1. Select foods which will take the same time to cook.<br />
2. Set the oven timer so that the food has just finished or is just about to finish cooking on your return to the oven.<br />
This will ensure the food has not cooled down and does not require reheating before serving.<br />
3. ood should be as cold as possible when it goes into the oven, ideally straight from the refrigerator. rozen<br />
meat and poultry should be thawed thoroughly before it is put in the oven.<br />
4. Warm food should never be placed in the oven if there is to be a delay <strong>per</strong>iod. Stews prepared by frying the<br />
meat and vegetables should be cooked as soon as possible.<br />
5. Dishes containing left-over cooked poultry or meat, for example Shepherds Pie, should not be cooked automatically<br />
if there is to be a delay <strong>per</strong>iod.<br />
6. Stews and joints should be cooked by the long slow method, so that the delay <strong>per</strong>iod is kept to a minimum.<br />
7. On warm days, to prevent harmful bacterial growth in certain foods (ie poultry, joints, etc) the delayed start<br />
should be kept to a minimum.<br />
8. Wine or beer may ferment and cream may curdle during the delay <strong>per</strong>iod, so it is best to add these ingredients<br />
just before serving.<br />
9. oods which discolour should be protected by coating in fat or tossing in water to which lemon juice has been<br />
added, prior to placing food in the oven.<br />
10.Dishes containing liquid should not be filled too full to prevent boiling over.<br />
11.ood should be well sealed (but not airtight) in a container to prevent the loss of liquid during cooking. Aluminium<br />
foil gives a good seal.<br />
12.Ensure food is cooked thoroughly before serving.<br />
6
OV<strong>EN</strong> TIMER OPERATION<br />
A<br />
U<br />
T<br />
O 0.<br />
00<br />
CLOCKACE<br />
The timer incorporates a 24 hour clock.<br />
Ensure the correct time of day is always set, before using your cooker.<br />
0.<br />
00<br />
0.<br />
00<br />
SYMBOLS<br />
A 'bell' symbol will light up when you select a Minute Minder Period and will remain lit for the<br />
<strong>per</strong>iod set.<br />
At the end of the Minute Minder Period, the timer will emit an audible tone and the 'bell'<br />
symbol will disappear.<br />
The 'cookpot' symbol will light up either:-<br />
- When the timer is in manual mode, or<br />
- During the actual Cook Period.<br />
A<br />
U<br />
T<br />
O<br />
0.<br />
00<br />
'AUTO' will light up:-<br />
- When the timer is first turned on it will flash. It will go out when a time of day is set or<br />
when the timer is set to manual.<br />
The 'AUTO' symbol will flash at the end of an Auto Cooking programme to indicate that the<br />
programme has finished.<br />
(When the 'AUTO' symbol is flashing, to return the oven to Manual o<strong>per</strong>ation, turn the oven controls off,<br />
ensure that the correct time of day is set, and press the "Manual" button - The 'AUTO' symbol will go out).<br />
TIMER UNCTION BUTTONS<br />
Minute Minder Button<br />
Here you can set a time <strong>per</strong>iod of up to 23 hours 59 minutes, that will count down. When it reaches zero, the<br />
timer will emit an audible tone.<br />
or Example: If you set 20 minutes, the audible tone will occur 20 minutes later.<br />
AUTO COOKING PROGRAMME<br />
Cook Period Button<br />
Cook Period is the actual length of time for which, the timer will switch the oven(s) on as part of an "Auto<br />
Cooking" programme. (e.g. If you set 2 hours, the food will be cooked for 2 hours).<br />
End Time Button<br />
The time of day at which you want an "Auto Cooking" programme to end.<br />
or Example: If you set a "Cook Period" for 2 hours, and "End Time" of 11:00. The timer will switch the oven(s)<br />
on at 9:00 and turn the oven(s) off at 11:00. You will hear a audible tone at 11:00, to indicate that the Auto<br />
Cooking Programme has finished.<br />
Notes:<br />
- When setting an Auto Cooking programme you will need to set the oven control(s) to the required tem<strong>per</strong>ature(s)<br />
when you set the timer.<br />
- If an Auto Cooking programme has been set the oven(s) will only o<strong>per</strong>ate during the pre-programmed time.<br />
Manual Button<br />
Needs to be pressed to cancel an Auto Cooking programme and return the oven(s) to Manual o<strong>per</strong>ation.<br />
"+" and "-" Buttons<br />
Used to adjust the various timer function settings.<br />
7
SETTING THE TIME O DAY<br />
Step 1 Make sure all oven controls are turned Off.<br />
A<br />
U<br />
T<br />
O 0.<br />
00<br />
Step 2<br />
OV<strong>EN</strong> TIMER OPERATION<br />
Check the electricity supply to the cooker is turned on.<br />
A<br />
U<br />
T<br />
O 0.<br />
00<br />
Step 3 When switched on the display will show 0.00 and the Auto symbol, flashing<br />
intermittently.<br />
Step 4 Press & hold in both the Cook Period & End Time buttons together.<br />
Step 5 With the Cook Period & End Time buttons still held in, press either the "+" or "-"<br />
buttons to set the correct time of day.<br />
Step 6<br />
Release all the buttons simultaneously. THE TIME O DAY IS NOW SET.<br />
To change the time of day repeat Steps 4, 5 & 6 above.<br />
Note:<br />
You cannot adjust the time of day if the timer has been set for an Auto Cooking Programme.<br />
SETTING THE MINUTE MINDER<br />
A<br />
U<br />
T<br />
O<br />
.<br />
0 00<br />
0.<br />
00<br />
Step 1 Ensure the time of day is set correctly.<br />
Step 2 Press and hold the Minute Minder button.<br />
Step 3 With the Minute Minder button held in, set the required Minute Minder <strong>per</strong>iod using<br />
the "+" and "-" buttons. A 'bell' symbol will light up.<br />
Release all buttons and the timer display will revert back to the time of day. The 'bell' symbol<br />
will remain lit to signify that a Minute Minder <strong>per</strong>iod has been set.<br />
At the end of the set time an audible tone will be heard, and the 'bell' symbol will disappear.<br />
Step 4<br />
To cancel the audible tone press the Minute Minder button.<br />
Note 1 When the Minute Minder has been set, the time remaining can be checked at any time by simply pressing<br />
the Minute Minder button.<br />
Note 2 If necessary the Minute Minder can be cancelled before the tone sounds by pressing and holding the<br />
Minute Minder button and then at the same time pressing the "-" button until 0.00 appears in the display<br />
window.<br />
8
OV<strong>EN</strong> TIMER OPERATION<br />
AUTO COOKING PROGRAMMES<br />
There are two Auto Cooking programmes that can be selected using your timer:-<br />
(a) To set the timer to switch the oven(s) On and Off Automatically<br />
(b) To set timer to switch on immediately and O automatically after a set cook <strong>per</strong>iod.<br />
a) TO SET THE TIMER TO SWITCH THE OV<strong>EN</strong>(S) ON AND O AUTOMATICALLY<br />
This allows you to cook at a specified time for a chosen <strong>per</strong>iod before the oven switches off<br />
Automatically.<br />
Step 1<br />
Step 2<br />
0.<br />
00<br />
Check that the correct time of day is set, if not follow instructions for setting the time of day.<br />
Place food onto the correct shelf position in the oven and close the oven door(s).<br />
Step 3 Press and hold in the Cook Period button. The display will read 0.00 with the<br />
'cookpot' symbol lit.<br />
Step 4 With the Cook Period button still held in, set the required Cook Period using the "+"<br />
and "-" buttons.<br />
.<br />
A<br />
U<br />
T<br />
O14<br />
20<br />
Release the buttons and the timer display will revert to the time of day with the 'Auto'<br />
symbol and 'cookpot' symbol lit.<br />
.<br />
A<br />
U<br />
T<br />
O16<br />
20<br />
Step 5 Press and hold in the End Time button. The display will read the earliest possible<br />
end time for the Cook Period that you have set above. The 'Auto' symbol and 'cookpot'<br />
symbol will be lit.<br />
.<br />
A<br />
U<br />
T<br />
O14<br />
20<br />
.<br />
A<br />
U<br />
T<br />
O16<br />
20<br />
16.<br />
20<br />
Step 6 With the End Time button still held in, use the "+" and "-" buttons to set the 'End<br />
Time' (i.e. The time you require the oven to switch off ).<br />
Release all the buttons and the timer will revert back to the time of day.<br />
The 'Auto' symbol will remain lit to signify that an Auto Cooking Programme has been set.<br />
The 'cookpot' symbol will go out.<br />
Step 7 Turn the oven control(s) to the required tem<strong>per</strong>ature, and if necessary select the<br />
appropriate oven function.<br />
At the end of the Automatic Cook Period the Auto Symbol will flash and an intermittent<br />
bleeping sound will be heard.<br />
The audible tone will continue unless cancelled.<br />
The 'Auto' symbol will continue to flash until the timer is returned to Manual o<strong>per</strong>ation (see<br />
below).<br />
Step 8 Press the Manual button, the audible tone will be cancelled and the oven(s) will be<br />
returned to Manual.<br />
Step 9<br />
Turn the oven control(s) to the O position.<br />
9
OV<strong>EN</strong> TIMER OPERATION<br />
Note 1<br />
Note 2<br />
When cooking automatically the Cook Period can be checked at any time by simply pressing the<br />
Cook Period button.<br />
When cooking automatically the End Time can be checked at any time by simply pressing the<br />
End Time button.<br />
b) TO SET TIMER TO SWITCH ON IMMEDIATELY AND O AUTOMATICALLY ATER A SET<br />
COOK PERIOD<br />
Step 1<br />
Step 2<br />
Step 3<br />
1.<br />
30<br />
Check that the correct time of day is set, if not follow instructions for setting the time of day.<br />
Place food onto the correct shelf position in the oven and close the oven door(s).<br />
Turn the oven control(s) to the required tem<strong>per</strong>ature, and if necessary select the appropriate oven<br />
function.<br />
Step 4 Press & hold in the Cook Period button, the display will read 0.00 and the 'cookpot'<br />
symbol will light up.<br />
With the Cook Period button still held in set the required Cook Period using the "+" and "-"<br />
buttons. Example: 1hr 30 minutes (as shown).<br />
Step 5 Release all buttons.<br />
.<br />
A<br />
U<br />
T<br />
O14<br />
20<br />
The timer display will revert to the time of day with the 'Auto' symbol lit & 'cookpot' symbol<br />
remaining lit.<br />
NOTE: The Cookpot symbol disappears<br />
A<br />
U<br />
T<br />
O16<br />
. 20<br />
At the end of the Cook Period the 'Auto' symbol will flash and an intermittent audible tone<br />
will be heard. The audible tone will continue until cancelled. The 'Auto' symbol will continue<br />
to flash until the timer is returned to Manual o<strong>per</strong>ation (see below).<br />
16.<br />
20<br />
Step 6 Press the Manual button. The audible tone will be cancelled and the oven(s) will be<br />
returned to Manual.<br />
Step 7<br />
Turn the oven control(s) to the O position.<br />
10
OV<strong>EN</strong> TIMER OPERATION<br />
TO CANCEL AN AUTO COOKING PROGRAMME BEORE THE COOK<br />
PERIOD HAS INISHED.<br />
Step 1<br />
Turn the oven control to the O position.<br />
15.<br />
00<br />
Step 2 Press the Manual button to return the oven to "Manual" o<strong>per</strong>ation. The 'Auto' symbol<br />
will go out.<br />
Note 1 When cooking automatically the Cook Period can be checked at any time by simply pressing<br />
the Cook Period button.<br />
OTHER NOTES ON TIMER OPERATION<br />
1. When cooking Automatically the Cook Period can be checked at any time simply by pressing the Cook Period<br />
button.<br />
2. When cooking Automatically the End Time can be checked at any time by simply pressing the End Time button.<br />
3. Having set a Cook Period and End Time an electronic device stores the information. The device within the timer<br />
will switch the oven(s) on and off at the required times.<br />
4. When setting an Auto Cooking Programme and a mistake is made, to clear:-<br />
(a) Press & release the Manual button.<br />
(b) Start the sequence again.<br />
5. If at any time the display shows three flashing zero's 0.00 and 'Auto', it is likely that the electricity supply to the<br />
oven has been interrupted. Reset the timer to the correct time of day. ood in the oven may, therefore, not<br />
have been cooked, before serving check food is thoroughly heated and completely cooked.<br />
6. To set each function always press and hold the required function button and at the same time press "+" or "-"<br />
buttons.<br />
11
HOTPLATE<br />
The hotplate has one dual control wok burner, one large high speed burner, three normal simmering burners and<br />
one small simmering burner. The dual control wok burner consists of a smaller inner and a larger outer burner<br />
that can o<strong>per</strong>ate either together or separately. Use of the two burners together with large pans on maximum<br />
setting gives a very high input and reduces cooking times with respect to conventional burners. Use of the two<br />
burners together provides a more uniform distribution of heat on the bottom of the pan. Cookware of all sizes<br />
can be used above the dual control wok burner. or small pans it is recommended that only the inner burner is<br />
used.<br />
The knob situated below the symbol<br />
on the fascia panel o<strong>per</strong>ates the outer burner.<br />
The knob situated below the symbol<br />
on the fascia panel o<strong>per</strong>ates the inner burner.<br />
The two normal simmering burners on the right hand side of the hotplate are oval in form and can be turned<br />
through 90°. This makes the hotplate more flexible in how it can be used.<br />
or cooking fish or heating oval cookware use the two burners with their longest sides at 90° to the front of the<br />
hotplate.<br />
When using the griddle or for heating rectangular, square or large cookware use the two burners with their<br />
longest sides parallel to the front of the hotplate.<br />
or medium size cookware use any of the two burners in any orientation.<br />
All pans should be placed centrally over the burners.<br />
TO USE THE HOTPLATE<br />
1. Press the ignition button and then push in and turn the control knob of the chosen burner anti-clockwise to the<br />
large flame symbol. Continue to press the ignition button until the spark lights the gas. When o<strong>per</strong>ating the dual<br />
control burner there is a separate control knob for the inner and outer burners.<br />
2. Turn the control knob anti-clockwise to the desired setting. Only turn the control knob between the large flame<br />
symbol and the small flame symbol for adjusting the setting.<br />
3. To turn off, turn the control knob fully clockwise to the O position.<br />
DO NOT<br />
DO NOT<br />
use mis-shapen pans which may be unstable.<br />
use round base woks directly on the pan supports.<br />
Each burner is fitted with a spark ignitor for lighting the gas. To ensure rapid lighting of the burners every time<br />
they are used, the ignitors must be kept clean and dry. Remove any food spillage or cleaning materials from<br />
the ignitor using a small nylon brush such as a tooth brush. Access to the ignitor can be achieved by lifting off<br />
the loose burner parts carefully when the burners are cool.<br />
In the event of the burner flames being accidentally extinguished, turn off the burner controls and do not attempt<br />
to re-ignite the burners for at least 1 minute.<br />
If aluminium based pans are used, a silvery deposit may appear on the top edge of the pan support fingers.<br />
See 'Care and Cleaning' section for cleaning information.<br />
Models with Hob Gas Burner Safety Devices to Prevent Leaks (only available on certain models)<br />
These models can be identified by the presence of the device itself.<br />
! Since the hob burners are equipped with a safety device, you must hold the control knob in for about 3<br />
seconds after the burner has been lighted to allow the gas to pass until the safety thermocouple has heated.<br />
12
HOTPLATE<br />
or the hotplate to work in the most efficient way possible and in order to save on the amount of gas consumed,<br />
it is recommended that only pans which have a lid and a flat base are used. They should also be suited to the<br />
size of the hotplate.<br />
Hotplate<br />
ø Cookware diameter (cm)<br />
Rear left 24 - 26<br />
Front left 16 - 22<br />
Centre rear 10 - 14<br />
Front right 16 - 22<br />
Rear right 16 - 22<br />
Centre front (DCDR<br />
internal)<br />
Centre front (DCDR<br />
external)<br />
10 -14<br />
26 - 28<br />
! Make sure the pans do not overlap the edges of the hob while it is being used.<br />
SAETY REQUIREM<strong>EN</strong>TS OR DEEP AT RYING<br />
1. Never fill chip pans more than one third full with oil or fat.<br />
2. Never leave oil or fat unattended during the heating or cooling <strong>per</strong>iod.<br />
3. Never heat fat or fry with a lid on the pan.<br />
4. Always dry food thoroughly before frying, and lower it slowly into the hot oil or fat. rozen foods in particular will<br />
cause frothing and spitting if added too quickly.<br />
5. Always keep the outside of the pan clean and free from streaks of oil or fat.<br />
HOW TO DEAL WITH A AT IRE<br />
1. Do not move the pan.<br />
2. Turn off the hotplate burners.<br />
3. Smother the flames with a fire blanket or damp cloth to extinguish the fire. Do not use water or a fire extinguisher<br />
as the force of it may spread the burning fat or oil over the edge of the pan.<br />
4. Leave the pan for at least 60 minutes before moving it.<br />
13
GRIDDLE<br />
A non-stick griddle is supplied for use over the two burners on the right hand side of the hob. The griddle is<br />
made of cast iron and the surface is covered with a special nonstick finish. To protect the non-stick coating<br />
never use metal cooking utensils as they may scratch the surface. Wooden or heat resistant plastic utensils<br />
may be used. Do not use saucepans on the griddle plate.<br />
UNDER NO CIRCUMSTANCES MUST THE GRIDDLE PLATE BE USED OVER ANY OTHER HOTPLATE<br />
BURNERS.<br />
USE O THE GRIDDLE<br />
The griddle may be used with either or both of the burners on, depending on the food being cooked. The<br />
griddle can be positioned with the ridged portion at the front or at the rear.<br />
1. Secure the griddle above the two simmer burners, on the right hand side of the hob, making sure that the<br />
support feet are located correctly on the pan support fingers.<br />
2. Press the ignition button and then push in and turn the control knob(s) of the burners anticlockwise to the large<br />
flame symbol. Continue to press the ignition button until the spark lights the gas. Preheat the griddle plate for<br />
approximately four minutes.<br />
3. Place the food directly on the griddle plate. However when cooking drier foods eg. drop scones the griddle<br />
plate can be lightly greased.<br />
4. The controls can be left at high for the sealing of foods or turned down to a lower heat setting depending on what<br />
food is being cooked. NB. A gentle heat is all that is required for the majority of griddling. Once the griddle<br />
plate is up to tem<strong>per</strong>ature it maintains the cooking tem<strong>per</strong>ature on a medium/low setting.<br />
5. Cook the food for the required time, which will depend on the type of food being cooked.<br />
6. To turn off, push in and turn the control knob(s) fully clockwise to the O position.<br />
7. Allow the griddle plate to cool before cleaning.<br />
In the event of the burner flames being accidentally extinguished, turn off the burner controls and do not<br />
attempt to re-ignite the burners for at least 1 minute.<br />
14
SOME RECIPE IDEAS OR YOUR GRIDDLE<br />
DROPPED SCONES<br />
4oz (100g) plain flour<br />
1/4 tsp salt<br />
1 level tsp (5ml) cream of tartar<br />
1/2 level tsp (2.5ml) bicarbonate of soda<br />
1 egg<br />
1oz (25g) caster sugar<br />
1/4 pint (150ml) milk<br />
1/2oz (10g) margarine<br />
METHOD<br />
1. Rub the fat into the flour.<br />
2. Beat in the remaining ingredients.<br />
3. When a smooth batter has been obtained, drop<br />
spoonfuls on to the pre-heated griddle plate.<br />
4. Turn each scone when bubbles start to burst on<br />
the up<strong>per</strong> side.<br />
5. Cook on the reverse side until light brown and the<br />
scone, when split, is dried through.<br />
6. Allow approx. 3 minutes for the first side and 2<br />
minutes for the second.<br />
7. Place inside a clean folded towel laid over a cooling<br />
rack.<br />
8. When cool, butter and serve.<br />
WELSH CAKES<br />
6oz (175g) plain flour<br />
1/2 level tsp (2.5ml) salt<br />
1/4oz (5g) baking powder<br />
2oz (50g) margarine<br />
2oz (50g) sugar<br />
2oz (50g) currant or sultanas<br />
1/4 tsp grated nutmeg<br />
1 egg<br />
a little milk<br />
METHOD<br />
1. Sieve the flour and salt into a bowl.<br />
2. Rub in the fat.<br />
3. Add the dry ingredients.<br />
4. Beat the egg and mix to a soft dough adding a<br />
little milk to obtain a soft consistency.<br />
5. Roll out 1/4" (5mm) thickness.<br />
6. Cut out with a 2" (50mm) plain cutter.<br />
7. Cook on the pre-heated griddle for about 6 minutes<br />
each side.<br />
8. They may be eaten hot or cold and should be split<br />
and buttered.<br />
POTATO CAKES<br />
8oz (225g) warm creamed potatoes<br />
2oz (50g) plain flour<br />
1/2 (2.5ml) salt<br />
pep<strong>per</strong> to taste<br />
2 tsp (10ml) milk<br />
METHOD<br />
1. Mix all the ingredients together.<br />
2. Knead lightly.<br />
3. Roll out thinly and cut with a pastry cutter to suit<br />
requirements.<br />
4. Cook on a pre-heated griddle for 3-4 minutes on<br />
each side.<br />
15
TWIN GRILL<br />
CAUTION - ACCESSIBLE PARTS MAY BECOME HOT WH<strong>EN</strong> THE GRILL IS USED.<br />
YOUNG CHILDR<strong>EN</strong> SHOULD BE KEPT AWAY.<br />
GRILLING SHOULD NEVER BE UNDERTAK<strong>EN</strong> WITH THE GRILL DOOR CLOSED.<br />
The grill control is designed to provide variable heat control of either the full width of the grill or just the grill half.<br />
Turning the control knob clockwise will switch on the full width and turning anticlockwise will switch on just the<br />
grill half.<br />
A gentle flow of air will be blown from underneath the control panel when the grill is in use.<br />
If the fan fails to blow air beneath the control panel when the grill is in use, you should contact your<br />
service engineer immediately (see back page).<br />
GRILL PAN HANDLE<br />
The grill pan handle is detachable from the pan to facilitate cleaning. The handle can be either detachable from<br />
or fixed to the pan.<br />
Remove the screw and washer from the grill pan bracket, tilt the handle over the recess adjacent to the bracket<br />
(A). Slide the handle towards the centre of the pan (B) and let the handle locate over the bracket (C).<br />
or a detachable handle: Remove the screw and washer from the grill pan and keep safe.<br />
or a fixed handle: Replace the screw and washer and ensure they are fully tightened.<br />
Warning: Ensure when using grill pan handle in the detachable manner it is centralised and secure.<br />
A<br />
Recess<br />
B<br />
C<br />
TO USE THE GRILL<br />
2. Open the top grill door<br />
2. Turn the grill control knob clockwise to 4 for full width grilling or anticlockwise for half width grilling.<br />
3. Slide the grill pan toward the back of the grill compartment until it stops.<br />
4. Leave the control at 4 for toast and for sealing and for fast cooking of foods. or thicker foods requiring longer<br />
cooking, turn the control to a lower setting after sealing on both sides at 4.<br />
Grilling can be started from cold but for best results preheat for approximately 2 minutes.<br />
DO NOT<br />
cover the grill pan or grid with aluminium foil as this can hold fat, intensify the heat and create a fire<br />
hazard.<br />
16
AN OV<strong>EN</strong><br />
The heating of the oven is achieved by turning the control knob clockwise to the required tem<strong>per</strong>ature as<br />
recommended in the tem<strong>per</strong>ature charts. The pilot light will immediately come on and will automatically go off<br />
and on during cooking as the oven thermostat maintains the correct tem<strong>per</strong>ature.<br />
It should be noted that at the end of a cooking <strong>per</strong>iod there may be a momentary puff of steam when the oven<br />
door is opened, this will dis<strong>per</strong>se in a few seconds and is a <strong>per</strong>fectly normal characteristic of an oven with a<br />
good seal.<br />
Since a fan oven heats up more quickly and generally cooks food at a lower tem<strong>per</strong>ature than a conventional<br />
oven, pre-heating the oven is often unnecessary. However, foods such as bread, scones, Yorkshire pudding do<br />
often benefit from being placed in a preheated oven.<br />
The charts on pages 20 and 21 are a guide only, giving approximate cooking tem<strong>per</strong>atures and times. To suit<br />
<strong>per</strong>sonal taste and requirements, it may be necessary to increase or decrease tem<strong>per</strong>atures by 10°C.<br />
Unless otherwise indicated in the charts, food is placed in a cold oven ie. without preheating.<br />
If food is placed in an already hot oven, the suggested cooking time should be reduced, depending on the type<br />
and quantity of food being cooked.<br />
OV<strong>EN</strong> POSITIONS<br />
Since the distribution of heat in the fan oven is very even, most foods will cook satisfactorily on any shelf<br />
position, but the shelves should be evenly spaced.<br />
To ensure even circulation do not use meat pans larger than 390 x 300mm (15ins x 12ins) and baking trays no<br />
larger than 330 x 255mm (13ins x 10ins), these should be positioned centrally on the oven shelf.<br />
- Do not fit shelves upside down.<br />
- Never use more than 3 shelves in the oven as air circulation will be restricted.<br />
- ood or cooking utensils should not be placed on the floor of the oven.<br />
To avoid unnecessary cleaning, rod shelves which are not in use should be removed from the oven.<br />
17
AN OV<strong>EN</strong><br />
TEMPERATURE AND TIME<br />
When all three shelves are used to cook large quantities of food for home freezing or parties, it may be<br />
necessary to increase the cooking times given in the charts by a few minutes to allow for the loss of heat due to<br />
the extra time taken to load the oven, and the larger mass of food. Baking trays should allow an equal gap on<br />
all sides of the oven.<br />
NB. Recipes in cookery books give times and tem<strong>per</strong>atures for cooking in ordinary ovens. The fan oven makes<br />
it possible in most cases to:<br />
- Reduce the recommended tem<strong>per</strong>atures 25°C (45°).<br />
- Reduce the recommended time by approximately 10 minutes <strong>per</strong> hour.<br />
- Make pre-heating the oven unnecessary for certain foods.<br />
TO PREPARE MEAT AND POULTRY OR ROASTING IN YOUR AN OV<strong>EN</strong><br />
a. Wipe the meat or poultry, dry well and weigh it. Meat which has been stored in a refrigerator should be allowed<br />
to come to room tem<strong>per</strong>ature before cooking and frozen meat or poultry must be completely defrosted before<br />
placing in the oven.<br />
b. The weight of any stuffing used should be added before calculating the cooking time.<br />
c. Place meat / poultry in the main oven meat pan supplied with your cooker. Small joints weighing less than<br />
1.75kg (31/2lb) should be roasted in a smaller meat pan / tin - or they may be 'pot roasted' - a small joint in a<br />
large meat pan causes unnecessary oven splashing and evaporation of meat juices.<br />
d. Additional fat should not be added, except for veal, very lean meat or poultry which can be 'larded' with bacon<br />
fat or brushed very sparingly with cooking oil or melted fat.<br />
e. Beef, lamb, mutton and poultry may be dusted lightly with seasoned flour to give a crisp outer surface. The skin<br />
of duck and goose should be pricked to release excess fat during cooking and the rind of pork should be<br />
scored, brushed lightly with oil and rubbed with salt to give crisp crackling.<br />
f. Meat and poultry wrapped in, or covered with a tent of aluminium foil will be juicy and tender. Roasting bags<br />
offer the same advantage. Always follow the manufacturer's packing instructions and remember to reduce the<br />
tem<strong>per</strong>atures given for conventional ovens by approximately 25°C and the time by approxi mately 10 minutes<br />
<strong>per</strong> hour.<br />
g. Potatoes for roasting only require to be brushed with cooking oil or melted fat.<br />
h. It is not necessary to baste when roasting in an electric oven and stock or liquid should not be added to the<br />
meat pan since this only causes unnecessary soiling, steam and condensation.<br />
ROZ<strong>EN</strong> MEAT AND POULTRY<br />
Joints of meat and whole birds should be defrosted slowly, preferably in a domestic refrigerator (allowing 5-6<br />
hours <strong>per</strong> 450g, 1lb), or at room tem<strong>per</strong>ature (allowing 2-3 hours <strong>per</strong> 450g, 1lb). rozen meat or poultry must be<br />
completely defrosted before placing in the oven. It is essential to wash thoroughly and cook meat and poultry<br />
immediately after defrosting.<br />
18
CONV<strong>EN</strong>TIONAL OV<strong>EN</strong><br />
OV<strong>EN</strong> CONTROL<br />
Heating of the oven is achieved by turning the control clockwise to the required oven tem<strong>per</strong>ature scale on the<br />
control panel, as recommended in the tem<strong>per</strong>ature charts. The pilot light will immediately come on and off<br />
during cooking as the thermostat maintains the correct tem<strong>per</strong>ature.<br />
The charts on pages 20 and 21 are a guide only, giving approximate cooking tem<strong>per</strong>atures and times. To suit<br />
<strong>per</strong>sonal taste and requirements, it may be necessary to increase and decrease tem<strong>per</strong>atures by 10°C.<br />
The oven is fitted with 'heat clean' liners and two rod shelves. The heating of the oven is achieved by turning the<br />
control knob clockwise to the required tem<strong>per</strong>ature as recommended in the tem<strong>per</strong>ature charts. The pilot light<br />
will immediately come on and will automatically go off and on during cooking as the oven thermostat maintains<br />
the correct tem<strong>per</strong>ature.<br />
It should be noted that at the end of a cooking <strong>per</strong>iod there may be a momentary puff of steam when the oven<br />
door is opened. This will dis<strong>per</strong>se in a few seconds and is a <strong>per</strong>fectly normal characteristic of an oven with a<br />
good seal.<br />
The correct positioning of food is indicated on the tem<strong>per</strong>ature charts.<br />
TO PREPARE MEAT OR ROASTING IN YOUR CONV<strong>EN</strong>TIONAL OV<strong>EN</strong><br />
Wipe the joint, dry well with a clean cloth, kitchen tissue etc. and weigh it. Meat which has been stored in a<br />
refrigerator should be allowed to come to room tem<strong>per</strong>ature for approximately 30 minutes before cooking and<br />
frozen meat or poultry must be completely defrosted beforehand.<br />
Beef, lamb, mutton and poultry may be lightly floured, but pork should be scored, brushed lightly with oil and<br />
rubbed with salt to give crisp crackling. Place joint in the main oven meat pan supplied with your cooker. (Small<br />
joints weighing less than 1.75kg (31/2lb) should be roasted in a smaller meat pan / tin - or they may be 'pot<br />
roasted' - a small joint in a large meat pan causes unnecessary oven splashing and evaporation of meat juices).<br />
Additional fat should not be added, except for veal, very lean meat or poultry which can be 'larded' with bacon<br />
fat or brushed very sparingly with cooking oil or melted fat. It is not necessary to baste, when roasting in an<br />
electric oven and liquid / stock should not be added to the pan.<br />
or optimum cooking <strong>per</strong>formance, there must be clearance between meat pan and oven sides.<br />
The meat pan must be placed lengthways in the oven to allow for air circulation.<br />
TIMES AND TEMPERATURES OR ROASTING<br />
The secret of succulent, tender meat, is not to roast it too quickly at too high a tem<strong>per</strong>ature.<br />
Best results are obtained when roasting is carried out at a low tem<strong>per</strong>ature. When a lower tem<strong>per</strong>ature is used,<br />
the joint loses less weight, is more tender (too high a tem<strong>per</strong>ature causes meat to be tough and dry) and the<br />
splashing of fat onto oven interior is reduced to a minimum.<br />
When a complete meal is being cooked in the oven, cooking time may need to be increased and tem<strong>per</strong>ature<br />
may need to be raised for approximately the last 30 minutes of the cooking <strong>per</strong>iod (for instance when cooking<br />
Yorkshire pudding to serve with roast beef ). The suggested times and tem<strong>per</strong>atures given below should be<br />
used as a guide, but may vary according to:-<br />
1. Whether you prefer meat rare, medium or well done.<br />
2. The size and shape of your joint.<br />
(a) A short thick joint requires a longer cooking <strong>per</strong>iod than a long thin joint.<br />
(b)A small joint under 1.5kg (3lbs) takes longer <strong>per</strong> 450g (1lb) cook in the time given for 'minutes' <strong>per</strong> 450g (1lb)<br />
without the 'minutes' over added.<br />
(c) Boned/rolled and stuffed joints take longer to cook through than those with a bone. The weight of stuffing<br />
should be added to the oven ready weight of the meat / poultry to calculate roasting times.<br />
NOTE:<br />
Remember to switch off the oven control after cooking is finished. If the door of the oven is left open for<br />
long <strong>per</strong>iods of time with the control switch ON, then the grill element will become hot. The correct<br />
positioning of food is indicated in the tem<strong>per</strong>ature charts.<br />
19
OV<strong>EN</strong> COOKING CHART - BAKING<br />
It is not necessary to pre-heat the fan oven before roasting. Note: Where times are stated, they are approximate only.<br />
Conventional Oven<br />
Meat Pre-heat Tem<strong>per</strong>ature °C Time (approx.)<br />
Position in Oven<br />
from bottom<br />
Beef Yes 190/200 25-30 mins <strong>per</strong> 450g (1lb) +25 mins over.<br />
Lamb Yes 190/200 25-30 mins <strong>per</strong> 450g (1lb) +25 mins over.<br />
Pork Yes 190/200 30-35 mins <strong>per</strong> 450g (1lb) +30 mins over.<br />
Veal Yes 190/200 25-35 mins <strong>per</strong> 450g (1lb) +30 mins over<br />
In meat pan on<br />
runner 2<br />
Poultry/Game<br />
up to 4kg (8lb)<br />
Yes 180/190 20-25 mins <strong>per</strong> 450g (1lb) +30 mins over<br />
Turkey up to<br />
5.5 kg (12lb)<br />
Turkey over<br />
5.5 kg (12lb)<br />
Yes<br />
Yes<br />
190<br />
180<br />
22 mins <strong>per</strong> 450g (1lb) eg.<br />
5.5kg (11lb) = 242mins<br />
18 mins <strong>per</strong> 450g (1lb) eg.<br />
10kg (22lb) = 352mins<br />
Runner 2<br />
Casserole<br />
Cooking<br />
Yes 140/160 2-2½ hrs Runner 3<br />
If using aluminium foil, never:<br />
1.Allow foil to touch sides of oven. 2.Cover oven interior with foil. 3.Cover shelves with foil.<br />
Fan Oven<br />
Meat Pre-heat Tem<strong>per</strong>ature °C Time (approx.)<br />
Position in Oven<br />
from bottom<br />
Beef No 160/180 20-25 mins <strong>per</strong> 450g (1lb) +20 mins over.<br />
Lamb No 160/180 25 mins <strong>per</strong> 450g (1lb) +25 mins over.<br />
Pork No 160/180 25 mins <strong>per</strong> 450g (1lb) +25 mins over.<br />
Veal No 160/170 25-30 mins <strong>per</strong> 450g (1lb) + 25 mins over<br />
In meat pan on<br />
runner 2<br />
Chicken/Turkey<br />
up to 4kg (8lb)<br />
No 160/180 18-20 mins <strong>per</strong> 450g (1lb) + 20 mins over<br />
Turkey up to<br />
5.5 kg (12lb)<br />
Turkey over<br />
5.5 kg (12lb)<br />
No<br />
No<br />
150 - 160<br />
150<br />
13-15 mins <strong>per</strong> 450g (1lb) eg.<br />
5.5kg (11lb) = 143-165 mins<br />
12 mins <strong>per</strong> 450g (1lb) eg.<br />
10kg (22lb) = 264 mins<br />
Runner 2<br />
Casserole<br />
Cooking<br />
No 140 - 150 1½ - 2 hrs Runner 3<br />
20<br />
If using aluminium foil, never:<br />
1.Allow foil to touch sides of oven. 2.Cover oven interior with foil. 3.Cover shelves with foil.<br />
The most accurate method of testing the readiness of joints of meat or whole poultry is to insert a meat<br />
thermometer into the thickest part of a joint, or the thickest part of poultry thighs, during the cooking <strong>per</strong>iod.The<br />
meat thermometer will indicate when the required internal temp has been reached.<br />
Beef - Rare: 60°C Lamb: 80°C Poultry: 90°C<br />
Medium: 70°C Pork: 90°C<br />
Well Done: 75°C Veal: 75°C
OV<strong>EN</strong> COOKING CHART - BAKING<br />
Fan Oven Cooking<br />
Food Pre-heat Tem<strong>per</strong>ature and Time Position in Oven<br />
Scones Yes 210/220°C approx. 8 - 10 mins. Runner 3<br />
Small Cakes Yes 160/170°C approx. 15 - 20 mins. Runner 3<br />
Victoria Sandwich No 160/170°C approx. 20 - 25 mins. Runner3<br />
Sponge Sandwich (fatless) Yes 160/170°C approx. 15 - 20 mins. Runner 3<br />
Swiss Roll Yes 170/180°C approx. 12 - 15 mins. Runner 3<br />
Rich ruit cakes No 120/130°C dependent on use Runner 2<br />
Semi-Rich Cakes No 140/150°C approx. 1¼ - 2¼ hrs. Runner 3<br />
Shortcrust Pastry No 180/190°C approx. 45 - 50 mins. Runner 2<br />
Puff Pastry No 190/200°C dependent on use Runner 2 & 5<br />
Yorkshire Pudding Yes 170/180°C approx. 40 - 45 mins. Runner 3<br />
Individual Yorkshire Pudding Yes 180/190°C approx. 20 - 25 mins. Runner 3<br />
Milk Pudding No 130/140°C approx. 1¼ - 2¼ hrs. Runner 2<br />
Baked Custard No 140/150°C approx. 40 - 50 mins. Runner 2<br />
Bread Yes 200/210°C approx. 40 - 45 mins. Runner 2<br />
Meringues No 70/80°C approx. 3 - 4 hrs. Runner 1<br />
Conventional Oven Cooking<br />
Food Pre-heat Tem<strong>per</strong>ature and Time Position in Oven<br />
Scones Yes 220/230°C approx. 10 - 15 mins. Runner 3<br />
Small Cakes Yes 180/190°C approx. 20 - 25 mins. Runner 3<br />
Victoria Sandwich Yes 170/180°C 6½" - 7" tins approx. 20 - 25 mins. Runner3<br />
Sponge Sandwich (fatless) Yes 190/200°C 7" tins 15 - 20 mins. Runner 3<br />
Swiss Roll Yes 190/200°C approx. 10 - 15 mins. Runner 3<br />
Rich ruit cakes Yes 130/140°C dependent on use Runner 2<br />
Semi-Rich Cakes Yes 160/170°C 7" - 8" tins 1¼ - 1½ hours Runner 3<br />
Shortcrust Pastry Yes 190/200°C depending on use Runner 2<br />
Puff Pastry Yes 220°C approx. dependent on use Runner 2 & 5<br />
Yorkshire Pudding Yes 200/210°C 30 - 45 mins. Runner 3<br />
Individual Yorkshire Pudding Yes 210/220°C approx. 20 - 25 mins. Runner 3<br />
Milk Pudding Yes 150/160°C approx. 2 - 2½ hours Runner 2<br />
Baked Custard Yes 150/160°C approx. 45 - 55 mins. Runner 2<br />
Bread<br />
Meringues<br />
Yes<br />
Yes<br />
220/230°C 50 - 60 mins. reducing to 210/220°C<br />
230°C 45-50 mins after first 10 minutes<br />
100/110°C Large 3½ - 4½ hours<br />
Small 2½ - 3 hours<br />
Runner 2<br />
Runner 1<br />
Note: If soft margarine is used for cake making, tem<strong>per</strong>atures recommended by the manufacturers should be<br />
followed.Tem<strong>per</strong>atures recommended in this chart refer to cakes made with block margarines or butter only.<br />
21
THE ‘SLOW COOK’ SETTING<br />
With the fanned oven thermostat set to 90° the oven can be used for slow cooking - The 'Slow Cook' setting.<br />
PREPARING OOD OR SLOW COOKING<br />
1. All dishes cooked by the 'Slow Cook' setting should be cooked for a minimum 6 hours. They will 'hold' at this<br />
setting for a further hour but marked deterioration in appearance will be noticed in some cases.<br />
2. Joints of meat and poultry should be cooked at 170° for 30 minutes before turning to the 'Slow Cook' setting and<br />
never be cooked lower than the middle shelf position.<br />
3. Joints of meat over 6 lbs (2.7kg) and poultry over 4 lbs 8oz (2 kg) should not be cooked using the 'Slow Cook'<br />
setting.<br />
4. Always stand covered joints on a rack over the meat tin to allow good air circulation.<br />
5 . A meat thermometer should be used when cooking pork joints and poultry. The internal tem<strong>per</strong>ature of the food<br />
should reach at least 88°C.<br />
6. This method is unsuitable for stuffed meat and stuffed poultry.<br />
7. Always bring soups, casseroles and liquids to the boil before putting in the oven.<br />
8. Cover casseroles with foil and then the lid to prevent loss of moisture.<br />
9. Always thaw frozen food completely before cooking.<br />
10.Root vegetables will cook better if cut into small pieces.<br />
11.Adjust seasonings and thickenings at the end of the cooking time.<br />
12.Use the zones of heat in the oven, e.g. meringues and milk puddings can be cooked lower in the oven whilst<br />
other dishes requiring greater heat can be cooked above them.<br />
13.Egg and fish dishes need only 1-5 hours cooking and should be included in day cooking sessions, when they<br />
can be observed from time to time.<br />
14.Dried red kidney beans must be boiled for a minimum of ten minutes after soaking, before inclusion in any dish.<br />
WARMING COMPARTM<strong>EN</strong>T<br />
The warming compartment is situated at the bottom right hand side of the cooker. It can be used for keeping<br />
plates or food warm. It is not designed as a 'Slow Cook' oven.<br />
22
CARE AND CLEANING<br />
! Never use steam cleaners or pressure cleaners on the appliance.<br />
! Clean the glass part of the oven door using a sponge and a non-abrasive cleaning product, then dry thoroughly with<br />
a soft cloth. Do not use rough abrasive material or sharp metal scra<strong>per</strong>s as these could scratch the surface and<br />
cause the glass to crack.<br />
! The accessories can be washed like averyday crockery (even in your dishwasher).<br />
! Switch off the electricity supply and allow to cool before cleaning the cooker.<br />
! Clean the cooker regularly and wipe up spills soon after they occur to prevent them from becoming<br />
burnt on. Never use biological washing powder, caustic cleaners, harsh abrasives, scouring pads,<br />
steam cleaners, aerosol cleaners or oven chemical cleaners of any kind.<br />
! Before moving your cooker ensure that it is cool and note that it is heavy so you may require<br />
assistance. The cooker is fitted with rear wheels and will slide in and out of position easily.<br />
Movement of your cooker is most easily achieved as follows:<br />
Open the grill/oven door sufficiently to allow a comfortable grip on the underside front edge of the oven<br />
roof, avoiding contact with any grill or oven furniture and then lift and slide at the same time.<br />
When repositioning the cooker, ensure that it is level. Take care to ensure that any floor covering is not<br />
damaged.<br />
'HEAT CLEAN' LINERS<br />
The oven linings are coated with a special enamel which has a continuous cleaning action. The higher the oven<br />
tem<strong>per</strong>ature the more effective the action. In most cases this cleaning o<strong>per</strong>ation will proceed during normal<br />
cooking.<br />
However, if high tem<strong>per</strong>atures are not used regularly it may be necessary to run the oven empty at maximum<br />
setting for one hour. If desired, they can be wiped over with a soapy cloth followed by a wipe with a clean,<br />
damp cloth.<br />
CLEANING THE GRIDDLE PLATE<br />
After cooking, leave the griddle plate on the hob and allow to cool before cleaning. It can then be taken to the<br />
sink and washed using warm soapy water, gently wipe the cooking surface with a dishcloth. DO NOT use<br />
abrasive cleaning materials.<br />
REPLACEM<strong>EN</strong>T O OV<strong>EN</strong> LIGHT BULB<br />
CAUTION: DISCONNECT THE APPLIANCE ROM THE ELECTRICITY SUPPLY BEORE<br />
REPLACING THE LAMP TO AVOID THE POSSIBILITY O AN ELECTRIC SHOCK.<br />
Light bulbs are not covered by the manufacturer's guarantee.<br />
A new 15W, 300°C rated SES bulb can be obtained from your cooker supplier or any major electrical retailer.<br />
1. Remove the shelves from the oven.<br />
2. Unscrew the lens using a thick cloth to protect your fingers in the unlikely event of a lens fracture.<br />
3. Unscrew bulb.<br />
4. it new bulb and refit lens.<br />
23
CARE AND CLEANING<br />
COOKER FINISH<br />
CLEANING METHOD<br />
Vitreous Enamel<br />
Hotplate (Traditional), pan supports, burner caps,<br />
roasting dish, grill pan, oven base, rear and roof,<br />
door inner panels, grill and warming<br />
compartments.<br />
Cloth wrung out in warm soapy water. Stubborn stains can be<br />
removed with a cream paste, liquid cleaner or by rubbing with<br />
fine steel wool soap pads e.g. Brillo, Ajax.<br />
Check that the cleaning agent is approved by the Vitreous<br />
Enamel Association.<br />
Aluminium<br />
Burner bodies, door handles.<br />
Similar to paint cleaning above. Use a nylon brush to remove any<br />
cleaning materials, water or dirt from the hotplate burner ports.<br />
Care should be taken when refitting the bodies over the<br />
electrodes.<br />
Glass<br />
As for enamel cleaning. Polish with a clean dry cloth or kitchen<br />
roll.<br />
Chromium Plating<br />
Oven shelves, grill pan grid, grill pan handle<br />
support.<br />
Wipe with a cloth wrung out in warm soapy water. A fine steel<br />
wool soap pad e.g. Brillo, Ajax, or a chrome or stainless steel<br />
cleaner may be used.<br />
Plastic<br />
Grill pan handle, control knobs, door handle<br />
supports.<br />
Wipe with a cloth wrung out in warm soapy water.<br />
Stainless Steel (Professional)<br />
Door trims, control panel, hotplate<br />
Wipe with a cloth wrung out in warm soapy water. Polish with a<br />
clean dry cloth or kitchen towel. or stubborn stains, use a<br />
proprietary stainless steel cleaner and follow the instructions on<br />
the container.<br />
Paint<br />
Control panel and doors (Traditional), side<br />
panels<br />
Wipe with a cloth wrung out in warm soapy water only. DO NOT<br />
USE ABRASIVES.<br />
24
SOMETHING WRONG<br />
WITH YOUR COOKER<br />
Before contacting your nearest Service Centre/Installer, check the problem guide below; there may be<br />
nothing wrong with your cooker.<br />
PROBLEM<br />
Slight odour or small amount of smoke<br />
when grill/oven used for first time.<br />
Oven cooks too fast or too slow.<br />
Ignition does not work:<br />
CHECK<br />
This is normal and should cease after a short <strong>per</strong>iod.<br />
Check that the oven setting and shelf positions are as recommended in<br />
the Cooking Charts. However, it may be necessary to increase or<br />
decrease the recommended setting slightly to suit your taste.<br />
If all burners fail to ignite:<br />
Check that sparks appear at the burners; a clicking noise should be<br />
heard.<br />
If not;<br />
(i) Check that the electricity supply is turned on.<br />
(ii) Check other appliances to see if you have had a power cut.<br />
If only one burner fails to ignite:<br />
(i) Check the burner cap is seated correctly.<br />
(ii) Check the slots in the burner bodies are not blocked with any soap<br />
residue or cooking soil (see care and cleaning).<br />
(iii) Check, if the burners have recently been cleaned using a wire wool<br />
pad eg. "Brillo Pad', ensure that no stray strands are caught on the<br />
ignitor or burner body.<br />
NOTE. Satisfactory ignition will only be achieved if all the hotplate<br />
burners are fitted. In the event of an electricity failure, all burners can be<br />
lit with a match.<br />
Cannot set an "Auto Cook" programme or<br />
cannot get the timer to turn the oven on or<br />
off at the required times.<br />
Timer Display shows "0:00" with "AUTO"<br />
lashing.<br />
anned oven does not work, but the grill,<br />
top oven and hotplate burners work.<br />
Oven lamp does not work.<br />
Read the Timer instructions in this book carefully remembering that the<br />
Cook <strong>per</strong>iod is the length of time that the timer will switch the oven(s) on<br />
as part of an Auto Cooking Programme.<br />
The electricity supply to the cooker may have been been interrupted, but<br />
has now come back on again. Set the correct time of day by following<br />
the instructions given in the timer section of this book.<br />
The Timer may be set for an Auto Cooking programme. Check the Timer<br />
to see if "AUTO" is illuminated. If it is, follow the instructions given in the<br />
Timer section of this book to cancel the Auto Cooking programme.<br />
The oven lamp is not covered by the guarantee. The part is easily<br />
changed (see the section on oven lamp replacement).<br />
A new lamp may be obtained from our Parts department, (see back<br />
page).<br />
If there is still a problem contact your local Service office (see back page).<br />
25
Disposal of your product<br />
To minimise the risk of injury to children please dispose of your product carefully and safely. Remove all doors<br />
and lids. Remove the mains cable (where fitted) by cutting off flush with the appliance and always ensure that<br />
no plug is left in a condition where it could be connected to the electricity supply.<br />
To help the environment, Local Authority instructions should be followed for the disposal of your product.<br />
Disposal of old electrical appliances<br />
The European Directive 2002/96/EC on Waste Electrical and Electronic Equipment (WEEE), requires that old<br />
household electrical appliances must not be disposed of in the normal unsorted municipal waste stream. Old<br />
appliances must be collected separately in order to optimise the recovery and recycling of the materials they<br />
contain and reduce the impact on human health and the environment.<br />
The crossed out "wheeled bin" symbol on the product reminds you of your obligation, that when you dispose of<br />
the appliance it must be separately collected.<br />
Consumers should contact their local authority or retailer for information concerning the correct disposal of their<br />
old appliance.<br />
26
INSTALLATION INSTRUCTIONS<br />
Prior to installation, ensure that the local distribution conditions (nature of the gas and gas pressure) and the<br />
adjustment conditions are compatible. The adjustment conditions for this appliance are stated on the data<br />
badge which is fitted on the back panel.<br />
This appliance is not designed to be connected to a combustion products evacuation device. It must be<br />
installed and connected in accordance with current installation regulations. particular attention should be given<br />
to the relevant requirements regarding ventilation.<br />
MODEL NUMBERS 10450G, 10455G, 10456G<br />
Category II2H3+ (GB. IE)<br />
This model is set to burn NATURAL GAS (G20) at 20 mbar but can be converted for use on BUTANE (G30) at<br />
28-30mbar or PROPANE (G31) at 37mbar with the use of a service kit supplied with the appliance or available<br />
from our Service and Genuine Parts and Accessories department (see back cover).<br />
GAS SAETY (INSTALLATION & USE) REGULATIONS<br />
It is the law that all gas appliances are installed by competent <strong>per</strong>sons in accordance with the current edition of<br />
the above regulations. It is in your interest and that of safety to ensure compliance with the law.<br />
In the UK, CORGI registered installers work to safe standards of practice.<br />
The cooker must also be installed in accordance with BS 6172.<br />
ailure to install the cooker correctly could invalidate the warranty liability claims and could lead to prosecution.<br />
LOCATION<br />
The cooker may be located in a kitchen, kitchen/diner or a bed-sitting room, but not in a room containing a bath<br />
or shower. The cooker must not be installed in a bed-sitting room of less than 20m 3 .<br />
When adjusted for use on BUTANE (G30) or PROPANE (G31) the cooker must not be installed in a room or<br />
internal space below ground level, eg. in a basement.<br />
PROVISION OR V<strong>EN</strong>TILATION<br />
The room containing the cooker should have an air supply in accordance with BS 5440: Part 2.<br />
The room must have an opening window or equivalent; some rooms may also require a <strong>per</strong>manent vent. If the<br />
room has a volume between 5 and 10m 3 , it will require an air vent of 50cm 2 effective area unless it has a door<br />
which opens directly to outside. If the room has a volume of less than 5m 3 , it will require an air vent of 100cm 2<br />
effective area. If there are other fuel burning appliances in the same room, BS 5440: Part 2 should be consulted<br />
to determine air vent requirements.<br />
27
TECHNICAL DATA<br />
INSTALLATION INSTRUCTIONS<br />
DIM<strong>EN</strong>SIONS<br />
Height<br />
Widht<br />
Depth<br />
G<strong>EN</strong>ERAL<br />
Gas connection<br />
Pressure test point<br />
Gas rate adjustment<br />
Aeration adjustment<br />
Electrical connection<br />
Total electrical heat input<br />
230-240V~<br />
900 - 915 mm<br />
1000 mm<br />
600 mm (excluding door handles)<br />
Rp ½ (½" BSP female)<br />
Hotplate burner injector<br />
None<br />
None<br />
230-240V~ 50Hz.<br />
6.00-6.80 kW<br />
Cat II2H3+<br />
G20 at 20 mbar<br />
Cat II2H3+<br />
G30 at 28 - 30 mbar<br />
G31 at 37 mbar<br />
BURNER<br />
HOTPLATE<br />
ront Left<br />
HOTPLATE<br />
Rear Left<br />
HEAT INPUT HEAT INPUT INJECTOR HEAT INPUT GAS RATE INJECTOR BY-PASS<br />
1.90 kW 102 Z 1.90 kW 138 g/hr 64 35<br />
3.00 kW 116 Y 3.00 kW 218 g/hr 86 44<br />
HOTPLATE<br />
Wok Inner<br />
Centre ront<br />
HOTPLATE<br />
Wok Outer<br />
Centre ront<br />
HOTPLATE<br />
Auxiliary<br />
Centre Rear<br />
HOTPLATE<br />
ront Right<br />
HOTPLATE<br />
Rear Right<br />
TWIN GRILL<br />
L/H OV<strong>EN</strong><br />
R/H OV<strong>EN</strong><br />
WARMING<br />
DRAWER<br />
2.50 kW<br />
1.60 kW<br />
1.80 kW<br />
0.10 kW<br />
4.10 kW 110 x 24.10 kW 298 g/hr 70 x 257<br />
1.00 kW 74 1.00 kW 73 g/hr 44 24<br />
1.00 kW 71 X 1.00 kW 73 g/hr 50 24<br />
1.50 kW 88 X 1.50 kW 110 g/hr 60 35<br />
1.50 kW 88 X 1.50 kW 110 g/hr 60 35<br />
28
INSTALLATION INSTRUCTIONS<br />
CONVERSION OR USE ON BUTANE OR PROPANE<br />
Each hob burner requires the injector to be replaced and each burner gas tap to have the by-pass screw<br />
adjusted according to the following procedure:<br />
1. Lift off the burner cap and the burner body and place it to one side.<br />
2. Remove the injector from the burner base with a suitable box spanner and discard.<br />
3. Replace the injector with the appropriate replacement (see Table on page 28).<br />
4. Repeat for each burner.<br />
5. Replace the burner bodies and caps, taking care that they are positioned correctly.<br />
6. Remove the tap knob from the left hand hotplate tap. Insert a narrow flat screwdriver centre of the tap spindle<br />
and turn fully clockwise. Replace the tap knob. Repeat this procedure with the other six hotplate taps.<br />
7. Position and fix the self-adhesive LPG conversion label over the gas details on the rating plate label.<br />
29
INSTALLATION INSTRUCTIONS<br />
SPACE OR IXING<br />
The cooker can be close fitted below hotplate level. This requires a minimum distance of 600mm between cupboard<br />
units of hotplate height.<br />
When installing next to a tall cupboard, partition or wall, for a minimum distance of 400mm above hotplate level,<br />
allow a side clearance of at least 65mm.<br />
The diagram below illustrates the minimum clearance between the cooker and adjacent walls, cupboards etc.<br />
The wall behind the cooker, 50mm below and 450mm above, and the width of the cooker, must be a noncombustible<br />
material such as ceramic wall tiles.<br />
If the cooker is to be fitted close to a corner on the left hand side, ensure that there is a clearance of at least 50mm<br />
to allow the main oven door to open fully for when removing oven shelves.<br />
750mm min<br />
COOKER HOODS<br />
If a cooker hood is to be installed, refer to the cooker hood manufacturers' instructions regarding fixing height.<br />
30
INSTALLATION INSTRUCTIONS<br />
UNPACKING THE COOKER<br />
Unpack the components from inside the grill and oven. Check that the following parts are present:<br />
Meat pan Pan supports (3)<br />
Grill pan, grid and handle<br />
LPG conversion kit<br />
Loose burner parts (14) Oven shelves (4)<br />
Aluminium burner bodies (6) Griddle<br />
Wok Stand<br />
Literature pack<br />
After unpacking your cooker, make sure that you remove all the packing from the oven and grill, and any<br />
stickers from the oven door and the hob.<br />
LEVELLING<br />
Your cooker is heavy, so it would be advisable for two people to move it. The cooker is fitted with rear wheels<br />
and will slide into position easily. Movement of your cooker is most easily achieved as follows. Open the grill/<br />
oven door sufficiently to allow a comfortable grip on the underside front edge of the oven roof, avoiding any grill<br />
or oven interior furniture, and then lift and slide back at the same time.<br />
Your cooker must stand on a flat surface so that the hob is <strong>per</strong>fectly level, and the cooker is stable and cannot<br />
be rocked, this is easily achieved by adjusting the three feet which are under the front of the cooker and the 3<br />
castors under the rear of the cooker, if necessary.<br />
STABILITY BRACKET<br />
The cooker must be fitted with a stability device firmly secured to the fabric of the building.<br />
The M6 bolt at the top of the rear of the cooker can be used to engage a stability chain. Keep the chain clear of<br />
controls and pipes on the rear of the cooker.<br />
The chain must be fitted to the wall behind the cooker.<br />
NOTE: If the cooker is to be placed on a base, precautions must be taken to prevent it from slipping off the<br />
base.<br />
31
INSTALLATION INSTRUCTIONS<br />
The cooker is designed to match the depth of standard 600mm worktops.<br />
An adaptor backplate should, therefore, be fitted within the shaded area shown to allow the cooker to be<br />
pushed fully to the wall. If a forward facing backplate is used, it must be chased into the wall.<br />
180<br />
450<br />
370<br />
250<br />
750<br />
750<br />
Connection to the cooker should be made with an approved appliance flexible connection to BS 669. A length of<br />
0.9 to 1.25m is recommended. The length of hose chosen should be such that when the cooker is in situ, the<br />
hose does not touch the floor.<br />
The tem<strong>per</strong>ature rise of areas at the rear of the cooker that are likely to come in contact with the flexible hose do<br />
not exceed 70°C.<br />
LPG cookers should be connected with a hose suitable for LPG and capable of withstanding 50mbar pressure.<br />
32
INSTALLATION INSTRUCTIONS<br />
WARNING - THIS APPLIANCE MUST BE EARTHED<br />
Your cooker should have been checked to ensure that the voltage corresponds with your supply voltage, which<br />
is stated on the data badge fitted on the rear panel.<br />
The cooker must be connected by a contractor/engineer who is registered with the National Inspection Council<br />
for Electrical Installation Contracting (NICEIC), to a suitable double - pole control unit with a minimum rating of<br />
30A and a minimum contact clearance of 3mm, which should be fitted adjacent to (but not above) the cooker, in<br />
accordance with IEE regulations.<br />
The power supply cable should conform to BS6004 with a conductor size of 4mm 2 .<br />
The power supply cable must be type H05RR- 3x4mm².<br />
The control unit should be easily accessible in the event of an emergency.<br />
This appliance conforms to <strong>EN</strong>55014 regarding suppression of radio and television interference.<br />
Access to the mains terminals is gained by removing the rear access cover.<br />
The mains cable must pass through the cable clamp adjacent to the terminal block.<br />
Sufficient cable should be used to allow the cooker to be pulled out for servicing.<br />
INSTALLATION & OPERATIONAL CHECKS<br />
After installation, check for gas soundness.<br />
it the hotplate burner bodies, burner port rings, enamelled discs and pan supports referring to the instructions<br />
for use where necessary.<br />
1. Check that the hotplate burners ignite correctly and burn with a steady flame.<br />
Check for a steady flame on the low setting.<br />
2. Check that with the left hand oven set at 230°C, the oven fan o<strong>per</strong>ates and the oven heats up.<br />
3. Check that with the right hand oven set at 230°C, the oven heats up.<br />
4. Check that the twin grill heats up.<br />
5. Check that the warming drawer heats up.<br />
6. Check o<strong>per</strong>ation of clock.<br />
Instruct the user on the o<strong>per</strong>ation of the cooker.<br />
33
34
Guarantee<br />
12 months Parts and Labour Guarantee<br />
Your appliance has the benefit of our manufacturer's guarantee, which covers the cost of<br />
breakdown repairs for twelve months from the date of purchase.<br />
This gives you the reassurance that if, within that time, your appliance is proven to be<br />
defective because of either workmanship or materials, we will, at our discretion, either repair<br />
or replace the appliance at no cost to you.<br />
The guarantee is subject to the following conditions:<br />
- The appliance has been installed and o<strong>per</strong>ated correctly and in accordance with our o<strong>per</strong>ating<br />
and maintenance instructions.<br />
- The appliance is only used on the electricity or gas supply printed on the rating plate.<br />
- The appliance has been used for normal domestic purposes only.<br />
- The appliance has not been altered, serviced, maintained, dismantled or otherwise interfered<br />
with by any <strong>per</strong>son not authorised by us.<br />
- Any repair work must be undertaken by us or our appointed agent.<br />
- Any parts removed during repair work or any appliance that is replaced become our pro<strong>per</strong>ty.<br />
- The appliance is used in the United Kingdom or Republic of Ireland.<br />
The guarantee does not cover:<br />
- Damage resulting from transportation, impro<strong>per</strong> use, neglect or interference or as a result of<br />
impro<strong>per</strong> installation.<br />
- Replacement of any consumable item or accessory. These include but are not limited to:<br />
plugs, cables, batteries, light bulbs, fluorescent tubes and starters, covers and filters.<br />
- Replacement of any removable parts made of glass or plastic.<br />
THE GUARANTEE WILL NOT APPLY I THE APPLIANCE HAS BE<strong>EN</strong> USED IN<br />
COMMERCIAL OR NON-DOMESTIC PREMISES.<br />
5 Year Parts Guarantee<br />
Cannon also offers you a REE 5 year parts guarantee. This additional guarantee is conditional<br />
on you registering your appliance with us and the parts being fitted by one of our authorised<br />
engineers. There will be a charge for our engineer's time. To activate the extra parts warranty on<br />
your appliance, simply call our registration line on 0870 6092094 (ROI 01 230 0800)<br />
Extended Guarantees<br />
We offer a selection of protection plans that enable you to fully cover yourself against the expense<br />
of repair bills for the life of your policy. To find the ideal plan for you please call our advice line on<br />
08709 088 088 (ROI 01 230 0233)<br />
ree Helpdesk Service<br />
We have a dedicated team who can provide free advice and assistance with your appliance if<br />
you ex<strong>per</strong>ience any technical difficulties within the first 90 days of ownership.<br />
Simply call our Cannon Service Hotline on 08709 066 066 (ROI 0818 313 413) for telephone<br />
assistance, or, where necessary, to arrange for an engineer to call.
After Sales Service<br />
No one is better placed to care for your Cannon appliance during the course of its working<br />
life than us - the manufacturer.<br />
Essential Contact Information<br />
Cannon Service<br />
We are the largest service team in the country offering you access to 400 skilled telephone<br />
advisors and 1100 fully qualified engineers on call to ensure you receive fast, reliable, local<br />
service.<br />
UK: 08709 066 066<br />
Republic of Ireland: 0818 313 413<br />
www.cannonservice.co.uk<br />
Please note: Our advisors will require the following information:<br />
Model number<br />
Serial number<br />
Parts & Accessories<br />
We supply a full range of genuine replacement parts as well as accessory products that<br />
protect and hygienically clean your appliance to keep it looking good and functioning<br />
efficiently throughout its life.<br />
UK: 08709 077 077<br />
Republic of Ireland: 0818 313 413<br />
www.cannonservice.co.uk<br />
Appliance Registration<br />
We want to give you additional benefits of Cannon ownership. To activate your REE 5 year<br />
parts guarantee you must register your appliance with us.<br />
UK 0870 6092094<br />
Republic of Ireland: 01 230 0800<br />
www.cannonservice.co.uk<br />
As part of Cannon's continued commitment to helping the environment, Cannon reserves the<br />
right to use quality, recycled components to keep down customer costs and minimise<br />
material wastage.<br />
Indesit Company UK Limited, Morley Way, Peterborough, PE2 9JB<br />
Indesit Company, Unit 49 Airways Industrial Estate, Dublin 17<br />
01/2009 Part no. 195044520.05


