

Sony MHC-EC719iP - MHC-EC719IP Istruzioni per l'uso Inglese
Sony MHC-EC719iP - MHC-EC719IP Istruzioni per l'uso Inglese
Sony MHC-EC719iP - MHC-EC719IP Istruzioni per l'uso Inglese

Create successful ePaper yourself
Turn your PDF publications into a flip-book with our unique Google optimized e-Paper software.
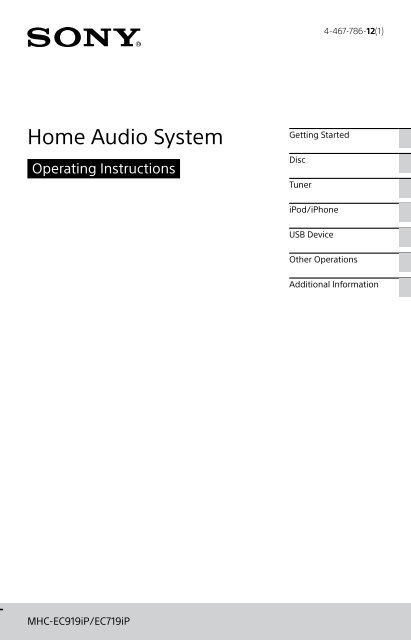
4-467-786-12(1)<br />
Home Audio System<br />
O<strong>per</strong>ating Instructions<br />
Getting Started<br />
Disc<br />
Tuner<br />
iPod/iPhone<br />
USB Device<br />
Other O<strong>per</strong>ations<br />
Additional Information<br />
<strong>MHC</strong>-EC919iP/<strong>EC719iP</strong>
WARNING<br />
To reduce the risk of fire or electric<br />
shock, do not expose this apparatus to<br />
rain or moisture.<br />
To reduce the risk of fire, do not cover the<br />
ventilation opening of the appliance with<br />
newspa<strong>per</strong>s, tablecloths, curtains, etc.<br />
Do not expose the appliance to naked<br />
flame sources (for example, lighted<br />
candles).<br />
To reduce the risk of fire or electric shock,<br />
do not expose this appliance to dripping<br />
or splashing, and do not place objects<br />
filled with liquids, such as vases, on the<br />
appliance.<br />
Do not install the appliance in a confined<br />
space, such as a bookcase or built-in<br />
cabinet.<br />
As the main plug is used to disconnect<br />
the unit from the mains, connect the unit<br />
to an easily accessible AC outlet. Should<br />
you notice an abnormality in the unit,<br />
disconnect the main plug from the AC<br />
outlet immediately.<br />
Do not expose batteries or appliances<br />
with battery-installed to excessive heat,<br />
such as sunshine and fire.<br />
The unit is not disconnected from the<br />
mains as long as it is connected to the<br />
AC outlet, even if the unit itself has been<br />
turned off.<br />
CAUTION<br />
The use of optical instruments with this<br />
product will increase eye hazard.<br />
Except for customers in the USA and<br />
Canada<br />
This appliance is classified as a CLASS 1<br />
LASER product. This marking is located<br />
on the rear exterior.<br />
2 GB<br />
Notice for the customers in the USA<br />
Owner’s Record<br />
The model and serial numbers are<br />
located on the rear of the unit. Record<br />
these numbers in the space provided<br />
below. Refer to them whenever you call<br />
upon your <strong>Sony</strong> dealer regarding this<br />
product.<br />
Model No.<br />
Serial No.<br />
Important Safety Instructions<br />
1) Read these instructions.<br />
2) Keep these instructions.<br />
3) Heed all warnings.<br />
4) Follow all instructions.<br />
5) Do not use this apparatus near water.<br />
6) Clean only with dry cloth.<br />
7) Do not block any ventilation<br />
openings. Install in accordance with<br />
the manufacturer’s instructions.<br />
8) Do not install near any heat sources<br />
such as radiators, heat registers,<br />
stoves, or other apparatus (including<br />
amplifiers) that produce heat.<br />
9) Do not defeat the safety purpose<br />
of the polarized or grounding-type<br />
plug. A polarized plug has two<br />
blades with one wider than the<br />
other. A grounding type plug has<br />
two blades and a third grounding<br />
prong. The wide blade or the third<br />
prong are provided for your safety.<br />
If the provided plug does not fit into<br />
your outlet, consult an electrician for<br />
replacement of the obsolete outlet.<br />
10) Protect the power cord from being<br />
walked on or pinched particularly at<br />
plugs, convenience receptacles, and<br />
the point where they exit from the<br />
apparatus.<br />
11) Only use attachments/accessories<br />
specified by the manufacturer.<br />
12) Use only with the cart,<br />
stand, tripod, bracket,<br />
or table specified by<br />
the manufacturer, or<br />
sold with the apparatus.<br />
When a cart is used, use caution<br />
when moving the cart/apparatus<br />
combination to avoid injury from tipover.
13) Unplug this apparatus during<br />
lightning storms or when unused for<br />
long <strong>per</strong>iods of time.<br />
14) Refer all servicing to qualified service<br />
<strong>per</strong>sonnel. Servicing is required when<br />
the apparatus has been damaged in<br />
any way, such as power-supply cord<br />
or plug is damaged, liquid has been<br />
spilled or objects have fallen into the<br />
apparatus, the apparatus has been<br />
exposed to rain or moisture, does<br />
not o<strong>per</strong>ate normally, or has been<br />
dropped.<br />
The following FCC statement applies<br />
only to the version of this model<br />
manufactured for sale in the USA.<br />
Other versions may not comply with<br />
FCC technical regulations.<br />
NOTE:<br />
This equipment has been tested and<br />
found to comply with the limits for<br />
a Class B digital device, pursuant to<br />
Part 15 of the FCC Rules. These limits<br />
are designed to provide reasonable<br />
protection against harmful interference<br />
in a residential installation. This<br />
equipment generates, uses, and can<br />
radiate radio frequency energy and, if<br />
not installed and used in accordance<br />
with the instructions, may cause harmful<br />
interference to radio communications.<br />
However, there is no guarantee that<br />
interference will not occur in a particular<br />
installation. If this equipment does<br />
cause harmful interference to radio<br />
or television reception, which can be<br />
determined by turning the equipment off<br />
and on, the user is encouraged to try to<br />
correct the interference by one or more<br />
of the following measures:<br />
Reorient or relocate the receiving<br />
antenna.<br />
Increase the separation between the<br />
equipment and receiver.<br />
Connect the equipment into an outlet<br />
on a circuit different from that to<br />
which the receiver is connected.<br />
Consult the dealer or an ex<strong>per</strong>ienced<br />
radio/TV technician for help.<br />
CAUTION<br />
You are cautioned that any changes or<br />
modifications not expressly approved in<br />
this manual could void your authority to<br />
o<strong>per</strong>ate this equipment.<br />
This symbol is intended<br />
to alert the user to the<br />
presence of uninsulated<br />
“dangerous voltage”<br />
within the product’s<br />
enclosure that may be of<br />
sufficient magnitude to<br />
constitute a risk of electric<br />
shock to <strong>per</strong>sons.<br />
This symbol is intended<br />
to alert the user<br />
to the presence of<br />
important o<strong>per</strong>ating and<br />
maintenance (servicing)<br />
instructions in the<br />
literature accompanying<br />
the appliance.<br />
Notice for customers: the following<br />
information is only applicable<br />
to equipment sold in countries<br />
applying EU directives.<br />
This product has been manufactured by<br />
or on behalf of <strong>Sony</strong> Corporation, 1-7-1<br />
Konan Minato-ku Tokyo, 108-0075 Japan.<br />
Inquiries related to product compliance<br />
based on European Union legislation<br />
shall be addressed to the authorized<br />
representative, <strong>Sony</strong> Deutschland GmbH,<br />
Hedelfinger Strasse 61, 70327 Stuttgart,<br />
Germany. For any service or guarantee<br />
matters, please refer to the addresses<br />
provided in the separate service or<br />
guarantee documents.<br />
3 GB
For customers in Europe and<br />
Australia<br />
Disposal of Old Electrical &<br />
Electronic Equipment<br />
(Applicable in the<br />
European Union and<br />
other European countries<br />
with separate collection<br />
systems)<br />
This symbol on the product or on its<br />
packaging indicates that this product<br />
shall not be treated as household<br />
waste. Instead it shall be handed over<br />
to the applicable collection point for<br />
the recycling of electrical and electronic<br />
equipment. By ensuring this product<br />
is disposed of correctly, you will help<br />
prevent potential negative consequences<br />
for the environment and human health,<br />
which could otherwise be caused by<br />
inappropriate waste handling of this<br />
product. The recycling of materials will<br />
help to conserve natural resources.<br />
For more detailed information about<br />
recycling of this product, please contact<br />
your local Civic Office, your household<br />
waste disposal service or the shop where<br />
you purchased the product.<br />
Applicable accessories: Remote<br />
commander<br />
Europe Only Disposal of waste batteries<br />
(applicable in the<br />
European Union and other<br />
European countries with<br />
separate collection<br />
systems)<br />
This symbol on the battery or on the<br />
packaging indicates that the battery<br />
provided with this product shall not be<br />
treated as household waste.<br />
On certain batteries this symbol might<br />
be used in combination with a chemical<br />
symbol. The chemical symbols for<br />
mercury (Hg) or lead (Pb) are added if<br />
the battery contains more than 0.0005%<br />
mercury or 0.004% lead.<br />
By ensuring these batteries are disposed<br />
of correctly, you will help prevent<br />
potentially negative consequences for<br />
the environment and human health<br />
which could otherwise be caused by<br />
inappropriate waste handling of the<br />
battery. The recycling of the materials will<br />
4 GB<br />
help to conserve natural resources.<br />
In case of products that for safety,<br />
<strong>per</strong>formance or data integrity reasons<br />
require a <strong>per</strong>manent connection with an<br />
incorporated battery, this battery should<br />
be replaced by qualified service staff<br />
only. To ensure that the battery will be<br />
treated pro<strong>per</strong>ly, hand over the product<br />
at end-of-life to the applicable collection<br />
point for the recycling of electrical and<br />
electronic equipment.<br />
For all other batteries, please view the<br />
section on how to remove the battery<br />
from the product safely. Hand the battery<br />
over to the applicable collection point for<br />
the recycling of waste batteries.<br />
For more detailed information about<br />
recycling of this product or battery,<br />
please contact your local Civic Office,<br />
your household waste disposal service<br />
or the shop where you purchased the<br />
product.<br />
Note on DualDiscs<br />
A DualDisc is a two sided disc product<br />
which mates DVD recorded material on<br />
one side with digital audio material on<br />
the other side. However, since the audio<br />
material side does not conform to the<br />
Compact Disc (CD) standard, playback on<br />
this product is not guaranteed.<br />
Music discs encoded with copyright<br />
protection technologies<br />
This product is designed to playback<br />
discs that conform to the Compact Disc<br />
(CD) standard. Recently, various music<br />
discs encoded with copyright protection<br />
technologies are marketed by some<br />
record companies. Please be aware that<br />
among those discs, there are some that<br />
do not conform to the CD standard and<br />
may not be playable by this product.
Table of Contents<br />
Guide to parts and controls.......6<br />
Getting Started<br />
Hooking up the system<br />
securely......................................9<br />
Inserting batteries.................... 10<br />
Setting the clock...................... 10<br />
Disc<br />
Playing a CD/MP3 disc.............. 11<br />
Additional Information<br />
Compatible devices with this<br />
system...................................... 24<br />
Troubleshooting....................... 24<br />
Messages.................................. 29<br />
Precautions............................... 29<br />
Specifications............................31<br />
License and Trademark<br />
Notice....................................... 33<br />
Tuner<br />
Listening to the radio................13<br />
iPod/iPhone<br />
Playing the iPod/iPhone.......... 14<br />
USB Device<br />
Before using the USB device.... 16<br />
Transferring music from<br />
a disc.........................................17<br />
Playing a file............................. 18<br />
Other O<strong>per</strong>ations<br />
Using optional audio<br />
components..............................21<br />
Adjusting the sound.................21<br />
Changing the display............... 22<br />
Using the timers....................... 22<br />
5 GB
This manual mainly explains o<strong>per</strong>ations using the remote control, but the same<br />
o<strong>per</strong>ations can also be <strong>per</strong>formed using the buttons on the unit having the same<br />
or similar names.<br />
Guide to parts and controls<br />
Unit<br />
6 GB<br />
About the child lock function<br />
You can lock the buttons except (on/standby) on the unit to prevent them<br />
from being o<strong>per</strong>ated by mistake. Hold down (stop) on the unit until “LOCK ON”<br />
or “LOCK OFF” appears on the display. The buttons except on the unit will be<br />
locked or unlocked.
Remote control<br />
<br />
Unit: ENTER button<br />
Remote control: button<br />
Press to enter/confirm the settings.<br />
<br />
TUNING+/TUNING button<br />
Press to tune to the desired station.<br />
(go backward)/ (go forward)<br />
button<br />
Press to select a track or file.<br />
(rewind)/ (fast forward)<br />
button<br />
Press to find a point in a track or file.<br />
Remote control: PRESET+/PRESET<br />
button<br />
Press to select a preset radio station.<br />
<br />
+/ (select folder) button<br />
(page 11, 18)<br />
Press to select a folder.<br />
<br />
(on/standby) button<br />
Press to turn on or off the system.<br />
<br />
OPTIONS button (page 19)<br />
Press to enter or exit the option<br />
menus.<br />
<br />
Remote control sensor<br />
<br />
Lightning connector<br />
Connect iPhone 5, iPod touch (5th<br />
generation) or iPod nano (7th<br />
generation).<br />
<br />
REC TO USB button (page 17)<br />
Press to transfer music from a disc to<br />
the connected optional USB device.<br />
Unit: PRESET+/PRESET button<br />
Press to select a preset radio station.<br />
Remote control: /// button<br />
Press to o<strong>per</strong>ate the menu of iPod/<br />
iPhone.<br />
<br />
OPEN/CLOSE button<br />
Press to open or close the disc tray.<br />
<br />
Unit: VOLUME control<br />
Turn to adjust the volume.<br />
Remote control: VOLUME +*/ button<br />
Press to adjust the volume.<br />
<br />
(USB) port<br />
Connect an optional USB device.<br />
<br />
AUDIO IN jack<br />
Connect an external audio component.<br />
7 GB
BASS BOOST button (page 21)<br />
Press to create a more dynamic sound.<br />
<br />
Unit: EQ button<br />
Remote control: EQ +/EQ button<br />
(page 21)<br />
Press to select the preset sound effect.<br />
<br />
(stop) button<br />
Press to stop playback.<br />
<br />
Unit: (play/pause) button<br />
Press to start or pause playback.<br />
Remote control: (play)* button<br />
Press to start playback.<br />
Remote control: (pause) button<br />
Press to pause playback.<br />
<br />
FUNCTION button<br />
Press to select the function.<br />
<br />
TUNING MODE button (page 13)<br />
Press to select the tuning mode.<br />
<br />
PLAY MODE button (page 11,<br />
18)<br />
Press to select the play mode of a CD,<br />
MP3 disc or USB device.<br />
<br />
REPEAT button (page 11, 18)<br />
Press to activate repeat playback<br />
mode.<br />
FM MODE button (page 13)<br />
Press to select the FM reception mode<br />
(monaural or stereo).<br />
<br />
CLEAR button (page 20)<br />
Press to delete the last step from the<br />
program list.<br />
8 GB<br />
<br />
RETURN button (page 14)<br />
Press to return to the previous menu<br />
on the iPod/iPhone.<br />
<br />
TUNER MEMORY button (page 13)<br />
Press to preset the radio station.<br />
<br />
TUNER MEMORY NUMBER button<br />
(page 13)<br />
Press to tune to a preset radio station.<br />
<br />
CD button<br />
Press to select the CD function.<br />
USB button<br />
Press to select the USB function.<br />
AUDIO IN button<br />
Press to select the AUDIO IN function.<br />
TUNER button<br />
Press to select the tuner function (FM/<br />
AM).<br />
iPod button<br />
Press to select the iPod function.<br />
<br />
DISPLAY button (page 22)<br />
Press to change the information on<br />
the display.<br />
<br />
SLEEP button (page 22)<br />
Press to set the Sleep Timer.<br />
<br />
TIMER MENU button (page 10,<br />
22)<br />
Press to set the clock and the Play<br />
Timer.<br />
* The VOLUME + and buttons on the<br />
remote control have a tactile dot. Use the<br />
tactile dot as a reference when o<strong>per</strong>ating<br />
the system.
Getting Started<br />
Hooking up the system securely<br />
For <strong>MHC</strong>-<strong>EC719iP</strong><br />
Getting Started<br />
To subwoofer<br />
To left speaker<br />
To right speaker<br />
Speaker cord (Red/)<br />
Speaker cord (Black/)<br />
FM lead antenna (Extend it<br />
horizontally.)<br />
AM loop antenna<br />
To wall outlet<br />
SUBWOOFER (<strong>MHC</strong>-EC919iP only)<br />
Connect the subwoofer cord to the<br />
SUBWOOFER jack. Place the subwoofer<br />
vertically to obtain a better bass<br />
reproduction. Also, position the<br />
subwoofer:<br />
on a solid floor where resonance is<br />
unlikely to occur.<br />
at least a few centimeters away from<br />
the wall.<br />
away from the center of the room or<br />
place a bookshelf against a wall, to<br />
avoid generating a standing wave.<br />
FRONT SPEAKERS (<strong>MHC</strong>-EC919iP)/<br />
SPEAKERS (<strong>MHC</strong>-<strong>EC719iP</strong>)<br />
Connect the speaker cords.<br />
ANTENNA<br />
When inserting the connector of FM<br />
lead antenna or AM loop antenna,<br />
make sure to insert it in the correct<br />
orientation.<br />
Find a location and orientation that<br />
provide good reception when you set<br />
up the antennas.<br />
Keep the antennas away from the<br />
speaker cords and the power cord to<br />
avoid picking up noise.<br />
Power<br />
Connect the power cord to a wall<br />
outlet.<br />
9 GB
Attaching the speaker pads<br />
Attach the supplied speaker pads<br />
to the bottom of the front speakers<br />
and subwoofer to prevent them from<br />
slipping.<br />
When carrying this system<br />
Make sure that there is no disc loaded<br />
and no USB device or no iPod/iPhone<br />
is connected, and remove the power<br />
cord from the wall outlet.<br />
10 GB<br />
Inserting batteries<br />
Insert an R6 (size AA) battery<br />
(supplied), matching the polarity<br />
shown below.<br />
Notes on using the remote control<br />
With normal use, the battery should last<br />
for about six months.<br />
If you do not use the remote control for a<br />
long <strong>per</strong>iod of time, remove the battery to<br />
avoid damage from battery leakage and<br />
corrosion.<br />
Setting the clock<br />
1 Press to turn on the<br />
system.<br />
2 Press TIMER MENU to select<br />
the clock set mode.<br />
If “SELECT” appears, press /<br />
repeatedly to select “CLOCK,” and<br />
then press (ENTER).<br />
3 Press / repeatedly to set<br />
the hour, then press .<br />
4 Use the same procedure to<br />
set the minutes.<br />
Notes<br />
The clock settings are lost when you<br />
disconnect the power cord or if a power<br />
failure occurs.<br />
When setting the clock, select a function<br />
other than the AUDIO IN beforehand.<br />
To display the clock when the<br />
system off<br />
Press DISPLAY. The clock is displayed<br />
for a few seconds.
Disc<br />
Playing a CD/MP3 disc<br />
1 Select the CD function.<br />
Press CD.<br />
2 Place a disc.<br />
Press OPEN/CLOSE on the unit<br />
to open the disc tray, then place a<br />
disc with the label side up in the<br />
disc tray.<br />
3 Press OPEN/CLOSE on the<br />
unit to close the disc tray.<br />
Playback starts automatically when<br />
you close the disc tray.<br />
If playback does not start<br />
automatically, press (play).<br />
Other o<strong>per</strong>ations<br />
To<br />
Press<br />
Pause<br />
playback<br />
Stop<br />
playback<br />
Select a<br />
folder on an<br />
MP3 disc<br />
Select a track<br />
or file<br />
Find a point<br />
in a track or<br />
file<br />
Select Repeat<br />
Play<br />
Change the<br />
play mode<br />
. To resume play,<br />
press .<br />
. To resume play,<br />
press . To cancel<br />
resume play, press <br />
again.<br />
+/ <br />
repeatedly.<br />
/.<br />
Hold down /<br />
during playback, and<br />
release the button at<br />
the desired point.<br />
REPEAT/FM MODE<br />
repeatedly until “REP<br />
ONE* 1 ,““REP FLDR* 2 “ or<br />
“REP ALL* 3 “ appears.<br />
PLAY MODE repeatedly<br />
while the player is<br />
stopped. You can<br />
select normal play<br />
(“FLDR” for all MP3<br />
files in the folder on<br />
the disc), shuffle play<br />
(“SHUF” or “FLDRSHUF”<br />
for folder shuffle),<br />
or program play<br />
(“PROGRAM”).<br />
* 1 “REP ONE”: Repeats the current track or<br />
file.<br />
* 2 “REP FLDR” (MP3 disc only): Repeats the<br />
current folder.<br />
* 3 “REP ALL”: Repeats all tracks or files.<br />
Notes on playing MP3 discs<br />
Do not save other types of files or<br />
unnecessary folders on a disc that has<br />
MP3 files.<br />
Folders that have no MP3 files are skipped.<br />
MP3 files are played back in the order that<br />
they are recorded onto the disc.<br />
The system can only play MP3 files that<br />
have a file extension of “.mp3.”<br />
Even when file name has the correct file<br />
extension, if the actual file differs, playing<br />
this file may generate a loud noise by<br />
which the system may malfunction.<br />
The maximum number of:<br />
folders is 256 (including the root folder).<br />
MP3 files is 999.<br />
folder levels (the tree structure of files)<br />
is 8.<br />
Compatibility with all MP3 encoding/<br />
writing software, recording device, and<br />
recording media cannot be guaranteed.<br />
Incompatible MP3 discs may produce<br />
noise or interrupted audio or may not play<br />
at all.<br />
Note on playing multisession discs<br />
The system can play back continuous<br />
sessions on a disc when they are recorded<br />
in the same session format as the first<br />
session. When a session recorded in a<br />
different session format is encountered, that<br />
session and the ones following it cannot be<br />
played back. Note that even if the sessions<br />
are recorded in the same format, some<br />
sessions may not play back.<br />
Disc<br />
11 GB
Creating your own program<br />
(Program Play)<br />
1 Select the CD function.<br />
Press CD.<br />
2 Select the play mode.<br />
Press PLAY MODE repeatedly until<br />
“PROGRAM” appears while the<br />
player is stopped.<br />
3 Select the desired track or file<br />
number.<br />
Press / repeatedly until<br />
the desired track or file number<br />
appears.<br />
Selected Total playing time<br />
track or file of the selected<br />
number track (CD-DA disc<br />
only)<br />
When programming MP3 files in a<br />
specific folder, press +/ <br />
repeatedly to select the desired<br />
folder, and then select the desired<br />
file.<br />
4 Program the selected track or<br />
file.<br />
Press to enter the selected track<br />
or file.<br />
5 Repeat steps 3 through 4 to<br />
program additional tracks or<br />
files, up to a total of 64 tracks<br />
or files.<br />
6 To play your program of<br />
tracks or files, press .<br />
The program is cleared when<br />
you <strong>per</strong>form one of the following<br />
o<strong>per</strong>ations:<br />
changing the function.<br />
turning off the system.<br />
disconnecting the power cord.<br />
opening the disc tray.<br />
To play the same program again,<br />
press .<br />
12 GB<br />
To cancel Program Play<br />
Press PLAY MODE.<br />
To delete the last step from the<br />
program list<br />
Press CLEAR when playback is<br />
stopped.
Tuner<br />
Listening to the radio<br />
1 Select the tuner function (FM/<br />
AM).<br />
Press TUNER (or FUNCTION on the<br />
unit) repeatedly.<br />
2 Perform tuning.<br />
Presetting radio stations<br />
1 Tune to the desired station.<br />
2 Press TUNER MEMORY to<br />
select the tuner memory<br />
mode.<br />
For automatic scanning<br />
Press TUNING MODE repeatedly<br />
until “AUTO” appears, and then<br />
press TUNING+/TUNING. Scanning<br />
stops automatically when a station<br />
is found.<br />
If the scanning does not stop, press<br />
to stop scanning, then <strong>per</strong>form<br />
manual tuning (below).<br />
For manual tuning<br />
Press TUNING MODE repeatedly<br />
until “MANUAL” appears, and<br />
then press TUNING+/TUNING<br />
repeatedly to tune to the desired<br />
station.<br />
When you tune to a station that<br />
provides RDS services, the station<br />
name appears on the display<br />
(European model only).<br />
Tip<br />
To reduce static noise on a weak FM stereo<br />
station, press REPEAT/FM MODE repeatedly<br />
until “MONO” appears to turn off stereo<br />
reception. You will lose stereo effect, but<br />
reception will improve.<br />
3 Press PRESET+/PRESET<br />
repeatedly to select the<br />
desired preset number.<br />
If another station is already<br />
assigned to the selected preset<br />
number, the station is replaced by<br />
the new station.<br />
4 Press to store the station.<br />
5 Repeat steps 1 through 4 to<br />
store other stations.<br />
You can preset up to 20 FM and<br />
10 AM stations. The preset stations<br />
are retained for about half a day<br />
even if you disconnect the power<br />
cord or if a power failure occurs.<br />
To tune to a preset radio station<br />
If you registered a radio station to a<br />
preset number 1 to 4, the radio station<br />
will be tuned in by just pressing the<br />
TUNER MEMORY NUMBER (1 to 4)<br />
when the system function is set to FM<br />
or AM.<br />
If you registered a radio station<br />
to a preset number 5 or higher,<br />
press TUNING MODE repeatedly<br />
until “PRESET” appears then press<br />
PRESET+/PRESET repeatedly to<br />
select the desired preset number.<br />
Tuner<br />
13 GB
Playing the iPod/iPhone<br />
The Lightning connector works with<br />
iPhone 5, iPod touch (5th generation)<br />
and iPod nano (7th generation).<br />
USB works with iPhone 5, iPhone 4S,<br />
iPhone 4, iPhone 3GS, iPod touch<br />
(3rd, 4th and 5th generation), iPod<br />
classic and iPod nano (4th through 7th<br />
generation).<br />
Also refer to page 24.<br />
1 Select the function.<br />
For iPhone 5, iPod touch (5th<br />
generation) or iPod nano (7th<br />
generation)<br />
Press iPod.<br />
For other iPod/iPhone models<br />
Press USB.<br />
2 Connect the iPod/iPhone.<br />
For iPhone 5, iPod touch (5th<br />
generation) or iPod nano (7th<br />
generation)<br />
Connect the iPod/iPhone to the<br />
Lightning connector.<br />
For other iPod/iPhone models<br />
Connect the iPod/iPhone to the<br />
(USB) port, using the USB cable<br />
supplied with the iPod/iPhone.<br />
3 Start playback.<br />
Press .<br />
14 GB iPod/iPhone<br />
Other o<strong>per</strong>ations<br />
To<br />
Press<br />
Pause /.<br />
playback<br />
Stop .<br />
Select a track /.<br />
Find a point<br />
in a track<br />
Choose the<br />
selected item<br />
Scroll up/<br />
down the<br />
menus<br />
Return to<br />
the previous<br />
menu*<br />
Hold down /<br />
during playback, and<br />
release the button at<br />
the desired point.<br />
/. You can choose<br />
the selected item<br />
much like the center<br />
button o<strong>per</strong>ation or<br />
the touch o<strong>per</strong>ation of<br />
the iPod/iPhone.<br />
/. You can scroll up<br />
or down the menus<br />
much like the “Click<br />
Wheel” o<strong>per</strong>ations or<br />
the drag up-or-down<br />
o<strong>per</strong>ations of the iPod/<br />
iPhone.<br />
/RETURN.<br />
* This o<strong>per</strong>ation may be invalid in some<br />
applications.
Notes<br />
The <strong>per</strong>formance of the system may vary,<br />
depending on the specifications of your<br />
iPod/iPhone.<br />
O<strong>per</strong>ate the iPod/iPhone directly if you<br />
cannot o<strong>per</strong>ate the iPod/iPhone normally<br />
using the system.<br />
When connecting or disconnecting the<br />
iPod/iPhone, brace the system with<br />
one hand and take care not to press the<br />
controls of the iPod/iPhone by mistake.<br />
Before disconnecting the iPod/iPhone,<br />
pause playback.<br />
To change the volume level, use VOLUME<br />
+/. The volume level does not change<br />
even if you adjust it on the iPod/iPhone.<br />
<strong>Sony</strong> cannot accept responsibility in the<br />
event that data recorded to iPod/iPhone<br />
is lost or damaged when using an iPod/<br />
iPhone with this system.<br />
To stop charging an iPod/iPhone<br />
Disconnect the iPod/iPhone. Turning off<br />
the system also stops charging the iPod/<br />
iPhone.<br />
To use the system as a battery<br />
charger<br />
You can use the system as a battery<br />
charger for an iPod/iPhone when the<br />
system is on.<br />
1 Select the function.<br />
iPod/iPhone<br />
For iPhone 5, iPod touch (5th<br />
generation) or iPod nano (7th<br />
generation)<br />
Press iPod.<br />
For other iPod/iPhone models<br />
Press USB.<br />
2 Connect the iPod/iPhone.<br />
For iPhone 5, iPod touch (5th<br />
generation) or iPod nano (7th<br />
generation)<br />
Connect the iPod/iPhone to the<br />
Lightning connector.<br />
For other iPod/iPhone models<br />
Connect the iPod/iPhone to the<br />
(USB) port, using the USB cable<br />
supplied with the iPod/iPhone.<br />
The charging begins when iPod/<br />
iPhone is connected to the<br />
Lightning connector or the (USB)<br />
port. The charge status appears<br />
on the display of iPod/iPhone. For<br />
details, see the user’s guide of your<br />
iPod/iPhone.<br />
15 GB
Before using the USB<br />
device<br />
Check the information on websites<br />
for compatible USB devices using the<br />
URLs listed under “USB devices” in<br />
“Compatible devices with this system”<br />
(page 24). For details on how to<br />
use the USB device, refer to the user’s<br />
guide supplied with your USB device.<br />
Notes<br />
When USB cable connection is necessary,<br />
connect the USB cable supplied with<br />
the USB device to be connected. See the<br />
o<strong>per</strong>ation manual supplied with the USB<br />
device to be connected for details on the<br />
o<strong>per</strong>ation method.<br />
It may take a long time before “SEARCH”<br />
appears depending on the type of USB<br />
device connected.<br />
Do not connect the system and the USB<br />
device through a USB hub.<br />
When the USB device is inserted, the<br />
system reads all the files on the USB<br />
device. If there are many folders or files on<br />
the USB device, it may take a long time to<br />
finish reading the USB device.<br />
With some connected USB devices, after<br />
an o<strong>per</strong>ation is <strong>per</strong>formed, there may<br />
be a delay before it is <strong>per</strong>formed by this<br />
system.<br />
Compatibility with all encoding/writing<br />
software cannot be guaranteed. If audio<br />
files on the USB device were originally<br />
encoded with incompatible software,<br />
those files may produce noise or<br />
interrupted audio, or may not play at all.<br />
This system does not necessarily support<br />
all the functions provided in a connected<br />
USB device.<br />
Do not remove the USB device during<br />
transferring or erase o<strong>per</strong>ations. Doing<br />
so may corrupt the data on the device or<br />
damage the device itself.<br />
16 GB USB Device<br />
To use the system as a battery<br />
charger<br />
You can use the system as a battery<br />
charger for USB devices that have<br />
a rechargeable function when the<br />
system is on.<br />
1 Select the USB function.<br />
Press USB.<br />
2 Connect the USB device to the<br />
(USB) port.<br />
The charging begins when the USB<br />
device is connected to the (USB)<br />
port. For details, see the user’s<br />
guide of your USB device.
Transferring music from<br />
a disc<br />
You can transfer music from a disc<br />
(CD-DA disc or MP3 disc) by using<br />
the following transfer modes of this<br />
system.<br />
CD SYNC transfer: Transfer all the CD-<br />
DA tracks from the CD-DA disc.<br />
MP3 folder transfer: Transfer MP3<br />
files in a specific folder from the MP3<br />
disc.<br />
REC1 transfer: Transfer a currently<br />
playing track or MP3 file from the disc.<br />
1 Select the CD function.<br />
Press CD.<br />
2 Connect the USB device to the<br />
(USB) port.<br />
3 Load a disc you want to<br />
transfer.<br />
If playback starts automatically,<br />
press twice.<br />
4 Prepare for transferring.<br />
Proceed to step 5 in case of CD<br />
SYNC transfer.<br />
For MP3 folder transfer<br />
To transfer MP3 files in a specific<br />
folder, press +/ <br />
repeatedly to select the folder you<br />
want. Then start playback and press<br />
once.<br />
Make sure the elapsed playing time<br />
has stopped on the display.<br />
For REC1 transfer<br />
Press / to select the track<br />
or MP3 file you want to transfer,<br />
then start playback.<br />
To transfer an MP3 file in a<br />
specific folder, press +/ <br />
repeatedly to select the folder you<br />
want, then press / to select<br />
the MP3 file you want to transfer.<br />
Then start playback.<br />
5 Press REC TO USB on the unit.<br />
“READY” appears on the display.<br />
6 Press .<br />
Transferring starts, then “USB REC”<br />
appears on the display.<br />
Do not remove the USB device until<br />
transferring is completed.<br />
When transferring is completed,<br />
“COMPLETE” appears on the display<br />
and audio files in MP3 format will<br />
be created.<br />
Folder and file generation rules<br />
When first transferring to a USB<br />
device, a folder (“CDDA001*,” “MP3_<br />
REC1” or “CD_REC1”) is created directly<br />
below the “ROOT” (in case of MP3<br />
folder transfer, a folder that has the<br />
same name as the transferring source<br />
is created below the “ROOT”).<br />
Folders and files are generated as<br />
follows.<br />
CD SYNC transfer<br />
Transferring<br />
source<br />
Folder<br />
name<br />
File name<br />
CD-DA “CDDA001”* “TRACK001”*<br />
MP3 folder transfer<br />
Transferring<br />
source<br />
MP3<br />
REC1 transfer<br />
Transferring<br />
source<br />
Folder<br />
name<br />
File name<br />
Same as the<br />
transferring source<br />
Folder<br />
name<br />
File name<br />
MP3 “MP3_REC1” Same as the<br />
transferring<br />
source<br />
CD-DA “CD_REC1” “TRACK001”*<br />
* Folder and file numbers are assigned<br />
serially thereafter.<br />
USB Device<br />
17 GB
18 GB Notes<br />
If you start transferring in shuffle play or<br />
repeat play mode, the selected play mode<br />
is automatically changed to normal play.<br />
CD-TEXT information is not transferred in<br />
the created MP3 files. This system does<br />
not support the CD-TEXT standard.<br />
Transferring stops automatically if:<br />
the USB device runs out of space during<br />
transferring.<br />
the number of audio files and folders<br />
on the USB device reaches the limit<br />
for the number that the system can<br />
recognize.<br />
If a folder or file that you are trying<br />
to transfer already exists on the USB<br />
device with the same name, a sequential<br />
number is added after the name without<br />
overwriting the original folder or file.<br />
Do not use buttons on the remote control<br />
or unit during transferring to prevent<br />
transferring from stopping.<br />
Note on copyright-protected content<br />
The transferred music is limited to private<br />
use only. Use of the music beyond this<br />
limit requires <strong>per</strong>mission of the copyright<br />
holders.<br />
Playing a file<br />
The audio format that can be played<br />
back on this system is MP3/WMA*.<br />
* Files with DRM (Digital Rights<br />
Management) copyright protection<br />
cannot be played back on this system.<br />
Files downloaded from an online music<br />
store may not be played back on this<br />
system.<br />
1 Select the USB function.<br />
Press USB.<br />
2 Connect the USB device to the<br />
(USB) port.<br />
3 Start playback.<br />
Press .<br />
Other o<strong>per</strong>ations<br />
To<br />
Press<br />
Pause<br />
playback<br />
Stop<br />
playback<br />
Select a<br />
folder<br />
Select a file<br />
Find a point<br />
in a file<br />
Select Repeat<br />
Play<br />
Change the<br />
play mode<br />
. To resume play,<br />
press .<br />
. To resume play,<br />
press * 1 . To cancel<br />
resume play, press <br />
again.<br />
+/ <br />
repeatedly.<br />
/.<br />
Hold down /<br />
during playback, and<br />
release the button at<br />
the desired point.<br />
REPEAT/FM MODE<br />
repeatedly until “REP<br />
ONE* 2 ,” “REP FLDR* 3 ” or<br />
“REP ALL* 4 ” appears.<br />
PLAY MODE repeatedly<br />
while the USB device<br />
is stopped. You can<br />
select normal play<br />
(“FLDR” for all files in<br />
the folder on the USB<br />
device), shuffle play<br />
(“SHUF” or “FLDRSHUF”<br />
for folder shuffle),<br />
or program play<br />
(“PROGRAM”).
* 1 When playing a VBR MP3/WMA file, the<br />
system may resume playback from a<br />
different point.<br />
* 2 “REP ONE”: Repeats the current file.<br />
* 3 “REP FLDR”: Repeats the current folder.<br />
* 4 “REP ALL”: Repeats all files on a USB<br />
device.<br />
Notes<br />
This system cannot play audio files on the<br />
USB device in the following cases;<br />
when the number of audio files in a<br />
folder exceeds 999.<br />
when the total number of audio files on<br />
a USB device exceeds 999.<br />
when the number of folders on a USB<br />
device exceeds 256 (including the<br />
“ROOT” folder and empty folders).<br />
These numbers may vary depending on<br />
the file and folder structure. Do not save<br />
other types of files or unnecessary folders<br />
on a USB device that has audio files.<br />
The system can play back to a depth of 8<br />
folders only.<br />
Files and folders are displayed in the order<br />
of their creation on the USB device.<br />
Folders that have no audio files are<br />
skipped.<br />
The audio formats that you can listen to<br />
with this system are as follows:<br />
MP3: file extension “.mp3”<br />
WMA: file extension “.wma”<br />
Note that even when file name has the<br />
correct file extension, if the actual file<br />
differs, the system may produce noise or<br />
may malfunction.<br />
To erase audio files or folders from<br />
the USB device<br />
1 Select the USB function.<br />
Press USB.<br />
2 Connect the USB device to the<br />
(USB) port.<br />
3 Press / or +/ <br />
repeatedly to select the audio file<br />
or folder you want to erase, then<br />
start playback.<br />
4 Press OPTIONS on the unit.<br />
“ERASE” appears on the display.<br />
5 Press / to select “FO ERASE”<br />
(folder erase) or “FI ERASE” (file<br />
erase).<br />
6 Press .<br />
“COMPLETE” appears on the<br />
display.<br />
USB Device<br />
19 GB
Creating your own program<br />
(Program Play)<br />
1 Select the USB function.<br />
Press USB.<br />
Selected file number<br />
When programming MP3/WMA<br />
files in a specific folder, press<br />
+/ repeatedly to select<br />
the desired folder, and then select<br />
the desired file.<br />
4 Program the selected file.<br />
Press to enter the selected file.<br />
5 Repeat steps 3 through 4 to<br />
program additional files, up<br />
to a total of 64 files.<br />
6 To play your program of files,<br />
press .<br />
The program is cleared when<br />
you <strong>per</strong>form one of the following<br />
o<strong>per</strong>ations:<br />
changing the function.<br />
turning off the system.<br />
disconnecting the power cord.<br />
opening the disc tray.<br />
To play the same program again,<br />
press .<br />
To cancel Program Play<br />
Press PLAY MODE.<br />
To delete the last step from the<br />
program list<br />
Press CLEAR when playback is<br />
stopped.<br />
20 GB<br />
2 Select the play mode.<br />
Press PLAY MODE repeatedly until<br />
“PROGRAM” appears while the<br />
player is stopped.<br />
3 Select the desired file number.<br />
Press / repeatedly until the<br />
desired file number appears.
Other O<strong>per</strong>ations<br />
Using optional audio<br />
components<br />
1 Prepare the sound source.<br />
Connect additional audio<br />
component to the AUDIO IN jack on<br />
the unit using an audio analog cord<br />
(not supplied).<br />
2 Press VOLUME repeatedly<br />
until “VOL MIN” appears on<br />
the display.<br />
3 Select the AUDIO IN function.<br />
Press AUDIO IN.<br />
4 Start playback.<br />
Start playback of the connected<br />
component and adjust the volume.<br />
Adjusting the sound<br />
To<br />
Press<br />
Adjust the VOLUME +/.<br />
volume<br />
Generate BASS BOOST.<br />
a more<br />
dynamic<br />
sound<br />
Set the sound EQ +/EQ repeatedly<br />
effect until desired sound<br />
effect is displayed.<br />
Note<br />
The system may enter standby mode<br />
automatically if the volume level of the<br />
connected component is too low. Adjust<br />
the component’s volume accordingly. See<br />
“To turn off the automatic standby function”<br />
(page 28).<br />
Other O<strong>per</strong>ations<br />
21 GB
Changing the display<br />
To<br />
Press<br />
Change<br />
information<br />
on the<br />
display*<br />
The system offers the following<br />
display mode.<br />
Display When the system<br />
mode is off<br />
Power Saving<br />
mode<br />
22 GB<br />
DISPLAY repeatedly<br />
when the system is on.<br />
* For example, you can view information,<br />
such as track number, file/folder name,<br />
album name and artist name.<br />
The display is turned<br />
off to conserve power.<br />
The clock continues to<br />
o<strong>per</strong>ate.<br />
Notes on the display information<br />
Characters that cannot be displayed<br />
appear as “_”.<br />
The following are not displayed;<br />
total playing time for an MP3 disc and a<br />
USB device.<br />
remaining playing time for an MP3/<br />
WMA file.<br />
The following are not displayed correctly;<br />
elapsed playing time of an MP3/WMA<br />
file encoded using VBR (variable bit<br />
rate).<br />
folder and file names that do not follow<br />
either the ISO9660 Level 1/Level 2 in<br />
the expansion format.<br />
Using the timers<br />
The system offers two timer functions.<br />
If you use both timers, the Sleep Timer<br />
has priority.<br />
Sleep Timer:<br />
You can fall asleep to music. This<br />
function works even if the clock is not<br />
set.<br />
Press SLEEP repeatedly. If you select<br />
“AUTO,” the system automatically turns<br />
off after the current disc or USB device<br />
stops, or within 100 minutes.<br />
Play Timer:<br />
You can wake up to a CD, FM/AM<br />
reception, iPod/iPhone or USB device<br />
at a preset time.<br />
Make sure you have set the clock.<br />
1 Prepare the sound source.<br />
Prepare the sound source, and then<br />
press VOLUME +/ to adjust the<br />
volume.<br />
2 Select the timer set mode.<br />
Press TIMER MENU.<br />
If the clock is not set, the system<br />
will be in clock set mode. In that<br />
case, set the clock.<br />
3 Set the play timer.<br />
Press / repeatedly to select<br />
“PLAY SET,” then press .<br />
4 Set the time to start playback.<br />
Press / repeatedly to set the<br />
hour, then press . Follow the<br />
same procedure to set the minutes.<br />
5 Follow the same procedure<br />
as in step 4 to set the time to<br />
stop playback.
6 Select the sound source.<br />
Press / repeatedly until the<br />
desired sound source appears, then<br />
press .<br />
7 Turn off the system.<br />
Press . The system<br />
automatically turns on before the<br />
preset time.<br />
If the system is on at the preset<br />
time, the Play Timer will not be<br />
activated. Do not o<strong>per</strong>ate the<br />
system from the time the system<br />
turns on until the playback starts.<br />
To check the setting<br />
1 Press TIMER MENU.<br />
2 Press / repeatedly to<br />
select “SELECT,” and then press .<br />
3 Press / repeatedly to<br />
select “PLAY SEL,” and then press<br />
.<br />
To cancel the timer<br />
Repeat the same procedure as in “To<br />
check the setting” until “OFF” appears<br />
in step 3, and then press .<br />
To change the setting<br />
Start over from step 1 of “Using the<br />
timers.”<br />
Other O<strong>per</strong>ations<br />
Notes for the users of iPod/iPhone<br />
Make sure the iPod/iPhone is not playing<br />
when using the Play Timer.<br />
The Play Timer may not be activated<br />
depending on the status of the connected<br />
iPod/iPhone.<br />
Tip<br />
The Play Timer setting remains as long as<br />
the setting is not cancelled manually.<br />
23 GB
Additional Information<br />
Compatible devices with<br />
this system<br />
iPod/iPhone<br />
You can use the following iPod/iPhone<br />
models with this system. Update your<br />
iPod/iPhone with the latest software<br />
before using it.<br />
Made for<br />
iPhone 5<br />
iPhone 4S<br />
iPhone 4<br />
iPhone 3GS<br />
iPod touch (5th generation)<br />
iPod touch (4th generation)<br />
iPod touch (3rd generation)<br />
iPod classic<br />
iPod nano (7th generation)<br />
iPod nano (6th generation)<br />
iPod nano (5th generation)<br />
iPod nano (4th generation)<br />
USB devices<br />
Check the websites below for the<br />
information about compatible USB<br />
devices.<br />
For customers in Europe:<br />
http://support.sony-europe.com/<br />
For customers in the USA:<br />
http://esupport.sony.com/<br />
For customers in Canada:<br />
http://esupport.sony.com/CA<br />
For customers in other countries/<br />
regions:<br />
http://www.sony-asia.com/support<br />
24 GB<br />
Troubleshooting<br />
1 Make sure the power<br />
cord and speaker cords<br />
are correctly and firmly<br />
connected.<br />
2 Find your problem in the<br />
checklist below, and take the<br />
indicated corrective action.<br />
If the issue <strong>per</strong>sists, contact your<br />
nearest <strong>Sony</strong> dealer.<br />
If “PROTECT” appears on the<br />
display<br />
Immediately unplug the power<br />
cord, and check the following items<br />
after “PROTECT” disappears.<br />
Are the + and speaker cords<br />
short-circuited?<br />
Is anything blocking the<br />
ventilation holes of the system?<br />
After you have checked these<br />
above items and found no<br />
problems, reconnect the power<br />
cord, and turn on the system. If the<br />
issue <strong>per</strong>sists, contact your nearest<br />
<strong>Sony</strong> dealer.<br />
If “OVER CURRENT” appears on<br />
the display<br />
A problem has been detected with<br />
the level of electrical current from<br />
the (USB) port and Lightning<br />
connector. Turn off the system and<br />
remove the USB device and iPod/<br />
iPhone from the (USB) port and<br />
Lightning connector. Make sure<br />
there is no problem with the USB<br />
device and iPod/iPhone. If this<br />
display pattern <strong>per</strong>sists, contact<br />
your nearest <strong>Sony</strong> dealer.
General<br />
The system does not turn on.<br />
Is the power cord plugged in?<br />
The system has entered standby mode<br />
unexpectedly.<br />
This is not a malfunction. The system<br />
enters standby mode automatically<br />
in about 30 minutes when there is<br />
no o<strong>per</strong>ation or audio signal output.<br />
See “To turn off the automatic<br />
standby function” (page 28).<br />
The clock setting or the Play Timer<br />
o<strong>per</strong>ation has been cancelled<br />
unexpectedly.<br />
If about a minute elapses with<br />
no o<strong>per</strong>ation, the clock setting<br />
or Play Timer setting is cancelled<br />
automatically. Perform the o<strong>per</strong>ation<br />
again from the beginning.<br />
There is no sound.<br />
Are the + and speaker cords shortcircuited?<br />
Are you using only the supplied<br />
speakers?<br />
Is anything blocking the ventilation<br />
holes of the system?<br />
The specified station may have<br />
temporarily stopped broadcast.<br />
Sound comes from one channel, or the<br />
left and right volumes are unbalanced.<br />
Place the speakers as symmetrically<br />
as possible.<br />
Connect only the supplied speakers.<br />
Severe hum or noise.<br />
Move the system away from sources<br />
of noise.<br />
Connect the system to a different<br />
wall outlet.<br />
Install a noise filter (available<br />
separately) to the power cord.<br />
The remote control does not function.<br />
Remove any obstacles between<br />
the remote control and the remote<br />
control sensor on the unit, and<br />
position the unit away from<br />
fluorescent lights.<br />
Point the remote control at the<br />
system’s sensor.<br />
Move the remote control closer to<br />
the system.<br />
Except , no buttons on the unit<br />
work, and “LOCK ON” appears on the<br />
display.<br />
The child lock function has been<br />
enabled. To disable the child lock,<br />
hold down on the unit until “LOCK<br />
OFF” appears on the display.<br />
A disc cannot be ejected and “LOCKED”<br />
appears on the display.<br />
Contact your <strong>Sony</strong> dealer or local<br />
authorized <strong>Sony</strong> service facility.<br />
CD/MP3 disc<br />
The sound skips, or the disc will not<br />
play.<br />
Wipe the disc clean, and replace it.<br />
Move the system to a location away<br />
from vibration (for example, on top<br />
of a stable stand).<br />
Move the speakers away from the<br />
system, or place them on separate<br />
stands. At high volume, speaker<br />
vibration may cause the sound to<br />
skip.<br />
Play does not start from the first track.<br />
Set the play mode to normal play<br />
mode.<br />
Starting playback takes more time than<br />
usual.<br />
The following discs can increase the<br />
time it takes to start playback;<br />
a disc recorded with a complicated<br />
tree structure.<br />
a disc recorded in multisession<br />
mode.<br />
a disc that has not been finalized<br />
(a disc to which data can be<br />
added).<br />
a disc that has many folders.<br />
iPod/iPhone<br />
There is no sound.<br />
Make sure the iPod/iPhone is<br />
connected securely.<br />
Make sure the iPod/iPhone is<br />
playing music.<br />
Make sure the iPod/iPhone is<br />
updated with the latest software. If<br />
not, update the iPod/iPhone before<br />
using with the system.<br />
Adjust the volume.<br />
Additional Information<br />
25 GB
Make sure the iPod/iPhone is<br />
connected securely.<br />
Turn down the volume.<br />
Set the “EQ” setting of the iPod/<br />
iPhone to “Off” or “Flat.”<br />
The iPod/iPhone does not function.<br />
Shut down any other “iOS”<br />
applications running on the iPod/<br />
iPhone. For details, refer to the<br />
o<strong>per</strong>ation manual supplied with the<br />
iPod/iPhone.<br />
Make sure the iPod/iPhone is<br />
connected securely.<br />
Because the o<strong>per</strong>ation of the system<br />
and the iPod/iPhone are different,<br />
you may not o<strong>per</strong>ate the iPod/<br />
iPhone using buttons on the remote<br />
control or unit. In this case, <strong>per</strong>form<br />
o<strong>per</strong>ations on the iPod/iPhone.<br />
The connected iPod/iPhone cannot be<br />
charged.<br />
Make sure the iPod/iPhone is<br />
connected securely.<br />
Make sure the system is turned on.<br />
The sound is distorted.<br />
USB device<br />
26 GB<br />
The connected USB device cannot be<br />
charged.<br />
Make sure the USB device is<br />
connected securely.<br />
Are you using a supported USB device?<br />
If you connect an unsupported USB<br />
device, the following problems may<br />
occur. Check the information on<br />
websites for compatible USB devices<br />
using the URLs listed under “USB<br />
devices” in “Compatible devices with<br />
this system” (page 24).<br />
The USB device is not recognized.<br />
File or folder names are not<br />
displayed on this system.<br />
Playback is not possible.<br />
The sound skips.<br />
There is noise.<br />
A distorted sound is output.<br />
There is no sound.<br />
The USB device is not connected<br />
correctly. Turn off the system, then<br />
reconnect the USB device.<br />
There is noise, skipping, or distorted<br />
sound.<br />
Turn off the system, then reconnect<br />
the USB device.<br />
The music data itself contains noise,<br />
or the sound is distorted. Noise may<br />
have been entered during music<br />
creation process using this system or<br />
the computer. Create the music data<br />
again.<br />
The bit rate used when encoding<br />
the files was low. Send files encoded<br />
with higher bit rates to the USB<br />
device.<br />
“SEARCH” is displayed for an extended<br />
time, or it takes a long time before<br />
playback starts.<br />
The reading process can take a long<br />
time in the following cases.<br />
There are many folders or files on<br />
the USB device.<br />
The file structure is extremely<br />
complex.<br />
The memory capacity is excessive.<br />
The internal memory is<br />
fragmented.<br />
Erroneous display<br />
Characters that cannot be displayed<br />
appear as “_“.<br />
The USB device is not recognized.<br />
Turn off the system and reconnect<br />
the USB device, then turn on the<br />
system.<br />
Check the information on websites<br />
for compatible USB devices using<br />
the URLs listed under “USB devices”<br />
in “Compatible devices with this<br />
system” (page 24).
Transferring results in an error.<br />
Check the information on websites<br />
for compatible USB devices using<br />
the URLs listed under “USB devices”<br />
in “Compatible devices with this<br />
system” (page 24).<br />
The USB device is not formatted<br />
correctly. Refer to the o<strong>per</strong>ating<br />
instructions of the USB device on<br />
how to format.<br />
Turn off the system and remove the<br />
USB device. If the USB device has a<br />
power switch, turn the USB device<br />
off and then on again after removing<br />
it from the system. Then <strong>per</strong>form<br />
transferring again.<br />
The USB device was disconnected<br />
or the power was turned off during<br />
transferring. Delete the partially<br />
transferred file, and <strong>per</strong>form<br />
transferring again. If this does not<br />
fix the problem, the USB device may<br />
be broken. Refer to the o<strong>per</strong>ating<br />
instructions of the USB device on<br />
how to deal with this problem.<br />
Play does not start from the first track.<br />
Set the play mode to normal play<br />
mode.<br />
Files cannot be played back.<br />
The audio files may have<br />
inappropriate file extensions. The file<br />
extensions supported by this system<br />
are as follows:<br />
MP3: file extension “.mp3”<br />
WMA: file extension “.wma”<br />
USB storage devices formatted with<br />
file systems other than FAT16 or<br />
FAT32 are unsupported.*<br />
If you use a partitioned USB storage<br />
device, only files on the first partition<br />
can be played.<br />
Files that are encrypted or protected<br />
by passwords, etc. cannot be played<br />
back.<br />
* This system supports FAT16 and FAT32,<br />
but some USB storage devices may not<br />
support all of these FAT. For details, see<br />
the o<strong>per</strong>ation manual of each USB storage<br />
device or contact the manufacturer.<br />
Audio files or folders on the USB device<br />
cannot be erased.<br />
Check if the USB device is writeprotected.<br />
The USB device was disconnected<br />
or the power was turned off during<br />
the erase o<strong>per</strong>ation. Delete the<br />
partially-erased file. If this does<br />
not fix the problem, the USB device<br />
may be broken. Refer to o<strong>per</strong>ating<br />
instructions of the USB device on<br />
how to deal with this problem.<br />
Play does not start.<br />
Turn off the system and reconnect<br />
the USB device, then turn on the<br />
system.<br />
Check the information on websites<br />
for compatible USB devices using<br />
the URLs listed under “USB devices“<br />
in “Compatible devices with this<br />
system” (page 24).<br />
Press to start playback.<br />
Tuner<br />
Severe hum or noise, or stations<br />
cannot be received.<br />
Connect the antenna pro<strong>per</strong>ly.<br />
Try another place and orientation for<br />
better antenna reception.<br />
Keep the antenna away from the<br />
speaker cords and the power cord to<br />
avoid picking up noise.<br />
Turn off nearby electrical equipment.<br />
Additional Information<br />
27 GB
To change the AM tuning interval<br />
(except for European model)<br />
The AM tuning interval is preset to<br />
9 kHz or 10 kHz by factory default. Use<br />
buttons on the unit to change the AM<br />
tuning interval.<br />
1 Tune to any AM station.<br />
2 Hold down OPTIONS on the unit<br />
until “530” or “531” appears on the<br />
display.<br />
All the AM preset stations are<br />
erased.<br />
To reset the system to factory<br />
settings<br />
If the system still does not o<strong>per</strong>ate<br />
pro<strong>per</strong>ly, reset the system to factory<br />
settings.<br />
1 Disconnect and reconnect the<br />
power cord, and then turn on the<br />
system.<br />
2 Hold down and EQ on the unit<br />
until “RESET OK” appears.<br />
All user-configured settings, such<br />
as preset radio stations, timer, and<br />
the clock, are deleted.<br />
28 GB<br />
To turn off the automatic standby<br />
function<br />
This system is equipped with an<br />
automatic standby function. With this<br />
function, the system enters standby<br />
mode automatically in about 30<br />
minutes when there is no o<strong>per</strong>ation or<br />
audio signal output.<br />
By default, the automatic standby<br />
function is turned on.<br />
Use buttons on the unit to turn off the<br />
automatic standby function.<br />
Hold down while the system<br />
is on, until “AUTO STANDBY OFF”<br />
appears.<br />
To turn on the function, repeat the<br />
procedure until “AUTO STANDBY<br />
ON” appears.<br />
Notes<br />
The automatic standby function is invalid<br />
for the tuner function (FM/AM).<br />
The system may not enter standby mode<br />
automatically in the following cases:<br />
when an audio signal is detected.<br />
when an iPod/iPhone is connected.<br />
during playback of audio tracks or files.<br />
while the preset Play Timer or Sleep<br />
Timer is in process.
Messages<br />
Precautions<br />
DISC ERR<br />
You have loaded a disc that cannot be<br />
played.<br />
ERROR<br />
The USB device is write-protected.<br />
The memory of the USB device is full.<br />
FULL<br />
You tried to program more than 64<br />
tracks or files (steps).<br />
NO FILE<br />
There are no playable files on the<br />
CD-R/CD-RW discs or on the USB<br />
device.<br />
NO STEP<br />
All of the programmed steps have<br />
been erased.<br />
NO USB<br />
No USB device is connected or an<br />
unsupported USB device is connected.<br />
PLAY SET<br />
You tried to select the timer when the<br />
Play Timer is not set.<br />
PLS STOP<br />
You pressed PLAY MODE during<br />
playback.<br />
SELECT<br />
You pressed TIMER MENU during timer<br />
o<strong>per</strong>ation.<br />
TIME NG<br />
The Play Timer start and end times are<br />
set to the same time.<br />
Discs that this system CAN play<br />
Audio CD<br />
CD-R/CD-RW (audio data/MP3 files)<br />
Discs that this system CANNOT play<br />
CD-ROM<br />
CD-R/CD-RW other than those<br />
recorded in music CD format,<br />
conforming to ISO9660 Level 1/Level<br />
2<br />
CD-R/CD-RW recorded in<br />
multisession that have not ended by<br />
“closing the session”<br />
CD-R/CD-RW of poor recording<br />
quality, CD-R/CD‐RW that have<br />
scratches or are dirty, or CD-R/CD-<br />
RW recorded with an incompatible<br />
recording device<br />
CD-R/CD-RW which is finalized<br />
incorrectly<br />
Discs containing files other than<br />
MPEG 1 Audio Layer-3 (MP3) files<br />
Discs of non-standard shape (for<br />
example, heart, square, star)<br />
Discs that have adhesive tape,<br />
pa<strong>per</strong>, or sticker attached to them<br />
Rental or used discs with attached<br />
seals where the glue extends<br />
beyond the seal<br />
Discs that have labels printed using<br />
ink that feels tacky when touched<br />
Notes on discs<br />
Before playing, wipe the disc with<br />
a cleaning cloth from the center<br />
outward to the edge.<br />
Do not clean discs with solvents,<br />
such as benzine, thinner, or<br />
commercially available cleaners or<br />
anti-static spray intended for vinyl<br />
LPs.<br />
Do not expose discs to direct<br />
sunlight or heat sources such as hot<br />
air ducts, nor leave them in a car<br />
parked in direct sunlight.<br />
Additional Information<br />
29 GB
Completely disconnect the power<br />
cord (mains lead) from the wall<br />
outlet (mains) if it is not going to be<br />
used for an extended <strong>per</strong>iod of time.<br />
When unplugging the unit, always<br />
grip the plug. Never pull the cord<br />
itself.<br />
Should any solid object or liquid get<br />
into the system, unplug the system,<br />
and have it checked by qualified<br />
<strong>per</strong>sonnel before o<strong>per</strong>ating it again.<br />
The AC power cord can be changed<br />
only by a qualified service facility.<br />
On placement<br />
Do not place the system in an<br />
inclined position or in locations<br />
that are extremely hot, cold, dusty,<br />
dirty, or humid or lacking adequate<br />
ventilation, or subject to vibration,<br />
direct sunlight or a bright light.<br />
Be careful when placing the unit<br />
or speakers on surfaces that have<br />
been specially treated (for example,<br />
with wax, oil, polish) as staining or<br />
discoloration of the surface may<br />
result.<br />
If the system is brought directly<br />
from a cold to a warm location or<br />
is placed in a very damp room,<br />
moisture may condense on the lens<br />
inside the CD player, and cause<br />
the system to malfunction. In this<br />
situation, remove the disc, and leave<br />
the system turned on for about an<br />
hour until the moisture evaporates.<br />
On heat buildup<br />
Heat buildup on the unit during<br />
o<strong>per</strong>ation is normal and is not cause<br />
for alarm.<br />
Do not touch the cabinet if it has<br />
been used continuously at a high<br />
volume because the cabinet may<br />
have become hot.<br />
Do not obstruct the ventilation<br />
holes.<br />
30 GB On safety<br />
On the speaker system<br />
This speaker system is not<br />
magnetically shielded, and the<br />
picture on nearby TV sets may<br />
become magnetically distorted. In this<br />
situation, turn off the TV, wait 15 to<br />
30 minutes, and turn it back on.<br />
If there is no improvement, move the<br />
speakers far away from the TV.<br />
Cleaning the cabinet<br />
Clean this system with a soft cloth<br />
slightly moistened with a mild<br />
detergent solution. Do not use any<br />
type of abrasive pad, scouring powder,<br />
or solvent, such as thinner, benzine, or<br />
alcohol.
Specifications<br />
Main unit<br />
Input<br />
AUDIO IN (stereo mini jack):<br />
Sensitivity 800 mV, impedance<br />
10 kilohms<br />
AUDIO POWER SPECIFICATIONS<br />
POWER OUTPUT AND TOTAL HARMONIC<br />
DISTORTION:<br />
(The United States model only)<br />
With 3 ohms loads, both channels<br />
driven, from 120 10,000 Hz; rated<br />
30 watts <strong>per</strong> channel minimum<br />
RMS power, with no more than<br />
0.7% total harmonic distortion from<br />
250 milliwatts to rated output.<br />
Amplifier section<br />
<strong>MHC</strong>-EC919iP<br />
U.S. model:<br />
Front speaker:<br />
Output power (reference):<br />
235 W + 235 W (<strong>per</strong> channel at<br />
3 ohms, 1 kHz)<br />
Subwoofer:<br />
Output power (reference):<br />
230 W (at 3 ohms, 100 Hz)<br />
Other models:<br />
Front speaker:<br />
Power output (rated):<br />
60 W + 60 W (at 3 ohms, 1 kHz, 1%<br />
THD)<br />
Output power (reference):<br />
235 W + 235 W (<strong>per</strong> channel at<br />
3 ohms, 1 kHz)<br />
Subwoofer:<br />
Output power (reference):<br />
230 W (at 3 ohms, 100 Hz)<br />
<strong>MHC</strong>-<strong>EC719iP</strong><br />
U.S. model:<br />
Output power (reference):<br />
235 W + 235 W (<strong>per</strong> channel at<br />
3 ohms, 1 kHz)<br />
Other models:<br />
Power output (rated):<br />
60 W + 60 W (at 3 ohms, 1 kHz, 1%<br />
THD)<br />
Output power (reference):<br />
235 W + 235 W (<strong>per</strong> channel at<br />
3 ohms, 1 kHz)<br />
Outputs<br />
FRONT SPEAKERS (<strong>MHC</strong>-EC919iP)/<br />
SPEAKERS (<strong>MHC</strong>-<strong>EC719iP</strong>): Accepts<br />
impedance of 3 ohms<br />
SUBWOOFER (<strong>MHC</strong>-EC919iP only):<br />
Accepts impedance of 3 ohms<br />
CD player section<br />
System: Compact disc and digital audio<br />
system<br />
Laser Diode Pro<strong>per</strong>ties<br />
Emission Duration: Continuous<br />
Laser Output*: Less than 44.6µW<br />
* This output is the value<br />
measurement at a distance of<br />
200mm from the objective lens<br />
surface on the Optical Pick-up Block<br />
with 7mm a<strong>per</strong>ture.<br />
Tuner section<br />
FM stereo, FM/AM su<strong>per</strong>heterodyne<br />
tuner<br />
Antenna:<br />
FM lead antenna<br />
AM loop antenna<br />
FM tuner section:<br />
Tuning range:<br />
North American model: 87.5 MHz –<br />
108.0 MHz (100 kHz step)<br />
Other models: 87.5 MHz – 108.0 MHz<br />
(50 kHz step)<br />
AM tuner section:<br />
Tuning range:<br />
European model: 531 kHz –<br />
1,602 kHz (9 kHz step)<br />
Other models:<br />
531 kHz – 1,710 kHz (9 kHz step)<br />
530 kHz – 1,710 kHz (10 kHz step)<br />
Dock section<br />
Connector type: 8-pin Lightning<br />
connector*<br />
Output voltage: DC 5 V<br />
Maximum output current: 1 A<br />
* The Lightning connector works with<br />
iPhone 5, iPod touch (5th generation)<br />
and iPod nano (7th generation).<br />
Additional Information<br />
31 GB
(USB) port*: Type A, maximum current<br />
1 A<br />
* Use the USB cable supplied with your<br />
USB section<br />
Speaker<br />
32 GB<br />
iPod/iPhone when connecting it to<br />
the (USB) port.<br />
Supported audio formats (MP3 discs and<br />
USB devices only)<br />
Supported bit rate:<br />
MP3 (MPEG 1 Audio Layer-3):<br />
32 kbps 320 kbps, VBR<br />
WMA*: 32 kbps 192 kbps, VBR<br />
Sampling frequencies:<br />
MP3 (MPEG 1 Audio Layer-3):<br />
32/44.1/48 kHz<br />
WMA*: 44.1 kHz<br />
* USB devices only<br />
Front speaker (SS-<strong>EC719iP</strong>)<br />
Speaker system: 2-way speaker system,<br />
Bass reflex<br />
Speaker units:<br />
Woofer: 160 mm (6 1/2 in), cone type<br />
Tweeter: 40 mm (1 1/2 in), horn type<br />
Rated impedance: 3 ohms<br />
Dimensions (W/H/D): Approx. 230 mm<br />
× 300 mm × 205 mm (9 in × 11 3/4 in ×<br />
8 1/8 in)<br />
Mass: Approx. 2.5 kg (5 lb 8 1/8 oz) net<br />
<strong>per</strong> speaker<br />
Quantity: 2 pieces<br />
Subwoofer (SS-WG919iP) for <strong>MHC</strong>-EC919iP<br />
only<br />
Speaker system: Subwoofer system, Bass<br />
reflex<br />
Speaker unit: 200 mm (8 in), cone type<br />
Rated impedance: 3 ohms<br />
Dimensions (W/H/D): Approx. 280 mm<br />
× 300 mm × 290 mm (11 in × 11 3/4 in ×<br />
11 3/8 in)<br />
Mass: Approx. 5.0 kg (11 lb 3/8 oz) net <strong>per</strong><br />
speaker<br />
Quantity: 1 piece<br />
General<br />
Power requirements:<br />
North American model: AC 120 V,<br />
60 Hz<br />
Other models: AC 120 V 240 V,<br />
50/60 Hz<br />
Power consumption:<br />
<strong>MHC</strong>-EC919iP: 90 W<br />
<strong>MHC</strong>-<strong>EC719iP</strong>: 75 W<br />
(0.5 W at the Power Saving mode)<br />
Dimensions (W/H/D, including largest<br />
protrusions) (excl. speakers):<br />
<strong>MHC</strong>-EC919iP: Approx. 193 mm<br />
× 300 mm × 260 mm (7 5/8 in ×<br />
11 3/4 in × 10 1/4 in)<br />
<strong>MHC</strong>-<strong>EC719iP</strong>: Approx. 193 mm<br />
× 300 mm × 260 mm (7 5/8 in ×<br />
11 3/4 in × 10 1/4 in)<br />
Mass (excl. speakers):<br />
<strong>MHC</strong>-EC919iP: Approx. 2.4 kg (5 lb<br />
4 5/8 oz)<br />
<strong>MHC</strong>-<strong>EC719iP</strong>: Approx. 2.4 kg (5 lb<br />
4 5/8 oz)<br />
Quantity of the main unit: 1 piece<br />
Supplied accessories: Remote control (1),<br />
R6 (size AA) battery (1), FM lead antenna<br />
(1), AM loop antenna (1), Speaker pads<br />
<strong>MHC</strong>-EC919iP (12)/<strong>MHC</strong>-<strong>EC719iP</strong> (8)<br />
Design and specifications are subject to<br />
change without notice.<br />
Standby power consumption: 0.5 W
License and Trademark<br />
Notice<br />
iPhone, iPod, iPod classic, iPod nano,<br />
and iPod touch are trademarks of<br />
Apple Inc., registered in the U.S.<br />
and other countries. Lightning is a<br />
trademark of Apple Inc.<br />
“Made for iPod,” and “Made for<br />
iPhone” mean that an electronic<br />
accessory has been designed to<br />
connect specifically to iPod or<br />
iPhone, respectively, and has been<br />
certified by the develo<strong>per</strong> to meet<br />
Apple <strong>per</strong>formance standards. Apple<br />
is not responsible for the o<strong>per</strong>ation<br />
of this device or its compliance with<br />
safety and regulatory standards.<br />
Please note that the use of this<br />
accessory with iPod or iPhone may<br />
affect wireless <strong>per</strong>formance.<br />
MPEG Layer-3 audio coding<br />
technology and patents licensed<br />
from Fraunhofer IIS and Thomson.<br />
Windows Media is either a<br />
registered trademark or trademark<br />
of Microsoft Corporation in<br />
the United States and/or other<br />
countries.<br />
This product is protected by<br />
certain intellectual pro<strong>per</strong>ty rights<br />
of Microsoft Corporation. Use or<br />
distribution of such technology<br />
outside of this product is prohibited<br />
without a license from Microsoft or<br />
an authorized Microsoft subsidiary.<br />
All other trademarks and registered<br />
trademarks are of their respective<br />
holders. In this manual, TM and ®<br />
marks are not specified.<br />
Additional Information<br />
33 GB
34 GB
Additional Information<br />
35 GB
©2013 <strong>Sony</strong> Corporation Printed in China 4-467-786-12(1)


