EPC12 EPC14 EPC18 EPC96 - Black & Decker Service Technical ...
EPC12 EPC14 EPC18 EPC96 - Black & Decker Service Technical ...
EPC12 EPC14 EPC18 EPC96 - Black & Decker Service Technical ...

Create successful ePaper yourself
Turn your PDF publications into a flip-book with our unique Google optimized e-Paper software.
- The charger automatically shuts off if the ambient<br />
temperature becomes too high. The thermal cut out<br />
operates only once and then requires complete<br />
replacement.<br />
Vibration<br />
The declared vibration emission values stated in the technical<br />
data and the declaration of conformity have been measured in<br />
accordance with a standard test method provided by<br />
EN 60745 and may be used for comparing one tool with<br />
another. The declared vibration emission value may also be<br />
used in a preliminary assessment of exposure.<br />
Warning! The vibration emission value during actual use of<br />
the power tool can differ from the declared value depending<br />
on the ways in which the tool is used. The vibration level may<br />
increase above the level stated.<br />
When assessing vibration exposure to determine safety<br />
measures required by 2002/44/EC to protect persons regularly<br />
using power tools in employment, an estimation of vibration<br />
exposure should consider, the actual conditions of use and the<br />
way the tool is used, including taking account of all parts of<br />
the operating cycle such as the times when the tool is<br />
switched off and when it is running idle in addition to the<br />
trigger time.<br />
Labels on tool<br />
The following pictograms are shown on the tool:<br />
: Warning! To reduce the risk of injury, the user must<br />
Electrical safety<br />
# Your charger is double insulated; therefore no earth<br />
read the instruction manual.<br />
wire is required. Always check that the mains<br />
voltage corresponds to the voltage on the rating<br />
plate. Never attempt to replace the charger unit with<br />
a regular mains plug.<br />
u If the supply cord is damaged, it must be replaced by the<br />
manufacturer or an authorised <strong>Black</strong> & <strong>Decker</strong> <strong>Service</strong><br />
Centre in order to avoid a hazard.<br />
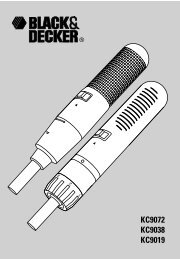
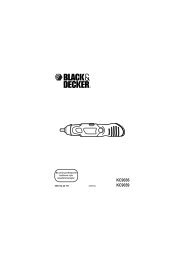
Features<br />
This tool includes some or all of the following features.<br />
1. Variable speed switch or two-speed on/off switch<br />
2. Forward/reverse slider<br />
3. Mode selector / torque adjustment collar<br />
4. Chuck<br />
5. Battery<br />
6. Battery release button<br />
fig. C & D<br />
7. Charger<br />
8. Charger receptacle<br />
9. Charger connector<br />
10. Charger plug<br />
ENGLISH<br />
Assembly<br />
Warning! Before assembly, remove the battery from the tool.<br />
Fitting and removing the battery (fig. A)<br />
u To fit the battery (5), line it up with the receptacle on the<br />
tool. Slide the battery into the receptacle and push until<br />
the battery snaps into place.<br />
u To remove the battery, push the release button (6) while at<br />
the same time pulling the battery out of the receptacle.<br />
Fitting the battery cap (fig. B)<br />
Warning! Fit the cap (11) to the battery (5) for transportation<br />
and storage.<br />
Fitting and removing a drill bit or screwdriver bit<br />
(fig. E)<br />
Warning! First remove the battery from the tool.<br />
This tool is fitted with a keyless chuck to allow for an easy<br />
exchange of bits.<br />
u Lock the tool by setting the forward/reverse slider (2) to<br />
the centre position.<br />
u Open the chuck by turning the front part (12) with one<br />
hand while holding the rear part (13) with the other.<br />
u Insert the bit shank (14) into the chuck.<br />
u Firmly tighten the chuck by turning the front part (12) with<br />
one hand while holding the rear part (13) with the other.<br />
Removing and refitting the chuck (fig. F)<br />
u Open the chuck as far as possible.<br />
u Remove the chuck retaining screw by turning it clockwise<br />
using a screwdriver.<br />
u Tighten an Allen key (15) into the chuck and strike it with<br />
a hammer as shown.<br />
u Remove the Allen key.<br />
u Remove the chuck by turning it counterclockwise.<br />
u To refit the chuck, screw it onto the spindle and secure it<br />
with the chuck retaining screw.<br />
Residual risks.<br />
Additional residual risks may arise when using the tool which<br />
may not be included in the enclosed safety warnings. These<br />
risks can arise from misuse, prolonged use etc.<br />
7