

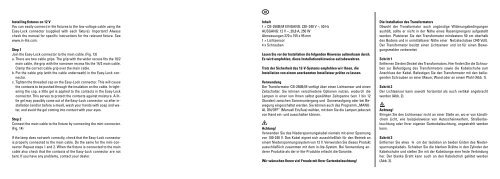
CB-250B/M in - In-Lite
CB-250B/M in - In-Lite
CB-250B/M in - In-Lite

You also want an ePaper? Increase the reach of your titles
YUMPU automatically turns print PDFs into web optimized ePapers that Google loves.
<strong>In</strong>stall<strong>in</strong>g fixtures on 12 V<br />
You can easily connect <strong>in</strong>-lite fixtures to the low-voltage cable us<strong>in</strong>g the<br />
Easy-Lock connector (supplied with each fixture). Important! Always<br />
check the manual for specific <strong>in</strong>structions for the relevant fixture. See<br />
www.<strong>in</strong>-lite.com.<br />
Step 1<br />
Jo<strong>in</strong> the Easy-Lock connector to the ma<strong>in</strong> cable. (Fig. 13)<br />
a. There are two cable grips. The grip with the wider recess fits the 10/2<br />
ma<strong>in</strong> cable, the grip with the narrower recess fits the 14/2 ma<strong>in</strong> cable.<br />
Clamp the correct cable grip over the ma<strong>in</strong> cable.<br />
b. Put the cable grip (with the cable underneath) <strong>in</strong> the Easy-Lock connector.<br />
c. Tighten the threaded cap on the Easy-Lock connector. This will cause<br />
the contacts to be pushed through the <strong>in</strong>sulation on the cable. <strong>In</strong> tighten<strong>in</strong>g<br />
the cap, a little gel is applied to the contacts <strong>in</strong> the Easy-Lock<br />
connector. This serves to protect the contacts aga<strong>in</strong>st moisture. A little<br />
gel may possibly come out of the Easy-Lock connector: so after <strong>in</strong>stallation<br />
(and/or before a meal), wash your hands with soap and water,<br />
and avoid the gel com<strong>in</strong>g <strong>in</strong>to contact with your eyes.<br />
Step 2<br />
Connect the ma<strong>in</strong> cable to the fixture by connect<strong>in</strong>g the m<strong>in</strong>i-connector.<br />
(Fig. 14)<br />
If the lamp does not work correctly, check that the Easy-Lock connector<br />
is properly connected to the ma<strong>in</strong> cable. Do the same for the m<strong>in</strong>i-connector.<br />
Repeat steps 1 and 2. When the fixture is connected to the ma<strong>in</strong><br />
cable also check that the contacts of the Easy-Lock connector are not<br />
bent. If you have any problems, contact your dealer.<br />
DE<br />
<strong>In</strong>halt<br />
1 × <strong>CB</strong>-<strong>250B</strong>/M EINGANG: 230–240 V ~, 50 Hz<br />
AUSGANG: 12 V ~, 20,8 A, 250 W<br />
Abmessungen 270 x 155 x 95 mm<br />
1 × Lichtsensor<br />
4 x Schrauben<br />
Lesen Sie vor der <strong>In</strong>stallation die folgenden H<strong>in</strong>weise aufmerksam durch.<br />
Es wird empfohlen, diese <strong>In</strong>stallationsh<strong>in</strong>weise aufzubewahren.<br />
Trotz der Sicherheit des 12-V-Systems empfehlen wir Ihnen, die<br />
<strong>In</strong>stallation von e<strong>in</strong>em anerkannten <strong>In</strong>stallateur prüfen zu lassen.<br />
Verwendung<br />
Der Transformator <strong>CB</strong>-<strong>250B</strong>/M verfügt über e<strong>in</strong>en Lichtsensor und e<strong>in</strong>en<br />
Zeitschalter. Sie können verschiedene Optionen nutzen, wodurch die<br />
Lampen <strong>in</strong> e<strong>in</strong>er von Ihnen selbst gewählten Zeitspanne (von 1 bis 12<br />
Stunden) zwischen Sonnenuntergang und Sonnenaufgang oder bei Bewegung<br />
e<strong>in</strong>geschaltet werden. Sie können auch das Programm „MANU-<br />
AL ON/OFF“ (Manuell E<strong>in</strong>/Aus) wählen, mit dem Sie die Lampen jederzeit<br />
von Hand e<strong>in</strong>- und ausschalten können.<br />
Achtung!<br />
Verwenden Sie das Niederspannungskabel niemals mit e<strong>in</strong>er Spannung<br />
von 100-240 V. Das Kabel eignet sich ausschließlich für den Betrieb an<br />
e<strong>in</strong>em Niederspannungssystem von 12 V. Verwenden Sie dieses Produkt<br />
ausschließlich zusammen mit dem <strong>in</strong>-lite-System. Bei Verwendung anderer<br />
Produkte als der <strong>in</strong>-lite-Produkte erlischt die Garantie.<br />
Wir wünschen Ihnen viel Freude mit Ihrer Gartenbeleuchtung!<br />
Die <strong>In</strong>stallation des Transformators<br />
Obwohl der Transformator auch ungünstige Witterungsbed<strong>in</strong>gungen<br />
aushält, sollte er nicht <strong>in</strong> der Nähe e<strong>in</strong>es Rasensprengers aufgestellt<br />
werden. Platzieren Sie den Transformator m<strong>in</strong>destens 50 cm oberhalb<br />
des Bodens und <strong>in</strong> unmittelbarer Nähe e<strong>in</strong>er Netzsteckdose (240 Volt).<br />
Der Transformator besitzt e<strong>in</strong>en Lichtsensor und ist für e<strong>in</strong>en Bewegungsmelder<br />
vorbereitet.<br />
Schritt 1<br />
Entfernen Sie den Deckel des Transformators. Hier f<strong>in</strong>den Sie die Schrauben<br />
zur Befestigung des Transformators sowie die Kabelschuhe zum<br />
Anschluss der Kabel. Befestigen Sie den Transformator mit den beiliegenden<br />
Schrauben an e<strong>in</strong>er Mauer, Wand oder an e<strong>in</strong>em Pfahl (Abb. 1).<br />
Schritt 2<br />
Der Lichtsensor kann sowohl horizontal als auch vertikal angebracht<br />
werden (Abb. 2).<br />
Achtung!<br />
Br<strong>in</strong>gen Sie den Lichtsensor nicht an e<strong>in</strong>er Stelle an, wo er von künstlichem<br />
Licht, wie beispielsweise von Autosche<strong>in</strong> werfern, Straßenbeleuchtung<br />
oder Ihrer eigenen Gartenbeleuchtung, angestrahlt werden<br />
kann.<br />
Schritt 3<br />
Entfernen Sie etwa ¾ cm der Isolation an beiden Enden des Niederspannungskabels.<br />
Schieben Sie die blanken Drähte <strong>in</strong> den Zyl<strong>in</strong>der der<br />
Kabelschuhe und stellen Sie mit der Kabelzange e<strong>in</strong>e feste Verb<strong>in</strong>dung<br />
her. Der blanke Draht kann auch an den Kabelschuh gelötet werden<br />
(Abb. 3).