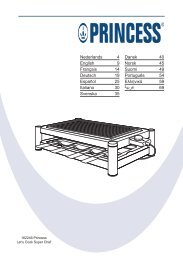
Classic Family Funcook Set Article 162249 Classic Stone ... - Princess
Classic Family Funcook Set Article 162249 Classic Stone ... - Princess
Classic Family Funcook Set Article 162249 Classic Stone ... - Princess

You also want an ePaper? Increase the reach of your titles
YUMPU automatically turns print PDFs into web optimized ePapers that Google loves.
General<br />
This attractive grill, one of the products of<br />
our <strong>Classic</strong> range, is ideal for grilling and<br />
racletting at the table.<br />
The set includes a heating base and eight<br />
pans. Different grill plates are supplied with<br />
the various models (see ‘Operation and<br />
controls’).<br />
Operation and<br />
controls<br />
See figures 1, 2, and 3.<br />
All models have the following features:<br />
1 Handle<br />
2 Heating base<br />
3 On/Off indicator light (red)<br />
4 On/Off switch<br />
5 8 racletting pans<br />
6 Power cord and plug<br />
Features depending on the relevant model:<br />
• <strong>162249</strong> <strong>Classic</strong> <strong>Family</strong> <strong>Funcook</strong> set<br />
(see Fig. 1):<br />
7 Grill plate with circular rim for pancakes<br />
• 162250 <strong>Classic</strong> <strong>Stone</strong> Raclette & Grill<br />
set (see Fig. 2):<br />
7 Grill plate<br />
8 Grill stone<br />
• 162251 <strong>Classic</strong> <strong>Stone</strong> & Raclette set<br />
(see Fig. 3):<br />
7 Grill stone<br />
Before use for the first time<br />
1 Remove all packaging materials and<br />
stickers from the appliance.<br />
2 Clean the appliance and all accessories<br />
(see ‘Maintenance and cleaning’).<br />
3 Rinse the grill plate and/or grill stone<br />
thoroughly under running water. Do not<br />
use abrasive cleaners or cleaning<br />
agents. Allow the plate and the stone to<br />
dry after rinsing.<br />
4 Use a paper towel or a brush to grease<br />
the polished surface of the stone with<br />
heat-resistant edible oil (olive oil or<br />
peanut oil). Allow the oil to soak into the<br />
stone and wipe off the excess oil.<br />
5 Prepare the appliance for use (see<br />
‘Preparing the appliance for use’).<br />
6 Switch on the appliance and allow it to<br />
heat to operating temperature.<br />
The appliance may emit some smoke<br />
and a characteristic smell when you<br />
switch it on for the first time. This is<br />
normal, and will soon stop. Make sure<br />
that there is sufficient ventilation.<br />
7 Allow the appliance to cool down<br />
completely.<br />
Preparing the appliance for use<br />
The heating base will become hot after<br />
you switch on the appliance. We<br />
recommend that you put some heatresistant<br />
(non-flammable) protection on<br />
the table under the appliance.<br />
1 Put the heating base on a stable<br />
surface.<br />
2 Fit the grill plate and/or grill stone<br />
(depending on the model) on the<br />
heating base.<br />
3 Put the plug into the wall socket.<br />
4 Turn the On/Off switch clockwise to<br />
switch on the appliance. The On/Off<br />
indicator will illuminate.<br />
The grill needs approximately 20 minutes<br />
to heat to operating temperature.<br />
6 <strong>Funcook</strong>ing <strong>Set</strong> <strong>Article</strong> <strong>162249</strong> /-50 /-51