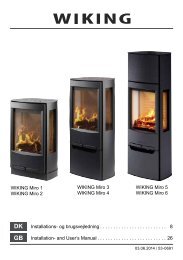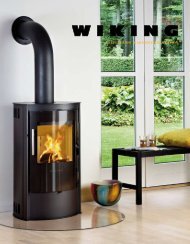
WIKING Miro 1 WIKING Miro 2 WIKING Miro 3 WIKING Miro 4 ...
WIKING Miro 1 WIKING Miro 2 WIKING Miro 3 WIKING Miro 4 ...
WIKING Miro 1 WIKING Miro 2 WIKING Miro 3 WIKING Miro 4 ...

Create successful ePaper yourself
Turn your PDF publications into a flip-book with our unique Google optimized e-Paper software.
Assembly Instructions for Fresh Air System<br />
English<br />
<strong>WIKING</strong> <strong>Miro</strong> 1 and <strong>WIKING</strong> <strong>Miro</strong> 2<br />
For a fresh air connection at the back of the stove (drawing 1):<br />
1. Break off the pre-cut plate (1) at the bottom of the rear plate.<br />
2. Pull the insulation sleeve (2) on to the flexi-hose (3) and mount the flexi-hose on the connector<br />
bush (4).<br />
3. Tighten the flexi-hose with the strap (5).<br />
For a fresh air connection beneath the stove (drawing 2):<br />
1. Pull the insulation sleeve (1) on to the flexi-hose (2) and mount the flexi-hose on the connector<br />
bush (3).<br />
2. Tighten the flexi-hose with the strap (4).<br />
<strong>WIKING</strong> <strong>Miro</strong> 3, <strong>WIKING</strong> <strong>Miro</strong> 4, <strong>WIKING</strong> <strong>Miro</strong> 5 and <strong>WIKING</strong> <strong>Miro</strong> 6<br />
For a fresh air connection at the back of the stove (drawing 3):<br />
1. Break off the pre-cut plate (1) at the bottom of the rear plate.<br />
2. Open the door (2) below the combustion chamber.<br />
3. Loosen the screws (3) in each side of the vertical cover plate (4) in the back of the chamber by<br />
using an Allen key. Lift up the cover plate, tilt the lower part forward and pull the cover plate out.<br />
4. Lead the flexi-hose (5) through the hole (1) in the rear plate. Mount the flexi-hose on the connector<br />
bush using the strap (7). Pull the insulation sleeve (8) on to the flexi-hose.<br />
5. Hook the cover plate (4) back in place and tighten the two screws (3).<br />
For a fresh air connection beneath the stove (drawing 4):<br />
1. Open the door (1) below the combustion chamber.<br />
2. Loosen the screws (2) in each side of the vertical cover plate (3) in the back of the chamber by<br />
using an Allen key. Lift up the cover plate, tilt the lower part forward and pull the cover plate out.<br />
3. Lead the flexi-hose (4) through the hole (5) in the bottom plate of the stove. Mount the flexi-hose<br />
on to the connector bush (6) and tighten the flexi-hose using the strap (7). Pull the insulation<br />
sleeve (8) on to the flexi-hose.<br />
4. Hook the cover plate (3) back in place and tighten the two screws (2).<br />
7