armariode ferramentas

You also want an ePaper? Increase the reach of your titles
YUMPU automatically turns print PDFs into web optimized ePapers that Google loves.
24 in.<br />
24 in.<br />
Side<br />
31/2 in.<br />
Side<br />
1 3 ⁄16 in.<br />
31/2 in.<br />
1 3 ⁄16 in.<br />
17 in.<br />
17 in.<br />
ou can thank Mike Pekovich,<br />
Fine Woodworking’s art director,<br />
for designing this simple but<br />
stylish bookcase. He took a straightforward<br />
form--an oak bookcase with dado<br />
and rabbet joints--and added nice proportions<br />
and elegant curves.<br />
We agreed that screws would reinforce<br />
the joints nicely, and that gave us a design<br />
option on the sides. Choose oak<br />
plugs, and align the grain carefully, and<br />
the plugs disappear. Make them from a<br />
contrasting wood, like walnut, and the<br />
rows of plugs add a nice design feature<br />
to the broad sides, hinting at the construction<br />
in a subtle way.<br />
By design the bookcase contains a<br />
number of fundamental lessons for<br />
would-be furniture-makers, and like the<br />
other projects in this video series, the<br />
whole thing can be built with just a few<br />
portable power tools: a circular saw, a<br />
drill, and a router<br />
The shelves attach to the sides with<br />
simple dadoes, and the back and backsplash<br />
drop into rabbets. Screws reinforce<br />
the dado joints and also attach the<br />
lower stretcher, and wood plugs cover<br />
the screw holes. Smaller wood screws<br />
are used to attach the plywood back.<br />
Curves add life to rectangular pieces<br />
of furniture, and Pekovich worked in<br />
three types, each irregular and organic<br />
(as opposed to radius curves that can<br />
seem mechanical). At the top are gentle<br />
curves that speed up as they move<br />
forward, each taken from a section of<br />
a French curve. At the bottom are two<br />
long curves formed with a flexible wood<br />
batten, one extending end to end on the<br />
lower stretcher, and the other a short<br />
graceful arch at the bottom of the sides,<br />
ending at a straight step at each end to<br />
suggest legs.<br />
--Asa Christiana, editor, Fine Woodworking<br />
1 3 ⁄16 in.<br />
11/2 in.<br />
1 3 ⁄16 in.<br />
2 7 ⁄8 in.<br />
11/2 in.<br />
2 7 ⁄8 in.<br />
9 5 ⁄8 in.<br />
10 in.<br />
9 5 ⁄8 in.<br />
10 in.<br />
B y A s A C h r i s t i A n A<br />
Lumber and hardware List<br />
Part QtY size materiaL<br />
sides 2 3/4 in. x 11 in. x 52 in. Oak<br />
sheLVes 5 3/4 in. x 10 5/8 in. x 27 in. Oak<br />
back sPLash 1 3/4 in. x 3 1/4 in. x 27 1/2 in. Oak<br />
arched<br />
1 3/4 in. x 3 in. x 26 1/2 in. Oak<br />
stretcher<br />
Oak veneer<br />
back 1 1/4 in. x 27 1/2 in. x 45 3/4 in.<br />
plywood<br />
screws FOr<br />
30 #12 x 2 in. flat head screws Steel<br />
sheLVes<br />
screws FOr<br />
24 #6 x 3/4 in. flat head screws Steel<br />
back<br />
62 in.<br />
62 in.<br />
41 in.<br />
41 in.<br />
48 in.<br />
48 in.<br />
3 5 ⁄16 in.<br />
3 5 ⁄16 in.<br />
4 in.<br />
1 3 ⁄4 in.<br />
1 3 ⁄4 in.<br />
4 in.<br />
1 3 ⁄4 in.<br />
33 5 ⁄8 in.<br />
VideOs<br />
Go to Finewoodworking.com/start to watch a multi-part video detailing how to build this bookcase from start to finish.<br />
1 3 ⁄4 in.<br />
TAUNTON’S<br />
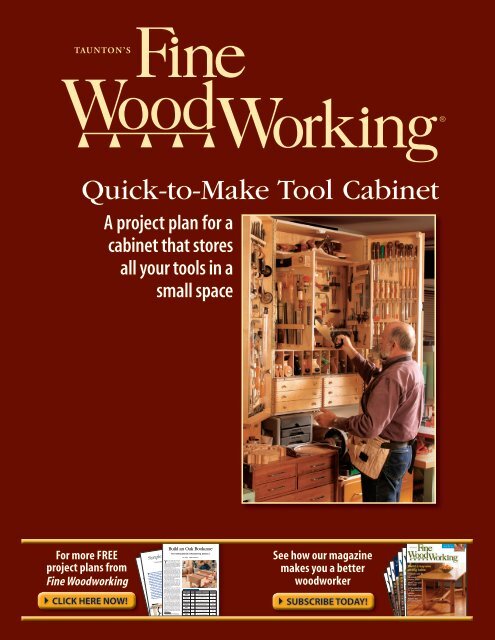
WQuick-to-Make Tool Cabinet<br />
A project plan for a<br />
cabinet that stores<br />
all your tools in a<br />
small space<br />
For more FREE<br />
project plans from<br />
Fine Woodworking<br />
CLICK HERE NOW!<br />
Simple, Sturdy Workbench<br />
T<br />
Simple, Sturdy Workbench<br />
T<br />
From Getting Started in Woodworking, Season 2<br />
From Getting Started in Woodworking, Season 2<br />
his workbench is easy and inexpensive<br />
to build, yet is sturdy and versatile<br />
enough for any woodworker. The base is<br />
construction lumber (4x4s and 2x4s), joined<br />
simply with long bolts and short dowels. The<br />
top is two layers of MDF (medium-density<br />
fiberboard), cut from a single sheet, with<br />
enough left over to make a handy shelf.<br />
The only tools needed to make this bench<br />
are a dri l/driver, a circular saw, and a handheld<br />
router or a router table.<br />
There is room at one end for a smal castiron<br />
woodworking vise, which is an essential<br />
tool in any woodworking shop. The vise is<br />
fitted with non-maring wooden jaws, and the<br />
jaws and benchtop receive dog holes, sized<br />
to fit a variety of handy bench accessories.<br />
stretchers<br />
ViDeOs<br />
B y A s A C h r i s t i A n A<br />
B y A s A C h r i s t i A n A<br />
his workbench is easy and inexpensive<br />
to build, yet is sturdy and versatile<br />
enough for any woodworker. The base is<br />
construction lumber (4x4s and 2x4s), joined<br />
simply with long bolts and short dowels. The<br />
top is two layers of MDF (medium-density<br />
fiberboard), cut from a single sheet, with<br />
enough left over to make a handy shelf.<br />
The only tools needed to make this bench<br />
are a dri l/driver, a circular saw, and a handheld<br />
router or a router table.<br />
There is room at one end for a sma l castiron<br />
woodworking vise, which is an essential<br />
tool in any woodworking shop. The vise is<br />
fitted with non-maring wooden jaws, and the<br />
jaws and benchtop receive dog holes, sized<br />
to fit a variety of handy bench accessories.<br />
stretchers<br />
ViDeOs<br />
Y<br />
Build an Oak Bookcase<br />
From Getting Started in Woodworking, Season 2<br />
LuMber, harDware anD suppLies LisT<br />
4 8-ft.-long 2x4s, kiln-dried<br />
2 8-ft.-long 4x4s, kiln-dried<br />
1 4x8 sheet of MDF<br />
2 Hardwood pieces for vise jaws, 71/2 in. long by 3 in. wide. Front jaw can be<br />
between 1 in. and 11/2 in. thick and the rear jaw is 3/4 in. thick.<br />
1 Fi ler block for mounting vise, 3/4-in.-thick plywood, 4 in. wide by 6 in. long<br />
1 bo tle of ye low glue<br />
1 7-in. Groz Rapid-Action Woodworking Vise (www.woodcraft.com)<br />
4 6-ft. lengths of 3 ⁄8-in.-dia. threaded rod<br />
16 3 ⁄8-in. washers<br />
16 3 ⁄8-in. nuts<br />
2 2-in.-long 1/4-20 bolts, nuts, washers for a taching front jaw of vise<br />
2 11/2-in.-long, 1/4-20 flathead screws for attaching rear jaw<br />
1 Box of 11/4-in.-long drywal screws for laminating benchtop<br />
4 3 ⁄8-in.-dia., 21/2-in.-long lag screws and washers, for a taching vise<br />
16 S-clip-type tabletop fasteners<br />
16 3 ⁄8-in.-dia. dowels, roughly 3 in. long<br />
LuMber, harDware anD suppLies LisT<br />
4 8-ft.-long 2x4s, kiln-dried<br />
2 8-ft.-long 4x4s, kiln-dried<br />
1 4x8 sheet of MDF<br />
2 Hardwood pieces for vise jaws, 71/2 in. long by 3 in. wide. Front jaw can be<br />
between 1 in. and 11/2 in. thick and the rear jaw is 3/4 in. thick.<br />
1 Fi ler block for mounting vise, 3/4-in.-thick plywood, 4 in. wide by 6 in. long<br />
1 bottle of ye low glue<br />
1 7-in. Groz Rapid-Action Woodworking Vise (www.woodcraft.com)<br />
4 6-ft. lengths of 3 ⁄8-in.-dia. threaded rod<br />
16 3 ⁄8-in. washers<br />
16 3 ⁄8-in. nuts<br />
2 2-in.-long 1/4-20 bolts, nuts, washers for attaching front jaw of vise<br />
2 11/2-in.-long, 1/4-20 flathead screws for attaching rear jaw<br />
1 Box of 11/4-in.-long drywal screws for laminating benchtop<br />
4 3 ⁄8-in.-dia., 21/2-in.-long lag screws and washers, for attaching vise<br />
16 S-clip-type tabletop fasteners<br />
16 3 ⁄8-in.-dia. dowels, roughly 3 in. long<br />
Long stretchers<br />
Long stretchers<br />
33 5 ⁄8 in.<br />
9 in. 9 3 ⁄16 in.<br />
9 in. 9 3 ⁄16 in.<br />
Visit us online at Finewoodworking.com/star to watch a two-part video detailing how to build this workbench from star to finish.<br />
Visit us online at Finewoodworking.com/star to watch a two-part video detailing how to build this workbench from star to finish.<br />
See how our magazine<br />
makes you a better<br />
woodworker<br />
SUBSCRIBE TODAY!
Credit Here
Quick-to-Make<br />
Tool Cabinet<br />
Attractive design stores all your tools in a small space<br />
B y J a n Z o l t o w s k i<br />
After a career of 35 years I had collected<br />
a substantial number of<br />
woodworking tools and I finally<br />
decided that they deserved a proper home.<br />
I set out to create a cabinet capable of<br />
holding my tools in a relatively small but<br />
accessible area. The result is home to<br />
well over 300 tools, yet covers only about<br />
12 sq. ft. of wall.<br />
I deliberately dedicated this cabinet to<br />
hand tools to keep them apart from dusty<br />
power tools, but the design can be modified<br />
easily to accommodate small power<br />
A brief tour<br />
tools as well. Think twice before making<br />
the cabinet smaller; even if your tool collection<br />
would look lost in a cabinet of this<br />
size, it’s nice to have space to grow into.<br />
No wasted space<br />
The inside surfaces of the main doors hold<br />
thin tools such as chisels and screwdrivers.<br />
Inside the cabinet, working down from<br />
the top, the upper shelf seats larger handplanes;<br />
the middle section has a pair of<br />
internal doors that support tools on both<br />
sides (increasing the hanging area by 40%)<br />
and that open to reveal additional space<br />
for saws and marking tools. The lower area<br />
is divided into cubbyholes for smoothing<br />
planes and other specialty planes, while six<br />
small drawers in the bottom hold smaller<br />
tools such as block planes, drill bits, and<br />
router bits.<br />
The cabinet hangs on upper and lower<br />
pairs of French cleats. Behind the cabinet,<br />
in the space between the cleats, is a<br />
place to hold a carpenter’s square on one<br />
side, and three panel saws, held securely<br />
by means of the friction of their teeth, on<br />
Drawers for small objects. The six drawers<br />
at the bottom of the cabinet hold small objects<br />
such as block planes.<br />
Hinged panels add storage. Tools hang<br />
on both sides, adding 40% to the cabinet’s<br />
hanging area.<br />
Storage behind the cabinet. A carpenter’s<br />
square on one side and three panel saws on the<br />
other fit into slots in the back of the cabinet.<br />
www.FineWoodwor k i n g.com T O O L S & S H O P S 2 0 0 7 41
A compact cabinet with ample capacit y<br />
The cabinet is made almost entirely from birch plywood, which gives dimensional stability at a<br />
budget price. The main carcase is 3 ⁄4-in.-thick plywood connected with finger joints.<br />
Top and bottom, 13 1 ⁄4 in. deep<br />
by 32 in. wide<br />
Rabbet, 1 ⁄2 in. deep<br />
by 3 ⁄8 in. wide<br />
Sides,<br />
13 1 ⁄4 in. deep<br />
by 48 in. tall<br />
1<br />
⁄2-in. finger joints<br />
Front and back,<br />
31 in. wide by<br />
47 1 ⁄4 in. tall<br />
1. Cut doors<br />
from case.<br />
2. Split doors<br />
in two.<br />
3. Add 3 ⁄4-in.-thick<br />
center door side.<br />
Construct the carcase<br />
Build a big box. The main body of the cabinet is connected at each<br />
corner with 1 ⁄2-in. finger joints cut on the tablesaw (left). Rabbet the<br />
front and rear for the panels. Glue and nail the front panel (above),<br />
but attach the rear with screws for interior access.<br />
42 F I N E w o o d w o r k i n g<br />
Photos: Mark Schofield; drawings: Bob La Pointe
the other. The cabinet holds all these tools<br />
within easy reach, and every blade and<br />
tooth stays sharp and protected.<br />
Construction starts with a single box<br />
I built my cabinet out of Baltic-birch plywood.<br />
Not only is it more economical than<br />
solid lumber, but it eliminates problems<br />
such as stuck drawers from dimensional<br />
changes caused by the high humidity in<br />
the Northwest. The body of the cabinet<br />
starts out as one large box with the sides<br />
made from 3 ⁄4-in.-thick plywood. Join the<br />
corners with 1 ⁄2-in. finger or box joints (for<br />
more on this method, see “A Lesson in Box<br />
Joints,” FWW #181, p. 84, or “Box Joints on<br />
the Tablesaw,” FWW #148, pp. 60-63).<br />
Rout a 1 ⁄2-in.-deep by 3 ⁄8-in.-wide rabbet<br />
around the inside front and back edges to<br />
accept panels of 1 ⁄2-in.-thick plywood. The<br />
front of the cabinet is attached with glue<br />
and nails, but the back is attached with<br />
screws only to allow access during later<br />
construction.<br />
Next, cut off approximately the front<br />
third of the box to form what will become<br />
the main doors. On the tablesaw, using the<br />
rip fence as a guide, cut through both ends<br />
of the box. Attach a thin piece of scrap<br />
plywood to each end by nailing it on both<br />
sides of the cut. This is to keep the two<br />
parts of the box attached while cutting<br />
through the long sides on the tablesaw.<br />
While at the saw, cut the newly removed<br />
front section of the cabinet in half to form<br />
the two main doors. When this is done, attach<br />
pieces of 3 ⁄4-in.-thick plywood to form<br />
the center side of each door. Don’t worry<br />
about the exposed edges of the plywood<br />
sides; these will be covered by banding.<br />
Create the gallery and drawers<br />
The central gallery, with its cubbyholes<br />
used to store planes, gives the cabinet rigidity.<br />
Cut the upper and lower crosspieces,<br />
then cut the dadoes for the 1 ⁄4-in.-thick shelf<br />
partitions either on the tablesaw or with<br />
a router. Use the same method to create<br />
the dado on the underside of the gallery to<br />
receive the center drawer divider.<br />
Before installing the gallery you need to<br />
make the drawers, because their height and<br />
spacing will determine the location of the<br />
gallery. The six drawers are made of 1 ⁄2-in.-<br />
thick plywood with 1 ⁄4-in. finger joints. The<br />
bottoms, made of 1 ⁄4-in.-thick plywood, sit<br />
in a rabbet rather than a groove because<br />
the latter would reduce the depth of these<br />
already-shallow drawers.<br />
After unscrewing the back panel of the<br />
cabinet, rout a dado on each side for the<br />
upper shelf, and then glue in the shelf.<br />
Stack the drawers using laminate or thin<br />
cardboard as spacers, and mark the top<br />
of the stack for the location of the bottom<br />
dado of the gallery. Lay the gallery<br />
across the cabinet and mark the location<br />
of the top dado. Cut the pair of dadoes<br />
on each side, and then install the gallery<br />
and the central drawer divider. The latter is<br />
screwed to the bottom of the cabinet from<br />
the outside and is not dadoed, so as not to<br />
weaken the bottom of the cabinet.<br />
I hung the drawers by attaching 1 ⁄4-in.-<br />
thick by 1 ⁄2-in.-wide strips of hard maple to<br />
the sides of the cabinet and the central divider.<br />
To get the drawers to hang perfectly<br />
Cut away the door section. With the front<br />
and rear panels installed, cut away the front<br />
quarter of the box to form the main doors.<br />
Cut the short sides first, and then tack a<br />
batten across the cut to hold the section in<br />
place while cutting the long sides.<br />
Next cut makes the two main doors. Tack two strips of wood across the cut line as shown. Then<br />
set the sawblade to just score the underside of the strips. In this way the panel is cut in half but<br />
won’t bind on the sawblade.<br />
www.FineWoodwor k i n g.com<br />
T O O L S & S H O P S 2 0 0 7 43
French cleats, 5 ⁄8 in. thick by<br />
3 in. wide by 30 1 ⁄2 in. long<br />
Carcase<br />
Top shelf,<br />
5<br />
⁄8 in. thick<br />
Piano hinge<br />
Dado, 3 ⁄8 in. deep<br />
by 5 ⁄8 in. wide<br />
Butt<br />
hinges<br />
Inside doors,<br />
5<br />
⁄8 in. thick<br />
Door post, 5 ⁄8 in.<br />
thick, screwed to<br />
the cabinet through<br />
counterbored holes<br />
Top shelf,<br />
1<br />
⁄2 in. thick<br />
Bottom shelf,<br />
5<br />
⁄8 in. thick<br />
Gallery dividers,<br />
1<br />
⁄4 in. thick<br />
Back panel<br />
consists of two<br />
layers of 1 ⁄4-in.-<br />
thick plywood.<br />
The inner layer<br />
has sections<br />
cut out to hold<br />
panel saws and<br />
a carpenter’s<br />
square.<br />
48 in.<br />
13 3 ⁄8 in.<br />
Drawer guides, hard maple,<br />
1<br />
⁄4 in. thick by 1 ⁄2 in. wide by<br />
9 1 ⁄2 in. long<br />
31 1 ⁄4 in.<br />
23 1 ⁄4 in.<br />
7 in.<br />
1 7 ⁄8 in.<br />
9 1 ⁄2 in.<br />
2 7 ⁄8 in.<br />
Drawer divider<br />
Grooves, 1 ⁄4 in. deep by<br />
1<br />
⁄2 in. wide by 9 1 ⁄2 in. long<br />
Drawer sides,<br />
1<br />
⁄2-in.-thick plywood<br />
Drawer bottoms, 1 ⁄4-in.-<br />
thick plywood, recessed<br />
into a rabbet cut in the<br />
bottom of the drawer sides<br />
Drawer fronts and<br />
backs, 1 ⁄2-in.-thick<br />
plywood<br />
10 1 ⁄4 in.<br />
6 1 ⁄2 in.<br />
8 in.<br />
32 in. 13 1 ⁄4 in.<br />
ShelVeS AnD cUbbyholeS<br />
pRoViDe tool StoRAGe<br />
The internal doors are 5 ⁄8 in. thick; the shelves are<br />
either 5 ⁄8 in. or 1 ⁄2 in. thick, and the front and back<br />
are 1 ⁄2-in.-thick panels. The drawers are made from<br />
1<br />
⁄2-in.-thick material with 1 ⁄4-in.-thick plywood used for<br />
the drawer bottoms and the gallery dividers.<br />
44<br />
F I N E w O O d w O r k I N g
parallel, I used the same spacers when cutting<br />
rabbets in the drawer sides and when<br />
attaching the strips to the cabinet.<br />
On a router table, create a guide channel<br />
the same width as the drawer sides comprising<br />
two outer guide strips, two center<br />
strips of wood the width of the straight-cut<br />
router bit, and two equal spacers to go<br />
above and below the bit that center the<br />
drawer side over the router bit. Clamp the<br />
outer strips to the table, remove the spacers<br />
and the center strips, raise the bit to 1 ⁄4 in.,<br />
and cut a groove until just before the finger<br />
joints at the front of the drawer.<br />
when all the grooves have been cut, use<br />
the spacer strips from the router table and<br />
the laminate spacers used earlier when<br />
stacking the drawers to establish the location<br />
for each maple drawer runner. Screw<br />
the runners to the sides, and the central<br />
divider and the drawers are hung.<br />
The two inner doors and their posts<br />
are made from 5 ⁄8-in.-thick plywood. Cut<br />
matching recesses on each door and post<br />
for a pair of hinges, and then screw each<br />
post to the sides of the cabinet between<br />
the top of the torsion box and the upper<br />
shelf. Hang the doors on these posts.<br />
The separate unit at the back of the cabinet<br />
is built of two layers of 1 ⁄4-in.-thick<br />
plywood and should be designed to accommodate<br />
carpenter’s squares and panel<br />
saws. Screw this unit to the back of the<br />
cabinet between the French cleats.<br />
The outer doors are hung using piano<br />
hinges and magnetic catches; ball catches<br />
give a positive latch to the doors. After<br />
hanging the front doors, conceal the exposed<br />
rabbet joint around the front panel<br />
with a 3 ⁄16-in.-thick by 3 ⁄4-in.-wide strip of<br />
solid maple, rounded slightly (as all exposed<br />
corners should be).<br />
with the main cabinet construction complete,<br />
make and attach custom hangers for<br />
each tool using scraps of plywood.<br />
I finished my cabinet with two coats of<br />
oil-based sealer that were sanded with<br />
P320-grit sandpaper. Then I wiped on a<br />
couple of coats of tung oil.<br />
The cubbyholes and the bottoms of<br />
the drawers were covered with industrial<br />
rubber- backed floor covering, available<br />
from home centers. It comes in many colors<br />
and gives excellent protection to edge<br />
tools. The final step was to attach pulls to<br />
the drawers and doors, and stout handles<br />
to the outside of the cabinet. These are a<br />
great help when you and a friend lift the<br />
cabinet onto the wall-mounted part of<br />
the cleats. Install all of the tools and then<br />
start putting them to use.<br />
<br />
Jan Zoltowski is a professional antique and art<br />
restorer who lives near Seattle, Wash.<br />
Assemble the interior<br />
Attach the<br />
inner doors.<br />
Stretching from<br />
the top of the<br />
gallery to the<br />
bottom of the<br />
upper shelf,<br />
each inner door<br />
is hung from a<br />
post screwed to<br />
the cabinet.<br />
Install the upper shelf and gallery. Cut a dado on both sides of the cabinet and<br />
install the upper shelf. This gives the carcase extra rigidity. After routing the dadoes<br />
for the upper and lower shelves, test-fit the gallery and then glue it in.<br />
Storage behind the cabinet. An inner layer of 1 ⁄4-in.-thick<br />
plywood is cut to receive panel saws and a carpenter’s<br />
square, then covered by a solid outer piece of plywood.<br />
www.FineWoodwor k i n g.com<br />
T O O L S & S H O P S 2 0 0 7 45