Going under cover
- No tags were found...

You also want an ePaper? Increase the reach of your titles
YUMPU automatically turns print PDFs into web optimized ePapers that Google loves.
G ROW YO U R OW N V EG<br />
Visit www.gardeningmags.co.uk<br />
GROW YOUR<br />
OWN VEG<br />
FINAL PART<br />
OF OUR SERIES<br />
A polytunnel<br />
will transform<br />
your plot<br />
Mix flowers<br />
with your veg<br />
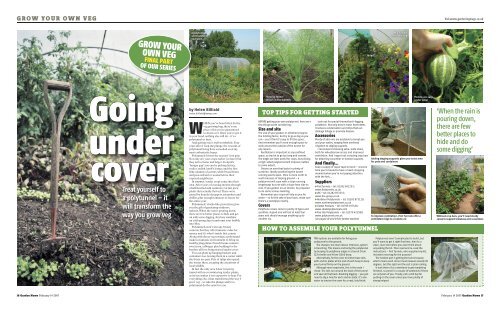
<strong>Going</strong><br />
<strong>under</strong><br />
<strong>cover</strong><br />
Treat yourself to<br />
a polytunnel – it<br />
will transform the<br />
way you grow veg<br />
WHEN<br />
by Helen Billiald<br />
helen.billiald@emap.com<br />
you’ve been bitten by the<br />
veg growing bug, there’s one<br />
piece of kit you’re guaranteed<br />
to drool over. Once you’ve got it<br />
in your head, nothing else will do – it’s a<br />
polytunnel or bust.<br />
And getting one is well worthwhile. Four<br />
years after I took the plunge, the rewards of<br />
polytunnel living have exceeded even my<br />
most enthusiastic hopes.<br />
Polytunnels loosen the seasons’ iron grip.<br />
Not only are your crops earlier (or later) but<br />
they arrive faster and larger. In April’s<br />
‘hungry gap’ you can be picking lettuce,<br />
rocket, radish, lamb’s lettuce and the first<br />
slim columns of carrots, while broad beans<br />
and peas will arrive weeks before their<br />
exposed neighbours.<br />
In summer, tender crops come into their<br />
own. After years of coaxing melons through<br />
a half-hearted sulk outdoors, I at last grew<br />
plants that actually thrived. These were<br />
joined by hoards of peppers, cucumbers and<br />
chillies, plus enough tomatoes to freeze for<br />
the entire year.<br />
Polytunnels’ cloche-like protection gives<br />
you the gift of gardening outdoors,<br />
indoors. When the rain is pouring down,<br />
there are few better places to hide and get<br />
on with some digging. And any sunshine<br />
on cold spring days transforms your bubble<br />
into May.<br />
Polytunnels won’t win any beauty<br />
contests, but they offer fantastic value for<br />
money and it’s what’s inside that counts.<br />
Along with direct veg sowings, a polytunnel<br />
makes a fantastic environment to bring on<br />
healthy plug plants. French beans, runners,<br />
sweetcorn, cabbages plus bedding for the<br />
borders all love being started <strong>under</strong> <strong>cover</strong>.<br />
You can plant up hanging baskets and<br />
containers too, leaving them in a corner until<br />
the frosts are past. Pots of tulips also spend<br />
the winter there, escaping the attentions of<br />
local wildlife.<br />
In fact the only area I don’t trust my<br />
tunnel with is overwintering tender plants,<br />
as its size makes it too expensive to heat. For<br />
everything else, it has transformed the way I<br />
grow veg – so take the plunge and let a<br />
polytunnel do the same for you.<br />
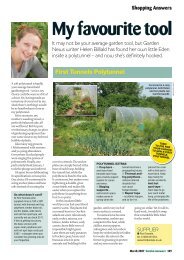
Florence fennel<br />
thrives in the warmth<br />
TOP TIPS FOR GETTING STARTED<br />
BEFORE getting your own polytunnel, here are a<br />
few things worth considering:<br />
Size and site<br />
The size of your garden or allotment may be<br />
the limiting factor, but try to go as big as you<br />
can – you’ll find it’s easy to fill the space.<br />
And remember you’ll need enough space to<br />
walk around the outside of the tunnel for<br />
any repairs.<br />
Ventilation is important in any confined<br />
space, so try not to go too long and narrow.<br />
The edges are least useful for crops, but picking<br />
a high-sided polytunnel will improve matters<br />
to some extent.<br />
Choose an area that basks in plenty of<br />
sunshine, ideally positioning the tunnel<br />
running east to west. Mine is more north to<br />
south because of sloping ground – a<br />
polytunnel will cope with a slope running<br />
lengthways but not with a slope from side to<br />
side. If you garden on an incline, be prepared<br />
to do some serious levelling.<br />
Remember your crops will rely on you for<br />
water – so for the sake of your back, make sure<br />
there’s a standpipe nearby.<br />
Covers<br />
Polythene <strong>cover</strong>s come in plenty of types and<br />
qualities. A good one will last at least four<br />
years and should manage anything up to<br />
another six.<br />
Look out for special thermal/anti-fogging<br />
polythene. Not only does it retain heat better,<br />
it reduces condensation and drips that can<br />
damage foliage or promote disease.<br />
Accessories<br />
Plenty of add-ons are available to tempt you<br />
and your wallet, ranging from overhead<br />
irrigation to staging supports.<br />
I recommend choosing extra-wide doors,<br />
both for wheelbarrow access and improved<br />
ventilation. And I regret not including crop bars<br />
for attaching cucumber or tomato supports.<br />
And finally...<br />
Keep a supply of repair tape to hand – at some<br />
time you’re bound to have a heart-stopping<br />
moment when you’re not paying attention<br />
with the fork…<br />
Suppliers<br />
● First Tunnels – tel: 01282 601253;<br />
www.firsttunnels.co.uk<br />
● LBS – tel: 01282 873333;<br />
www.lbs-group.co.uk<br />
● Northern Polytunnels – tel: 01282 873120;<br />
www.northernpolytunnels.co.uk<br />
● Citadel Products – tel: 01789 297456;<br />
www.citadelpolytunnels.com<br />
● Five Star Polytunnels – tel: 01570 421580;<br />
www.polytunnels.me.uk<br />
See pages 48 and 49 for further stockists<br />
HOW TO ASSEMBLE YOUR POLYTUNNEL<br />
TWO options are available for fixing your<br />
polytunnel to the ground.<br />
The cheaper, but more labour intensive, system<br />
is trenching. This means anchoring the polytunnel<br />
by burying its polythene edges in a trench 30cm<br />
(12in) wide and 40cm (16in) deep.<br />
Alternatively, fix the <strong>cover</strong> to timber base rails,<br />
with anchor plates at the end of each hoop to keep<br />
your tunnel firmly on the ground.<br />
Although more expensive, this is the route I<br />
chose. The rails run around the base of the tunnel<br />
and save all that back-breaking digging – you just<br />
need to dig a hole for each anchor plate. It‘s also<br />
easier to tension the <strong>cover</strong> for a neat, tidy finish.<br />
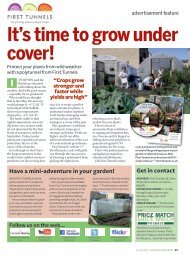
Adding staging supports gives you extra area<br />
for pots and containers<br />
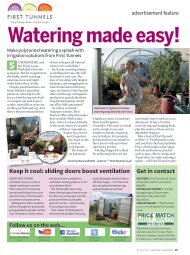
To improve ventilation, First Tunnels offer a<br />
ventilated ridge to circulate air<br />
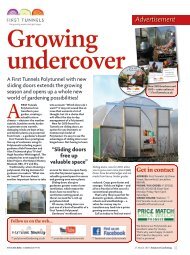
Melons are easy<br />
<strong>under</strong> <strong>cover</strong><br />
Polytunnels aren’t complicated to build, but<br />
you’ll want to get it right first time. Aim for a<br />
clean, level site before you even think about<br />
unpacking the kit. Then read and re-read the<br />
instructions – First Tunnels, who supplied my kit,<br />
included a tea bag for the purpose!<br />
The hardest part is getting the tunnel square,<br />
which means each corner must measure exactly 90<br />
degrees. Get this right and the rest is plain sailing.<br />
It took three of us a weekend to get everything<br />
finished, so pencil in a couple of weekends if there<br />
are only two of you. Finally, pick a still day for<br />
putting on the <strong>cover</strong> unless you have plenty of<br />
strong helpers!<br />
‘When the rain is<br />
pouring down,<br />
there are few<br />
better places to<br />
hide and do<br />
some digging’<br />
Without crop bars, you’ll need sturdy<br />
canes to support tomatoes and cucumbers<br />
16 Garden News February 14 2007<br />
February 14 2007 Garden News 17