

ToAsTER ovEN HoRNo TosTADoR Models Modelos TRos1500 ...
ToAsTER ovEN HoRNo TosTADoR Models Modelos TRos1500 ...
ToAsTER ovEN HoRNo TosTADoR Models Modelos TRos1500 ...

You also want an ePaper? Increase the reach of your titles
YUMPU automatically turns print PDFs into web optimized ePapers that Google loves.
GETTING STARTED<br />
• Remove all packing material, labels and any stickers.<br />
• Remove and save literature.<br />
• Unpack mounting parts and set them aside in a safe place where they will not<br />
roll away or get lost.<br />
Important: Do not attempt to operate appliance until it is properly installed.<br />
CHOOSE A LOCATION<br />
When choosing your location, consider the following:<br />
• DO make sure to mount within reach of an electrical outlet.<br />
• DO consider your normal work patterns in the kitchen when choosing<br />
location.<br />
• DO NOT mount over any heating or cooking appliance such as your range or<br />
oven.<br />
• DO NOT mount over or near a sink.<br />
• DO NOT mount under, in front of or behind any under-cabinet light fixtures.<br />
Note: If you are mounting multiple †SpaceMaker appliances, they should not<br />
be mounted flush to one another. Allow at least 4” of space between appliances<br />
for adequate cooling.<br />
Caution: This appliance features a Save-A-Plug outlet receptacle to connect<br />
smaller †SpaceMaker appliances such as the mini food processor / grinder or<br />
can opener. Do not use this outlet for any other appliance!<br />
Caution: When selecting a location for your toaster oven, make sure you have<br />
adequate room to reach the Rear Receptacle.<br />
Note: If you are connecting another †SpaceMaker appliance into the Save-A-<br />
Plug outlet, make sure you can easily unplug the appliance after each use.<br />
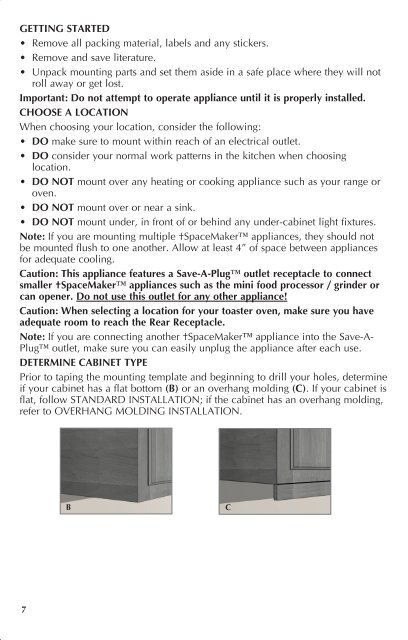
DETERMINE CABINET TYPE<br />
Prior to taping the mounting template and beginning to drill your holes, determine<br />
if your cabinet has a flat bottom (B) or an overhang molding (C). If your cabinet is<br />
flat, follow STANDARD INSTALLATION; if the cabinet has an overhang molding,<br />
refer to OVERHANG MOLDING INSTALLATION.<br />
7<br />
B C<br />
STANDARD INSTALLATION (FLAT CABINET)<br />
Important: Always wear protective glasses or goggles to prevent injury when<br />
drilling.<br />
1. Clear countertop under installation area to avoid getting dust or debris on other<br />
appliances or items. Open cabinets and remove contents to make mounting<br />
easier.<br />
2. Clean both the underside and topside of the bottom panel of the cabinet.<br />
3. With cabinet doors open, place mounting template flush against the surface of<br />
the underside of your cabinet, making sure to align thick line on template with<br />
bottom front edge of your cabinet (D).<br />
D<br />
Important: Do not align screw holes on template directly under the partition<br />
between cabinets, as this will prevent you from installing the appliance properly.<br />
Pay close attention to where the drill holes will be set so as not to damage your<br />
cabinets during mounting. Drilling through your cabinet’s partition may cause<br />
damage to cabinets and prevent proper installation.<br />
4. Fold the template along the edge of your cabinet so the thick line is straight<br />
with bottom front edge; pull template tight and tape down to hold in place.<br />
5. Drilling from under the cabinet up, drill holes through the 4 places marked on<br />
the template, using a ¼-inch drill bit (E).<br />
E<br />
Important: Always ensure you are drilling straight up through the marked<br />
mounting hole on the template. Drilling at an angle may prevent proper<br />
installation and may damage cabinets if the drill bit pierces the partition.<br />
6. Once holes are drilled, remove tape and mounting template.<br />
7. Wipe dust and debris off the topside and underside of the cabinet surface.<br />
8. Place a washer inside the cabinet over each of the 4 holes you drilled.<br />
8


