

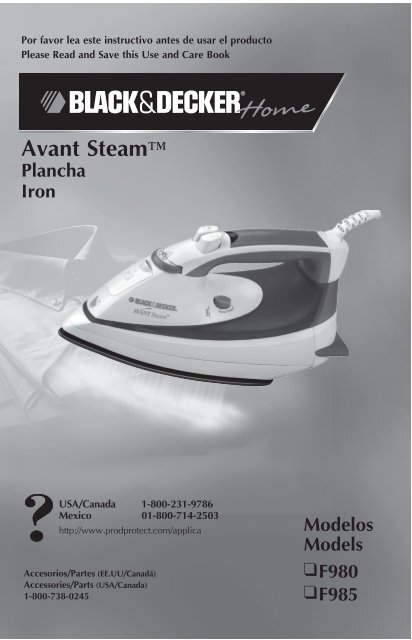
Avant Steam⢠- Applica Use and Care Manuals
Avant Steam⢠- Applica Use and Care Manuals
Avant Steam⢠- Applica Use and Care Manuals
- No tags were found...

Create successful ePaper yourself
Turn your PDF publications into a flip-book with our unique Google optimized e-Paper software.
INSTRUCCIONES IMPORTANTESDE SEGURIDADCu<strong>and</strong>o se utilizan aparatos eléctricos, especialmente en la presencia de losniños, siempre se debe tomar ciertas medidas de seguridad, incluyendo lassiguientes:❑ LEA TODAS LAS INSTRUCCIONES ANTES DE UTILIZAR ELPRODUCTO.❑ Utilice la plancha solamente con el fin previsto.❑ A fin de evitar el riesgo de un choque eléctrico, no sumerja la plancha enagua ni en ningún otro líquido.❑ Siempre ajuste la plancha a la posición de apagado (0) antes deconectarla o desconectarla de la toma de corriente. Nunca tire del cablepara desconectar el aparato; sujete el enchufe y hale con cuidado.❑ No permita que el cable entre en contacto con las superficies calientes.Espere que la plancha se enfríe bien antes de guardarla. Enrolle el cableholgadamente alrededor de la plancha.❑ Siempre desconecte la plancha cu<strong>and</strong>o no esté en uso y cu<strong>and</strong>o llene ovacíe el tanque de agua.❑ No utilice la plancha si el cable o el enchufe presentan algúndesperfecto, si la ha dejado caer o dañado. Para evitar el riesgo deun choque eléctrico, no desarme la plancha. Acuda a una persona deservicio calificada. El reensamblaje incorrecto de la plancha puedeocasionar el riesgo de un choque eléctrico.❑ Se requiere supervisar de cerca todo aparato eléctrico al ser utilizadopor o en la presencia de los niños. Nunca descuide la plancha mientraspermanece enchufada ni sobre la tabla de planchar.❑ Pueden ocurrir quemaduras al tocar las piezas metálicas, el agua caliente,o el vapor que emite la plancha. Tenga cuidado al invertir una planchade vapor ya que puede haber agua caliente adentro del tanque.INSTRUCCIONES ESPECIALES❑ Para evitar una sobrecarga eléctrica, no utilice ningún otro aparato de altoconsumo de corriente en el mismo circuito.❑ Si el uso de un cable de extensión es indispensable, se debe deutilizar uno de 15 amperios. Los cables de menor amperaje se puedensobrecalentar. Se debe tener cuidado de acomodar el cable de maneraque nadie lo hale ni se tropiece.CONSERVE ESTAS INSTRUCCIONES.Este aparato eléctrico es para uso doméstico únicamenteENCHUFE POLARIZADOEste aparato cuenta con un enchufe polarizado (un contacto es más ancho que el otro).A fin de reducir el riesgo de un choque eléctrico, este enchufe encaja en una toma decorriente polarizada en un solo sentido. Si el enchufe no entra en la toma de corriente,inviértalo y si aun así no encaja, consulte con un electricista. Por favor no trate dealterar esta medida de seguridad.TORNILLO DE SEGURIDADAdvertencia: Este aparato cuenta con un tornillo de seguridad para evitar laremoción de la cubierta exterior del mismo. A fin de reducir el riesgo de incendioo de choque eléctrico, por favor no trate de remover la cubierta exterior. Esteproducto no contiene piezas reparables por el consumidor. Toda reparación sedebe llevar a cabo únicamente por personal de servicio autorizado.Nota: Si el cordón de alimentación es dañado, en América Latina debe sustituirsepor personal calificado o por el centro de servicio autorizado.12
Este producto puede variar ligeramente del que aparece ilustrado132Símbolos1. Boquilla de rociar2. Tapa del tanque de agua3. Selector de tejidos4. Botón de emisión de vapor5. Botón de rociar6. Luz indicadora de funcionamiento7. Mango Comfort Grip 8. Cable giratorio de 360°9. Talón engomado, antideslizante10. Guía de tejidos11. Tanque de agua12. Botón de limpieza automática (AUTO CLEAN ® )13. Suela133SecoVapor/impacto de vaporCLEAN MAX MINRocío4 5 6 71214. Enrollado de cable y enganche (no mostrado)118910Como usarEste aparato es para uso doméstico solamente.PASOS PRELIMINARESDespegue toda calcomanía o etiqueta adherida al cuerpo o a la suela de aplancha.Nota: Utilice agua de la llave para llenar el tanque de la plancha.No utilice agua procesada por un abl<strong>and</strong>ador de agua doméstico.Importante: Para óptimo rendimiento, se recomienda dejar reposar la planchadurante 90 segundos antes de comenzar a planchar.LLENADO DEL TANQUE DE AGUA1. Abra la tapa del orificio de llenado según la ilustración (A).2. Incline la plancha y con una taza de medir limpia, viertaagua en el orificio hasta alcanzar la marca de llenado MAXen el tanque. No exceda el nivel de llenado.A3. Cierre la tapa.4. Enchufe la plancha. La luz indicadora de funcionamiento se ilumina. Una vezque la plancha alcanza la temperatura programada, esta luz se apaga. Esta luzse ilumina y se apaga en intervalos durante el ciclo de planchado.Nota: Si tiene que agregar agua al tanque durante el planchado, desconecte laplancha y siga los pasos citados anteriormente.Consejo: Para evitar daño a las prendas, si desconoce la fibra de cierto tejido,ensaye primero sobre una superficie pequeña y planche una costura o ruedointerior.TECNOLOGÍA SMART STEAM ®El sistema Smart Steam® produce vapor automáticamente cu<strong>and</strong>o uno ajustael selector de tejidos entre el nivel 4 y 6. Entre más elevado el nivel, mayor laemisión de vapor.EMISIÓN DE VAPORApropiado para suavizar las arrugas persistentes.1. Llene el tanque de agua hasta alcanzar la marca de llenadoMAX y ajuste el selector de tejidos entre el nivel 4 y 6,según el tejido de la prenda. Consulte la guía de tejidosdebajo del talón de descanso de la plancha y lea la etiquetade la prenda para determinar el tipo de tejido (B).B2. Asegúrese de que haya agua en el tanque. La emisión devapor se apaga automáticamente entre el nivel 0 y 3.3. Para mejor rendimiento, utilice la emisión de vapor enintervalos de 5 segundos (C).4. Cu<strong>and</strong>o termine de planchar, ajuste el selector de tejidos ala posición “0” y desconecte la plancha.Importante: Siempre coloque la plancha sobre el talón deCdescanso cu<strong>and</strong>o esté encendida o no en uso.4
VAPOR VerticalIdeal para suavizar las arrugas de las prendas colgantes o de las cortinas.1. Asegúrese de que el tanque de agua esté lleno hasta el nivel MAX.2. Cuelgue la prenda que desea vaporizar en un gancho. (Uno puede vaporizarlas cortinas una vez instaladas).3. Ajuste el selector al nivel apropiado (entre el 4 y 6), según el tejido.4. Sujete la plancha cerca, pero no en contacto conel tejido.5. Hale el tejido con una mano y bombee el botónCLEAN MAX MINcon la otra, a medida pasa la plancha sobre la prenda (D).DEUSO DEL ROCIADORUtilice a cualquier nivel de temperatura para humedecer lasarrugas persistentes (E).1. Asegúrese de que el tanque de agua esté lleno.2. Para el primer uso, bombee el botón varias veces.PLANCHADO A SECO1. Ajuste el selector de tejidos a la posición 1, 2 o 3 a finde planchar sin vapor (F). El sistema Smart Steam ® se apagaautomáticamente.F2. Si desea planchar a seco a temperaturas más elevadas, vacíeel tanque por completo para evitar la emisión de vapor.VACIADO DEL TANQUE (OPCIONAL)Nota: No es necesario vaciar el tanque de agua después de cada uso.1. Desconecte la plancha y permita que se enfríe.2. Si desea vaciar el agua, sujete la plancha sobre un fregaderocon la punta hacia abajo y hacia un lado. El agua sale através de la tapa del tanque de agua (G).GCuidado y limpiezaEste producto no contiene piezas reparables por el consumidor. Para servicio,acuda a personal calificado.LIMPIEZA DE LAS SUPERFICIES EXTERIORES1. Asegúrese de desconectar y permitir que la plancha se enfríe bien. Limpie lasuela y las superficies exteriores con un paño suave, humedecido con agua yun detergente doméstico suave. Jamás utilice abrasivos, limpiadores fuertes,vinagre ni almohadillas de fregar que puedan rallar o decolorar la plancha.2. Después de limpiar, planche a vapor sobre un paño viejo a fin de retirar todoresiduo acumulado en los orificios de vapor.LIMPIEZA AUTOMÁTICAA fin de mantener los orificios de vapor libres de acumulaciones, siga lassiguientes instrucciones por lo menos una vez al mes:1. Llene el tanque de agua por debajo de la línea MAX.2. Enchufe la plancha.3. Ajuste el selector de tejidos al nivel 6 y coloque la plancha sobre el talónde descanso. Permita que la plancha se caliente hasta que la luz verdeindicadora de temperatura se apague.4. Gire el selector de tejidos a la posición “0”, desconectey sujete la plancha sobre un lavabo con la suela orientadahacia abajo. Presione y sostenga el botón de limpiezaautomática (AUTO CLEAN ® ). Tenga cuidado del aguacaliente y del vapor que emiten los orificios de vapor (H).HContinúe sosteniendo el botón de limpieza automática(AUTO CLEAN ® ) hasta haber vaciado toda el agua. Si esnecesario, mueva la plancha de lado a lado y de atrás paraadelante.5. Al terminar, suelte el botón, coloque la plancha sobre el talón de descansoy enchúfela. Permita que la plancha se caliente unos dos minutos hasta secartoda el agua sobrante.ALMACENAMIENTO DE LA PLANCHA1. Desconecte la plancha y espere que se enfríe.2. Verifique que el selector de tejidos esté ajustado a la posición “0”.3. Enrolle el cable e insertelo en el enganche del enchufehasta que quede seguro en su lugar (J).4. Almacene la plancha verticalmente sobre el talón dedescanso, a fin de evitar el goteo a través de la suela.J56
IMPORTANT SAFEGUARDSWhen using your iron, basic safety precautions should always be followed,including the following:❑ READ ALL INSTRUCTIONS BEFORE USING.❑ <strong>Use</strong> iron only for its intended use.❑ To protect against a risk of electric shock, do not immerse the iron inwater or other liquids.❑ The iron should always be turned to “0” before plugging or unpluggingfrom outlet. Never yank cord to disconnect from outlet; instead grasp plug<strong>and</strong> pull to disconnect.❑ Do not allow cord to touch hot surfaces. Let iron cool completely beforeputting away. Loop cord loosely around the iron when storing.❑ Always disconnect iron from electrical outlet when filling with water oremptying <strong>and</strong> when not in use.❑ Do not operate iron with a damaged cord or if the iron has been droppedor damaged. To avoid the risk of electric shock, do not disassemblethe iron, take it to a qualified serviceman for examination <strong>and</strong> repair.Incorrect reassembly can cause a risk of electric shock when the iron isused.❑ Close supervision is necessary for any appliance being used by or nearchildren. Do not leave iron unattended while connected or on an ironingboard.❑ Burns can occur from touching hot metal parts, hot water or steam. <strong>Use</strong>caution when you turn a steam iron upside down - there may be hotwater in the reservoir.SPECIAL INSTRUCTIONS❑ To avoid a circuit overload, do not operate another high-wattageappliance on the same circuit.❑ If an extension cord is absolutely necessary, a 15-ampere cord should beused. Cords rated for less amperage may overheat. <strong>Care</strong> should be takento arrange the cord so that it cannot be pulled or tripped over.SAVE THESE INSTRUCTIONS.This product is for household use only.POLARIZED PLUGThis appliance has a polarized plug (one blade is wider than the other). To reducethe risk of electric shock, this plug is intended to fit into a polarized outlet only oneway. If the plug does not fit fully into the outlet, reverse the plug. If it still does not fit,contact a qualified electrician. Do not attempt to modify the plug in any way.TAMPER-RESISTANT SCREWWarning: This appliance is equipped with a tamper-resistant screw to preventremoval of the outer cover. To reduce the risk of fire or electric shock, do notattempt to remove the outer cover. There are no user-serviceable parts inside.Repair should be done only by authorized service personnel.Note: If the power supply cord is damaged, it should be replaced by qualifiedpersonnel. In Latin America, by an authorized service center.78
Product may vary slightly from what is illustrated.4 5 6 7321111213SymbolsDrySteam/Surge of SteamCLEAN MAX MINSpray1. Spray nozzle2. Water-fill cover3. Fabric-select dial4. Steam button5. Spray button6. On indicator light7. Comfort Grip h<strong>and</strong>le8. 360° pivoting cord9. Anti-slip, rubberized heel10. Fabric guide11. Water tank12. AUTO CLEAN ® button13. Soleplate14. Cord wrap <strong>and</strong> cord hook (not shown)98910How to <strong>Use</strong>This appliance is intended for household use only.GETTING STARTEDRemove any labels, stickers or tags attached to the body or soleplate of the iron.Note: <strong>Use</strong> ordinary tap water for ironing. Do not use water processed through ahome softening system.Important: For optimum performance, let the iron st<strong>and</strong> for 90 seconds beforebeginning to iron.FILLING WATER TANK1. With iron on flat surface with soleplate down, openwater-fill cover (A).2. Tilt the iron <strong>and</strong> using a clean measuring cup, pour waterinto opened chamber until water reaches the MAX levelAmark on the side of the water tank. Do not overfill.3. Close the water-fill cover.4. Plug in the iron. The on indicator light illuminates. Once the iron reaches theselected temperature, the light goes off. The light will then cycle on <strong>and</strong> offduring ironing.Note: If you need to add water while ironing, unplug the iron <strong>and</strong> follow abovesteps.Tip: If unsure of a garment's fiber, test a small area (on an inside seam or hem)before ironing.SMART STEAM ® TECHNOLOGYThe Smart Steam ® system automatically produces steam when you turn the fabricselectdial between settings 4 <strong>and</strong> 6. The higher the setting, the more powerful thesteam.SURGE OF STEAM<strong>Use</strong> to remove stubborn creases.1. With the water tank filled to the MAX mark, set fabric-selectdial to appropriate setting (between 4 <strong>and</strong> 6) for your fabric.See fabric guide under the heel rest <strong>and</strong> read garment's labelto help you determine fabric type (B).2. Be sure there is water in the reservoir. Steam is automaticallyBturned off between settings 0 <strong>and</strong> 3.C3. For best performance, use surge of steam at 5-secondintervals (C).4. When finished ironing, turn the fabric-select dial to 0 <strong>and</strong>unplug the iron.Important: Always st<strong>and</strong> the iron on its heel rest whenpowered on but not in use.10
Vertical STEAM<strong>Use</strong> for removing wrinkles from hanging clothes <strong>and</strong> drapes.1. Be sure the water tank is filled to the MAX mark.2. Hang the garment to be steamed on a clothes hanger. (Curtains or drapes canbe steamed once they are hung.)3. Set the fabric-select dial to appropriate setting (between 4 <strong>and</strong> 6) foryour fabric.4. Hold the iron close to, but not touching, the fabric.DEF<strong>Care</strong> <strong>and</strong> CleaningThis product contains no user serviceable parts. Refer service to qualified servicepersonnel.CLEANING OUTSIDE SURFACES1. Make sure iron is unplugged <strong>and</strong> has cooled completely. Wipe the soleplate<strong>and</strong> outer surfaces with a soft cloth dampened with water. Add mild householddetergent. Never use abrasives, heavy-duty cleansers, vinegar or scouring padsthat may scratch or discolor the iron.CLEAN MAX MIN5. Pull the fabric tight in your free h<strong>and</strong> <strong>and</strong> pump the 2. After cleaning, steam iron over an old cloth to remove any residue from thebutton as you move the iron over the fabric (D).steam vents.AUTO CLEANINGTo keep the steam vents free of any buildup, about once a month follow theseinstructions:1. Fill the water tank well below the MAX line. Plug in the iron.2. Turn the fabric-select dial to 6 <strong>and</strong> st<strong>and</strong> the iron on its heel rest. Allow it toUSING SPRAYheat until the on indicator light goes out <strong>and</strong> comes on again.<strong>Use</strong> to dampen tough wrinkles at any setting (E).3. Turn fabric selection dial to 0, unplug the iron <strong>and</strong> hold over a sink with the1. Be sure the iron is filled with water.soleplate facing down.2. On first use, pump the button several times.4. Press <strong>and</strong> hold the AUTO CLEAN ® button. Be careful, ashot water <strong>and</strong> steam will come out of the steam vents (H).Continue to hold the AUTO CLEAN ® button until all thewater has emptied. If necessary, rock iron side-to-side <strong>and</strong>front-to-back.DRY IRONING1. Turn the fabric selection dial to setting 1, 2, or 3 toiron without steam (F). The Smart Steam ® system willautomatically turn off.2. To dry iron at higher settings, empty the water from thereservoir to prevent steaming.EMPTYING WATER TANK (OPTIONAL)Note: It is not necessary to empty the water after each use.1. Unplug the iron <strong>and</strong> let it cool.2. To release the water, hold the iron over a sink with the tippointing down <strong>and</strong> to one side. Water will empty out of thewater-fill opening (G).G5. When finished, release the button, st<strong>and</strong> the iron on its heelHrest <strong>and</strong> plug it in. Heat for about 2 minutes to dry out anyremaining water.STORING YOUR IRON1. Unplug the iron <strong>and</strong> allow it to cool.2. Check that the selector is set to 0.3. Wrap the cord around the iron <strong>and</strong> insert cord into the clipto secure in place (J).4. Store vertically on its heel to prevent water leaking from thesoleplate.J1112
NOTAS/NOTESNOTAS/NOTES13 14
¿NECESITA AYUDA?Para servicio, reparaciones o preguntas relacionadas al producto, por favor llameal número del centro de servicio en el país donde usted compró su producto.NO devuelva el producto al fabricante. Llame o lleve el producto a un centro deservicio autorizado.DOS AÑOS DE GARANTÍA LIMITADA(No aplica en México, Estados Unidos o Canadá)¿Qué cubre la garantía?• La garantía cubre cualquier defecto de materiales o de mano de obra. <strong>Applica</strong>no se responsabiliza por ningún costo que exceda el valor de compra delproducto.¿Por cuánto tiempo es válida la garantía?• Por dos años a partir de la fecha original de compra.¿Cómo se puede obtener servicio?• Conserve el recibo original de compra.• Por favor llame al número del centro de servicio autorizadoEsta garantía no cubre:• Los productos que han sido utilizados en condiciones distintas a las normales• Los daños ocasionados por el mal uso, el abuso o negligencia• Los productos que han sido alterados de alguna manera• Los daños ocasionados por el uso comercial del producto• Los productos utilizados o reparados fuera del país original de compra• Las piezas de vidrio y demás accesorios empacados con el aparato• Los gastos de tramitación y embarque asociados al reemplazo del producto• Los daños y perjuicios indirectos o incidentalesNEED HELP?For service, repair or any questions regarding your appliance, call the appropriate 800 numberon cover of this book. Please DO NOT return the product to the place of purchase. Also,please DO NOT mail product back to manufacturer, nor bring it to a service center. Youmay also want to consult the website listed on the cover of this manual.Two-Year Limited Warranty(Applies only in the United States <strong>and</strong> Canada)What does it cover?• Any defect in material or workmanship provided; however, <strong>Applica</strong>’s liability will notexceed the purchase price of product.For how long?• Two years after date of purchase.What will we do to help you?• Provide you with a reasonably similar replacement product that is either new or factoryrefurbished.How do you get service?• Save your receipt as proof of date of sale.• Visit the online service website at www.prodprotect.com/applica, or call toll-free1-800-231-9786, for general warranty service.• If you need parts or accessories, please call 1-800-738-0245.What does your warranty not cover?• Damage from commercial use• Damage from misuse, abuse or neglect• Products that have been modified in any way• Products used or serviced outside the country of purchase• Glass parts <strong>and</strong> other accessory items that are packed with the unit• Shipping <strong>and</strong> h<strong>and</strong>ling costs associated with the replacement of the unit• Consequential or incidental damages (Please note, however, that some states do not allowthe exclusion or limitation of consequential or incidental damages, so this limitation maynot apply to you.)How does state law relate to this warranty?• This warranty gives you specific legal rights. You may also have other rights that varyfrom state to state or province to province.15 16
Póliza de Garantía(Válida sólo para México)Duración<strong>Applica</strong> Manufacturing, S. de R. L. de C.V. garantiza este productopor 2 años a partir de la fecha original de compra.¿Qué cubre esta garantía?Esta Garantía cubre cualquier defecto que presenten las piezas, componentes y lamano de obra contenidas en este producto.Requisitos para hacer válida la garantíaPara reclamar su Garantía deberá presentar al Centro de Servicio Autorizado lapóliza sellada por el establecimiento en donde adquirió el producto. Si no latiene, podrá presentar el comprobante de compra original.¿Donde hago válida la garantía?Llame sin costo al teléfono 01 800 714 2503, para ubicar el Centro de ServicioAutorizado más cercano a su domicilio en donde usted podrá encontrar partes,componentes, consumibles y accesorios.Procedimiento para hacer válida la garantíaAcuda al Centro de Servicio Autorizado con el producto con la póliza de Garantíasellada o el comprobante de compra original, ahí se reemplazará cualquier piezao componente defectuoso sin cargo alguno para el usuario final. Esta Garantíaincluye los gastos de transportación que se deriven de su cumplimiento.ExcepcionesEsta Garantía no será válida cu<strong>and</strong>o el producto:A) Se hubiese utilizado en condiciones distintas a las normales.B) No hubiese sido operado de acuerdo con el instructivo de uso que leacompaña.C) Cu<strong>and</strong>o el producto hubiese sido alterado o reparado por personas noautorizadas por <strong>Applica</strong> de Manufacturing, S. de R. L. de C.V.Nota: Usted podra encontrar partes, componentes, consumibles y accesoriosen los centros de servicios autorizados. Esta garantía incluyen los gastos detransportación que se deriven de sus cumplimiento dentro de sus red de servicio.Por favor llame al número correspondiente que aparece en la lista a continuación parasolicitar que se haga efectiva la garantía y donde Ud. puede solicitar servicio, reparacioneso partes en el país donde el producto fué comprado. También puede consultarnos en el e-mail. “servicio@applicamail.com.mxArgentinaServicio Central AttendaceMonroe 3351 CiudadAutónoma de Bs. As.Buenos Aires ArgentinaTel. 0810-999-8999ChileServicio Máquinas yHerramientas Ltda.Av. Apoquindo No. 4867 -Las CondesSantiago, ChileTel.: (562) 263-2490ColombiaPLINARESAvenida Quito # 88A-09Bogotá, ColombiaTel. sin costo 01 8007001870Costa RicaAplicacionesElectromecanicas, S.A.Calle 26 Bis y Ave. 3San Jose, Costa RicaTel.: (506) 257-5716223-0136EcuadorServicio Master de EcuadorAv. 6 de Diciembre 9276y los AlamosTel. (593) 2281-3882El SalvadorCalle San Antonio Abad2936San Salvador, El SalvadorTel. (503) 2284-8374GuatemalaMacPartes SA3ª Calle 414 Zona 9Frente a TecunTel. (502) 2331-50202332-2101HondurasServiTotalContigua a TelecentroTegucigalpa, Honduras,Tel. (504) 235-6271MéxicoArticulo 123 # 95 Local109 y 112Col. Centro, Cuauhtemoc,México, D.F.Tel. 01 800 714 2503NicaraguaServiTotalDe semáforo de portezuelo500 metros al sur.Managua, Nicaragua,Tel. (505) 248-7001PanamáServicios Técnicos CAPRITumbamuerto BoulevardEl Dorado Panamá500 metros al sur.Tel. (507) 2360-236(507) 2360-159PerúServicio Central FastServiceAv. Angamos Este 2431San Borja, Lima PerúTel. (511) 2251 388Puerto RicoBuckeye ServiceJesús P. Piñero #1013Puerto Nuevo, SJ PR00920Tel.: (787) 782-6175Republica DominicanaPlaza Lama, S.A.Av, Duarte #94Santo Domingo,República DominicanaTel.: (809) 687-9171VenezuelaInversiones BDR CAAv. Casanova C.C.City Market Nivel PlazaLocal 153Diagonal Hotel Melia,Caracas.Tel. (582) 324-0969www.applica-latam.comservicio@applicamail.com.mx17 18
CAT. NO. EHB500TYPE 1 160 W 120 VAC ONLY 60HzCAT. NO. EHB500Sello del Distribuidor:Fecha de compra:Modelo:Date CodeComercializado por:<strong>Applica</strong> Manufacturing S. de R.L de C.VPresidente Mazarik No111, 1er PisoCol. Chapultepec Morales, Mexico D.FDelegacion Miguel HidalgoCP 11570MexicoServicio y ReparaciónArt. 123 No. 95Col. Centro, C.P. 06050Deleg. CuauhtemocServicio al Consumidor,Venta de Refacciones y Accesorios01 800 714 2503marca registrada de The Black & Decker Corporation, Towson, Maryl<strong>and</strong>, E.U.A trademark of The Black & Decker Corporation, Towson, Maryl<strong>and</strong>, USA1 200 W 220 V50/60Hz1 200 W 120 V 60 HzTYPE 1 160 W 120 VAC ONLY 60HzImportado por:<strong>Applica</strong> Americas, Inc.Av. Juan B Justo 637 Piso 10(C1425FSA) Ciudad Autonoma de Buenos AiresArgentinaC.U.I.T No. 30-69729892-0R22008/1-10-7S/ECopyright © 2008 <strong>Applica</strong> Consumer Products, Inc.Made in People’s Republic of ChinaPrinted in People’s Republic of ChinaImportado por:<strong>Applica</strong> Manufacturing S. de R.L de C.VPresidente Mazarik No111, 1er PisoCol. Chapultepec Morales, Mexico D.FDelegacion Miguel HidalgoCP 11570MexicoDel interior marque sin costo01 (800) 714 2503Fabricado en la República Popular de ChinaImpreso en la República Popular de China


