P MANUAL DE INSTRUÇÕES E MANUAL DE ... - ELECTREX
P MANUAL DE INSTRUÇÕES E MANUAL DE ... - ELECTREX
P MANUAL DE INSTRUÇÕES E MANUAL DE ... - ELECTREX

You also want an ePaper? Increase the reach of your titles
YUMPU automatically turns print PDFs into web optimized ePapers that Google loves.
2. <strong>DE</strong>SCRIPTION<br />
2.1 <strong>DE</strong>SCRIPTION E 230<br />
Ref. Front panel<br />
1 Hot Start adjustment (MMA mode)<br />
Up-slope adjustment (TIG mode)<br />
2 Current adjustment<br />
3 Thermal protection led<br />
4 Under voltage led<br />
5 Arc Force adjustment (MMA mode)<br />
Down-slope adjustment (TIG mode)<br />
6 MMA welding indicator<br />
7 TIG/MMA selector<br />
8 TIG welding led<br />
9 Quick connection (- negative)<br />
10 Quick connection (+ positive)<br />
Ref. Rear panel<br />
11 Main switch ON/OFF<br />
12 Input cable<br />
MMA Welding (Coated electrode)<br />
1<br />
2<br />
3<br />
4<br />
A - MMA welding process selection (coated electrode):<br />
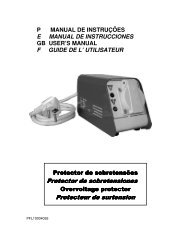
OPS Overvoltage Protection System<br />
With machine connected, press key button 3, led 4 lights on.<br />
B - Welding current:<br />
Adjust welding current with knob 1. If necessary, during welding, adjust current.<br />
C - Hot Start:<br />
Adjust Hot Start time with knob 2 between 0 and 1,1 seconds. This function increases initial current to<br />
improve arc ignition when welding under low currents.<br />
D - Arc Force:<br />
Adjust Arc Force current with knob 5 between 0 and 100% of main current to avoid electrode sticking<br />
during welding.<br />
1<br />
2<br />
3<br />
4<br />
5<br />
6<br />
7<br />
8<br />
9<br />
10<br />
11<br />
12<br />
5<br />
38