P MANUAL DE INSTRUÇÕES E MANUAL DE ... - ELECTREX
P MANUAL DE INSTRUÇÕES E MANUAL DE ... - ELECTREX
P MANUAL DE INSTRUÇÕES E MANUAL DE ... - ELECTREX

You also want an ePaper? Increase the reach of your titles
YUMPU automatically turns print PDFs into web optimized ePapers that Google loves.
4. INSTALATION<br />
4.1 CONNECTION TO THE MAIN SUPPLY<br />
These units must be connected to a single phase 230V – 50/60 Hz + ground with a tolerance of +15%/-10%.<br />
They have built-in over voltage protection which allows engine driven generator supply.<br />
Main supply must be protected by fuses or circuit-breaker according to the value I1eff written on the<br />
specifications of the power source.<br />
It is strongly recommended the use a differential protection for operator’s safety.<br />
4.2 EARTH CONNECTION<br />
For the operator's protection, the power source must be correctly grounded (according to the International<br />
Protections Norms).<br />
It is absolutely necessary to set a good earth connection with the green/yellow wire of the power cable. This<br />
will avoid discharges caused by accidental contacts with grounded pieces. If no earth connection has been set,<br />
a high risk of electric shock through the chassis of the unit remains possible.<br />
4.3 WELDING<br />
Connect the power source to the main supply and the ground.<br />
Connect the ground cable and the electrode holder to the appropriate power connections + (5) and - (6)<br />
according to the electrode polarity being used (refer to the electrodes manufacturer’s datasheets).<br />
Start up the power source with the switch ON/OFF (7).<br />
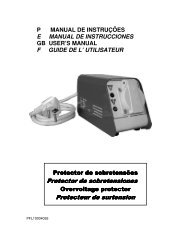
When you start the power source, the yellow indicator (2) illuminates but goes out immediately if no failure<br />
has been found.<br />
The red indicator (3) illuminates and indicates that the machine is under voltage.<br />
Adjust welding current with potentiometer (1).<br />
Place the electrode on the piece you have to weld in order to strike the arc. Weld according security rules<br />
described on chapter 1.<br />
The ventilating system is controlled automatically by means of a thermal switch which starts and stops the<br />
ventilator according to pre-adjusted internal temperature values.<br />
46