4 técnicas para trabajar con SIO-2 COLORPLUS - Cerámica Collet
4 técnicas para trabajar con SIO-2 COLORPLUS - Cerámica Collet
4 técnicas para trabajar con SIO-2 COLORPLUS - Cerámica Collet

You also want an ePaper? Increase the reach of your titles
YUMPU automatically turns print PDFs into web optimized ePapers that Google loves.
GAMA Y PRESENTACIÓN /RANGE & PRESENTATION<br />
PRODUCTO<br />
PRODUCT<br />
<strong>COLORPLUS</strong> 75g<br />
<strong>COLORPLUS</strong> 500g<br />
<strong>COLORPLUS</strong> 1.5kg<br />
Kits infantiles<br />
<strong>COLORPLUS</strong><br />
Thematic Kits<br />
<strong>COLORPLUS</strong><br />
Consulta la web www.sio-2.com y descubre todos los productos <strong>para</strong><br />
manualidades y bellas artes que tenemos <strong>para</strong> ti.<br />
Visit our web site www.sio-2.com to discover all our products for<br />
handcrafts and fine arts.<br />
CERÁMICA COLLET S.A. Fundada en 1874<br />
Pol. Ind. L’Olana s/n 08292 Esparreguera, BARCELONA (Spain)<br />
T· +34 93 777 23 44 F· +34 93 770 94 11<br />
info@sio-2.com<br />
www.sio-2.com<br />
Copyright © Ceramica <strong>Collet</strong> SA, 2009<br />
GAMA<br />
RANGE<br />
Blanco, amarillo, naranja, rosa, rojo, marrón,<br />
verde claro, verde, azul claro, azul, lila, negro<br />
White, yellow, orange, pink, red, brown, light<br />
green, green, light blue, blue, lilac, black<br />
Blanco, amarillo, rojo, verde, azul, negro<br />
White, yellow, red, green, blue, black<br />
Blanco, amarillo, rojo, verde, azul, negro<br />
White, yellow, red, green, blue, black<br />
...en la jungla / ...in the jungle<br />
...en el Jurásico / ...in Jurasic ages<br />
...bajo el mar / ...under the sea<br />
...se mueve / ...on trip<br />
...en la granja / ...on the farm<br />
...de flor en flor / ...from flower to flower<br />
...en el lago / ...on the lake<br />
...en el espacio / ...in the space<br />
PRESENTACIÓN<br />
PRESENTATION<br />
Caja 36 uds x color<br />
Box 36 units x colour<br />
Caja 36 uds surtido 6 colores<br />
Box 36 units x 6 colours assorted<br />
Caja 36 uds surtido 12 colores<br />
Box 36 units x 12 colours assorted<br />
Blister 6 uds surtido 6 colores<br />
Blister 6 units x 6 colours assorted<br />
Cubo 12 uds surtido 12 colores<br />
Bucket 12 units x 12 colours assorted<br />
Caja 12 uds x color<br />
Box 12 units x colour<br />
Pack 4 uds x color<br />
Pack 4 units x colour<br />
Blister 4 uds <strong>COLORPLUS</strong> +<br />
barniz + pincel + paso a paso<br />
Blister 4 units <strong>COLORPLUS</strong> +<br />
glaze + brush + step by step project<br />
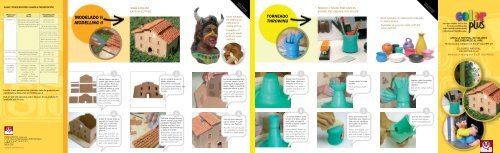
MODELADO II<br />
MODELLING II<br />
1<br />
Mezclar blanco, marrón y<br />
amarillo <strong>para</strong> obtener el color<br />
de las paredes. Hacer una<br />
plancha uniforme <strong>con</strong> un<br />
rodillo de madera y cortar<br />
paredes, suelo y techo.<br />
Mix white, brown and yellow<br />
to obtain the colour of the<br />
walls. Make a uniform slab<br />
with a roller and cut the walls,<br />
floor and ceiling.<br />
4<br />
Acabar de montar todas las<br />
paredes y el suelo. Para<br />
evitar que se deformen,<br />
dejar secar lentamente<br />
tapando la casa <strong>con</strong> un<br />
plástico.<br />
Once walls and floor are<br />
joined, leave to dry. To<br />
avoid deformations, slow<br />
drying covering the project<br />
with a thin plastic layer.<br />
MASÍA CATALANA<br />
CATALAN COTTAGE<br />
2<br />
Cortar ventanas y puertas.<br />
Añadir elementos<br />
decorativos a la fachada.<br />
Cut windows and doors. Add<br />
decorative elements to<br />
façade.<br />
5<br />
Para hacer el tejado, mezclar<br />
marrón, naranja y rojo, según<br />
tonalidades deseadas. Hacer<br />
planchas muy finas. Cortar<br />
rectángulos, dar forma de teja<br />
y colocar en el techo.<br />
Blend brown, orange and red<br />
to obtain suitable tones for the<br />
roof tiles. Make thin slabs, cut<br />
rectangles, shape the tiles and<br />
place them on the roof.<br />
NIVEL AVANZADO<br />
ADVANCED LEVEL<br />
Otros ejemplos<br />
de elaboración<br />
utilizando la<br />
misma técnica.<br />
Examples of<br />
projects made<br />
with the same<br />
method.<br />
3<br />
Unir las placas humedeciendo<br />
la zona de <strong>con</strong>tacto <strong>con</strong> un<br />
pincel mojado en agua y hacer<br />
presión. Añadir un churrito de<br />
pasta <strong>para</strong> reforzar la junta.<br />
Fix the slabs dampening the<br />
junctions with a wet brush<br />
and strengthen with thin<br />
coils.<br />
6<br />
Una vez secas todas las<br />
partes, montar el tejado<br />
sobre la casa. Barnizar.<br />
Place the roof once all parts<br />
are completely dry. Finally,<br />
varnish the Catalan cottage.<br />
TORNEADO<br />
THROWING<br />
1<br />
Amasar bien el material,<br />
darle forma cilíndrica y<br />
colocarlo en el torno.<br />
Knead the clay, make a<br />
cylinder and place it on<br />
the wheel.<br />
4<br />
Con un hilo metálico, cortar<br />
la base de la pieza y dejar<br />
secar sobre un papel de<br />
periódico tapando la pieza<br />
<strong>con</strong> un plástico.<br />
Using a metallic thread cut<br />
the bottom of the piece and<br />
leave to dry placing it on a<br />
news paper. Cover with a<br />
plastic layer to slow drying.<br />
PRÁCTICO Y SÓLIDO PORTALÁPICES<br />
STRONG AND ORIGINAL PEN HOLDER<br />
2<br />
Tornear dando la forma<br />
deseada.<br />
Throw getting suitable<br />
shapes.<br />
5<br />
Antes que la pieza está<br />
totalmente seca, repasar la<br />
base <strong>con</strong> una medialuna<br />
<strong>para</strong> quitar las posibles<br />
imperfecciones.<br />
Before total drying, trim<br />
the bottom of the piece<br />
with a rib in order to obtain<br />
a perfect and flat surface.<br />
Otros ejemplos de elaboración utilizando<br />
la misma técnica.<br />
Examples of projects made with the<br />
same method.<br />
NIVEL AVANZADO<br />
ADVANCED LEVEL<br />
3<br />
Repasar y alisar las paredes<br />
<strong>con</strong> una herramienta<br />
metálica.<br />
Smooth the surface with a<br />
scraper.<br />
6<br />
Una vez seco, barnizar.<br />
Varnish once the pen<br />
holder is completely dry.<br />
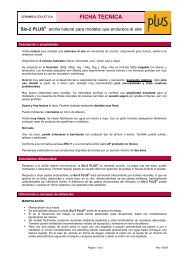
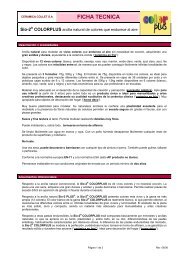
ARCILLA NATURAL DE COLORES<br />
QUE ENDURECE AL AIRE<br />
Técnicas <strong>para</strong> <strong>trabajar</strong> <strong>con</strong> Sio-2 ® <strong>COLORPLUS</strong><br />
COLOURED NATURAL<br />
AIR-DRYING CLAY<br />
Methods of working with Sio-2 ® <strong>COLORPLUS</strong>
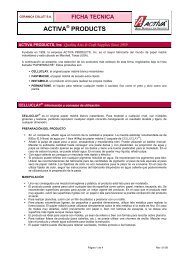
MANIPULACIÓN<br />
Es a<strong>con</strong>sejable amasar la arcilla Sio-2 ®<br />
><br />
<strong>COLORPLUS</strong> antes de empezar el<br />
trabajo.<br />
> Si en el transcurso del trabajo la<br />
arcilla pierde plasticidad, <strong>para</strong><br />
recuperarla, basta <strong>con</strong> humedecerse<br />
ligeramente las manos.<br />
> Los colores se mezclan fácilmente<br />
entre si amasándolos <strong>con</strong> las manos. ><br />
> En caso de utilizar varios colores<br />
por se<strong>para</strong>do en un mismo objeto,<br />
se recomienda lavarse las manos<br />
antes de cambiar de color.<br />
> Para unir dos piezas de arcilla entre<br />
si, rayar <strong>con</strong> una espátula o punzón ><br />
previamente las partes a unir y<br />
mediante un pincel humedecerlas<br />
<strong>con</strong> barbotina (arcilla mezclada<br />
previamente <strong>con</strong> agua hasta<br />
<strong>con</strong>seguir una textura líquida). En ><br />
el caso de uniones en forma de<br />
ángulo, reforzar la unión <strong>con</strong> la<br />
ayuda de un churrito de arcilla<br />
extendiéndolo siguiendo el ángulo<br />
y después presionar y alisar la unión ><br />
<strong>con</strong> una espátula.<br />
> Para unir dos piezas ya secas, utilizar<br />
cola <strong>con</strong>vencional. No se recomienda ><br />
unir una pieza seca <strong>con</strong> otra húmeda<br />
pues se agrietaría la unión debido<br />
a la <strong>con</strong>tracción durante el secado<br />
de la pieza húmeda.<br />
> Para alisar y pulir superficies<br />
<strong>con</strong>siguiendo un acabado muy<br />
limpio, utilizar una esponja húmeda.<br />
> Es posible realizar <strong>con</strong> resultados<br />
óptimos, objetos macizos o de<br />
paredes muy delgadas.<br />
> Para realizar objetos huecos, pueden<br />
utilizarse soportes rígidos o flexibles.<br />
Si la pasta se utiliza envolviendo<br />
soportes rígidos interiores (de metal, ><br />
plástico o madera) es recomendable<br />
cubrir el soporte <strong>con</strong> una lámina de<br />
papel o tela <strong>para</strong> favorecer la ><br />
<strong>con</strong>tracción de la arcilla durante el<br />
secado y prevenir la aparición de<br />
grietas o fisuras.<br />
><br />
CONSERVACIÓN<br />
Una vez abierto el paquete, envolver<br />
la arcilla Sio-2 ® ><br />
<strong>COLORPLUS</strong> sobrante<br />
en un plástico.<br />
> Mientras <strong>con</strong>tenga un mínimo de<br />
humedad, puede reciclarse<br />
envolviéndola <strong>con</strong> paños húmedos.<br />
> Durante las interrupciones del<br />
trabajo, cubrir el objeto <strong>con</strong> un<br />
><br />
plástico o paño húmedo.<br />
Conservar el producto en ambiente<br />
fresco evitando las temperaturas<br />
elevadas. No almacenar a<br />
temperaturas inferiores a 0ºC. Si el<br />
producto se <strong>con</strong>gela, pierde sus<br />
propiedades.<br />
SECADO<br />
Acabado el objeto, dejarlo secar de<br />
forma uniforme, evitando fuentes de<br />
calor directas y corrientes de aire.<br />
Cuanto más lento es el secado, menor<br />
posibilidad de aparición de grietas<br />
y fisuras en piezas grandes.<br />
Si la pieza es muy grande o maciza,<br />
se recomienda retardar el secado<br />
cubriendo la pieza <strong>con</strong> plásticos que<br />
permitan una ligera apertura <strong>para</strong> la<br />
lenta evacuación de la humedad.<br />
Si la pieza es totalmente plana, se<br />
recomienda dejarla secar <strong>con</strong> un<br />
peso plano encima. Ello evitará que<br />
la pieza combe o se fisure por el<br />
interior si el secado es rápido.<br />
La dureza y la resistencia máximas<br />
se obtienen entre 2 y 5 días a<br />
temperatura ambiente.<br />
Puede aumentarse adicionalmente la<br />
dureza finalizando el secado en horno<br />
doméstico entre 100 y 110ºC.<br />
Durante el secado, la arcilla Sio-2 ®<br />
<strong>COLORPLUS</strong> <strong>con</strong>trae. Cuanta más<br />
agua <strong>con</strong>tiene la arcilla, mayor es su<br />
<strong>con</strong>tracción de secado. En caso de<br />
realizar piezas muy grandes o de<br />
secado muy difícil, se recomienda<br />
modelar la arcilla después de dejarla<br />
secar ligeramente y homogeneizarla<br />
mediante amasado.<br />
ACABADO Y DECORACIÓN<br />
Una vez seco, el objeto puede pulirse,<br />
tallarse o perforarse previamente a<br />
su decoración.<br />
El objeto puede decorarse <strong>con</strong><br />
cualquier tipo de pintura, lápiz o<br />
rotulador.<br />
Al ser muy poco poroso basta <strong>con</strong><br />
una sola mano de pintura <strong>para</strong><br />
<strong>con</strong>seguir toda la viveza del color.<br />
También puede barnizarse. Se<br />
recomienda el uso del barniz <strong>para</strong><br />
realzar la viveza color.<br />
La arcilla Sio-2 ® <strong>COLORPLUS</strong> no es<br />
resistente al agua. No es<br />
recomendable realizar objetos que<br />
deban <strong>con</strong>tener agua aunque se<br />
proteja <strong>con</strong> un impermeabilizante.<br />
HOW TO USE IT<br />
It is recommended kneading the clay<br />
Sio-2 ® <strong>COLORPLUS</strong> before starting<br />
working with it.<br />
If during the modelling the clay loses<br />
its plasticity, it is enough to slightly<br />
wet your hands.<br />
The clay is easy to model using adequate<br />
modelling tools (we recommend the<br />
pottery tool kit Sio-2 ® ><br />
><br />
><br />
. It can also be<br />
moulded (we recommend plaster’s<br />
moulds) and thrown in a potter’s wheel.<br />
> The colours are easily mixed by hand.<br />
> In case of using se<strong>para</strong>te colours for<br />
the same item, it is better to wash<br />
hands after the use of each color.<br />
> To seal two different pieces of clay,<br />
mark them with a spatula or a die<br />
and then moisten them with slurry<br />
(clay mixed previously with water<br />
until a liquid texture is obtained)<br />
using a paintbrush. When pieces are<br />
united to form an angle, in order to<br />
glue them, it is better to make a<br />
noodle of clay following the angle,<br />
then press and define the angle with<br />
a spatula.<br />
> To seal two already dry pieces<br />
<strong>con</strong>ventional glue can be used. It is<br />
not recommended to glue a dry piece<br />
to a wet one because the glue will<br />
not hold due to the shrinkage of the<br />
humid piece during drying.<br />
> To smooth and polish surfaces use a<br />
wet sponge for obtaining a clean finish.<br />
Best results are obtained on very thin<br />
walls or solidified objects.<br />
> For modelling hollow items, flexible<br />
or rigid supports can be used.<br />
If the clay is used over inside rigid<br />
surfaces (of metal, plastic or wood),<br />
it is recommended to cover the<br />
surface with a sheet of paper or<br />
fabric to help the shrinkage of the<br />
clay when drying and avoid the<br />
appearance of cracks and fissures.<br />
><br />
><br />
><br />
HOW TO PRESERVE IT<br />
Once the <strong>con</strong>tainer is opened, the<br />
clay Sio-2 ® <strong>COLORPLUS</strong> needs to be<br />
wrapped in plastic in order to be<br />
preserved.<br />
Since it <strong>con</strong>tains a minimum of<br />
humidity, it can be recovered by<br />
wrapping it in a humid cloth.<br />
During work interruptions, cover the<br />
item with a plastic or a humid cloth.<br />
Keep the clay in a cool place and avoid<br />
high temperatures. Do not store at<br />
><br />
><br />
><br />
><br />
><br />
><br />
><br />
><br />
><br />
temperatures lower then 0ºC (32 F).<br />
If freezes, it loses its properties.<br />
DRYING<br />
Once finished, leave the item to dry<br />
in a uniform way, avoiding sources<br />
of direct heat and air currents. Longer<br />
drying time allows avoiding the<br />
appearance of cracks and fissures<br />
on the bigger pieces.<br />
For very large or solidified pieces,<br />
it is recommended to slow down the<br />
drying, by covering the item with<br />
plastic while leaving a small opening,<br />
in order to slow the evacuation of<br />
the humidity.<br />
Pieces that are completely flat should<br />
be dried leaving on top a flat weight.<br />
It will avoid that the piece bends or<br />
cracks from inside, which occurs<br />
when drying fast.<br />
Hardness and maximum solidity are<br />
obtained after 2 to 5 days drying at<br />
room temperature.<br />
Hardness can be reinforced<br />
additionally, by completing the<br />
drying in domestic oven at<br />
temperatures between 100ºC and<br />
110ºC (180-200ºF).<br />
During drying, the clay Sio-2 ®<br />
<strong>COLORPLUS</strong> shrinks. The more water<br />
<strong>con</strong>tains the clay, greater is its<br />
shrinkage while drying. For<br />
modelling very large pieces or<br />
objects with difficult drying, it is<br />
recommended to first leave the clay<br />
to dry for a while and then<br />
homogenize it by kneading it.<br />
FINISHING AND DECORATION<br />
Once dry, the item can be polished,<br />
carved or drilled, before being<br />
painted.<br />
It can be decorated with any type<br />
of paint, with pencil or marker.<br />
Since the surface is not porous, a<br />
single layer of painting is enough<br />
to obtain all the brightness of the<br />
colour.<br />
It can also be varnished. The use of<br />
the varnish is recommended to<br />
highlight the clay colour. Using<br />
varnish ensures greater durability<br />
and allows easier cleaning.<br />
The clay Sio-2 ® <strong>COLORPLUS</strong> is not<br />
water-resistant. It should not be use<br />
for items which will <strong>con</strong>tain water,<br />
unless they are protected with<br />
waterproof product.<br />
PLANCHA<br />
Y MOLDE<br />
SLAB AND<br />
MOULD<br />
1<br />
Hacer una plancha <strong>con</strong><br />
ayuda del rodillo de<br />
madera.<br />
Make a slab with of a<br />
wooden roller.<br />
4<br />
Dejar secar sobre un papel<br />
de periódico. Para evitar<br />
deformación, cubrir <strong>con</strong> otro<br />
papel y poner un peso plano<br />
encima.<br />
Leave to dry placing it on<br />
a news paper. To avoid<br />
deformation, cover with<br />
paper and put a flat<br />
weight on top.<br />
VISILLO DE HILOS CON HOJAS<br />
NET CURTAINS WITH LEAVES<br />
2<br />
Cortar la plancha <strong>con</strong><br />
el molde metálico.<br />
Cut the slab using the<br />
metallic shape (leaf).<br />
5<br />
Una vez seco, barnizar.<br />
Varnish once the leaf is dry.<br />
Otros ejemplos de elaboración utilizando<br />
la misma técnica.<br />
Examples of projects made with the<br />
same method.<br />
NIVEL BÁSICO<br />
BASIC LEVEL<br />
3<br />
Repasar y alisar los bordes<br />
de la hoja. Con un palillo,<br />
hacer 2 agujeros.<br />
Smooth the edges of the<br />
leaf. Make two small<br />
holes with a stick.<br />
6<br />
Atar las hojas <strong>con</strong> hilos de<br />
colores y montar el visillo.<br />
Tie the leaves with threads<br />
of colours and assemble the<br />
curtains.<br />
MODELADO I<br />
MODELLING I<br />
1<br />
Para el color de la cara,<br />
manos y pies, usar color<br />
blanco <strong>con</strong> un poco de rojo<br />
y amarillo y mezclar bien.<br />
To prepare the colour of<br />
the face, hands and feet,<br />
use white with few red and<br />
yellow and mix well.<br />
4<br />
Agujerear la base de la<br />
cabeza <strong>para</strong> unir el cuerpo.<br />
Introducir el cuello en el<br />
orificio de la cabeza.<br />
Make a hole on the bottom<br />
of the head to join the<br />
body. Introduce the neck<br />
into the hole of the head.<br />
DIVERTIDO SUJETALIBROS<br />
FUNNY BOOKEND<br />
2<br />
Hacer 1 bola grande y 3<br />
pequeñas <strong>para</strong> la cara. Para<br />
unir las piezas, humedecer la<br />
zona de <strong>con</strong>tacto <strong>con</strong> un<br />
pincel mojado en agua y unir<br />
haciendo presión.<br />
Make 1 ball + 3 small balls for<br />
making the head. To join the<br />
balls, damp the junctions with<br />
a wet brush and strengthen<br />
while modelling nose and ears.<br />
5<br />
Con un círculo, iniciamos<br />
los pantalones. Pegar el<br />
círculo en la parte inferior<br />
del cuerpo. Hacer las<br />
piernas y los pies. Una vez<br />
hechos, unirlos al cuerpo.<br />
Begin the trousers modelling<br />
a circle of clay. Join the circle<br />
in the bottom of the body.<br />
Make legs and feet and join<br />
them. Then, join to the body.<br />
Otros ejemplos de elaboración utilizando<br />
la misma técnica.<br />
Examples of projects made with the<br />
same method.<br />
NIVEL INTERMEDIO<br />
INTERMEDIATE LEVEL<br />
3<br />
Para el pelo, hacer churros.<br />
A <strong>con</strong>tinuación, rayar la zona<br />
de <strong>con</strong>tacto, humedecer <strong>con</strong><br />
un pincel y unir los pelos a<br />
la cabeza haciendo presión.<br />
For the hair, make coils.<br />
Then, grate and damp the<br />
junction with a wet brush<br />
and strengthen the hair over<br />
the head.<br />
6<br />
Unir los brazos. Dejar secar<br />
tapado <strong>con</strong> un plástico.<br />
Finalmente, barnizar.<br />
Join the arms to the body.<br />
Leave to dry protecting with<br />
a plastic layer. Varnish once<br />
the bookend is completely<br />
dry.