

Instrucciones de Sustitución de la Empaquetadura de ... - Swagelok
Instrucciones de Sustitución de la Empaquetadura de ... - Swagelok
Instrucciones de Sustitución de la Empaquetadura de ... - Swagelok

Create successful ePaper yourself
Turn your PDF publications into a flip-book with our unique Google optimized e-Paper software.
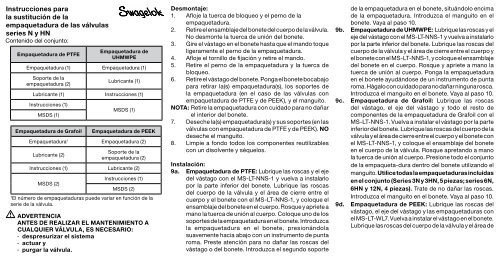
<strong>Instrucciones</strong> para<br />
<strong>la</strong> sustitución <strong>de</strong> <strong>la</strong><br />
empaquetadura <strong>de</strong> <strong>la</strong>s válvu<strong>la</strong>s<br />
series N y HN<br />
Contenido <strong>de</strong>l conjunto:<br />
<strong>Empaquetadura</strong> <strong>de</strong> PTFE<br />
<strong>Empaquetadura</strong> <strong>de</strong><br />
UHMWPE<br />
<strong>Empaquetadura</strong> (1) <strong>Empaquetadura</strong> (1)<br />
Soporte <strong>de</strong> <strong>la</strong><br />
empaquetadura (2)<br />
Lubricante (1)<br />
Lubricante (1) <strong>Instrucciones</strong> (1)<br />
<strong>Instrucciones</strong> (1)<br />
MSDS (1)<br />
MSDS (1)<br />
<strong>Empaquetadura</strong> <strong>de</strong> Grafoil <strong>Empaquetadura</strong> <strong>de</strong> PEEK<br />
<strong>Empaquetadura</strong> 1 <strong>Empaquetadura</strong> (2)<br />
Lubricante (2)<br />
Soporte <strong>de</strong> <strong>la</strong><br />
empaquetadura (2)<br />
<strong>Instrucciones</strong> (1) Lubricante (2)<br />
MSDS (2)<br />
<strong>Instrucciones</strong> (1)<br />
MSDS (2)<br />
1El número <strong>de</strong> empaquetaduras pue<strong>de</strong> variar en función <strong>de</strong> <strong>la</strong><br />
serie <strong>de</strong> <strong>la</strong> válvu<strong>la</strong>.<br />
ADVERTENCIA<br />
ANTES DE REALIZAR EL MANTENIMIENTO A<br />
CUALQUIER VÁLVULA, ES NECESARIO:<br />
∙ <strong>de</strong>spresurizar el sistema<br />
∙ actuar y<br />
∙ purgar <strong>la</strong> válvu<strong>la</strong>.<br />
Desmontaje:<br />
1. Afloje <strong>la</strong> tuerca <strong>de</strong> bloqueo y el perno <strong>de</strong> <strong>la</strong><br />
empaquetadura.<br />
2. Retire el ensamb<strong>la</strong>je <strong>de</strong>l bonete <strong>de</strong>l cuerpo <strong>de</strong> <strong>la</strong> válvu<strong>la</strong>.<br />
No <strong>de</strong>smonte <strong>la</strong> tuerca <strong>de</strong> unión <strong>de</strong>l bonete.<br />
3. Gire el vástago en el bonete hasta que el mando toque<br />
ligeramente el perno <strong>de</strong> <strong>la</strong> empaquetadura.<br />
4. Afloje el tornillo <strong>de</strong> fijación y retire el mando.<br />
5. Retire el perno <strong>de</strong> <strong>la</strong> empaquetadura y <strong>la</strong> tuerca <strong>de</strong><br />
bloqueo.<br />
6. Retire el vástago <strong>de</strong>l bonete. Ponga el bonete bocabajo<br />
para retirar <strong>la</strong>(s) empaquetadura(s), los soportes <strong>de</strong><br />
<strong>la</strong> empaquetadura (en el caso <strong>de</strong> <strong>la</strong>s válvu<strong>la</strong>s con<br />
empaquetadura <strong>de</strong> PTFE y <strong>de</strong> PEEK), y el manguito.<br />
NOTA: Retire <strong>la</strong> empaquetadura con cuidado para no dañar<br />
el interior <strong>de</strong>l bonete.<br />
7. Deseche <strong>la</strong>(s) empaquetadura(s) y sus soportes (en <strong>la</strong>s<br />
válvu<strong>la</strong>s con empaquetadura <strong>de</strong> PTFE y <strong>de</strong> PEEK). NO<br />
<strong>de</strong>seche el manguito.<br />
8. Limpie a fondo todos los componentes reutilizables<br />
con un disolvente y séquelos.<br />
Insta<strong>la</strong>ción:<br />
9a. <strong>Empaquetadura</strong> <strong>de</strong> PTFE: Lubrique <strong>la</strong>s roscas y el eje<br />
<strong>de</strong>l vástago con el MS-LT-NNS-1 y vuelva a insta<strong>la</strong>rlo<br />
por <strong>la</strong> parte inferior <strong>de</strong>l bonete. Lubrique <strong>la</strong>s roscas<br />
<strong>de</strong>l cuerpo <strong>de</strong> <strong>la</strong> válvu<strong>la</strong> y el área <strong>de</strong> cierre entre el<br />
cuerpo y el bonete con el MS-LT-NNS-1, y coloque el<br />
ensamb<strong>la</strong>je <strong>de</strong>l bonete en el cuerpo. Rosque y apriete a<br />
mano <strong>la</strong> tuerca <strong>de</strong> unión al cuerpo. Coloque uno <strong>de</strong> los<br />
soportes <strong>de</strong> <strong>la</strong> empaquetadura en el bonete. Introduzca<br />
<strong>la</strong> empaquetadura en el bonete, presionándo<strong>la</strong><br />
suavemente hacia abajo con un instrumento <strong>de</strong> punta<br />
roma. Preste atención para no dañar <strong>la</strong>s roscas <strong>de</strong>l<br />
vástago o <strong>de</strong>l bonete. Introduzca el segundo soporte<br />
<strong>de</strong> <strong>la</strong> empaquetadura en el bonete, situándolo encima<br />
<strong>de</strong> <strong>la</strong> empaquetadura. Introduzca el manguito en el<br />
bonete. Vaya al paso 10.<br />
9b. <strong>Empaquetadura</strong> <strong>de</strong> UHMWPE: Lubrique <strong>la</strong>s roscas y el<br />
eje <strong>de</strong>l vástago con el MS-LT-NNS-1 y vuelva a insta<strong>la</strong>rlo<br />
por <strong>la</strong> parte inferior <strong>de</strong>l bonete. Lubrique <strong>la</strong>s roscas <strong>de</strong>l<br />
cuerpo <strong>de</strong> <strong>la</strong> válvu<strong>la</strong> y el área <strong>de</strong> cierre entre el cuerpo y<br />
el bonete con el MS-LT-NNS-1, y coloque el ensamb<strong>la</strong>je<br />
<strong>de</strong>l bonete en el cuerpo. Rosque y apriete a mano <strong>la</strong><br />
tuerca <strong>de</strong> unión al cuerpo. Ponga <strong>la</strong> empaquetadura<br />
en el bonete ayudándose <strong>de</strong> un instrumento <strong>de</strong> punta<br />
roma. Hágalo con cuidado para no dañar ninguna rosca.<br />
Introduzca el manguito en el bonete. Vaya al paso 10.<br />
9c. <strong>Empaquetadura</strong> <strong>de</strong> Grafoil: Lubrique <strong>la</strong>s roscas<br />
<strong>de</strong>l vástago, el eje <strong>de</strong>l vástago y todo el resto <strong>de</strong><br />
componentes <strong>de</strong> <strong>la</strong> empaquetadura <strong>de</strong> Grafoil con el<br />
MS-LT-NNS-1. Vuelva a insta<strong>la</strong>r el vástago por <strong>la</strong> parte<br />
inferior <strong>de</strong>l bonete. Lubrique <strong>la</strong>s roscas <strong>de</strong>l cuerpo <strong>de</strong> <strong>la</strong><br />
válvu<strong>la</strong> y el área <strong>de</strong> cierre entre el cuerpo y el bonete con<br />
el MS-LT-NNS-1, y coloque el ensamb<strong>la</strong>je <strong>de</strong>l bonete<br />
en el cuerpo <strong>de</strong> <strong>la</strong> válvu<strong>la</strong>. Rosque apretando a mano<br />
<strong>la</strong> tuerca <strong>de</strong> unión al cuerpo. Presione todo el conjunto<br />
<strong>de</strong> <strong>la</strong> empaqueta-dura <strong>de</strong>ntro <strong>de</strong>l bonete utilizando el<br />
manguito. Utilice todas <strong>la</strong> empaquetaduras incluidas<br />
en el conjunto (Series 3N y 3HN, 5 piezas; series 6N,<br />
6HN y 12N, 4 piezas). Trate <strong>de</strong> no dañar <strong>la</strong>s roscas.<br />
Introduzca el manguito en el bonete. Vaya al paso 10.<br />
9d. <strong>Empaquetadura</strong> <strong>de</strong> PEEK: Lubrique <strong>la</strong>s roscas <strong>de</strong>l<br />
vástago, el eje <strong>de</strong>l vástago y <strong>la</strong>s empaquetaduras con<br />
el MS-LT-WL7. Vuelva a insta<strong>la</strong>r el vástago en el bonete.<br />
Lubrique <strong>la</strong>s roscas <strong>de</strong>l cuerpo <strong>de</strong> <strong>la</strong> válvu<strong>la</strong> y el área <strong>de</strong>
cierre entre el cuerpo y el bonete con el MS-LT-NNS-1, y<br />
coloque el ensamb<strong>la</strong>je <strong>de</strong>l bonete en el cuerpo. Apriete a<br />
mano <strong>la</strong> tuerca <strong>de</strong> unión al cuerpo. Introduzca un soporte<br />
<strong>de</strong> <strong>la</strong> empaquetadura en el bonete, presionándolo<br />
suavemente con un instrumento <strong>de</strong> punta roma. Hágalo<br />
con cuidado, para no dañar <strong>la</strong>s roscas <strong>de</strong>l vástago ni<br />
<strong>de</strong>l bonete. Inserte <strong>la</strong> empaquetadura inferior lubricada<br />
y <strong>de</strong>spués <strong>la</strong> empaquetadura superior. Presione hacia<br />
abajo, <strong>de</strong>ntro <strong>de</strong>l bonete. Inserte el segundo soporte<br />
<strong>de</strong> <strong>la</strong> empaquetadura y presione hacia abajo. Inserte el<br />
manguito y presione también hacia <strong>de</strong>ntro <strong>de</strong>l bonete.<br />
Vaya al paso 10.<br />
Para todos los ensamb<strong>la</strong>jes:<br />
10. Lubrique <strong>la</strong>s roscas externas <strong>de</strong>l perno <strong>de</strong> <strong>la</strong><br />
empaquetadura y rósquelo en el bonete.<br />
11. Lubrique los primeros (2) o (3) hilos <strong>de</strong> <strong>la</strong> rosca <strong>de</strong>l<br />
bonete y rosque <strong>la</strong> tuerca <strong>de</strong> bloqueo al bonete.<br />
12. Coloque el mando sobre el vástago. Antes <strong>de</strong> apretar<br />
el tornillo <strong>de</strong> fijación, asegúrese <strong>de</strong> que su orificio está<br />
bien alineado con <strong>la</strong> in<strong>de</strong>ntación <strong>de</strong>l vástago.<br />
13. Desenrosque el vástago <strong>de</strong>l bonete (2) o (3) vueltas,<br />
para evitar el gripado durante el proceso <strong>de</strong> apriete.<br />
14. Rosque <strong>la</strong> tuerca <strong>de</strong> unión al cuerpo apretándo<strong>la</strong> según<br />
<strong>la</strong> tab<strong>la</strong> <strong>de</strong> par <strong>de</strong> apriete <strong>de</strong> <strong>la</strong> tuerca unión.<br />
15. Rosque y apriete el perno <strong>de</strong> <strong>la</strong> empaquetadura según <strong>la</strong><br />
tab<strong>la</strong> <strong>de</strong> par <strong>de</strong> apriete correspondiente. Gire el mando<br />
(2) o (3) veces y compruebe el apriete.<br />
16. Manteniendo fijo el perno <strong>de</strong> <strong>la</strong> empaquetadura,<br />
apriete <strong>la</strong> tuerca <strong>de</strong> bloqueo contra el perno <strong>de</strong> <strong>la</strong><br />
empaquetadura.<br />
17. Compruebe que <strong>la</strong> válvu<strong>la</strong> funciona correctamente.<br />
Tab<strong>la</strong> <strong>de</strong> par <strong>de</strong> apriete <strong>de</strong> <strong>la</strong> tuerca unión<br />
Serie <strong>de</strong> <strong>la</strong> válvu<strong>la</strong><br />
Par <strong>de</strong> apriete,<br />
N∙m (pulg.∙lb)<br />
3N 40,6 (360)<br />
3HN, 6N 88,1 (780)<br />
6HN 122 (1080)<br />
12N 248 (2200)<br />
Tab<strong>la</strong> <strong>de</strong> par <strong>de</strong> apriete <strong>de</strong>l perno <strong>de</strong> <strong>la</strong><br />
empaquetadura<br />
Serie <strong>de</strong> <strong>la</strong><br />
válvu<strong>la</strong><br />
<strong>Empaquetadura</strong><br />
<strong>de</strong> Grafoil<br />
<strong>Empaquetadura</strong><br />
<strong>de</strong> PTFE,<br />
UHMWPE y PEEK<br />
Par <strong>de</strong> apriete, N∙m (pulg.∙lb)<br />
3N, 3HN 2,8 (25) 3,4 (30)<br />
6N, 6HN 12,4 (110) 8,5 (75)<br />
12N 17,0 (150) 28,2 (250)<br />
Nota: En función <strong>de</strong> <strong>la</strong> presión <strong>de</strong>l sistema y <strong>la</strong> viscosidad <strong>de</strong>l<br />
fluido es posible que sea necesario volver a ajustar <strong>la</strong><br />
empaquetadura.<br />
Traducciones disponibles en www.swagelok.com.mx<br />
<strong>Swagelok</strong> — TM <strong>Swagelok</strong> Company<br />
Grafoil — TM GrafTech International Holdings Inc.<br />
© 2009, 2011 <strong>Swagelok</strong> Company<br />
Agosto <strong>de</strong> 2011, RJ<br />
MS-INS-N-ES<br />
Superior<br />
Inferior<br />
Mando<br />
Tuerca <strong>de</strong> bloqueo<br />
Tuerca <strong>de</strong> montaje<br />
en panel<br />
Tuerca <strong>de</strong> unión<br />
Perno <strong>de</strong> <strong>la</strong><br />
empaquetadura<br />
Cuerpo<br />
Manguito<br />
Soportes<br />
<strong>de</strong> <strong>la</strong><br />
empaquetadura<br />
<strong>Empaquetadura</strong> <strong>de</strong> PEEK<br />
Bonete<br />
Obturador <strong>de</strong><br />
regu<strong>la</strong>ción<br />
b<strong>la</strong>ndo<br />
Pasador<br />
<strong>de</strong>l mando<br />
Obturador esférico<br />
Obturador <strong>de</strong><br />
regu<strong>la</strong>ción<br />
Tornillo <strong>de</strong><br />
fijación<br />
<strong>Empaquetadura</strong> <strong>de</strong> PTFE<br />
<strong>Empaquetadura</strong><br />
<strong>de</strong> Grafoil 1<br />
<strong>Empaquetadura</strong><br />
<strong>de</strong><br />
UHMWPE<br />
Lubrique los ejes y<br />
roscas <strong>de</strong>l vástago<br />
para los distintos<br />
tipos <strong>de</strong> vástago.<br />
1 El número <strong>de</strong> empaquetaduras pue<strong>de</strong> variar en función <strong>de</strong> <strong>la</strong><br />
serie <strong>de</strong> <strong>la</strong> válvu<strong>la</strong>.