

SILM SHARK -IZ6099-AG8531-R03_Multi_IM.indd - Freestyle
SILM SHARK -IZ6099-AG8531-R03_Multi_IM.indd - Freestyle
SILM SHARK -IZ6099-AG8531-R03_Multi_IM.indd - Freestyle

You also want an ePaper? Increase the reach of your titles
YUMPU automatically turns print PDFs into web optimized ePapers that Google loves.
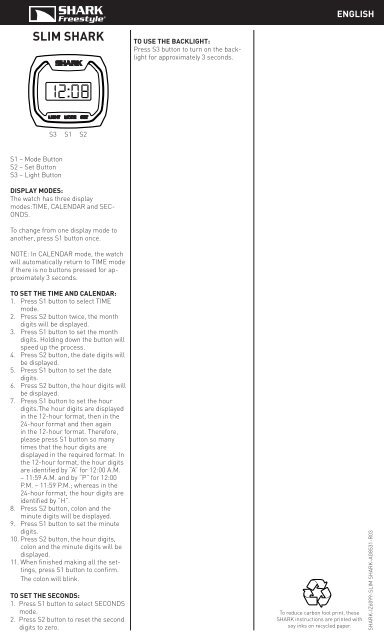
SL<strong>IM</strong> <strong>SHARK</strong><br />
S3<br />
S1 – Mode Button<br />
S2 – Set Button<br />
S3 – Light Button<br />
S1 S2<br />
DISPLAY MODES:<br />
The watch has three display<br />
modes:T<strong>IM</strong>E, CALENDAR and SEC-<br />
ONDS.<br />
To change from one display mode to<br />
another, press S1 button once.<br />
NOTE: In CALENDAR mode, the watch<br />
will automatically return to T<strong>IM</strong>E mode<br />
if there is no buttons pressed for approximately<br />
3 seconds.<br />
TO SET THE T<strong>IM</strong>E AND CALENDAR:<br />
1. Press S1 button to select T<strong>IM</strong>E<br />
mode.<br />
2. Press S2 button twice, the month<br />
digits will be displayed.<br />
3. Press S1 button to set the month<br />
digits. Holding down the button will<br />
speed up the process.<br />
4. Press S2 button, the date digits will<br />
be displayed.<br />
5. Press S1 button to set the date<br />
digits.<br />
6. Press S2 button, the hour digits will<br />
be displayed.<br />
7. Press S1 button to set the hour<br />
digits.The hour digits are displayed<br />
in the 12-hour format, then in the<br />
24-hour format and then again<br />
in the 12-hour format. Therefore,<br />
please press S1 button so many<br />
times that the hour digits are<br />
displayed in the required format. In<br />
the 12-hour format, the hour digits<br />
are identified by “A” for 12:00 A.M.<br />
– 11:59 A.M. and by “P” for 12:00<br />
P.M. – 11:59 P.M.; whereas in the<br />
24-hour format, the hour digits are<br />
identified by “H”.<br />
8. Press S2 button, colon and the<br />
minute digits will be displayed.<br />
9. Press S1 button to set the minute<br />
digits.<br />
10. Press S2 button, the hour digits,<br />
colon and the minute digits will be<br />
displayed.<br />
11. When finished making all the settings,<br />
press S1 button to confirm.<br />
The colon will blink.<br />
TO SET THE SECONDS:<br />
1. Press S1 button to select SECONDS<br />
mode.<br />
2. Press S2 button to reset the second<br />
digits to zero.<br />
TO USE THE BACKLIGHT:<br />
Press S3 button to turn on the backlight<br />
for approximately 3 seconds.<br />
ENGLISH<br />
To reduce carbon foot print, these<br />
<strong>SHARK</strong> instructions are printed with<br />
soy inks on recycled paper.<br />
<strong>SHARK</strong>-<strong>IZ6099</strong>-SL<strong>IM</strong> <strong>SHARK</strong>-<strong>AG8531</strong>-<strong>R03</strong>
SL<strong>IM</strong> <strong>SHARK</strong><br />
S3<br />
S1 S2<br />
S1-Botón de modo<br />
S2-Botón de configuración<br />
S3-Botón de luz<br />
MODOS DE VISUALIZACIÓN:<br />
El reloj tiene tres vistas: HORA, CAL-<br />
ENDARIO Y SEGUNDOS.<br />
Para cambiar de una vista a otra, pulse<br />
el botón S1 una vez.<br />
NOTA: En la vista de CALENDARIO,<br />
el reloj volverá automáticamente a<br />
modo HORA si no se toca ningún botón<br />
durante 3 segundos.<br />
CÓMO AJUSTAR LA HORA Y EL<br />
CALENDARIO:<br />
1. Pulse el botón S1 para cambiar el<br />
reloj a modo HORA.<br />
2. Pulse el botón S2 dos veces para<br />
ver los dígitos del mes.<br />
3. Pulse el botón S1 para ajustar los<br />
dígitos del mes. Mantenga pulsado<br />
el botón para acelerar el proceso.<br />
4. Pulse el botón S2 para ver los<br />
dígitos de la fecha.<br />
5. Pulse el botón S1 para ajustar los<br />
dígitos de la fecha.<br />
6. Pulse el botón S2 para ver los<br />
dígitos de la hora, dos puntos y A<br />
o P (es decir, am o pm respectivamente).<br />
7. Pulse el botón S1 para ajustar los<br />
dígitos de la hora. Los dígitos de la<br />
hora se muestran en el formato 12<br />
horas, a continuación en el formato<br />
24 horas y de nuevo en el formato<br />
12 horas. Por lo tanto, pulse el<br />
botón S1 las veces que sean<br />
necesarias hasta que los dígitos<br />
de la hora se muestren en el<br />
formato deseado. En el formato de<br />
12 horas, los dígitos de la hora se<br />
identifican con “A” para 00:00-12:00<br />
y con “P” para 12:00-00:00. En el<br />
formato de 24 horas, en cambio,<br />
los dígitos de la hora se identifican<br />
con «H».<br />
8. Pulse el botón S2 para ver dos puntos<br />
y los dígitos de los minutos.<br />
9. Pulse el botón S1 para ajustar los<br />
dígitos de los minutos.<br />
10. Pulse el botón S2 para ver los<br />
dígitos de la hora, dos puntos y los<br />
dígitos de los minutos.<br />
11. Después de hacer todos los ajustes<br />
necesarios, pulse el botón S1<br />
para confirmarlo. Los dos puntos<br />
parpadearán.<br />
PARA CONFIGURAR LOS SEGUNDOS:<br />
1. Pulse el botón S1 para seleccionar el<br />
modo SEGUNDOS.<br />
2. Pulse el botón S2 para poner los<br />
dígitos de los segundos de vuelta<br />
a cero.<br />
CÓMO USAR LA LUZ DE FONDO:<br />
Pulse el botón S3 para encender la luz<br />
de fondo durante unos<br />
3 segundos.<br />
ESPAÑOL<br />
Para reducir la huella del carbono,<br />
las instrucciones de <strong>SHARK</strong> se han<br />
imprimido con tinta de soja en papel<br />
reciclado.<br />
<strong>SHARK</strong>-<strong>IZ6099</strong>-SL<strong>IM</strong> <strong>SHARK</strong>-<strong>AG8531</strong>-<strong>R03</strong>
SL<strong>IM</strong> <strong>SHARK</strong><br />
S3<br />
S1 S2<br />
S1-Modustaste<br />
S2-Taste „Set“ (Einstellen)<br />
S3-Lichttaste<br />
ANZEIGEMODI:<br />
Die Uhr hat drei Anzeigemodi:<br />
UHRZEIT, KALENDER, und SEKUN-<br />
DEN.<br />
Drücken Sie die Taste S1 einmal um<br />
von einer Anzeige zur nächsten zu<br />
wechseln.<br />
HINWEIS: Falls im KALENDER-Modus<br />
3 Sekunden lang keine Tasten gedrückt<br />
werden, wird sich die Uhr automatisch<br />
zur Anzeige der UHRZEIT zurückstellen.<br />
ZEIT UND KALENDER EINSTELLEN:<br />
1. Drücken Sie die Taste S1 um den<br />
Modus für UHRZEIT zu wählen.<br />
2. Drücken Sie Taste S2 zwei mal und<br />
der Monat wird angezeigt.<br />
3. Drücken Sie Taste S1 um den Monat<br />
einzustellen. Halten Sie die Taste<br />
gedrückt um die Anzeige schneller<br />
vorzubewegen.<br />
4. Drücken Sie Taste S2 um das Datum<br />
anzuzeigen.<br />
5. Drücken Sie Taste S1 um das Datum<br />
einzustellen.<br />
6. Drücken Sie Taste S2 um die Stunden<br />
mit Doppelpunkt und A oder P<br />
(für A.M. [vor Mittag] und P.M. [nach<br />
Mittag]) anzuzeigen.<br />
7. Drücken Sie Taste S1 um die Stunden<br />
einzustellen.<br />
8. Drücken Sie Taste S2 um den<br />
Doppelpunkt und die Minuten<br />
anzuzeigen.<br />
9. Drücken Sie Taste S1 um die<br />
Minuten einzustellen.<br />
10.Drücken Sie Taste S2 um die Stunde<br />
mit Doppelpunkt und Minuten<br />
anzuzeigen.<br />
11.Wenn Sie alle Einstellungen<br />
abgeschlossen haben, drücken Sie<br />
Taste S1 zur Bestätigung. Der Doppelpunkt<br />
wird blinken.<br />
EINSTELLEN DER SEKUNDEN:<br />
1. Drücken Sie Taste S1 um den<br />
SEKUNDEN-Modus auszuwählen.<br />
2. Drücken Sie Taste S2 um die Sekundenanzeige<br />
auf null zurückzusetzen.<br />
HINTERGRUNDBELEUCHTUNG:<br />
Drücken Sie Taste S3 um die<br />
Hintergrundbeleuchtung für etwa 3<br />
Sekunden anzuschalten.<br />
DEUTSCH<br />
Diese <strong>SHARK</strong>-Gebrauchsanweisung<br />
wurde mit Tinte auf Sojabasis auf<br />
Recycling-Papier gedruckt um den<br />
Kohleausstoß zu reduzieren.<br />
<strong>SHARK</strong>-<strong>IZ6099</strong>-SL<strong>IM</strong> <strong>SHARK</strong>-<strong>AG8531</strong>-<strong>R03</strong>
SL<strong>IM</strong> <strong>SHARK</strong><br />
S3<br />
S1 S2<br />
S1-Bouton Mode<br />
S2-Bouton Réglages<br />
S3-Bouton d’Eclairage<br />
MODES D’AFFICHAGE:<br />
La montre offre trois modes<br />
d’affichage : HEURE LOCALE, CALEN-<br />
DRIER et SECONDES.<br />
Pour changer le mode d’affichage, appuyez<br />
une fois sur le bouton S1.<br />
REMARQUE: En mode CALENDRIER,<br />
si aucune activité n’est détectée<br />
durant environ 3 secondes, la montre<br />
retournera automatiquement en mode<br />
HEURE LOCALE.<br />
REGLAGE DE L’HEURE ET DU CALEN-<br />
DRIER :<br />
1. Appuyez sur le bouton S1 pour sélectionner<br />
le mode NORMAL T<strong>IM</strong>E<br />
(HEURE LOCALE).<br />
2. Appuyez deux fois sur le bouton S2,<br />
les chiffres des mois s’afficheront.<br />
3. Appuyez sur le bouton S1 pour<br />
régler les chiffres des mois.<br />
Maintenez le bouton enfoncé pour<br />
accélérer la procédure.<br />
4. Appuyez sur le bouton S2, les chiffres<br />
de la date s’afficheront.<br />
5. Appuyez sur le bouton S1 pour<br />
régler les chiffres de la date.<br />
6. Appuyez sur le bouton S2, les<br />
chiffres des heures, les deux points<br />
et A ou P (représentant A.M pour<br />
le matin et P.M pour l’après-midi<br />
respectivement) apparaitront.<br />
7. Appuyez sur le bouton S1 pour<br />
régler les chiffres des heures.<br />
8. Appuyez sur le bouton S2, les chiffres<br />
des minutes et les deux points<br />
apparaitront.<br />
9. Appuyez sur le bouton S1 pour<br />
régler les chiffres des minutes.<br />
10. Appuyez sur le bouton S2, les chiffres<br />
des heures, les deux points et<br />
les chiffres des minutes apparaitront.<br />
11. Après avoir effectué tous les<br />
réglages, appuyez sur le bouton<br />
S1 pour confirmer. Les deux points<br />
clignoteront.<br />
POUR RÉGLER LES SECONDES :<br />
1. Appuyez sur le bouton S1 pour<br />
sélectionner le mode SECONDS.<br />
2. Appuyez sur le bouton S2 pour<br />
remettre les chiffres des secondes<br />
à 0.<br />
UTILISATION DU RETRO ECLAIRAGE:<br />
Appuyez sur le bouton S3 pour activer<br />
le rétro éclairage durant environ 3<br />
secondes.<br />
FRANÇAIS<br />
Pour réduire l’émission de carbone<br />
dans l’atmosphère, ces instructions<br />
<strong>SHARK</strong> sont imprimées avec des<br />
encres de soja sur du papier recyclé.<br />
<strong>SHARK</strong>-<strong>IZ6099</strong>-SL<strong>IM</strong> <strong>SHARK</strong>-<strong>AG8531</strong>-<strong>R03</strong>
SL<strong>IM</strong> <strong>SHARK</strong><br />
S3<br />
S1 S2<br />
S1 -Tasto Mode (Modalità)<br />
S2 –Tasto set (impostazione)<br />
S3 –Tasto Luce<br />
MODALITA’ DISPLAY:<br />
L’orologio ha tre modalità display: T<strong>IM</strong>E<br />
(ORA), CALENDAR (CALENDARIO), e<br />
SECONDS (SECONDI).<br />
Per passare tra una modalità display<br />
e l’altra e viceversa, premere una volta<br />
il tasto S1.<br />
NOTA: Nella modalità CALENDARIO, se<br />
nessun tasto viene premuto per circa 3<br />
secondi, l’orologio ritornerà automaticamente<br />
alla modalità T<strong>IM</strong>E.<br />
COME <strong>IM</strong>POSTARE L’ORA E IL CAL-<br />
ENDARIO:<br />
1. Premere il tasto S1 per selezionare<br />
la modalità ORA.<br />
2. Premere due volte il tasto S2, le<br />
cifre dei mesi appariranno.<br />
3. Premere il tasto S1 per impostare<br />
le cifre del mese. Premere a lungo<br />
il tasto farà avanzare la progressione<br />
più velocemente.4. Premere<br />
il tasto S2, le cifre della data appariranno.<br />
5. Premere il tasto S1 per impostare<br />
le cifre della data.<br />
6. Premere il tasto S2, e appariranno<br />
le cifre dell’ora, due punti e A o P<br />
(che rappresentano rispettivamente<br />
A.M e P.M.).<br />
7. Premere il tasto S1 per impostare<br />
le cifre dell’ora.<br />
8. Premere il tasto S2, e appariranno i<br />
due punti e le cifre dei minuti.<br />
9. Premere il tasto S1 per impostare<br />
le cifre dei minuti.<br />
10. Premere il tasto S2, e appariranno<br />
le cifre dell’ora, i due punti e le cifre<br />
dei minuti.<br />
11. Dopo avere terminato le impostazioni,<br />
premere il tasto S1 per<br />
confermare. I due punti lampeggeranno.<br />
PER <strong>IM</strong>POSTARE I SECONDI:<br />
1. Premere il tasto S1 per selezionare<br />
la modalità SECONDI.<br />
2. Premere il tasto S2 per resettare a<br />
zero le cifre dei secondi.<br />
COME UTILIZZARE LA RETROILLUMI-<br />
NAZIONE:<br />
Premere il tasto S3 per accendere la<br />
retroilluminazione per circa 3 secondi.<br />
ITALIANO<br />
Per ridurre l’impatto ambientale,<br />
queste istruzioni <strong>SHARK</strong> sono<br />
stampate con inchiostri di soia su<br />
carta riciclata .<br />
<strong>SHARK</strong>-<strong>IZ6099</strong>-SL<strong>IM</strong> <strong>SHARK</strong>-<strong>AG8531</strong>-<strong>R03</strong>
SL<strong>IM</strong> <strong>SHARK</strong><br />
S3<br />
S1 S2<br />
S1 - Botão Modo<br />
S2 – Botão Configuração<br />
S3 – Botão da Luz<br />
MODOS DE VISUALIZAÇÃO:<br />
O relógio tem três modos de visualização:<br />
HORA, CALENDÁRIO e<br />
SEGUNDOS.<br />
Para mudar de um modo de visualização<br />
para outro, prima o botão S1<br />
uma vez.<br />
NOTA: nos modos CALENDÁRIO, o<br />
relógio voltará automaticamente<br />
ao modo HORA, se não for premido<br />
qualquer botão durante cerca de 3<br />
segundos.<br />
AJUSTAR A HORA E O CALENDÁRIO:<br />
1. Prima o botão S1 para seleccionar<br />
o modo HORA.<br />
2. Prima o botão S2 duas vezes, os<br />
dígitos do mês serão visualizados.<br />
3. Prima o botão S1 para acertar os<br />
dígitos do mês. Se mantiver o botão<br />
premido acelerará o processo.<br />
4. Prima o botão S2, os dígitos da data<br />
serão visualizados.<br />
5. Prima o botão S1 para acertar os<br />
dígitos da data.<br />
6. Prima o botão S2, os dígitos das<br />
horas, dois pontos e A ou P [representando<br />
A.M. e P.M. respectivamente]<br />
serão visualizados.<br />
7. Prima o botão S1 para acertar os<br />
dígitos das horas.<br />
8. Prima uma vez o botão S2, os dois<br />
pontos e os dígitos dos minutos<br />
serão visualizados.<br />
9. Prima o botão S1 para acertar os<br />
dígitos dos minutos.<br />
10. Prima o botão S2, os dígitos das<br />
horas, dois pontos e os dígitos dos<br />
minutos serão visualizados.<br />
11. Após acabar de efectuar todos os<br />
ajustes, prima o botão S1 para confirmar.<br />
Os dois pontos piscarão.<br />
AJUSTAR OS SEGUNDOS:<br />
1. Prima o botão S1 para seleccionar o<br />
modo SEGUNDOS.<br />
2. Prima o botão S2 para repor os<br />
dígitos dos segundos a zero.<br />
UTILIZAR A LUZ POSTERIOR:<br />
Prima o botão S3 para ligar a luz<br />
posterior cerca de 3 segundos.<br />
PORTUGUÊS<br />
Para reduzir a emissão de carbono,<br />
estas instruções <strong>SHARK</strong> foram<br />
impressas com tinta de soja em papel<br />
reciclado.<br />
<strong>SHARK</strong>-<strong>IZ6099</strong>-SL<strong>IM</strong> <strong>SHARK</strong>-<strong>AG8531</strong>-<strong>R03</strong>