
You also want an ePaper? Increase the reach of your titles
YUMPU automatically turns print PDFs into web optimized ePapers that Google loves.
EN mos & EN up mos & up<br />
FR<br />
ESP<br />
6mos to 24mos<br />
up to 25 ESP lbs<br />
2 to 5 yrs<br />
25lbs up to 11.3kg<br />
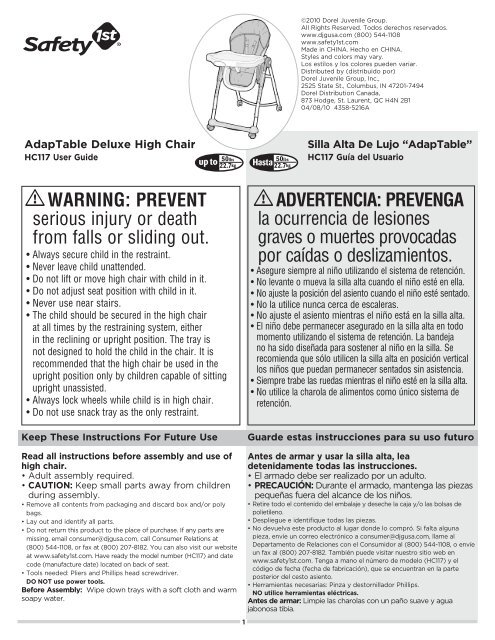
AdapTable Deluxe High Chair<br />
HC117 User Guide<br />
40 lbs up to 18 kg<br />
up to<br />
serious injury or death<br />
40lbs<br />
18kg<br />
6mos to 24mos<br />
up to 25 lbs<br />
2 to 5 yrs<br />
up to 11.3kg<br />
• Always secure child in the restraint. up to up to<br />
• Never leave child unattended. 25lbs 25lbs<br />
11.3kg 11.3kg 11,3kg<br />
• Do not lift or move high chair with child in it.<br />
• Do not adjust seat position with up child to in it. up to<br />
• Never use near stairs.<br />
6.8kg 6.8kg 6,8kg<br />
• The child should be secured in the high chair<br />
at all times by the restraining system, up to either up to<br />
in the reclining or upright position. 50lbsThe<br />
tray is 50lbs<br />
22.7kg 22.7kg 22,7kg<br />
not designed to hold the child in the chair. It is<br />
recommended that the high chair be used in the<br />
upright position only by children capable of sitting<br />
upright unassisted.<br />
• Always lock wheels while child is in high chair.<br />
• Do not use snack tray as the only restraint.<br />
Keep These Instructions For Future Use Guarde estas instrucciones para su uso futuro<br />
Read all instructions before assembly and use of<br />
high chair.<br />
• Adult assembly required.<br />
• CAUTION: Keep small parts away from children<br />
during assembly.<br />
• Remove all contents from packaging and discard box and/or poly<br />
bags.<br />
• Lay out and identify all parts.<br />
• Do not return this product to the place of purchase. If any parts are<br />
missing, email consumer@djgusa.com, call Consumer Relations at<br />
(800) 544-1108, or fax at (800) 207-8182. You can also visit our website<br />
at www.safety<strong>1st</strong>.com. Have ready the model number (HC117) and date<br />
code (manufacture date) located on back of seat.<br />
• Tools needed: Pliers and Phillips head screwdriver.<br />
DO NOT use power tools.<br />
Before Assembly: Wipe down trays with a soft cloth and warm<br />
soapy water.<br />
FR<br />
<strong>WARNING</strong>: PREVENT<br />
from falls or sliding out.<br />
25 25lbs livres 25 25lbs livres 25lbs<br />
Jusqu'à Hasta 11,3 kg<br />
Jusqu'à Hasta 11.3kg 11,3 kg<br />
11.3kg<br />
40 livres lbs<br />
40lbs<br />
up Jusqu'à to 40 livres 40lbs<br />
18 kg<br />
Hasta Jusqu'à 18kg 18 kg Hasta 18kg<br />
up to<br />
Jusqu'à<br />
40lbs<br />
18kg<br />
Jusqu'à<br />
Jusqu'à<br />
Jusqu'à<br />
1<br />
©2010 <strong>Dorel</strong> <strong>Juvenile</strong> <strong>Group</strong>.<br />
All Rights Reserved. Todos derechos reservados.<br />
www.djgusa.com (800) 544-1108<br />
www.safety<strong>1st</strong>.com<br />
Made in CHINA. Hecho en CHINA.<br />
Styles and colors may vary.<br />
Los estilos y los colores pueden variar.<br />
Distributed by (distribuido por)<br />
<strong>Dorel</strong> <strong>Juvenile</strong> <strong>Group</strong>, Inc.,<br />
2525 State St., Columbus, IN 47201-7494<br />
<strong>Dorel</strong> Distribution Canada,<br />
873 Hodge, St. Laurent, QC H4N 2B1<br />
04/08/10 4358-5216A<br />
Silla Alta De Lujo “AdapTable”<br />
HC117 Guía del Usuario<br />
ADVERTENCIA: PREVENGA<br />
Jusqu'à Hasta Hasta la 40lbs ocurrencia 40lbs de lesiones<br />
18kg<br />
18kg graves o muertes provocadas<br />
por caídas o deslizamientos.<br />
Jusqu'à Hasta Hasta<br />
25lbs 25lbs<br />
• Asegure 11,3kg 11.3kg siempre 11.3kg al niño utilizando el sistema de retención.<br />
• No levante o mueva la silla alta cuando el niño esté en ella.<br />
• No Jusqu'à Hasta ajuste la posición Hasta del asiento cuando el niño esté sentado.<br />
• No la utilice nunca cerca de escaleras.<br />
6,8kg 6.8kg 6.8kg<br />
• No ajuste el asiento mientras el niño está en la silla alta.<br />
• El Jusqu'à Hasta niño debe permanecer Hasta asegurado en la silla alta en todo<br />
momento 50lbs utilizando 50lbs el sistema de retención. La bandeja<br />
no 22,7kg 22.7kg ha sido diseñada 22.7kg para sostener al niño en la silla. Se<br />
recomienda que sólo utilicen la silla alta en posición vertical<br />
los niños que puedan permanecer sentados sin asistencia.<br />
• Siempre trabe las ruedas mientras el niño esté en la silla alta.<br />
• No utilice la charola de alimentos como único sistema de<br />
retención.<br />
Antes de armar y usar la silla alta, lea<br />
detenidamente todas las instrucciones.<br />
• El armado debe ser realizado por un adulto.<br />
• PRECAUCIÓN: Durante el armado, mantenga las piezas<br />
pequeñas fuera del alcance de los niños.<br />
• Retire todo el contenido del embalaje y deseche la caja y/o las bolsas de<br />
polietileno.<br />
• Despliegue e identifique todas las piezas.<br />
• No devuelva este producto al lugar donde lo compró. Si falta alguna<br />
pieza, envíe un correo electrónico a consumer@djgusa.com, llame al<br />
Departamento de Relaciones con el Consumidor al (800) 544-1108, o envíe<br />
un fax al (800) 207-8182. También puede visitar nuestro sitio web en<br />
www.safety<strong>1st</strong>.com. Tenga a mano el número de modelo (HC117) y el<br />
código de fecha (fecha de fabricación), que se encuentran en la parte<br />
posterior del cesto asiento.<br />
• Herramientas necesarias: Pinza y destornillador Phillips.<br />
NO utilice herramientas eléctricas.<br />
Antes de armar: Limpie las charolas con un paño suave y agua<br />
jabonosa tibia.
Parts List Lista de piezas<br />
NOTE: Date code is located on back of seat. NOTA: El código de fecha se encuentra en el respaldo del asiento.<br />
A Seat pad<br />
B<br />
C<br />
D<br />
E<br />
F<br />
G<br />
H<br />
I<br />
J<br />
K<br />
L<br />
M<br />
N<br />
Upper seat bucket (with restraint belt)<br />
Phillips head screw (3)<br />
Lower seat bucket<br />
Insert tray<br />
Tray<br />
Snack tray<br />
Height adjusters (left & right)<br />
Bolt (2)<br />
Nut (2)<br />
Seat crossbar<br />
Upper leg assembly (left & right)<br />
Upper leg crossbar<br />
Lower leg assembly (front & rear)<br />
A B C D<br />
2 3<br />
N<br />
2<br />
F<br />
I<br />
J<br />
H<br />
L M<br />
To Assemble Armado<br />
1 Attach Lower<br />
Seat Bucket B C D<br />
:<br />
Align seat footrest to seat bucket<br />
(Figure 1). Locate three screw holes<br />
at the back of the seat. Using a<br />
Phillips head screwdriver, secure<br />
seat together with three screws.<br />
2 Install Crossbar K :<br />
Slide crossbar into seat pivots at back of<br />
seat (Figure 2).<br />
3 Attach Height<br />
Adjusters H I J K :<br />
Slide left and right height adjusters<br />
onto crossbar (Figure 3). Insert bolts<br />
through holes and fasten nuts until tight.<br />
DO NOT OVERTIGHTEN.<br />
TIP: Use pliers to hold nut in place while<br />
you hand-tighten bolt using a Phillips head<br />
screwdriver.<br />
1<br />
2<br />
2a<br />
3<br />
E<br />
K<br />
G<br />
A<br />
B<br />
C<br />
D<br />
E<br />
F<br />
G<br />
H<br />
I<br />
J<br />
K<br />
L<br />
M<br />
N<br />
Almohadilla del asiento<br />
Butaca del asiento superiores (con cinturón<br />
de retención)<br />
Tornillo Phillips (3)<br />
Butaca del asiento inferiores<br />
Charola de inserción<br />
Charola<br />
Charola de alimentos<br />
Ajustadores del altura (izquierdo y derecho)<br />
Perno (2)<br />
Tuerca (2)<br />
Barra transversal del asiento<br />
Conjunto de patas superiores (izquierdo y<br />
derecho)<br />
Barra transversal de patas superiores<br />
Conjunto de patas inferiores (delantera y<br />
trasera)<br />
1 Para colocar butaca del asiento<br />
inferiores B C D :<br />
Alinee el apoyapiés del asiento con<br />
su butaca (Figura 1). Localice los tres<br />
orificios de tornillo en el respaldo del<br />
asiento. Usando un destornillador Phillips,<br />
arme las piezas del asiento con tres<br />
tornillos.<br />
2 Instalación de la barra<br />
transversal K :<br />
Deslice la barra transversal en los pivotes<br />
delasiento ubicados en el respaldo<br />
(Figura 2).<br />
3 Colocación de los ajustadores del<br />
altura H I J K :<br />
Deslice los ajustadores del altura izquierdo<br />
y derecho sobre la barra transversal<br />
(Figura 3). Inserte el pernos a través del<br />
orificios y ajuste la tuercas hasta apretarla.<br />
NO APRIETE DEMASIADO.<br />
CONSEJO: Utilice la pinza para sostener la<br />
tuerca en posición mientras ajusta a mano el<br />
perno con el destornillador Phillips.
To Assemble (continued) Armado (continuación)<br />
4 Seat Pad :<br />
Feed five restraint buckles<br />
through slots (Figure 4).<br />
5 Attach Snack Tray G :<br />
Press snack tray onto left and right<br />
height adjusters until it snaps into<br />
place (Figure 5). Pull up on tray to<br />
ensure it is assembled securely.<br />
<strong>WARNING</strong>:<br />
• DO NOT use high chair<br />
without the snack tray installed.<br />
6 Attach Upper Leg<br />
Crossbar L M :<br />
Position upper leg<br />
crossbar with pins facing<br />
down as shown (Figure<br />
6).<br />
Back View<br />
Vista posterior<br />
A 4 Almohadilla del<br />
Locate two tabs at center of<br />
seat bucket (Figure 4a) and<br />
third tab at center near foot<br />
rest. Hook seat pad onto<br />
tabs using three loops.<br />
Pull back of seat pad over<br />
top of seat back (Figure 4b).<br />
Secure four plastic clips to<br />
the edge of seat, two on<br />
each side (Figure 4c).<br />
Slide leg crossbar into each<br />
upper leg and push crossbar<br />
until it clicks into place. Pull<br />
on each leg to ensure the<br />
leg crossbar is assembled<br />
securely.<br />
4<br />
6<br />
4b<br />
5<br />
4a<br />
4c<br />
Pins face down<br />
Clavijas deben<br />
quedar hacia abajo<br />
3<br />
Front View<br />
Vista frontal<br />
asiento A<br />
:<br />
Haga pasar las cinco<br />
hebillas de retención por<br />
las ranuras (Figura 4).<br />
Localice dos lengüetas en<br />
el centro de la butaca del<br />
asiento (Figura 4a) y una<br />
tercera lengüeta cerca del<br />
apoyapiés. Enganche la<br />
almohadilla del asiento en<br />
las lengüetas usando tres<br />
lazos.<br />
Tire de la parte posterior<br />
de la almohadilla para<br />
colocarla sobre el respaldo<br />
del asiento (Figura 4b).<br />
Asegure cuatro clips<br />
plásticos al borde del<br />
asiento, dos de cada lado<br />
(Figura 4c).<br />
5 Charola de alimentos G :<br />
Apriete la charola de alimentos sobre<br />
los ajustadores de altura izquierdo y<br />
derecho hasta que se trabe en posición<br />
(Figura 5). Tire hacia arriba de la charola<br />
para asegurarse de que esté armada<br />
firmemente.<br />
ADVERTENCIA:<br />
• NO utilice la silla alta sin la charola<br />
de alimentos instalada.<br />
6 Barra transversal de<br />
patas superiores L M :<br />
Coloque la barra transversal<br />
de las patas superiores como<br />
se muestra, con las clavijas<br />
hacia abajo (Figura 6).<br />
Deslice el travesaño en ambas<br />
patas superiores y empújelo<br />
hasta que se trabe con un<br />
clic. Tire de las patas para<br />
comprobar que la barra esté<br />
correctamente armada.
To Assemble (continued) Armado (continuación)<br />
7 Attach Upper Leg<br />
Assembly:<br />
To unfold, press in on both<br />
fold buttons and pull legs<br />
apart (Figure 7).<br />
Open upper leg assembly<br />
until frame clicks and locks<br />
open. Position the crossbar<br />
to the back (Figure 7a).<br />
Slide front legs into left and<br />
right height adjusters, then<br />
slide seat assembly up the<br />
front legs until it locks.<br />
8 Attach Lower Leg Assemblies N :<br />
Evenly slide both legs of upper leg<br />
assembly over lower legs. Do not<br />
click into place until both legs have<br />
been partially inserted, then push<br />
lower legs until they click into<br />
place (Figure 8).<br />
Confirm that pins emerge<br />
completely through holes.<br />
Repeat for other lower leg<br />
assembly.<br />
TIP: Lock wheels to keep high<br />
chair from sliding.<br />
1 Adjusting Recline:<br />
Grasp handle at back of seat. Squeeze<br />
handle to adjust recline angle (Figure 1).<br />
7<br />
To Operate Para operar<br />
<strong>WARNING</strong>:<br />
• DO NOT adjust recline when<br />
child is in seat.<br />
Fold Button<br />
Botone de<br />
plegado<br />
8<br />
1<br />
7a<br />
Click both pins at once<br />
Encaje ambas clavijas<br />
al mismo tiempo<br />
4<br />
Crossbar<br />
Barra transversal<br />
Squeeze<br />
Apriete<br />
7 Conjunto de patas<br />
superiores:<br />
Para desplegar, presione<br />
ambos botones de plegado<br />
y tire de las patas para<br />
separarlas (Figura 7).<br />
Abra el conjunto de patas<br />
superiores hasta que el bastidor<br />
se encaje y se trabe en la<br />
posición abierta. Coloque la<br />
barra transversal en el respaldo<br />
(Figura 7a). Deslice las patas<br />
frontales en los ajustadores<br />
de altura izquierdo y derecho;<br />
luego, deslice el conjunto del<br />
asiento hacia arriba en las patas<br />
frontales hasta que se trabe.<br />
8 Conjuntos de patas inferior N :<br />
Deslice uniformemente ambas<br />
patas del conjunto de patas superiores<br />
sobre las patas inferiores. No las encaje en<br />
posición hasta tanto ambas patas se hayan<br />
insertado parcialmente; luego, empuje las<br />
patas inferiores hasta que se encajen en<br />
posición (Figura 8).<br />
Confirme que las clavijas sobresalgan<br />
completamente por los orificios.<br />
Repita el proceso para el otro conjunto de<br />
pata inferior.<br />
CONSEJO: Para evitar que la silla alta<br />
se deslice, trabe las ruedas.<br />
1 Ajuste de la reclinación:<br />
Sujete la manija en el respaldo del asiento.<br />
Apriete la manija para ajustar el ángulo de<br />
reclinación (Figura 1).<br />
ADVERTENCIA:<br />
• NO ajuste el ángulo cuando el niño esté<br />
en el asiento.
To Operate (continued) Para operar (continuación)<br />
2 Restraint System:<br />
Place child in the seat, with the crotch strap<br />
between the child’s legs. Fasten both buckles<br />
(Figure 2). Clip shoulder straps to waist belt.<br />
Adjust straps (five places) to tighten snugly<br />
such that you can comfortably slide your finger<br />
between the strap and your child (Figure 2a).<br />
<strong>WARNING</strong>:<br />
• Always secure child in the<br />
restraint belt.<br />
To adjust shoulder strap height:<br />
Fold t-shaped strap ends and<br />
push through desired slots (Figure 2b).<br />
NOTE: Shoulder straps are optional.<br />
If not used, remove shoulder straps<br />
completely.<br />
3 Attaching Trays E F :<br />
Squeeze front handle and slide<br />
tray onto sides of snack tray<br />
(Figure 3).<br />
Adjust tray: Squeeze front<br />
handle and slide tray forward or<br />
backward (Figure 3a).<br />
Remove tray: Squeeze front<br />
handle and pull toward you.<br />
Remove insert tray: Lift up using<br />
the convenient lift tab on front<br />
lip.<br />
Use insert tray: Align on main<br />
tray, inserting the rear first then<br />
press down at front (Figure 3b).<br />
Store tray: Conveniently hang<br />
tray on back crossbar, fitting<br />
peg to keyhole opening on<br />
underside of tray (Figure 3c).<br />
4 Adjusting Height:<br />
TIP: Rest your foot on the lower leg<br />
while you adjust the height.<br />
Grasp both height adjustment<br />
handles on sides underneath the<br />
tray. Squeeze handles. Adjust height<br />
to any of six positions (Figure 4).<br />
<strong>WARNING</strong>:<br />
• Never adjust height with<br />
child in seat.<br />
3<br />
4<br />
2<br />
2a<br />
2b<br />
3b 3c<br />
5<br />
Buckles<br />
Hebillas<br />
Adjust straps (5 places)<br />
Ajuste las correas (5 lugares)<br />
3a<br />
2 Cinturón de retención:<br />
Siente al niño en la silla alta y coloque la correa de<br />
entrepierna entre las piernas del niño. Enganche<br />
ambas hebillas (Figura 2). Enganche las correas<br />
de hombro al cinturón. Ajuste las correas (cinco<br />
lugares) para tensarlas, de modo que se pueda<br />
deslizar cómodamente un dedo entre cada correa<br />
y el niño (Figura 2a).<br />
ADVERTENCIA:<br />
• Asegure siempre al niño utilizando<br />
el sistema de retención.<br />
Para ajustar la altura de la correa de hombro:<br />
Doble los extremos en T de la correa y páselos<br />
por las ranuras correspondientes (Figura 2b).<br />
NOTA: Las correas de hombro son opcionales.<br />
Si no utiliza las correas de hombro, retírelas por<br />
completo.<br />
3 Colocación de<br />
las charolas E F :<br />
Apriete la manija frontal y deslice la<br />
charola sobre los lados de la charola<br />
de alimentos (Figura 3).<br />
Cómo ajustar la charola: Apriete la<br />
manija frontal y deslice la charola hacia<br />
delante o hacia atrás (Figura 3a).<br />
Para retirar la charola: Levántela<br />
utilizando la conveniente aleta de<br />
elevación ubicada en el reborde<br />
delantero.<br />
Para retirar charola de inserción:<br />
Levántela utilizando la conveniente<br />
aleta de elevación.<br />
Para usar charola de inserción:<br />
Alinéelo en la charola principal,<br />
insertando primero la parte trasera<br />
y luego presione el frente hacia<br />
abajo (Figura 3b).<br />
Almacenamiento de charola:<br />
Cuelgue convenientemente la charola<br />
en el travesaño trasero, encajando la<br />
clavija en el orificio situado en la parte<br />
inferior de la charola (Figura 3c).<br />
4 Ajuste de la altura:<br />
CONSEJO: Apoye el pie en la pata inferior<br />
mientras ajusta la altura.<br />
Sujete ambas manijas de ajuste de altura<br />
a los costados, debajo de la charola, y<br />
apriételas. Ajuste la altura a cualquiera de<br />
las seis posiciones (Figura 4).<br />
ADVERTENCIA:<br />
• Nunca ajuste la altura con el niño<br />
en el asiento.
To Operate (continued) Para operar (continuación)<br />
5 Folding:<br />
Stand behind high chair. Press in<br />
on both fold buttons (one on each<br />
side) and lift to fold legs together<br />
(Figure 5).<br />
NOTE: To unfold, press in on both<br />
fold buttons and pull legs apart.<br />
<strong>Dorel</strong> <strong>Juvenile</strong> <strong>Group</strong>, Inc. warrants to the original purchaser that this<br />
product (AdapTable Deluxe High Chair), is free from material and<br />
workmanship defects when used under normal conditions for a period of<br />
one (1) year from the date of purchase. Should the product contain defects<br />
in material or workmanship <strong>Dorel</strong> <strong>Juvenile</strong> <strong>Group</strong>, Inc., will repair or replace<br />
the product, at our option, free of charge. Purchaser will be responsible<br />
for all costs associated with packaging and shipping the product to <strong>Dorel</strong><br />
<strong>Juvenile</strong> <strong>Group</strong> Consumer Relations Department at the address noted on<br />
front page and all other freight or insurance costs associated with the<br />
return. <strong>Dorel</strong> <strong>Juvenile</strong> <strong>Group</strong> will bear the cost of shipping the repaired or<br />
replaced product to the purchaser. Product should be returned in its original<br />
package accompanied by a proof of purchase, either a sales receipt or other<br />
proof that the product is within the warranty period. This warranty is void if<br />
the owner repairs or modifies the product or the product has been damaged<br />
as a result of misuse.<br />
This warranty excludes any liability other than that expressly stated<br />
previously, including but not limited to, any incidental or inconsequential<br />
damages.<br />
SOME STATES DO NOT ALLOW THE EXCLUSION OR LIMITATION<br />
OF INCIDENTAL OR CONSEQUENTIAL DAMAGES, SO THE ABOVE<br />
LIMITATION OR EXCLUSION MAY NOT APPLY TO YOU.<br />
THIS WARRANTY GIVES YOU SPECIFIC LEGAL RIGHTS, AND YOU MAY<br />
ALSO HAVE OTHER RIGHTS THAT MAY VARY FROM STATE TO STATE.<br />
5<br />
Fold Button<br />
Botón de plegado<br />
High Chair Care and Maintenance Cuidado y mantenimiento de la silla alta<br />
High chair and trays: Wipe with soft, damp cloth and warm, soapy<br />
water and allow to dry.<br />
Insert tray: Dishwasher safe - top rack only.<br />
Seat pad: Machine wash in cold water on delicate cycle and<br />
air-dry. DO NOT BLEACH.<br />
Restraint system: Restraint and crotch straps should be surface<br />
washed and air dried only. Do not place in washing machine or dryer.<br />
One (1) Year Limited Warranty Garantía limitada durante un (1) año<br />
6<br />
5 Plegado:<br />
Párese detrás de la silla alta.<br />
Apriete hacia dentro ambos botones<br />
de plegado (uno a cada lado), y<br />
levante para plegar las patas entre sí<br />
(Figura 5).<br />
NOTA: Para desplegar, apriete hacia dentro<br />
ambos botones de plegado y tire de las<br />
patas para separarlas.<br />
Silla alta y charolas: Límpielas con un paño suave húmedo<br />
y jabonosa y enjuáguelo con agua tibia y permita que se sequen.<br />
Insert tray: Puede lavarse en lavavajillas - sólo en canasta<br />
superior.<br />
Almohadilla del asiento: Lávela a máquina con agua fría en ciclo<br />
delicado y deje secar al aire. NO UTILICE BLANQUEADORES.<br />
Sistema de retención: Las correas de retención y de la entrepierna<br />
deben limpiarse en su superficie únicamente y debe dejarlas secar al aire.<br />
No colocar en la lavadora ni en la secadora.<br />
La firma <strong>Dorel</strong> <strong>Juvenile</strong> <strong>Group</strong>, Inc. asegura al comprador original que este<br />
producto (Silla alta de lujo “AdapTable”), está garantizado contra materiales<br />
defectuosos o mano de obra deficiente durante un (1) año a partir de la fecha<br />
de compra, si se utiliza en condiciones normales. Si el producto presentara<br />
materiales defectuosos o mano de obra deficiente, <strong>Dorel</strong> <strong>Juvenile</strong> <strong>Group</strong>, Inc.<br />
reparará o sustituirá el producto, a nuestra discreción, de manera gratuita. El<br />
comprador cubrirá todos los costes relacionados con el envase y envío del<br />
producto al Departamento de Relaciones con el Consumidor de <strong>Dorel</strong> <strong>Juvenile</strong><br />
<strong>Group</strong>, a la dirección que aparece al inicio de este documento, y los demás costes<br />
de transportación o aseguramiento relacionados con el envío. <strong>Dorel</strong> <strong>Juvenile</strong><br />
<strong>Group</strong> cubrirá los costes de devolución al comprador del producto reparado o<br />
sustituido. El producto debe enviarse en su envase original junto con una prueba<br />
documental de la compra, ya sea el recibo de venta u otro medio demostrativo<br />
de que el producto aún esté dentro del período de garantía. Esta garantía<br />
quedará anulada si el propietario hubiera reparado o modificado el producto, o si<br />
éste se hubiera dañado como consecuencia del uso incorrecto.<br />
Esta garantía excluye cualesquiera otras responsabilidades ajenas a la expresada<br />
más arriba, entre otras los daños incidentales o consecuentes.<br />
EN ALGUNOS ESTADOS NO SE PERMITEN LAS EXCLUSIONES O LIMITACIONES<br />
REFERENTES A LOS DAÑOS INCIDENTALES O CONSECUENTES, DE MODO QUE<br />
LA LIMITACIÓN O EXCLUSIÓN ANTES EXPUESTA QUIZÁS NO SE APLIQUE EN SU<br />
CASO PARTICULAR.<br />
ESTA GARANTÍA LE OTORGA DERECHOS LEGALES ESPECÍFICOS Y ES<br />
POSIBLE QUE USTED TAMBIÉN CUENTE CON OTROS DERECHOS QUE<br />
PUDIERAN VARIAR EN DISTINTOS ESTADOS.