
You also want an ePaper? Increase the reach of your titles
YUMPU automatically turns print PDFs into web optimized ePapers that Google loves.
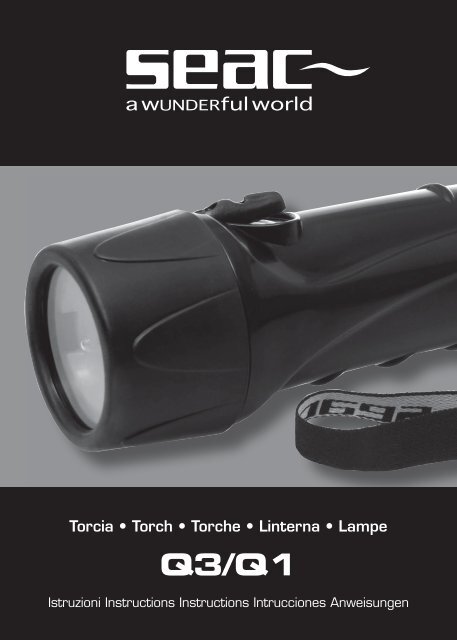
<strong>manuale</strong> d’Istruzioni<br />
Torcia • Torch • Torche • Linterna • Lampe<br />
Q3/Q1<br />
Istruzioni Instructions Instructions Intrucciones Anweisungen<br />
84-<strong>manuale</strong> seac Q3-Q1-rev A.indd 1 31/10/2012 11:59:41
Italiano 3<br />
English 11<br />
Français 19<br />
Español 27<br />
Deutsch 35<br />
84-<strong>manuale</strong> seac Q3-Q1-rev A.indd 2 31/10/2012 11:59:41
Congratulazioni<br />
Grazie per aver scelto un prodotto tecnologicamente avanzato SEAC.<br />
I processi di lavorazione, le materie prime utilizzate e la cura dei particolari<br />
rendono tutti i nostri prodotti affidabili sia dal punto di vista della qualità<br />
che di durata nel tempo. La continua crescita tecnologica della SEAC offre<br />
costantemente garanzia di continua innovazione.<br />
Buon divertimento con i prodotti SEAC...<br />
Introduzione<br />
Q3 - Q1 è frutto di una ricerca avanzata in collaborazione con esperti del<br />
settore.<br />
Le caratteristiche di semplicità, affidabilità e qualità della luce collocano la<br />
Q3 - Q1 tra le torce tascabili o di “back up” più potenti sul mercato.<br />
I Led ad alta efficenza luminosa e la semplicità dell’alloggiamento del vano<br />
batterie rendono questa torcia ideale per ogni tipo di immersione dalle più facili<br />
a quelle impegnative.<br />
La semplicità della forma permette il trasporto e l’utilizzo della Q3 - Q1 in<br />
qualsiasi condizioni e necessità d’immersione.<br />
Commercializzata in diversi colori, la Q3 - Q1 sarà vostra compagna<br />
d’avventure e utile mezzo d’illuminazione.<br />
Italiano 3<br />
84-<strong>manuale</strong> seac Q3-Q1-rev A.indd 3 31/10/2012 11:59:41
4 Italiano<br />
AVVERTENZE GENERALI<br />
ATTENZIONE<br />
Prima di utilizzare la torcia Q3 - Q1 siate sicuri di aver letto<br />
completamente questo <strong>manuale</strong>.<br />
ATTENZIONE! Non puntare la torcia verso i propri occhi o verso<br />
gli occhi di altre persone, sia questo in ambiente aereo che durante<br />
l’utilizzo in immersione.<br />
ATTENZIONE! Accettarsi di posizionare l’interruttore nella posizione<br />
di blocco durante tutte le fasi di trasporto in modo da impedire<br />
accensioni involontarie.<br />
ATTENZIONE! Assicurarsi di togliere le batterie durante il trasporto<br />
in aereo della torcia<br />
ATTENZIONE! Durante la fase della sostituzione delle batterie,<br />
ricordarsi di rispettare la polarità delle stesse.<br />
ATTENZIONE! Utilizzare batterie di ottima qualità del tipo Alcalino<br />
Manganese.<br />
ATTENZIONE! Non lasciare mai la torcia inutilizzata chiusa per un<br />
lungo periodo con le batterie inserite.<br />
ATTENZIONE! Nei periodi di non utilizzo della torcia, tenere<br />
leggermente svitata la ghiera oblò onde evitare il bloccaggio della<br />
ghiera stessa.<br />
ATTENZIONE! Il film in plastica trasparente presente sul corpo<br />
interno intorno alla testa illuminante è una protezione che non va<br />
asportata per nessuna ragione.<br />
• Non tenere accesa la torcia fuori dall’acqua.<br />
• Non puntare la luce negli occhi sia in ambiente <strong>sub</strong>acqueo che in ambiente<br />
esterno.<br />
• Non svitare la ghiera oblò della torcia in immersione o se bagnata.<br />
• Non tenere la torcia vicino a fonti di calore estreme.<br />
• Utilizzare sempre ricambi originali per eventuali operazioni di ordinaria e<br />
straordinaria manutenzione.<br />
• Le batterie non sono fornite assieme alla torcia ma devono essere acquistate<br />
separatamente.<br />
• Non utilizzate batterie con differente stato di carica.<br />
84-<strong>manuale</strong> seac Q3-Q1-rev A.indd 4 31/10/2012 11:59:41
CARATTERISTICHE TECNICHE<br />
• Corpo realizzato in ABS ad alta resistenza.<br />
• Gruppo ottico a fascio concentrato.<br />
• Parabola Liscia.<br />
• Vetro oblò in policarbonato.<br />
• Corpo ghiera in termo gomma antisdrucciolo.<br />
• Interruttore meccanico microswitch.<br />
• 1 Led ad alta efficenza luminosa, Tempertura colore 4250 °K.<br />
• Doppio O-ring di tenuta alloggiato su tenuta oblò.<br />
• Cestello porta-batterie configurato per l’uso in parallelo di 4 o 8 batterie.<br />
CARATTERISTICHE Q1<br />
Potenza 6 W<br />
Volt 5,0 V<br />
Richiesto uso di batterie alcaline formato A-A (R6)<br />
Tipo di batterie 1,5 V. In alternativa batterie ricaricabili stesso<br />
formato da 1,2 V<br />
Lumen 150<br />
Alloggiamento batterie<br />
Cestello appositamente configurato per utilizzo in<br />
parallelo di 4 o 8 batterie<br />
Sorgente luminosa 1 led<br />
Temperatura colore 4250 °K<br />
Fascio luminoso Concentrato<br />
Autonomia ore *)<br />
16 a piena potenza<br />
Oltre 25 a potenza ridotta<br />
Profondità massima 100 m<br />
*) L’autonomia riportata è indicativa poiché dipende dalla qualità delle batterie<br />
usate – si consiglia l’utilizzo di batterie Alcaline di qualità superiore. E’ possibile<br />
usare batterie ricaricabili da 1.2 V comunemente in commercio. Con l’uso<br />
di batterie ricaricabili non garantiamo l’autonomia e la potenza luminosa<br />
dichiarate nella scheda tecnica.<br />
Italiano 5<br />
84-<strong>manuale</strong> seac Q3-Q1-rev A.indd 5 31/10/2012 11:59:41
6 Italiano<br />
CARATTERISTICHE TECNICHE<br />
• Corpo realizzato in ABS ad alta resistenza.<br />
• Gruppo ottico a fascio concentrato.<br />
• Vetro oblò in policarbonato.<br />
• Corpo ghiera in termo gomma antisdrucciolo.<br />
• Interruttore meccanico microswitch.<br />
• N°3 Led ad alta efficienza luminosa, Temperatura colore 6000 °K<br />
• Doppio O-ring di tenuta alloggiato su tenuta oblò.<br />
• Cestello porta-batterie configurato per l’uso in parallelo di 4 o 8 batterie.<br />
CARATTERISTICHE Q3<br />
Potenza 6 W<br />
Volt 5,0 V<br />
Richiesto uso di batterie alcaline formato A-A (R6)<br />
Tipo di batterie 1,5 V. In alternativa batterie ricaricabili stesso<br />
formato da 1,2 V<br />
Lumen 360<br />
Alloggiamento batterie<br />
Cestello appositamente configurato per<br />
utilizzo in parallelo di 4 o 8 batterie<br />
Sorgente luminosa 3 led<br />
Temperatura colore 6000 °K<br />
Fascio luminoso Concentrato<br />
Autonomia ore *)<br />
9 a piena potenza<br />
Oltre 20 a potenza ridotta<br />
Profondità massima 100 m<br />
*) L’autonomia riportata è indicativa poiché dipende dalla qualità delle batterie<br />
usate – si consiglia l’utilizzo di batterie Alcaline di qualità superiore. E’ possibile<br />
usare batterie ricaricabili da 1.2 V comunemente in commercio. Con l’uso<br />
di batterie ricaricabili non garantiamo l’autonomia e la potenza luminosa<br />
dichiarate nella scheda tecnica.<br />
84-<strong>manuale</strong> seac Q3-Q1-rev A.indd 6 31/10/2012 11:59:41
SCHEMA POSIZIONAMENTO BATTERIA SU PORTABATTERIA<br />
ATTENZIONE<br />
Rispettare tassativamente l'indicazioni delle polarità!<br />
Schema con 4 batterie.<br />
Italiano 7<br />
84-<strong>manuale</strong> seac Q3-Q1-rev A.indd 7 31/10/2012 11:59:41
Schema con 8 batterie.<br />
8 Italiano<br />
84-<strong>manuale</strong> seac Q3-Q1-rev A.indd 8 31/10/2012 11:59:41
INSERIMENTO BATTERIE<br />
• Svitare in senso antiorario la ghiera oblò della torcia.<br />
• Togliere il cestello porta batterie.<br />
• Inserire le batterie seguendo le indicazioni di polarità (+ o -) indicate sul cestello.<br />
• Inserire il cestello porta batterie nel corpo torcia.<br />
• Lubrificare le O-ring di tenuta con un velo di grasso al silicone.<br />
• Avvitare la ghiera oblò in senso orario.<br />
• Verificare l’accensione della torcia tramite l’apposito interruttore.<br />
ATTENZIONE<br />
In caso di errato posizionamento delle batterie (inversione di polarità)<br />
si genera un corto circuito provocando un danno irreversibile con<br />
pericolo di esplosione della torcia.<br />
MODALITÀ DI CONTROLLO PRIMA DELL'IMMERSIONE<br />
• Se non utilizzata recentemente,verificare lo stato delle batterie della torcia<br />
Q3 - Q1 procedendo ad una verifica dell’accensione.<br />
• Controllare la perfetta chiusura del corpo.<br />
• Appena giunti in acqua verificare che non vi sia presenza continua di bolle<br />
che fuoriescono dal corpo della torcia.<br />
ALLAGAMENTO<br />
In caso di entrata d’acqua nella torcia si consiglia d’aprire la stessa, togliere<br />
le batterie e sciacquare immediatamente le parti interne con acqua dolce,<br />
asciugare poi con uno panno e con un phone ad aria tiepida prestando<br />
particolare attenzione alle parti meccaniche. Asportare l'eventuale ossido<br />
formatosi sulle parti metalliche e procedere ad una prova di funzionalità.<br />
Se la quantità di acqua penetrata all'interno della torcia è consistente e se<br />
vi è rimasta per molto tempo si consiglia di aprire la stessa e sciacquare<br />
immediatamente le parti interne con acqua dolce, in questo caso suggeriamo<br />
di rivolgersi immediatamente ad un centro riparazioni competente o di<br />
rivolgersi al negozio SEAC più vicino.<br />
LIMITI DI IMPIEGO<br />
• La profondità massima operativa è di 100 m.<br />
• A causa delle alte temperature raggiunte dalla lampada si consiglia l’uso<br />
della stessa solo ed esclusivamente in ambiente <strong>sub</strong>acqueo.<br />
Italiano 9<br />
84-<strong>manuale</strong> seac Q3-Q1-rev A.indd 9 31/10/2012 11:59:41
MANUTENZIONE E TRASPORTO<br />
È importante attenersi alle seguenti istruzioni:<br />
• Trasportare sempre la torcia all'interno di una borsa che lo protegga da<br />
eventuali urti.<br />
• Evitare prolungate esposizioni ai raggi solari.<br />
• Alla fine di ogni immersione (mare, lago o piscina) sciacquare sempre con<br />
acqua dolce ed asciugare.<br />
• Verificare lo stato delle guarnizioni di tenuta (O-ring) ogni volta che si è<br />
proceduto all'apertura del corpo.<br />
• Pulire e lubrificare le parti interessate all’apertura con grasso siliconico.<br />
• Si consiglia di far ispezionare annualmente il prodotto da un centro<br />
autorizzato SEAC.<br />
CONDIZIONI DI GARANZIA<br />
SEAC garantisce il prodotto per anni due dal momento dell’acquisto.<br />
Si consiglia vivamente di conservare lo scontrino fiscale comprovante la data<br />
di acquisto.<br />
La garanzia non include le normali parti di comune consumo o usura quali:<br />
• O-ring, batterie, lampadine, oblò.<br />
La presente garanzia non copre danni dovuti a:<br />
• Urti meccanici.<br />
• Utilizzo in acque cariche di cloro o inquinate.<br />
• Prolungata esposizione a intense fonti di calore superiori a 70 °C.<br />
La garanzia decade se:<br />
• L’attrezzatura è stata utilizzata in maniera impropria, eludendo l’istruzioni<br />
per l’uso.<br />
• Il proprietario ha apportato modifiche o manomissioni e/o ha personalmente<br />
eseguito riparazioni, o se tali interventi sono stati effettuati da personale non<br />
autorizzato.<br />
SEAC declina ogni responsabilità relativa a danni causati all'utilizzatore da<br />
un uso improprio delle attrezzature. Altrettanto dicasi per danni diretti o<br />
indiretti di qualsiasi natura causati a persone o cose dovuti ad eventuali<br />
periodi di inutilizzo del prodotto o da un uso scorretto dello stesso.<br />
Il listino ricambi è disponibile sul sito www.seac<strong>sub</strong>.com, area download.<br />
10 Italiano<br />
84-<strong>manuale</strong> seac Q3-Q1-rev A.indd 10 31/10/2012 11:59:42
Congratulations<br />
SEAC thanks you for choosing one of our high-tech products.<br />
Our manufacturing techniques, selection of raw materials and care for details<br />
make all our products reliable both in terms of quality and long life. SEAC<br />
continuous technological growth is a constant guarantee of non-stop innovation.<br />
Enjoy your diving experience with SEAC products...<br />
Introduction<br />
Q3 - Q1 is based on the most advanced team research with a network of<br />
experts.<br />
Easy to use, reliable and with excellent light quality, Q3 - Q1 is one of the most<br />
powerful pocket flashlights or “back up” diving torches currently available on<br />
the market.<br />
The high light efficiency LEDs and the simple battery housing compartment<br />
make this torch ideal for any kind of dive, from the easiest to the most<br />
demanding.<br />
The Q3 - Q1 torch essential design ensures easy handling and use and makes<br />
it suitable for all diving conditions and requirements.<br />
The Q3 - Q1 torch comes in a wide range of colours and will be your adventure<br />
mate as well as a handy instrument for underwater lighting.<br />
English 11<br />
84-<strong>manuale</strong> seac Q3-Q1-rev A.indd 11 31/10/2012 11:59:42
12 English<br />
GENERAL WARNINGS<br />
CAUTION<br />
Before using the Q3 - Q1 torch make sure you have fully read this<br />
manual.<br />
CAUTION! Do not direct the torch towards your eyes and towards<br />
other people’s eyes, both during a dive and out of the water.<br />
CAUTION! Make sure that the switch is in lock position during<br />
transport in order to prevent accidental switching.<br />
CAUTION! Remove the bulb if the torch is to be transported by air<br />
CAUTION! Observe the correct polarity when replacing batteries.<br />
CAUTION! Use high-quality alkaline-manganese batteries.<br />
CAUTION! In case of long periods of non-use, remove the batteries<br />
before storing the torch.<br />
CAUTION! During airfreight remove the batteries from the torch.<br />
CAUTION! During the non-use periods, keep the port light of the<br />
port light slightly unscrewed in order to avoid the block of the port<br />
light itself.<br />
CAUTION! The transparent plastic film on the inner body around<br />
the illuminating head is protective and should not be removed for any<br />
reason.<br />
• Never keep the torch on when out of the water.<br />
• Do not direct the light towards the eyes both under water and out of the water.<br />
• Never unscrew the torch lens ring nut during a dive or if wet.<br />
• Do not keep the torch near extreme heat sources.<br />
• Use only original spare parts both for ordinary and extraordinary<br />
maintenance.<br />
• Batteries are not provided with the torch and must be purchased separately.<br />
• Do not use batteries with a different state of charge.<br />
84-<strong>manuale</strong> seac Q3-Q1-rev A.indd 12 31/10/2012 11:59:42
TECHNICAL SPECIFICATIONS<br />
• Shock-resistant ABS body.<br />
• Spotlight optics.<br />
• Smooth-surface reflector.<br />
• Polycarbonate glass lens.<br />
• Non-slip thermorubber ring nut body.<br />
• Mechanical microswitch.<br />
• 1 high light efficiency LED, Color temperature 4,250 °K.<br />
• Twin O-ring fitted on lens seal.<br />
• Battery holder specially shaped for parallel use of 4 or 8 batteries.<br />
CHARACTERISTICS Q1<br />
Output 6 W<br />
Volt 5.0 V<br />
Requires the use of 1.5 V (R6) AA alkaline<br />
Type of batteries batteries. 1.2 V rechargeable batteries of the<br />
same size can also be used.<br />
Lumens rating 150<br />
Battery housing<br />
Compartment specially configured for use of 4 or<br />
8 batteries in parallel<br />
Light source 1 LED<br />
Color temperature 4,250 °K<br />
Light beam Concentrated<br />
Burntime, hours *)<br />
16 at full power<br />
Over 25 at reduced power<br />
Maximum depth 100 m<br />
*) The burntime shown is approximate because it depends on the quality of<br />
the batteries used. We recommend using high quality alkaline batteries. 1.2 V<br />
rechargeable batteries commonly found on the market can also be used. If<br />
rechargeable batteries are used we cannot guarantee the burntime and light<br />
output shown on the technical sheet.<br />
English 13<br />
84-<strong>manuale</strong> seac Q3-Q1-rev A.indd 13 31/10/2012 11:59:42
14 English<br />
TECHNICAL SPECIFICATIONS<br />
• Shock-resistant ABS body.<br />
• Spotlight optics.<br />
• Polycarbonate glass lens.<br />
• Non-slip thermorubber ring nut body.<br />
• Mechanical microswitch.<br />
• 3 high light efficiency LEDs, Color temperature 6,000 °K<br />
• Twin O-ring fitted on lens seal.<br />
• Battery holder specially shaped for parallel use of 4 or 8 batteries.<br />
CHARACTERISTICS Q3<br />
Output 6 W<br />
Volt 5.0 V<br />
Requires the use of 1.5 V (R6) AA alkaline<br />
Type of batteries batteries. 1.2 V rechargeable batteries of the<br />
same size can also be used.<br />
Lumens rating 360<br />
Battery housing<br />
Compartment specially configured for use of 4 or<br />
8 batteries in parallel<br />
Light source 3 LEDs<br />
Color temperature 6,000 °K<br />
Light beam Concentrated<br />
Burntime, hours *)<br />
9 at full power<br />
Over 20 at reduced power<br />
Maximum depth 100 m<br />
*) The burntime shown is approximate because it depends on the quality of<br />
the batteries used. We recommend using high quality alkaline batteries. 1.2 V<br />
rechargeable batteries commonly found on the market can also be used. If<br />
rechargeable batteries are used we cannot guarantee the burntime and light<br />
output shown on the technical sheet.<br />
84-<strong>manuale</strong> seac Q3-Q1-rev A.indd 14 31/10/2012 11:59:42
BATTERY POSITIONING ON THE BATTERY HOLDER<br />
WARNING<br />
Always observe the polarity indication!<br />
Battery holder with 4 batteries.<br />
English 15<br />
84-<strong>manuale</strong> seac Q3-Q1-rev A.indd 15 31/10/2012 11:59:42
Battery holder with 8 batteries.<br />
16 English<br />
84-<strong>manuale</strong> seac Q3-Q1-rev A.indd 16 31/10/2012 11:59:42
BATTERY REPLACEMENT<br />
• Unscrew the lens ring nut anticlockwise.<br />
• Remove the battery holder.<br />
• Make sure to insert the batteries observing the correct polarity marks<br />
(+ or -) shown on the holder.<br />
• Insert the battery holder into the body of the torch.<br />
• Lubricate the O-ring seal with a silicone grease film.<br />
• Screw the lens ring nut clockwise.<br />
• Switch on the torch to test.<br />
WARNING<br />
If the battery has not been installed properly (polarity inversion), a<br />
short circuit will damage the equipment, with a serious risk of an<br />
explosion.<br />
CHECKS BEFORE DIVING<br />
• If the torch has not been recently used, check the state of the Q3 - Q1 torch<br />
batteries and switch on the torch to test.<br />
• Check for the perfect seal of the body.<br />
• When under water, check that there is no continuous discharge of air bubbles<br />
from the torch body.<br />
FLOODING<br />
In case of water leakage into the torch, open it, remove the batteries and rinse<br />
immediately the internal parts in fresh water, then wipe with a cloth and dry<br />
with a warm air source, paying particular care to mechanical parts. Remove<br />
the oxide, if any, deposited on metal parts and test for correct operation.<br />
If the quantity of water leaked into the torch is considerable and if it has<br />
remained there for a long time, open the torch and rinse immediately the<br />
internal parts in fresh water; in such occurrence immediately contact a<br />
suitable servicing centre or the nearest SEAC centre.<br />
LIMITS OF USE<br />
• The maximum operating depth is 100 m.<br />
• Owing to the high temperatures reached by the bulb, the lamp should be<br />
used only under water.<br />
English 17<br />
84-<strong>manuale</strong> seac Q3-Q1-rev A.indd 17 31/10/2012 11:59:42
MAINTENANCE AND TRANSPORT<br />
Compliance with the following instructions is required:<br />
• Always carry the torch inside a bag protecting it from any shocks.<br />
• Avoid prolonged exposure to sunrays.<br />
• At the end of each dive (sea, lake or swimming-pool) always rinse in fresh<br />
water and wipe.<br />
• Check the state of O-rings every time the body is opened.<br />
• Clean and lubricate the parts involved in the opening process with silicone<br />
grease.<br />
• It is recommended to have the product inspected every year at an authorized<br />
SEAC centre.<br />
WARRANTY CONDITIONS<br />
SEAC guarantees the product for a period of two years from the date of<br />
purchase.<br />
You are strongly advised to keep the fiscal slip supplying evidence of the date<br />
of purchase.<br />
The warranty does not include standard consumption or wear parts, such as:<br />
• O-rings, batteries, bulbs, glass.<br />
This warranty does not cover damage resulting from:<br />
• Mechanical shocks.<br />
• Use in chlorinated or polluted water.<br />
• Prolonged exposure to strong heat sources exceeding 70 °C.<br />
The warranty is cancelled if:<br />
• The equipment has been improperly used, not following the instructions for use.<br />
• The owner has made modifications or tampered and/or personally carried<br />
out repairs, or if such interventions have been carried out by unauthorized<br />
personnel.<br />
SEAC will not be liable under this warranty for damage caused to the user<br />
through improper use of the equipment. The same is valid for direct or<br />
indirect damage of any nature caused to persons or things due to any<br />
periods of non-use or to misuse of the product.<br />
The spare parts list is available in the downloads section of www.seac<strong>sub</strong>.com.<br />
18 English<br />
84-<strong>manuale</strong> seac Q3-Q1-rev A.indd 18 31/10/2012 11:59:42
Nos compliments !<br />
Merci d’avoir choisi un produit SEAC de nouvelle technologie.<br />
Les processus de fabrication, les matières premières utilisées et le soin des<br />
détails assurent à nos produits une bonne fiabilité aussi bien du point de vue<br />
de la qualité que de leur durée de vie. L’évolution technologique continuelle de<br />
SEAC offre constamment les meilleures garanties d’innovation.<br />
Amusez-vous avec les produits SEAC…<br />
Introduction<br />
Q3 - Q1 est le résultat d’une recherche moderne avec la collaboration des<br />
experts du secteur.<br />
Grâce à ses caractéristiques d’emploi très simple, de fiabilité et de qualité de<br />
la lumière, Q3 - Q1 se place parmi les lampes de poche ou de secours les plus<br />
puissantes sur le marché.<br />
Les LED à haute efficacité lumineuse et le compartiment de logement de la<br />
pile simple rendent cette torche idéale pour tout type de plongée, de la plus<br />
facile à la plus exigeante.<br />
La simplicité de son dessin permet d’employer Q3 - Q1 aisément dans toute<br />
condition et situation de plongée.<br />
Commercialisée en plusieurs couleurs, Q3 - Q1 sera votre camarade<br />
d’aventure et un moyen d’éclairage utile.<br />
Français 19<br />
84-<strong>manuale</strong> seac Q3-Q1-rev A.indd 19 31/10/2012 11:59:42
20 Français<br />
AVERTISSEMENTS GENERAUX<br />
ATTENTION !<br />
Avant d’utiliser la torche Q3 - Q1, assurez-vous d’avoir lu tout ce manuel.<br />
ATTENTION ! Ne jamais pointer la torche vers ses yeux ni vers<br />
les yeux d’autres personnes, aussi bien hors de l’eau que pendant<br />
l’immersion.<br />
ATTENTION ! S’assurer de positionner l’interrupteur sur la position<br />
de blocage pendant toutes les phases du transport, de façon à éviter<br />
toute mise en marche accidentelle.<br />
ATTENTION ! Vérifier d’enlever l’ampoule pendant le transport de la<br />
torche en avion.<br />
ATTENTION ! Pendant la phase du remplacement des piles, il faut<br />
faire attention a respecter les polarités.<br />
ATTENTION ! Utiliser des piles alcalines au manganèse de très bonne<br />
qualité.<br />
ATTENTION ! Si vous ne devez pas utiliser la torche pendant une<br />
longue période, retirez les piles avant de ranger celle-ci.<br />
ATTENTION ! En cas de transport par avion vous devez retirer les<br />
piles de la lampe.<br />
ATTENTION ! Si la lampe n’est pas utilisée un certain temps, laisser<br />
le hublot légèrement dévissé pour en éviter le blocage.<br />
ATTENTION ! Le film plastique transparent situé sur l’intérieur du<br />
corps, autour de la tête d’éclairage, est protecteur et ne doit pas être<br />
enlevé pour quelque raison que ce soit.<br />
• Ne pas tenir la torche allumée hors de l’eau.<br />
• Ne pas pointer la lumière vers les yeux aussi bien dans le milieu <strong>sub</strong>aquatique<br />
que dans le milieu extérieur.<br />
• Ne pas dévisser l’embout hublot de la torche en immersion ou si elle est<br />
mouillée.<br />
• Conserver la torche à l’abri des sources de chaleur extrême.<br />
• Pour toute opération d’entretien ordinaire ou exceptionnelle, toujours utiliser<br />
des pièces de rechange originales.<br />
• Les piles ne doivent pas fournies avec la torche ; elles doivent être achetées<br />
séparément.<br />
• Ne pas utiliser de piles de différentes conditions de charge.<br />
84-<strong>manuale</strong> seac Q3-Q1-rev A.indd 20 31/10/2012 11:59:42
CARACTÉRISTIQUES TECHNIQUES<br />
• Boîtier réalisé en ABS à haute résistance.<br />
• Bloc optique à faisceau intermédiaire.<br />
• Parabole lisse.<br />
• Verre du hublot en polycarbonate.<br />
• Embout en caoutchouc thermoformé antidérapant.<br />
• Micro-interrupteur mécanique.<br />
• 1 LED haute efficacité, couleur de température 4 250 °K.<br />
• Étanchéité du hublot par double joint torique.<br />
• Support de piles conçu pour utiliser 4 ou 8 piles en parallèle.<br />
CARACTÉRISTIQUES Q1<br />
Puissance 6 W<br />
Voltage 5,0 V<br />
Nécessite des piles de 1,5 V (R6) AA alcalines.<br />
Type de piles<br />
Les piles rechargeables de 1,2 V de la même<br />
dimension peuvent aussi être utilisées.<br />
Luminosité nominale 150 lumens<br />
Compartiment spécialement conçu pour utiliser 4<br />
Logement de la pile<br />
ou 8 piles en parallèle<br />
Source de lumière 1 LED<br />
Température de la<br />
4 250 °K<br />
couleur<br />
Faisceau Concentré<br />
16 à pleine puissance<br />
Autonomie, heures *)<br />
Plus de 25 à puissance réduite<br />
Profondeur maximale 100 m<br />
*) La durée d’éclairage est approximative du fait qu’elle dépend de la qualité<br />
des piles utilisées. Nous recommandons l’utilisation de piles alcalines de<br />
haute qualité. On peut aussi utiliser les piles rechargeables de 1,2 V de la<br />
même dimension qu’on trouve facilement dans le commerce. Si des piles<br />
rechargeables sont utilisées, nous ne pouvons pas garantir la durée d’éclairage<br />
et la puissance lumineuse qui sont indiquées sur la fiche technique.<br />
Français 21<br />
84-<strong>manuale</strong> seac Q3-Q1-rev A.indd 21 31/10/2012 11:59:42
22 Français<br />
CARACTÉRISTIQUES TECHNIQUES<br />
• Boîtier réalisé en ABS à haute résistance.<br />
• Bloc optique à faisceau intermédiaire.<br />
• Verre du hublot en polycarbonate.<br />
• Embout en caoutchouc thermoformé antidérapant.<br />
• Micro-interrupteur mécanique.<br />
• 3 LED haute efficacité, couleur de température 6 000 °K.<br />
• Étanchéité du hublot par double joint torique..<br />
• Support de piles conçu pour utiliser 4 ou 8 piles en parallèle.<br />
CARACTÉRISTIQUES Q3<br />
Puissance 6 W<br />
Voltage 5,0 V<br />
Nécessite des piles de 1,5 V (R6) AA alcalines.<br />
Type de piles<br />
Les piles rechargeables de 1,2 V de la même<br />
dimension peuvent aussi être utilisées.<br />
Luminosité nominale 360 lumens<br />
Compartiment spécialement conçu pour utiliser 4<br />
Logement de la pile<br />
ou 8 piles en parallèle<br />
Source de lumière 3 LED<br />
Température de la<br />
6 000 °K<br />
couleur<br />
Faisceau Concentré<br />
9 à pleine puissance<br />
Autonomie, heures *)<br />
Plus de 20 à puissance réduite<br />
Profondeur maximale 100 m<br />
*) La durée d’éclairage est approximative du fait qu’elle dépend de la qualité<br />
des piles utilisées. Nous recommandons l’utilisation de piles alcalines de<br />
haute qualité. On peut aussi utiliser les piles rechargeables de 1,2 V de la<br />
même dimension qu’on trouve facilement dans le commerce. Si des piles<br />
rechargeables sont utilisées, nous ne pouvons pas garantir la durée d’éclairage<br />
et la puissance lumineuse qui sont indiquées sur la fiche technique.<br />
84-<strong>manuale</strong> seac Q3-Q1-rev A.indd 22 31/10/2012 11:59:42
POSITIONNEMENT DES PILES DANS LE SUPPORT<br />
ATTENTION !<br />
Toujours respecter l'indication des polarités !<br />
Positionnement avec 4 piles.<br />
Français 23<br />
84-<strong>manuale</strong> seac Q3-Q1-rev A.indd 23 31/10/2012 11:59:42
Positionnement avec 8 piles.<br />
24 Français<br />
84-<strong>manuale</strong> seac Q3-Q1-rev A.indd 24 31/10/2012 11:59:42
REMPLACEMENT DES PILES<br />
• Dévisser l’embout du hublot de la torche dans le sens contraire des aiguilles<br />
d’une montre.<br />
• Retirer le support des piles.<br />
• Insérer les piles en suivant les polarités (+ o -) marquées sur le panier.<br />
• Insérer le support de piles dans le boîtier.<br />
• Lubrifier le joint torique d’étanchéité avec un film de graisse de silicone.<br />
• Allumer la torche pour la tester.<br />
• Vérifier l’allumage de la torche par l’interrupteur spécial.<br />
ATTENTION !<br />
Si les piles ne sont pas positionnées correctement (inversion de la<br />
polarite), il se produira un court-circuit qui endommagera l'appareil,<br />
avec risque d'explosion de la torche.<br />
VÉRIFICATIONS À EFFECTUER AVANT LA PLONGÉE<br />
• Si la torche Q1 - Q3 n’a pas été utilisée récemment, vérifiez l’état de ses piles<br />
et allumez-la pour tester.<br />
• Vérifiez que le boîtier est parfaitement étanche.<br />
• Dès l’immersion, vérifiez qu’il n’y a pas de bulles qui s’échappent en continu de<br />
la torche.<br />
TORCHE NOYÉE<br />
En cas de pénétration d’eau dans la torche, il est conseillé de l’ouvrir et<br />
de rincer immédiatement l’intérieur à l’eau douce et de l’essuyer avec un<br />
chiffon ou à l’aide d’un séchoir à l’air tiède, faisant très attention aux parties<br />
mécaniques. Retirez la corrosion qui s’est éventuellement formée sur les<br />
parties métalliques et procéder immédiatement à un essai de fonctionnement.<br />
Si la quantité d’eau qui a pénétré à l’intérieur de la torche est importante,<br />
et si elle y est resté longtemps, il est conseillé d’ouvrir la torche et de rincer<br />
immédiatement les parties intérieures à l’eau douce ; en ce cas nous vous<br />
conseillons de ne pas hésiter à contacter un centre d’assistance qualifié ou de<br />
vous adresser au magasin SEAC le plus proche.<br />
LIMITES D’UTILISATION<br />
• La profondeur maximale d’utilisation est de 100 m.<br />
• À cause des températures élevées atteintes par la lampe, l’emploi de la<br />
torche N’EST conseillé QUE dans le milieu sous-marin.<br />
Français 25<br />
84-<strong>manuale</strong> seac Q3-Q1-rev A.indd 25 31/10/2012 11:59:42
ENTRETIEN ET TRANSPORT<br />
Il est important de respecter les instructions suivantes :<br />
• Transporter toujours la torche dans un sac pour la protéger contre les<br />
chocs éventuels.<br />
• Éviter toute exposition prolongée aux rayons solaires.<br />
• À la fin de chaque plongée (mer, lac ou piscine) rincer toujours la torche à<br />
l’eau douce et essuyer.<br />
• Vérifier l’état des joints toriques à chaque fois que le boîtier est ouvert.<br />
• Nettoyer et lubrifier les parties concernées à l’ouverture avec de la graisse<br />
de silicone.<br />
• Il est conseillé de faire contrôler le produit une fois par an auprès d’un centre<br />
autorisé SEAC.<br />
CONDITIONS DE GARANTIE<br />
SEAC garantit le produit pendant deux ans à partir de la date de son achat.<br />
Il vous est recommandé de conserver le ticket de caisse prouvant la date de<br />
l’achat.<br />
La garantie ne comprend pas les pièces normalement sujettes à l’usure,<br />
telles que :<br />
• Joints toriques, piles, ampoules, hublot.<br />
Cette garantie ne couvre pas les dommages dus à :<br />
• Chocs mécaniques.<br />
• Emploi dans des eaux chlorées ou polluées.<br />
• Exposition prolongée à des sources de chaleur dépassant 70 °C.<br />
La garantie est annulée dans les cas suivants :<br />
• Si le matériel a été utilisé d’une manière inadaptée, sans suivre les<br />
instructions d’utilisation.<br />
• Si le propriétaire a effectué des modifications ou des altérations, ou qu’il a<br />
effectué lui-même des réparations, ou si celles-ci ont été effectuées par du<br />
personnel non agréé.<br />
SEAC décline toute responsabilité concernant les dommages provoqués à<br />
l’utilisateur à cause de l’emploi impropre de l’appareil. Cela s’applique aussi<br />
aux dommages directs ou indirects de quelque nature que ce soit, provoqués<br />
à des personnes ou des objets, du fait de périodes de non-utilisation ou d’une<br />
mauvaise utilisation de l’appareil.<br />
Vous trouverez la liste des pièces détachées dans la section téléchargements<br />
du site www.seac<strong>sub</strong>.com.<br />
26 Français<br />
84-<strong>manuale</strong> seac Q3-Q1-rev A.indd 26 31/10/2012 11:59:42
¡Felicidades!<br />
Gracias por haber elegido un producto tecnológicamente avanzado de SEAC.<br />
Los procesos de elaboración, las materias primas empleadas y el cuidado<br />
de los detalles, hacen que todos nuestros productos sean fiables tanto<br />
desde el punto de vista de la calidad como de la duración. El ininterrumpido<br />
crecimiento tecnológico de SEAC ofrece constantemente una garantía de<br />
continua innovación.<br />
Que os entretengáis mucho con los productos SEAC...<br />
Introducción<br />
Q3 - Q1 es fruto de una investigación avanzada en colaboración con expertos<br />
en el sector.<br />
Las características de sencillez, fiabilidad y calidad de la luz sitúan a la Q3 - Q1<br />
entre las linternas de bolsillo o de “back up” de mayor potencia en el mercado.<br />
Los LED de alto rendimiento luminoso y el sencillo compartimento para la pila<br />
hacen que esta linterna sea perfecta para cualquier tipo de inmersión, desde<br />
las más sencillas hasta las más exigentes.<br />
La simplicidad de la forma permite el transporte y el uso de la Q3 - Q1 en<br />
todas las condiciones y necesidades de inmersión.<br />
Comercializada en varios colores, la Q3 - Q1 será vuestra compañera de<br />
aventuras y un útil medio de iluminación.<br />
Español 27<br />
84-<strong>manuale</strong> seac Q3-Q1-rev A.indd 27 31/10/2012 11:59:42
28 Español<br />
ADVERTENCIAS GENERALES<br />
¡ATENCIÓN!<br />
Antes de utilizar la linterna Q3 - Q1 asegurarse de haber leído por<br />
completo este manual.<br />
¡ATENCIÓN! No apuntar la linterna hacia los propios ojos o los de<br />
otras personas, tanto afuera del agua como durante su uso en la<br />
inmersión.<br />
¡ATENCIÓN! Asegurarse de poner el interruptor en la posición de<br />
bloqueo durante todas las fases del transporte con el fin de impedir<br />
encendidos involuntarios.<br />
¡ATENCIÓN! Asegurarse de quitar las baterías durante el transporte<br />
de la linterna en avión.<br />
¡ATENCIÓN! Durante la fase de reemplazo de las baterías,<br />
acordarse de respetar la polaridad de las mismas.<br />
¡ATENCIÓN! Usar baterías de excelente calidad de tipo Alcalino<br />
Manganeso.<br />
¡ATENCIÓN! Nunca dejar la linterna sin usar encerrada por un largo<br />
período con las baterías puestas.<br />
¡ATENCIÓN! En los períodos en los que no se utiliza la linterna, dejar<br />
ligeramente destornillado el casquillo de la ventanilla con el fin de<br />
evitar que el casquillo se bloquee.<br />
¡ATENCIÓN! La película transparente que cubre el cuerpo interior<br />
rodeando el cabezal de iluminación es de protección y no se debe<br />
retirar bajo ningún concepto.<br />
• No mantener encendida la linterna fuera del agua.<br />
• Non apuntar la luz hacia los ojos tanto en ambiente <strong>sub</strong>acuático como en<br />
ambiente exterior.<br />
• No destornillar el casquillo de la ventanilla de la linterna durante la inmersión<br />
o si está mojado.<br />
• No tener la linterna cerca de fuentes de calor excesivo.<br />
• Utilizar siempre repuestos originales para eventuales operaciones de<br />
mantenimiento ordinario y extraordinario.<br />
• Las baterías no se proporcionan con la linterna, sino que tienen que ser<br />
adquiridas por separado.<br />
• No usar baterías con niveles de carga diferentes.<br />
84-<strong>manuale</strong> seac Q3-Q1-rev A.indd 28 31/10/2012 11:59:42
CARACTERÍSTICAS TÉCNICAS<br />
• Cuerpo realizado en ABS de elevada resistencia.<br />
• Grupo óptico de haz concentrado.<br />
• Parábola Lisa.<br />
• Cristal de la ventanilla de policarbonato.<br />
• Cuerpo casquillo de termo-jebe antideslizante.<br />
• Interruptor mecánico microswitch.<br />
• 1 LED de alto rendimiento luminoso, temperatura de color 4.250 °K.<br />
• Doble O-ring de bloqueo en la junta estanca de la ventanilla.<br />
• Canastillo porta-baterías configurado para el uso en paralelo de 4 u 8 baterías.<br />
CARACTERÍSTICAS Q1<br />
Potencia 6 W<br />
Voltaje 5,0 V<br />
Funciona con pilas alcalinas de 1,5 V (R6) AA.<br />
Tipo de pilas<br />
También se pueden utilizar pilas recargables de<br />
1,2 V del mismo tamaño.<br />
Clasificación de lúmenes 150<br />
Compartimento especialmente configurado para 4<br />
Alojamiento de la pila<br />
u 8 pilas en paralelo<br />
Fuente de luz 1 diodo LED<br />
Temperatura de color 4.250 °K<br />
Haz de luz Concentrado<br />
16 a potencia máxima<br />
Autonomía, horas *)<br />
Más de 25 h a potencia reducida<br />
Profundidad máxima 100 m<br />
*) La autonomía mostrada es aproximada porque depende de la calidad de las<br />
pilas utilizadas. Recomendamos utilizar pilas alcalinas de alta calidad. También<br />
se pueden utilizar pilas recargables de 1,2 V fáciles de encontrar en cualquier<br />
comercio. Si utiliza pilas recargables, no podemos garantizar la autonomía y la<br />
potencia luminosa mostradas en la ficha técnica.<br />
Español 29<br />
84-<strong>manuale</strong> seac Q3-Q1-rev A.indd 29 31/10/2012 11:59:42
30 Español<br />
CARACTERÍSTICAS TÉCNICAS<br />
• Cuerpo realizado en ABS de elevada resistencia.<br />
• Grupo óptico de haz concentrado.<br />
• Cristal de la ventanilla de policarbonato.<br />
• Cuerpo casquillo de termo-jebe antideslizante.<br />
• Interruptor mecánico microswitch.<br />
• 3 LED de alto rendimiento luminoso, temperatura de color 6.000 °K.<br />
• Doble O-ring de bloqueo en la junta estanca de la ventanilla.<br />
• Canastillo porta-baterías configurado para el uso en paralelo de 4 u 8 baterías.<br />
CARACTERÍSTICAS Q3<br />
Potencia 6 W<br />
Voltaje 5,0 V<br />
Funciona con pilas alcalinas de 1,5 V (R6) AA.<br />
Tipo de pilas<br />
También se pueden utilizar pilas recargables de<br />
1,2 V del mismo tamaño.<br />
Clasificación de lúmenes 360<br />
Alojamiento de la pila<br />
Compartimento especialmente configurado para 4<br />
u 8 pilas en paralelo<br />
Fuente de luz 3 diodos LED<br />
Temperatura de color 6.000 °K<br />
Haz de luz Concentrado<br />
Autonomía, horas *)<br />
9 a potencia máxima<br />
Más de 20 h a potencia reducida<br />
Profundidad máxima 100 m<br />
*) La autonomía mostrada es aproximada porque depende de la calidad de las<br />
pilas utilizadas. Recomendamos utilizar pilas alcalinas de alta calidad. También<br />
se pueden utilizar pilas recargables de 1,2 V fáciles de encontrar en cualquier<br />
comercio. Si utiliza pilas recargables, no podemos garantizar la autonomía y la<br />
potencia luminosa mostradas en la ficha técnica.<br />
84-<strong>manuale</strong> seac Q3-Q1-rev A.indd 30 31/10/2012 11:59:42
COLOCACION DE LAS BATERIAS EN EL PORTABATERIAS<br />
¡ATENCIÓN!<br />
Siempre respete la polaridad indicada!<br />
Colocación con 4 baterias..<br />
Español 31<br />
84-<strong>manuale</strong> seac Q3-Q1-rev A.indd 31 31/10/2012 11:59:42
Colocación con 8 baterias.<br />
32 Español<br />
84-<strong>manuale</strong> seac Q3-Q1-rev A.indd 32 31/10/2012 11:59:42
INTRODUCCIÓN BATERÍAS<br />
• Destornillar en sentido contrario a las manecillas del reloj el casquillo de la<br />
ventanilla.<br />
• Quitar el canastillo portabaterías.<br />
• Introducir las baterías siguiendo las indicaciones de la polaridad (+ o -)<br />
indi cadas en el canastillo.<br />
• Introducir el canastillo portabaterías en el cuerpo de la linterna.<br />
• Lubrificar los O-rings de la junta estanca con un estrato de grasa de silicona.<br />
• Enroscar el casquillo de la ventanilla en el sentido de las manecillas del reloj.<br />
• Verificar el encendido de la linterna mediante el interruptor ad hoc.<br />
¡ATENCIÓN!<br />
Si las baterias no están instaladas correctamente (inversión de la<br />
polaridad), se producirá un cortocircuito que arruinará el aparato, con<br />
riesgo de explosión de la antorcha.<br />
MODALIDADES DE CONTROL ANTES DE LA INMERSIÓN<br />
• Si no ha sido utilizada recientemente, controlar el estado de las baterías de la<br />
linterna Q3 - Q1, procediendo a una comprobación del encendido.<br />
• Controlar el perfecto cierre del cuerpo.<br />
• Una vez en el agua, verificar que no haya una presencia constante de bur<br />
bujas que salgan del cuerpo de la linterna.<br />
PENETRACIÓN DEL AGUA<br />
En caso de penetración del agua en la linterna se sugiere abrirla, quitar las<br />
baterías y enjuagar de inmediato las partes interiores con agua dulce, secar<br />
luego con un paño y con un phon de aire tibio, cuidando especialmente las<br />
partes mecánicas. Remover el eventual óxido que se haya formado en las<br />
partes metálicas y proceder a efectuar una prueba de funcionalidad.<br />
Si la cantidad de agua que ha penetrado en el interior de la linterna es<br />
considerable y si ha permanecido ahí por mucho tiempo, se sugiere abrirla<br />
y enjuagar de inmediato las partes interiores con agua dulce. En este caso<br />
sugerimos dirigirse inmediatamente a un centro reparaciones competente o a<br />
la tienda SEAC más cercana.<br />
LÍMITES EN EL USO<br />
• La profundidad máxima operativa es de 100 m.<br />
• A causa de las elevadas temperaturas alcanzadas por la linterna, se sugiere<br />
el uso de la misma única y exclusivamente en ambiente <strong>sub</strong>acuático.<br />
Español 33<br />
84-<strong>manuale</strong> seac Q3-Q1-rev A.indd 33 31/10/2012 11:59:43
MANTENIMIENTO Y TRANSPORTE<br />
Es importante atenerse a las siguientes instrucciones:<br />
• Transportar siempre la linterna dentro de una bolsa que la proteja de<br />
eventuales golpes.<br />
• Evitar exposiciones prolongadas a los rayos del sol.<br />
• Al final de cada inmersión (Mar, Lago o Piscina) enjuagar siempre con agua<br />
dulce y secar.<br />
• Verificar el estado de las guarniciones de la junta estanca (O-rings) cada vez<br />
que se proceda a abrir el cuerpo.<br />
• Limpiar y lubrificar las partes pertinentes con grasa silicónica.<br />
• Se sugiere hacer inspeccionar una vez al año el producto por un centro<br />
autorizado SEAC.<br />
CONDICIONES DE GARANTÍA<br />
SEAC garantiza el producto por dos años desde el momento de la compra.<br />
Se aconseja encarecidamente conservar el resguardo fiscal que comprueba la<br />
fecha de la compra.<br />
La garantía no incluye las normales partes de consumo o desgaste, tales como:<br />
• O-rings, baterías, bombillas, ventanilla.<br />
La presente garantía no cubre daños causados por:<br />
• Golpes mecánicos.<br />
• Uso prolongado en aguas con cloro o contaminadas.<br />
• Prolongada exposición a intensas fuentes de calor superiores a 70 °C.<br />
La garantía ya no es válida si:<br />
• El equipo ha sido utilizado de modo impropio, no conforme con las<br />
instrucciones para el uso.<br />
• El propietario ha aportado modificaciones o desarreglos y/o ha efectuado<br />
reparaciones personalmente, o si dichas intervenciones han sido efectuadas<br />
por personal no autorizado.<br />
SEAC declina toda responsabilidad relativa a daños causados al usuario<br />
por una utilización inadecuada de los equipos. Lo mismo dígase por daños<br />
directos o indirectos de cualquier naturaleza causados a personas o cosas<br />
debido a eventuales períodos de falta de uso del producto o de un uso<br />
incorrecto del mismo.<br />
La lista de repuestos está disponible en la sección descargas del sitio<br />
www.seac<strong>sub</strong>.com<br />
34 Español<br />
84-<strong>manuale</strong> seac Q3-Q1-rev A.indd 34 31/10/2012 11:59:43
Wir gratulieren Ihnen zu Ihrer Wahl!<br />
Wir danken Ihnen, dass Sie sich für eines der technologisch innovativen<br />
Produkte von SEAC entschieden haben. Herstellungsprozesse, Rohmaterialien<br />
und eine ganz besondere Detailverarbeitung verleihen unseren Produkten<br />
Zuverlässigkeit und lange Lebensdauer. Die ununterbrochene technologische<br />
Entwicklung der SEAC garantiert eine stetige Verbesserung der Produkte.<br />
Viel Vergnügen mit den Produkten SEAC ...<br />
Einführung<br />
Q3 - Q1 ist das Ergebnis moderner Forschung in Zusammenarbeit mit<br />
Spezialisten.<br />
Dank ihrer Einfachheit, Zuverlässigkeit und Lichtqualität darf sich die Q3 - Q1<br />
zu den leistungsstärksten Lampen oder „Backup“ Lampen zählen, die auf dem<br />
Markt sind.<br />
Die LED-Leuchten mit hoher Leuchtkraft und das einfache Batteriegehäuse<br />
dieser Lampe sind ideal für jede Art von Tauchgängen, vom leichtesten bis<br />
zum anspruchsvollsten.<br />
Die einfache Form ermöglicht den Transport und die Benutzung unter jeglichen<br />
Bedingungen und in allen Tauchsituationen.<br />
Q3 - Q1 wird in verschiedenen Farben angeboten und wird auf Ihren<br />
Abenteuern eine treue Begleiterin und nützliche Beleuchtung sein.<br />
Deutsch 35<br />
84-<strong>manuale</strong> seac Q3-Q1-rev A.indd 35 31/10/2012 11:59:43
ALLGEMEINE SICHERHEITSHINWEISE<br />
ACHTUNG!<br />
Bevor Sie die Lampe Q3 - Q1 in Betrieb nehmen, lesen Sie bitte diese<br />
Bedienungsanleitungen vollständig.<br />
ACHTUNG! Richten Sie die Lampe nicht auf Ihre Augen oder auf die<br />
Augen anderer, weder in der Luft, noch während des Tauchgangs.<br />
ACHTUNG! Stellen Sie während des Transports immer den Schalter<br />
auf Blockierstellung, um ein unerwünschtes Einschalten der Lampe zu<br />
vermeiden.<br />
ACHTUNG! Nehmen Sie bei der Beförderung im Flugzeug immer die<br />
Glühbirne heraus.<br />
ACHTUNG! Beim Ersetzen der Batterien beachten Sie deren Plusund<br />
Minuspole.<br />
ACHTUNG! Benutzen Sie nur alkalisch-mangane Trockenbatterien<br />
bester Qualität.<br />
ACHTUNG! Lassen Sie niemals die Batterien längere Zeit in der<br />
Lampe, wenn diese nicht benutzt wird.<br />
ACHTUNG! Während des Fluges nehmen Sie bitte die Batterien aus<br />
der Stablampe heraus.<br />
ACHTUNG! Lagern Sie die Lampe mit leicht geöffnetem<br />
Lampengehäuse, um eine Blockierung des Gewindes zu verhindern.<br />
ACHTUNG! Die transparente Kunststofffolie, die im inneren Gehäuse<br />
den Lampenkopf umgibt, dient zum Schutz und darf keinesfalls<br />
entfernt werden.<br />
• Schalten Sie die Lampe außerhalb des Wassers immer aus.<br />
• Richten Sie das Licht nicht auf die Augen, weder unter Wasser, noch<br />
außerhalb des Wassers.<br />
• Schrauben Sie den Lampenkopf nicht ab, wenn die Lampe unter Wasser<br />
oder nass ist.<br />
• Schützen Sie die Lampe vor extremen Wärmequellen.<br />
• Benutzen Sie bei herkömmliche oder außergewöhnlicher Wartung immer<br />
Original-Ersatzteile.<br />
• Die Batterien werden nicht mit der Lampe geliefert; sie sind getrennt<br />
erhältlich.<br />
• Verwenden Sie keinesfalls neue und alte Batterien gemeinsam.<br />
36 Deutsch<br />
84-<strong>manuale</strong> seac Q3-Q1-rev A.indd 36 31/10/2012 11:59:43
TECHNISCHE DATEN<br />
• Gehäuse aus ABS mit hoher Widerstandskraft.<br />
• Optik mit konzentriertem Lichtstrahl.<br />
• Glatte Parabel.<br />
• Frontscheibe des Lampenkopfs aus Polycarbonat.<br />
• Gehäuse der Schraubfassung aus rutschfestem Thermogummi.<br />
• Mechanischer Schalter Microswitch.<br />
• 1 LED hoher Leuchtkraft, Farbtemperatur 4250 °K.<br />
• Doppelter O-Dichtungsring auf Lampenkopfdichtung.<br />
• Speziell entwickelter Batterieträger zur gleichzeitigen Nutzung von 4 oder<br />
8 Batterien geeignet.<br />
MERKMALE Q1<br />
Leistung 6 W<br />
Volt 5,0 V<br />
Erfordert die Verwendung von 1,5 V (R6) AA<br />
Batterietyp<br />
Alkalibatterien. Wieder aufladbare 1,2-V-Batterien<br />
derselben Größe können auch verwendet werden.<br />
Leuchtkraft in Lumen 150<br />
Batteriefach für die gleichzeitige Verwendung von<br />
Batteriegehäuse<br />
4 oder 8 Batterien<br />
Lichtquelle 1 LED<br />
Farbtemperatur 4250 °K<br />
Lichtstrahl Konzentriert<br />
Brenndauer,<br />
16 bei voller Leistung<br />
Stunden *)<br />
Über 25 bei reduzierter Leistung<br />
Maximaltiefe 100 m<br />
*) Die angegebene Brenndauer ist ein Näherungswert und hängt von der<br />
Qualität der verwendeten Batterien ab. Wir empfehlen die Verwendung von<br />
hochwertigen Alkalibatterien. Es können auch handelsübliche wieder aufladbare<br />
1,2-V-Batterien verwendet werden. Für wieder aufladbare Batterien können<br />
wir nicht für die in den technischen Merkmalen angegebene Brenndauer und<br />
Leuchtkraft garantieren.<br />
Deutsch 37<br />
84-<strong>manuale</strong> seac Q3-Q1-rev A.indd 37 31/10/2012 11:59:43
38 Deutsch<br />
TECHNISCHE DATEN<br />
• Gehäuse aus ABS mit hoher Widerstandskraft.<br />
• Optik mit konzentriertem Lichtstrahl.<br />
• Frontscheibe des Lampenkopfs aus Polycarbonat.<br />
• Gehäuse der Schraubfassung aus rutschfestem Thermogummi.<br />
• Mechanischer Schalter Microswitch.<br />
• 3 LED hoher Leuchtkraft, Farbtemperatur 6000 °K.<br />
• N. 3 weiß LED 6200°K Power-LED 6 Watt 500 mA.<br />
• Speziell entwickelter Batterieträger zur gleichzeitigen Nutzung von<br />
4 oder 8 Batterien geeignet.<br />
MERKMALE Q3<br />
Leistung 6 W<br />
Volt 5,0 V<br />
Erfordert die Verwendung von 1,5 V (R6) AA<br />
Batterietyp<br />
Alkalibatterien. Wieder aufladbare 1,2-V-Batterien<br />
derselben Größe können auch verwendet werden.<br />
Leuchtkraft in Lumen 360<br />
Batteriefach für die gleichzeitige Verwendung von<br />
Batteriegehäuse<br />
4 oder 8 Batterien<br />
Lichtquelle 3 LEDs<br />
Farbtemperatur 6000 °K<br />
Lichtstrahl Konzentriert<br />
Brenndauer,<br />
9 bei voller Leistung<br />
Stunden *)<br />
Über 20 bei reduzierter Leistung<br />
Maximaltiefe 100 m<br />
*) Die angegebene Brenndauer ist ein Näherungswert und hängt von der<br />
Qualität der verwendeten Batterien ab. Wir empfehlen die Verwendung von<br />
hochwertigen Alkalibatterien. Es können auch handelsübliche wieder aufladbare<br />
1,2-V-Batterien verwendet werden. Für wieder aufladbare Batterien können<br />
wir nicht für die in den technischen Merkmalen angegebene Brenndauer und<br />
Leuchtkraft garantieren.<br />
84-<strong>manuale</strong> seac Q3-Q1-rev A.indd 38 31/10/2012 11:59:43
EINLEGEN DER BATTERIEN IM BATTERIERAUM<br />
ACHTUNG!<br />
Beachten Sie immer die angegebene Polarität!<br />
Einlegen von 4 Batterien.<br />
Deutsch 39<br />
84-<strong>manuale</strong> seac Q3-Q1-rev A.indd 39 31/10/2012 11:59:43
Einlegen von 8 Batterien.<br />
40 Deutsch<br />
84-<strong>manuale</strong> seac Q3-Q1-rev A.indd 40 31/10/2012 11:59:43
EINSETZEN DER BATTERIEN<br />
• Die Schraubfassung am Lampenkopf im Gegenuhrzeigersinn abschrauben.<br />
• Batterieträger entnehmen.<br />
• Legen Sie die Batterien entsprechend der Angaben über Plus- und Minuspole<br />
(+ o -) in den Batterieträger.<br />
• Setzen Sie den Batterieträger in das Lampengehäuse ein.<br />
• Bestreichen Sie die O-ringe mit einer feinen Schicht Silikonfett.<br />
• Schrauben Sie das Schraubgewinde am Lampenkopf im Uhrzeigersinn zu.<br />
• Mit dem dafür vorgesehenen Schalter schalten Sie die Lampe zur Kontrolle ein.<br />
ACHTUNG!<br />
Wenn die Batterien nicht korrekt eingelegt worden sind<br />
(Falschpolung), ein Kurzschluss wird die Lampe beschädigt, und es<br />
besteht Explosionsgefahr.<br />
KONTROLLEN VOR DEM TAUCHGANG<br />
• Wurde die Lampe längere Zeit nicht gebraucht, überprüfen Sie die Batterien<br />
der Lampe Q3 - Q1 durch eine Einschaltkontrolle.<br />
• Kontrollieren Sie den einwandfreien Verschluss des Gehäuses.<br />
• Sowie Sie im Wasser sind, kontrollieren Sie, dass keine Luftblasen aus dem<br />
Gehäuse austreten.<br />
WASSEREINTRITT<br />
Sollte Wasser in die Lampe gelangen, öffnen Sie diese, nehmen Sie<br />
die Batterien heraus und spülen Sie unverzüglich die inneren Teile mit<br />
Süßwasser. Trocknen Sie diese dann mit einem Tuch und einem lauwarmen<br />
Fön. Seien Sie dabei insbesondere bei den mechanischen Teile vorsichtig.<br />
Entfernen Sie eventuelle Oxidierungsrückstände von den Metallteilen und<br />
probieren Sie dann, ob die Lampe funktioniert.<br />
Wenn eine große Menge Wasser in die Lampe eingedrungen und dort lange<br />
Zeit verblieben ist, raten wir, die Lampe zu öffnen und die inneren Teile sofort<br />
mit Süßwasser abzuspülen; in diesem Fall sollten Sie sich unverzüglich an ein<br />
qualifiziertes Kundendienstzentrum oder an Ihren nächsten SEAC Händler wenden.<br />
ANWENDUNGSGRENZEN<br />
• Die Lampe kann bis zu einer Tauchtiefe von max. 100 m verwendet werden.<br />
• Wegen der hohen Temperaturen, welche die Lampe erreicht, raten wir,<br />
sollte diese ausschließlich unter Wasser benutzt werden.<br />
Deutsch 41<br />
84-<strong>manuale</strong> seac Q3-Q1-rev A.indd 41 31/10/2012 11:59:43
WARTUNG UND TRANSPORT<br />
Beachten Sie bitte folgende Anweisungen:<br />
• Befördern Sie die Lampe immer in einer Tasche zum Schutz gegen<br />
Schockeinwirkung.<br />
• Lassen Sie die Lampe nicht längere Zeit in der Sonne liegen.<br />
• Nach jedem Tauchgang (Meer, See oder Schwimmbad) immer mit<br />
Süßwasser abspülen und abtrocknen.<br />
• Kontrollieren Sie den Zustand der Dichtungen (O-ringe) nach jeder Öffnung<br />
des Gehäuses.<br />
• Reinigen Sie alle Teile des Verschlusses und bestreichen Sie diese dann mit<br />
Silikonfett.<br />
• Wir raten, das Produkt jährlich von einer autorisierten SEAC<br />
Kundendienstzentrale kontrollieren zu lassen.<br />
GARANTIEBEDINGUNGEN<br />
Die SEAC gewährt zwei Jahre Garantie auf das Produkt ab Kaufdatum.<br />
Sie sollten unbedingt den Kassenzettel zum Nachweis des Kaufdatums<br />
aufbewahren.<br />
Folgende Teile, die dem normalen Verschleiß unterliegen, fallen nicht unter<br />
die Garantieleistungen:<br />
• O-Ring, Batterien, Glühbirnen, Lampenkopf.<br />
Vorliegende Garantie erstreckt sich nicht auf folgende Mängel:<br />
• Mängel in Folge mechanischer Einwirkungen.<br />
• Gebrauch in stark chlorhaltigem Wasser oder in verschmutzen Gewässern.<br />
• Längere, starke Hitzeeinwirkung über 70 °C.<br />
Die Garantie entfällt, wenn:<br />
• Das Gerät in unsachgemäßer Weise benutzt wurde, ohne den Richtlinien der<br />
Bedienungsanleitung Folge zu leisten.<br />
• Der Besitzer irgendwelche Änderungen am Gerät vorgenommen hat oder<br />
eigenständig Reparaturen durchgeführt hat, oder wenn derartige Eingriffe<br />
von nicht autorisiertem Personal ausgeführt wurden.<br />
SEAC lehnt jede Verantwortung ab für Schäden, die dem Anwender durch<br />
unsachgemäßen Gebrauch der Geräte entstehen. Dasselbe gilt für direkte<br />
oder indirekte Schäden jeglicher Art an Personen oder Sachen, die auf<br />
eventuelle Zeiten des Nichtgebrauchs des Produktes zurückzuführen sind<br />
oder auf dessen unsachgemäße Anwendung.<br />
Die Liste der Ersatzteile steht zum Download auf www.seac<strong>sub</strong>.com zur<br />
Verfügung.<br />
42 Deutsch<br />
84-<strong>manuale</strong> seac Q3-Q1-rev A.indd 42 31/10/2012 11:59:43
84-<strong>manuale</strong> seac Q3-Q1-rev A.indd 43 31/10/2012 11:59:43<br />
43
SEACSUB S.p.A.<br />
Via D. Norero, 29<br />
16040 S. Colombano Certenoli<br />
(GE) Italy<br />
Tel. +39 0185356301<br />
Fax +39 0185356300<br />
e-mail: seac<strong>sub</strong>@seac<strong>sub</strong>.com<br />
www.seac<strong>sub</strong>.com<br />
<strong>Seac</strong> USA Corp.<br />
231 Front st.<br />
Brooklyn<br />
11201 New York<br />
Tel. +1 347 505 7842<br />
e-mail: seac.usa@seac<strong>sub</strong>.com<br />
www.seac<strong>sub</strong>.com<br />
84-<strong>manuale</strong> seac Q3-Q1-rev A.indd 44 31/10/2012 11:59:43<br />
S156315 • Rev. A • Artbook 8584/12