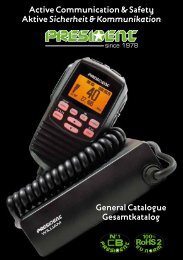
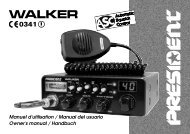
PM-1000 WP FR ESP UK.p65 - President Electronics
PM-1000 WP FR ESP UK.p65 - President Electronics
PM-1000 WP FR ESP UK.p65 - President Electronics
Create successful ePaper yourself
Turn your PDF publications into a flip-book with our unique Google optimized e-Paper software.
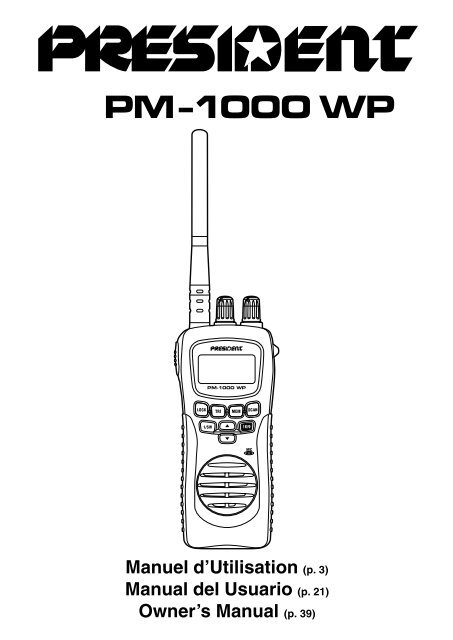
<strong>PM</strong> -<strong>1000</strong> <strong>WP</strong><br />
Manuel d’Utilisation (p. 3)<br />
Manual del Usuario (p. 21)<br />
Owner’s Manual (p. 39)
Table des matières<br />
Commandes et indicateurs ................................................. 4<br />
Afficheur LCD ...................................................................... 5<br />
Avertissement ! ................................................................... 6<br />
Introduction ......................................................................... 7<br />
Caractéristiques ............................................................ 7<br />
Service Technique ......................................................... 7<br />
Contenu de l’emballage ...................................................... 8<br />
Mise en route ...................................................................... 9<br />
Installation du support ................................................... 9<br />
Fixer l’antenne ............................................................... 9<br />
Installer le bloc accus rechargeable .............................. 9<br />
Utiliser le boîtier piles alcalines ................................... 10<br />
Attacher le clip ceinture ............................................... 10<br />
Charger le bloc accus .................................................. 11<br />
Fonctionnement ................................................................ 12<br />
Allumer l’appareil et régler le squelch ......................... 12<br />
Sélectionner un canal.................................................. 13<br />
Touche Canal 16/9 ...................................................... 13<br />
Triple Veille .................................................................. 14<br />
Programmer un canal dans la mémoire ...................... 14<br />
Effacer un canal de la mémoire .................................. 14<br />
Balayage (scanning) ................................................... 15<br />
Émission ...................................................................... 15<br />
Touches éclairées et afficheur .................................... 16<br />
Activer / Désactiver le Beep des touches ................... 16<br />
Indicateur du niveau de batterie .................................. 16<br />
Verrouillage du clavier ................................................. 17<br />
Dépannage ....................................................................... 18<br />
Garantie ............................................................................ 18<br />
Spécifications .................................................................... 19<br />
International Marine VHF Channel Chart.......................... 56<br />
Déclaration de conformité ................................................. 57<br />
3
Commandes et indicateurs<br />
1. Antenne<br />
2. Clip ceinture<br />
3. Prise de charge<br />
4. Batterie<br />
5. Clip déclenchement batterie<br />
6. Touche PTT (Push to Talk)<br />
7. Touche Triple Veille - TRI<br />
8. Touche verrouillage - LOCK<br />
9. Touche de sélection de puissance d’émission - 1/5 W<br />
10. Microphone<br />
11. Prise haut-parleur microphone (en option)<br />
12. Bouton volume - VOL<br />
13. Bouton Squelch - SQ<br />
14. Afficheur LCD<br />
15. Touche Mémoire - MEM<br />
16. Touche SCAN - SCAN<br />
17. Touche canal Up - ▲<br />
18. Touche 16/9 - 16/9<br />
19. Touche canal Down - ▼<br />
20. Haut-parleur<br />
4
Afficheur LCD<br />
A. Indicateur d’émission<br />
B. Indicateur puissance d’émission<br />
C. Afficheur numéro de canal<br />
D. Indicateur mémoire<br />
E. Indicateur Scan<br />
F. Indicateur Batterie<br />
G. Indicateur triple veille<br />
H. Indicateur verrouillage clavier<br />
5
Avertissement !<br />
• Le <strong>PM</strong>-<strong>1000</strong> <strong>WP</strong> est étanche uniquement lorsque l’antenne,<br />
les capuchons (jack de charge, jack du micro/HP externe)<br />
et la batterie sont correctement installées.<br />
• Ne pas utiliser l’émetteur radio sans antenne.<br />
• Ne pas utiliser l’émetteur dans une atmosphère explosive.<br />
• Ne pas laisser des enfants utiliser l’appareil sans votre surveillance<br />
• Ne pas charger le pack accus Ni-MH avec un autre adaptateur<br />
que celui conçu pour la charge. L’utilisation d’un autre<br />
adaptateur peut endommager le bloc accus ou provoquer<br />
une explosion.<br />
• Les piles NiMH doivent être installées correctement.<br />
6
Introduction<br />
Le <strong>PM</strong>-<strong>1000</strong> <strong>WP</strong> est un appareil VHF marine portable étanche.<br />
Il est compact, léger, robuste et s’adapte facilement à<br />
votre main.<br />
Pour vous assurer d’utiliser les fonctions du <strong>PM</strong>-<strong>1000</strong> <strong>WP</strong> de<br />
façon optimale, veuillez lire ce manuel attentivement avant<br />
utilisation.<br />
Caractéristiques<br />
• Étanche (en conformité avec les spécifications d’étanchéité<br />
IPX4)<br />
• Mode Triple Veille<br />
• Activation du canal prioritaire (canal 16)<br />
• Mémoire programmable<br />
• Touche unique canal 16/9<br />
• Balayage mémoire<br />
• Support de table (peut aussi être fixé au mur)<br />
• Bloc accus NiMH rechargeable<br />
• Economie batterie<br />
• Verrouillage du clavier<br />
• Eclairage clavier et afficheur<br />
• Clip ceinture<br />
• Dragonne<br />
• Puissance TX 1 W / 5 W<br />
• Boîtier piles alcaline (piles alcalines non incluses)<br />
Service Technique<br />
Votre revendeur GPE peut vous fournir de l’assistance et des<br />
informations. Si votre VHF marine ne fonctionne pas correctement,<br />
suivez les consignes de dépannage au fond de ce<br />
manuel. Pour un support technique, veuillez contacter GPE .<br />
Veillez à ce qu’un technicien qualifié répare votre appareil.<br />
7
Contenu de l’emballage<br />
Si l’un de ces éléments est manquant dans votre emballage,<br />
contactez votre fournisseur.<br />
8
Mise en route<br />
Installation du support<br />
Installez le support sur une table ou au mur.<br />
Sur une table :<br />
1. Fixez le support en utilisant les vis de<br />
montage et rondelles comme suit.<br />
Au mur :<br />
1. Appliquez le support au mur et insérez les<br />
deux vis de montage dans les trous les plus<br />
grands du support.<br />
2. Poussez le support vers le bas jusqu’à ce<br />
qu’il soit bien calé.<br />
3. Lorsque vous enlevez le support du mur,<br />
desserrez les vis et poussez le support vers<br />
le haut.<br />
Fixez l’antenne<br />
Appliquez l’antenne sur la radio comme indiqué.<br />
Vérifiez que l’antenne soit bien fixée.<br />
Installer le bloc accus rechargeable<br />
1. Baissez le verrou et enlevez le boîtier<br />
piles alcaline. Ensuite placez le bloc<br />
accus rechargeables.<br />
2. Verrouillez le bloc accus et vérifiez<br />
qu’il soit correctement enclenché dans<br />
l’appareil.<br />
9
Utiliser le boîtier piles alcalines<br />
Si nécessaire, vous pouvez utiliser le boîtier<br />
piles avec des piles alcaline AA (non incluses)<br />
à la place du bloc accus.<br />
Pour installer les piles :<br />
1. Enlevez le couvercle du boîtier piles en tirant<br />
sur les deux moitiés .<br />
2. Installez 6 piles alcaline AA (non incluses)<br />
dans le boîtier piles.<br />
Respectez les polarités (+/-).<br />
3. Remettez le couvercle du boîtier piles.<br />
Attacher le clip ceinture<br />
1. Tenez le clip ceinture dans la direction<br />
illustrée.<br />
2. Appliquez-le sur l’attache à l’arrière<br />
de la radio. Ensuite glissez-le vers le<br />
haut.<br />
3. Lorsque vous entendez un clic, le<br />
clip ceinture est bien attaché.<br />
4. Pour enlever le clip ceinture de la<br />
radio, tournez-le la tête en bas et glissez-le<br />
vers le haut.<br />
10
Charger le bloc accus<br />
Votre radio marine est alimentée par un bloc accus NI-MH<br />
spécialement conçu.<br />
Avant d’utiliser le <strong>PM</strong>-<strong>1000</strong> <strong>WP</strong>, chargez le bloc accus Ni-<br />
MH pendant 16 heures sans interruption avec le chargeur<br />
mural.<br />
1. Placez le <strong>PM</strong>-<strong>1000</strong> <strong>WP</strong> dans le support. Vérifiez<br />
que la radio soit sur OFF.<br />
2. Branchez le connecteur du chargeur mural sur<br />
la prise 220 V et l’autre connecteur sur le jack de<br />
l’accu NiMH à l’arrière du <strong>PM</strong>-<strong>1000</strong> <strong>WP</strong>.<br />
3. Chargez la batterie pendant 16 heures.<br />
• Après 16 h sans interruption, la charge est terminée.<br />
• Veillez à replacer le capuchon caoutchouc après avoir<br />
chargé afin d’assurer l’étanchéité.<br />
• La radio ne chargera pas la batterie si elle est allumée<br />
et reçoit des messages.<br />
• La prise sert uniquement pour la charge. Si le niveau de la<br />
batterie est faible, la radio a besoin d’être chargée avant<br />
utilisation.<br />
11
Fonctionnement<br />
• Voir « Commandes et Indicateurs » (page 4) pour les positions<br />
des boutons et des touches.<br />
• Lorsque vous allumez votre <strong>PM</strong>-<strong>1000</strong> <strong>WP</strong> pour la première<br />
fois, il est automatiquement réglé sur canal 16, la fréquence<br />
pour détresse, sécurité et appel.<br />
• Lorsque vous appuyez sur n’importe quelle touche (sauf<br />
les touches PTT et LOCK), une courte tonalité est émise.<br />
Allumer l’appareil et régler le squelch<br />
1. Avant d’allumer l’appareil, tournez<br />
le bouton squelch SQ entièrement<br />
dans le sens inverse des aiguilles<br />
d’une montre.<br />
2. Ensuite, allumez l’appareil en tournant<br />
le bouton volume/power VOL<br />
dans les sens des aiguilles d’une<br />
montre jusqu’à ce que vous entendiez<br />
un sifflement.<br />
3. Tournez le bouton SQ dans le sens<br />
des aiguilles d’une montre jusqu’à ce<br />
que le souffle soit coupé. Utilisez ce<br />
bouton pour régler jusqu’au niveau<br />
de squelch souhaité. Considérez que<br />
le bouton squelch est comme une<br />
porte de fréquence qui contrôle l’accès des signaux faibles<br />
ou puissants en fonction de son réglage.<br />
• Pour écouter une station faible ou lointaine, tournez le bouton<br />
dans le sens inverse des aiguilles d’une montre. Si la réception<br />
est brouillée, tournez-le dans le sens des aiguilles d’une<br />
montre pour éliminer ces émissions incompréhensibles.<br />
12
• Si le bouton squelch est réglé de façon à ce que vous entendiez<br />
continuellement un souffle, l’appareil ne pourra pas<br />
scanner correctement.<br />
4. Pour éteindre l’appareil, tournez le bouton VOL dans le<br />
sens contraire des aiguilles d’une montre jusqu’à ce que vous<br />
entendiez un clic.<br />
Sélectionner un canal<br />
1. Allumez votre <strong>PM</strong>-<strong>1000</strong> <strong>WP</strong>.<br />
2. Pour sélectionner un canal supérieur,<br />
appuyez sur la touche ▲.<br />
MONTER<br />
3. Pour sélectionner un canal inférieur,<br />
appuyez la touche ▼.<br />
• Pour faire défiler les canaux, appuyez<br />
et maintenez la touche ▲ ou<br />
▼ pendant plus d’une seconde.<br />
DESCENDRE<br />
Touche canal 16/9<br />
Exemple : Lorsque vous êtes sur canal<br />
20 et vous voulez surveiller canal<br />
16 ou canal 9 :<br />
1. Vous êtes maintenant sur canal 20.<br />
2. Pour surveiller canal 16, appuyez<br />
la touche 16/9.<br />
3. Pour surveiller canal 9, appuyez à<br />
nouveau la touche 16/9.<br />
4. Pour revenir au canal 20, appuyez à<br />
nouveau la touche 16/9.<br />
13
Triple Veille / Triple Watch<br />
Le mode triple veille surveille les canaux 16 et 9 pour un signal<br />
pendant que vous écoutez le<br />
canal sélectionné en cours. La radio<br />
marine vérifie s’il y a une activité<br />
sur canal 16 et 9 toutes les 2<br />
secondes.<br />
1. Pour sélectionner le mode Triple<br />
Watch, appuyez sur la touche TRI.<br />
TRIPLE apparaît sur l’afficheur.<br />
2. Pour sortir du Triple Watch, appuyez<br />
la touche TRI. TRIPLE disparaît.<br />
• Lorsque vous êtes en mode Triple<br />
Watch, vous pouvez changer<br />
le canal sélectionné en cours en<br />
utilisant les touches ▲ et ▼.<br />
Programmer un canal dans la mémoire.<br />
Avant d’utiliser la fonction scan, vous devez programmer les<br />
canaux dans la mémoire.<br />
1. Sélectionnez le canal à entrer dans<br />
la mémoire en appuyant sur la touche<br />
▲ ou ▼.<br />
2. Appuyez sur la touche MEM pendant 2 secondes pour stocker<br />
le canal. MEM apparaît sur l’afficheur.<br />
3. Appuyez brièvement et successivement sur la touche MEM<br />
pour faire défiler les canaux mémorisés.<br />
Effacer un canal de la mémoire<br />
1. Sélectionnez le canal à annuler de<br />
la mémoire en appuyant sur la touche<br />
▲ ou ▼.<br />
2. Appuyez la touche MEM pendant 2 secondes. MEM disparaît<br />
de l’afficheur.<br />
14
Balayage (scanning)<br />
1. Pour commencer le balayage des<br />
canaux programmés, appuyez la touche<br />
SCAN. SCAN et TRIPLE apparaissent<br />
sur l’afficheur.<br />
2. Pour arrêter le balayage, appuyez encore une fois sur la<br />
touche SCAN. SCAN et TRIPLE disparaissent de l’afficheur.<br />
• Le balayage commence du canal le plus bas au canal le<br />
plus haut et s’arrête lorsqu’il trouve un canal actif. Il reste<br />
sur ce canal jusqu’à ce que l’émission s’arrête. Ensuite il<br />
reprend le balayage après 2 secondes.<br />
• En mode scan, l’appareil active la fonction Triple Watch<br />
automatiquement. Pour désactiver Triple Watch du mode<br />
scan, appuyez sur la touche TRI. TRIPLE disparaît de l’afficheur.<br />
Émission<br />
1. La puissance d’émission peut être<br />
réglée sur 5W ou 1W.<br />
Appuyez la touche 1/5W pour effectuer<br />
le changement, ensuite l’indicateur 5W ou 1W sur l’afficheur<br />
change en conséquence.<br />
2. Pour émettre, appuyez et maintenez la touche PTT (pushto-talk).<br />
TX apparaît sur l’afficheur.<br />
3. Pour retourner en réception, relâchez la touche PTT. TX<br />
disparaît sur l’afficheur.<br />
• Si la touche PTT est appuyée pendant plus de 5 minutes,<br />
TX commence à clignoter et l’émission se termine. Un beep<br />
est émis jusqu’à ce que la touche PTT soit relâchée.<br />
• Si l’indicateur batterie descend sur la marque clignotante<br />
du niveau 1 sur l’afficheur et que la touche PTT est ap-<br />
15
puyée, la radio n’émettra pas et l’icône TX commencera à<br />
clignoter. (Voir ci-dessous la description de l’Indicateur batterie).<br />
Touches éclairées et afficheur<br />
Pour éclairer l’afficheur, appuyez sur n’importe quelle touche<br />
sauf la touche PTT.<br />
• Si vous appuyez sur n’importe quelle touche autre que la<br />
touche PTT lorsque l’afficheur et le clavier sont éclairés, il<br />
reste éclairé pendant 5 secondes de plus.<br />
Activer / Désactiver le Beep des touches<br />
Votre radio émet un beep chaque fois qu’une des touches<br />
(sauf PTT et LOCK) est activée.<br />
Pour activer / désactiver le beep des touches :<br />
Allumez la radio à nouveau en appuyant et maintenant la touche<br />
▲ ou ▼.<br />
Indicateur de batterie<br />
Lorsque l’appareil est allumé, le niveau des batteries est toujours<br />
indiqué sur l’afficheur.<br />
Lorsque la batterie est entièrement<br />
chargée, l’indicateur batterie apparaît<br />
comme suit :<br />
Lorsque la batterie est presque déchargée,<br />
l’indicateur de batterie apparaît<br />
comme suit :<br />
• Lorsque l’indicateur de batterie<br />
tombe au marquage 1 clignotant sur<br />
l’afficheur, la radio reçoit mais<br />
n’émet pas.<br />
16
Verrouillage du clavier<br />
Pour éviter des manipulations accidentelles, vous pouvez<br />
verrouiller le clavier.<br />
1. Appuyez et maintenez le bouton LOCK pendant 2 secondes.<br />
Une double tonalité de confirmation retentit. LOCK s’affiche.<br />
2. Pour déverrouiller le clavier, appuyez et maintenez le bouton<br />
LOCK à nouveau pendant 2 secondes. Une double tonalité<br />
de confirmation retentit. LOCK disparaît de l’afficheur.<br />
• Vous pouvez aussi déverrouiller le clavier en éteignant la<br />
radio et en la rallumant.<br />
17
Dépannage<br />
• Pas assez de portée<br />
Cause : la ligne d’horizon est bloquée.<br />
Þ augmenter la hauteur de l’antenne.<br />
• N’émet pas en 5 Watt mais en 1 Watt<br />
Cause : Faible niveau de batterie.<br />
Þ recharger ou remplacer les batteries.<br />
• N’émet pas durant la charge<br />
Cause : Faible niveau de batterie.<br />
Þ La radio n’est pas conçue pour émettre durant la charge. Le<br />
chargeur ne fournit pas assez de puissance pour l’émission.<br />
Garantie<br />
Ce poste est garanti 3 ans pièces et main d’œuvre dans son pays<br />
d’achat contre tout vice de fabrication reconnu par notre service<br />
technique. Il est recommandé de lire attentivement les conditions<br />
ci-après et de les respecter sous peine d’en perdre le bénéfice.<br />
• Toute intervention effectuée dans le cadre de la garantie sera<br />
gratuite et les frais de réexpédition pris en charge par notre Société.<br />
• Une preuve d’achat doit être jointe obligatoirement avec le poste<br />
à réparer.<br />
• Ne pas procéder à l’installation de votre appareil sans avoir lu ce<br />
manuel d’instructions.<br />
• Aucune pièce détachée ne sera envoyée ni échangée par nos<br />
services au titre de la garantie.<br />
Ne sont pas couverts :<br />
• Le bloc accumulateur.<br />
• Les dommages causés par accident , choc, emballage insuffisant<br />
ou utilisation d’accessoires non conformes<br />
• Les interventions ayant modifié les caractéristiques de conformité,<br />
les réparations ou modifications effectuées par des tiers non<br />
agréés par notre Société.<br />
• Toute ouverture du boîtier annule la garantie.<br />
18
Spécifications<br />
Généralités<br />
Contrôle de fréquence<br />
PLL<br />
Tolérance de fréquence Emission +/- 1.5 P<strong>PM</strong> (à 25 °C)<br />
Réception +/- 1.5 P<strong>PM</strong> (à 25 °C)<br />
Température de fonctionnement de -15° C à 55 °C<br />
Antenne<br />
brin flexible<br />
Microphone<br />
Type électret intégré<br />
Afficheur<br />
LCD<br />
Haut-parleur<br />
8 ohms, 1 Watt<br />
Alimentation Accus Ni-MH 7.2 V 1350<br />
mAh<br />
Dimensions (sans antenne)<br />
144 (H) x 67(L) x 42 (P)<br />
Poids (avec batterie et antenne) 430 g<br />
Emetteur<br />
Gamme de fréquence<br />
156 ~ 158 MHz<br />
Stabilité de fréquence<br />
+/- 10 P<strong>PM</strong><br />
Puissance de sortie<br />
1.0 W & 5 W<br />
Harmoniques 0.03 µW<br />
Consommation de courant<br />
700 mA (1W), 1300 mA (5W)<br />
Récepteur<br />
Type de récepteur<br />
PLL / Convertisseur double<br />
Super hétérodyne<br />
Gamme de fréquence<br />
156 ~ 163 MHz<br />
Sensibilité (20 dB SINAD)<br />
-3 dB µV (emf)<br />
Sensibilité squelch près de 1 µV<br />
Audio<br />
+/- 6 dB 500 à 2000 Hz<br />
Sélectivité du canal adjacent 70 dB @ +/- 25 kHz<br />
Puissance de sortie audio<br />
0.4 W @ 10 % THD<br />
Consommation de courant squelch 40 mA<br />
Audio max 160 mA<br />
Les spécifications indiquées peuvent être modifiées sans préavis.<br />
19
Índice del contenido<br />
Mandos e Indicadores ...................................................... 22<br />
Display LCD ...................................................................... 23<br />
¡Advertencia! ..................................................................... 24<br />
Introducción ...................................................................... 25<br />
Características ............................................................ 25<br />
Servicio Técnico .......................................................... 25<br />
Contenido del embalaje .................................................... 26<br />
Puesta en funcionamiento ................................................ 27<br />
Instalación del soporte ................................................ 27<br />
Fijar la antena ............................................................. 27<br />
Instalar el bloque de acumuladores ............................ 27<br />
Utilice la caja de pilas alcalinas .................................. 28<br />
Sujete el clip de cinturón ............................................. 28<br />
Cargar el bloque de acumuladores ............................. 29<br />
Operación ......................................................................... 30<br />
Poner en funcionamiento y regular el squelch ............ 30<br />
Seleccionar un canal ................................................... 31<br />
Tecla multifunciones Canal 16/9 ................................. 31<br />
Triple Vigilia / Triple Watch .......................................... 32<br />
Programar un canal en memoria................................. 32<br />
Borrar el canal de la memoria ..................................... 32<br />
Barrido ......................................................................... 33<br />
Emisión ........................................................................ 33<br />
Teclas iluminadas y display......................................... 34<br />
Activar / Desactivar el beep de teclas ......................... 34<br />
Indicador del nivel de batería ...................................... 34<br />
Bloqueo del teclado..................................................... 35<br />
Averías .............................................................................. 35<br />
Garantía ............................................................................ 36<br />
Especificaciones ............................................................... 37<br />
Internacional Marine VHF Channel Chart ......................... 56<br />
Declaración de conformidad ............................................. 57<br />
21
Mandos e Indicadores<br />
1. Antena<br />
2. Clip de sujeción en cinturón<br />
3. Toma de carga<br />
4. Batería<br />
5. Clip de desconexión de la batería<br />
6. Tecla PTT (Push to Talk)<br />
7. Tecla triple vigilancia - TRI<br />
8. Tecla bloqueo - LOCK<br />
9. Tecla de selección de potencia de emisión - 1/5 W<br />
10. Micrófono<br />
11. Toma para altavoz micrófono (opcional)<br />
12. Botón de volumen - VOL<br />
13. Botón squelch - SQ<br />
14. Display LCD<br />
15. Tecla de memoria - MEM<br />
16. Tecla SCAN - SCAN<br />
17. Tecla de canal Up - ▲<br />
18. Tecla 16/9 - 16/9<br />
19. Tecla de canal Down - ▼<br />
20. Altavoz<br />
22
Display LCD<br />
A. Indicador de emisión<br />
B. Indicador de potencia TX<br />
C. Display número de canal<br />
D. Indicador de memoria<br />
E. Indicador de scan<br />
F. Indicador de batería<br />
G. Indicador de triple WATCH (vigilia)<br />
H. Indicador bloqueo del teclado<br />
23
¡Advertencia!<br />
• El <strong>PM</strong>-<strong>1000</strong> <strong>WP</strong> será impermeable siempre que la antena,<br />
las caperuzas (jack de carga, jack del micro/HP externo) y<br />
la batería estén correctamente instalados.<br />
• No utilice el emisor de radio sin antena.<br />
• No utilice el emisor en una atmósfera explosiva.<br />
• No deje que los niños utilicen el aparato sin su vigilancia.<br />
• No cargue el pack de las baterías NiMH con otro adaptador<br />
que no sea el que esté diseñado para cargar. El uso de<br />
otro adaptador puede dañar el bloque de baterías o provocar<br />
una explosión.<br />
• Las pilas NiMH tienen que instalarse correctamente.<br />
<strong>President</strong> Antenas Ibérica S.A. Declara bajo su responsabilidad,<br />
que este aparato cumple con lo dispuesto en la Directiva<br />
99/05/CE, del Parlamento Europeo y del consejo de 9 de<br />
marzo de 1999, transpuesta a la legislación española mediante<br />
el Real Decreto 1890/2000, de 20 de noviembre.<br />
¡Aviso!<br />
El usuario debe solicitar una licencia administrativa.<br />
Equipo NO–SOLAS para uso restringido a navegaciones que<br />
no se alejen más de 25 millas de la costa.<br />
24
Introducción<br />
El <strong>PM</strong>-<strong>1000</strong> <strong>WP</strong> es un emisor-receptor VHF portátil estanco.<br />
Es compacto, ligero, robusto y ergonómico.<br />
Para aprovechar al máximo todas las prestaciones del <strong>PM</strong>-<br />
<strong>1000</strong> <strong>WP</strong>, lea detenidamente este manual de utilización antes<br />
de poner en funcionamiento el equipo.<br />
Características<br />
• Estanco (conforme a las especificaciones de estanqueidad<br />
IPX4)<br />
• Modo tripe watch (triple vigilia)<br />
• Arranque desde el canal prioritario (canal 16)<br />
• Memoria programable<br />
• Canal 16/9 mediante una misma tecla<br />
• Barrido de memoria<br />
• Soporte de mesa (es posible también fijarlo en una pared)<br />
• Bloque de acumuladores NiMH recargable<br />
• Economía de batería<br />
• Cierre del teclado<br />
• Teclas y display retro-iluminación<br />
• Clip de cinturón<br />
• Dragona<br />
• Potencia TX 1 W / 5 W<br />
• Caja de pilas alcalinas (pilas alcalinas no incluidas)<br />
Servicio Técnico<br />
Su vendedor GPE puede proporcionarle asistencia e información.<br />
Si su emisora de marina no funciona correctamente,<br />
siga las indicaciones para reparaciones que se encuentran al<br />
final de este manual.<br />
Para obtener asistencia técnica, contacte con GPE. Permita<br />
que un técnico cualificado repare el aparato.<br />
25
Contenido del embalaje<br />
Si uno de estos elementos no está en el envase, contacte<br />
con su proveedor.<br />
26
Puesta en funcionamento<br />
Instalación del soporte<br />
Instale el soporte sobre una mesa o en una pared.<br />
Sobre una mesa:<br />
1. Fije el soporte utilizando los tornillos de<br />
montaje y las arandelas tal como se indica.<br />
A una pared:<br />
1. Cuelgue el soporte a la pared e introduzca<br />
los dos tornillos de montaje en los agujeros<br />
más grandes del soporte.<br />
2. Empuje el soporte hacia abajo hasta que<br />
quede bien acuñado.<br />
3. Cuando quite el soporte de la pared, afloje<br />
los tornillos y empuje el soporte hacia arriba.<br />
Fijar la antena<br />
Ponga la antena sobre la radio tal como se indica.<br />
Compruebe que la antena esté bien fijada.<br />
Instalar el bloque de acumuladores<br />
1. Baje el seguro y quite la caja de pilas<br />
alcalinas. A continuación coloque el bloque<br />
de baterías recargables.<br />
2. Bloquee el bloque de baterías y compruebe<br />
que está correctamente fijado en<br />
el aparato.<br />
27
Utilice la caja de pilas alcalinas<br />
Si fuera necesario, puede utilizar la caja de<br />
pilas con pilas alcalinas AA (no incluidas) en<br />
lugar del bloque de baterías.<br />
Para instalar las pilas:<br />
1. Extraiga la tapa de la caja de pilas al tirar<br />
de las dos mitades.<br />
2. Instale 6 pilas alcalinas AA (no incluidas)<br />
en la caja de pilas.<br />
Respete las polaridades (+/-).<br />
3. Vuelva a colocar la tapa de la caja de pilas.<br />
Sujete el clip de cinturón<br />
1. Sujete el clip de sujeción en cinturón<br />
en la dirección de la ilustración.<br />
2. Aplíquelo a la fijación de la parte<br />
posterior de la radio. A continuación,<br />
deslícelo hacia arriba.<br />
3. El clip de sujeción en cinturón estará<br />
bien fijado cuando oiga un clic.<br />
4. Para quitar el clip de sujeción en<br />
cinturón de la radio, gírelo con la punta<br />
hacia abajo y deslícelo hacia arriba.<br />
28
Cargar el bloque de acumuladores<br />
Su radio marina se alimenta por un bloque de acumuladores<br />
NiMH especialmente diseñado.<br />
Antes de utilizar el <strong>PM</strong>-<strong>1000</strong> <strong>WP</strong>, cargue el bloque de acumuladores<br />
NiMH durante 16 horas sin interrupción con el cargador<br />
de pared.<br />
1. Coloque el <strong>PM</strong>-<strong>1000</strong> <strong>WP</strong> en el soporte. Compruebe<br />
que la radio esté en posición OFF.<br />
2. Conecte el conector del cargador de pared en<br />
la toma de 220 V y el otro conector en el jack de<br />
los acumuladores NiMH en la parte posterior del<br />
<strong>PM</strong>-<strong>1000</strong> <strong>WP</strong>.<br />
3. Cargue la batería durante 16 horas.<br />
• Tras 16 horas sin interrupción, la carga ya está terminada.<br />
• Remplace la caperuza de goma después de haber cargado<br />
para asegurar la impermeabilidad.<br />
• La radio no cargará la batería si está encendida y recibe<br />
mensajes.<br />
• La toma sirve sólo para cargar. Si el nivel de la batería es<br />
bajo, la radio necesita cargarse antes de su utilización.<br />
29
Operación<br />
• Consulte “Mandos e indicadores” (página 22) para las posiciones<br />
de los botones y de las teclas.<br />
• Cuando encienda el <strong>PM</strong>-<strong>1000</strong> <strong>WP</strong> por primera vez, el canal<br />
16 y la frecuencia para emergencias, seguridad y llamada<br />
se ajustan automáticamente.<br />
• Cuando pulse cualquier tecla (excepto las teclas PTT y<br />
LOCK), se emite un tono corto.<br />
Poner en funcionamiento y regular el squelch<br />
1. Antes de encender el aparato, gire<br />
el botón squelch SQ totalmente en el<br />
sentido contrario de las agujas del<br />
reloj.<br />
2. A continuación, encienda el aparato<br />
al girar el botón volume/power<br />
VOL en el sentido de las agujas del<br />
reloj hasta oír un silbido.<br />
3. Gire el botón SQ en el sentido de<br />
las agujas del reloj hasta que pare el<br />
silbido.<br />
Utilice este botón para ajustar el nivel<br />
deseado de squelch. Piense que<br />
el botón squelch es como una puerta<br />
de frecuencia que controla el acceso<br />
de las señales débiles o fuertes<br />
en función de su ajuste.<br />
• Para escuchar una estación débil o lejana, gire el botón en<br />
el sentido contrario a las agujas del reloj. Si hay<br />
interferencias en la recepción, gírelo en el sentido de las<br />
agujas del reloj para eliminar esas interferencias.<br />
30
• Si el botón squelch se regula de manera que se oye continuamente<br />
un silbido, el aparato no podrá escanear correctamente.<br />
4. Para apagar en aparato, gire el botón VOL en el sentido<br />
contrario a las agujas del reloj hasta que oiga un clic.<br />
Seleccionar un canal<br />
1. Encienda el <strong>PM</strong>-<strong>1000</strong> <strong>WP</strong>.<br />
2. Para seleccionar un canal superior,<br />
pulse la tecla ▲.<br />
SUBIR<br />
3. Para seleccionar un canal inferior,<br />
pulse la tecla ▼.<br />
Para sintonizar diferentes canales,<br />
mantenga pulsada la tecla ▲ o ▼ durante<br />
más de un segundo.<br />
BAJAR<br />
Tecla multifunciones Canal 16/9<br />
Ejemplo: Cuando esté en el canal 20<br />
y quiera controlar el canal 16 o el canal<br />
9:<br />
1. Ahora está en el canal 20.<br />
2. Para escuchar el canal 16, pulse la<br />
tecla 16/9.<br />
3. Para escuchar el canal 9, pulse de<br />
nuevo la tecla 16/9.<br />
4. Para volver al canal 20, pulse de<br />
nuevo la tecla 16/9.<br />
31
Triple Vigilia / Triple Watch<br />
El modo triple vigilia controla los<br />
canales 16 y 9 mientras que Vd.<br />
escucha el canal seleccionado en<br />
curso. La radio marina controla la<br />
actividad del canal 16 y 9 cada 2<br />
segundos.<br />
1. Para seleccionar el modo Triple<br />
Vigilia, pulse la tecla TRI. Aparecerá<br />
TRIPLE en el display.<br />
2. Para salir de Triple vigilia, pulse<br />
la tecla TRI. Desaparecerá TRIPLE.<br />
• En modo Triple Vigilia, es posible<br />
cambiar el canal en curso pulsando<br />
la tecla ▲ o ▼.<br />
Programar un canal en memoria<br />
Antes de utilizar una función de barrido, debe programar los<br />
canales en memoria.<br />
1. Seleccionar el canal que desee<br />
memorizar presionando la tecla ▲ o<br />
▼.<br />
2. Presione la tecla MEM durante 2 segundos para memorizar<br />
el canal. MEM aparece en el display.<br />
3. Presione la tecla MEM brevemente y sucesivamente para<br />
alcanzar a los canales memorizados.<br />
Borrar el canal de la memoria<br />
1. Seleccionar el canal que se desee<br />
borrar de la memoria presionando la<br />
tecla ▲ o ▼.<br />
2. Presione la tecla MEM durante 2 segundos. MEM desaparece<br />
del display.<br />
32
Barrido<br />
1. Para iniciar el barrido de los canales<br />
programados, presione sobre la<br />
tecla SCAN. SCAN y TRIPLE aparecen<br />
en el display.<br />
2. Para detener el barrido, presione una vez más sobre el<br />
botón SCAN. SCAN y TRIPLE desaparecen del display.<br />
• El barrido empieza a partir del canal más bajo hasta el más<br />
elevado y se detiene cuando encuentra un canal activo.<br />
Permanece en el canal hasta el fin de la emisión, y en un<br />
plazo de tres segundo reinicia el barrido.<br />
• En función scan el equipo activa de forma automática la función<br />
Triple Vigilia. Para desactivar esta función a partir del<br />
modo scan, presione la tecla TRI. TRIPLE desaparece del<br />
display.<br />
Emisión<br />
1. La potencia de emisión puede<br />
regularse en 5W o 1W.<br />
Pulse la tecla 1/5 W para realizar la<br />
modificación, en display cambia en<br />
1W o 5W según se haya modificado.<br />
2. Para emitir, presione y mantenga la tecla PTT. Aparece TX.<br />
3. Para regrasar a recepción, suelte la tecla PTT. TX desaparece<br />
del display.<br />
• Si se presiona la tecla PTT durante más de 5 minutos, TX<br />
empieza a parpadear y la emisión finaliza. La confirmación<br />
sonora de fin de emisión es audible hasta que se deje de<br />
presionar la tecla PTT.<br />
33
• Si el indicador del nivel de batería cae hasta el nivel 1 en el<br />
display y si se presiona la tecla PTT, la radio no emitirá y<br />
TX parpadeará (véase la descripción del Indicador del nivel<br />
de batería).<br />
Teclas iluminadas y display<br />
Para iluminar el display, presione cualquier tecla salvo la de<br />
PTT.<br />
• Si Vd. pulsa cualquier otra tecla que no sea la PTT cuando<br />
el display está iluminado éste se mantiene con luz durante<br />
5 segundos más.<br />
Activar / Desactivar el beep de teclas<br />
La radio emite un beep cada vez que se activa alguna de las<br />
teclas (excepto PTT y LOCK).<br />
Para activar / desactivar el beep de teclas:<br />
Encienda la radio de nuevo al mantener pulsada la tecla ▲ o<br />
▼.<br />
Indicador del nivel de batería<br />
Cuando el equipo está encendido, el nivel de batería aparece<br />
siempre en el display.<br />
Cuando la batería está cargada, el<br />
indicador del nivel de carga aparece<br />
como sigue:<br />
Cuando la batería está casi descargada,<br />
el indicador del nivel de carga<br />
aparece como sigue:<br />
• Cuando el indicador del nivel de carga cae al nivel 1 en el<br />
display la radio recibe pero no emite.<br />
34
Bloqueo del teclado<br />
Para evitar las manipulaciones accidentales es posible precintar<br />
el teclado.<br />
1. Pulse y mantenga la presión sobre la tecla LOCK durante<br />
1.5 segundos. El equipo emitirá dos veces dos bip bip para<br />
confirmar que el teclado está bloqueado y LOCK aparece en<br />
el display.<br />
2. Para desbloquear el teclado, presione y mantenga la presión<br />
sobre la tecla LOCK nuevamente durante 1,5 segundos.<br />
El emisor emitirá dos veces unos bip bip para confirmar<br />
que el teclado está desprecintado y LOCK desaparecerá.<br />
• También es posible desbloquear el teclado apagando la<br />
radio y conectándola de nuevo.<br />
Averías<br />
• No hay suficiente alcance<br />
Causa: la línea del horizonte está bloqueada.<br />
Þ Aumentar la altura de la antena.<br />
• No emite con 5 W pero sí con 1 W.<br />
Causa: Nivel bajo de batería.<br />
Þ Recargar o cambiar las baterías.<br />
• No emite durante la carga.<br />
Causa: Nivel bajo de batería.<br />
Þ La radio no está diseñada para emitir durante la carga.<br />
El cargador no proporciona suficiente potencia para la<br />
emisión.<br />
35
Garantía<br />
Este aparato tiene garantizados 3 años de recambios y mano<br />
de obra en el país de compra por cualquier defecto de fabricación<br />
reconocido por nuestro servicio técnico. Se recomienda<br />
leer atentamente las condiciones a continuación expuestas<br />
y respetarlas, ya que si no podría perder todos los beneficios<br />
de la garantía.<br />
• Toda intervención efectuada en el marco de la garantía será<br />
gratuita y nuestra Sociedad se hará cargo de los gastos de<br />
reexpedición.<br />
• Se debe adjuntar obligatoriamente una prueba de compra<br />
con el aparato que se deba reparar.<br />
• No proceda a instalar el aparato sin haber leído este manual<br />
de instrucciones.<br />
• Nuestros servicios, a título de la garantía, no enviarán ni<br />
cambiarán ninguna pieza suelta.<br />
No están cubiertos:<br />
• El bloque acumulador.<br />
• Los daños causados por accidente, choque, embalaje insuficiente<br />
o utilización de accesorios que no sean originales.<br />
• Las intervenciones que hayan modificado las características<br />
originales, las reparaciones o modificaciones efectuadas<br />
por terceros no reconocidos por nuestra Sociedad.<br />
• Toda apertura de la caja anula la garantía.<br />
36
Especificaciones<br />
Generalidades<br />
Control de frecuencia<br />
PLL<br />
Tolerancia de frecuencia Emisión +/-1.5 P<strong>PM</strong> (a 25 ºC)<br />
Recepción +/- 1.5 P<strong>PM</strong> (a 25 ºC)<br />
Temperatura de funcionamiento De -15 ºC a 55 ºC<br />
Antena<br />
Cable flexible<br />
Micrófono<br />
Tipo electret integrado<br />
Display<br />
Cristal líquido<br />
Altavoz<br />
8 Ω, 1 W<br />
Alimentación Baterías NiMH 7.2 V 1350<br />
mAh<br />
Dimensiones (sin antena)<br />
144 (A) x 67 (L) x 42 (P)<br />
Peso (con batería y antena)<br />
430 g<br />
Emisor<br />
Gama de frecuencia<br />
156 ˜ 158 MHz<br />
Estabilidad de frecuencia<br />
+/- 10 P<strong>PM</strong><br />
Potencia de salida<br />
1.0 W y 5 W<br />
Armónicos 0.03 µW<br />
Consumo de corriente<br />
700 mA (1W), 1300 mA (5W)<br />
Receptor<br />
Tipo de receptor<br />
PLL / Convertidor doble<br />
Súper heterodino<br />
Gama de frecuencia<br />
156 ~ 163 MHz<br />
Sensibilidad (20 dB SINAD)<br />
-3 dB µV (emf)<br />
Sensibilidad squelch Casi 1 µV<br />
Audio +/- 6 dB 500 a 2000 Hz<br />
Selectividad del canal adyacente 70 dB @ +/- 25 kHz<br />
Potencia de salida audio<br />
0.4 W @ 10 % THD<br />
Consumo de corriente<br />
Squelch 40 Ma<br />
Audio máx. 160 mA<br />
Las especificaciones son sujetas a modificaciones sin previo aviso.<br />
37
Contents<br />
Controls and Indications ................................................... 40<br />
LCD Display ...................................................................... 41<br />
Warning! ........................................................................... 42<br />
Introduction ....................................................................... 43<br />
Features ...................................................................... 43<br />
Technical Support and Service ................................... 43<br />
Included in Your Package ................................................. 44<br />
Getting Started .................................................................. 45<br />
Mounting the Cradle .................................................... 45<br />
Attaching the Antenna ................................................. 45<br />
Attaching the Rechargeable Battery Pack .................. 45<br />
Using the Alkaline Battery Case .................................. 46<br />
Attaching the Beltclip ................................................... 46<br />
Charging the Battery Pack .......................................... 47<br />
Operation .......................................................................... 48<br />
Turning On the Unit and Setting Squelch .................... 48<br />
Selecting a Channel .................................................... 49<br />
One-touch Channel 16/9 ............................................. 49<br />
Triple Watch ................................................................ 49<br />
Programming a Channel into Memory ........................ 50<br />
Deleting a Channel from Memory ............................... 50<br />
Scanning ..................................................................... 51<br />
Transmitting ................................................................. 51<br />
Lighted Keys and Display ........................................... 52<br />
Turning and reactivating the Key Beep ....................... 52<br />
Battery Indicator .......................................................... 52<br />
Key Lock...................................................................... 53<br />
Troubleshooting ................................................................ 53<br />
Warranty ........................................................................... 54<br />
Specifications .................................................................... 55<br />
International Marine VHF Channel Chart.......................... 56<br />
Certificate of conformity .................................................... 57<br />
39
Controls and Indications<br />
1 Antenna<br />
2 Belt Clip<br />
3 Adapter Jack<br />
4 Battery<br />
5 Battery Release Clip<br />
6 PTT (Push to Talk) Key<br />
7 Triple Watch Button - TRI<br />
8 Lock Button - LOCK<br />
9 TX Power Button - 1/5W<br />
10 Microphone<br />
11 Speaker MIC (Optional) Jack<br />
12 Volume/Power Knob - VOL<br />
13 Squelch Knob - SQ<br />
14 LCD Display<br />
15 Memory Button - MEM<br />
16 Scan Button - SCAN<br />
17 Channel Up Button ▲<br />
18 16/9 Button - 16/9<br />
19 Channel Down Button ▼<br />
20 Speaker<br />
40
LCD Display<br />
A. Transmit Indicator<br />
B. TX Power Indicator<br />
C. Channel Number Display<br />
D. Memory Indicator<br />
E. Scan Indicator<br />
F. Battery Indicator<br />
G. Triple Watch Indicator<br />
H. Key Lock Indicator<br />
41
Warning!<br />
• The <strong>PM</strong>-<strong>1000</strong> <strong>WP</strong> is waterproof only when the antenna,<br />
rubber caps (adapter jack, speaker mic jack) and the battery<br />
are properly attached.<br />
• Do not operate the transmitter of any radio equipment unless<br />
all the Radio Frequency (RF) connectors are secure<br />
and any open connectors are properly terminated.<br />
• Do not operate the transmitter of any radio equipment near<br />
electrical blasting caps or in an explosive atmosphere.<br />
• Do not let children operate any transmitter-equipped radio<br />
equipment without proper supervision.<br />
• Do not charge the Ni-MH Battery Pack used in this equipment<br />
with any Adapter other than the one designed to charge<br />
this Battery Pack. Using another Adapter may damage the<br />
Battery Pack or cause the Battery Pack to explode.<br />
• Ni-MH batteries must be disposed of properly.<br />
42
Introduction<br />
The <strong>PM</strong>-<strong>1000</strong> <strong>WP</strong> is a waterproof, portable two-way VHF transceiver.<br />
It is compact, lightweight, rugged and fits easily in your<br />
hand.<br />
To ensure that you get the most from the <strong>PM</strong>-<strong>1000</strong> <strong>WP</strong> features,<br />
please read this operating guide carefully before using<br />
the unit.<br />
Features<br />
• Waterproof (meets IPX4 waterproof specifications)<br />
• Triple Watch Mode<br />
• Priority Channel Startup (Channel 16)<br />
• Programmable Memory<br />
• One-Touch Channel 16/9<br />
• Memory Scan<br />
• Table-Top Cradle (can also be wall-mounted)<br />
• Rechargeable Ni-MH Battery Pack<br />
• Battery Save Operation<br />
• Key Lock<br />
• Back-Lit Keys and Display<br />
• Belt Clip<br />
• Wrist Strap<br />
• TX Power 1W/5W<br />
• Alkaline Battery Case (Alkaline batteries are not included)<br />
Technical Support and Service<br />
Your GPE dealer can provide you with sales assistance and<br />
information. If your marine radio does not perform properly,<br />
follow the troubleshooting tips in the back of this operating<br />
guide. For technical support contact GPE. Be sure that a qualified<br />
technician services your radio equipment.<br />
43
Included in Your Package<br />
If any of these items are missing from the box, contact your<br />
Dealer.<br />
44
Getting Started<br />
Mounting the Cradle to either a counter or wall.<br />
To counter:<br />
1. Attach the Cradle using the mounting<br />
screws and washers as follows.<br />
To wall:<br />
1. Apply the Cradle to the wall and insert the<br />
two mounting screws into the larger holes<br />
of the Cradle.<br />
2. Push down the Cradle until it is firmly<br />
seated.<br />
3. When you remove the Cradle from the<br />
wall, loosen the screws and push the Cradle<br />
up.<br />
Attaching the Antenna<br />
Apply the antenna to the radio as shown.<br />
Be sure the antenna is firmly seated.<br />
Attaching the Rechargeable Battery Pack<br />
1. Snap the battery release clip out and<br />
remove the alkaline battery case. Then<br />
place the rechargeable battery pack<br />
onto the back of the radio. It will only fit<br />
in one way.<br />
2. Snap the battery release clip until it<br />
clicks. Be sure the battery pack fits tightly<br />
against the body.<br />
45
Using the Alkaline Battery Case<br />
When needed, you can use the battery case with Alkaline AA<br />
batteries (not included) instead of the rechargeable<br />
battery pack.<br />
To install the batteries:<br />
1. Remove the battery case cover by pulling<br />
the 2 halves apart applying your fingers to<br />
the projections.<br />
2. Install 6 AA Alkaline batteries (not included)<br />
into the battery case.<br />
Be certain to follow the + and - symbols in the<br />
compartment.<br />
3. Replace the battery case cover as follows<br />
until it clicks into place.<br />
Attaching the Beltclip<br />
1. Hold the beltclip in the direction as<br />
illustrated.<br />
2. Apply it to the hanger piece on the<br />
back of the radio. Then slide it up.<br />
3. When you hear a click, the beltclip<br />
is firmly attached.<br />
4. To take the beltclip off the radio, turn<br />
it upside down and slide it up.<br />
46
Charging the Battery Pack<br />
Your marine radio is powered by a specially designed Ni-MH<br />
battery pack.<br />
Before operating the <strong>PM</strong>-<strong>1000</strong> <strong>WP</strong>, charge the Ni-MH battery<br />
pack for 16 hours without interruption with the Adapter.<br />
1. Place the <strong>PM</strong>-<strong>1000</strong> <strong>WP</strong> in the Cradle. Make sure<br />
your radio is OFF.<br />
2. Plug one end of the AC adapter into the wall<br />
outlet and the other end into the Adapter jack on<br />
the back of the <strong>PM</strong>-<strong>1000</strong> <strong>WP</strong>.<br />
3. Charge the battery for 16 hours.<br />
• After 16 hours without interruption, charging is<br />
completed.<br />
• Be sure to replace the rubber cap after charging<br />
in order to secure the waterproof seal.<br />
• The radio will not charge the battery while on and receiving<br />
incoming voice traffic.<br />
• The jack is for charging only. If the battery level is low, the<br />
radio needs to charge before use.<br />
47
Operation<br />
• See “Controls and Indications” (page 40) for button, knob,<br />
and key positions.<br />
• When you turn On your <strong>PM</strong>-<strong>1000</strong> <strong>WP</strong> just after purchasing,<br />
it is automatically tuned to channel 16, frequency for distress,<br />
safety, and calling.<br />
• When you press any button (except PTT and LOCK key), a<br />
short tone sounds.<br />
Turning On the Unit and Setting Squelch<br />
1. Before you turn On the unit, turn the squelch SQ knob fully<br />
counterclockwise.<br />
2. Then, turn On the unit by turning<br />
the Volume/Power VOL knob clockwise<br />
until you hear a hissing sound.<br />
3. Turn the SQ knob clockwise, just<br />
until the hissing sound stops. Use the<br />
knob to adjust to the desired squelch<br />
level. Think of the squelch control as<br />
a frequency gate which controls access<br />
to weak or strong signals depending<br />
on its setting.<br />
• To listen to a weak or distant station,<br />
turn the knob counterclockwise.<br />
If reception is poor, turn it<br />
clockwise to cut out weak transmissions.<br />
• If the squelch control is adjusted so that you continually<br />
hear a hissing sound, the unit will not scan properly.<br />
4. To turn Off the unit, turn the VOL knob counterclockwise<br />
until it clicks.<br />
48
Selecting a Channel<br />
1. Turn On your <strong>PM</strong>-<strong>1000</strong> <strong>WP</strong>.<br />
2. To select a higher channel, press<br />
the ▲ button.<br />
UP<br />
3. To select a lower channel, press the<br />
▼ button.<br />
• To change the channel continuously,<br />
press and hold the ▲ or ▼ button<br />
for more than 1 second.<br />
DOWN<br />
One-touch Channel 16/9<br />
Example: While you are monitoring<br />
channel 20, you want to check channel<br />
16 or channel 9.<br />
1. You are now on channel 20.<br />
2. To monitor channel 16, press the<br />
16/9 button.<br />
3. To monitor channel 9, press the<br />
16/9 button again.<br />
4. To return to channel 20, press the<br />
16/9 button again.<br />
Triple Watch<br />
Triple Watch mode monitors channels 16 and 9 for a signal<br />
while you listen to the currently selected channel. The marine<br />
radio checks channel 16 and 9 for activity every 2 seconds.<br />
49
1. To select Triple Watch mode,<br />
press the TRI button. TRIPLE appears<br />
on the display.<br />
2. To exit from Triple Watch, press<br />
TRI button. TRIPLE disappears.<br />
• While in Triple Watch mode, you<br />
can change the currently selected<br />
channel using the ▲ or ▼ button.<br />
Programming a Channel into Memory<br />
Before using the scanning feature, you have to program channels<br />
into memory.<br />
1. Select the channel to enter into memory by pressing the ▲<br />
or ▼ button.<br />
2. Press the MEM button for two seconds<br />
to store the channel. MEM appears<br />
on the display.<br />
3. Press shortly and successively the MEM button to move<br />
into the memorized channels.<br />
Deleting a Channel from Memory<br />
1. Select the channel to delete from<br />
memory by pressing the ▲ or ▼ button.<br />
2. Press the MEM button for two seconds. MEM disappears<br />
from the display.<br />
50
Scanning<br />
1. To begin scanning the programmed<br />
channels, press the SCAN button.<br />
SCAN and TRIPLE appear on the display.<br />
2. To stop scanning, press the SCAN button once more. SCAN<br />
and TRIPLE disappear from the display.<br />
• Scanning starts from the lowest to highest channel and stops<br />
when it finds an active channel. It remains on that channel<br />
until the transmission ends, then resumes scanning after a<br />
2 second delay period.<br />
• When in the scan mode, the unit automatically activates<br />
the Triple Watch feature. To deactivate Triple Watch from<br />
the scanning mode, press TRI button. TRIPLE disappears<br />
from the display.<br />
Transmitting<br />
1. Transmission power can be set to<br />
either 5W or 1W.<br />
Press the 1/5W button to make the<br />
change, then the 5W or the 1W indicator<br />
on the display changes accordingly.<br />
2. To transmit, press and hold the PTT (push-to-talk) key. TX<br />
appears on the display.<br />
3. To return to receive, release the PTT key. TX disappears<br />
from the display.<br />
• If the PTT key is pressed for more than 5 minutes, TX starts<br />
blinking and the transmission ends. The TX time out tone<br />
will sound until the PTT key is released.<br />
• If the battery indicator drops to the blinking 1-mark level on<br />
the display and the PTT key is pressed, the radio will not<br />
51
transmit and the TX icon starts blinking. (Refer to the description<br />
of the Battery Indicator on this page.)<br />
Lighted Keys and Display<br />
To light the display, press any key excluding the PTT key.<br />
• If you press any button other than the PTT key while the<br />
display and keypad are illuminated, it remains illuminated<br />
for another 5 seconds.<br />
Turning and reactivating the Key Beep<br />
Your radio emits a beep each time one of the buttons (except<br />
for the PTT and LOCK key) is pressed.<br />
To turn off or reactivate the Key beep:<br />
Turn the radio on again while pressing and holding the ▲ or<br />
▼ buttons.<br />
Battery Indicator<br />
When the unit is On, battery power is<br />
always indicated on the display.<br />
When the battery is fully charged, the<br />
battery indicator appears as follows:<br />
When the battery is nearly discharged,<br />
the battery indicator appears<br />
as follows:<br />
• When the battery indicator drops to<br />
the blinking 1-mark level on the display,<br />
the radio will receive but will<br />
not transmit.<br />
52
Key Lock<br />
To prevent accidental entries, you can lock the keypad.<br />
1. Press and hold the LOCK button for 2 seconds. A double<br />
confirmation tone sounds. LOCK appears on the display.<br />
2. To unlock the keypad, press and hold the LOCK button<br />
again for 2 seconds. A double confirmation tone sounds. LOCK<br />
disappears from the display.<br />
• You can also unlock the keypad by turning the radio Off and<br />
then On again.<br />
Troubleshooting<br />
• Not enough range<br />
Cause: Line of sight blocked<br />
Þ Increase antenna height.<br />
• Will not transmit on 5 watt range but will transmit on<br />
the 1 watt range.<br />
Cause: Low voltage<br />
Þ Recharge or replace the batteries.<br />
• Will not transmit while charging.<br />
Cause: Low voltage<br />
ÞThe radio is not designed to transmit while charging.<br />
ÞDC or AC adapter does not supply enough power for transmitting.<br />
• Battery will not charge.<br />
Cause: Low voltage<br />
ÞDo not to transmit while charging. The adaptor does not<br />
supply enough power for transmitting.<br />
53
Warranty<br />
This transceiver has a 3 years warranty for materials and<br />
workmanship in its country of purchase against any manufacturing<br />
defect recognized by our technical department. It is recommended<br />
to read carefully following conditions and to respect<br />
them in order not to loose it.<br />
• Any repair under warranty will be free of charge and the<br />
transport costs for sending back will be on charge of our<br />
company.<br />
• A proof of purchase must compulsorily be added to the transceiver<br />
in need of repair.<br />
• Don’t install your transceiver without having read this instructions<br />
manual.<br />
• Our technical department won’t send nor exchange any<br />
spare parts as part of warranty.<br />
Are not covered<br />
• The battery pack.<br />
• Damages caused by accident , shock , inadequate packing<br />
or the use of accessories that are not in conformity.<br />
• Interventions that modified the conformity features, repairs<br />
or modifications done by third parties which are not agreed<br />
by our company.<br />
• Any opening of the housing cancels the warranty.<br />
54
Specifications<br />
General<br />
Freq. Control<br />
PLL<br />
Freq. Tol. Transmit ±1.5 P<strong>PM</strong> (at 25°C)<br />
Receive ±1.5 P<strong>PM</strong> (at 25°C)<br />
Oper. Temp. -15°C to 55°C<br />
Antenna<br />
Flexible Whip<br />
Microphone<br />
Built-in Electret type<br />
Display<br />
Liquid Crystal Display<br />
Speaker<br />
8 Ω, 1 Watt<br />
Power Source<br />
Rechargeable Ni-MH Battery Pack<br />
7.2V 1350 mAh<br />
Size (without antenna) 5.8 (H) x 2.7 (W) x 1.68 (D) inch<br />
144 (H) x 67 (W) x 42 (D) mm<br />
Weight (w/battery & anten.) 15.2 oz (430g)<br />
Transmitter<br />
Frequency Range<br />
156~158 MHz<br />
Frequency Stability<br />
±10 P<strong>PM</strong><br />
Power Output<br />
1.0 W & 5 W<br />
Spurious Emissions 0.03 µW<br />
Current Drain<br />
700 mA (1W), 1300 mA (5W)<br />
Receiver<br />
Receiver Type Double Conversion Super Heterodyne Phase<br />
Locked Loop system for Local Oscillator<br />
Frequency Range<br />
156~163 MHz<br />
Sensitivity (20 dB SINAD) -3 dB µV (emf)<br />
Squelch Sensitivity Tight 1 µV<br />
Audio<br />
±6 dB 500 to 2000Hz<br />
Frequency Response<br />
Adjacent Channel Selectivity 70 dB @ ±25 kHz<br />
Audio Output Power<br />
0.4 W @ 10 % THD<br />
Current Drain Squelched 40 mA<br />
Max. Audio 160 mA<br />
Specifications shown are typical and subject to change without notice.<br />
55
International Marine VHF Channel Chart<br />
Chl Transmitter Receiver Mode Ship Ship<br />
Frequency Frequency S/D To To<br />
Ship<br />
Shore<br />
1 ........................ 156.050 ................... 160.650 ................. D ................ YES ................. YES<br />
2 ........................ 156.100 ................... 160.700 ................. D ................ YES ................. YES<br />
3 ........................ 156.150 ................... 160.750 ................. D ................ YES ................. YES<br />
4 ........................ 156.200 ................... 160.800 ................. D ................ YES ................. YES<br />
5 ........................ 156.250 ................... 160.850 ................. D ................ YES ................. YES<br />
6 ........................ 156.300 ................... 156.300 ................. S ................ YES .................. NO<br />
7 ........................ 156.350 ................... 160.950 ................. D ................ YES ................. YES<br />
8 ........................ 156.400 ................... 156.400 ................. S ................ YES .................. NO<br />
9 ........................ 156.450 ................... 156.450 ................. S ................ YES ................. YES<br />
10 ....................... 156.500 ................... 156.500 ................. S ................ YES ................. YES<br />
11 ....................... 156.550 ................... 156.550 ................. S ................ YES ................. YES<br />
12 ....................... 156.600 ................... 156.600 ................. S ................. NO .................. YES<br />
13 ....................... 156.650 ................... 156.650 ................. S ................ YES ................. YES<br />
14 ....................... 156.700 ................... 156.700 ................. S ................ YES ................. YES<br />
15 ....................... 156.750 ................... 156.750 ................. S ................ YES ................. YES<br />
16 ....................... 156.800 ................... 156.800 ................. S ................ YES ................. YES<br />
17 ....................... 156.850 ................... 156.850 ................. S ................ YES ................. YES<br />
18 ....................... 156.900 ................... 161.500 ................. D ................ YES ................. YES<br />
19 ....................... 156.950 ................... 161.550 ................. D ................. NO .................. YES<br />
20 ....................... 157.000 ................... 161.600 ................. D ................. NO .................. YES<br />
21 ....................... 157.050 ................... 161.650 ................. D ................. NO .................. YES<br />
22 ....................... 157.100 ................... 161.700 ................. D ................. NO .................. YES<br />
23 ....................... 157.150 ................... 161.750 ................. D ................. NO .................. YES<br />
24 ....................... 157.200 ................... 161.800 ................. D<br />
25 ....................... 157.250 ................... 161.850 ................. D<br />
26 ....................... 157.300 ................... 161.900 ................. D<br />
27 ....................... 157.350 ................... 161.950 ................. D<br />
28 ....................... 157.400 ................... 162.000 ................. D<br />
60 ....................... 156.025 ................... 160.625 ................. D<br />
61 ....................... 156.075 ................... 160.675 ................. D<br />
62 ....................... 156.125 ................... 160.725 ................. D<br />
63 ....................... 156.175 ................... 160.775 ................. D<br />
64 ....................... 156.225 ................... 160.825 ................. D<br />
65 ....................... 156.275 ................... 160.875 ................. D ................ YES ................. YES<br />
66 ....................... 156.325 ................... 160.925 ................. D ................ YES ................. YES<br />
67 ....................... 156.375 ................... 156.375 ................. S ................ YES .................. NO<br />
68 ....................... 156.425 ................... 156.425 ................. S ................ YES ................. YES<br />
69 ....................... 156.475 ................... 156.475 ................. S ................ YES ................. YES<br />
70 ....................... RX only ................... 156.525 ................. S ................ YES .................. NO<br />
71 ....................... 156.575 ................... 156.575 ................. S ................ YES ................. YES<br />
72 ....................... 156.625 ................... 156.625 ................. S ................ YES .................. NO<br />
73 ....................... 156.675 ................... 156.675 ................. S ................ YES ................. YES<br />
74 ....................... 156.725 ................... 156.725 ................. S ................ YES ................. YES<br />
75 ....................... 156.775 ................... 156.775<br />
76 ....................... 156.825 ................... 156.825<br />
77 ....................... 156.875 ................... 156.875 ................. S ................ YES .................. NO<br />
78 ....................... 156.925 ................... 161.525 ................. D ................ YES ................. YES<br />
79 ....................... 156.975 ................... 161.575 ................. D ................ YES ................. YES<br />
80 ....................... 157.025 ................... 161.625 ................. D ................ YES ................. YES<br />
81 ....................... 157.075 ................... 161.675 ................. D ................ YES ................. YES<br />
82 ....................... 157.125 ................... 161.725 ................. D ................ YES ................. YES<br />
83 ....................... 157.175 ................... 161.775 ................. D ................ YES ................. YES<br />
84 ....................... 157.225 ................... 161.825 ................. D ................ YES ................. YES<br />
85 ....................... 157.275 ................... 161.875 ................. D ................. NO .................. YES<br />
86 ....................... 157.325 ................... 161.925 ................. D ................. NO .................. YES<br />
87 ....................... 157.375 ................... 157.375 ................. S<br />
88 ....................... 157.425 ................... 157.425 ................. S<br />
56
DÉCLARATION DE CONFORMITÉ<br />
DECLARACIÓN DE CONFORMIDAD<br />
CERTIFICATE OF CONFORMITY<br />
Nous, GROUPE PRESIDENT ELECTRONICS, Route de Sète, BP 100 –<br />
34540 Balaruc – <strong>FR</strong>ANCE,<br />
Nosotros, GROUPE PRESIDENT ELECTRONICS, Route de Sète, BP 100<br />
– 34540 Balaruc – <strong>FR</strong>ANCIA,<br />
We, GROUPE PRESIDENT ELECTRONICS, Route de Sète, BP 100 – 34540<br />
Balaruc – <strong>FR</strong>ANCE,<br />
Déclarons, sous notre seule responsabilité que l’émetteur-récepteur<br />
de radiocommunication VHF Marine,<br />
Declaramos bajo nuestra propia responsabilidad que el emisor receptor de<br />
VHF para radiocomunicaciones marítimas,<br />
Declare, on our own responsibility that the Marine VHF radio-communication<br />
transceiver,<br />
Marque / Marca / Brand : PRESIDENT<br />
Modèle / Modelo / Model : <strong>PM</strong>-<strong>1000</strong> <strong>WP</strong><br />
Fabriqué / Fabricado / Manufactured<br />
en Chine / en China / in China<br />
est conforme aux exigences essentielles de la Directive 1999/5/CE (Article<br />
3) transposées à la législation nationale, ainsi qu’aux Normes Européennes<br />
suivantes:<br />
Es conforme a las exigencias esenciales de la Directiva 1999/5/CE ( Artículo<br />
3 ) transpuesto a la legislación nacional, así como a las Normas Europeas<br />
siguientes:<br />
is in conformity with the essential requirements of the Directive 1999/5/CE<br />
(Article 3) adapted to the national law, as well as with the following European<br />
Standards:<br />
EN 60215 (1996) / EN 301 178 (2000) / EN 60945 (1997)<br />
Balaruc, le / el / the / den 01/12/2004<br />
Jean-Gilbert MULLER<br />
Directeur Général / Director General / General Manager<br />
57
Siège Social / Head Office France – Route de Sète<br />
BP 100 – 34540 BALARUC<br />
Site internet : http://www.president-electronics.com<br />
E-mail : groupe@president-electronics.com<br />
0634/12-04<br />
UTZZ01606ZZ


