
Create successful ePaper yourself
Turn your PDF publications into a flip-book with our unique Google optimized e-Paper software.
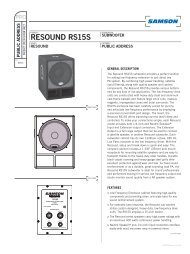
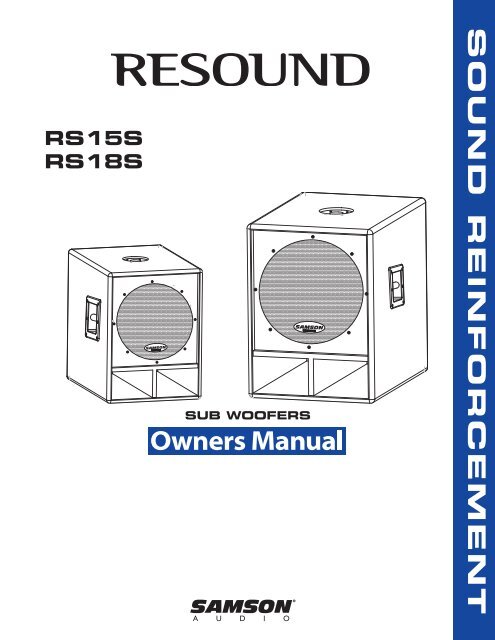
<strong>RS15S</strong><br />
<strong>RS18S</strong><br />
SUB WOOFERS<br />
A U D I O<br />
SOUND REINFORCEMENT
Safety Instructions/Consignes de sécurité/Sicherheitsvorkehrungen<br />
WARNING: To r<strong>ed</strong>uce the risk of fire or electric shock, do not expose this unit to rain or moisture. To r<strong>ed</strong>uce the hazard of electrical shock, do not remove cover or back. No<br />
user serviceable parts inside. Please refer all servicing to qualifi<strong>ed</strong> personnel.The lightning flash with an arrowhead symbol within an equilateral triangle, is intend<strong>ed</strong> to alert<br />
the user to the presence of uninsulat<strong>ed</strong> "dangerous voltage" within the products enclosure that may be of sufficient magnitude to constitute a risk of electric shock to persons.<br />
The exclamation point within an equilateral triangle is intend<strong>ed</strong> to alert the user to the presence of important operating and maintenance (servicing) instructions in the<br />
literature accompanying the product.<br />
Important Safety Instructions<br />
1. Please read all instructions before operating the unit.<br />
2. Keep these instructions for future reference.<br />
3. Please he<strong>ed</strong> all safety warnings.<br />
4. Follow manufacturers instructions.<br />
5. Do not use this unit near water or moisture.<br />
6. Clean only with a damp cloth.<br />
7. Do not block any of the ventilation openings. Install in accordance with the manufacturers instructions.<br />
8. Do not install near any heat sources such as radiators, heat registers, stoves, or other apparatus (including amplifiers) that produce heat.<br />
9. Do not defeat the safety purpose of the polariz<strong>ed</strong> or grounding-type plug. A polariz<strong>ed</strong> plug has two blades with one wider than the other. A grounding type plug has<br />
two blades and a third grounding prong. The wide blade or third prong is provid<strong>ed</strong> for your safety. When the provid<strong>ed</strong> plug does not fit your outlet, consult an electrician<br />
for replacement of the obsolete outlet.<br />
10. Protect the power cord from being walk<strong>ed</strong> on and pinch<strong>ed</strong> particularly at plugs, convenience receptacles and at the point at which they exit from the unit.<br />
11. Unplug this unit during lightning storms or when unus<strong>ed</strong> for long periods of time.<br />
12. Refer all servicing to qualifi<strong>ed</strong> personnel. Servicing is requir<strong>ed</strong> when the unit has been damag<strong>ed</strong> in any way, such as power supply cord or plug damage, or if liquid has<br />
been spill<strong>ed</strong> or objects have fallen into the unit, the unit has been expos<strong>ed</strong> to rain or moisture, does not operate normally, or has been dropp<strong>ed</strong>.<br />
ATTENTION: Pour éviter tout risque d’électrocution ou d’incendie, ne pas exposer cet appareil à la pluie ou à l’humidité. Pour éviter tout risque d’électrocution, ne pas ôter le<br />
couvercle ou le dos du boîtier. Cet appareil ne contient aucune pièce remplaçable par l'utilisateur. Confiez toutes les réparations à un personnel qualifié. Le signe avec un éclair<br />
dans un triangle prévient l’utilisateur de la présence d’une tension dangereuse et non isolée dans l’appareil. Cette tension constitue un risque d’électrocution. Le signe avec<br />
un point d’exclamation dans un triangle prévient l’utilisateur d’instructions importantes relatives à l’utilisation et à la maintenance du produit.<br />
Consignes de sécurité importantes<br />
1. Veuillez lire toutes les instructions avant d’utiliser l’appareil.<br />
2. Conserver ces instructions pour toute lecture ultérieure.<br />
3. Lisez avec attention toutes les consignes de sécurité.<br />
4. Suivez les instructions du fabricant.<br />
5. Ne pas utiliser cet appareil près d’une source liquide ou dans un lieu humide.<br />
6. Nettoyez l’appareil uniquement avec un tissu humide.<br />
7. Veillez à ne pas obstruer les fentes prévues pour la ventilation de l’appareil. Installez l’appareil selon les instructions du fabricant.<br />
8. Ne pas installer près d’une source de chaleur (radiateurs, etc.) ou de tout équipement susceptible de générer de la chaleur (amplificateurs de puissance par exemple).<br />
9. Ne pas retirer la terre du cordon secteur ou de la prise murale. Les fiches canadiennes avec polarisation (avec une lame plus large) ne doivent pas être modifiées. Si votre<br />
prise murale ne correspond pas au modèle fourni, consultez votre électricien.<br />
10. Protégez le cordon secteur contre tous les dommages possibles (pincement, tension, torsion,, etc.). Veillez à ce que le cordon secteur soit libre, en particulier à sa sortie<br />
du boîtier.<br />
11. Déconnectez l’appareil du secteur en présence d’orage ou lors de périodes d’inutilisation prolongées.<br />
12. Consultez un service de réparation qualifié pour tout dysfonctionnement (dommage sur le cordon secteur, baisse de performances, exposition à la pluie, projection liquide<br />
dans l’appareil, introduction d’un objet dans le boîtier, etc.).<br />
ACHTUNG: Um die Gefahr eines Brandes oder Stromschlags zu verringern, sollten Sie dieses Gerät w<strong>ed</strong>er Regen noch Feuchtigkeit aussetzen.Um die Gefahr eines<br />
Stromschlags zu verringern, sollten Sie w<strong>ed</strong>er Deckel noch Rückwand des Geräts entfernen. Im Innern befinden sich keine Teile, die vom Anwender gewartet werden können.<br />
Überlassen Sie die Wartung qualifiziertem Fachpersonal.Der Blitz mit Pfeilspitze im gleichseitigen Dreieck soll den Anwender vor nichtisolierter “gefährlicher Spannung”<br />
im Geräteinnern warnen. Diese Spannung kann so hoch sein, dass die Gefahr eines Stromschlags besteht. Das Ausrufezeichen im gleichseitigen Dreieck soll den Anwender<br />
auf wichtige B<strong>ed</strong>ienungs- und Wartungsanleitungen aufmerksam machen, die im mitgelieferten Informationsmaterial näher beschrieben werden.<br />
Wichtige Sicherheitsvorkehrungen<br />
1. Lesen Sie alle Anleitungen, bevor Sie das Gerät in Betrieb nehmen.<br />
2. Bewahren Sie diese Anleitungen für den späteren Gebrauch gut auf.<br />
3. Bitte treffen Sie alle beschriebenen Sicherheitsvorkehrungen.<br />
4. Befolgen Sie die Anleitungen des Herstellers.<br />
5. Benutzen Sie das Gerät nicht in der Nähe von Wasser oder Feuchtigkeit.<br />
6. Verwenden Sie zur Reinigung des Geräts nur ein feuchtes Tuch.<br />
7. Blockieren Sie keine Belüftungsöffnungen. Nehmen Sie den Einbau des Geräts nur entsprechend den Anweisungen des Herstellers vor.<br />
8. Bauen Sie das Gerät nicht in der Nähe von Wärmequellen wie Heizkörpern, Wärmeklappen, Öfen oder anderen Geräten (inklusive Verstärkern) ein, die Hitze erzeugen.<br />
9. Setzen Sie die Sicherheitsfunktion des polarisierten oder geerdeten Steckers nicht außer Kraft. Ein polarisierter Stecker hat zwei flache, unterschi<strong>ed</strong>lich breite Pole. Ein<br />
geerdeter Stecker hat zwei flache Pole und einen dritten Erdungsstift. Der breitere Pol oder der dritte Stift dient Ihrer Sicherheit. Wenn der vorhandene Stecker nicht in<br />
Ihre Steckdose passt, lassen Sie die veraltete Steckdose von einem Elektriker ersetzen.<br />
10. Schützen Sie das Netzkabel dahingehend, dass niemand darüber laufen und es nicht geknickt werden kann. Achten Sie hierbei besonders auf Netzstecker,<br />
Mehrfachsteckdosen und den Kabelanschluss am Gerät.<br />
11. Ziehen Sie den Netzstecker des Geräts bei Gewittern oder längeren Betriebspausen aus der Steckdose.<br />
12. Überlassen Sie die Wartung qualifiziertem Fachpersonal. Eine Wartung ist notwendig, wenn das Gerät auf irgendeine Weise, beispielsweise am Kabel oder Netzstecker<br />
beschädigt wurde, oder wenn Flüssigkeiten oder Objekte in das Gerät gelangt sind, es Regen oder Feuchtigkeit ausgesetzt war, nicht mehr wie gewohnt betrieben<br />
werden kann oder fallen gelassen wurde.
Instrucciones de seguridad / Istruzioni di Sicurezza<br />
PRECAUCION: Para r<strong>ed</strong>ucir el riesgo de incendios o descargas, no permita que este aparato qu<strong>ed</strong>e expuesto a la lluvia o la hum<strong>ed</strong>ad. Para r<strong>ed</strong>ucir el riesgo de descarga<br />
eléctrica, nunca quite la tapa ni el chasis. Dentro del aparato no hay piezas susceptibles de ser reparadas por el usuario. Dirija cualquier reparación al servicio técnico oficial.<br />
El símbolo del relámpago dentro del triángulo equilátero pretende advertir al usuario de la presencia de “voltajes peligrosos” no aislados dentro de la carcasa del producto,<br />
que pu<strong>ed</strong>en ser de la magnitud suficiente como para constituir un riesgo de descarga eléctrica a las personas. El símbolo de exclamación dentro del triángulo equilátero<br />
quiere advertirle de la existencia de importantes instrucciones de manejo y mantenimiento (reparaciones) en los documentos que se adjuntan con este aparato.<br />
Instrucciones importantes de seguridad<br />
1. Lea todo este manual de instrucciones antes de comenzar a usar la unidad.<br />
2. Conserve estas instrucciones para cualquier consulta en el futuro.<br />
3. Cumpla con todo lo indicado en las precauciones de seguridad.<br />
4. Observe y siga todas las instrucciones del fabricante.<br />
5. Nunca utilice este aparato cerca del agua o en lugares húm<strong>ed</strong>os.<br />
6. Limpie este aparato solo con un trapo suave y ligeramente hum<strong>ed</strong>ecido.<br />
7. No bloquee ninguna de las aberturas de ventilación. Instale este aparato de acuerdo a las instrucciones del fabricante.<br />
8. No instale este aparato cerca de fuentes de calor como radiadores, calentadores, hornos u otros aparatos (incluyendo amplificadores) que produzcan calor.<br />
9. No anule el sistema de seguridad del enchufe de tipo polarizado o con toma de tierra. Un enchufe polarizado tiene dos bornes, uno más ancho que el otro. Uno con<br />
toma de tierra tiene dos bornes normales y un tercero para la conexión a tierra. El borne ancho o el tercero se incluyen como m<strong>ed</strong>ida de seguridad. Cuando el enchufe<br />
no encaje en su salida de corriente, llame a un electricista para que le cambie su salida anticuada.<br />
10. Evite que el cable de corriente qu<strong>ed</strong>e en una posición en la que pu<strong>ed</strong>a ser pisado o aplastado, especialmente en los enchufes, receptáculos y en el punto en el que<br />
salen de la unidad.<br />
11. Desconecte de la corriente este aparato durante las tormentas eléctricas o cuando no lo vaya a usar durante un periodo de tiempo largo.<br />
12. Dirija cualquier posible reparación solo al servicio técnico oficial. Deberá hacer que su aparato sea reparado cuando esté dañado de alguna forma, como si el cable de<br />
corriente o el enchufe están dañados, o si se han derramado líquidos o se ha introducido algún objeto dentro de la unidad, si esta ha qu<strong>ed</strong>ado expuesta a la lluvia o la<br />
hum<strong>ed</strong>ad, si no funciona normalmente o si ha caído al suelo.<br />
ATTENZIONE: per ridurre il rischio di incendio o di scariche elettriche, non esponete questo apparecchio a pioggia o umidità. Per ridurre il pericolo di scariche elettriche evitate<br />
di rimuoverne il coperchio o il pannello posteriore. Non esistono all'interno dell'apparecchio parti la cui regolazione è a cura dell'utente. Per eventuale assistenza, fate riferimento<br />
esclusivamente a personale qualificato. Il fulmine con la punta a freccia all'interno di un triangolo equilatero avvisa l'utente della presenza di "tensioni pericolose" non isolate<br />
all'interno dell'apparecchio, tali da costituire un possibile rischio di scariche elettriche dannose per le persone. Il punto esclamativo all'interno di un triangolo equilatero avvisa<br />
l'utente della presenza di importanti istruzioni di manutenzione (assistenza) nella documentazione che accompagna il prodotto.<br />
Importanti Istruzioni di Sicurezza<br />
1. Prima di usare l'apparecchio, vi preghiamo di leggerne per intero le istruzioni.<br />
2. Conservate tali istruzioni per una eventuale consultazione futura.<br />
3. Vi preghiamo di rispettare tutte le istruzioni di sicurezza.<br />
4. Seguite tutte le istruzioni del costruttore.<br />
5. Non usate questo apparecchio vicino ad acqua o umidità.<br />
6. Pulite l'apparecchio esclusivamente con un panno asciutto.<br />
7. Evitate di ostruire una qualsiasi delle aperture di ventilazione. Posizionatelo seguendo le istruzioni del costruttore.<br />
8. Non posizionatelo vicino a sorgenti di calore come radiatori, scambiatori di calore, forni o altri apparecchi (amplificatori compresi) in grado di generare calore.<br />
9. Non disattivate la protezione di sicurezza costituita dalla spina polarizzata o dotata di collegamento a terra. Una spina polarizzata è dotata di due spinotti, uno più<br />
piccolo <strong>ed</strong> uno più grande. Una spina dotata di collegamento a terra è dotata di due spinotti più un terzo spinotto di collegamento a terra. Questo terzo spinotto, eventualmente<br />
anche più grande, viene fornito per la vostra sicurezza. Se la spina fornita in dotazione non si adatta alla vostra presa, consultate un elettricista per la sostituzione<br />
della presa obsoleta.<br />
10. Proteggete il cavo di alimentazione in modo che non sia possibile camminarci sopra né piegarlo, con particolare attenzione alle prese, ai punti di collegamento e al punto<br />
in cui esce dall'apparecchio.<br />
11. Staccate l'apparecchio dalla alimentazione in caso di temporali o tempeste o se non lo usate per un lungo periodo.<br />
12. Per l'assistenza, fate riferimento esclusivamente a personale qualificato. È necessaria l'assistenza se l'apparecchio ha subito un qualsiasi tipo di danno, come danni al cavo<br />
o alla spina di alimentazione, nel caso in cui sia stato versato del liquido o siano caduti oggetti al suo interno, sia stato esposto a pioggia o umidità, non funzioni correttamente<br />
o sia stato fatto cadere.<br />
Copyright 2004, <strong>Samson</strong> Technologies Corp.<br />
Print<strong>ed</strong> October, 2004<br />
<strong>Samson</strong> Technologies Corp.<br />
575 Underhill Blvd.<br />
P.O. Box 9031<br />
Syosset, NY 11791-9031<br />
Phone: 1-800-3-SAMSON (1-800-372-6766)<br />
Fax: 516-364-3888<br />
www.samsontech.com
Table of Contents<br />
ENGLISH<br />
Introduction 3<br />
Resound <strong>RS15S</strong> and <strong>RS18S</strong> Features 4<br />
<strong>RS15S</strong> and <strong>RS18S</strong> Components 5<br />
Resound FRONT VIEW 5<br />
Resound REAR PANEL 5<br />
Configuring Your Speaker System 6<br />
Common Sub Operation 6<br />
Stereo Sub Operation 6<br />
Connecting the Resound Sub woofer 7<br />
Choosing the Correct cables 7<br />
Powering the Resound 7<br />
Quick Set-Up 8<br />
Positioning the <strong>RS15S</strong> and <strong>RS18S</strong> 9<br />
Operating the <strong>RS15S</strong> and <strong>RS18S</strong> 11<br />
Specifications 44<br />
FRANÇAIS<br />
Introduction 12<br />
Caractéristiques 13<br />
Composants des enceintes <strong>RS15S</strong> et <strong>RS18S</strong> 14<br />
FACE AVANT des enceintes Resound 14<br />
FACE ARRIÈRE des enceintes Resound 14<br />
Configuration de votre système de sonorisation 15<br />
Subwoofer mono 15<br />
Subwoofers stéréo 15<br />
Installation rapide 16<br />
Schémas d'installation des enceintes <strong>RS15S</strong> et <strong>RS18S</strong> 17<br />
Utilisation des enceintes <strong>RS15S</strong> et <strong>RS18S</strong> 18<br />
Caractéristiques techniques 44<br />
DEUTSCHE<br />
Einleitung 19<br />
Resound <strong>RS15S</strong> und <strong>RS18S</strong> Features 20<br />
<strong>RS15S</strong> und <strong>RS18S</strong> Bauteile 21<br />
Resound VORDERSEITE 21<br />
Resound RÜCKSEITE 21<br />
Boxen-System konfigurieren 22<br />
Common Sub-Betrieb 22<br />
Stereo Sub-Betrieb 22<br />
Schnelles Setup 23<br />
<strong>RS15S</strong> und <strong>RS18S</strong> System-Setups 24<br />
<strong>RS15S</strong> und <strong>RS18S</strong> betreiben 25<br />
Technische Daten 45<br />
ESPAÑOL<br />
Introducción 26<br />
Características del Resound <strong>RS15S</strong> y <strong>RS18S</strong> 27<br />
Componentes del <strong>RS15S</strong> y <strong>RS18S</strong> 28<br />
PANEL FRONTAL del Resound 28<br />
PANEL TRASERO del Resound 28<br />
Configuración de su sistema de altavoces 29<br />
Funcionamiento de sub común 29<br />
Funcionamiento sub en stereo 29<br />
Configuración rápida 30<br />
Manejo del <strong>RS15S</strong> y <strong>RS18S</strong> 32<br />
Sub mono <strong>RS15S</strong> y <strong>RS18S</strong> son satélites activos 32<br />
Especificaciones 45<br />
ITALIANO<br />
Introduzione 33<br />
Resound <strong>RS15S</strong> <strong>ed</strong> <strong>RS18S</strong> - Le Caratteristiche 34<br />
<strong>RS15S</strong> <strong>ed</strong> <strong>RS18S</strong> - I Componenti 35<br />
Resound - VISTA DI FRONTE 35<br />
Resound - IL PANELLO POSTERIORE 35<br />
Configurazioni di Sistema 36<br />
Il Sub in Comune 36<br />
Il Sub in Stereo 36<br />
Il Collegamento dei Sub woofer Resound 37<br />
La Corretta Scelta dei Cavi 37<br />
L'Uso dell'Uscita di ESTENSIONE 37<br />
La Potenza da Applicare alle Resound 37<br />
Messa a Punto Veloce 38<br />
Il Posizionamento delle Casse 39<br />
<strong>RS15S</strong> <strong>ed</strong> <strong>RS18S</strong> - Configurazioni di Sistema 40<br />
Sub <strong>RS15S</strong> o <strong>RS18S</strong> in Stereo con Satelliti Passivi 40<br />
Sub <strong>RS15S</strong> o <strong>RS18S</strong> in Mono con Satelliti Passivi 40<br />
L'Uso dell'<strong>RS15S</strong> e dell'<strong>RS18S</strong> 41<br />
<strong>RS15S</strong> <strong>ed</strong> <strong>RS18S</strong> - Guida al Cablaggio 42<br />
<strong>RS15S</strong> and <strong>RS18S</strong> Wiring Guide 43<br />
Specifiche 46
Introduction<br />
Congratulations on purchasing the <strong>Samson</strong> Resound Series Subwoofer! The Resound <strong>RS15S</strong> and <strong>RS18S</strong> subwoofers<br />
provide a perfect solution for adding low frequency extension to just about any PA system. By combining high power<br />
handling, satellite input filtering, along with quality speaker and cabinet components, the Resound <strong>RS15S</strong> and <strong>RS18S</strong><br />
provide serious bottom-end for any kind of live application. The low frequency drive units are construct<strong>ed</strong> with heavyduty<br />
steel and aluminum cast-frame baskets and feature large voice coils, massive magnets, impregnat<strong>ed</strong> cones and<br />
butyl surrounds. The <strong>RS15S</strong> and <strong>RS18S</strong> enclosures have been carefully voic<strong>ed</strong> for punchy and articulate low-frequency<br />
performance by employing a precision tun<strong>ed</strong> shelf-port design. The result, the Resound <strong>RS15S</strong> and <strong>RS18S</strong> offer slamming<br />
low-end that’s deep and controll<strong>ed</strong>. To make your connections simple, each Resound model provides both 1/4-inch and<br />
NEUTRIK SPEAKON® Input and Extension output connectors.The Extension Output is a full range output that can be us<strong>ed</strong><br />
to connect a satellite speaker, or another Resound subwoofer. Each subwoofer cabinet has its own 12dB per octave, 180<br />
Hz, Low Pass crossover to the low frequency driver. With the Resound, setup and break down is quick and easy. The compact<br />
cabinets include a 1 3/8” (35mm) pole mount receptacle for mounting satellite speakers and are easy to transport<br />
thanks to the heavy-duty steel handles. Durable black carpet covering and heavy-gauge steel grills offer excellent protection<br />
against wear and tear. As fix<strong>ed</strong> sound reinforcement or as a durable, great-sounding road PA, the Resound <strong>RS15S</strong> and<br />
<strong>RS18S</strong> subwoofers are ideal for sound professionals and performers looking for serious low frequency output and studio<br />
monitor sound quality from a PA speaker system.<br />
ENGLISH<br />
In these pages, you’ll find a detail<strong>ed</strong> description of the features of the Resound PA system, as well as a description of its<br />
front and rear panels, step-by-step instructions for its setup and use, and full specifications. You’ll also find a warranty<br />
card enclos<strong>ed</strong>—please don’t forget to fill it out and mail it in so that you can receive online technical support and so we<br />
can send you updat<strong>ed</strong> information about these and other <strong>Samson</strong> products in the future.<br />
With proper care your Resound will operate trouble free for many years. We recommend you record your serial number<br />
in the space provid<strong>ed</strong> below for future reference.<br />
Serial number: __________________________<br />
Date of purchase: ________________________<br />
Should your unit ever require servicing, a Return Authorization number (RA) must be obtain<strong>ed</strong> before shipping your unit<br />
to <strong>Samson</strong>. Without this number, the unit will not be accept<strong>ed</strong>. Please call <strong>Samson</strong> at 1-800-3SAMSON (1-800-372-6766)<br />
for a Return Authorization number prior to shipping your unit. Please retain the original packing materials and if possible,<br />
return the unit in the original carton and packing materials.<br />
3
Resound <strong>RS15S</strong> and <strong>RS18S</strong> Features<br />
ENGLISH<br />
The <strong>Samson</strong> Resound series sub-woofers offer two models to manage a variety of live sound applications. With<br />
their high quality components, convenient siz<strong>ed</strong> enclosures, ergonomic carry handles and stand mounts, the<br />
Resound series sub-woofer will provide great sound with reliability. Here are some of their main features:<br />
• Low Frequency Extension cabinet featuring high quality components and providing clean, articulate bass<br />
for any sound reinforcement system.<br />
• For extend<strong>ed</strong> bass response, the Resound sub-woofers utilize custom design<strong>ed</strong>, heavy-duty, low-frequency<br />
drive units. The <strong>RS15S</strong> employ a 15-inch woofer, and an 18-inch low frequency driver is us<strong>ed</strong> in<br />
the <strong>RS18S</strong>.<br />
• The Resound series speakers carry high power ratings with an enormous 400 watts continuous power<br />
handling.<br />
• Neutrik Speakon ® plus 1/4-inch Input connectors interface easily with most any power amp or power<strong>ed</strong><br />
mixer.<br />
• Neutrik Speakon ® plus 1/4-inch Extension output connectors also allow you to “daisy-chain” multiple<br />
Resound models together to create larger sound reinforcement systems.<br />
• Internal 12dB per octave, 180 Hz, Low Pass crossover to the low frequency driver.<br />
• Standard 1 3/8-inch speaker stand receptacles for mounting mid-high satellite speakers.<br />
• Rugg<strong>ed</strong>, road-worthy carpet cover<strong>ed</strong> enclosures with steel speaker grills for high reliability.<br />
• Quality build and rugg<strong>ed</strong> construction ensure reliable performance from night-to-night and venue-tovenue.<br />
• Three-year extend<strong>ed</strong> warranty.<br />
4
<strong>RS15S</strong> and <strong>RS18S</strong> Components<br />
Resound FRONT VIEW<br />
1 Low Frequency Driver – Custom<br />
design<strong>ed</strong>, heavy-duty, 15”and 18" low frequency<br />
driver provides deep bass.<br />
2 Handle – One of two, ultra over-siz<strong>ed</strong><br />
carry handles.<br />
<br />
<br />
ENGLISH<br />
3 Steel Grill – Durable steel grill provides<br />
protection for, and easy access to, LF<br />
driver.<br />
<br />
<br />
4 Shelf Port– Two precision tun<strong>ed</strong>, low<br />
frequency port sections extend the bass<br />
response.<br />
5 Enclosure – Rugg<strong>ed</strong> wooden<br />
enclosure with durable carpet covering.<br />
<br />
<br />
<br />
Resound REAR PANEL<br />
A<br />
INPUT – Neutrik Speakon® input connector<br />
for connecting to the output of a power<br />
amplifier or power<strong>ed</strong> mixer.<br />
<br />
<br />
B<br />
C<br />
D<br />
EXTENSION – Neutrik Speakon® parallel<br />
output connector for connecting additional<br />
Resounds.<br />
INPUT – 1/4-inch phone input connector for<br />
connecting to the output of a power amplifier<br />
or power<strong>ed</strong> mixer.<br />
EXTENSION – 1/4-inch parallel output for<br />
connecting additional Resounds.<br />
<br />
<br />
<br />
Note: For a detail<strong>ed</strong> wiring diagram, see page 42 of<br />
this manual.<br />
<br />
<br />
5
Configuring Your Speaker System<br />
ENGLISH<br />
Before you start plugging in cables, you should take a minute to decide how you want to interface your new subwoofer.<br />
There are several ways you can interface the <strong>RS15S</strong> and <strong>RS18S</strong>, however most systems set-ups fall into<br />
two categories, Stereo or Mono (Common) sub operation.<br />
Common Sub Operation<br />
In most cases a common sub,<br />
with mono system operation is<br />
desir<strong>ed</strong>. This is true for several<br />
reasons, but mostly because<br />
low frequencies produc<strong>ed</strong><br />
by a subwoofer tend to be<br />
non-directional. Since low frequency<br />
waves take so much<br />
space to actually develop,<br />
you can’t tell if the sub bass<br />
is coming from the left or right<br />
side, unless of course you’re<br />
in a very large room. Because<br />
of this phenomena, just about<br />
all sub bass material is mix<strong>ed</strong><br />
in mono.<br />
Stereo Sub Operation<br />
In larger rooms, as well as<br />
in theatres and theme park<br />
installations (for low frequency<br />
special audio effects), two<br />
<strong>RS15S</strong> and <strong>RS18S</strong>’s can be<br />
us<strong>ed</strong> in stereo.<br />
6
Connecting the Resound Sub woofer<br />
Choosing the Correct cables<br />
The Resound series speaker connections are made via the rear panel 1/4-inch and/or Neutrik Speakon® connectors.<br />
Standard unshield<strong>ed</strong> speaker wire, available at your local pro audio or music store, with either 1/4-inch phone or<br />
Speakon connectors (wire gauge of 12-14 is recommend<strong>ed</strong>).<br />
If your amplifier uses binding posts, you can use speaker cables with banana plugs, but be sure to pay attention to the<br />
plus and minus polarity when making the connections. It is important that your PA system is connect<strong>ed</strong> in phase, otherwise<br />
you will not have the proper low-end response and stereo image.<br />
ENGLISH<br />
In order to ensure that your PA system is in phase, be careful to pay close attention to the positive and negative marking<br />
on the amplifier and wires. Make sure that the + terminal of the speaker, or banana connector, is connect<strong>ed</strong> to the + terminal<br />
of the power amplifier and that the - terminal of the speaker, or banana connector, is connect<strong>ed</strong> to the - terminal of<br />
the power amplifier. For a detail<strong>ed</strong> wiring diagram, see page 42 of this manual.<br />
About Imp<strong>ed</strong>ance<br />
Before you hook up your speaker cabinet, be sure that you understand a little about imp<strong>ed</strong>ance. Imp<strong>ed</strong>ance is the electronic<br />
load that the speaker puts on the power amplifier and is measur<strong>ed</strong> in Ohms.<br />
Here is the tricky, yet simple rule of imp<strong>ed</strong>ance: When two speakers, of equal imp<strong>ed</strong>ance are wir<strong>ed</strong> in "Parallel", like when<br />
you use the Extension Output, the total imp<strong>ed</strong>ance is cut in half and when two speakers are wire in “Series”, (usually for<br />
internal cabinet wiring only), the total imp<strong>ed</strong>ance is the sum of the speakers individual imp<strong>ed</strong>ance.<br />
Each of the Resound models, EXCEPT the <strong>RS15S</strong>, <strong>RS18S</strong> and RS215 is 8 Ohms. So, when two Resound models, EXCEPT<br />
the RS215, are connect<strong>ed</strong> together in parallel, the total imp<strong>ed</strong>ance is 4 Ohms. The RS215 imp<strong>ed</strong>ance is 4 Ohms. So, when<br />
two RS215’s are connect<strong>ed</strong> together in parallel, the total imp<strong>ed</strong>ance is 2 Ohms. The imp<strong>ed</strong>ance of your speaker also has<br />
an effect on your amplifier. In general, the lower the imp<strong>ed</strong>ance, the more power your amplifier will put out.<br />
IMPORTANT NOTE: There is minimum safe imp<strong>ed</strong>ance for running power amplifiers so be sure to check the manufacturer’s<br />
recommend<strong>ed</strong> imp<strong>ed</strong>ance for your amplifier to avoid any damage to your amplifier or voiding your warranty.<br />
Using the EXTENSION Output<br />
The Resound models provide a convenient Extension Output for connecting additional speaker cabinets in parallel. Be<br />
sure to read the section above on imp<strong>ed</strong>ance to insure a proper hook up with your amplifier. To connect two Resounds<br />
using the Extension output, connect your amplifier output to the Input of the first Resound and then, connect the<br />
Extension Output to the Input of the second Resound.<br />
Powering the Resound<br />
Each of the Resound loudspeakers have a specific power rating, which is print<strong>ed</strong> on the input jack-plate, and also, in the<br />
Specification section on page 12 of this manual. Be sure to check that your power amp has the correct power output for<br />
your Resound. Be careful to consider the total imp<strong>ed</strong>ance if you are connecting more the one Resound to one side of a<br />
stereo power amplifier. Using a power amplifier with too low of a power rating can be dangerous since the output signal<br />
is often clipp<strong>ed</strong> in an effort to get the desir<strong>ed</strong> level. Over powering the Resound can result in catastrophic failure and<br />
therefore using any amplifier with a power rating over the recommend power rating may void your warranty.<br />
7
Quick Set-Up<br />
In the following pages of this manual you will find a detail<strong>ed</strong> diagrams of other system set-ups, but if you just want to get start<strong>ed</strong><br />
quickly, you can follow the diagram and steps below to set up a basic stereo with mono PA system.<br />
ENGLISH<br />
NOTE: Before plugging in and turning on, it is important to remember the Golden Rule of audio … “ LAST ON, FIRST OFF”. Translat<strong>ed</strong>,<br />
this means that when turning on your system, you should always turn your power amplifiers or power<strong>ed</strong> monitors on LAST, and when<br />
turning your system off, turn your power amps off FIRST. This helps avoid any loud pops caus<strong>ed</strong> by inrush current at power up, which<br />
can sometimes damage loudspeakers.<br />
<br />
<br />
• Before connecting your Resounds, make sure that the power of all your systems components are turn<strong>ed</strong> off. Also, make sure that<br />
your power amplifier volume controls and the main left and right faders of your mixer are turn<strong>ed</strong> all the way down.<br />
• Connect the cables to your microphones and instruments, or a CD player, to your mixer.<br />
• Next, connect the mixers left and outputs to the INPUT of a power amplifier for your mid-high satellite speakers.<br />
• Now, connect the mixers mono output to the INPUT of a low frequency power amplifier running in bridge mono mode. If your<br />
amplifier does not have a bridge mono mode, set your power amp’s input mode switch to parallel, or use a “Y” cable to connect<br />
both amplifier channels<br />
• Using a standard speaker cable with Speakon connectors, connect low frequency power amplifier output to the INPUT of the<br />
<strong>RS15S</strong> or <strong>RS18S</strong>.<br />
• Using a standard speaker cable with Speakon connectors, connect the Mid-high power amp’s output to the INPUT of the satellite<br />
speakers.<br />
IMPORTANT NOTE: Be sure to check the power amplifiers owners manual to confirm the amplifier can run safely at 4 Ohms<br />
• Switch on the power of the mixer, instruments and/or CD player, and then switch on your power amplifier.<br />
• While speaking into the mic (or playing the instrument or CD), raise the mixers main Left and Right faders to the “0” position. Be<br />
sure that the mixer’s output meters are not clipping. If they are, adjust the mixer volumes down until the signal cleans up.<br />
• Now, slowly raise your mid-high power amp controls until you reach the desir<strong>ed</strong> listening level.<br />
• Be sure that the mixers mono output is turn<strong>ed</strong> down and then raise the sub power amplifier all the way up.<br />
• Finally, use the mixer's mono output to adjust the level of the sub woofers.<br />
8
Positioning the <strong>RS15S</strong> and <strong>RS18S</strong><br />
Microphone Positioning - How to R<strong>ed</strong>uce Fe<strong>ed</strong>back<br />
Fe<strong>ed</strong>back is the annoying howling and squealing that is heard when the microphone<br />
gets too close to the speaker and the volume is high. You get fe<strong>ed</strong>back<br />
when the microphone picks up the amplifi<strong>ed</strong> signal from the speaker, and then<br />
amplifies through the speaker again, and then picks it up again, and so on and<br />
so on. In general, it is always recommend<strong>ed</strong> that any LIVE mic (a mic that’s on)<br />
is position<strong>ed</strong> behind the speaker enclosures. This will give you the best level<br />
from your system before fe<strong>ed</strong>back. One possible exception is when you are<br />
adjusting the sounds of the microphones, since you want to listen in front of<br />
the speaker to hear properly. To do this, lower the MAIN VOLUME while setting<br />
the EQ and effect from in front of the speakers. Once you have the sound you<br />
like, move the microphones to behind the speakers and raise the Main volume.<br />
ENGLISH<br />
Speaker Placement<br />
Whenever possible, it is a good idea to raise the speakers above the heads of<br />
the listening audience. The Resound enclosures feature a standard 1 3/8” pole<br />
mount receptacle, which is compatible with speaker stands from a variety of<br />
manufacturers.<br />
Note: Be sure to check the manufacturers minimum recommend<strong>ed</strong> imp<strong>ed</strong>ance<br />
for your power amplifier to avoid overload and possible damage to both<br />
the speaker and amplifier. In many instances when using the Resound as a<br />
monitor system, you may choose to use an external equalizer like the <strong>Samson</strong><br />
S Curve 131 to increase the volume and r<strong>ed</strong>uce the chance of fe<strong>ed</strong>back.<br />
9
<strong>RS15S</strong> and <strong>RS18S</strong> System Set-ups<br />
<strong>RS15S</strong> and <strong>RS18S</strong> Stereo Sub with Passive Satellites<br />
ENGLISH<br />
<br />
<br />
<br />
<br />
This is example shows a system with a single power amplifier connecting the subs and satellites in stereo. The mixer’s left and right outputs<br />
are connect<strong>ed</strong> to the inputs of the power amplifier using shield<strong>ed</strong> cable. The outputs of the amplifier are connect<strong>ed</strong> to the <strong>RS15S</strong> or <strong>RS18S</strong><br />
INPUT using un-shield<strong>ed</strong> speaker cable. Next, run an un-shield<strong>ed</strong> speaker cable from the <strong>RS15S</strong>’s or <strong>RS18S</strong>’s EXTENSION OUTPUT to the two<br />
satellite speakers. For details on wiring your speaker cables, see page 42 in this manual.<br />
IMPORTANT NOTE: To avoid any possible damage to your amp and speakers, be sure to check the manufacturer’s owners manual<br />
to confirm your power amplifier is capable of operating at 2 ohms.<br />
<strong>RS15S</strong> and <strong>RS18S</strong> Mono Sub with Passive Satellites<br />
<br />
<br />
This example shows a stereo system with mono sub power<strong>ed</strong> by separate amplifiers for the mid-high satellites and subwoofers. The mixer’s<br />
left and right outputs are connect<strong>ed</strong> to the inputs of the mid-high power amplifier using shield<strong>ed</strong> cable. Next, run un-shield<strong>ed</strong> speaker cables<br />
from that amplifier to the two satellite speakers. Now, connect the mixer’s mono output to the inputs of the sub power amplifier using shield<strong>ed</strong><br />
cable. The outputs of the sub amplifier are connect<strong>ed</strong> to the <strong>RS15S</strong> or <strong>RS18S</strong> INPUT using un-shield<strong>ed</strong> speaker cable. For details on wiring<br />
your speaker cables, see page 42 in this manual.<br />
10
ENGLISH<br />
<strong>RS15S</strong> and <strong>RS18S</strong> Stereo Sub, Bi-amp System with Passive Satellites<br />
Operating the <strong>RS15S</strong> and <strong>RS18S</strong><br />
This example shows a stereo, bi-amp system with an active crossover and separate amplifiers for the mid-high satellites and subwoofers. The<br />
mixer’s left and right outputs are connect<strong>ed</strong> to the inputs of the stereo crossover using shield<strong>ed</strong> cable. The crossover’s High Frequency outputs<br />
are connect<strong>ed</strong> to the inputs of the mid-high power amplifier using shield<strong>ed</strong> cable. Next, run un-shield<strong>ed</strong> speaker cables from that amplifier to<br />
the two satellite speakers. Now, connect the crossover’s Low Frequency outputs to the inputs of the subwoofer power amplifier using shield<strong>ed</strong><br />
cable. The outputs of the sub amplifier are connect<strong>ed</strong> to the <strong>RS15S</strong> or <strong>RS18S</strong> INPUT using un-shield<strong>ed</strong> speaker cable. For details on wiring your<br />
speaker cables, see page 42 in this manual.<br />
<strong>RS15S</strong> and <strong>RS18S</strong> Mono Sub with Active Satellites<br />
<br />
<br />
In this example, the mixer’s left and right outputs are connect<strong>ed</strong> to the inputs of the active satellite speakers using shield<strong>ed</strong> cable. Next, connect<br />
the mixer’s mono output to the input(s) of the subwoofer power amplifier using shield<strong>ed</strong> cable. Set your power amp’s input mode to<br />
parallel or use a “Y” cable to connect both amplifier channels. Now, connect<strong>ed</strong> the outputs of the sub amplifier to the <strong>RS15S</strong> or <strong>RS18S</strong> INPUT<br />
using un-shield<strong>ed</strong> speaker cable. For details on wiring your speaker cables, see page 42 in this manual.<br />
11
Introduction<br />
FRANÇAIS<br />
Merci d'avoir porté votre choix sur les enceintes Subwoofer de la gamme Resound Series de <strong>Samson</strong> ! Les enceintes<br />
Resound <strong>RS15S</strong> et <strong>RS18S</strong> représentent la solution par excellence pour renforcer les basses fréquences de pratiquement<br />
tous les systèmes de sonorisation. Combinant une haute tenue en puissance, un filtrage des entrées satellites ainsi<br />
que des haut-parleurs et des baffles de qualité, les enceintes <strong>RS15S</strong> et <strong>RS18S</strong> permettent une restitution realiste des<br />
extrêmes graves dans n'importe quelle application de sonorisation. Les Woofers sont constitués de saladiers en acier<br />
renforcé et en aluminium coulé, de grosses bobines acoustiques, d'aimants imposants, de membranes traitées et de<br />
suspensions en caoutchouc butyl. L'évent linéaire accordé des enceintes <strong>RS15S</strong> et <strong>RS18S</strong> a été spécialement conçu pour<br />
produire des graves précis et puissants. Résultat : les enceintes Resound <strong>RS15S</strong> et <strong>RS18S</strong> restituent des graves riches et<br />
constants. Afin de faciliter les connexions, l'entrée et la sortie de chacune des enceintes Resound sont pourvues de connecteurs<br />
6,35 mm et NEUTRIK SPEAKON®. Les sorties Extension sont des sorties large bande permettant la connexion<br />
d'une enceinte satellite ou d'une autre enceinte Subwoofer Resound. Le Woofer de chacune des enceintes est muni d'un<br />
filtre passe-bas de 12 dB/octave à 180 Hz. Avec les enceintes Resound, autant le montage que le démontage se font<br />
rapidement. De format compact, les enceintes sont pourvues d'une embase pour pi<strong>ed</strong> de 35 mm permettant de monter<br />
une enceinte satellite, de même que de poignées en acier renforcé facilitant le transport. La grille en acier robuste et le<br />
revêtement moquetté résistant assurent la protection contre l'usure. Qu'elles soients utilisées en sonorisation fixe ou en<br />
sonorisation mobile, les enceintes Subwoofer Resound <strong>RS15S</strong> et <strong>RS18S</strong> répondent aux besoins des artistes et des professionnels<br />
du son nécessitant des graves puissants de qualité de leur système de sonorisation.<br />
Vous trouverez dans ce guide une description détaillée des caractéristiques du système de sonorisation Resound, une<br />
présentation des faces avant et arrière, la marche à suivre pour son installation et son utilisation ainsi que ses caractéristiques<br />
techniques détaillées. Vous trouverez également une carte de garantie : n'oubliez pas de la compléter et de nous<br />
l'envoyer afin que vous puissiez bénéficier de l'assitance technique en ligne et recevoir les informations concernant les<br />
produits <strong>Samson</strong>.<br />
Avec les soins appropriés, votre enceinte Resound devrait fonctionner sans problème pendant de nombreuses années.<br />
Nous vous recommandons d'inscrire votre numéro de série ci-dessous pour consultation ultérieure :<br />
Numéro de série : __________________________<br />
Date d'achat : ________________________<br />
Si votre appareil devait nécessiter des réparations, un numéro d'autorisation de retour sera nécessaire avant de le faire<br />
parvenir à <strong>Samson</strong>. Sans ce numéro, votre appareil ne sera pas accepté. Contactez <strong>Samson</strong> au 1-800-3SAMSON<br />
(1-800-372-6766) pour obtenir un numéro d'autorisation de retour avant de l'expédier. Veuillez si possible conserver le<br />
matériel d'emballage afin de l'utiliser en cas de retour.<br />
12
Caractéristiques des enceintes Resound <strong>RS15S</strong> et <strong>RS18S</strong><br />
Les enceintes Subwoofer de la gamme Resound Series de <strong>Samson</strong> sont disponibles en deux modèles afin de répondre<br />
à une multitude d'applications de sonorisation. Avec leurs composants de haute qualité, leurs poignées de transport et<br />
leur embase de poteau ergonomiques et leur format pratique, les enceintes Subwoofer Resound sont fiables et très efficaces.<br />
Voici quelques-unes des caractéristiques principales :<br />
FRANÇAIS<br />
• Des enceintes de renforcement des basses fréquences composées de composants de haute qualité et permettant<br />
d'obtenir des graves précis avec n'importe quel système de sonorisation.<br />
• Des moteurs haute résistance conçus spécialement pour les basses fréquences, servant à étendre leur réponse.<br />
Les enceintes <strong>RS15S</strong> sont dotées d'un Woofer de 38 cm (15 pouces) et les enceintes <strong>RS18S</strong> d'un Woofer de 46<br />
cm (18 pouces).<br />
• Une puissance nominale élevée, soit une puissance continue impressionnante de 400 Watts.<br />
• Des connecteurs d'entrée Neutrik Speakon ® et 6,35 mm facilitant la connexion avec la plupart des amplificateurs<br />
de puissance ou des mélangeurs amplifiés.<br />
• Des connecteurs de sortie Neutrik Speakon ® et 6,35 mm permettant de connecter en cascade plusieurs enceintes<br />
Resound afin d'obtenir des systèmes de sonorisation plus puissants.<br />
• Un filtre passe-bas de 12dB/octave à 180 Hz intégré au Woofer.<br />
• Une embase pour pi<strong>ed</strong> standard de 35 mm permettant de monter des haut-parleurs satellites de médiums et<br />
d'aigus.<br />
• Un revêtement moquette très résistant ainsi qu'une grille en acier, pour une excellente protection de l'enceinte.<br />
• Une garantie étendue de trois ans.<br />
13
Composants des enceintes <strong>RS15S</strong> et <strong>RS18S</strong><br />
FACE AVANT des enceintes Resound<br />
1 Moteur Woofer – Woofer haute puissance<br />
de 38 cm (15 pouces) ou 46 cm (18 pouces)<br />
conçu spécialement pour générer des graves<br />
riches.<br />
2 Poignée – Une des deux poignées de transport<br />
surdimensionnées.<br />
3 Grille en acier – Grille en acier robuste servant<br />
à protéger le Woofer et permettant son<br />
accès.<br />
<br />
<br />
<br />
<br />
FRANÇAIS<br />
4 Évent linéaire – Deux évents accordés pour<br />
les graves, servant à étendre la réponse dans<br />
les basses fréquences.<br />
5 Baffle – Baffle en bois robuste recouvert<br />
d'une finition moquette.<br />
<br />
<br />
<br />
FACE ARRIÈRE des enceintes Resound<br />
A<br />
Entrée INPUT – Un connecteur d'entrée<br />
Neutrik Speakon® permettant la connexion à<br />
la sortie d'un amplificateur de puissance ou<br />
d'un mélangeur amplifié.<br />
<br />
<br />
B<br />
C<br />
D<br />
Sortie EXTENSION – Un connecteur de sortie<br />
Neutrik Speakon® permettant de connecter<br />
d'autres Resound en parallèle.<br />
Entrée INPUT – Un connecteur d'entrée<br />
6,35 mm permettant la connexion à la sortie<br />
d'un amplificateur de puissance ou d'un<br />
mélangeur amplifié.<br />
Sortie EXTENSION – Un connecteur de<br />
sortie de 6,35 mm permettant de connecter<br />
d'autres enceintes Resound en parallèle.<br />
<br />
<br />
<br />
Remarque : Pour un schéma de câblage détaillé,<br />
consultez la page 9 de ce mode d'emploi.<br />
<br />
<br />
14
Configuration de votre système de sonorisation<br />
Avant d'effectuer les connexions, prenez le temps de déterminer de quelle façon sera connectée votre nouvelle enceinte<br />
Subwoofer. Il y a plusieurs façons de connecter les enceintes <strong>RS15S</strong> et <strong>RS18S</strong>, mais la plupart du temps, la configuration<br />
sera en mono (Subwoofer commun) ou en stéréo.<br />
Subwoofer mono<br />
Dans la plupart des cas, un seul<br />
Subwoofer commun configuré<br />
en mono est souhaitabe pour<br />
plusieurs raisons, la principale<br />
étant que les basses fréquences<br />
produitent sont omnidirectionnelles.<br />
Puisque les ondes des<br />
basses fréquences prennent<br />
énormément d'espace pour se<br />
développer, il est impossible de<br />
dire si elles proviennent de la<br />
droite ou de la gauche, sauf dans<br />
les très grandes salles. En raison<br />
de ce phénomène, pratiquement<br />
toutes les sources d'extrêmes<br />
graves sont mélangées en mono.<br />
FRANÇAIS<br />
Subwoofers stéréo<br />
Dans les salles plus grandes, de<br />
même que dans les cinémas<br />
et les parcs d'attractions, deux<br />
enceintes <strong>RS15S</strong> et <strong>RS18S</strong> peuvent<br />
être utilisées en stéréo afin<br />
de créer des effets de basses<br />
fréquences spéciaux.<br />
15
Installation rapide<br />
Dans les pages suivantes, vous trouverez des schémas détaillés d'installations de systèmes de sonorisation, mais si vous souhaitez<br />
commencer tout de suite, consultez le schéma et les étapes ci-dessous afin de mettre en place un système stéréo de base à partir d'un<br />
système de sonorisation mono.<br />
REMARQUE : Avant de mettre sous tension, il est toujours bon de se remémorer la règle d'or de la sonorisation : LE DERNIER APPAREIL<br />
MIS SOUS TENSION DOIT ÊTRE LE PREMIER MIS HORS TENSION, ce qui veut dire qu'à la mise sous tension de votre système, vous<br />
devriez toujours mettre sous tension vos amplificateurs de puissance ou vos enceintes amplifiées en DERNIER, et qu'à la mise hors tension,<br />
vous devriez mettre hors tension les amplificateurs de puissance en PREMIER. Cette règle vise à éviter les claquements bruyants<br />
résultant du courant d'appel à la mise sous tension, qui peuvent parfois endommager les haut-parleurs.<br />
• Avant de connecter vos enceintes Resound, assurez-vous que tous les composants de votre système sont hors tension. Réglez<br />
aussi les potentiomètres de volume de votre amplificateur de puissance, ainsi que les Faders généraux des canaux de droite et de<br />
gauche de votre mélangeur, à la valeur minimum.<br />
• Connectez les câbles de vos micros, de vos instruments ou de votre lecteur de CD à votre mélangeur.<br />
FRANÇAIS<br />
• Connectez ensuite les sorties de votre mélangeur à l'entrée d'un amplificateur de puissance pour vos haut-parleurs satellites de<br />
médiums et d'aigus.<br />
• Connectez maintenant la sortie mono du mélangeur à l'entrée d'un amplificateur de puissance basses fréquences en mode Bridgé<br />
mono. Si votre amplificateur ne peut pas être Bridgé, réglez le commutateur du mode d'entrée de l'amplificateur pour qu'il soit en<br />
parallèle, ou utilisez un câble en “Y” pour connecter les deux entrées de l'amplificateur.<br />
• Connectez la sortie des basses fréquences de l'amplificateur de puissance à l'entrée des enceintes <strong>RS15S</strong> et <strong>RS18S</strong> à l'aide de<br />
câbles de haut-parleur standard munis de connecteurs Speakon.<br />
• Connectez les sorties des médiums et des aigus de l'amplificateur de puissance à l'entrée des enceintes satellites à l'aide de câbles<br />
de haut-parleur standard munis de connecteurs Speakon.<br />
REMARQUE IMPORTANTE : Consultez les guides d'utilisateur de vos amplificateurs de puissance afin de vous assurer qu'ils<br />
peuvent fonctionner en toute sécurité sous 4 Ohms.<br />
• Mettez votre mélangeur, vos instruments ou votre lecteur de CD sous tension, puis ensuite votre amplificateur de puissance.<br />
• Tout en parlant dans votre micro (ou en utilisant un instrument ou le lecteur de CD), réglez les égaliseurs principaux des canaux<br />
de droite et de gauche à la position “0”. Assurez-vous que les afficheurs de niveau de sortie du mélangeur n'indiquent pas de saturation.<br />
Si c'est le cas, réduisez le volume du mélangeur jusqu'à ce que le signal soit clair.<br />
• Augmentez maintenant le niveau de l'amplificateur de puissance des médiums et des aigus jusqu'au niveau souhaité.<br />
• Réglez le niveau de sortie mono du mélangeur à la valeur minimum puis réglez celui de l'amplificateur à la valeur maximum.<br />
• Réglez finalement le niveau des Subwoofers à l'aide de la sortie mono du mélangeur.<br />
16
Schémas d'installation des enceintes <strong>RS15S</strong> et <strong>RS18S</strong><br />
Enceintes <strong>RS15S</strong> et <strong>RS18S</strong> en stéréo avec satellites passifs<br />
<br />
<br />
<br />
<br />
FRANÇAIS<br />
Voici un exemple de système avec un seul amplificateur de puissance auquel sont connectés en stéréo les enceintes et les satellites. Les sorties<br />
de gauche et de droite du mélangeur sont connectées aux entrées de l'amplificateur de puissance à l'aide de câbles blindés. Les sorties de<br />
l'amplificateur sont connectées aux entrées INPUT des enceintes <strong>RS15S</strong> ou <strong>RS18S</strong> à l'aide de câbles de haut-parleur standard. Les deux hautparleurs<br />
satellites sont connectés aux sorties EXTENSION des enceintes <strong>RS15S</strong> ou <strong>RS18S</strong> à l'aide de câbles de haut-parleur standard. Pour<br />
plus de détails sur le câblage des haut-parleurs, consultez la page 42. REMARQUE IMPORTANTE : Pour éviter des dommages à vos hautparleurs<br />
et à votre amplificateur, consultez le manuel de ce dernier afin de vous assurer qu'il peut fonctionner sous 2 Ohms.<br />
Enceintes <strong>RS15S</strong> et <strong>RS18S</strong> en mono avec satellites passifs<br />
<br />
<br />
Voici un exemple de système stéréo avec Subwoofer mono où des amplificateurs différents alimentent les satellites de médiums et d'aigus et<br />
les Subwoofers. Les sorties du mélangeur sont connectées aux entrées de l'amplificateur de puissance des médiums et des aigus à l'aide de<br />
câbles blindés. Utilisez des câbles standard pour connecter les deux satellites à cet amplificateur. Connectez la sortie mono du mélangeur aux<br />
entrées de l'amplificateur de puissance du Subwoofer à l'aide de câbles blindés. Les sorties de cet amplificateur sont connectées aux entrées<br />
des enceinte <strong>RS15S</strong> et <strong>RS18S</strong> à l'aide de câble standard. Pour plus de détails sur le câblage des haut-parleurs, consultez la page 42.<br />
17
Utilisation des enceintes <strong>RS15S</strong> et <strong>RS18S</strong><br />
Enceintes <strong>RS15S</strong> et <strong>RS18S</strong> en stéréo avec satellites passifs dans un système à deux amplificateurs<br />
FRANÇAIS<br />
Ce schéma illustre un système stéréo à deux amplificateurs avec filtre actif, où les Subwoofers et les satellites sont alimentés par des amplificateurs<br />
différents. Les sorties du mélangeur sont connectées aux entrées du filtre stéréo à l'aide de câbles blindés. Les sorties hautes fréquences<br />
sont connectées aux entrées de l'amplificateur de puissance de médiums et d'aigus à l'aide de câbles blindés. Connectez les haut-parleurs<br />
satellites à cet amplificateur à l'aide de câbles standard. Connectez les sorties basses fréquences du filtre aux entrées de l'amplificateur du<br />
Subwoofer à l'aide de câbles blindés. Les sorties de cet amplificateur sont connectées aux entrées des enceintes <strong>RS15S</strong> ou <strong>RS18S</strong> à l'aide de<br />
câbles de haut-parleur standard. Pour plus de détails sur le câblage des haut-parleurs, consultez la page 42.<br />
Enceintes <strong>RS15S</strong> et <strong>RS18S</strong> en mono avec des satellites actifs<br />
<br />
<br />
Dans cet exemple, les sorties du mélangeur sont connectées aux entrées des enceintes satellites actifs à l'aide de câbles blindés. Connectez la<br />
sortie mono du mélangeur à la ou les sorties de l'amplificateur de puissance du Subwoofer à l'aide de câble blindé. Utilisez un mode d'entrée<br />
parallèle ou utilisez un câble en “Y” pour connecter les deux canaux de l'amplificateur. Connectez les sorties de cet amplificateur aux enceintes<br />
<strong>RS15S</strong> ou <strong>RS18S</strong> à l'aide de câbles standard. Pour plus de détails sur le câblage des haut-parleurs, consultez la page 42.<br />
18
Einleitung<br />
Herzlichen Glückwunsch zum Kauf eines Subwoofers der <strong>Samson</strong> Resound Series! Mit den Resound <strong>RS15S</strong> und <strong>RS18S</strong><br />
Subwoofern können Sie fast j<strong>ed</strong>es PA-System durch einen Tiefbassbereich erweitern. Dank ihrer Kombination aus hoher<br />
Belastbarkeit, separatem Eingangsfilter sowie hochwertigen Lautsprecher- und Gehäusebauteilen bieten die Resound<br />
<strong>RS15S</strong> und <strong>RS18S</strong> massive Tiefbässe für alle Live-Anwendungen. Die Tieffrequenz-Treibereinheiten sind aus hoch belastbarem<br />
Stahl und gegossenen Aluminium-Körben konstruiert und zeichnen sich durch große Schwingspulen, massive<br />
Magnete, imprägnierte Konusse und Butyl-Umrandungen aus. Die <strong>RS15S</strong> und <strong>RS18S</strong> Gehäuse wurden mittels präzise<br />
abgestimmtem Schacht-Port-Design sorgfältig an einen druckvollen und klaren Tieffrequenz-Betrieb angepasst.<br />
Als Ergebnis bieten die Resound <strong>RS15S</strong> und <strong>RS18S</strong> dynamische, tiefe und kontrollierte Subbässe. Für eine einfache<br />
Verkabelung wurde j<strong>ed</strong>es Resound-Modell mit 1/4" und NEUTRIK SPEAKON® Eingängen sowie Erweiterungsausgängen<br />
ausgestattet. An den breitbandigen Extension-Ausgang lassen sich Satelliten-Boxen oder ein weiterer Resound<br />
Subwoofer anschließen. J<strong>ed</strong>e Subwoofer-Box besitzt ein eigenes 12dB/Oktave, 180 Hz Tiefpass-Crossover für den<br />
Tieffrequenztreiber. Das Resound-System lässt sich sehr schnell und einfach auf- und abbauen. Die kompakten Boxen<br />
verfügen über eine 1 3/8” (35 mm) Ständerhalterung zum Montieren von Satelliten-Boxen und sind dank hoch belastbarer<br />
Stahlgriffe einfach zu transportieren. Der langlebige, schwarze Teppichbezug und das stabile, vorderseitige Stahlgitter<br />
schützen hervorragend vor Gebrauchsspuren und Transportschäden. Als fest installierte Beschallungsanlage oder als<br />
strapazierfähige, großartig klingende Tour-PA sind die Resound <strong>RS15S</strong> und <strong>RS18S</strong> Subwoofer ideal für Sound-Profis und<br />
Performer geeignet, die bei einem PA-Boxensystem nach hoher Bass-Ausgangsleistung und Studiomonitor-Klangqualität<br />
suchen.<br />
Auf diesen Seiten finden Sie eine detaillierte Beschreibung der Funktionen des Resound PA-Systems und dessen Vorder-<br />
/Rückseite sowie schrittweise Anleitungen für die Einrichtung und Anwendung plus umfassende Technische Daten.<br />
Die beiliegende Garantiekarte sollten Sie ausfüllen und an uns zurücksenden, damit Sie online technischen Support<br />
beanspruchen und zukünftig aktualisierte Informationen über dieses und andere <strong>Samson</strong>-Produkte von uns erhalten<br />
können.<br />
Bei korrekter Pflege wird Ihr Resound über Jahre hinaus problemlos funktionieren. Sie sollten Ihre Seriennummer für den<br />
zukünftigen Gebrauch in die folgende Zeile eintragen.<br />
Seriennummer: _____________________<br />
Kaufdatum: ________________________<br />
DEUTSCHE<br />
Wenn Ihr Gerät einmal gewartet werden muss, benötigen Sie vor der Rücksendung an <strong>Samson</strong> eine Return Authorization-Nummer<br />
(RA/Rücksende-Berechtigungsnummer). Ohne diese Nummer wird das Gerät nicht angenommen.<br />
Bitte rufen Sie <strong>Samson</strong> unter 1-800-3SAMSON (1-800-372-6766) an, um vor dem Verschicken der Box eine Return<br />
Authorization-Nummer zu erhalten. Bitte heben Sie das Original-Verpackungsmaterial auf und schicken Sie das Gerät<br />
möglichst im originalen Karton mit Verpackungsmaterial zurück.<br />
19
Resound <strong>RS15S</strong> und <strong>RS18S</strong> Features<br />
Die beiden Subwoofer-Modelle der <strong>Samson</strong> Resound-Serie sind für ein breites Spektrum an Live-Beschallungen geeignet.<br />
Mit ihren hochwertigen Bauteilen, ihren kompakten Gehäusen sowie ihren ergonomischen Tragegriffen und<br />
Ständerhalterungen zeichnen sich die Subwoofer der Resound-Serie durch großartigen Sound und hohe Zuverlässigkeit<br />
aus. Die wichtigsten Features sind:<br />
• Bass-Extensionsgehäuse mit hochwertigen Bauteilen für saubere, deutliche Bässe in j<strong>ed</strong>em Beschallungssystem.<br />
• Für eine erweiterte Bassansprache verwenden die Resound-Subwoofer speziell entwickelte, hoch belastbare<br />
Tieffrequenztreiber. Der <strong>RS15S</strong> verfügt über einen 15" Woofer und der <strong>RS18S</strong> über einen 18" Woofer.<br />
DEUTSCHE<br />
• Die Boxen der Resound-Serie sind mit 400 Watt Dauerbelastbarkeit sehr hoch belastbar.<br />
• Neutrik Speakon ® plus 1/4" Eingänge lassen sich mit fast j<strong>ed</strong>er Endstufe und j<strong>ed</strong>em Aktivmischer verbinden.<br />
• Neutrik Speakon ® plus 1/4" Erweiterungsausgänge ermöglichen zudem das Verketten mehrerer Resound-<br />
Modelle, um größere Beschallungssysteme aufzubauen.<br />
• Internes, 12dB/Oktave, 180 Hz Low Pass Crossover zum Tieffrequenztreiber.<br />
• Standard 1 3/8" Boxenständerhalterungen zum Montieren von mittelhohen Satelliten-Boxen.<br />
• Robuste, tour-taugliche, teppich-bezogene Gehäuse mit Stahlschutzgittern für hohe Zuverlässigkeit.<br />
• Hochwertige und stabile Konstruktion garantiert einen zuverlässigen Betrieb - j<strong>ed</strong>e Nacht an j<strong>ed</strong>em<br />
Veranstaltungsort.<br />
• 3-jährige, erweiterte Garantie.<br />
20 20
<strong>RS15S</strong> und <strong>RS18S</strong> Bauteile<br />
Resound VORDERSEITE<br />
1 Tieffrequenztreiber – Speziell entwickelter,<br />
hoch belastbarer 15” bzw. 18" Tieffrequenztreiber<br />
erzeugt massive Tiefbässe.<br />
2 Tragegriffe – Einer von zwei übergroßen<br />
Tragegriffen.<br />
3 Stahlschutzgitter – Stabiles Stahlgitter vor<br />
dem LF-Treiber zum Schutz und einfachen<br />
Zugriff.<br />
4 Port-Schächte – Zwei präzise abgestimmte<br />
Bass-Portsektionen zur Erweiterung der<br />
Bassansprache.<br />
5 Gehäuse – Robustes Holzgehäuse mit langlebigem<br />
Teppichbezug.<br />
<br />
<br />
<br />
<br />
<br />
<br />
<br />
Resound RÜCKSEITE<br />
DEUTSCHE<br />
A<br />
INPUT – Neutrik Speakon® Eingang für den<br />
Anschluss an den Ausgang einer Endstufe<br />
oder eines Aktivmischers.<br />
<br />
<br />
B<br />
C<br />
D<br />
EXTENSION – paralleler Neutrik Speakon®<br />
Ausgang für den Anschluss zusätzlicher<br />
Resounds.<br />
INPUT – 1/4" Klinkeneingang für den<br />
Anschluss an den Ausgang einer Endstufe<br />
oder eines Aktivmischers.<br />
EXTENSION – paralleler 1/4" Ausgang für<br />
den Anschluss zusätzlicher Resounds.<br />
<br />
<br />
<br />
Hinweis: Ein detailliertes Verdrahtungsdiagramm<br />
finden Sie auf Seite 9 dieses Handbuchs.<br />
<br />
<br />
21
Boxen-System konfigurieren<br />
Bevor Sie Kabel anschließen, sollten Sie entscheiden, wie Sie Ihren neuen Subwoofer integrieren möchten. Man kann den<br />
<strong>RS15S</strong> und <strong>RS18S</strong> auf viele verschi<strong>ed</strong>ene Arten integrieren, wobei die meisten System-Setups in zwei Kategorien fallen:<br />
Stereo- oder Mono (common) Sub-Betrieb.<br />
DEUTSCHE<br />
Common Sub-Betrieb<br />
In den meisten Fällen ist beim<br />
Betrieb eines Mono-Systems ein<br />
common Sub wünschenswert.<br />
Hierfür gibt es mehrere Gründe,<br />
am wichtigsten ist j<strong>ed</strong>och,<br />
dass die von einem Subwoofer<br />
erzeugten tiefen Frequenzen<br />
unidirektional sind. Da tiefe<br />
Frequenzwellen so viel Raum<br />
benötigen, um sich zu entwickeln,<br />
lässt sich nicht mehr<br />
feststellen, ob der Subbass von<br />
links oder rechts kommt, falls<br />
Sie sich nicht gerade in einem<br />
sehr großen Raum befinden.<br />
Aufgrund dieses Phänomens<br />
ist fast das gesamte Subbass-<br />
Material in Mono gemischt.<br />
Stereo Sub-Betrieb<br />
In großen Räumen sowie in<br />
Theatern und Freizeitpark-<br />
Installationen (für Subbass-<br />
Spezialeffekte) können auch<br />
zwei <strong>RS15S</strong> und <strong>RS18S</strong> in Stereo<br />
eingesetzt werden.<br />
22
Schnelles Setup<br />
Auf den folgenden Seiten dieses Handbuchs finden Sie detaillierte Diagramme anderer System-Einrichtungen, aber wenn Sie einfach<br />
schnell beginnen möchten, können Sie nach dem folgenden Diagramm und der schrittweisen Beschreibung vorgehen, um ein<br />
elementares Stereo-PA-System mit zwei Mono-Subwoofern einzurichten.<br />
HINWEIS: Beherzigen Sie vor dem Einstecken der Netzstecker und Einschalten der Geräte die Goldene Audioregel … " ZULETZT EIN,<br />
ZUERST AUS". Beim Einschalten Ihres Systems sollten Sie also Ihre Endstufen und Aktivmonitore immer ZULETZT einschalten und<br />
diese beim Ausschalten des Systems ZUERST ausschalten. Damit vermeiden Sie laute Pop-Geräusche durch Spannungsspitzen beim<br />
Einschalten, die manchmal Boxen beschädigen können.<br />
• Bevor Sie Ihre Resounds anschließen, müssen alle System-Komponenten ausgeschaltet sein. Außerdem müssen die<br />
Lautstärkeregler der Endstufe und die linken/rechten Hauptfader des Mischers ganz zurückg<strong>ed</strong>reht sein.<br />
• Schließen Sie Mikrofon- oder Instrumentenkabel oder einen CD Player an Ihren Mischer an.<br />
• Verbinden Sie die linken und rechten Ausgänge des Mischers mit dem INPUT einer Endstufe für Ihre Mitten/Höhen-<br />
Satellitenboxen.<br />
• Verbinden Sie dann den Mono-Ausgang des Mischers mit dem INPUT einer Bass-Endstufe, die im gebrückten Mono-Modus<br />
betrieben wird. Falls Ihr Amp keinen gebrückten Mono-Modus besitzt, stellen Sie den Input Mode-Schalter Ihrer Endstufe auf<br />
"Parallel" oder schließen Sie beide Amp-Kanäle über ein “Y” Kabel an.<br />
• Verbinden Sie dann den Ausgang der Bass-Endstufe über Boxenkabel mit Speakon-Anschlüssen mit den INPUTs der <strong>RS15S</strong> oder<br />
<strong>RS18S</strong>.<br />
• Verbinden Sie dann die Ausgänge der Mitten/Höhen-Endstufe über Boxenkabel mit Speakon-Anschlüssen mit den INPUTs von<br />
Satelliten-Boxen.<br />
WICHTIGER HINWEIS: Prüfen Sie anhand des Endstufen-B<strong>ed</strong>ienungshandbuchs, ob der Amp sicher mit 4 Ohm betrieben<br />
werden kann.<br />
• Schalten Sie zuerst den Mischer, die Instrumente und/oder den CD Player und dann die Endstufe ein.<br />
• Sprechen Sie ins Mikrofon (oder spielen Sie auf dem Instrument bzw. starten Sie den CD Player) und schieben Sie die linken/<br />
rechten Hauptfader des Mischers auf die “0” Position. Die Ausgangsanzeigen des Mischers dürfen hierbei nicht übersteuern.<br />
Andernfalls regeln Sie den Mischerpegel zurück, bis Sie ein sauberes Signal erhalten.<br />
• Drehen Sie dann die Regler der Mitten/Höhen-Endstufe auf, bis der gewünschte Abhörpegel erreicht ist.<br />
• Drehen Sie den Mono-Ausgang des Mischers ganz zurück und dann die Sub-Endstufe ganz auf.<br />
• Stellen Sie schließlich mit dem Mono-Ausgang des Mischers den Pegel der Subwoofer ein.<br />
DEUTSCHE<br />
<br />
<br />
23
<strong>RS15S</strong> und <strong>RS18S</strong> System-Setups<br />
<strong>RS15S</strong> und <strong>RS18S</strong> Stereo-Sub mit passiven Satelliten-Boxen<br />
<br />
<br />
<br />
<br />
DEUTSCHE<br />
Dieses Beispiel zeigt ein System mit einer einzelnen Endstufe, an die die Sub- und Satelliten-Boxen in Stereo angeschlossen sind. Der linke und<br />
rechte Ausgang des Mischers ist über abgeschirmte Kabel mit den Eingängen der Endstufe verbunden. Die Ausgänge des Amps sind über<br />
nicht-abgeschirmte Boxenkabel mit den INPUTs der <strong>RS15S</strong> oder <strong>RS18S</strong> verbunden. Führen Sie dann ein nicht-abgeschirmtes Boxenkabel vom<br />
EXTENSION OUTPUT der <strong>RS15S</strong> oder <strong>RS18S</strong> zu den Satelliten-Boxen. Details zur Verdrahtung von Boxenkabeln finden Sie auf Seite 42.<br />
WICHTIGER HINWEIS: Um mögliche Beschädigungen an Amp und Boxen zu vermeiden, prüfen Sie im B<strong>ed</strong>ienungshandbuch des<br />
Herstellers, ob Ihre Endstufe mit 2 Ohm betrieben werden kann.<br />
<strong>RS15S</strong> und <strong>RS18S</strong> Mono Sub mit passiven Satelliten-Boxen<br />
<br />
<br />
Dieses Beispiel zeigt ein Stereo-System mit Mono-Subboxen, das mit separaten Amps für die Mitten/Höhen-Satelliten und Subwoofer<br />
betrieben wird. Der linke und rechte Ausgang des Mischers ist über abgeschirmte Kabel mit den Eingängen der Mitten/Höhen-Endstufen verbunden.<br />
Führen Sie dann nicht-abgeschirmte Kabel von diesem Amp zu den beiden Satelliten-Boxen. Verbinden Sie dann den Mono-Ausgang<br />
des Mischers über abgeschirmte Kabel mit den Eingängen der Sub-Endstufe. Die Ausgänge der Sub-Endstufe werden über nicht-abgeschirmte<br />
Kabel mit den INPUTs der <strong>RS15S</strong> oder <strong>RS18S</strong> verbunden. Details über die Verdrahtung von Boxenkabeln finden Sie auf Seite 42.<br />
24
<strong>RS15S</strong> und <strong>RS18S</strong> Stereo Sub, Bi-Amp-System mit passiven Satelliten-Boxen<br />
<strong>RS15S</strong> und <strong>RS18S</strong> betreiben<br />
Dieses Beispiel zeigt ein Stereo Bi-Amp-System mit einem aktiven Crossover und separaten Endstufen für die Mitten/Höhen-Satelliten und<br />
Subwoofer. Der linke und rechte Ausgang des Mischers wird über abgeschirmte Kabel mit den Eingängen des Stereo Crossovers verbunden.<br />
Die High Frequency-Ausgänge des Crossovers werden über abgeschirmte Kabel mit den Eingängen des Mitten/Höhen-Amps verbunden.<br />
Führen Sie dann nicht-abgeschirmte Kabel von diesem Amp zu den beiden Satelliten-Boxen. Verbinden Sie dann die Low Frequency-<br />
Ausgänge des Crossovers über abgeschirmte Kabel mit den Eingängen der Subwoofer-Endstufe. Die Ausgänge des Sub-Amps werden über<br />
nicht-abgeschirmte Kabel mit den INPUTs der <strong>RS15S</strong> oder <strong>RS18S</strong> verbunden. Details zur Verdrahtung von Boxenkabeln finden Sie auf Seite 42.<br />
<strong>RS15S</strong> und <strong>RS18S</strong> Mono Sub mit aktiven Satelliten-Boxen<br />
DEUTSCHE<br />
<br />
<br />
In diesem Beispiel wird der linke und rechte Ausgang des Mischers über abgeschirmte Kabel mit den Eingängen der aktiven Satelliten-Boxen<br />
verbunden. Verbinden Sie dann den Mono-Ausgang des Mischers über ein abgeschirmtes Kabel mit dem Eingang (den Eingängen) der<br />
Subwoofer-Endstufe. Stellen Sie den Input-Modus der Endstufe auf "Parallel" ein oder schließen Sie beide Amp-Kanäle über ein “Y” Kabel an.<br />
Verbinden Sie dann die Ausgänge des Sub-Amps über nicht-abgeschirmte Boxenkabel mit den INPUTs der <strong>RS15S</strong> oder <strong>RS18S</strong>. Details zur<br />
Verdrahtung von Boxenkabeln finden Sie auf Seite 42.<br />
25
Introducción<br />
¡Felicidades y gracias por comprar el subwoofer <strong>Samson</strong> Resound Series! Los subwoofers Resound <strong>RS15S</strong> y <strong>RS18S</strong><br />
subwoofers suponen una solución perfecta para añadir ampliación en graves a prácticamente cualquier sistema PA.<br />
Con su gran capacidad de manejo de potencia, combinada con el filtrado de entrada de los satélites y la alta calidad de<br />
tanto su recinto como de los altavoces, el Resound <strong>RS15S</strong> y <strong>RS18S</strong> ofrecen unos super graves profesionales para cualquier<br />
tipo de aplicación en directo. Los cabezales de graves han sido fabricados en acero de gran resistencia sobre un marco<br />
moldeado en aluminio y disponen de grandes bobinas de voz, enormes imanes, conos tratados y recubrimiento de<br />
butilo. Los recintos acústicos <strong>RS15S</strong> y <strong>RS18S</strong> han sido cuidadosamente escogidos y moldeados para que ofrezcan un<br />
rendimiento en graves articulado y con pegada, empleando un diseño con toberan en estantería de gran precisión.<br />
Como resultado, el Resound <strong>RS15S</strong> y <strong>RS18S</strong> ofrecen unos impresionantes super graves profundos y controlados. Para<br />
hacer que sus conexiones sean más sencillas, cada uno de estos Resound le ofrece conectores de entrada y salida de<br />
ampliación tanto en 6,3 mm como en NEUTRIK SPEAKON®. La salida Extension o de ampliación es una salida de rango<br />
completo que pu<strong>ed</strong>e usar para conectar un satélite u otro subwoofer Resound. Cada uno de estos recintos subwoofer<br />
tiene su propio crossover pasabajos de 12 dB por octava, 180 Hz para el cabezal de graves. Con el Resound, el proceso de<br />
configuración y puesta en marcha es rápido y sencillo. Los recintos compactos incluyen un receptáculo para montaje en<br />
barra de 1 3/8” (35mm) para la colocación de altavoces satélites, y además son muy sencillos de transportar gracias a sus<br />
robustas asas de acero. Un resistente recubrimiento de moqueta y unas parrillas de protección en acero le ofrecen una<br />
excelente protección contra el desgaste y los golpes. Tanto como sistema de refuerzo de sonido fijo o como resistente y<br />
potente PA de directo, los subwoofers Resound <strong>RS15S</strong> y <strong>RS18S</strong> resultan extraordinarios para profesionales del sonido y<br />
músicos que busquen una salida de graves de calidad y una calidad de sonido de monitor de estudio en un sistema de<br />
altavoces PA.<br />
En estas páginas encontrará una descripción detallada de las características del sistema PA Resound, así como<br />
una descripción de su panel frontal y posterior, instrucciones paso-a-paso para su configuración y manejo y sus<br />
especificaciones completas. También encontrará una tarjeta de garantía—no se olvide de rellenarla y devolvérnosla por<br />
correo para que pu<strong>ed</strong>a recibir soporte técnico online y para que podamos informarle sobre cualquier nov<strong>ed</strong>ad sobre este<br />
y cualquier otro aparato <strong>Samson</strong> en el futuro.<br />
Con unos cuidados mínimos y una ventilación adecuada, su Resound funcionará durante años sin darle ningún<br />
problema. Le recomendamos que apunte aquí abajo el número de serie de esta unidad para cualquier posible consulta<br />
que tenga que hacernos en el futuro.<br />
Número de serie: __________________________<br />
Fecha de compra: ________________________<br />
ESPAÑOL<br />
En el improbable caso de que su unidad tenga que ser reparada en algún momento, necesitará conseguir un número de<br />
Autorización de devolución (RA) para poder enviar su unidad a <strong>Samson</strong>. Sin este número, ninguna unidad es aceptada en<br />
fábrica. Póngase en contacto con <strong>Samson</strong> en el teléfono 1-800-3SAMSON (1-800-372-6766) para que le facilitemos este<br />
número de autorización de devolución antes de enviarnos la unidad. Le recomendamos que guarde el embalaje original<br />
de este aparato y, si es posible, utilice este embalaje para devolvernos la unidad en caso de reparación.<br />
26
Características del Resound <strong>RS15S</strong> y <strong>RS18S</strong><br />
Los subwoofers <strong>Samson</strong> Resound series le ofrecen dos modelos para que pu<strong>ed</strong>a gestionar una amplia gama<br />
de aplicaciones de sonido directo. Gracias a sus componentes de alta calidad, recintos acústicos de grandes<br />
dimensiones, sus asas ergonómicamente ubicadas y sus receptáculos de montaje, los subwoofer Resound<br />
series le darán un sonido de gran fiablidad. Estas son algunas de sus características:<br />
• Recinto acústico de ampliación de graves con componentes de alta calidad, que ofrecen unos graves<br />
limpios y articulados para cualquier sistema de refuerzo de sonido.<br />
• Para una mayor respuesta en graves, los subwoofers Resound usan cabezales de bajas frecuencias<br />
de gran rendimiento y diseño exclusivo. El <strong>RS15S</strong> emplea un woofer de 15 pulgadas, mienrtas que el<br />
<strong>RS18S</strong> utiliza uno de 18 pulgadas.<br />
• Los altavoces Resound series son capaces de manejar altos niveles de potencia, con una capacidad<br />
de potencia continua de unos impresionantes 400 watios.<br />
• Sus conectores de entrada Neutrik Speakon ® y de 6,3 mm permiten una interconexión fácil con la<br />
mayoría de etapas de potencia y mesas de mezclas autoamplificadas.<br />
• También dispone de conectores de salida de ampliación Neutrik Speakon ® y de 6,3 mm que le permiten<br />
"conectar en cadena" varios modelos Resound, para crear un sistema de refuerzo de sonido<br />
mayor.<br />
• Crossover pasabajos interno de 12 dB por octava, 180 Hz para el cabezal de graves.<br />
• Receptáculos de barra de 1 3/8 pulgadas standard para el montaje de satélites de m<strong>ed</strong>ios-agudos.<br />
• Robustos recintos acústicos con resistente recubrimiento de moqueta y parrillas de acero para una<br />
mayor durabilidad y fiabilidad.<br />
ESPAÑOL<br />
• Una construcción robusta y de calidad que le asegura un rendimiento fiable día tras día.<br />
• Tres años de garantía ampliada.<br />
27
Componentes del <strong>RS15S</strong> y <strong>RS18S</strong><br />
PANEL FRONTAL del Resound<br />
1 Cabezal de graves – Cabezal de graves,<br />
de 15”y 18", de alto rendimiento, para<br />
unos bajos fiables y profundos.<br />
2 Asa – Una de las dos enormes asas de<br />
agarre de la unidad.<br />
3 Parrilla de acero – Resistente parrilla de<br />
acero que le ofrece protección a la vez<br />
que un acceso fácil al cabezal de graves.<br />
4 Tobera en estantería – Dos secciones<br />
de tobera, perfectamente afinadas, para<br />
ampliar la respuesta en graves.<br />
5 Recinto acústico – Resistente recinto<br />
acústico en madera con un fuerte<br />
recubrimiento de moqueta.<br />
<br />
<br />
<br />
<br />
<br />
<br />
<br />
PANEL TRASERO del Resound<br />
A<br />
INPUT – Conector de entrada en Neutrik<br />
Speakon® para su conexión a la salida de<br />
una etapa de potencia o mesa de mezclas<br />
autoamplificada.<br />
<br />
<br />
ESPAÑOL<br />
B<br />
EXTENSION – Conector de salida en<br />
paralelo Neutrik Speakon® para la inclusión<br />
de Resounds adicionales.<br />
C INPUT – Conector de entrada en 6,3<br />
mm para su conexión a la salida de una<br />
etapa de potencia o mesa de mezclas<br />
autoamplificada.<br />
<br />
<br />
<br />
D<br />
EXTENSION – Conector de salida en<br />
paralelo en 6,3 mm para la inclusión de<br />
Resounds adicionales.<br />
Nota: Si quiere ver un diagrama de cableado en<br />
detalle, vea la página 42 de este manual.<br />
<br />
<br />
28
Configuración de su sistema de altavoces<br />
Antes de empezar a colocar cables, debería d<strong>ed</strong>icar un minuto a decidir cómo quiere interconectar su nuevo<br />
subwoofer. Existen varias formas en las que pu<strong>ed</strong>e conectar el <strong>RS15S</strong> y <strong>RS18S</strong>, pero la mayoría de sistemas<br />
suelen qu<strong>ed</strong>ar encuadrados en solo dos categorías; funcionamiento sub en stereo o en mono (común).<br />
Funcionamiento de sub común<br />
En muchos casos se utiliza<br />
un sub común, con el sistema<br />
funcionando en mono. Esto<br />
se suele hacer por varias<br />
razones, pero principalmente<br />
porque las frecuencias graves<br />
producidas por un subwoofer<br />
suelen ser no-direccionales.<br />
Dado que las ondas de graves<br />
ocupan un gran espacio<br />
para su desarrollo, no se<br />
pu<strong>ed</strong>e saber realmente si los<br />
subgraves vienen del lado<br />
izquierdo o del derecho, salvo<br />
que esté en una sala enorme.<br />
Debido a este fenónemo, casi<br />
todo el material de subgraves<br />
se mezcla en mono.<br />
Funcionamiento sub en<br />
stereo<br />
En salas grandes, así como<br />
también en cines y parques<br />
temáticos (para los efectos<br />
especiales de audio de bajas<br />
frecuencias), pu<strong>ed</strong>e usar dos<br />
<strong>RS15S</strong> y <strong>RS18S</strong> en stereo.<br />
ESPAÑOL<br />
29
ESPAÑOL<br />
Configuración rápida<br />
En las páginas siguientes de este manual encontrará diagramas con distintas configuraciones de sistemas, pero si lo que quiere es<br />
sencillamente empezar lo antes posible, siga el diagrama y los pasos siguientes para configurar un sistema PA stereo con sub mono.<br />
NOTA: Antes de conectar y encender la unidad, es importante que recuerde la regla de oro del audio.... "EL ULTIMO QUE ENCIENDA<br />
DEBE SER EL PRIMERO QUE APAGUE". En otras palabras, estos quiere decir que a la hora de encender su sistema, siempre debería<br />
encender sus etapas de potencia y monitores autoamplificados AL FINAL DE TODO, y a la hora de apagarlo, estas unidades deberían<br />
ser LAS PRIMERAS que apagase. Esto evitará el que se produzcan los potentes chasquidos que son producidos por la entrada de<br />
corriente durante el encendido, que a veces pu<strong>ed</strong>en llegar a dañar los altavoces.<br />
• Antes de conectar sus Resounds, asegúrese que todo su sistema de sonido esté apagado. Además, asegúrese también de que los<br />
controles de volumen de su etapa de potencia y los faders principales izquierdo y derecho de la mesa estén al mínimo.<br />
• Conecte los cables de sus micrófonos e instrumentos, o de un reproductor de CD, a su mesa de mezclas.<br />
• Después, conecte las salidas izquierda y derecha de su mesa de mezclas a la entrada de la etapa de potencia que vaya a dar señal<br />
a sus altavoces satélites de m<strong>ed</strong>ios y agudos.<br />
• Después, conecte la salida mono de la mesa de mezclas a la entrada de una etapa de potencia de graves que estén funcionando<br />
en el modo de puente mono. Si su amplificador no tiene este tipo de modo, coloque el interruptor de modo de entrada de su<br />
etapa de potencia a paralelo, o use un cable en "Y" para conectar los dos canales del amplificador.<br />
• Usando un cable de altavoz standard con conectores Speakon, conecte la etapa de potencia de graves a la entrada INPUT del<br />
<strong>RS15S</strong> o <strong>RS18S</strong>.<br />
• Por m<strong>ed</strong>io de otro cable de altavoz standard con conectores Speakon, conecte la salida de la etapa de m<strong>ed</strong>ios y agudos a la<br />
entrada de sus altavoces satélites.<br />
NOTA IMPORTANTE: Compruebe en el manual de instrucciones de sus etapas de potencia que esos amplificadores pu<strong>ed</strong>en<br />
funcionar sin problemas a 4 ohmios<br />
• Encienda la mesa de mezclas, instrumentos y/o reproductor de CD y al final encienda sus etapas de potencia.<br />
• Mientras habla o canta en el micro (o toca el instrumento o reproduce un CD), vaya aumentando los faders principales izquierdo<br />
y derecho de la mesa hasta la posición "0". Asegúrese de que los m<strong>ed</strong>idores de salida de la mesa de mezclas no le indiquen<br />
saturación. Si lo hacen, r<strong>ed</strong>uzca el volumen en la mesa hasta que la señal vuelva a qu<strong>ed</strong>ar limpia.<br />
• Después, aumente lentamente los controles del amplificador de los m<strong>ed</strong>io-agudos hasta llegar al nivel de escucha que quiera.<br />
• Asegúrese de que la salida mono de la mesa esté abajo y después aumente al máximo el volumen del amplificador del sub.<br />
• Finalmente, use la salida mono de la mesa de mezclas para ajustar el nivel de los subwoofers.<br />
30
Configuraciones de sistemas con <strong>RS15S</strong> y <strong>RS18S</strong><br />
Sub stereo <strong>RS15S</strong> y <strong>RS18S</strong> con satélites pasivos<br />
<br />
<br />
<br />
<br />
Este ejemplo le muestra un sistema con una única etapa de potencia conectada a los subs y satélites en stereo. Las salidas izquierda y<br />
derecha de la mesa están conectadas a las entradas de la etapa con cables blindados. Las salidas del amplificador están conectadas al INPUT<br />
del <strong>RS15S</strong> o <strong>RS18S</strong> INPUT con cables de altavoz (sin blindaje). Después, coloque otro cable de altavoz desde la toma EXTENSION OUTPUT del.<br />
<strong>RS15S</strong> o <strong>RS18S</strong> hasta los dos altavoces satélites. Para más detalles sobre cómo hacerlo, vea la página 42 de este manual.<br />
NOTA IMPORTANTE: Para evitar posibles daños en su amplificador o altavoces, asegúrese de comprobar en el manual de<br />
fabricante que su etapa de potencia es capaz de funcionar a 2 ohmios.<br />
Sub mono <strong>RS15S</strong> y <strong>RS18S</strong> con satélites pasivos<br />
<br />
<br />
ESPAÑOL<br />
Aquí pu<strong>ed</strong>e ver un sistema stereo con sub en mono que reciben su señal de amplificadores distintos para los satélites de m<strong>ed</strong>io-agudos y<br />
para los subwoofers. Las salidas izquierda y derecha de la mesa están conectadas a las entradas de la etapa de m<strong>ed</strong>io-agudos usando cables<br />
blindados. Después, van cables de altavoz sin blindaje desde ese amplificador a los dos satélites. Ahora, conecte la salida mono de su mesa<br />
a las entradas de la etapa del sub usando un cable blindado, y desde las salidas del amplificador a la toma INPUT del <strong>RS15S</strong> o <strong>RS18S</strong> usando<br />
cables de altavoz sin blindaje. Para más detalles sobre cómo hacerlo, vea la página 42 de este manual.<br />
31
Manejo del <strong>RS15S</strong> y <strong>RS18S</strong><br />
Sub stereo <strong>RS15S</strong> y <strong>RS18S</strong>, Sistema biamplificado con satélites pasivos<br />
En este ejemplo le mostramos un sistema biamplificado stereo con un crossover activo y amplificadores independientes para los satélites de<br />
m<strong>ed</strong>io-agudos y para los subwoofers. Las salidas izquierda y derecha de la mesa se conectan a las entradas del crossover stereo con un cable<br />
blindado. Las salidas de agudos del crossover se conectan a las entradas de la etapa de m<strong>ed</strong>io-agudos con cable blindado. Después, conecte<br />
con cables de altavoces sin blindaje ese amplificador con los dos satélites. Ahora, conecte las salidas de graves del crossover con las entradas<br />
de la etapa del subwoofer usando un cable blindado. Las salidas del amplificador sub se conectan a las tomas INPUT del <strong>RS15S</strong> o <strong>RS18S</strong> por<br />
m<strong>ed</strong>io de cables de altavoz sin blindaje. Para más detalles sobre cómo hacerlo, vea la página 42 de este manual.<br />
Sub mono <strong>RS15S</strong> y <strong>RS18S</strong> son satélites activos<br />
ESPAÑOL<br />
<br />
<br />
Aquí, las salidas izquierda y derecha de la mesa se conectan a las entradas de los altavoces satélites activos usando cables blindados.<br />
Después, debe conectar la salida mono de la mesa a la entrada de la etapa de potencia del subwoofer usando un cable blindado. Ajuste el<br />
modo de entrada de esa etapa a paralelo o use un cable en "Y" para conectar ambos canales. Ahora, conecte las salidas de ese amplificador<br />
sub al INPUT del <strong>RS15S</strong> o <strong>RS18S</strong> INPUT con un cable de altavoz. Para más detalles sobre cómo hacerlo, vea la página 42 de este manual.<br />
32
Introduzione<br />
Congratulazioni per aver acquistato un Subwoofer della Serie Resound <strong>Samson</strong>! I subwoofer Resound <strong>RS15S</strong> <strong>ed</strong> <strong>RS18S</strong><br />
sono la soluzione perfetta per espandere la risposta alle basse frequenze praticamente di qualsiasi sistema di amplificazione.<br />
Dato che combinano una potenza elevata, il filtraggio satellite in ingresso e altoparlanti e componenti di cassa<br />
acustica di ottima qualità, i Resound <strong>RS15S</strong> <strong>ed</strong> <strong>RS18S</strong> forniscono bassi imponenti per qualsiasi tipo di applicazione dal<br />
vivo. Gli altoparlanti per le basse frequenze sono costruiti in acciaio robusto con cesto esterno pressofuso in alluminio<br />
e dispongono di grandi bobine voce, magneti massicci, coni impregnati e contorni in butile. I mobili delle casse <strong>RS15S</strong><br />
<strong>ed</strong> <strong>RS18S</strong> sono stati studiati con cura per prestazioni potenti e dettagliate alle basse frequenze, tramite l'impiego di un<br />
progetto autoventilato con accordatura di precisione. Come risultato, i Resound <strong>RS15S</strong> <strong>ed</strong> <strong>RS18S</strong> offrono una risposta<br />
sui bassi esplosiva, eppure profonda e controllata. Per semplificarne il collegamento, ognuno dei modelli di Resound<br />
dispone di connessioni in ingresso e di estensione in uscita sia su connettori da 1/4“ che SPEKON® NEUTRIK. L'Uscita di<br />
Estensione è una uscita sull'intera banda di frequenza che può essere usata per il collegamento di una cassa acustica<br />
satellite, oppure di un altro subwoofer Resound. Ognuno dei subwoofer dispone del proprio crossover Passa-basso a<br />
12dB per ottava a 180 Hz per l'altoparlante delle basse frequenze. Con le Resound, l'installazione e la messa in opera<br />
sono facili e imm<strong>ed</strong>iati. I mobili compatti sono dotati di un ricettacolo per supporto ad asta da 1 e 3/8“ (35mm) per il<br />
montaggio di casse satellite e sono facili da trasportare, grazie alle maniglie in acciaio “heavy duty“. Robuste e solide griglie<br />
in metallo <strong>ed</strong> una durevole copertura in moquette offrono una eccellente protezione contro l'usura. Sia come amplificazione<br />
fissa che come PA robusto e dal suono alla grande “on the road“, i subwoofer <strong>RS15S</strong> <strong>ed</strong> <strong>RS18S</strong> sono l'ideale per i<br />
professionisti del suono e per gli esecutori che dal sistema di casse PA pretendono un serio livello di potenza in uscita alle<br />
basse frequenze <strong>ed</strong> una qualità di suono a livello di monitor da studio.<br />
In queste pagine troverete una dettagliata descrizione delle caratteristiche del sistema PA Resound, la descrizione dei<br />
suoi pannelli frontale e posteriore, istruzioni passo a passo per il collegamento e l'uso e le specifiche complete. Troverete<br />
anche inclusa la garanzia che vi preghiamo di compilare e inviare per posta, per permettervi di ricevere supporto tecnico<br />
in linea e informazioni aggiornate su questo e su altri futuri prodotti <strong>Samson</strong>.<br />
Se le trattate con cura, le vostre Resound saranno in grado di funzionare senza problemi per molti anni. Vi raccomandiamo<br />
di registrarne il numero di serie nell'apposito spazio che segue, a memoria futura.<br />
Numero di serie:<br />
Data d'acquisto:<br />
__________________________________________________________________________<br />
__________________________________________________________________________<br />
Dovesse mai accadere che il vostro sistema necessiti di un intervento in assistenza, contattate il distributore <strong>Samson</strong><br />
Italiano m. casale bauer via mail all'indirizzo info@casalebauer.com oppure telefonicamente allo 051 - 766.648. Vi preghiamo<br />
di conservare i materiali di imballo originali e di usarli in caso di sp<strong>ed</strong>izione.<br />
33 33<br />
ITALIANO
Resound <strong>RS15S</strong> <strong>ed</strong> <strong>RS18S</strong> - Le Caratteristiche<br />
I subwoofer della serie Resound <strong>Samson</strong> sono disponibili in due diversi modelli in grado di adattarsi a svariate applicazioni<br />
dal vivo. Grazie alla qualità elevata dei componenti, ai mobili di dimensioni convenienti, alle maniglie ergonomiche<br />
per il trasporto e alla possibilità del montaggio di supporti di estensione, i subwoofer della serie Resound sono in<br />
grado di fornire affidabilità e un suono alla grande. Ecco alcune delle loro caratteristiche principali.<br />
• Casse acustiche di estensione della risposta alle basse freqeunze dotate di componenti di qualità elevata in<br />
grado di fornire bassi puliti e dettagliati per qualsiasi sistema di amplificazione sonora.<br />
• Per estendere la risposta alle basse frequenze, i subwoofer Resound utilizzano altoparlanti per le basse frequenze<br />
“heavy duty“ di progettazione specifica. L'<strong>RS15S</strong> impiega un woofer da 15“ mentre nell'<strong>RS18S</strong> viene usato un<br />
altoparlante per le basse frequenze da 18“.<br />
• Le casse acustiche della serie Resound sono in grado di gestire livelli di potenza elevati con un valore enorme di<br />
400 watt di potenza continua.<br />
• Connettori in ingresso Speakon® Neutrik e da 1/4“ permettono un facile interfacciamento con la maggior parte<br />
dei finali di potenza e dei mixer amplificati.<br />
• I connettori di estensione in uscita Speakon® Neutrik e da 1/4“ permettono anche il collegamento in “cascata“ di<br />
più unità Resound, per la creazione di ampi sistemi di amplificazione sonora.<br />
• Crossover interno a 12 dB/ottava, a 180 Hz, Passa-basso per l'altoparlante delle basse frequenze.<br />
• Ricettacolo standard per supporto da 1 e 3/8“ per il montaggio di casse acustiche satelliti per le frequenze<br />
m<strong>ed</strong>ie e acute.<br />
• Mobili ricoperti in robusta moquette, adatti all'uso “on the road“ e coperture degli altoparlanti con griglie di<br />
metallo assicurano un elevato livello di affidabilità.<br />
• La costruzione robusta e di qualità garantisce prestazioni affidabili notte dopo notte, concerto dopo concerto.<br />
• Garanzia estesa a tre anni (valida per il mercato Statunitense).<br />
ITALIANO<br />
34 34
<strong>RS15S</strong> <strong>ed</strong> <strong>RS18S</strong> - I Componenti<br />
Resound - VISTA DI FRONTE<br />
1 Altoparlante per le Basse Frequenze –<br />
altoparlante “heavy-duty“ di progettazione<br />
specifica, da 15” e da 18“, per bassi profondi.<br />
2 Maniglia – è una delle due ampie maniglie<br />
per il trasporto.<br />
3 Griglia in Acciaio – la robusta griglia in<br />
acciaio garantisce protezione e facilita l'accesso<br />
all'altoparlante per le basse frequenze.<br />
4 Apertura a Ripiano – doppia sezione di ventilazione<br />
per le basse frequenze, ad accordatura<br />
di precisione, per estendere la risposta<br />
dei bassi.<br />
5 Mobile – robusto mobile in legno ricoperto<br />
in moquette resistente all'usura.<br />
<br />
<br />
<br />
<br />
<br />
<br />
<br />
Resound - IL PANELLO POSTERIORE<br />
A<br />
Ingresso – connettore di ingresso Speakon®<br />
Neutrik, per il collegamento dell'uscita di un<br />
finale di potenza o di un mixer amplificato.<br />
<br />
<br />
B<br />
C<br />
D<br />
Estensione – connettore parallelo in uscita<br />
Speakon® Neutrik, per il collegamento di<br />
ulteriori Resound.<br />
Ingresso – connettore di ingresso phono<br />
da 1/4“, per il collegamento dell'uscita di un<br />
finale di potenza o di un mixer amplificato.<br />
Estensione – connettore parallelo in uscita<br />
da 1/4“, per il collegamento di ulteriori<br />
Resound.<br />
<br />
<br />
<br />
Nota: per il diagramma dettagliato di cablaggio,<br />
fate riferimento a pag. 11 di questo manuale.<br />
<br />
35 35<br />
<br />
ITALIANO
Configurazioni di Sistema<br />
Prima di cominciare ad effettuare i collegamenti, prendetevi un minuto per decidere come interfacciare il subwoofeer.<br />
Potete interfacciare l'<strong>RS15S</strong> e l'<strong>RS18S</strong> in molti modi, ma la maggior parte delle configurazioni di sistema ricadono in due<br />
categorie, a seconda se il funzionamento del sub è in Stereo o in Mono (in Comune).<br />
Il Sub in Comune<br />
In molti casi è preferibile il sub in<br />
comune. Questo per molte ragioni,<br />
ma soprattutto perché le basse frequenze<br />
prodotte da un subwoofer<br />
tendono ad essere non-direzionali.<br />
Dato che le onde a bassa frequenza<br />
hanno bisogno di molto spazio<br />
per svilupparsi effettivamente, è<br />
impossibile capire se i bassi del sub<br />
provengono da destra o da sinistra<br />
a meno che, naturalmente, non<br />
ci si trovi in un ambiente davvero<br />
ampio. A causa di questo fenomeno,<br />
praticamente tutto il materiale<br />
dei bassi per il sub viene missato<br />
in mono.<br />
Il Sub in Stereo<br />
Negli ambienti più ampi, oppure<br />
nelle installazioni nei teatri o nei<br />
parchi a tema (per effetti audio<br />
speciali in bassa frequenza), è possibile<br />
usare due <strong>RS15S</strong> o <strong>RS18S</strong> in<br />
stereo.<br />
ITALIANO<br />
36
Il Collegamento dei Sub woofer Resound<br />
La Corretta Scelta dei Cavi<br />
I collegamenti delle casse acustiche della serie Resound vanno effettuati tramite i connettori da 1/4“ o Speakon® Neutrik<br />
del pannello posteriore. Raccomandiamo cavi standard da cassa acustica non schermati, facilmente disponibili presso il<br />
vostro rivenditore di audio professionale o di strumenti musicali, con connettori da 1/4“ o Speakon e spessore di cavo da<br />
12 o da 14.<br />
Se il vostro amplificatore dispone di prese autobloccanti potete usare cavi per cassa acustica con spinotti a banana ma,<br />
nel fare i collegamenti, fate attenzione alla polarità positiva e negativa. È importante che il sistema di amplificazione sia<br />
collegato in fase, altrimenti non risponde correttamente alle frequenze basse e non ha la corretta immagine stereo.<br />
Per accertarvi che il vostro sistema di diffusione acustica sia in fase, ponete la massima cura nel rispettare i contrassegni<br />
positivi e negativi su amplificatori e casse. Assicuratevi che il terminale o il connettore a banana + della cassa acustica sia<br />
collegato al terminale + del finale di potenza e che il terminale o connettore a banana - della cassa acustica sia a sua volta<br />
collegato al terminale - dell'amplificatore. Per il diagramma di cablaggio dettagliato, fate riferimento a pag. 11 di questo<br />
manuale.<br />
L'Imp<strong>ed</strong>enza<br />
Prima di collegare le vostre casse acustiche, fate in modo di saperne qualcosa sull'imp<strong>ed</strong>enza. L'imp<strong>ed</strong>enza è il carico<br />
elettronico che la cassa acustica dimostra all'amplificatore e viene misurata in Ohm.<br />
Ecco la curiosa, eppure semplice regola dell'imp<strong>ed</strong>enza: quando due casse acustiche di eguale imp<strong>ed</strong>enza vengono<br />
collegate in “Parallelo“, come per esempio quando usate l'Uscita di Estensione, l'imp<strong>ed</strong>enza totale viene divisa per due<br />
e quando due altoparlanti vengono collegati in “Serie“ (questo di solito avviene solo nei collegamenti interni della cassa<br />
acustica), l'imp<strong>ed</strong>enza totale è la somma della singola imp<strong>ed</strong>enza di ognuno degli altoparlanti.<br />
Ognuno dei modelli Resound, ESCLUSA la RS215, è da 8 Ohm. Per cui, quando si collegano insieme in parallelo due<br />
modelli Resound, ESCLUSA la RS215, l'imp<strong>ed</strong>enza totale è di 4 Ohm. L'imp<strong>ed</strong>enza delle RS215 è di 4 Ohm per cui, quando<br />
si collegano insieme in parallelo due RS215, l'imp<strong>ed</strong>enza totale è di 2 Ohm. L'imp<strong>ed</strong>enza della cassa acustica interviene<br />
sull'amplificatore. In generale, minore l'imp<strong>ed</strong>enza, maggiore la potenza che l'amplificatore genera.<br />
NOTA IMPORTANTE: per il funzionamento dei finali di potenza, esiste un valore minimo di sicurezza dell'imp<strong>ed</strong>enza,<br />
per cui controllate con attenzione l'imp<strong>ed</strong>enza raccomandata dal costruttore dei vostri amplificatori, per evitare qualsiasi<br />
danno agli amplificatori e di invalidare la garanzia.<br />
L'Uso dell'Uscita di ESTENSIONE<br />
I modelli Resound dispongono di una utile Uscita di Estensione per il collegamento in parallelo di ulteriori casse acustiche.<br />
Per assicurare il corretto collegamento all'amplificatore, leggete con attenzione il paragrafo prec<strong>ed</strong>ente d<strong>ed</strong>icato<br />
all'imp<strong>ed</strong>enza. Per collegare due Resound tramite l'Uscita di Estensione, collegate l'Uscita dell'amplificatore all'Ingresso<br />
della prima Resound e l'Uscita di Estensione di questa all'Ingresso della seconda Resound.<br />
La Potenza da Applicare alle Resound<br />
Ognuna della casse acustiche Resound gode di uno specifico valore di potenza riportato sia di fianco ai collegamenti<br />
in ingresso che nei paragrafi d<strong>ed</strong>icati alle Specifiche a pagina 12 di questo manuale. Controllate che il finale di potenza<br />
abbia la potenza in uscita corretta per le vostre Resound. Se collegate più di una Resound ad uno dei canali di un amplificatore<br />
stereo, controllate con attenzione l'imp<strong>ed</strong>enza totale. L'uso di un amplificatore con un valore di potenza troppo<br />
basso può essere pericoloso, dato che il segnale in uscita, nel tentativo di raggiungere il livello desiderato, va spesso in<br />
distorsione (clipping). Sovralimentare le resound può dare per risultato un fallimento catastrofico, per cui l'uso di qualsiasi<br />
amplificatore con un valore di potenza superiore a quello raccomandato può invalidare la garanzìa.<br />
37 37<br />
ITALIANO
Messa a Punto Veloce<br />
Nelle pagine che seguono di questo manuale troverete una spiegazione dettagliata delle configurazioni di sistema, ma se<br />
volete semplicemente partire in fretta, potete attenervi al diagramma e alle istruzioni qui di seguito per la realizzazione<br />
imm<strong>ed</strong>iata di un semplice sistema di amplificazione in stereo.<br />
NOTA: prima di effettuare i collegamenti <strong>ed</strong> accendere il sistema, è importante ricordare la Regola d'Oro dei sistemi<br />
audio... “L'ULTIMO DA ACCENDERE È IL PRIMO DA SPEGNERE“. Tradotto, questo significa che quando accendete il vostro<br />
sistema, dovete sempre accendere i finali di potenza o i monitor amplificati PER ULTIMI e, quando lo spegnete, dovete<br />
spegnere i finali di potenza PER PRIMI. Questo aiuta ad evitare quegli “schiocchi“ a volume elevato, causati dalla sovracorrente<br />
di accensione, che a volte possono danneggiare le casse.<br />
<br />
<br />
<br />
<br />
<br />
<br />
<br />
<br />
<br />
<br />
<br />
<br />
<br />
<br />
<br />
<br />
<br />
<br />
<br />
<br />
<br />
<br />
<br />
<br />
<br />
<br />
ITALIANO<br />
• Prima di collegare le Resound, accertatevi che tutti i componenti del sistema siano spenti. Accertatevi anche che i<br />
controlli di volume del finale di potenza <strong>ed</strong> i fader principali di sinistra e destra del mixer siano completamente chiusi.<br />
• Collegate i cavi dei microfoni, degli strumenti e/o del lettore CD, al mixer.<br />
• Collegate poi le uscite sinistra e destra del mixer all'INGRESSO del finale di potenza per le casse acustiche satellite per<br />
le frequenze m<strong>ed</strong>ie <strong>ed</strong> acute.<br />
• Ora collegate l'uscita mono del mixer all'INGRESSO del finale di potenza per le frequenze basse che farete lavorare<br />
in mono a ponte. Se il vostro amplificatore non dispone del modo mono a ponte, regolatene l'interruttore di modo<br />
degli ingressi in parallelo, oppure usate un cavo a “Y“ per collegare entrambe gli ingressi dell'amplificatore.<br />
• Usando cavi standard da cassa acustica con connettori Speakon, collegate le uscite dell'ampli per le frequenze basse<br />
agli INGRESSi delle <strong>RS15S</strong> o delle <strong>RS18S</strong>.<br />
• Usando cavi standard da cassa acustica con connettori Speakon, collegate le uscite dell'ampli per le frequenze m<strong>ed</strong>ie<br />
<strong>ed</strong> acute agli INGRESSI delle casse acustiche satellite.<br />
NOTA IMPORTANTE: controllate il manuale d'uso dell'amplificatore e accertatevi che vi confermi che l'amplificatore<br />
può lavorare a 4 Ohm in perfetta sicurezza.<br />
• Accendete il mixer, gli strumenti e/o il lettore CD, poi accendete il finale di potenza.<br />
• Parlando al microfono (o suonando uno strumento o un CD), alzate i fader principali di Sinistra e di Destra del mixer<br />
nella posizione a “0“. Accertatevi che la misura di livello delle uscite del mixer non segnali distorsione. Se lo fa, abbassate<br />
i volumi del mixer fino a ripulire il segnale.<br />
• A questo punto, alzate lentamente i controlli del finale di potenza fino a raggiungere il livello di ascolto desiderato.<br />
• Accertatevi che l'uscita mono del mixer sia chiusa, poi alzate del tutto l'amplificatore di potenza dei subwoofer.<br />
• Infine, usate il controllo dell'uscita mono del mixer per regolare il livello dei subwoofer.<br />
38 38
Il Posizionamento dell'<strong>RS15S</strong> e dell'<strong>RS18S</strong><br />
Il Posizionamento dei Microfoni - Come Ridurre il Fe<strong>ed</strong>back<br />
Il Fe<strong>ed</strong>back è quel noioso fischio stridulo che si avverte quando il volume è<br />
elevato e il microfono viene avvicinato troppo alla cassa. Il fe<strong>ed</strong>back nasce<br />
quando il microfono riprende il segnale amplificato dalla cassa e lo rimanda<br />
nuovamente alla cassa, e così via di continuo. In generale, è sempre raccomandabile<br />
che qualsiasi microfono ATTIVO (acceso) sia posizionato dietro le<br />
casse. In questo modo si ottiene il massimo livello possibile dal sistema prima<br />
del fe<strong>ed</strong>back. Una possibile eccezione è il momento in cui si regola il suono<br />
del microfono, dato che lo si vuole sentire di fronte alle casse, per poterlo<br />
ascoltare correttamente. Per farlo, abbassate il VOLUME PRINCIPALE mentre<br />
regolate l'EQ e gli effetti davanti alle casse. Quando avete ottenuto il suono<br />
voluto, spostate il microfono dietro le casse e rialzate il volume principale.<br />
Il Posizionamento delle Casse<br />
Ogni qual volta è possibile, è buona norma alzare le casse sopra la testa degli<br />
ascoltatori. Le casse Resound dispongono di un ricettacolo standard da 1 e<br />
3/8“ per il montaggio su asta, compatibile con i supporti per cassa acustica di<br />
svariati costruttori.<br />
Nota: controllate con attenzione l'imp<strong>ed</strong>enza minima raccomandata dal<br />
costruttore per i vostri finali di potenza, in modo da evitare sovraccarichi e<br />
possibili danni sia alle casse acustiche che agli amplificatori. In molti casi, se<br />
usate le Resound come sistema di monitorizzazione, varrà la pena di usare un<br />
equalizzatore esterno come l'S Curve 131 <strong>Samson</strong>, per aumentare il volume e<br />
diminuire il rischio del fe<strong>ed</strong>back.<br />
39 39<br />
ITALIANO
<strong>RS15S</strong> <strong>ed</strong> <strong>RS18S</strong> - Configurazioni di Sistema<br />
Sub <strong>RS15S</strong> o <strong>RS18S</strong> in Stereo con Satelliti Passivi<br />
<br />
<br />
<br />
<br />
<br />
<br />
<br />
<br />
<br />
<br />
<br />
<br />
<br />
<br />
<br />
<br />
<br />
<br />
<br />
<br />
Questo esempio mostra un sistema con un singolo finale di potenza collegato in stereo a sub e satelliti. Le uscite di sinistra e destra del mixer<br />
sono collegate agli ingressi dell'amplificatore con cavi schermati. Le uscite dell'amplificatore sono collegate agli INGRESSI degli <strong>RS15S</strong> o<br />
<strong>RS18S</strong> con cavi da cassa acustica non schermati. Vanno poi collegati due cavi da cassa acustica non schermati dalle USCITE di ESTENSIONE<br />
degli <strong>RS15S</strong> o <strong>RS18S</strong> alle due casse acustiche satellite. Per il dettaglio del cablaggio dei cavi, fate riferimento a pagina 42 di questo manuale.<br />
NOTA IMPORTANTE: per evitare qualsiasi possibile danno all'amplificatore e alle casse acustiche, controllate con attenzione il<br />
manuale d'uso del costruttore dell'ampli per accertarvi che sia in grado di lavorare a 2 ohm.<br />
Sub <strong>RS15S</strong> o <strong>RS18S</strong> in Mono con Satelliti Passivi<br />
<br />
<br />
<br />
<br />
<br />
<br />
<br />
<br />
<br />
<br />
<br />
<br />
<br />
<br />
<br />
<br />
<br />
<br />
<br />
<br />
ITALIANO<br />
<br />
<br />
<br />
<br />
Questo esempio mostra un sistema stereo con i sub in mono, alimentato da amplificatori separati per i satelliti per le m<strong>ed</strong>ie e le acute e per<br />
i sub. Le uscite di sinistra e destra del mixer sono collegate agli ingressi dell'amplificatore per le casse satellite con cavi schermati. Vanno poi<br />
collegati due cavi per cassa acustica non schermati dalle uscite di questo amplificatore alle casse satellite. Poi, l'uscita mono del mixer va collegata<br />
con cavi schermati agli ingressi del finale di potenza per i sub. Le uscite dell'ampli per i sub vanno collegate con cavi da cassa custica<br />
non schermati agli INGRESSI degli <strong>RS15S</strong> o <strong>RS18S</strong>. Per il dettaglio del cablaggio dei cavi, fate riferimento a pagina 42 di questo manuale.<br />
40
I Sub <strong>RS15S</strong> <strong>ed</strong> <strong>RS18S</strong> in Stereo, in un Sistema Bi-amplificato con Satelliti Passivi<br />
L'Uso dell'<strong>RS15S</strong> e dell'<strong>RS18S</strong><br />
<br />
<br />
<br />
<br />
<br />
<br />
<br />
<br />
<br />
<br />
<br />
<br />
<br />
<br />
<br />
<br />
<br />
<br />
<br />
<br />
Questo esempio mostra un sistema stereo in bi-amplificazione con un crossover attivo e amplificatori separati per i satelliti per le frequenze<br />
m<strong>ed</strong>ie e acute e per i subwoofer. Le uscite sinistra e destra del mixer sono collegate agli ingressi del crossover stereo con cavi schermati. Le<br />
uscite per le Frequenze Acute del crossover sono collegate agli ingressi dell'ampli per le m<strong>ed</strong>ie e acute con cavi schermati. Vanno poi collegati<br />
cavi non schermati da cassa acustica da questo amplificatore alle due casse acustiche satellite. Poi vanno collegate, con cavi schermati, le<br />
uscite in Bassa Frequenza del crossover agli ingressi del finale di potenza per i subwoofer. Le uscite dell'ampli per i sub vanno collegate, con<br />
cavi non schermati da cassa acustica, agli INGRESSI delle <strong>RS15S</strong> o <strong>RS18S</strong>. Per i dettagli sul cablaggio dei cavi da cassa acustica, fate riferimento<br />
a pagina 42 di questo manuale.<br />
I Sub <strong>RS15S</strong> <strong>ed</strong> <strong>RS18S</strong> in Mono con Satelliti Attivi<br />
<br />
<br />
<br />
<br />
<br />
<br />
<br />
<br />
<br />
<br />
<br />
<br />
<br />
<br />
<br />
<br />
<br />
<br />
<br />
<br />
<br />
In questo esempio, le uscite sinistra e destra del mixer sono collegate agli ingressi delle casse acustiche satellite attive con cavi schermati. Va<br />
poi collegata, sempre con cavi schermati, l'uscita mono del mixer all'ingresso (o agli ingressi) del finale di potenza dei subwoofer. Il modo di<br />
ingresso di questo amplificatore va regolato in parallelo, oppure bisogna usare un cavo a “Y“ per il collegamento di entrambi i canali dell'ampli.<br />
Vanno poi collegate, con cavi non schermati da cassa acustica, le uscite dell'ampli per i sub agli INGRESSI delle <strong>RS15S</strong> o <strong>RS18S</strong>. Per i dettagli<br />
sul cablaggio dei cavi da cassa acustica, fate riferimento a pagina 42 di questo manuale.<br />
41<br />
ITALIANO
<strong>RS15S</strong> and <strong>RS18S</strong> Wiring Guide / CONNEXION DES Resound / Resound ANSCHLIESSEN /<br />
CONEXION DEL Resound / <strong>RS15S</strong> <strong>ed</strong> <strong>RS18S</strong> - Guida al Cablaggio<br />
<strong>RS15S</strong> and <strong>RS18S</strong> Wiring Guide<br />
The Resound <strong>RS15S</strong> and <strong>RS18S</strong> provide both Speakon and 1/4” phone connectors for easy interface with industry standard<br />
cables. You can use a variety of standard speaker cables that are available “off the shelf” at your local pro-audio or<br />
musical instrument retailer. Be sure that cables use standard, strand<strong>ed</strong> speaker wire. A 12-14 gauge is recommend<strong>ed</strong>. If<br />
you are making your own cables, use the diagrams following below to ensure a proper hook up.<br />
CONNEXION DES Resound<br />
Les Resound sont équipées de connecteurs Speakon et Jack 6,35 mm pour des connexions compatibles avec les deux<br />
standards de câbles. Vous pouvez utiliser les câbles d’enceinte standards vendus par votre revendeur habituel. Assurezvous<br />
que les câbles ne sont pas blindés. Ces câbles doivent être des câbles d’enceinte uniquement et de forte section.<br />
Suivez le schéma ci-dessous si vous souhaitez réaliser vos propres câbles.<br />
Resound ANSCHLIESSEN<br />
Das Resound verfügt über Speakon- und 1/4” Klinkenanschlüsse, die sich problemlos mit standard Kabeln verbinden<br />
lassen. Sie können verschi<strong>ed</strong>ene standard Lautsprecherkabel verwenden, die Sie direkt bei Ihrem örtlichen Pro-Audiooder<br />
Musikinstrumenten-Händler erhalten. Die Kabel müssen mit stabilem standard Lautsprecherdraht mit einer Dicke<br />
von 12 - 14 bestückt sein. Wenn Sie die Kabel selbst anfertigen, können Sie aus den folgenden Diagrammen die korrekte<br />
Verdrahtung entnehmen.<br />
CONEXION DEL Resound<br />
El Resound dispone tanto de conectores Speakon como de tipo auriculares de 6,3 mm para una intercomunicación más<br />
sencilla con cables standard. Pu<strong>ed</strong>e usar una amplia vari<strong>ed</strong>ad de cables de altavoz de los que pu<strong>ed</strong>e encontrar en las<br />
estanterías de su comercio habitual de instrumentos o de audio para ello. Asegúrese de que estos cables usen filamentos<br />
trenzados de los standard de altavoces, con un calibre de 12-14 como recomendación. Si fabrica sus propios cables, use los<br />
diagramas siguientes para asegurarse una correcta conexión.<br />
<strong>RS15S</strong> <strong>ed</strong> <strong>RS18S</strong> - Guida al Cablaggio<br />
Per facilitare l'interfacciamento tramite cavi audio standard, le Resound <strong>RS15S</strong> <strong>ed</strong> <strong>RS18S</strong> dispongono di connettori sia<br />
Speakon che da 1/4“. È così possibile l'uso di una miriade di cavi standard imm<strong>ed</strong>iatamente disponibili presso il vostro<br />
più vicino rivenditore audio professionale o di strumenti musicali. Accertatevi che i cavi in uso siano di tipo standard, a<br />
treccia, per cassa acustica. È raccomandata una sezione da 12 o da 14. Se ve li fabbricate da soli, per ottenere il collegamento<br />
corretto fate riferimento ai diagrammi di cablaggio qui di seguito.<br />
Unbalanc<strong>ed</strong> 1/4” Connector / Connecteur Jack 6,35 mm Asymmetrischer 1/4” Anschluss / Conector no<br />
balanceado de 6,3 mm / Connettore Sbilanciato da 1/4”<br />
<br />
<br />
<br />
<br />
<br />
<br />
Speakon Wiring Guide / Câblage des connecteurs Speakon / Speakon-Verdrahtung / Guía de cableado<br />
Speakon / Guida al Cablaggio del Connettore Speakon<br />
SPEAKON<br />
+<br />
-<br />
1- 1+<br />
SPEAKON<br />
2+ 2-<br />
NOT CONNECTED<br />
42
Specifications/Caractéristiques techniques<br />
Specifications<br />
<strong>RS15S</strong><br />
Power Rating (@ 4Ω):<br />
Nominal Imp<strong>ed</strong>ance:<br />
Frequency Response:<br />
Sensitivity:<br />
MAX SPL:<br />
LF Driver:<br />
Mounting:<br />
Dimensions:<br />
Weight:<br />
<strong>RS18S</strong><br />
Power Rating (@ 4Ω):<br />
Nominal Imp<strong>ed</strong>ance:<br />
Frequency Response:<br />
Sensitivity:<br />
MAX SPL:<br />
LF Driver:<br />
Mounting:<br />
Dimensions:<br />
Weight:<br />
Caractéristiques techniques<br />
<strong>RS15S</strong><br />
Puissance admissible (sous 4 Ohms) :<br />
Impédance nominale :<br />
Bande passante :<br />
Sensibilité (1 W / 1 m) :<br />
NPA maximal :<br />
Moteur du Woofer :<br />
Montage :<br />
Dimensions :<br />
Poids :<br />
400 Watts RMS, 800 Watts Program<br />
4 Ohms<br />
55Hz – 150 Hz ± 3 dB<br />
98 dB SPL @ 1W/1m<br />
125dB<br />
15-inch heavy-duty driver<br />
Integral 1 3/8-inch Pole Mount Receptacle for satellite mounting<br />
440mm x 610mm x 591mm<br />
17.5" x 24" x 23.25"<br />
78 lbs. 35.45kg<br />
400 Watts RMS, 800 Watts Program<br />
4 Ohms<br />
40Hz – 150 Hz ± 3 dB<br />
98 dB SPL @ 1W/1m<br />
125dB<br />
18-inch heavy-duty driver<br />
Integral 1 3/8-inch Pole Mount Receptacle for satellite mounting<br />
522mm x 610mm x 645mm<br />
20.5" x 24" x 25.5"<br />
103 lbs. 46.82 kg<br />
Specifications subject to change.<br />
400 Watts efficace, 800 Watts programme<br />
4 Ohms<br />
55 Hz à 150 Hz ± 3 dB<br />
98 dB NPA<br />
125 dB<br />
Moteur haute puissance de 38 cm (15 pouces)<br />
Embase de pi<strong>ed</strong> intégrée de 35 mm pour les satellite<br />
440 mm (L) x 610 mm (l) x 591 mm (H)<br />
35,5 kg<br />
<strong>RS18S</strong><br />
Puissance admissible (sous 4 Ohms): 400 Watts efficace, 800 Watts programme<br />
Impédance nominale :<br />
4 Ohms<br />
Bande passante :<br />
40 Hz à 150 Hz ± 3 dB<br />
Sensibilité (1 W / 1 m) :<br />
98 dB NPA<br />
NPA maximal :<br />
125 dB<br />
Moteur Woofer :<br />
Moteur haute puissance de 46 cm (18 pouces)<br />
Montage :<br />
Embase pour pi<strong>ed</strong> intégrée de 35 mm pour les satellites<br />
Dimensions :<br />
522 mm (L) x 610 mm (l) x 645 mm (H)<br />
Poids :<br />
46,8 kg<br />
Caractéristiques techniques sujettes à modifications.<br />
43
Technische Daten /Especificaciones técnicas<br />
Technische Daten<br />
<strong>RS15S</strong><br />
Belastbarkeit (@ 4Ω):<br />
Nominal-Imp<strong>ed</strong>anz:<br />
Frequenzgang:<br />
Empfindlichkeit:<br />
max. Schalldruckpegel:<br />
LF-Treiber:<br />
Montage:<br />
Abmessungen:<br />
Gewicht:<br />
<strong>RS18S</strong><br />
Belastbarkeit (@ 4Ω):<br />
Nominal-Imp<strong>ed</strong>anz:<br />
Frequenzgang:<br />
Empfindlichkeit:<br />
max. Schalldruckpegel:<br />
LF-Treiber:<br />
Montage:<br />
Abmessungen:<br />
Gewicht:<br />
400 Watt RMS, 800 Watt Programm<br />
4 Ohm<br />
55 Hz – 150 Hz ± 3 dB<br />
98 dB SPL @ 1W/1m<br />
125 dB<br />
hoch belastbarer 15" Treiber<br />
Integrierte 1 3/8" Ständerhalterung für die Satellitenboxen-Montage<br />
440 mm x 610 mm x 591 mm<br />
17,5" x 24" x 23,25"<br />
35,45 kg, 78 lbs.<br />
400 Watt RMS, 800 Watt Programm<br />
4 Ohm<br />
40 Hz – 150 Hz ± 3 dB<br />
98 dB SPL @ 1W/1m<br />
125 dB<br />
hoch belastbarer 18" Treiber<br />
Integrierte 1 3/8" Ständerhalterung für die Satellitenboxen-Montage<br />
522 mm x 610 mm x 645 mm<br />
20,5" x 24" x 25,5"<br />
46,82 kg, 103 lbs.<br />
Technische Daten können geändert werden.<br />
Especificaciones<br />
<strong>RS15S</strong><br />
Potencia m<strong>ed</strong>ia (@ 4Ω):<br />
400 watios RMS, 800 watios de programa<br />
Imp<strong>ed</strong>ancia nominal:<br />
4 Ohmios<br />
Respuesta de frecuencia:<br />
55Hz – 150 Hz ± 3 dB<br />
Sensibilidad:<br />
98 dB SPL @ 1W/1m<br />
SPL máximo:<br />
125 dB<br />
Cabezal de graves:<br />
Cabezal de 15 pulgadas de alto rendimiento<br />
Montaje:<br />
Montaje de barra integral de 1 3/8 de pulgada<br />
Receptáculo para el montaje de satélites<br />
Dinesiones:<br />
440mm x 610mm x 591mm<br />
445 x 609,6 x 590,6 mm<br />
Peso:<br />
78 lbs. 35.45kg<br />
<strong>RS18S</strong><br />
Potencia m<strong>ed</strong>ia (@ 4Ω):<br />
Imp<strong>ed</strong>ancia nominal:<br />
Respuesta de frecuencia:<br />
Sensibilidad:<br />
SPL máximo:<br />
Cabezal de graves:<br />
Montaje:<br />
Dinesiones:<br />
Peso:<br />
400 watios RMS, 800 watios de programa<br />
4 Ohmios<br />
40Hz – 150 Hz ± 3 dB<br />
98 dB SPL @ 1W/1m<br />
125 dB<br />
Cabezal de 18 pulgadas de alto rendimiento<br />
Montaje de barra integral de 1 3/8 de pulgada Receptáculo para el<br />
montaje de satélites<br />
522mm x 610mm x 645mm<br />
521 x 609,6 x 647,7 mm<br />
103 lbs. 46.82 kg<br />
Estas especificaciones están sujetas a cambios sin previo aviso.<br />
44
<strong>RS15S</strong> <strong>ed</strong> <strong>RS18S</strong> - Specifiche<br />
Specifiche<br />
<strong>RS15S</strong><br />
Potenza (@ 4Ω):<br />
Imp<strong>ed</strong>enza Nominale:<br />
Risposta in Frequenza:<br />
Sensibilità:<br />
SPL MAX:<br />
Altoparlante per le BF:<br />
Montaggio:<br />
Dimensioni:<br />
Peso:<br />
<strong>RS18S</strong><br />
Potenza (@ 4Ω):<br />
Imp<strong>ed</strong>enza Nominale:<br />
Risposta in Frequenza:<br />
Sensibilità:<br />
SPL MAX:<br />
Altoparlante per le BF:<br />
Montaggio:<br />
Dimensioni:<br />
Peso:<br />
400 Watt RMS, 800 Watt di Programma<br />
4 Ohm<br />
da 55Hz a150 Hz, ± 3 dB<br />
98 dB SPL @ 1W/1m<br />
125dB<br />
da 15“, “heavy-duty“<br />
ricettacolo interno da 1 e 3/8“ per il<br />
montaggio su asta di satelliti<br />
440mm x 610mm x 591mm<br />
17,5" x 24" x 23,25"<br />
35,45kg, 78 lbs<br />
400 Watt RMS, 800 Watt di Programma<br />
4 Ohm<br />
da 40Hz a150 Hz, ± 3 dB<br />
98 dB SPL @ 1W/1m<br />
125dB<br />
da 18“, “heavy-duty“<br />
ricettacolo interno da 1 e 3/8“ per il<br />
montaggio su asta di satelliti<br />
522mm x 610mm x 645mm<br />
20,5" x 24" x 25,5"<br />
46,82 kg, 103 lbs<br />
Specifiche soggette a variazioni.<br />
45
Notes<br />
46
<strong>Samson</strong> Technologies Corp.<br />
575 Underhill Blvd.<br />
P.O. Box 9031<br />
Syosset, NY 11791-9031<br />
Phone: 1-800-3-SAMSON (1-800-372-6766)<br />
Fax: 516-364-3888<br />
www.samsontech.com