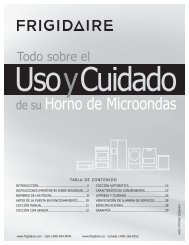
Microwave Oven Micro-ondes Horno Microondas - Home Depot
Microwave Oven Micro-ondes Horno Microondas - Home Depot
Microwave Oven Micro-ondes Horno Microondas - Home Depot

You also want an ePaper? Increase the reach of your titles
YUMPU automatically turns print PDFs into web optimized ePapers that Google loves.
<strong><strong>Micro</strong>wave</strong> <strong>Oven</strong><br />
<strong>Micro</strong>-<strong>ondes</strong><br />
<strong>Horno</strong> <strong>Micro</strong>ondas<br />
User Manual<br />
Guide de l’Utilisateur<br />
Manual del Usuario Modelo<br />
HMC1120BEWW, HMC1120BEBB<br />
Design may vary by model number.<br />
El diseño puede variar conforme al número de modelo
TABLE OF CONTENTS<br />
SAFETY INFORMATION..........................................................................................<br />
Precautions to Avoid Possible Exposure to Excessive <strong><strong>Micro</strong>wave</strong> Energy.......... 2<br />
A Special Note on Arcing........................................................................................ 2<br />
Addendum............................................................................................................... 2<br />
Important Safety Instructions........................................................................... 3-5<br />
Grounding Instructions.......................................................................................... 6<br />
Cookware and Utensil Guide.............................................................................. 7-8<br />
ENGLISH<br />
SET UP & USE...........................................................................................................<br />
Specifications.......................................................................................................... 9<br />
Installation Guide.................................................................................................... 9<br />
Parts & Features....................................................................................................10<br />
Control Panel.........................................................................................................11<br />
Operation Instructions...................................................................................12-14<br />
Convenience Cooking Settings.....................................................................14-15<br />
Cooking Techniques.............................................................................................16<br />
CLEANING AND CARE.........................................................................................17<br />
TROUBLE SHOOTING & WARRANTY....................................................................<br />
Before You Call For Service..................................................................................18<br />
Customer Service.................................................................................................18<br />
Limited Warranty..................................................................................................19<br />
PRODUCT REGISTRATION<br />
Thank you for purchasing our Haier<br />
product. This easy-to-use manual will<br />
guide you in getting the best use of<br />
your microwave oven.<br />
Remember to record the model and<br />
serial numbers. They are on a label<br />
inside of the microwave oven.<br />
Model number<br />
Serial number<br />
Date of purchase<br />
Staple your receipt to your manual. You will need it to obtain warranty service.
ENGLISH<br />
PRECAUTIONS TO AVOID POSSIBLE EXPOSURE<br />
TO EXCESSIVE MICROWAVE ENERGY<br />
A. Do not attempt to operate this oven with the door open. This can result in<br />
harmful exposure to microwave energy. It is important not to disable or tamper<br />
with the safety interlocks.<br />
B. Do not place any object between the oven front face and the door or allow soil or<br />
cleaner residue to accumulate on sealing surfaces.<br />
C. Do not operate the oven if damaged. It is especially important that the oven<br />
door closes properly and that there is no damage to the:<br />
1. DOOR (bent)<br />
2. HINGES AND LATCHES (broken or loosened)<br />
3. DOOR SEALS AND SEALING SURFACES<br />
D. The oven should not be adjusted or repaired by anyone except properly qualified<br />
service personnel.<br />
A SPECIAL NOTE ON ARCING<br />
“Arcing” refers to the presence of sparks inside the microwave oven. It can be<br />
caused by:<br />
• Metal or foil touching the inside walls of the oven.<br />
• Foil not closely molded to food, where edges have been left sticking up.<br />
• Small metal parts such as twist-ties, poultry pins, or gold-rimmed dishes.<br />
• Recycled paper towels which may contain small amounts of metal.<br />
CAUTION<br />
IF YOU SEE SPARKS IN YOUR MICROWAVE OVEN, IMMEDIATELY PRESS<br />
STOP/START TO CEASE COOKING AND CORRECT THE PROBLEM.<br />
ADDENDUM<br />
If this product is not maintained in a good state of cleanliness, its surface could<br />
be degraded. This could affect the lifespan of the product and lead to a dangerous<br />
situation.<br />
PAGE 2 • SAFETY INFORMATION
IMPORTANT SAFETY INSTRUCTIONS<br />
WARNING<br />
When using electrical appliances, basic safety precautions<br />
should be followed, including the following:<br />
WARNING - To reduce the risk of burns, electric shock, fire, and<br />
injury to persons or exposure to excessive microwave energy:<br />
ENGLISH<br />
1. Read all instructions before using the appliance.<br />
2. Read carefully and follow the specific "PRECAUTIONS TO AVOID<br />
POSSIBLE EXPOSURE TO EXCESSIVE MICROWAVE ENERGY" on<br />
page 2.<br />
3. This appliance must be grounded. Connect only to properly<br />
grounded outlet. See "GROUNDING INSTRUCTIONS” on page 6.<br />
4. Install or position this appliance only in accordance with the<br />
provided installation instructions on page 9.<br />
5. Some products such as whole eggs and sealed containers -for<br />
example, closed glass jars- can potentially explode and should<br />
not be heated in this oven.<br />
6. Use this appliance only for the intended uses as described in this<br />
manual. This type of oven is specifically designed to heat, cook, or<br />
dry food. It is not designed for industrial or laboratory use. Do not<br />
use corrosive chemicals or vapors in this appliance.<br />
7. As with any appliance, close supervision is necessary when used<br />
by children.<br />
8. To reduce the risk of fire in the oven cavity:<br />
• Do not overcook food. Carefully attend the appliance when<br />
paper, plastic, or other combustible materials are placed inside<br />
the oven to facilitate cooking.<br />
• Remove wire twist-ties from paper or plastic bags before<br />
placing bag in oven.<br />
PAGE 3 • SAFETY INFORMATION
ENGLISH<br />
IMPORTANT SAFETY INSTRUCTIONS<br />
• If materials inside the oven ignite, keep oven door closed, turn<br />
oven off, and disconnect the power cord or shut off power at<br />
the fuse or circuit breaker panel.<br />
• Do not use the cavity for storage purpose. Do not leave paper<br />
products, cooking utensils or food inside the cavity when not in<br />
use.<br />
9. Liquids, such as water, coffee, or tea can be overheated beyond<br />
the boiling point without appearing to be boiling due to surface<br />
tension of the liquid. Visible bubbling or boiling when the container<br />
is removed from the microwave oven is not always present. THIS<br />
COULD RESULT IN VERY HOT LIQUIDS SUDDENLY BOILING<br />
OVER WHEN A SPOON OR OTHER UTENSIL IS INSERTED INTO<br />
THE LIQUID.<br />
10. Do not heat oil or fat for deep-frying. It is difficult to control the<br />
temperature of oil in a microwave oven.<br />
11. Foods with heavy skins such as potatoes, whole squash, apples<br />
and chestnuts should be pierced with a fork or the tip of a sharp<br />
knife before cooking.<br />
12. The contents of feeding bottles and baby food jars should be<br />
stirred or shaken and the temperature should be checked before<br />
serving in order to avoid burns.<br />
13. Cooking utensils may become hot because of heat transferred<br />
from the heated food. Pot holders may be needed to handle the<br />
utensil.<br />
14. Do not cover or block any openings on the appliance.<br />
15. Do not store or use this appliance outdoors. Do not use this<br />
product near water, for example, near a kitchen sink, in a wet<br />
basement, near a swimming pool, or similar locations.<br />
16. Do not operate this appliance if the cord or plug is damaged, if it<br />
is not working properly, or if it has been damaged or dropped.<br />
17. Do not immerse cord or plug in water. Keep cord away from<br />
heated surfaces. Do not let cord hang over the edge of a table or<br />
counter.<br />
PAGE 4 • SAFETY INFORMATION
IMPORTANT SAFETY INSTRUCTIONS<br />
18. Use only thermometers, specifically designed for use in<br />
microwave ovens.<br />
19. Be certain the glass tray and roller rings are in place before<br />
operating the oven<br />
20. This appliance should be serviced only by qualified service<br />
personnel. Contact nearest authorized service facility for<br />
examination, repair, or adjustment.<br />
21. When cleaning sealing surfaces of the oven, such as the door<br />
jamb, use only mild, nonabrasive soaps, or mild detergents<br />
applied with a sponge or soft cloth.<br />
SAVE THESE INSTRUCTIONS<br />
HOUSEHOLD USE ONLY<br />
ENGLISH<br />
PAGE 5 • SAFETY INFORMATION
ENGLISH<br />
GROUNDING INSTRUCTIONS<br />
ELECTRICAL REQUIREMENTS<br />
The electrical requirements are a 120 volt 60 Hz, AC only, 15 amp. It is<br />
recommended that a separate circuit serving only the oven be provided. The oven<br />
is equipped with a 3-wire cord having a 3-prong grounding plug. It must be plugged<br />
into a wall receptacle that is properly installed and grounded.<br />
This appliance must be grounded. In the event of an electrical short circuit,<br />
grounding reduces risk of electric shock by providing an escape wire for the electric<br />
current. The cord provided with this appliance is equipped with a grounding wire<br />
and a grounding plug. The plug must be plugged into an outlet that is properly<br />
installed and grounded. Do not attempt to defeat this safety feature by modifying<br />
the plug in any way.<br />
WARNING<br />
Improper use of the grounding plug can result in a risk of electric shock.<br />
Consult a qualified electrician or serviceman if:<br />
1) The grounding instructions are not completely understood.<br />
2) You are unsure that the appliance is properly grounded.<br />
3) You have any questions about the grounding or electrical instructions.<br />
POWER SUPPLY CORD<br />
1. A short power supply cord is provided to reduce the risk of becoming entangled in<br />
or tripping over a longer cord.<br />
2. If the power supply cord is too short, do not use an extension cord. Have a<br />
qualified electrician or serviceman to install an outlet near the appliance.<br />
3. If it is absolutely necessary to use longer cord sets or an extension cord, extreme<br />
care must be exercised.<br />
a) Use only a grounding type 3-wire extension cord that<br />
has a 3-blade grounding plug and a 3-slot receptacle<br />
that will accept the plug on the appliance.<br />
b) The marked electrical rating of the cord set or extension<br />
cord must equal to or greater than the electrical rating<br />
of the appliance. The longer cord should be arranged<br />
so that it will not drape over the counter top or table<br />
top where it can be pulled on by children or tripped over<br />
unintentionally.<br />
NOTE: Neither Haier nor the dealer can accept any liability for damage to the oven<br />
or personal injury resulting from failure to observe the electrical connection<br />
procedures.<br />
PAGE 6 • SAFETY INFORMATION
COOKWARE AND UTENSIL GUIDE<br />
This section lists which utensils can be used in the microwave, which have limited<br />
use, and which should not be used in the microwave at all.<br />
ENGLISH<br />
RECOMMENDED<br />
• <strong><strong>Micro</strong>wave</strong> browning dish: Use to brown the exterior of small items such as steaks,<br />
chops, or pancakes. Follow the directions provided with your browning dish.<br />
• <strong><strong>Micro</strong>wave</strong>able plastic wrap: Use to retain steam. Leave a small opening for some<br />
steam to escape and avoid placing it directly on the food.<br />
• Paper towels and napkins: These absorb excess moisture and prevent spattering.<br />
Use for short-term heating and covering. Do not use recycled paper towels, which<br />
may contain metal and could ignite.<br />
• Heat-proof glass or glass-ceramic bowls and dishes: Use for heating or cooking.<br />
• Paper plates and cups: Use for short-term heating at low temperatures. Do not<br />
use recycled paper, which may contain metal and could ignite.<br />
• Wax paper: Use as a cover to prevent spattering.<br />
• Thermometers: Use only those labeled “<strong><strong>Micro</strong>wave</strong> Safe” and follow all directions.<br />
Check the temperature of food in several places. Conventional thermometers<br />
may be used on microwaved food once the food has been removed from the oven.<br />
LIMITED USE<br />
• Aluminum foil: Smooth, narrow strips of foil may be used to shield delicate areas<br />
on food items like drumsticks and wings to prevent overcooking.<br />
NOTE: Using too much foil can damage your oven, so be careful.<br />
• Ceramic, porcelain, and stoneware: Use these only if they are labeled “<strong><strong>Micro</strong>wave</strong><br />
Safe”. If they are not labeled, test them to make sure they can be used safely.<br />
• Plastic: Use only if labeled “<strong><strong>Micro</strong>wave</strong> Safe”. Other plastics can melt.<br />
• Straw, wicker, and wood: Use only for short-term heating, such as warming dinner<br />
rolls for a few seconds. Baskets and bowls may be flammable.<br />
PAGE 7 • SAFETY INFORMATION
ENGLISH<br />
COOKWARE AND UTENSIL GUIDE CONT.<br />
NOT RECOMMENDED<br />
• Glass jars and bottles: Regular glass is too thin to be used in a microwave. It can<br />
shatter, causing damage and injury.<br />
• Paper bags: These are a fire hazard, except for popcorn bags that are designed for<br />
microwave use.<br />
• Styrofoam plates and cups: These can melt and leave a harmful chemical residue<br />
on food.<br />
• Plastic storage and food containers: Containers meant for cold storage, such as<br />
margarine tubs, can melt in the microwave.<br />
• Metal utensils: These can damage your microwave oven. Remove all metal from<br />
food and containers before cooking.<br />
NOTE: To test if a dish is safe for microwaving, place the empty dish in the oven and<br />
microwave on HIGH for 30 seconds. A dish which becomes very hot should<br />
not be used.<br />
• Parchment paper: Use as a cover to prevent spattering or as a wrap for steaming.<br />
• Aluminum tray: May cause arcing. Transfer food to a microwave-safe container.<br />
• Take-out carton with metal handle: May cause arcing. Transfer food to a<br />
microwave-safe container.<br />
• Metal or metal-trimmed utensils: Metal cookware, metal trim, and metallic glazes<br />
may cause arcing.<br />
• Wood: Wood will dry out when used in the microwave oven and may split or crack.<br />
PAGE 8 • SAFETY INFORMATION
SPECIFICATIONS<br />
Power Consumption:<br />
120V~60Hz, 1450W<br />
MWO Power:<br />
1000W<br />
Operation Frequency:<br />
2450MHz<br />
<strong>Oven</strong> Cavity Dimensions (H x W x D): 9.5" x 13.9" x 14.1"<br />
<strong>Oven</strong> Capacity:<br />
1.1 cubic feet<br />
Cooking Uniformity: Turntable Diameter 12.4"<br />
Net Weight:<br />
Approx. 35.25 lbs.<br />
ENGLISH<br />
INSTALLATION GUIDE<br />
1. Make sure that all the packing<br />
materials are removed from the<br />
inside of the door.<br />
2. Check the oven for any damage, such<br />
as misaligned or bent door, damaged<br />
door seals and sealing surfaces,<br />
broken or loose door hinges and<br />
latches, and dents inside the cavity or<br />
on the door. If there is any damage,<br />
do not operate the oven. Contact<br />
qualified service personnel.<br />
3. This microwave oven must be placed<br />
on a flat, stable surface capable of<br />
supporting the weight of the oven<br />
plus the heaviest food likely to be<br />
cooked in the oven.<br />
4. Do not place the oven where heat,<br />
moisture, or high humidity are<br />
generated, or near combustible<br />
materials.<br />
5. To function correctly, the oven must<br />
have sufficient airflow on all sides.<br />
Allow 8" of space above the oven, 4"<br />
at back, and 2" at both sides. Do not<br />
cover or block any openings on the<br />
appliance. Do not remove feet on<br />
which oven stands.<br />
6. Do not operate the oven without<br />
glass tray, roller support, and shaft in<br />
their proper positions.<br />
7. Make sure that the power supply cord<br />
is undamaged and does not run under<br />
the oven or over any hot or sharp<br />
surface.<br />
8. The socket must be readily<br />
accessible so that the cord can be<br />
quickly reached<br />
and easily<br />
unplugged in an<br />
emergency.<br />
RADIO OR TV INTERFERENCE<br />
Should the microwave oven cause interference to your radio or TV, check that the<br />
microwave oven is on a different circuit, relocate the radio or TV as far away from<br />
the oven as possible or check position and signal of receiving antenna.<br />
PAGE 9 • SET UP & USE
ENGLISH<br />
PARTS & FEATURES<br />
Diagram for instructional purposes only.<br />
Design may vary by model number.<br />
Door Safety Lock System<br />
<strong>Oven</strong> Window<br />
Control Panel<br />
Turntable Roller<br />
Glass Tray<br />
Door Jamb<br />
PAGE 10 • SET UP & USE
CONTROL PANEL<br />
ENGLISH<br />
Display<br />
Convenience Cooking<br />
Buttons<br />
Number Pad<br />
Power Level<br />
Time Cook 2<br />
Clock<br />
Auto Cook<br />
Start / Stop<br />
Timer<br />
Clear<br />
Speed Defrost<br />
Auto Defrost<br />
DISPLAY<br />
Shows cooking time, power, indicators<br />
and present time.<br />
CONVENIENCE COOKING BUTTONS<br />
Instant settings to cook popular foods<br />
TIMER<br />
Timer functions independently,<br />
even while a cooking program is in<br />
progress.<br />
POWER LEVEL<br />
Use to set power level. Also lets you<br />
check power level during cooking.<br />
TIME COOK 2<br />
Use for multi-stage cooking. Enables<br />
cooking at multiple power and time<br />
settings automatically.<br />
AUTO COOK<br />
Programs cooking based on the<br />
weight of the foods to be cooked.<br />
AUTO DEFROST<br />
Programs defrosting based on the<br />
weight of the foods to be defrosted.<br />
SPEED DEFROST<br />
Quickly and effectively defrosts foods<br />
by alternating defrost and stand<br />
times.<br />
NUMBER PAD (0-9)<br />
Use to manually set time or weight.<br />
CLEAR<br />
Clears all previous settings or sets the<br />
child lock.<br />
CLOCK<br />
Use to set the time of day or recall the<br />
time of day.<br />
START/STOP<br />
Touch to start or stop cooking.<br />
PAGE 11 • SET UP & USE
ENGLISH<br />
OPERATION INSTRUCTIONS<br />
SIGNALS DURING OVEN SETTINGS<br />
ONE BEEP: <strong>Oven</strong> accepts the entry.<br />
TWO BEEP: <strong>Oven</strong> does not accept the<br />
entry, check and try again.<br />
SETTING THE CLOCK<br />
1. Touch CLOCK pad.<br />
2. Use the number pad to enter the<br />
correct time.<br />
3. Touch CLOCK pad again.<br />
NOTE: This is a 12-hour clock. When the<br />
oven is first plugged in or when power<br />
resumes after a power interruption,<br />
the display will show ENTER CLOCK<br />
TIME. If you prefer to not have the clock<br />
displayed, touch RESET.<br />
SETTING THE TIMER<br />
The timer operates as a minute timer.<br />
1. Press Timer pad.<br />
2. Enter the amount of time you want to<br />
count down.<br />
3. Press the Start pad. When the time is<br />
up, the timer will signal.<br />
NOTE: The timer operates without<br />
microwave energy.<br />
SETTING THE POWER LEVEL<br />
The default power output setting is<br />
100%. If you want to set a power level<br />
other than 100%, touch POWER LEVEL,<br />
and then use the number pad to enter<br />
the power level.<br />
SETTING A COOKING PROGRAM<br />
A. Single-stage cooking<br />
1. Use the number pad to set a cooking<br />
time. You can set a cooking time from<br />
one second to 99 minutes and 99<br />
seconds.<br />
2. Set the Power Level if other than<br />
100%.<br />
3. Touch START/STOP to start cooking.<br />
B. Multiple-stage cooking<br />
Some foods or recipes require<br />
different stages of cooking at different<br />
temperatures.<br />
1. SET STAGE 1:<br />
Follow steps 1 and 2 in “Single-stage<br />
Cooking”. Do not touch START/STOP.<br />
2. SET STAGE 2:<br />
Touch TIME COOK 2 then enter<br />
proper cooking time and (lower)<br />
power level. Most Multiple-Stage<br />
recipes use lower power for second<br />
stage.<br />
3. Touch START/STOP to start cooking.<br />
NOTE: After stage 1 time has elapsed,<br />
one beep sounds, signaling the<br />
beginning of stage 2.<br />
• After total time has elapsed, the<br />
system will beep with END in the<br />
display. The beeps will continue<br />
to sound automatically every two<br />
minutes until the door is opened or<br />
any button is touched.<br />
NUMBER<br />
PAD<br />
COOKING<br />
POWER<br />
NUMBER<br />
PAD<br />
COOKING<br />
POWER<br />
10 100% 5 50%<br />
9 90% 4 40%<br />
8 80% 3 30%<br />
7 70% 2 20%<br />
6 60% 1 10%<br />
SPEED DEFROST<br />
1. Touch SPEED DEFROST.<br />
2. Enter desired defrosting time with<br />
the number pad.<br />
3. Touch START/STOP.<br />
NOTE: Remove meat from package and<br />
place on microwave safe dish.<br />
PAGE 12 • SET UP & USE
OPERATION INSTRUCTIONS CONT.<br />
• After total time has elapsed, the<br />
system will sound beeps with END in<br />
the display. The beeps will continue<br />
to sound automatically every two<br />
minutes until the door is opened or<br />
any button is touched.<br />
• After setting SPEED DEFROST, oven<br />
can be programmed to automatically<br />
switch to single or multiple-stage<br />
cooking.<br />
• For speed defrost and single stage<br />
cooking, follow steps above. Before<br />
touching START/STOP, touch TIME<br />
COOK 2, enter time and power level<br />
and then touch START/STOP.<br />
• For speed defrost and multiple stage<br />
cooking, follow steps above. Before<br />
touching START/STOP, touch TIME<br />
COOK 2, enter two-stage cooking<br />
programs and then touch START/<br />
STOP to start.<br />
AUTO COOK<br />
1. Touch AUTO COOK.<br />
2. Select food code using numbers 1-3<br />
on the number pad.<br />
3. Enter food weight.<br />
4. Touch START/STOP.<br />
AUTO COOK FOOD CODES<br />
CODE TYPE MAX WEIGHT<br />
1 Beef 5 lb. 16 oz.<br />
2 Lamb 5 lb. 16 oz.<br />
3 Pork 5 lb. 4 oz.<br />
NOTE: Meat must be defrosted and at<br />
refrigerated temperature.<br />
• Weight must be in pounds and ounces.<br />
• Ounce weights less than 10 must be<br />
preceded by a 0. If label gives weight<br />
in pounds only, change the fraction of<br />
a pound to ounces using the chart on<br />
the next page.<br />
Example: 1 lb. 8 oz. = 108<br />
2 lb. 12 oz. = 212<br />
• During cooking, the system will<br />
pause automatically and beep to<br />
remind users to turn meat over. After<br />
turning, touch START/STOP to resume<br />
cooking.<br />
• After total time has elapsed, the<br />
system will sound several beeps with<br />
END in the display. The beeps will<br />
continue to sound automatically every<br />
two minutes until the door is opened<br />
or any button is touched.<br />
AUTO DEFROST<br />
1. Touch AUTO DEFROST pad.<br />
2. Enter food weight with the number<br />
pad.<br />
3. Touch START/STOP pad to start<br />
cooking.<br />
NOTE: Weight must be in pounds and<br />
ounces. Ounce weights less than 10<br />
must be preceded by a 0. If label gives<br />
weight in pounds only, change the<br />
fraction of a pound to ounces using the<br />
chart on the following page.<br />
• During defrosting, you need to turn<br />
food over for uniform defrosting. After<br />
turning, touch START/STOP pad to<br />
resume defrosting.<br />
• After total time elapsed, the system<br />
will sound several beeps with END in<br />
the display. The beeps will continue<br />
to sound automatically every two<br />
minutes until the door is opened or<br />
any button is touched.<br />
ENGLISH<br />
PAGE 13 • SET UP & USE
ENGLISH<br />
OPERATION INSTRUCTIONS CONT.<br />
CONVERTING FRACTIONS OF A POUND TO OUNCES<br />
FRACTIONS OF A LB. OUNCES FRACTIONS OF A LB. OUNCES<br />
Less than .03 0 .54 to 59 9<br />
.03 to .09 1 .60 to .65 10<br />
.10 to .15 2 .66 to .71 11<br />
.16 to .21 3 .72 to .78 12<br />
.22 to .27 4 .79 to .84 13<br />
.28 to .34 5 .85 to .90 14<br />
.35 to .40 6 .91 to .97 15<br />
.41 to .46 7 Above .97 Go to next even<br />
.47 to .53 8<br />
SETTING CHILD LOCK<br />
The safety lock prevents unsupervised operation by children. Set the function in<br />
standby mode.<br />
To set: Press and hold CLEAR for 3 seconds. LOCK is indicated on the display.<br />
To cancel: Press and hold CLEAR for 3 seconds. LOCK disappears from the display.<br />
CONVENIENCE COOKING SETTINGS<br />
The CONVENIENCE COOKING settings<br />
allow you to cook or reheat food<br />
automatically without entering power<br />
level or time.<br />
For smaller portions, simply touch the<br />
desired button then START/STOP.<br />
For larger portions, push the desired<br />
number twice.<br />
FROZEN DINNER, BAKED POTATO<br />
and BEVERAGE allow you to cook<br />
multiple amounts of the same food.<br />
Simply touch pad once, and ENTER<br />
AMT appears in the display. Enter the<br />
amount of servings and press START/<br />
STOP.<br />
POPCORN<br />
For a 3.5 oz. bag of microwave popcorn:<br />
1. Touch POPCORN once.<br />
2. Touch START/STOP.<br />
NOTE: To change the preset POPCORN<br />
time: Touch POPCORN twice. ENTER<br />
TIME appears in display. Enter desired<br />
cooking time on number pad. Touch<br />
START/STOP. This new cooking time<br />
will remain whenever you use the<br />
POPCORN setting<br />
until you CLEAR it.<br />
PAGE 14 • SET UP & USE
CONVENIENCE COOKING SETTINGS CONT.<br />
BAKED POTATO<br />
For potatoes (4 ~6 oz. each):<br />
NOTE: Potatoes should be pierced with<br />
a fork or the tip of a sharp knife before<br />
cooking to prevent bursting.<br />
1. Touch BAKED POTATO once.<br />
2. Enter number of potatoes (1 - 4).<br />
3. Touch START/STOP.<br />
For larger potatoes (8~10 oz. each):<br />
1. Touch BAKED POTATO twice.<br />
2. Enter number of potatoes (1 - 4).<br />
3. Touch START/STOP.<br />
PIZZA<br />
Reheating a slice of pizza:<br />
1. Touch PIZZA once.<br />
2. Touch START/STOP.<br />
Heating a whole pizza:<br />
1. Touch PIZZA twice.<br />
2. Touch START/STOP.<br />
BEVERAGE<br />
For smaller cups (5 ~ 7 oz. each):<br />
1. Touch BEVERAGE once.<br />
2. Enter number of cups by touching<br />
number pad from 1 to 4.<br />
3. Touch START/STOP.<br />
For larger coffee mugs (9~11 oz. each):<br />
1. Touch BEVERAGE twice.<br />
2. Enter number of mugs by touching<br />
number pad from 1 to 4.<br />
3. Touch START/STOP.<br />
FROZEN DINNER<br />
For one or two small frozen dinners<br />
(7~ 9 oz. each):<br />
1. Touch FROZEN DINNER once.<br />
2. Select 1 or 2 for number of entrees.<br />
3. Touch START/STOP pad.<br />
Larger frozen dinners (10 ~ 12 oz. each):<br />
1. Touch FROZEN DINNER twice.<br />
2. Select 1 or 2 for number of entrees.<br />
3. Touch START/STOP.<br />
REHEAT<br />
1. Touch REHEAT pad.<br />
2. Touch START/STOP.<br />
NOTE:<br />
This setting is meant for reheating a<br />
plate of chilled leftovers.<br />
ENGLISH<br />
PAGE 15 • SET UP & USE
ENGLISH<br />
COOKING TECHNIQUES<br />
Your microwave can make cooking<br />
quicker and easier than conventional<br />
cooking. For best results, exercise the<br />
following techniques:<br />
STIRRING<br />
Stir foods such as casseroles and<br />
vegetables while cooking to distribute<br />
heat evenly. Food at the outside of the<br />
dish absorbs more energy and heats<br />
more quickly, so stir from the outside<br />
to the center. The oven will pause<br />
automatically when you open the door<br />
to stir your food.<br />
ARRANGEMENT<br />
Arrange unevenly shaped foods, such<br />
as chicken pieces or chops, with the<br />
thicker, meatier parts toward the<br />
outside of the turntable where they<br />
receive more microwave energy. To<br />
prevent overcooking, place delicate<br />
areas, such as asparagus tips, toward<br />
the center of the turntable.<br />
SHIELDING<br />
You may shield food with narrow<br />
strips of aluminum foil to prevent<br />
overcooking. Areas that need shielding<br />
include poultry wing-tips, the ends<br />
of poultry legs, and corners of square<br />
baking dishes. Use only small amounts<br />
of aluminum foil. Larger amounts can<br />
damage your oven. Apply foil strips<br />
as smoothly as the food item allows,<br />
avoiding creases wherever possible.<br />
TURNING<br />
Turn foods over midway through<br />
cooking to expose all parts to<br />
microwave energy. This is especially<br />
important with large items such as<br />
roasts.<br />
STANDING<br />
Foods cooked in the microwave build<br />
up internal heat and continue to cook<br />
for a few minutes after heating stops.<br />
Let foods stand to complete cooking,<br />
especially foods such as cakes and<br />
whole vegetables. Roasts need this<br />
time to complete cooking in the center<br />
without overcooking the outer areas.<br />
All liquids, such as soup or hot<br />
chocolate, should be shaken or stirred<br />
prior to cooking, midway through, and<br />
when cooking is complete. Let liquids<br />
stand a moment before serving. When<br />
heating baby food, stir well at removal<br />
and test the temperature before<br />
serving.<br />
ADDING MOISTURE<br />
<strong><strong>Micro</strong>wave</strong> energy is attracted to water<br />
molecules. Food that is uneven in<br />
moisture content should be covered<br />
or allowed to stand so that the heat<br />
disperses evenly. Add a small amount<br />
of water to dry food to help it cook.<br />
PAGE 16 • SET UP & USE
CLEANING AND CARE<br />
1. Keep the inside of the oven clean.<br />
When food splatters or spilled liquids<br />
adhere to oven walls, wipe with a<br />
damp cloth. Mild detergent may be<br />
used if the oven gets very dirty. Avoid<br />
the use of spray and other harsh<br />
cleaners as they may stain, streak or<br />
dull the door surface.<br />
2. When cleaning surfaces such as the<br />
door jamb, use only mild, nonabrasive<br />
soaps, or mild detergents applied<br />
with a sponge or soft cloth.<br />
3. Turn off the oven and unplug the<br />
power cord from the wall socket<br />
before cleaning.<br />
4. The outside surfaces should be<br />
cleaned with a damp cloth. To prevent<br />
damage to the operating parts inside<br />
the oven, water should not be allowed<br />
to seep into the ventilation openings.<br />
5. Wipe the window on both sides with<br />
a damp cloth to remove any spills or<br />
spatters.<br />
6. Do not allow the control panel to get<br />
wet. Clean with a soft, damp cloth.<br />
When cleaning the control panel,<br />
leave oven door open to prevent<br />
oven from accidentally turning on.<br />
7. If steam accumulates inside or<br />
around the outside of the oven door,<br />
wipe with a soft cloth. This may occur<br />
when the microwave oven is operated<br />
under high humidity conditions. This<br />
is normal in such conditions.<br />
8. It may be necessary to remove the<br />
glass tray for cleaning. Wash the<br />
tray in warm sudsy water or in a<br />
dishwasher.<br />
9. The roller ring and oven floor should<br />
be cleaned regularly. Simply wipe<br />
the bottom surface of the oven with<br />
mild detergent. The roller ring may<br />
be washed in mild sudsy water or<br />
dishwasher. When removing the roller<br />
ring from cavity floor for cleaning, be<br />
sure to replace in the proper position.<br />
10. Remove odors from your oven by<br />
combining a cup of water with the<br />
juice and skin of one lemon in a deep<br />
bowl, microwave for 5 minutes. Wipe<br />
thoroughly and dry with a soft cloth.<br />
11. When the oven light burns out,<br />
please consult a dealer to have it<br />
replaced.<br />
12. If the power cord becomes soiled,<br />
unplug and wipe down with a damp<br />
cloth. Make sure to dry thoroughly<br />
before plugging back into outlet.<br />
13. Please do not dispose of this<br />
appliance with regular garbage.<br />
It should be disposed of through<br />
an appropriate disposal facility<br />
provided by your municipality.<br />
ENGLISH<br />
PAGE 17 • CLEANING AND CARE
ENGLISH<br />
BEFORE YOU CALL FOR SERVICE<br />
IF THE OVEN FAILS TO OPERATE:<br />
A) Check to make sure that the oven is plugged in securely. If it is not, remove the<br />
plug from the outlet, wait 10 seconds and plug it in again securely.<br />
B) Check for a blown circuit fuse or a tripped main circuit breaker. If these seem to<br />
be operating properly, test the outlet with another appliance.<br />
C) Check to make sure the control panel is programmed correctly and the timer is<br />
set.<br />
D) Check to ensure that the door is securely closed engaging the door safety lock<br />
system. Otherwise, the microwave energy will not flow into the oven.<br />
IF NONE OF THE ABOVE SOLVES THE PROBLEM, CONTACT A QUALIFIED<br />
TECHNICIAN. DO NOT TRY TO ADJUST OR REPAIR THE OVEN YOURSELF.<br />
CUSTOMER SERVICE<br />
IMPORTANT<br />
DO NOT RETURN THIS PRODUCT TO THE STORE<br />
If you have a problem with this product, please contact the Haier<br />
Customer Satisfaction Center at 1-877-337-3639.<br />
DATED PROOF OF PURCHASE, MODEL # AND SERIAL #<br />
REQUIRED FOR WARRANTY SERVICE<br />
CUSTOMER<br />
SERVICE<br />
SERVICIO<br />
AL CLIENTE<br />
Hotline 24/7<br />
1-877-337-3639<br />
PAGE 18 • TROUBLE SHOOTING AND WARRANTY
TROUBLESHOOTING<br />
Check your problem by using the chart below and try the solutions for each problem. If<br />
the microwave oven still does not work properly, contact Haier customer service center<br />
or the nearest authorized service center. Customers must never troubleshoot internal<br />
components. <strong><strong>Micro</strong>wave</strong>s hold dangerous voltage (5000V) even after power is removed. Only<br />
a certified technician should attempt <strong><strong>Micro</strong>wave</strong> repair.<br />
ENGLISH<br />
TROUBLE POSSIBLE CAUSE POSSIBLE REMEDY<br />
<strong>Oven</strong> will not start<br />
Arcing or sparkling<br />
Unevenly cooked<br />
foods<br />
Overcooked foods<br />
Under cooked foods<br />
Improper defrosting<br />
A. Electrical cord for oven is not<br />
plugged in.<br />
B. Door is open.<br />
C. Wrong operation is set.<br />
A. Materials to be avoided in<br />
microwave oven , such as metal,<br />
were used.<br />
B. The oven is operated when<br />
empty.<br />
C. Spilled food remains in the<br />
cavity.<br />
A. Materials to be avoided in<br />
microwave oven were used.<br />
B. Food is not defrosted<br />
completely.<br />
C. Cooking time, power level is not<br />
suitable.<br />
D. Food is not turned or stirred.<br />
Cooking time, power level is not<br />
suitable. Use correct cooking time,<br />
power level.<br />
A. Materials to be avoided in<br />
microwave oven were used.<br />
B. Food is not defrosted<br />
completely.<br />
C. <strong>Oven</strong> ventilation ports are<br />
restricted.<br />
D. Cooking time, power level is not<br />
suitable.<br />
A. Materials to be avoided in<br />
microwave oven were used.<br />
B. Cooking time, power level is not<br />
suitable.<br />
C. Food is not turned or stirred.<br />
A. Plug into the outlet.<br />
B. Close the door and try<br />
again.<br />
C. Check instructions.<br />
A. Use microwave-safe<br />
cookware only.<br />
B. Do not operate with oven<br />
empty.<br />
C. Clean cavity with wet<br />
towel.<br />
A. Use microwave-safe<br />
cookware only.<br />
B. Completely defrost food.<br />
C. Use correct cooking time,<br />
power level.<br />
D. Turn or stir food.<br />
Use correct cooking time and<br />
power level.<br />
A. Use microwave-safe<br />
cookware only.<br />
B. Completely defrost food.<br />
C. Check to see that oven<br />
ventilation ports are not<br />
restricted.<br />
D. Use correct cooking time<br />
and power level.<br />
A. Use microwave-safe<br />
cookware only.<br />
B. Use correct cooking time<br />
and power level.<br />
C. Turn or stir food.<br />
PAGE 19 • TROUBLE SHOOTING AND WARRANTY
ENGLISH<br />
LIMITED WARRANTY<br />
What is covered and for how long<br />
This warranty covers all defects in<br />
workmanship or materials for a period of:<br />
12 months for labor<br />
12 months for parts (Functional Parts Only)<br />
2 years Magnetron Tube for <strong><strong>Micro</strong>wave</strong> (part<br />
only)<br />
The warranty commences on the date of<br />
item purchase. Customer shall provide Haier<br />
with proof of the date of purchase and the<br />
original receipt along with; brand, model and<br />
serial number for verification prior to any<br />
warranty service being provided.<br />
Carry-In Service is available for selected<br />
products at the discretion of Haier America.<br />
EXCEPTIONS:<br />
Commercial or Rental Use warranty<br />
90 days for labor 90 days for parts No other<br />
warranty applies.<br />
What is covered.<br />
1. The mechanical and electrical parts of<br />
the appliance which serve the functional<br />
purpose of this appliance are covered for<br />
a period of 12 months or as stated above.<br />
This includes all parts except finish, trim<br />
and glass.<br />
2. The limited warranty does not cover<br />
any credit or refund for any loss or injury<br />
caused by the product or defects to<br />
the product including but not limited to<br />
incidental or consequential damages.<br />
3. If the magnetron tube fails (for <strong><strong>Micro</strong>wave</strong>)<br />
due to poor workmanship or material, the<br />
part will be replaced.<br />
What will be done<br />
1. Any mechanical or electrical part that<br />
proves to be defective in normal usage<br />
during the specified warranty period will be<br />
repaired or replaced at Haier’s discretion.<br />
ALL WARRANTY SERVICE MUST BE<br />
PROVIDED BY ONLY OUR FACTORY<br />
SERVICE CENTERS, OR BY AN AUTHORIZED<br />
HAIER CUSTOMER TECHNICIAN.<br />
If it is determined that repair is not<br />
appropriate or replacement parts are<br />
unavailable for repair, Haier will exchange the<br />
product with a refurbished or new product<br />
the same or similar to the original at its<br />
discretion.<br />
2. There will be no charge to the purchaser<br />
for functional replacement parts and labor<br />
on any covered items during the initial 12-<br />
month period or as stated above.<br />
3. THIS WARRANTY COVERS APPLIANCES<br />
WITHIN THE CONTINENTAL UNITED<br />
STATES, PUERTO RICO AND CANADA. IT<br />
DOES NOT COVER THE FOLLOWING:<br />
Damages from improper installation.<br />
Damages incurred during shipping.<br />
Defects other than manufacturing. Damage<br />
from misuse, abuse, accident, alteration,<br />
lack of proper care and maintenance or<br />
incorrect current or voltage or acts of<br />
God. Damage from other than household<br />
use. Damage from service by other than<br />
an authorized dealer or service center.<br />
Decorative trims, glass or replaceable light<br />
bulbs. Transportation and shipping costs.<br />
Labor (after the initial 12 months). Credit or<br />
Refund for products over 30 days past date<br />
of purchase Food loss for food spoiled as<br />
a direct result of mechanical failure of the<br />
product or of any delay in providing service,<br />
repair, replacement. This limited warranty<br />
doesn’t apply to refurbished product or unit<br />
purchased as/like new or second-hand. THIS<br />
LIMITED WARRANTY IS GIVEN IN LIEU OF<br />
ALL OTHER WARRANTIES, EXPRESSED<br />
OR INCLUDING THE WARRANTIES OF<br />
MERCHANTABILITY AND FITNESS FOR<br />
A PARTICULAR PURPOSE. The remedy<br />
provided in this warranty is exclusive and<br />
is granted in lieu of all other remedies.<br />
This warranty does not cover incidental<br />
or consequential damages, so the above<br />
limitations may not apply to you. Some<br />
states do not allow limitations on how long<br />
an implied warranty lasts, so the above<br />
limitations may not apply to you. This<br />
warranty gives you specific legal rights, and<br />
you may have other rights, which vary from<br />
state to state.<br />
Haier America,<br />
New York, NY 10018<br />
PAGE 20 • TROUBLE SHOOTING AND WARRANTY
ÍNDICE<br />
INFORMACIÓN DE SEGURIDAD.............................................................................<br />
Precauciones para evitar posible sobre exposición a energía de microondas.... 2<br />
Nota especial acerca del arco de voltaje............................................................... 2<br />
Apéndice.................................................................................................................. 2<br />
Instrucciones importantes de seguridad ......................................................... 3-5<br />
Instrucciones de conexión a tierra..................................................................... 6-7<br />
Guía para utensilios y trastos de cocina............................................................ 7-8<br />
COLOCACIÓN Y USO..............................................................................................<br />
Especificaciones..................................................................................................... 9<br />
Guía de instalación.................................................................................................. 9<br />
Partes y funciones................................................................................................10<br />
Panel de control....................................................................................................11<br />
Instrucciones de funcionamiento..................................................................12-14<br />
Ajustes convenientes para cocinar................................................................14-15<br />
Técnicas para cocinar............................................................................................16<br />
LIMPIEZA Y CUIDADO.........................................................................................17<br />
SOLUCIÓN DE PROBLEMAS Y GARANTÍA...........................................................<br />
Antes de llamar a servicio técnico.......................................................................18<br />
Servicio al cliente..................................................................................................18<br />
Garantía limitada...................................................................................................19<br />
REGISTRO DEL PRODUCTO<br />
Gracias por adquirir nuestro producto<br />
Haier. Este manual de uso sencillo lo<br />
guiará para que aproveche al máximo su<br />
horno de microondas.<br />
Recuerde registrar los números de<br />
modelo y de serie que se encuentran en<br />
una etiqueta en el interior del horno de<br />
microondas.<br />
Número de modelo<br />
Número de serie<br />
Fecha de compra<br />
Engrape el recibo al manual. Lo necesitará para recibir el servicio de garantía..<br />
ESPAÑOL
PRECAUCIONES PARA EVITAR POSIBLE SOBRE<br />
EXPOSICIÓN A LA ENERGÍA DEL MICROONDAS<br />
A. No intente operar este horno con la puerta abierta. Esto puede generar una<br />
exposición dañina a la energía del microondas. Es importante no inhabilitar o<br />
violar los seguros.<br />
B. No coloque ningún objeto entre el frente del horno y la puerta, ni permita que se<br />
acumule suciedad o residuos del limpiador en las superficies de sellado.<br />
C. No utilice el horno si está dañado. Es especialmente importante que la puerta<br />
del horno cierre bien y que no haya daños en:<br />
1. LA PUERTA (arqueada).<br />
2. LAS BISAGRAS Y SEGUROS (rotos o flojos).<br />
3. LOS SELLOS DE LA PUERTA Y LAS SUPERFICIES DE SELLADO.<br />
D. Únicamente personal de servicio con capacitación adecuada debe ajustar o<br />
reparar el horno.<br />
NOTA ESPECIAL ACERCA DEL ARCO DE VOLTAJE<br />
Un “arco de voltaje” se refiere a la presencia de chispas dentro del horno de<br />
microondas. Puede generarse por las siguientes causas:<br />
• Alguna pieza metálica o papel aluminio está en contacto con las paredes<br />
interiores del horno.<br />
• El papel aluminio no está cubriendo herméticamente los alimentos sino que hay<br />
bordes puntiagudos levantados.<br />
• Hay partes pequeñas metálicas, como amarres, trinches para pollo o platos con<br />
bordes dorados.<br />
• Se están usando servilletas de papel reciclado que pueden contener pequeñas<br />
cantidades de metal.<br />
PRECAUCIÓN<br />
SI OBSERVA QUE SE GENERAN CHISPAS EN SU HORNO DE<br />
MICROONDAS, OPRIMA DE INMEDIATO EL BOTÓN DE PARO/INICIO<br />
PARA DETENER LA COCCIÓN Y CORREGIR EL PROBLEMA.<br />
ESPAÑOL<br />
APÉNDICE<br />
Si este producto no se mantiene en buenas condiciones de limpieza, su superficie<br />
podría degradarse. Esto podría afectar su vida útil y generar situaciones de peligro.<br />
PÁGINA 2 • INFORMACIÓN DE SEGURIDAD
INSTRUCCIONES IMPORTANTES<br />
DE SEGURIDAD<br />
ADVERTENCIA<br />
Cuando use electrodomésticos, se deben seguir las precauciones<br />
básicas de seguridad, incluyendo las siguientes:<br />
ADVERTENCIA - Para reducir el riesgo de quemaduras, descargas<br />
eléctricas, incendio y lesiones personales, o reducir la sobreexposición a<br />
la energía del microondas:<br />
1. Lea todas las instrucciones antes de usar el aparato.<br />
2. Lea cuidadosamente y cumpla con las precauciones específicas<br />
de la página 2: “PRECAUCIONES PARA EVITAR UNA POSIBLE<br />
SOBREEXPOSICIÓN A LA ENERGÍA DEL MICROONDAS”.<br />
3. Este electrodoméstico debe conectarse a tierra. Conéctelo<br />
únicamente a un tomacorriente con conexión a tierra adecuada.<br />
Véase "INSTRUCCIONES DE CONEXIÓN A TIERRA" en la página<br />
6.<br />
4. Instale o coloque este electrodoméstico únicamente conforme a<br />
las instrucciones de instalación descritas en la página 9.<br />
5. Algunos productos, como los huevos enteros y los envases<br />
sellados (por ejemplo, frascos de vidrio cerrados), pueden<br />
explotar, por lo que no deben calentarse en este horno.<br />
6. Utilice este aparato solamente para lo que fue diseñado, según<br />
se describe en este manual. Este tipo de horno está diseñado<br />
específicamente para calentar, cocinar o deshidratar comida.<br />
No está diseñado para uso industrial o de laboratorio. No use<br />
químicos corrosivos ni vapores con este aparato.<br />
7. Al igual que con cualquier electrodoméstico, es necesario<br />
supervisar a los niños atentamente cuando lo usen.<br />
8. Para reducir el riesgo de incendio dentro del horno:<br />
• No cocine los alimentos en exceso. Preste atención al<br />
electrodoméstico cuando coloque en su interior papel, plástico u<br />
otros materiales combustibles para facilitar la cocción.<br />
ESPAÑOL<br />
PÁGINA 3 • INFORMACIÓN DE SEGURIDAD
INSTRUCCIONES IMPORTANTES<br />
DE SEGURIDAD CONT.<br />
ESPAÑOL<br />
• Retire los amarres de alambre de las bolsas de papel o plástico<br />
antes de colocarlas en el horno.<br />
• Si se incendian materiales dentro del horno, mantenga cerrado<br />
el horno, apáguelo y desconecte el cable de suministro eléctrico<br />
o interrumpa el suministro eléctrico en el tablero de fusibles o<br />
interruptor de carga.<br />
• No utilice el interior del horno para guardar cosas. No deje<br />
productos de papel, artículos de cocina ni alimentos en el interior<br />
del horno cuando no esté en uso.<br />
9. Los líquidos como agua, café o té pueden sobrecalentarse más<br />
allá del punto de ebullición sin que parezca que están hirviendo,<br />
debido a la tensión superficial del líquido. No siempre aparecen<br />
burbujas o signos visibles de ebullición cuando se saca el envase<br />
del horno de microondas. LOS LÍQUIDOS MUY CALIENTES<br />
PODRÍAN COMENZAR A HERVIR REPENTINAMENTE CUANDO<br />
SE INTRODUCE EN EL LÍQUIDO UNA CUCHARA O ALGÚN OTRO<br />
UTENSILIO DE COCINA.<br />
10. No caliente aceite o grasas para freír. Es difícil controlar la<br />
temperatura del aceite dentro de un horno de microondas.<br />
11. Los alimentos con cáscara gruesa, como es el caso de las<br />
papas, calabazas, manzanas y castañas deben perforarse con un<br />
tenedor o la punta de un cuchillo afilado, antes de cocinarse.<br />
12. El contenido de los biberones y vasos para alimentos de bebé<br />
se deben mover o menear y revisar su temperatura antes de<br />
servirlos para evitar quemaduras.<br />
13. Los utensilios de cocina pueden calentarse debido al calor<br />
transferido por los alimentos calientes. Se deben usar<br />
agarraollas para manejar los utensilios.<br />
14. No cubra ni obstruya ninguna abertura del electrodoméstico.<br />
15. No guarde ni use este aparato en exteriores. No use este<br />
producto cerca del agua, por ejemplo, cerca de un fregadero, en<br />
un sótano húmedo, cerca de una alberca o en lugares similares.<br />
PÁGINA 4 • INFORMACIÓN DE SEGURIDAD
INSTRUCCIONES IMPORTANTES<br />
DE SEGURIDAD CONT.<br />
16. No use este electrodoméstico si el cable o el enchufe está<br />
dañado, si no está funcionado adecuadamente o si se ha dañado<br />
o caído.<br />
17. No sumerja en agua el cable o enchufe. Mantenga el cable<br />
alejado de superficies calientes. No permita que el cable cuelgue<br />
sobre el borde de una mesa o mostrador.<br />
18. Use únicamente termómetros diseñados específicamente para<br />
hornos de microondas.<br />
19. Asegúrese de que la base de vidrio y los anillos giratorios se<br />
encuentren en su sitio antes de utilizar el horno.<br />
20. Únicamente personal de servicio calificado deben dar servicio<br />
a este electrodoméstico. Comuníquese con el centro de<br />
servicio autorizado más cercano en caso de requerir revisiones,<br />
reparaciones o ajustes.<br />
21. Cuando limpie las superficies de sellado del horno, como por<br />
ejemplo el marco de la puerta, use únicamente jabón suave no<br />
abrasivo o detergentes suaves aplicados con una esponja o paño<br />
suave.<br />
GUARDE ESTAS INSTRUCCIONES<br />
SÓLO PARA USO DOMÉSTICO<br />
ESPAÑOL<br />
PÁGINA 5 • INFORMACIÓN DE SEGURIDAD
INSTRUCCIONES DE CONEXIÓN A TIERRA<br />
REQUISITOS ELÉCTRICOS<br />
Los requisitos eléctricos son únicamente corriente alterna de 120 voltios, 15<br />
amperios y 60 Hertz. Se recomienda que se suministre un circuito por separado<br />
para servicio único del horno. El horno está equipado con un cable de 3 hilos<br />
que tiene enchufe de tres puntas con conexión a tierra. Se debe conectar en un<br />
tomacorriente de pared que esté instalado y conectado a tierra correctamente.<br />
Este electrodoméstico debe conectarse a tierra. En caso de corto circuito eléctrico,<br />
la conexión a tierra reduce el riesgo de sufrir una descarga eléctrica al proporcionar<br />
un cable de escape para la corriente eléctrica. El cable que se entrega con este<br />
electrodoméstico está equipado con un cable, enchufe y alambre de conexión<br />
a tierra. El enchufe se debe conectar en un tomacorriente que esté instalado y<br />
conectado a tierra correctamente. No intente inutilizar de ninguna manera esta<br />
característica de seguridad, modificando el enchufe de alguna forma.<br />
ADVERTENCIA<br />
El uso inadecuado del enchufe de conexión a tierra puede provocar<br />
riesgo de descarga eléctrica.<br />
Consulte a un técnico o electricista calificado en los siguientes casos:<br />
1) No entiende por completo las instrucciones para la conexión a tierra.<br />
2) No está seguro de que el electrodoméstico se encuentre debidamente<br />
conectado a tierra.<br />
3) Tiene dudas acerca de las instrucciones de conexión eléctrica o a tierra.<br />
ESPAÑOL<br />
CABLE DE SUMINISTRO ELÉCTRICO<br />
1. El cable de suministro eléctrico que se incluye es corto para reducir el riesgo de<br />
enredarse o tropezarse con uno más largo.<br />
2. Si el cable de suministro eléctrico es muy corto, no use una extensión eléctrica.<br />
Pida a un técnico o electricista calificado que instale una toma corriente cerca del<br />
electrodoméstico.<br />
3. Si es absolutamente necesario el uso de cables largos o de una extensión, debe<br />
extremar precauciones.<br />
a) Use únicamente un cable de extensión de tres hilos con conexión<br />
a tierra que tenga un enchufe de tres clavijas con conexión a<br />
tierra y un tomacorriente de tres ranuras que acepte la clavija del<br />
electrodoméstico.<br />
b) El valor eléctrico nominal marcado en el cable o la extensión debe<br />
ser igual o mayor al valor nominal eléctrico del electrodoméstico. Los cables más<br />
largos deben acomodarse de modo que no queden tendidos sobre el mostrador<br />
o la mesa, donde los niños puedan jalarlos o puedan provocar tropiezos<br />
accidentalmente.<br />
PÁGINA 6 • INFORMACIÓN DE SEGURIDAD
INSTRUCCIONES DE CONEXIÓN A TIERRA CONT.<br />
NOTA: Ni Haier ni el distribuidor aceptarán responsabilidad alguna por daños en el<br />
horno eléctrico o lesiones personales que sean resultado del incumplimiento<br />
de los procedimientos de conexión eléctrica.<br />
GUÍA PARA EL USO DE UTENSILIOS<br />
Y TRASTOS DE COCINA<br />
Esta sección enumera los utensilios que pueden utilizarse en el microondas, los<br />
que pueden usarse de modo limitado y los que no deben utilizarse nunca en el<br />
microondas.<br />
RECOMENDADOS<br />
• Platón dorador para microondas: Úselo para dorar el exterior de piezas pequeñas,<br />
como bisteces, chuletas o panques. Siga las instrucciones incluidas con su plato<br />
de asado.<br />
• Envoltura plástica para microondas: Úsela para retener el vapor. Debe dejarse<br />
una abertura pequeña para que escape una parte del vapor y evitar colocarlo<br />
directamente sobre los alimentos.<br />
• Toallas y servilletas de papel: Estas absorben el exceso de humedad y evitan<br />
salpicaduras. Úselas para cubrir y calentar por tiempos cortos. No deben usarse<br />
toallas de papel reciclado, pues podrían contener residuos de metal y encenderse.<br />
• Platos y recipientes de cerámica vitrificada y de vidrio resistente al calor. Úselos<br />
para calentar o cocinar.<br />
• Platos y vasos de cartón: Úselos para calentar por tiempos cortos a bajas<br />
temperaturas. No debe usarse papel reciclado, pues podría contener metal y<br />
encenderse.<br />
• Papel encerado: Úselo para cubrir y evitar salpicaduras.<br />
• Termómetros: Deben usarse únicamente los etiquetados como “seguros para<br />
microondas”, además de seguir todas las instrucciones. Revise la temperatura<br />
de los alimentos en diferentes partes. Los termómetros convencionales pueden<br />
usarse en los alimentos únicamente cuando se hayan retirado del horno.<br />
USO LIMITADO<br />
• Papel aluminio: Se pueden usar tiras delgadas y lisas de papel para cubrir áreas<br />
delicadas de los alimentos, como por ejemplo muslos y alas de pollo, para evitar<br />
que se cocinen en exceso.<br />
ESPAÑOL<br />
PÁGINA 7 • INFORMACIÓN DE SEGURIDAD
GUÍA PARA EL USO DE UTENSILIOS<br />
Y TRASTOS DE COCINA CONT.<br />
NOTA: Tenga mucho cuidado, el uso excesivo del papel aluminio puede dañar el<br />
horno.<br />
• Cerámica, porcelana y barro: Úselos únicamente si están etiquetados como<br />
“seguros para microondas”. Si no tienen esta instrucción, pruébelos para<br />
asegurarse de que puedan utilizarse de manera segura.<br />
• Plástico: Úselo únicamente si está etiquetado como “seguro para microondas”.<br />
Otros tipos de plásticos pueden derretirse.<br />
• Paja, mimbre y madera. Úselos solamente para calentar por tiempos cortos, por<br />
ejemplo para calentar roles por algunos segundos. Las canastitas y los cuencos<br />
pueden ser inflamables.<br />
ESPAÑOL<br />
NO RECOMENDADOS<br />
• Botellas y jarras de cristal: El cristal regular es muy delgado para usarse en un<br />
microondas. Puede estrellarse y provocar lesiones y daños.<br />
• Bolsas de papel: Representan un riesgo de incendio, excepto en el caso de las<br />
bolas de palomitas, las cuales están diseñadas para usarse en microondas.<br />
• Platos y vasos de espuma de estireno (unicel): Pueden derretirse y dejar residuos<br />
químicos dañinos en los alimentos.<br />
• Contenedores de plástico para alimentos y para almacenamiento: Los<br />
contenedores normalmente están diseñados para almacenar los alimentos en frío,<br />
por ejemplo las mantequilleras, por lo que pueden derretirse en un microondas.<br />
• Utensilios metálicos: Pueden dañar su horno de microondas. Retire todo lo que<br />
sea de metal de los alimentos y recipientes antes de cocinar.<br />
NOTA: Para probar si es seguro usar un recipiente en el microondas, colóquelo vacío<br />
y caliente a ALTA potencia por 30 segundos. Si el plato queda muy caliente<br />
NO debe usarlo.<br />
• Papel para horno: Úselo para cubrir y evitar salpicaduras o para envolver y cocinar<br />
al vapor.<br />
• Charola de aluminio: Puede generar arcos de voltaje. Vacíe los alimentos en un<br />
recipiente apto para microondas.<br />
• Recipientes de cartón con asa de metal. Puede generar arcos de voltaje. Vacíe los<br />
alimentos en un recipiente apto para microondas.<br />
• Artículos de cocina de metal o con adornos metálicos Los recipientes de metal, los<br />
adornos o recubrimientos metálicos pueden provocar arcos de voltaje.<br />
• Madera: La madera puede deshidratarse cuando se usa en el horno de microondas<br />
y podría quebrarse o agrietarse.<br />
PÁGINA 8 • INFORMACIÓN DE SEGURIDAD
ESPECIFICACIONES<br />
Consumo eléctrico:<br />
Potencia del horno de microondas:<br />
Frecuencia de operación:<br />
Dimensiones del interior del horno (largo,<br />
ancho y alto):<br />
Capacidad del horno:<br />
120V~60Hz, 1450W<br />
1000W<br />
2450MHz<br />
9.5" x 13.9" x 14.1" pulgadas<br />
(24 x 35 x 36 cm)<br />
Volumen de 1.1 pies cúbicos<br />
Uniformidad de la cocción: Base giratoria con un diámetro de 12.4"<br />
de pulgada (31 cm)<br />
Peso neto:<br />
Aproximadamente 35.25 libras (11 kg)<br />
GUÍA DE INSTALACIÓN<br />
1. Asegúrese de que todos los<br />
materiales de empaque se hayan<br />
retirado del interior de la puerta.<br />
2. Revise que no haya ningún daño<br />
en el horno, como por ejemplo un<br />
mal alineado de la puerta o que se<br />
encuentre doblada, daños en los<br />
sellos de la puerta y superficies de<br />
sellado, ganchos o bisagras rotos o<br />
sueltos en la puerta o desportillados<br />
dentro del horno o en la puerta. Si<br />
encuentra cualquier daño, no use el<br />
horno. Póngase en contacto con el<br />
personal de servicio calificado.<br />
3. Este horno de microondas debe<br />
colocarse sobre una superficie<br />
estable, capaz de soportar el peso del<br />
horno más el de los alimentos más<br />
pesados que pueda contener y que se<br />
vayan a cocinar en él.<br />
4. No coloque el horno en áreas donde<br />
se genere calor, agua o niveles altos<br />
de humedad, ni cerca de materiales<br />
combustibles.<br />
5. Para un funcionamiento correcto, el<br />
horno debe contar con un flujo de<br />
aire suficiente por todos sus lados.<br />
Deje un espacio de 8 pulgadas (20.32<br />
cm) por encima del horno, 4 pulgadas<br />
(10.16 cm) por la parte posterior y 2<br />
pulgadas (5.08 cm) a ambos lados. No<br />
cubra ni obstruya ninguna abertura<br />
del electrodoméstico. No retire las<br />
patas sobre las cuales se sostiene el<br />
horno.<br />
6. No opere el horno sin la base de<br />
vidrio, el soporte con rodillos y el eje<br />
en sus posiciones correctas.<br />
7. Asegúrese de que el cable de<br />
suministro eléctrico no se encuentre<br />
dañado, que no se haya tendido<br />
debajo del horno, ni sobre ninguna<br />
superficie caliente o borde filoso.<br />
8. El contacto debe estar al alcance<br />
de modo que pueda alcanzarse<br />
rápidamente<br />
y desenchufar<br />
fácilmente el<br />
horno en caso de<br />
emergencia.<br />
INTERFERENCIA CON SEÑALES DE RADIO O TELEVISIÓN<br />
Los hornos de microondas pueden generar interferencia con las señales de radio y<br />
televisión, revise que el horno de microondas se encuentre en un circuito diferente,<br />
cambie de posición el radio o el televisor para alejarlos lo más posible del horno o<br />
revise la posición y señal de la antena receptora.<br />
PÁGINA 9 • COLOCACIÓN Y USO<br />
ESPAÑOL
PARTES Y FUNCIONES<br />
El diagrama es únicamente para fines ilustrativos.<br />
El diseño puede variar conforme al número de modelo.<br />
Sistema de cierre de<br />
seguridad de la puerta<br />
Ventana abierta<br />
Panel de control<br />
Base giratoria<br />
Base de vidrio<br />
Marco de la puerta<br />
ESPAÑOL<br />
PÁGINA 10 • COLOCACIÓN Y USO
PANEL DE CONTROL<br />
Pantalla<br />
Botones De<br />
Cocción Rápida<br />
Teclado Numérico<br />
Power Level<br />
Time Cook 2<br />
Clock<br />
Auto Cook<br />
Start / Stop<br />
Timer<br />
Clear<br />
Speed Defrost<br />
Auto Defrost<br />
PANTALLA<br />
Muestra el tiempo de cocción, potencia,<br />
indicaciones y tiempo actual.<br />
BOTONES DE COCCIÓN RÁPIDA<br />
Son ajustes instantáneos para la cocción<br />
de alimentos habituales.<br />
TIMER<br />
El temporizador funciona<br />
independientemente, incluso mientras<br />
se encuentra en curso un programa de<br />
cocción.<br />
POWER LEVEL<br />
Se usa para establecer el nivel de<br />
potencia. También le permite revisar el<br />
nivel de potencia durante la cocción.<br />
TIME COOK 2<br />
Se usa para la cocción en varias etapas.<br />
Permite la cocción automática a<br />
diferentes potencias y ajustes de tiempo.<br />
AUTO COOK<br />
Programa la cocción según el peso de los<br />
alimentos que se van a cocinar.<br />
AUTO DEFROST<br />
Programa el descongelado según el<br />
peso de los alimentos que se van a<br />
descongelar.<br />
SPEED DEFROST<br />
Permite el descongelado rápido y<br />
efectivo de los alimentos alternando los<br />
tiempos de descongelado y espera.<br />
TECLADO NUMÉRICO (0-9)<br />
Se usa para ajustar manualmente el<br />
tiempo o el peso.<br />
CLEAR<br />
Borra todos los ajustes previos o<br />
establece el bloqueo para niños.<br />
CLOCK<br />
Se usa para establecer o restablecer la<br />
hora del día.<br />
START/STOP<br />
Se oprime para iniciar o detener la<br />
cocción.<br />
ESPAÑOL<br />
PÁGINA 11 • COLOCACIÓN Y USO
INSTRUCCIONES DE FUNCIONAMIENTO<br />
ESPAÑOL<br />
SEÑALES DURANTE EL AJUSTE DEL<br />
HORNO. UN TONO: El horno acepta<br />
el valor introducido. DOS TONOS: El<br />
horno no acepta el valor introducido,<br />
debe revisarse e intentar de nuevo.<br />
AJUSTE DEL RELOJ<br />
1) Pulse la tecla del reloj, CLOCK.<br />
2) Use el teclado numérico para<br />
introducir la hora correcta.<br />
3) Después vuelva a pulsar la tecla del<br />
reloj, CLOCK.<br />
NOTA: Este es un reloj de 12 horas.<br />
Cuando el horno se enchufa por primera<br />
vez o cuando se restablece la energía<br />
después de un apagón, la pantalla<br />
mostrará el mensaje INTRODUCIR<br />
LA HORA DEL RELOJ (ENTER CLOCK<br />
TIME). Si prefiere que no se muestre el<br />
reloj, oprima la opción RESTABLECER<br />
(RESET).<br />
AJUSTE DEL TEMPORIZADOR<br />
El temporizador funciona como un<br />
cronómetro por minutos.<br />
1) Oprima la tecla del temporizador.<br />
2) Introduzca la cantidad de tiempo para<br />
la cuenta regresiva.<br />
3) Oprima la tecla de inicio (Start).<br />
Cuando se agote la cuenta, el<br />
temporizador emitirá una señal.<br />
NOTA: El temporizador funciona sin la<br />
energía de microondas.<br />
AJUSTE DEL NIVEL DE POTENCIA<br />
El ajuste predeterminado para la<br />
potencia de salida es del 100%. Si desea<br />
ajustar un nivel de potencia distinto<br />
al 100%, oprima la tecla de nivel de<br />
potencia (POWER LEVEL) y después use<br />
el teclado numérico para introducir el<br />
nivel deseado.<br />
TECLA DE<br />
NUMER<br />
POTENCIA<br />
DE<br />
COCCIÓN<br />
TECLA DE<br />
NÚMERO<br />
POTENCIA<br />
DE<br />
COCCIÓN<br />
10 100% 5 50%<br />
9 90% 4 40%<br />
8 80% 3 30%<br />
7 70% 2 20%<br />
6 60% 1 10%<br />
AJUSTE DE UN PROGRAMA DE<br />
COCCIÓN<br />
A. Cocción en una sola etapa<br />
1) Use el teclado numérico para<br />
establecer un tiempo de cocción.<br />
Puede establecer un tiempo de<br />
cocción desde un segundo hasta 99<br />
minutos y 99 segundos.<br />
2) Ajuste el nivel de potencia, si requiere<br />
un valor distinto al 100%.<br />
3) Oprima START/STOP para comenzar<br />
a cocinar.<br />
B. Cocción en varias etapas<br />
Algunos alimentos o recetas requieren<br />
diferentes etapas de cocción a<br />
diferentes temperaturas.<br />
1) ESTABLECIMIENTO DE LA ETAPA<br />
1: Siga los pasos 1 y 2 descritos en<br />
“Cocción en una sola etapa”. No<br />
oprima el botón START/STOP.<br />
2) ESTABLECIMIENTO DE LA ETAPA<br />
2: Oprima la tecla TIME COOK<br />
2, después introduzca el tiempo<br />
de cocción deseado y el nivel de<br />
potencia (bajo). La mayoría de las<br />
recetas en varias etapas usan una<br />
potencia baja en la segunda etapa.<br />
3) Oprima START/STOP para comenzar<br />
a cocinar.<br />
NOTA: Después de que ha transcurrido<br />
el tiempo de la Etapa 1, sonará un tono,<br />
el cual señala el inicio de la etapa 2.<br />
PÁGINA 12 • COLOCACIÓN Y USO
INSTRUCCIONES DE FUNCIONAMIENTO CONT.<br />
• Después de que ha transcurrido el<br />
tiempo total, el sistema emitirá un<br />
tono y se mostrará en la pantalla la<br />
palabra FIN (END). Los tonos seguirán<br />
sonando automáticamente cada dos<br />
minutos hasta que se abra la puerta o<br />
se oprima cualquier botón..<br />
SPEED DEFROST<br />
1) Oprima el botón SPEED DEFROST.<br />
2) Introduzca el tiempo de<br />
descongelado deseado, con ayuda del<br />
teclado numérico.<br />
3) Oprima el botón START/STOP (inicio/<br />
paro).<br />
NOTA: Saque la carne del empaque y<br />
colóquela en un recipiente apto para<br />
microondas.<br />
• Después de que ha transcurrido el<br />
tiempo total, el sistema emitirá varios<br />
tonos y se mostrará en la pantalla la<br />
palabra END (FIN). Los tonos seguirán<br />
sonando automáticamente cada dos<br />
minutos hasta que se abra la puerta o<br />
se oprima cualquier botón.<br />
• Después de ajustar el descongelado<br />
rápido (SPEED DEFROST), el horno<br />
puede programarse para cambiar<br />
automáticamente de cocción en una<br />
etapa a la cocción en varias etapas.<br />
• Para el descongelado rápido y la<br />
cocción en una sola etapa, siga los<br />
pasos anteriores. Antes de oprimir<br />
START/STOP, oprima TIME COOK<br />
2, introduzca el tiempo y el nivel de<br />
potencia y después oprima START/<br />
STOP.<br />
• Para el descongelado rápido y la<br />
cocción en varias etapas, siga los<br />
pasos anteriores. Antes de oprimir<br />
START/STOP, oprima TIME COOK 2,<br />
introduzca los programas de cocción<br />
de dos etapas y después oprima<br />
START/STOP para comenzar.<br />
AUTO COOK<br />
1) Oprima AUTO COOK.<br />
2) Seleccione el código del alimento,<br />
usando los números 1 al 3 en el<br />
teclado numérico.<br />
3) Introduzca el peso del alimento.<br />
4) Oprima el botón START/STOP (inicio/<br />
paro).<br />
CÓDIGOS DE ALIMENTO PARA LA<br />
COCCIÓN AUTOMÁTICA<br />
Código Tipo Peso Max<br />
1 Bistec 5 lb. 16 oz.<br />
2 Cordero 5 lb. 16 oz.<br />
3 Puerco 5 lb. 4 oz.<br />
NOTA: la carne debe descongelarse y a<br />
la temperatura refrigerada.<br />
• El peso debe estar en libras y onzas.<br />
• Para los pesos en onzas menores de<br />
10, deberá ir precedido por un 0. Si<br />
la etiqueta le da el peso únicamente<br />
en libras, cambie la fracción de libra a<br />
onzas usando la tabla de la siguiente<br />
página.<br />
Ejemplo: 1 lb. 8 oz. = 108 2 lb.<br />
2 lb. 12 oz. = 212<br />
• Durante la cocción, el sistema hará<br />
una pausa automáticamente y emitirá<br />
un tono para recordarle a los usuarios<br />
que deben voltear la pieza de carne.<br />
Después de voltear la pieza, oprima<br />
START/STOP para reanudar la cocción.<br />
• Después de que ha transcurrido el<br />
tiempo total, el sistema emitirá varios<br />
tonos y se mostrará en la pantalla la<br />
palabra END (FIN). Los tonos seguirán<br />
sonando automáticamente cada dos<br />
minutos hasta que se abra la puerta o<br />
se oprima cualquier botón.<br />
ESPAÑOL<br />
PÁGINA 13 • COLOCACIÓN Y USO
INSTRUCCIONES DE OPERACIÓN CONT.<br />
CONVERSIÓN DE FRACCIONES DE LIBRA EN ONZAS<br />
FRACCIONES DE<br />
UNA LIBRA<br />
ONZAS<br />
AUTO DEFROST<br />
1) Oprima la tecla AUTO DEFROST.<br />
2) Introduzca el peso del alimento con el<br />
teclado numérico.<br />
3) Oprima START/STOP para comenzar a<br />
cocinar.<br />
NOTA: El peso debe estar en libras y<br />
onzas. Para los pesos en onzas menores<br />
de 10, deberá ir precedido por un 0. Si<br />
la etiqueta le da el peso únicamente en<br />
libras, cambie la fracción de libra a onzas<br />
usando la tabla de la siguiente página.<br />
• Durante el descongelado, necesitará<br />
voltear el alimento para lograr un<br />
deshielo uniforme. Después de voltear<br />
la pieza, oprima START/STOP para<br />
reanudar el descongelado.<br />
FRACCIONES DE<br />
UNA LIBRA<br />
ONZAS<br />
Menos de 0.03 0 .54 to 59 9<br />
.03 to .09 1 .60 to .65 10<br />
.10 to .15 2 .66 to .71 11<br />
.16 to .21 3 .72 to .78 12<br />
.22 to .27 4 .79 to .84 13<br />
.28 to .34 5 .85 to .90 14<br />
.35 to .40 6 .91 to .97 15<br />
.41 to .46 7 Above .97 Pase al siguiente par<br />
.47 to .53 8<br />
AJUSTES DE COCCIÓN RÁPIDA<br />
• Después de que ha transcurrido el<br />
tiempo total, el sistema emitirá varios<br />
tonos y se mostrará en la pantalla la<br />
palabra END (FIN). Los tonos seguirán<br />
sonando automáticamente cada dos<br />
minutos hasta que se abra la puerta o se<br />
oprima cualquier botón.<br />
AJUSTE DEL SEGURO PARA NIÑOS<br />
El bloqueo de seguridad evita que los<br />
niños usen el horno sin supervisión.<br />
Coloque la función en modo de espera.<br />
Para ajustar: Oprima y mantenga así la<br />
tecla CLEAR por 3 segundos. En la pantalla<br />
se muestra LOCK.<br />
Para cancelar: Oprima y mantenga así la<br />
tecla CLEAR por 3 segundos. Desaparece<br />
de la pantalla la palabra LOCK.<br />
ESPAÑOL<br />
Los ajustes de cocción rápida,<br />
CONVENIENCE COOKING, le permiten<br />
cocinar o recalentar los alimentos<br />
automáticamente, sin necesidad de<br />
introducir el tiempo o el nivel de potencia.<br />
Para porciones pequeñas, simplemente<br />
oprima el botón deseado y después<br />
la tecla START/STOP. Para porciones<br />
grandes, oprima dos veces el número<br />
deseado.<br />
Las opciones FROZEN DINNER (alimento<br />
congelado), BAKED POTATO (papa asada)<br />
y BEVERAGE (bebida) le permiten calentar<br />
diferentes cantidades del mismo alimento.<br />
Simplemente oprima la tecla una vez<br />
y aparecerá en la<br />
pantalla la opción<br />
introducir cantidad,<br />
ENTER AMT.<br />
Introduzca la cantidad<br />
de porciones y oprima<br />
START/STOP.<br />
PÁGINA 14 • COLOCACIÓN Y USO
AJUSTES DE COCCIÓN RÁPIDA CONT.<br />
POPCORN<br />
Para una bolsa de 3.5 onzas de palomitas<br />
de maíz de microondas:<br />
1. Oprima una vez POPCORN.<br />
2. Oprima el botón START/STOP (inicio/<br />
paro).<br />
NOTA: Para cambiar el tiempo<br />
preestablecido para POPCORN: Oprima<br />
dos veces POPCORN. En la pantalla<br />
aparece la opción para introducir el<br />
tiempo, ENTER TIME. Introduzca el tiempo<br />
de cocción deseado con ayuda del teclado<br />
numérico. Oprima el botón START/<br />
STOP (inicio/paro). Este nuevo tiempo<br />
de cocción permanecerá en la memoria<br />
siempre que use el ajuste POPCORN hasta<br />
que los borre con la tecla CLEAR.<br />
BAKED POTATO<br />
Para papas (de 4 a 6 onzas<br />
aproximadamente por cada una):<br />
NOTA: Las papas deben perforarse con<br />
un tenedor o con la punta de un cuchillo<br />
filoso antes de cocinarlas para evitar que<br />
revienten.<br />
1. Oprima una vez la tecla BAKED POTATO.<br />
2. Introduzca la cantidad de papas (1 a 4).<br />
3. Oprima el botón START/STOP (inicio/<br />
paro).<br />
Para papas grandes (de aproximadamente<br />
8 a 10 libras cada una):<br />
1. Oprima dos veces la tecla BAKED<br />
POTATO.<br />
2. Introduzca la cantidad de papas<br />
(1 a 4).<br />
3. Oprima el botón START/STOP (inicio/<br />
paro).<br />
PIZZA<br />
Para recalentar una rebanada de pizza:<br />
1. Oprima una vez PIZZA.<br />
2. Oprima el botón START/STOP (inicio/<br />
paro).<br />
Para calentar una pizza completa:<br />
1. Oprima dos veces PIZZA.<br />
2. Oprima el botón START/STOP (inicio/<br />
paro).<br />
BEVERAGE<br />
Para tazas pequeñas (aproximadamente<br />
de 5 a 7 onzas cada una)<br />
1. Oprima una vez BEVERAGE.<br />
2. Introduzca el número de tazas<br />
oprimiendo el teclado numérico del 1<br />
al 4.<br />
3. Oprima el botón START/STOP (inicio/<br />
paro).<br />
Para tazas de café grandes (de 9 a 11<br />
onzas cada una):<br />
1. Oprima dos veces BEVERAGE.<br />
2. Introduzca el número de tazas<br />
oprimiendo el teclado numérico del 1<br />
al 4.<br />
3. Oprima el botón START/STOP (inicio/<br />
paro).<br />
FROZEN DINNER<br />
Para una a dos piezas de alimentos<br />
congelados (de 7 a 9 onzas cada una):<br />
1. Oprima una vez FROZEN DINNER.<br />
2. Seleccione 1 o 2 para el número de<br />
porciones.<br />
3. Oprima el botón START/STOP (inicio/<br />
paro).<br />
Para porciones más grandes de alimentos<br />
congelados (10 a 12 onzas cada una):<br />
1. Oprima dos veces FROZEN DINNER.<br />
2. Seleccione 1 o 2 para el número de<br />
porciones.<br />
3. Oprima el botón START/STOP (inicio/<br />
paro).<br />
REHEAT<br />
1. Oprima la tecla recalentar, REHEAT.<br />
2. Oprima el botón START/STOP (inicio/<br />
paro).<br />
NOTA: Este ajuste está diseñado para<br />
recalentar un plato de guisados sobrantes<br />
refrigerados.<br />
ESPAÑOL<br />
PÁGINA 15 • COLOCACIÓN Y USO
TÉCNICAS PARA COCINAR<br />
ESPAÑOL<br />
Con el microondas puede cocinar<br />
más rápido y sencillo que en la estufa<br />
convencional. Para obtener mejores<br />
resultados, aplique las siguientes<br />
técnicas:<br />
AGITE<br />
Mueva los alimentos guisados y<br />
vegetales mientras se cocinan, para<br />
distribuir el calor de manera uniforme.<br />
Los alimentos en los extremos del<br />
recipiente absorben más energía y se<br />
calientan más rápido, de modo que debe<br />
moverlos de afuera hacia el centro. El<br />
horno hará una pausa automáticamente<br />
cuando abra la puerta para agitar o<br />
mover los alimentos.<br />
DISTRIBUYA<br />
Coloque los alimentos que tienen<br />
formas irregulares, como el caso de<br />
piezas de pollo o chuletas, con los lados<br />
más gruesos y carnosos hacia la orilla<br />
de la base de vidrio giratoria, en donde<br />
recibirán más energía del microondas.<br />
Para evitar el calentamiento excesivo,<br />
coloque las áreas delicadas, como las<br />
puntas de espárragos, hacia el centro de<br />
la base de vidrio giratoria.<br />
PROTEGA<br />
Puede proteger algunos alimentos<br />
con tiras delgadas de papel aluminio,<br />
para evitar que se cocinen en exceso.<br />
Las áreas que necesitan protegerse<br />
incluyen las puntas de las alitas de aves,<br />
los extremos de las piernas de aves y<br />
las puntas de los platos cuadrados para<br />
hornear. Use únicamente cantidades<br />
pequeñas de papel aluminio. Las<br />
piezas grandes pueden dañar su horno.<br />
Coloque las tiras lo más lisas según<br />
lo permita el alimento, evitando que<br />
se hagan pliegues en la medida de lo<br />
posible.<br />
VOLTEE<br />
Debe voltear los alimentos a la mitad del<br />
tiempo de cocción para exponer todas<br />
sus partes a la energía del microondas.<br />
Esto es especialmente importante con<br />
las piezas grandes. Puede proteger las<br />
piezas que se van a asar.<br />
DEJE REPOSAR<br />
Los alimentos cocinados en<br />
el microondas acumulan calor<br />
internamente y siguen cocinándose<br />
por algunos minutos después de que se<br />
detiene el calentamiento. Mantenga en<br />
reposo los alimentos para completar la<br />
cocción, especialmente los alimentos<br />
como pasteles y vegetales completos.<br />
Las piezas asadas necesitan este<br />
tiempo para completar su cocción en<br />
el centro, a fin de no cocer en exceso<br />
las áreas exteriores. Todos los líquidos,<br />
como las sopas o los chocolates<br />
calientes, deben agitarse o moverse<br />
a la mitad del tiempo de su cocción<br />
y cuando ésta se haya completado.<br />
Mantenga en reposo los líquidos<br />
por un momento antes de servirlos.<br />
Cuando caliente alimentos para bebés,<br />
muévalos bien al retirarlos y pruebe la<br />
temperatura antes de servirlos.<br />
AGREGUE AGUA<br />
Las moléculas de agua atraen la<br />
energía de microondas. Los alimentos<br />
que no tienen un contenido uniforme<br />
de humedad deben cubrirse o dejar<br />
reposar, de modo que el calor se<br />
disperse de manera uniforme. Agregue<br />
una cantidad pequeña de agua para<br />
ayudar a la cocción de los alimentos<br />
secos.<br />
PÁGINA 16 • COLOCACIÓN Y USO
LIMPIEZA Y CUIDADO<br />
1. Mantenga limpio el interior del<br />
horno. Cuando salpique la comida<br />
o los líquidos derramados se<br />
adhieran a la pared del horno, limpie<br />
con un paño húmedo. Puede usar<br />
detergente suave si el horno está<br />
muy sucio. Evite el uso de limpiadores<br />
atomizados u otros limpiadores<br />
fuertes, ya que pueden manchar,<br />
rayar o deslustrar la superficie de la<br />
puerta.<br />
2. Cuando limpie las superficies,<br />
como el marco de la puerta, use<br />
únicamente jabón suave no abrasivo<br />
o detergentes suaves aplicados con<br />
una esponja o paño suave.<br />
3. Apague el horno y desenchufe el<br />
cable de suministro eléctrico del<br />
tomacorriente de pared, antes de la<br />
limpieza.<br />
4. Las superficies exteriores deben<br />
limpiarse con un paño húmedo. Para<br />
evitar daños a las partes internas del<br />
horno que se accionan, no deje que<br />
se filtre agua por las aberturas de<br />
ventilación.<br />
5. Limpie la ventana por ambos lados<br />
con un paño húmedo para retirar<br />
cualquier salpicado o derrame.<br />
6. No permita que se moje el panel de<br />
control. Limpie con un paño húmedo<br />
y suave. Cuando limpie el panel de<br />
control, deje abierta la puerta del<br />
horno para evitar que el horno se<br />
encienda accidentalmente.<br />
7. Si se acumula vapor dentro o<br />
alrededor de la parte exterior de la<br />
puerta del horno, limpie con un paño<br />
suave. Esto puede ocurrir cuando el<br />
horno de microondas funciona bajo<br />
condiciones de mucha humedad. Esto<br />
es normal en dichas condiciones.<br />
8. Es posible que sea necesario retirar la<br />
base de vidrio para realizar la limpieza.<br />
Lave la base giratoria con agua tibia<br />
jabonosa o en el lavavajillas.<br />
9. El anillo giratorio y la base del<br />
horno deben limpiarse de manera<br />
regular. La superficie del fondo del<br />
horno simplemente límpiela con un<br />
detergente suave. El anillo giratorio<br />
puede lavarse en agua jabonosa o en<br />
el lavavajillas. Cuando retire el anillo<br />
giratorio de la base del interior del<br />
horno para su limpieza, asegúrese<br />
de volverlo a colocar en la posición<br />
apropiada.<br />
10. Para eliminar los olores de su horno<br />
mezcle una taza de agua con el<br />
jugo y la cáscara de un limón en<br />
un recipiente hondo y caliente en<br />
el microondas por cinco minutos.<br />
Limpie perfectamente y seque con<br />
un paño suave.<br />
11. Cuando se funda la lámpara del<br />
horno, consulte a su distribuidor<br />
para su reemplazo.<br />
12. Si el cable de suministro eléctrico<br />
se ensucia, desenchufe y limpie<br />
con un paño húmedo. Asegúrese<br />
de que seque perfectamente<br />
antes de volverlo a enchufar en el<br />
tomacorriente.<br />
13. No deseche este electrodoméstico<br />
en la basura convencional.<br />
Debe desecharlo a través de<br />
las instalaciones de desechos<br />
adecuadas ofrecidas por el<br />
municipio.<br />
ESPAÑOL<br />
PÁGINA 17 • LIMPIEZA Y CUIDADO
ANTES DE LLAMAR A SERVICIO TÉCNICO<br />
SI EL HORNO NO FUNCIONA:<br />
A. Revise que el horno esté enchufado de manera segura. Si no lo está, retire la<br />
clavija del tomacorriente, espere 10 segundos y enchufe de nuevo de manera<br />
segura.<br />
B. Revise si hay algún fusible quemado o se ha accionado el interruptor principal de<br />
carga. Si parecen funcionar adecuadamente, pruebe el tomacorriente con otro<br />
aparato.<br />
C. Revise para asegurarse de que el panel de control se encuentra programado<br />
correctamente y que se ha ajustado el temporizador.<br />
D. Revise para asegurarse de que se ha cerrado herméticamente la puerta con el<br />
sistema de bloqueo de seguridad. De lo contrario, la energía del microondas no<br />
fluirá dentro del horno.<br />
SI NINGUNA DE LAS ACCIONES ANTERIORES RESUELVE EL PROBLEMA,<br />
PÓNGASE EN CONTACTO CON UN TÉCNICO CALIFICADO. NO INTENTE<br />
AJUSTAR O REPARAR EL HORNO USTED MISMO.<br />
SERVICIO AL CLIENTE<br />
IMPORTANTE<br />
NO DEVUELVA ESTE PRODUCTO A LA TIENDA<br />
Si tiene algún problema con este producto, comuníquese con el<br />
“Centro de satisfacción del cliente” de Haier al 1-877-337-3639.<br />
ES NECESARIO TENER EL COMPROBANTE DE COMPRA<br />
FECHADO, EL NÚMERO DE MODELO Y DE SERIE PARA RECIBIR EL<br />
SERVICIO DE GARANTÍA.<br />
CUSTOMER<br />
SERVICE<br />
SERVICIO<br />
AL CLIENTE<br />
ESPAÑOL<br />
Hotline 24/7<br />
1-877-337-3639<br />
PÁGINA 18 • SOLUCIÓN DE PROBLEMAS Y GARANTÍA
SOLUCIÓN DE PROBLEMAS<br />
Consulte el problema que tiene en la siguiente tabla y pruebe las soluciones para cada uno de<br />
ellos. Si el horno de microondas sigue sin funcionar correctamente, comuníquese al centro<br />
de servicio al cliente de Haier o al centro de servicio autorizado más cercano. Los clientes<br />
nunca deben intentar solucionar los problemas en los componentes internos. Los hornos<br />
de microondas tienen voltajes peligrosos (5,000 voltios) incluso cuando se haya cortado el<br />
suministro eléctrico. Únicamente un técnico certificado debe intentar reparar el microondas.<br />
PROBLEMA POSIBLE CAUSA SOLUCIÓN POSIBLE<br />
El horno no<br />
enciende.<br />
Arcos de voltaje<br />
o chispas.<br />
Los alimentos<br />
no se cuecen de<br />
modo uniforme.<br />
Overcooked<br />
foods<br />
Alimentos que<br />
no se cuecen lo<br />
suficiente.<br />
No descongela<br />
correctamente.<br />
A. El cable de suministro eléctrico<br />
del horno no está enchufado.<br />
B. La puerta está abierta.<br />
C. Está establecido un modo de<br />
funcionamiento incorrecto.<br />
A. Se utilizaron materiales que no<br />
deben usarse en el horno de<br />
microondas, como metal.<br />
B. El horno se hizo funcionar vacío.<br />
C. Hay restos de alimentos<br />
derramados en la cavidad.<br />
A. Se utilizaron materiales que no<br />
deben usarse en el horno de<br />
microondas.<br />
B. El alimento no está<br />
descongelado por completo.<br />
C. El tiempo de cocción y/o la<br />
potencia no son adecuados.<br />
D. El alimento no se ha volteado ni<br />
agitado.<br />
El tiempo de cocción y la potencia<br />
no son adecuados. Emplee el<br />
tiempo de cocción y/o la potencia<br />
correctos.<br />
A. Se utilizaron materiales que no<br />
deben usarse en el horno de<br />
microondas.<br />
B. El alimento no está<br />
descongelado por completo.<br />
C. Los orificios de ventilación del<br />
horno están obstruidos.<br />
D. El tiempo de cocción y/o la<br />
potencia no son adecuados.<br />
A. Se utilizaron materiales que no<br />
deben usarse en el horno de<br />
microondas.<br />
B. El tiempo de cocción y/o la<br />
potencia no son adecuados.<br />
C. El alimento no se ha volteado ni<br />
agitado.<br />
A. Enchúfelo en el tomacorriente.<br />
B. Cierre la puerta e intente de<br />
nuevo.<br />
C. Consulte las instrucciones.<br />
A. Emplee sólo artículos de cocina<br />
aptos para microondas.<br />
B. No ponga en funcionamiento el<br />
horno cuando esté vacío.<br />
C. Limpie el interior del horno con<br />
una toalla húmeda.<br />
A. Emplee sólo artículos de cocina<br />
aptos para microondas.<br />
B. Descongele el alimento por<br />
completo.<br />
C. Emplee el tiempo de cocción<br />
y/o la potencia correctos.<br />
D. Voltee o agite el alimento.<br />
Emplee el tiempo de cocción y la<br />
potencia correctos.<br />
A. Emplee sólo artículos de cocina<br />
aptos para microondas.<br />
B. Descongele el alimento por<br />
completo.<br />
C. Compruebe que los orificios de<br />
ventilación del horno no estén<br />
obstruidos.<br />
D. Emplee el tiempo de cocción y<br />
la potencia correctos.<br />
A. Emplee sólo artículos de cocina<br />
aptos para microondas.<br />
B. Emplee el tiempo de cocción y<br />
la potencia correctos.<br />
C. Voltee o agite el alimento.<br />
ESPAÑOL<br />
PÁGINA 19 • SOLUCIÓN DE PROBLEMAS Y GARANTÍA
GARANTÍA LIMITADA<br />
ESPAÑOL<br />
¿Qué cubre y por cuánto tiempo<br />
Esta garantía cubre todos los defectos de<br />
fabricación o de materiales durante un período<br />
de: 12 meses en mano de obra<br />
Periodo de 12 meses para partes (únicamente<br />
las piezas funcionales), dos años para el tubo<br />
magnetrón del microondas (únicamente esa<br />
pieza).<br />
La garantía entra en vigor en la fecha de compra<br />
del artículo. El cliente debe presentar a Haier<br />
el comprobante de compra y la factura original<br />
fechadas, la marca, el modelo y el número de<br />
serie para su verificación, antes de realizar<br />
cualquier servicio de garantía. Haier America<br />
puede ofrecer el servicio en el taller para<br />
productos seleccionados, si así lo decide.<br />
EXCEPCIONES:<br />
Garantía del producto para uso comercial o de<br />
renta.<br />
90 días para mano de obra y 90 días para partes.<br />
No se aplica ninguna otra garantía.<br />
¿Qué cubre<br />
1. Las partes mecánicas y eléctricas del aparato<br />
cuyo objetivo es poner en funcionamiento<br />
este aparato tienen cobertura por un período<br />
de 12 meses o lo indicado más arriba.<br />
Esto incluye todas las partes, excepto la<br />
terminación, el acabado y el vidrio.<br />
2. La garantía limitada no cubre ningún crédito<br />
o reembolso por ninguna pérdida o lesión<br />
provocada por el producto o por defectos del<br />
producto, que incluyen entre otros, daños<br />
incidentales o derivados.<br />
3. En el caso de falla del tubo magnetrón<br />
(para las microondas) debido a defectos en<br />
materiales o mano de obra, dicha parte será<br />
reemplazada.<br />
¿Qué se hará<br />
1. Haier reparará o reemplazará, a su criterio,<br />
cualquier parte mecánica o eléctrica que<br />
resulte estar defectuosa por uso normal<br />
durante el período de garantía especificado.<br />
TODO EL SERVICIO DE GARANTÍA DEBERÁ<br />
SER PRESTADO ÚNICAMENTE POR NUESTROS<br />
CENTROS DE SERVICIO DE FÁBRICA O POR<br />
UN TÉCNICO AUTORIZADO DE SERVICIO AL<br />
CLIENTE DE HAIER.<br />
Si se determina que no corresponde hacer<br />
una reparación o que las partes de repuesto<br />
no están disponibles para hacerla, Haier le<br />
cambiará el producto por uno arreglado o uno<br />
nuevo igual o similar al original, según lo que<br />
determine.<br />
2. No se le cobrará al comprador las partes de<br />
repuesto funcionales y la mano de obra de<br />
ningún artículo cubierto durante el período<br />
inicial de 12 meses o según se indique arriba.<br />
3. ESTA GARANTÍA CUBRE APARATOS DENTRO<br />
DE ESTADOS UNIDOS CONTINENTAL,<br />
PUERTO RICO Y CANADÁ. NO CUBRE LO<br />
SIGUIENTE:<br />
Daños por instalación inadecuada. Daños<br />
producidos durante el envío. Defectos<br />
distintos a los de fabricación. Daño por uso<br />
incorrecto, maltrato, accidente, alteración,<br />
falta de cuidado y mantenimiento adecuados,<br />
corrientes o voltajes incorrectos, o desastres<br />
naturales. Daño por uso distinto al doméstico.<br />
Daño por un servicio brindado por alguien<br />
distinto a un distribuidor o centro de servicio<br />
autorizado. Acabados decorativos, vidrios<br />
o bombillas reemplazables. Costos de<br />
transporte y envío. Mano de obra (después de<br />
los primeros 12 meses). Crédito o reembolso<br />
de productos 30 días después de la fecha de<br />
compra. Pérdida en alimentos por productos<br />
echados a perder debido al resultado directo<br />
de una falla mecánica del producto o cualquier<br />
demora en ofrecer el servicio, la reparación o<br />
el cambio. Esta garantía limitada no se aplicará<br />
en productos reconstruidos o en unidades<br />
compradas como saldos o de segunda mano.<br />
ESTA GARANTÍA LIMITADA SE OTORGA EN<br />
LUGAR DE CUALQUIER OTRA GARANTÍA<br />
EXPRESA O INCLUSO LAS GARANTÍAS DE<br />
COMERCIALIZACIÓN E IDONEIDAD PARA UN<br />
FIN EN PARTICULAR. La solución ofrecida en<br />
esta garantía es exclusiva y se otorga en lugar<br />
de cualquier otra solución. Esta garantía no<br />
cubre daños incidentales o indirectos, de modo<br />
que es posible que las limitaciones anteriores<br />
no apliquen en su caso. Algunos estados no<br />
permiten limitaciones sobre la duración de una<br />
garantía implícita, de modo que es posible que<br />
las limitaciones anteriores no apliquen en su<br />
caso. Esta garantía le otorga derechos legales<br />
específicos; usted puede tener otros derechos,<br />
que varían en cada estado.<br />
Haier America<br />
New York, NY 10018<br />
PÁGINA 20 • SOLUCIÓN DE PROBLEMAS Y GARANTÍA
www.HaierAmerica.com<br />
Model # HMC1120BEWW,<br />
HMC1120BEBB<br />
Issued Date: February 2012<br />
120 V, 60 Hz<br />
Made in China<br />
Fabriqué en Chine<br />
Hecho en China<br />
Printed in China<br />
Haier America<br />
New York, NY 10018<br />
©2012 Haier America Trading, LLC.