Power Windows Leve-glace Electrique Elektrische Fensterheber ...
Power Windows Leve-glace Electrique Elektrische Fensterheber ...
Power Windows Leve-glace Electrique Elektrische Fensterheber ...

Create successful ePaper yourself
Turn your PDF publications into a flip-book with our unique Google optimized e-Paper software.
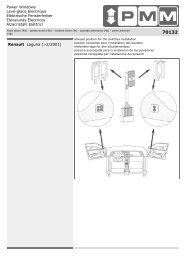
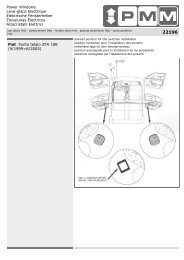
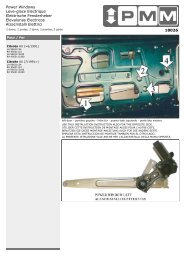
<strong>Power</strong> <strong>Windows</strong><br />
<strong>Leve</strong>-<strong>glace</strong> <strong>Electrique</strong><br />
<strong>Elektrische</strong> <strong>Fensterheber</strong><br />
Elevalunas Electricos<br />
Máquina De Vidro Elétrico<br />
Alzacristalli Elettrici<br />
Pour / For<br />
Mercedes Benz<br />
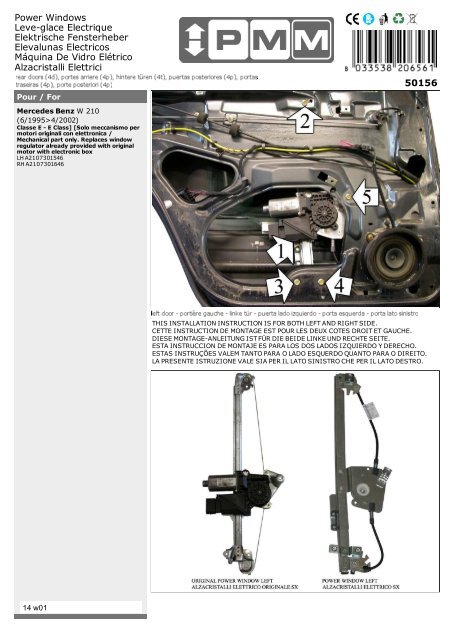
Mercedes Benz W 210<br />
(6/1995>4/2002)<br />
Classe E - E Class] [Solo meccanismo per<br />
motori originali con elettronica /<br />
Mechanical part only. Replaces window<br />
regulator already provided with original<br />
motor with electronic box<br />
LH A2107301546<br />
RH A2107301646<br />
50156<br />
THIS INSTALLATION INSTRUCTION IS FOR BOTH LEFT AND RIGHT SIDE.<br />
CETTE INSTRUCTION DE MONTAGE EST POUR LES DEUX COTES DROIT ET GAUCHE.<br />
DIESE MONTAGE-ANLEITUNG IST FÜR DIE BEIDE LINKE UND RECHTE SEITE.<br />
ESTA INSTRUCCION DE MONTAJE ES PARA LOS DOS LADOS IZQUIERDO Y DERECHO.<br />
ESTAS INSTRUÇÕES VALEM TANTO PARA O LADO ESQUERDO QUANTO PARA O DIREITO.<br />
LA PRESENTE ISTRUZIONE VALE SIA PER IL LATO SINISTRO CHE PER IL LATO DESTRO.<br />
14 w01
ME702 23- 05- 2014<br />
ENGLISH<br />
ENGLISH<br />
THIS INSTALLATION INSTRUCTION IS FOR BOTH LEFT AND RIGHT SIDE.<br />
A) Disassemble door panel.<br />
B) Remove the window regulator drilling the originally equipped fixing rivets. Remove the<br />
original motor from the window regulator to replace and re-mount it on the new window<br />
regulator using the two original screws.<br />
C) Drill into positions 2, 3, 4 and 5 (ø 6,5 mm.).<br />
D) Connect motor wiring. Insert the electric window regulator into the door. Insert the slide<br />
1 into the hole in the glass. Secure electric window regulator into the holes at positions 2, 3,<br />
4 and 5.<br />
E) Wire as per wiring diagram. Check correct window operation before re-fitting door trim.<br />
F) PLEASE NOTE! To re-establish the auto function on the replacement regulator, turn the<br />
ignition on and operate the window switch to close the window.<br />
ENGLISH<br />
FRANÇAIS<br />
FRANÇAIS<br />
CETTE INSTRUCTION DE MONTAGE EST POUR LES DEUX COTES DROIT ET GAUCHE.<br />
A) Demonter le panneau de la porte.<br />
B) Demonter le leve-vitre en perçant les rivets originaux de fixage. Demonter le moteur<br />
d'origine du leve-vitre a remplacer et le remonter sur le leve-vitre nouveau en utilisant les<br />
deux vis d'origine.<br />
C) Percer les trous 2, 3, 4 et 5 (ø 6,5 mm.).<br />
D) Connecter le cable du moteur. Inserer le leve-vitre electrique. Inserer le patin n° 1 dans<br />
le trou de la vitre. Fixer le leve-vitre electrique sur les points 2, 3, 4 et 5.<br />
E) Effectuer les liaisons electriques. Verifier le bon fonctionnement de la vitre avant de<br />
remonter le panneau.<br />
F) ATTENTION! Apres avoir pose la piece de rechange, la fermeture et l'ouverture<br />
automatique ne fonctionnent pas. Pour retablir cette fonction veuillez suivre le manuel<br />
d'usage de la voiture.<br />
FRANÇAIS<br />
DEUTSCH<br />
DEUTSCH<br />
DIESE MONTAGE-ANLEITUNG IST FÜR DIE BEIDE LINKE UND RECHTE SEITE.<br />
A) Demontieren Sie die Türverkleidung.<br />
B) Bauen Sie den <strong>Fensterheber</strong> aus, indem Sie die Original-Befestigungs-Nieten bohren.<br />
Bauen Sie den Original-Motor aus dem <strong>Fensterheber</strong> zu ersetzen aus und bauen Sie ihn an<br />
den neuen <strong>Fensterheber</strong> mit den zwei Original-Schrauben ein.<br />
C) Erweitern Sie die Bohrungen 2, 3, 4 und 5 auf 6,5 mm. Ø.<br />
D) Verlegen Sie die Motor-Verkabelung. Setzen Sie den elektrischen <strong>Fensterheber</strong> in die Tür<br />
ein. Setzen Sie die Gleitschiene 1 in die Bohrung im Fenster ein. Befestigen Sie den<br />
elektrischen <strong>Fensterheber</strong> an den Punkten 2, 3, 4 und 5.<br />
E) Verlegen Sie die elektrische Verkabelung. Vor der endgültigen Fertigstellung überprüfen<br />
Sie die einwandfreie Funktion des <strong>Elektrische</strong>n <strong>Fensterheber</strong>s.<br />
F) ACHTUNG! Sollte, nach dem Einbau des <strong>Fensterheber</strong>s, das automatische Öffnen und<br />
Schliessen nicht funktionieren, folgen Sie das Verwendung-Handbuch des Fahrzeugs.<br />
DEUTSCH<br />
ESPAÑOL<br />
ESPAÑOL<br />
ESTA INSTRUCCION DE MONTAJE ES PARA LOS DOS LADOS IZQUIERDO Y<br />
DERECHO.<br />
A) Desmontar el panel de la puerta.<br />
B) Sacar el mecanismo de elevalunas agujereando los remaches metálicos. Desmontar el<br />
motor original del elevalunas a sustituir y remontarlo en el elevalunas nuevo con los dos<br />
tornillos originales.<br />
C) Agrandar los taladros 2, 3, 4 y 5 (ø 6,5 mm.).<br />
D) Conectar el cable del motor. Introducir el elevalunas eléctrico. Introducir el patin n° 1 en<br />
el hueco del vidrio. Sujetar el elevalunas eléctrico con los tornillos 2, 3, 4 y 5.<br />
E) Efectuar las conexiones eléctricas. Verificar el funcionamiento del cristal antes de volver a<br />
montar el panel de la puerta.<br />
F) ATENCION! Despues del montaje del elevalunas, las lunas habran perdido la funcion de<br />
automatismo, “Comfort”. Para restablecer esta funcion, seguir el folleto de las instrucciones<br />
del coche.<br />
ESPAÑOL<br />
PORTUGUÊS<br />
ITALIANO<br />
ESTAS INSTRUÇÕES VALEM TANTO PARA O LADO ESQUERDO QUANTO PARA O<br />
DIREITO.<br />
A) Desmontar o painel da porta.<br />
B) Retirar a máquina de vidro extraindo os rebites originais de fixação com uma broca.<br />
Desmontar o motor original da máquina de vidro a ser substituída e montá-la na máquina de<br />
vidro nova utilizando os dois parafusos originais.<br />
C) Alargar os furos n° 2, 3, 4 e 5 (ø 6,5 mm.).<br />
D) Conectar o cabo do motor. Introduzir a máquina de vidro elétrico na porta. Inserir o<br />
arraste n° 1 no furo do vidro. Fixar a máquina de vidro elétrico nos pontos n° 2, 3, 4 e 5.<br />
E) Efetuar as ligações elétricas. Verificar o funcionamento dos vidros antes de montar o<br />
painel da porta.<br />
F) ATENÇÃO! Após a instalação desta máquina de vidro de reposição, a subida e a descida<br />
automática NÃO FUNCIONAM MAIS. Para restabelecer esta função, devem ser utilizadas as<br />
instruções do manual de uso do automóvel.
PORTUGUÊS<br />
ITALIANO<br />
ITALIANO<br />
LA PRESENTE ISTRUZIONE VALE SIA PER IL LATO SINISTRO CHE PER IL LATO<br />
DESTRO.<br />
A) Smontare il pannello portiera.<br />
B) Togliere l'alzacristalli trapanando i rivetti originali di fissaggio. Smontare il motore<br />
originale dall’ alzacristalli da sostituire e rimontarlo sull’ alzacristalli nuovo utilizzando le due<br />
viti originali.<br />
C) Allargare i fori n° 2, 3, 4 e 5 (ø 6,5 mm.).<br />
D) Collegare il cavo motore. Introdurre l'alzacristalli elettrico in portiera. Inserire il pattino n°<br />
1 nel foro del vetro. Fissare l'alzacristalli elettrico nei punti n° 2, 3, 4 e 5.<br />
E) Eseguire i collegamenti elettrici. Controllare il funzionamento dei cristalli prima di<br />
rimontare il pannello portiera.<br />
F) ATTENZIONE! Dopo che l'alzacristalli ricambio è stato installato, la chiusura ed apertura<br />
automatica NON FUNZIONA. Per ripristinare tale funzione utilizzare le istruzioni del manuale<br />
d’uso vettura.