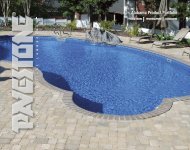
plaza paver - Pavestone
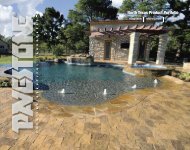
plaza paver - Pavestone
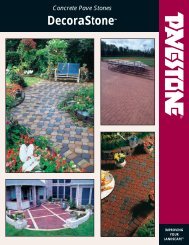
plaza paver - Pavestone

Create successful ePaper yourself
Turn your PDF publications into a flip-book with our unique Google optimized e-Paper software.
Patio Installation<br />
PATIO STONE INSTALLATION BASICS<br />
PASOS BáSICOS PARA LA INSTALACIóN DE PIEDRAS PARA PATIO<br />
PATIO INSTALLATION<br />
STEP 1: Remove Grass<br />
Remove grass from area to be<br />
laid with <strong>Pavestone</strong> Company<br />
patio product. Build a frame for<br />
your patio or walk with aluminum<br />
or plastic edging (redwood or<br />
treated lumber can also be used).<br />
Patio should slightly fall away<br />
from home.<br />
STEP 2: Sand<br />
Place roughly 1 in. of <strong>paver</strong> sand<br />
over area. (A 2"x4" notched board<br />
approx. 1.5 in. from each end can<br />
be used to screed or level <strong>paver</strong><br />
sand). Pack with hand tamp or<br />
gently spray water hose skyward<br />
over project.<br />
STEP 3: Placing Stones<br />
Start in corner and place stones<br />
over entire area. Slide stone<br />
straight down; do not slide across<br />
<strong>paver</strong> sand as this will disrupt<br />
the base.<br />
STEP 4: Side View<br />
After laying stones, sweep <strong>paver</strong><br />
sand across stones, filling joints<br />
with sand. (Do not use any kind of<br />
Portland Cement or mortar<br />
mixture).<br />
PASO 1: Retirar el césped<br />
Retira el césped del área donde<br />
colocarás los productos para<br />
patio de <strong>Pavestone</strong>. Construye un<br />
marco para tu patio o camino con<br />
un borde de aluminio o plástico<br />
(también puedes usar madera de<br />
redwood o madera tratada) El<br />
patio debe tener una caída ligera<br />
desde la casa.<br />
PASO 2: Arena<br />
Coloca aproximadamente 1" de<br />
arena para pavimento sobre el<br />
área. (Puedes utilizar una tabla<br />
dentada de 2"x4" y de<br />
aproximadamente 1.5" en cada<br />
extremo para nivelar o revestir<br />
con arena para pavimento).<br />
Apisona manualmente o rocía<br />
suavemente con la manguera de<br />
agua hacia arriba sobre el<br />
proyecto.<br />
PASO 3: Colocación de las<br />
piedras<br />
Comienza en la esquina y coloca<br />
las piedras en toda el área.<br />
Desliza las piedras en línea recta;<br />
no las deslices en la arena para<br />
pavimento porque alterarás la<br />
base.<br />
PASO 4: Vista lateral<br />
Después de colocar las piedras,<br />
barre la arena para pavimento<br />
sobre las piedras para rellenar las<br />
juntas con arena. (No utilices<br />
cualquier clase de cemento<br />
Portland o mezcla de mortero).<br />
Equipment List Lista del equipo<br />
❑ Gloves & Safety Glasses ❑ Carpenter's Level ❑ Aluminum or Plastic Edge. Restraint or 4 pieces of Redwood or treated lumber ❑ Shovel & Spade<br />
❑ 2" x 4" Board (Cut 3" wider than projected patio) ❑ Pick (if ground is hard) ❑ Paver Sand for joints and bed ❑ *Mason Tool (optional)<br />
❑ Guantes y lentes de seguridad ❑ Nivel de carpintero ❑ Retenedor de borde de. aluminio o plástico o 4 maderos de madera tratada ❑ Pala y Palustre<br />
❑ Madero de 2" x 4" (Cortado 3" mas largo de la medida del proyecto) ❑ Pica (si el suelo es duro) ❑ Arena para pavimento para uniones y la base<br />
❑ Herramientas para instalación de mampostería (opcional)<br />
Ask the Pro, Design, Center, FAQs, Installation Help, Photo Gallery & Product Information. Available Online: www.pavestone.com<br />
Pregúntale al Profesional, Centro de Diseño, Preguntas Frecuentes, Ayuda para la Instalación, Galería de Fotos e Información de Productos.<br />
Disponible en Línea: www.pavestone.com<br />
Installation 31