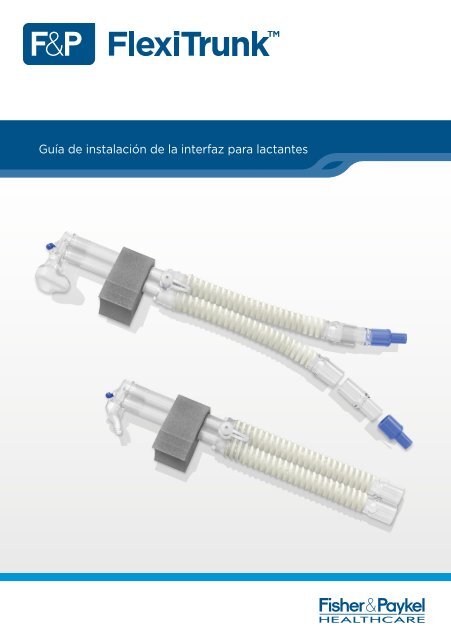
Guía de instalación de la interfaz para lactantes
Guía de instalación de la interfaz para lactantes
Guía de instalación de la interfaz para lactantes
You also want an ePaper? Increase the reach of your titles
YUMPU automatically turns print PDFs into web optimized ePapers that Google loves.
<strong>Guía</strong> <strong>de</strong> <strong>insta<strong>la</strong>ción</strong> <strong>de</strong> <strong>la</strong> <strong>interfaz</strong> <strong>para</strong> <strong>la</strong>ctantes
Si <strong>de</strong>se conocer <strong>la</strong>s instrucciones completas <strong>para</strong> el usuario, consulte Instrucciones <strong>para</strong> el usuario <strong>de</strong> <strong>la</strong><br />
<strong>interfaz</strong> <strong>para</strong> <strong>la</strong>ctantes FlexiTrunk (n.° <strong>de</strong> referencia: 185042952).
GUÍA DE TAMAÑOS DE FlexiTrunk<br />
En <strong>la</strong> siguiente guía se muestra <strong>la</strong> gama <strong>de</strong> tamaños que se pue<strong>de</strong> utilizar en <strong>la</strong>ctantes, agrupados<br />
por peso. Cada <strong>la</strong>ctante es distinto, con lo que <strong>de</strong>ben llevarse a cabo mediciones reales siguiendo <strong>la</strong><br />
guía <strong>de</strong> tamaños <strong>para</strong> obtener un ajuste i<strong>de</strong>al y lograr administrar el tratamiento <strong>de</strong> manera óptima.<br />
GUÍA DE LA GAMA DE TAMAÑOS PARA LACTANTES, AGRUPADOS POR PESO<br />
Ancho <strong>de</strong>l<br />
tabique<br />
Estándar (serie BC18x)<br />
Universal (serie BC19x)<br />
con conectores<br />
Diámetro <strong>de</strong><br />
<strong>la</strong>s narinas<br />
*3,0 mm/2,0 mm<br />
Diámetro <strong>de</strong> <strong>la</strong>s narinas/<br />
Ancho <strong>de</strong>l tabique<br />
CÓDIGO DE<br />
PRODUCTO<br />
BC180-05<br />
BC190-05<br />
BC181-05<br />
BC191-05<br />
BC182-05<br />
BC192-05<br />
TAMAÑO DEL<br />
PRODUCTO<br />
50 mm �<br />
PESO DEL LACTANTE (APROX.)<br />
�1.500 g �2.500 g >2.500 g<br />
70 mm � �<br />
100 mm � �<br />
BC300-05 17-22 cm �<br />
BC303-05 22-25 cm � �<br />
BC306-05 25-29 cm �<br />
BC309-05 29-36 cm � �<br />
BC325-05 29-36 cm �<br />
BC328-05 35-40 cm �<br />
BC331-05 40-45 cm �<br />
BC351-10 20-26 cm �<br />
BC353-10 26-32 cm � �<br />
BC355-10 32-38 cm �<br />
BC357-10 38-44 cm � �<br />
BC800-10 Pequeño �<br />
BC801-10 Mediano � �<br />
BC802-10 Gran<strong>de</strong> � �<br />
BC803-10 Extra gran<strong>de</strong> �<br />
BC3020-10 3,0 mm/2,0 mm* �<br />
BC3520-10 3,5 mm/2,0 mm �<br />
BC4030-10 4,0 mm/3,0 mm � �<br />
BC4540-10 4,5 mm/4,0 mm �<br />
BC5040-10 5,0 mm/4,0 mm �<br />
BC5050-10 5,0 mm/5,0 mm � �<br />
BC5550-10 5,5 mm/5,0 mm � �<br />
BC5560-10 5,5 mm/6,0 mm �<br />
BC6060-10 6,0 mm/6,0 mm �<br />
BC6070-10 6,0 mm/7,0 mm �<br />
BC6570-10 6,5 mm/7,0 mm �<br />
GUÍA DE INSTALACIÓN DE LA INTERFAZ PARA LACTANTES FLEX ITRUNK 1
INSTALACIÓN DE LA INTERFAZ PARA LACTANTES FlexiTrunk<br />
360px<br />
� Mida el perímetro <strong>de</strong> <strong>la</strong> cabeza <strong>de</strong>l <strong>la</strong>ctante en centímetros.<br />
�� Seleccione el gorro <strong>de</strong>l tamaño correcto. El gorro<br />
<strong>de</strong>be quedar ajustado.<br />
�� En primer lugar, estire el gorro con <strong>la</strong>s manos <strong>para</strong><br />
facilitar su colocación.<br />
� Coloque el gorro en <strong>la</strong> cabeza <strong>de</strong>l <strong>la</strong>ctante <strong>de</strong> forma que<br />
cubra completamente <strong>la</strong>s orejas y el bor<strong>de</strong> inferior <strong>de</strong><br />
<strong>la</strong> parte <strong>de</strong> atrás que<strong>de</strong> en <strong>la</strong> base <strong>de</strong>l cuello. El bor<strong>de</strong><br />
<strong>de</strong><strong>la</strong>ntero <strong>de</strong>l gorro <strong>de</strong>be quedar justo por encima <strong>de</strong><br />
<strong>la</strong>s cejas o sobre éstas.<br />
NO cubra <strong>la</strong> cara <strong>de</strong>l <strong>la</strong>ctante con el gorro, puesto<br />
que podría asfixiarse.<br />
2 GUÍA DE INSTALACIÓN DE LA INTERFAZ PARA LACTANTES FLEX ITRUNK
REF 185043042 Rev E 2011-02<br />
Sizing Gui<strong>de</strong><br />
S<br />
6570<br />
6070<br />
L<br />
3020 3520 4030 4540 5040<br />
6060<br />
5560<br />
XL<br />
5050<br />
5550<br />
�� Utilice <strong>la</strong> guía <strong>de</strong> tamaños <strong>para</strong> seleccionar <strong>la</strong>s cánu<strong>la</strong>s<br />
nasales o <strong>la</strong> máscara más a<strong>de</strong>cuadas.<br />
�� Las cánu<strong>la</strong>s nasales <strong>de</strong>ben ocupar por completo <strong>la</strong>s<br />
narinas sin estirar <strong>la</strong> piel. Utilice el tamaño más gran<strong>de</strong>.<br />
�� ��������������������������������������������������<br />
<strong>de</strong> <strong>la</strong> nariz, el tabique o los ojos.<br />
�� Seleccione <strong>la</strong> longitud correcta <strong>para</strong> el tubo nasal.<br />
Haga uso <strong>de</strong> <strong>la</strong> longitud más corta.<br />
�� ��������������������������������������������������<br />
<strong>de</strong>l <strong>la</strong>ctante.<br />
�� ��������������������������������������������������<br />
50 mm �1,5 kg<br />
70 mm �2,5 kg<br />
100 mm >2,5 kg<br />
�� �������������������������������������������������������<br />
y asegúrese <strong>de</strong> que quedan perfectamente insertadas.<br />
�� Si se utilizan cánu<strong>la</strong>s nasales: apriete los extremos <strong>de</strong><br />
<strong>la</strong>s cánu<strong>la</strong>s nasales con fuerza <strong>para</strong> exponer <strong>la</strong>s ranuras.<br />
Comience por un extremo e introduzca <strong>la</strong>s ranuras <strong>de</strong><br />
<strong>la</strong>s cánu<strong>la</strong>s nasales en el tubo nasal. Empuje el extremo<br />
con fuerza.<br />
GUÍA DE INSTALACIÓN DE LA INTERFAZ PARA LACTANTES FLEX ITRUNK 3
INSTALACIÓN DE LA INTERFAZ PARA LACTANTES FlexiTrunk<br />
�� �����������������������������������������������������<br />
ajustar el ángulo <strong>de</strong>l tubo nasal y conseguir un cierre<br />
hermético óptimo.<br />
�� ����������������������������������������������������<br />
al cambiar entre cánu<strong>la</strong>s nasales y máscaras.<br />
�� �����������������������������������������������<br />
<strong>la</strong>ctante (no inclinados hacia arriba ni hacia abajo).<br />
�� Conecte el circuito al tubo nasal con cualquier orientación.<br />
Consulte <strong>la</strong>s instrucciones <strong>de</strong>l fabricante <strong>de</strong>l circuito<br />
<strong>para</strong> obtener información más <strong>de</strong>tal<strong>la</strong>da.<br />
�� Nota: gire los conectores <strong>para</strong> <strong>de</strong>sconectar FlexiTrunk.<br />
NO tire en exceso, ya que podría dañar los tubos.<br />
Manipu<strong>la</strong>r con cuidado.<br />
�� Configure el flujo <strong>de</strong> gas hasta el nivel prescrito.<br />
�� Encienda el humidificador. Consulte <strong>la</strong>s instrucciones<br />
<strong>de</strong>l fabricante.<br />
Coloque <strong>la</strong> mano cerca <strong>de</strong> <strong>la</strong>s cánu<strong>la</strong>s nasales o <strong>de</strong> <strong>la</strong><br />
máscara <strong>para</strong> asegurarse <strong>de</strong> que existe flujo <strong>de</strong> gas.<br />
4 GUÍA DE INSTALACIÓN DE LA INTERFAZ PARA LACTANTES FLEX ITRUNK
2 mm<br />
�� Si se utilizan cánu<strong>la</strong>s nasales: limpie <strong>la</strong>s secreciones<br />
nasales antes <strong>de</strong> insertar <strong>la</strong>s cánu<strong>la</strong>s nasales.<br />
Asegúrese <strong>de</strong> que <strong>la</strong>s cánu<strong>la</strong>s nasales estén colocadas al<br />
menos a 2 mm (0,08 pulgadas) <strong>de</strong>l tabique <strong>para</strong> evitar<br />
necrosis por presión. Ajúste<strong>la</strong>s según sea necesario.<br />
�� Se recomienda comprobar <strong>la</strong> integridad <strong>de</strong>l tabique<br />
nasal cada hora.<br />
�� Si se utiliza máscara: <strong>para</strong> conectar <strong>la</strong> máscara al<br />
paciente, colóque<strong>la</strong> alre<strong>de</strong>dor <strong>de</strong> <strong>la</strong> nariz. La máscara<br />
<strong>de</strong>be quedar cómodamente asentada alre<strong>de</strong>dor <strong>de</strong> <strong>la</strong><br />
nariz <strong>de</strong>l paciente. No <strong>de</strong>be ocluir <strong>la</strong>s fosas nasales ni<br />
tocar el tabique, ni <strong>de</strong>be cubrir los <strong>la</strong>bios o los ojos.<br />
�� Cambio <strong>de</strong> cánu<strong>la</strong>s nasales a máscara: añada cintas<br />
con almohadil<strong>la</strong> <strong>de</strong> espuma según sea necesario <strong>para</strong><br />
colocar <strong>la</strong> máscara correctamente.<br />
�� Coloque <strong>la</strong> correa sobre <strong>la</strong> almohadil<strong>la</strong> <strong>de</strong> espuma y<br />
apriete <strong>para</strong> que el tubo se fije perfectamente en <strong>la</strong><br />
posición a<strong>de</strong>cuada.<br />
�� �����������������������������������������������<br />
paciente (no inclinados hacia arriba ni hacia abajo).<br />
GUÍA DE INSTALACIÓN DE LA INTERFAZ PARA LACTANTES FLEX ITRUNK 5
INSTALACIÓN DE LA INTERFAZ PARA LACTANTES FlexiTrunk<br />
�� Enganche los pasadores <strong>de</strong> <strong>la</strong>s correas <strong>la</strong>terales <strong>de</strong>l<br />
gorro en <strong>la</strong> correa <strong>de</strong>slizante.<br />
�� Tire <strong>de</strong> <strong>la</strong>s dos correas a <strong>la</strong> vez <strong>para</strong> que el dispositivo<br />
que<strong>de</strong> centrado.<br />
�� ���������������������������������������������������<br />
azul <strong>de</strong>l gorro.<br />
�� ���������������������������������������������������<br />
nivel <strong>de</strong> CPAP prescrito y <strong>la</strong> estabilidad <strong>de</strong> <strong>la</strong> <strong>interfaz</strong><br />
<strong>para</strong> <strong>la</strong>ctantes.<br />
�� ���������������������������������������������������<br />
simi<strong>la</strong>res, ya que pue<strong>de</strong>n perforar los tubos FlexiTrunk<br />
y provocar una pérdida <strong>de</strong> presión.<br />
�� Asegúrese <strong>de</strong> que el circuito esté bien apoyado <strong>para</strong><br />
reducir <strong>la</strong> tensión en el tubo nasal. Se recomienda<br />
usar una almohada o una toal<strong>la</strong> dob<strong>la</strong>da. Los tubos<br />
FlexiTrunk <strong>de</strong>ben po<strong>de</strong>r moverse sin problemas <strong>para</strong><br />
que el <strong>la</strong>ctante no encuentre ningún impedimento<br />
<strong>para</strong> <strong>de</strong>sp<strong>la</strong>zar <strong>la</strong> cabeza.<br />
�� ��������������������������������������������������<br />
<strong>de</strong>l tubo nasal <strong>para</strong> minimizar <strong>la</strong> con<strong>de</strong>nsación <strong>para</strong><br />
el <strong>la</strong>ctante.<br />
6 GUÍA DE INSTALACIÓN DE LA INTERFAZ PARA LACTANTES FLEX ITRUNK
185047263 REV A ES © 2012 Fisher & Paykel Healthcare Limited<br />
Para obtener más información, póngase en contacto<br />
con su representante local <strong>de</strong> Fisher & Paykel Healthcare<br />
Manufacturer<br />
Fisher & Paykel Healthcare Ltd<br />
15 Maurice Paykel P<strong>la</strong>ce<br />
East Tamaki, Auck<strong>la</strong>nd 2013<br />
PO Box 14 348, Panmure<br />
Auck<strong>la</strong>nd 1741<br />
New Zea<strong>la</strong>nd<br />
Tel: +64 9 574 0100<br />
Fax: +64 9 574 0158<br />
Email: info@fphcare.com<br />
Web: www.fphcare.com<br />
www.fphcare.com<br />
Australia<br />
Fisher & Paykel Healthcare Pty Limited<br />
36-40 New Street, PO Box 167<br />
Ringwood, Melbourne<br />
Victoria 3134, Australia<br />
Tel: +61 3 9879 5022<br />
Fax: +61 3 9879 5232<br />
Austria<br />
Tel: 0800 29 31 23<br />
Fax: 0800 29 31 22<br />
Benelux<br />
Tel: +31 40 216 3555<br />
Fax: +31 40 216 3554<br />
China<br />
Tel: +86 20 3205 3486<br />
Fax: +86 20 3205 2132<br />
France<br />
Tel: +33 1 6446 5201<br />
Fax: +33 1 6446 5221<br />
Germany<br />
Tel: +49 7181 98599 0<br />
Fax: +49 7181 98599 66<br />
India<br />
Tel: +91 80 4284 4000<br />
Fax: +91 80 4123 6044<br />
Irish Republic<br />
Tel: 1800 409 011<br />
Italy<br />
Tel: +39 06 7839 2939<br />
Fax: +39 06 7814 7709<br />
Spain<br />
Tel: +34 902 013 346<br />
Fax: +34 902 013 379<br />
Swe<strong>de</strong>n<br />
Tel: +46 8 564 76 680<br />
Fax: +46 8 36 63 10<br />
Switzer<strong>la</strong>nd<br />
Tel: 0800 83 47 63<br />
Fax: 0800 83 47 54<br />
Taiwan<br />
Tel: +886 2 8751 1739<br />
Fax: +886 2 8751 5625<br />
Turkey<br />
Tel: +90 312 354 34 12<br />
Fax: +90 312 354 31 01<br />
UK<br />
Fisher & Paykel Healthcare Ltd<br />
Unit 16, Cordwallis Park<br />
Clivemont Road, Mai<strong>de</strong>nhead<br />
Berkshire SL6 7BU, UK<br />
Tel: +44 1628 626 136<br />
Fax: +44 1628 626 146<br />
USA/Canada<br />
Tel: +1 800 446 3908<br />
or +1 949 453 4000<br />
Fax: +1 949 453 4001


