C350 manual - NAD
C350 manual - NAD
C350 manual - NAD
Create successful ePaper yourself
Turn your PDF publications into a flip-book with our unique Google optimized e-Paper software.
GB<br />
4<br />
<strong>NAD</strong> <strong>C350</strong> Stereo Integrated Amplifier<br />
QUICK START<br />
1. Connect the speakers to the rear Speaker sockets and sources<br />
to the relevant rear input sockets.<br />
2. Plug in the AC power cord.<br />
3. Press the POWER button to turn the <strong>NAD</strong> <strong>C350</strong> on.<br />
4. Press the required input selector.<br />
NOTES ON INSTALLATION<br />
Your <strong>NAD</strong> <strong>C350</strong> should be placed on a firm, level surface. Avoid<br />
placing the unit in direct sunlight or near sources of heat and<br />
damp. Allow adequate ventilation. Do not place the unit on a soft<br />
surface like a carpet. Do not place or it in an enclosed position,<br />
such a bookcase or cabinet, that may impede the air-flow through<br />
the ventilation slots. Make sure the unit is switched off before<br />
making any connections.<br />
The RCA sockets on your <strong>NAD</strong> <strong>C350</strong> are colour coded for<br />
convenience. Red and white are Right and Left audio respectively,<br />
and yellow for <strong>NAD</strong> Link. Use high quality leads and sockets for<br />
optimum performance and reliability. Ensure that leads and<br />
sockets are not damaged in any way and all sockets are firmly<br />
pushed home.<br />
For best performance, use quality speaker leads of 16 gauge<br />
(1.5mm) thickness or more. If the unit is not going to be used for<br />
some time, disconnect the plug from the AC socket.<br />
Should water get into your <strong>NAD</strong> <strong>C350</strong>, shut off the power to the<br />
unit and remove the plug from the AC socket. Have the unit<br />
inspected by a qualified service technician before attempting to<br />
use it again. Do not remove the cover, there are no userserviceable<br />
parts inside. Use a dry soft cloth to clean the unit.<br />
If necessary, lightly dampen the cloth with soapy water. Do not use<br />
solutions containing benzol or other volatile agents.<br />
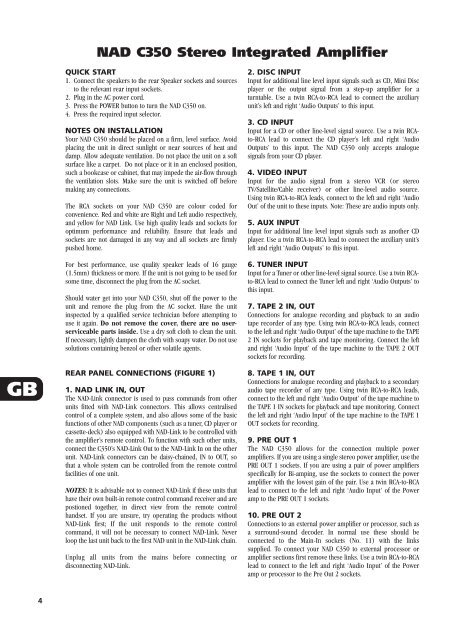
REAR PANEL CONNECTIONS (FIGURE 1)<br />
1. <strong>NAD</strong> LINK IN, OUT<br />
The <strong>NAD</strong>-Link connector is used to pass commands from other<br />
units fitted with <strong>NAD</strong>-Link connectors. This allows centralised<br />
control of a complete system, and also allows some of the basic<br />
functions of other <strong>NAD</strong> components (such as a tuner, CD player or<br />
cassette-deck) also equipped with <strong>NAD</strong>-Link to be controlled with<br />
the amplifier’s remote control. To function with such other units,<br />
connect the <strong>C350</strong>’s <strong>NAD</strong>-Link Out to the <strong>NAD</strong>-Link In on the other<br />
unit. <strong>NAD</strong>-Link connectors can be daisy-chained, IN to OUT, so<br />
that a whole system can be controlled from the remote control<br />
facilities of one unit.<br />
NOTES: It is advisable not to connect <strong>NAD</strong>-Link if these units that<br />
have their own built-in remote control command receiver and are<br />
postioned together, in direct view from the remote control<br />
handset. If you are unsure, try operating the products without<br />
<strong>NAD</strong>-Link first; If the unit responds to the remote control<br />
command, it will not be necessary to connect <strong>NAD</strong>-Link. Never<br />
loop the last unit back to the first <strong>NAD</strong> unit in the <strong>NAD</strong>-Link chain.<br />
Unplug all units from the mains before connecting or<br />
disconnecting <strong>NAD</strong>-Link.<br />
2. DISC INPUT<br />
Input for additional line level input signals such as CD, Mini Disc<br />
player or the output signal from a step-up amplifier for a<br />
turntable. Use a twin RCA-to-RCA lead to connect the auxiliary<br />
unit’s left and right ‘Audio Outputs’ to this input.<br />
3. CD INPUT<br />
Input for a CD or other line-level signal source. Use a twin RCAto-RCA<br />
lead to connect the CD player’s left and right ‘Audio<br />
Outputs’ to this input. The <strong>NAD</strong> <strong>C350</strong> only accepts analogue<br />
signals from your CD player.<br />
4. VIDEO INPUT<br />
Input for the audio signal from a stereo VCR (or stereo<br />
TV/Satellite/Cable receiver) or other line-level audio source.<br />
Using twin RCA-to-RCA leads, connect to the left and right ‘Audio<br />
Out’ of the unit to these inputs. Note: These are audio inputs only.<br />
5. AUX INPUT<br />
Input for additional line level input signals such as another CD<br />
player. Use a twin RCA-to-RCA lead to connect the auxiliary unit’s<br />
left and right ‘Audio Outputs’ to this input.<br />
6. TUNER INPUT<br />
Input for a Tuner or other line-level signal source. Use a twin RCAto-RCA<br />
lead to connect the Tuner left and right ‘Audio Outputs’ to<br />
this input.<br />
7. TAPE 2 IN, OUT<br />
Connections for analogue recording and playback to an audio<br />
tape recorder of any type. Using twin RCA-to-RCA leads, connect<br />
to the left and right ‘Audio Output’ of the tape machine to the TAPE<br />
2 IN sockets for playback and tape monitoring. Connect the left<br />
and right ‘Audio Input’ of the tape machine to the TAPE 2 OUT<br />
sockets for recording.<br />
8. TAPE 1 IN, OUT<br />
Connections for analogue recording and playback to a secondary<br />
audio tape recorder of any type. Using twin RCA-to-RCA leads,<br />
connect to the left and right ‘Audio Output’ of the tape machine to<br />
the TAPE 1 IN sockets for playback and tape monitoring. Connect<br />
the left and right ‘Audio Input’ of the tape machine to the TAPE 1<br />
OUT sockets for recording.<br />
9. PRE OUT 1<br />
The <strong>NAD</strong> <strong>C350</strong> allows for the connection multiple power<br />
amplifiers. If you are using a single stereo power amplifier, use the<br />
PRE OUT 1 sockets. If you are using a pair of power amplifiers<br />
specifically for Bi-amping, use the sockets to connect the power<br />
amplifier with the lowest gain of the pair. Use a twin RCA-to-RCA<br />
lead to connect to the left and right ‘Audio Input’ of the Power<br />
amp to the PRE OUT 1 sockets.<br />
10. PRE OUT 2<br />
Connections to an external power amplifier or processor, such as<br />
a surround-sound decoder. In normal use these should be<br />
connected to the Main-In sockets (No. 11) with the links<br />
supplied. To connect your <strong>NAD</strong> <strong>C350</strong> to external processor or<br />
amplifier sections first remove these links. Use a twin RCA-to-RCA<br />
lead to connect to the left and right ‘Audio Input’ of the Power<br />
amp or processor to the Pre Out 2 sockets.


