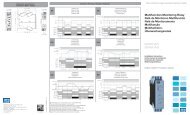
SCA-05 Communication Board Kit (COM5) Kit con Tarjeta de - Weg
SCA-05 Communication Board Kit (COM5) Kit con Tarjeta de - Weg
SCA-05 Communication Board Kit (COM5) Kit con Tarjeta de - Weg

You also want an ePaper? Increase the reach of your titles
YUMPU automatically turns print PDFs into web optimized ePapers that Google loves.
<strong>SCA</strong>-<strong>05</strong> <strong>Communication</strong><br />
<strong>Board</strong> <strong>Kit</strong> (<strong>COM5</strong>)<br />
<strong>Kit</strong> <strong>con</strong> <strong>Tarjeta</strong> <strong>de</strong><br />
Comunicación <strong>de</strong>l<br />
<strong>SCA</strong>-<strong>05</strong> (<strong>COM5</strong>)<br />
<strong>Kit</strong> com Placa <strong>de</strong><br />
Comunicação do <strong>SCA</strong>-<strong>05</strong><br />
(<strong>COM5</strong>)<br />
Instalação<br />
<strong>de</strong> Guia Instalación <strong>de</strong> Guía Gui<strong>de</strong><br />
<strong>SCA</strong>-<strong>05</strong><br />
English / Español / Português<br />
Document: 10000102243 / 01 Installation
I. SAFETY INFORMATION<br />
II. DESCRIPTION OF THE KIT<br />
Installation Gui<strong>de</strong><br />
<strong>SCA</strong>-<strong>05</strong> <strong>COM5</strong> <strong>Kit</strong><br />
NOTE!<br />
When the <strong>COM5</strong> board is used, the communication interface board REM<strong>05</strong><br />
(KCR) or the RS232 (X4) communication must not be used, or the drive will<br />
be damaged.<br />
ATTENTION!<br />
- Switch off the <strong>SCA</strong>-<strong>05</strong> servodrive before installing the <strong>COM5</strong> RS485<br />
communication kit.<br />
- Electronic boards have components sensitive to electrostatic discharges. Do<br />
not touch components or <strong>con</strong>nectors directly. If necessary, touch first the<br />
groun<strong>de</strong>d metallic frame or use a suitably groun<strong>de</strong>d wrist strap.<br />
It is the <strong>COM5</strong> RS485 communication board kit for the <strong>SCA</strong>-<strong>05</strong> servodrive.<br />
This kit <strong>con</strong>tains:<br />
<strong>COM5</strong> <strong>Board</strong> <strong>Kit</strong> - <strong>Communication</strong> RS483 <strong>SCA</strong>-<strong>05</strong> (co<strong>de</strong> 417110100)<br />
Quantity Description Part Number<br />
1 <strong>COM5</strong> RS485 <strong>Communication</strong> <strong>Board</strong> 4015.1<strong>05</strong>6<br />
1 28,6 mm metallic standoff 0309.0395<br />
1. <strong>COM5</strong> <strong>SCA</strong>-<strong>05</strong> KIT INSTALLATION<br />
For the correct installation of the <strong>SCA</strong>-<strong>05</strong> <strong>COM5</strong> kit, follow the steps below:<br />
Step 1 Dis<strong>con</strong>nect all the cables and <strong>con</strong>nectors attached to the front, top and<br />
bottom of the <strong>con</strong>trol module (A).<br />
Step 2 Detach the <strong>con</strong>trol module from the power module (B). Unfasten the<br />
screws indicated in the figure 1 and remove the module performing the<br />
two movements indicated by the arrow.<br />
Step 3 Then dis<strong>con</strong>nect the cables that <strong>con</strong>nect the <strong>con</strong>trol module to the power<br />
module.<br />
English<br />
3
English<br />
4<br />
Figure 1: Separation between the <strong>con</strong>trol module and the power section<br />
Step 4 With the <strong>con</strong>trol module free, remove the HMI (C), holding it by the si<strong>de</strong>s<br />
and pulling it frontwards.<br />
Step 5 Remove the plastic cover (D). Disengage the fasteners located around<br />
the <strong>con</strong>trol module. Together with the plastic cover, remove the X9 fitting<br />
protection.<br />
C<br />
D<br />
B<br />
A<br />
‘X’ VIEW<br />
‘X’ VIEW<br />
Figure 2: Removal of the HMI and the <strong>SCA</strong>-<strong>05</strong> plastic part<br />
B<br />
A<br />
MOVEMENT<br />
DIRECTION
Step 6 Unfasten the screws indicated in the figure 3, in or<strong>de</strong>r to remove the<br />
metallic lateral (E) of the <strong>con</strong>trol module and to become able to access<br />
the <strong>SCA</strong>-<strong>05</strong> <strong>con</strong>trol board (F).<br />
XC12<br />
F<br />
E<br />
Figure 3: Removal of the <strong>con</strong>trol module metallic si<strong>de</strong> plate<br />
Step 7 Remove the screw indicated by the figure 4, fixing the metallic standoff in<br />
the hole where the removed screw was fixed.<br />
Figure 4: Metallic stand-off fixing<br />
Step 8 Remove the fixing screws present on the DB9 <strong>con</strong>nector si<strong>de</strong>s of the received<br />
<strong>COM5</strong> board, according to the figure 5. Then mount the <strong>COM5</strong> board<br />
fixing the hea<strong>de</strong>r on the XC12 receptacle on the <strong>con</strong>trol board (showed<br />
in the figure).<br />
Figure 5: <strong>COM5</strong> board fixing<br />
English<br />
5
English<br />
6<br />
Step 9 Secure the <strong>COM5</strong> board on the metallic standoff using the screw<br />
removed from the <strong>con</strong>trol board, as indicated by the arrow in the figure<br />
4. Afterwards, fasten the screws of the <strong>COM5</strong> board DB9 <strong>con</strong>nector<br />
again, fixing it to the product metallic front cover.<br />
Figure 6: DB9 <strong>con</strong>nector lateral screws fixing<br />
Step 10 Once the <strong>SCA</strong>-<strong>05</strong> <strong>COM5</strong> kit has been installed, mount again the <strong>con</strong>trol<br />
module metallic lateral cover (E), as indicated in the figure 3. Afterwards,<br />
as indicated in the figure 2, mount the plastic cover (D) and then <strong>con</strong>nect<br />
the HMI (C). Finally, make correctly the necessary <strong>con</strong>nections between<br />
the <strong>con</strong>trol and the power modules, and with a movement opposite to the<br />
indicated by the arrow on figure 1, fit the <strong>con</strong>trol module on the power<br />
module, securing it with the screws.<br />
NOTE!<br />
- Do not forget to <strong>con</strong>nect all the cables removed during the installation.
Guía <strong>de</strong> Instalación<br />
<strong>Kit</strong> <strong>COM5</strong> <strong>SCA</strong>-<strong>05</strong><br />
I. INFORMACIONES DE SEGURIDAD<br />
iNOTA!<br />
Cuando se utiliza la tarjeta <strong>COM5</strong>, la tarjeta <strong>de</strong> interface <strong>de</strong> comunicación<br />
REM<strong>05</strong> (KCR) o la tarjeta <strong>de</strong> comunicación RS232 (X4) no <strong>de</strong>ben ser usadas.<br />
Caso <strong>con</strong>trario, el drive será dañado.<br />
!ATENCIóN!<br />
- Desligue el servo<strong>con</strong>vertidor <strong>SCA</strong>-<strong>05</strong> antes <strong>de</strong> instalar el kit <strong>de</strong> comunicación<br />
RS485 <strong>COM5</strong>.<br />
- Las tarjetas electrónicas poseen componentes sensibles a <strong>de</strong>scargas<br />
electrostáticas. No tocar directamente sobre los componentes o <strong>con</strong>ectores.<br />
Caso necesario, tocar antes en el armazón metálico puesto a tierra o utilice<br />
pulsera antiestática a<strong>de</strong>cuada.<br />
II. DESCRIPCIóN DE LA EMBALAjE<br />
<strong>Kit</strong> <strong>con</strong> tarjeta <strong>de</strong> comunicación RS485 <strong>COM5</strong> para servo<strong>con</strong>vertidor <strong>SCA</strong>-<strong>05</strong>.<br />
Este kit <strong>con</strong>tiene:<br />
<strong>Kit</strong> <strong>de</strong> la <strong>Tarjeta</strong> <strong>COM5</strong> - Comunicación RS483 <strong>SCA</strong>-<strong>05</strong> (código 417110100)<br />
Cantidad Descripción Código<br />
1 <strong>Tarjeta</strong> <strong>de</strong> comunicación RS485 <strong>COM5</strong> 4015.1<strong>05</strong>6<br />
1 Espaciador metálico - 28,6 mm 0309.0395<br />
1. INSTALACIóN DEL KIT <strong>COM5</strong> <strong>SCA</strong>-<strong>05</strong><br />
Para la correcta instalación <strong>de</strong>l <strong>Kit</strong> <strong>COM5</strong> <strong>SCA</strong>-<strong>05</strong>, proce<strong>de</strong>r los siguientes<br />
pasos abajo:<br />
Paso 1 Des<strong>con</strong>ecte todos los cables y <strong>con</strong>ectores <strong>de</strong> la parte frontal, superior e<br />
inferior <strong>de</strong>l módulo <strong>de</strong> <strong>con</strong>trol (A).<br />
Paso 2 Separe el módulo <strong>de</strong> <strong>con</strong>trol <strong>de</strong>l módulo <strong>de</strong> potencia (B). Quite los<br />
tornillos indicados en la figura 1 y, en seguida, <strong>de</strong>sencaje el módulo<br />
realizando dos movimientos <strong>con</strong>forme indicado por las flechas.<br />
Paso 3 Des<strong>con</strong>ecte los cables que <strong>con</strong>ectan el módulo <strong>de</strong> <strong>con</strong>trol al módulo <strong>de</strong><br />
potencia.<br />
Español<br />
7
Español<br />
8<br />
Paso 4 Con el módulo <strong>de</strong> <strong>con</strong>trol libre, quite el HMI (C), sujetando por las<br />
laterales y haciendo fuerza en el sentido frontal <strong>de</strong>l producto.<br />
Paso 5 Quite la parte plástica (D). Desencaje los fijadores ubicados al re<strong>de</strong>dor<br />
<strong>de</strong>l módulo <strong>de</strong> <strong>con</strong>trol. Con el frontal plástico, quite la protección <strong>de</strong>l<br />
encaje X9.<br />
C<br />
D<br />
B<br />
A<br />
VISTA ‘X’<br />
VISTA ‘X’<br />
Figura 1: Modulo <strong>de</strong> <strong>con</strong>trol y <strong>de</strong> potencia aislados<br />
Figura 2: Quitando el HMI y parte plástica <strong>de</strong>l <strong>SCA</strong>-<strong>05</strong><br />
B<br />
A<br />
SENTIDO DO<br />
MOVIMENTO
Paso 6 Quite los tornillo indicados en la figura 3 para remover la lateral metálica<br />
(E) <strong>de</strong>l módulo <strong>de</strong> <strong>con</strong>trol y para po<strong>de</strong>r acce<strong>de</strong>r a la tarjeta <strong>de</strong> <strong>con</strong>trol<br />
(F) <strong>de</strong>l <strong>SCA</strong>-<strong>05</strong>.<br />
XC12<br />
F<br />
E<br />
Figura 3: Quitando la lateral metálica <strong>de</strong>l modulo <strong>de</strong> <strong>con</strong>trol<br />
Paso 7 Quite el tornillo indicado por figura 4, fijando el espaciador metálico<br />
en el orificio don<strong>de</strong> estaba fijado el tornillo removido.<br />
Figura 4: Fijación <strong>de</strong>l espaciador metálico<br />
Paso 8 Para la tarjeta <strong>COM5</strong> recibida, quite los tornillos <strong>de</strong> fijación presentes<br />
al lado <strong>de</strong>l <strong>con</strong>ector DB9, <strong>con</strong>forme la figura que sigue. Fije, entonces,<br />
la tarjeta <strong>COM5</strong>, ajuste el bus <strong>de</strong> terminales en el <strong>con</strong>ector XC12 <strong>de</strong> la<br />
tarjeta <strong>de</strong> <strong>con</strong>trol (indicado en la figura 5).<br />
Figura 5: Fijación <strong>de</strong> la tarjeta <strong>COM5</strong><br />
Español<br />
9
Español<br />
10<br />
Paso 9 Fije la tarjeta <strong>COM5</strong> al espaciador metálico utilizando el tornillo removido<br />
<strong>de</strong> la tarjeta <strong>de</strong> <strong>con</strong>trol, <strong>con</strong>forme indicado por la flecha en la figura 4.<br />
En seguida, coloque nuevamente los tornillos <strong>de</strong> fijación en las laterales<br />
<strong>de</strong>l <strong>con</strong>ector DB9 <strong>de</strong> la tarjeta <strong>de</strong> <strong>con</strong>trol, fijándola en la parte metálica<br />
frontal <strong>de</strong>l producto.<br />
Figura 6: Fijación <strong>de</strong> los tornillos laterales <strong>de</strong>l <strong>con</strong>ector DB9<br />
Paso 10 Una vez instalado el <strong>Kit</strong> <strong>COM5</strong> <strong>SCA</strong>-<strong>05</strong>, fijar nuevamente la parte<br />
metálica lateral (E) <strong>de</strong>l servo<strong>con</strong>vertidor, como indicado en la figura 3.<br />
En seguida, como indicado en la figura 2, encajar la parte plástica<br />
frontal (D) y luego <strong>con</strong>ectar el HMI (C). Finalmente, haga correctamente<br />
las <strong>con</strong>exiones necesarias entre el módulo <strong>de</strong> <strong>con</strong>trol y el módulo <strong>de</strong><br />
potencia y, haciendo movimiento inverso al indicado por la flecha <strong>de</strong> la<br />
figura 1, encaje el módulo <strong>de</strong> <strong>con</strong>trol al módulo <strong>de</strong> potencia y atornille<br />
para una mejor fijación.<br />
iNOTA!<br />
- No olvi<strong>de</strong> <strong>de</strong> <strong>con</strong>ectar todos los cables removidos durante la instalación.
<strong>Kit</strong> <strong>COM5</strong> <strong>SCA</strong>-<strong>05</strong><br />
II. CONTEÚDO DA EMBALAGEM<br />
Guia <strong>de</strong> Instalação<br />
I. INFORMAÇÕES DE SEGURANÇA<br />
NOTA!<br />
Quando utilizada a placa <strong>COM5</strong>, a placa <strong>de</strong> interface <strong>de</strong> comunicação REM<strong>05</strong><br />
(KCR) ou a comunicação RS232 (X4) não <strong>de</strong>vem ser usadas, ou o drive será<br />
danificado.<br />
ATENÇÃO!<br />
- Desligue o servo<strong>con</strong>versor <strong>SCA</strong>-<strong>05</strong> antes <strong>de</strong> instalar o kit <strong>de</strong> comunicação<br />
RS485 <strong>COM5</strong>.<br />
- Os cartões eletrônicos possuem componentes sensíveis a <strong>de</strong>scargas<br />
eletrostáticas. Não toque diretamente sobre componentes ou <strong>con</strong>ectores.<br />
Caso necessário, toque antes na carcaça metálica aterrada ou utilize pulseira<br />
<strong>de</strong> aterramento a<strong>de</strong>quada.<br />
<strong>Kit</strong> com placa <strong>de</strong> comunicação RS485 <strong>COM5</strong> para servo<strong>con</strong>versor <strong>SCA</strong>-<strong>05</strong>.<br />
Este kit <strong>con</strong>tém:<br />
<strong>Kit</strong> Cartão <strong>COM5</strong> - Comunicação RS483 <strong>SCA</strong>-<strong>05</strong> (código 417110100)<br />
Quantida<strong>de</strong> Descrição Código<br />
1 Cartão <strong>de</strong> comunicação RS485 <strong>COM5</strong> 4015.1<strong>05</strong>6<br />
1 Espaçador metálico - 28,6 mm 0309.0395<br />
1. INSTALAÇÃO DO KIT <strong>COM5</strong> <strong>SCA</strong>-<strong>05</strong><br />
Para a correta instalação do <strong>Kit</strong> <strong>COM5</strong> <strong>SCA</strong>-<strong>05</strong>, siga os passos abaixo:<br />
Passo 1 Des<strong>con</strong>ecte todos os cabos e <strong>con</strong>ectores ligados na parte frontal, superior<br />
e inferior do módulo <strong>de</strong> <strong>con</strong>trole (A).<br />
Passo 2 Separe o módulo <strong>de</strong> <strong>con</strong>trole do módulo <strong>de</strong> potência (B). Solte os<br />
parafusos indicados na figura 1 e, em seguida, <strong>de</strong>sencaixe o módulo<br />
realizando dois movimentos <strong>con</strong>forme indicado pelas setas.<br />
Passo 3 Des<strong>con</strong>ecte, então, os cabos que ligam o módulo <strong>de</strong> <strong>con</strong>trole ao módulo<br />
<strong>de</strong> potência.<br />
Português<br />
11
Português<br />
12<br />
Passo 4 Com o módulo <strong>de</strong> <strong>con</strong>trole livre, remova a HMI (C), segurando pelas<br />
laterais e puxando no sentido frontal do produto.<br />
Passo 5 Remova a parte plástica (D). Desencaixe os pren<strong>de</strong>dores localizados em<br />
volta do módulo <strong>de</strong> <strong>con</strong>trole. Com a frente plástica, retire a proteção<br />
<strong>de</strong> encaixe X9.<br />
C<br />
D<br />
B<br />
A<br />
VISTA ‘X’<br />
VISTA ‘X’<br />
Figura 1: Separação do módulo <strong>de</strong> <strong>con</strong>trole e potência<br />
Figura 2: Remoção da HMI e parte plástica do <strong>SCA</strong>-<strong>05</strong><br />
B<br />
A<br />
SENTIDO DO<br />
MOVIMENTO
Passo 6 Solte os parafusos indicados na figura 3 para remover a lateral metálica<br />
(E) do módulo <strong>de</strong> <strong>con</strong>trole e po<strong>de</strong>r acessar o cartão <strong>de</strong> <strong>con</strong>trole (F) do<br />
<strong>SCA</strong>-<strong>05</strong>.<br />
XC12<br />
F<br />
E<br />
Figura 3: Remoção da lateral metálica do módulo <strong>de</strong> <strong>con</strong>trole<br />
Passo 7 Remova o parafuso indicado pela seta (figura 4), fixando o espaçador<br />
metálico no orifício on<strong>de</strong> era fixado o parafuso removido.<br />
Figura 4: Fixação do espaçador metálico<br />
Passo 8 No cartão <strong>COM5</strong> recebido, remova os parafusos <strong>de</strong> fixação presentes<br />
ao lado do <strong>con</strong>ector DB9, <strong>con</strong>forme a figura 5. Fixe, então, o cartão<br />
<strong>COM5</strong>, alinhando o barramento <strong>de</strong> pinos no <strong>con</strong>ector XC12 do cartão<br />
<strong>de</strong> <strong>con</strong>trole (indicado na figura 5).<br />
Figura 5: Fixação do cartão <strong>COM5</strong><br />
Português<br />
13
Português<br />
14<br />
Passo 9 Fixe o cartão <strong>COM5</strong> ao espaçador metálico utilizando o parafuso<br />
removido do cartão <strong>de</strong> <strong>con</strong>trole, <strong>con</strong>forme indicado pela seta na figura<br />
4. Em seguida, coloque novamente os parafusos <strong>de</strong> fixação nas laterais<br />
do <strong>con</strong>ector DB9 do cartão <strong>de</strong> <strong>con</strong>trole, pren<strong>de</strong>ndo-o na frente metálica<br />
do produto.<br />
Figura 6: Fixação dos parafusos laterais do <strong>con</strong>ector DB9<br />
Passo 10 Uma vez instalado o <strong>Kit</strong> <strong>COM5</strong> <strong>SCA</strong>-<strong>05</strong>, fixe novamente a parte<br />
metálica lateral (E) do servo<strong>con</strong>versor, como indicado na figura 3. Em<br />
seguida, como indicado na figura 2, encaixe a parte plástica frontal<br />
(D) e, em seguida, <strong>con</strong>ecte a HMI (C). Finalmente, faça corretamente<br />
as <strong>con</strong>exões necessárias entre o módulo <strong>de</strong> <strong>con</strong>trole e o módulo <strong>de</strong><br />
potência e, fazendo movimento inverso ao indicado pela seta da figura<br />
1, encaixe o módulo <strong>de</strong> <strong>con</strong>trole ao módulo <strong>de</strong> potência, parafusando<br />
para melhor fixação.<br />
NOTA!<br />
- Não esquecer <strong>de</strong> <strong>con</strong>ectar todos os cabos removidos durante a instalação.
www.weg.net