macinadosatore t sm 92 instant sm 97 instant t sm tk ... - La San Marco
macinadosatore t sm 92 instant sm 97 instant t sm tk ... - La San Marco
macinadosatore t sm 92 instant sm 97 instant t sm tk ... - La San Marco

Create successful ePaper yourself
Turn your PDF publications into a flip-book with our unique Google optimized e-Paper software.
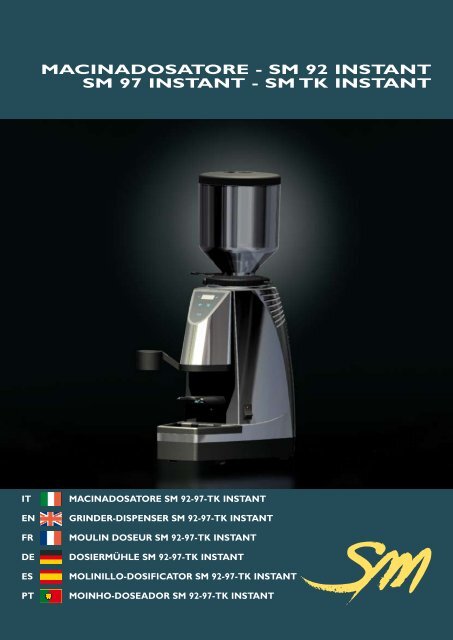
<strong>macinadosatore</strong> - <strong>sm</strong> <strong>92</strong> <strong>instant</strong><br />
<strong>sm</strong> <strong>97</strong> <strong>instant</strong> - <strong>sm</strong> tK <strong>instant</strong><br />
it <strong>macinadosatore</strong> <strong>sm</strong> <strong>92</strong>-<strong>97</strong>-tK <strong>instant</strong><br />
en grinder-dispenser <strong>sm</strong> <strong>92</strong>-<strong>97</strong>-tK <strong>instant</strong><br />
Fr moulin doseur <strong>sm</strong> <strong>92</strong>-<strong>97</strong>-tK <strong>instant</strong><br />
de dosiermühle <strong>sm</strong> <strong>92</strong>-<strong>97</strong>-tK <strong>instant</strong><br />
es molinillo-dosiFicator <strong>sm</strong> <strong>92</strong>-<strong>97</strong>-tK <strong>instant</strong><br />
pt moinho-doseador <strong>sm</strong> <strong>92</strong>-<strong>97</strong>-tK <strong>instant</strong><br />
el ¢oImetpIko my§o kaºe <strong>sm</strong> <strong>92</strong>-<strong>97</strong>-tK <strong>instant</strong>
<strong>macinadosatore</strong> <strong>sm</strong> <strong>92</strong> <strong>instant</strong><br />
<strong>sm</strong> <strong>97</strong> <strong>instant</strong>- <strong>sm</strong> tK <strong>instant</strong><br />
Istruzioni originali<br />
italiano
italiano<br />
Indice Generale<br />
1. Note di carattere generale ..........................pag. 3<br />
1.1 Il caffè espresso . . . . . . . . . . . . . . . . . . . . . . . . . . . . . . . . . . . . . . . . . . . . . . . . pag. 3<br />
1.2 <strong>La</strong> conservazione del caffè in grani . . . . . . . . . . . . . . . . . . . . . . . . . . . . . . . . . pag. 3<br />
1.3 Il <strong>macinadosatore</strong> e la macinatura . . . . . . . . . . . . . . . . . . . . . . . . . . . . . . . . . . pag. 3<br />
1.4 <strong>La</strong> macchina per caffè espresso .................................... pag. 3<br />
1.5 Condizioni climatiche - operatore ................................... pag. 3<br />
2. Introduzione .....................................pag. 4<br />
2.1 Consultazione del manuale ........................................ pag. 4<br />
2.2 Avvertenze . . . . . . . . . . . . . . . . . . . . . . . . . . . . . . . . . . . . . . . . . . . . . . . . . . . . pag. 4<br />
3. Caratteristiche tecniche ............................pag. 5<br />
3.1 Caratteristiche generali dei vari modelli .............................. pag. 5<br />
3.2 Caratteristiche tecniche . . . . . . . . . . . . . . . . . . . . . . . . . . . . . . . . . . . . . . . . . . pag. 5<br />
3.3 Disegno complessivo . . . . . . . . . . . . . . . . . . . . . . . . . . . . . . . . . . . . . . . . . . . . pag. 6<br />
4. Installazione .....................................pag. 7<br />
4.1 Avvertenze . . . . . . . . . . . . . . . . . . . . . . . . . . . . . . . . . . . . . . . . . . . . . . . . . . . . pag. 7<br />
4.2 Collegamento elettrico . . . . . . . . . . . . . . . . . . . . . . . . . . . . . . . . . . . . . . . . . . . pag. 7<br />
4.3 Regolazione della macinatura ...................................... pag. 8<br />
4.4 Sostituzione delle macine ......................................... pag. 8<br />
5. Istruzioni per il funzionamento .......................pag. 8<br />
5.1 Dosi erogabili . . . . . . . . . . . . . . . . . . . . . . . . . . . . . . . . . . . . . . . . . . . . . . . . . . pag. 8<br />
5.2 Stand by . . . . . . . . . . . . . . . . . . . . . . . . . . . . . . . . . . . . . . . . . . . . . . . . . . . . . . pag. 9<br />
5.3 Erogazione dosi programmabili . . . . . . . . . . . . . . . . . . . . . . . . . . . . . . . . . . . . pag. 9<br />
5.4 Erogazione continua ............................................. pag. 9<br />
5.5 Programmazione: . . . . . . . . . . . . . . . . . . . . . . . . . . . . . . . . . . . . . . . . . . . . . . . pag. 10<br />
5.6 Abilitazione /disabilitazione del cicalino .............................. pag. 10<br />
5.7 Allarme consumo eccessivo delle macine . . . . . . . . . . . . . . . . . . . . . . . . . . . . pag. 10<br />
6. Consigli pratici per l’operatore. . . . . . . . . . . . . . . . . . . . . . . pag. 10<br />
7. Informazione agli utenti . . . . . . . . . . . . . . . . . . . . . . . . . . . . pag. 11<br />
8. Garanzia ........................................pag. 11<br />
9. Dichiarazione di conformità .........................pag. 11<br />
10. Problemi e soluzioni ...............................pag. 12<br />
Manuale Cod. 7770.051<br />
Revisione 03.11<br />
2
1. note di carattere generale<br />
• Nella prima parte di questo manuale d'uso è spiegato brevemente il metodo per la produzione del caffè<br />
espresso, le moderne attrezzature utilizzate e la funzione che svolge il <strong>macinadosatore</strong> all'interno di questo<br />
delicato processo.<br />
1.1 Il caffè espresso<br />
L'espresso è un caffè preparato con un metodo d'estrazione particolare, che consente di ottenere una bevanda<br />
molto concentrata, sciropposa, dal gusto e dall'aroma intensi. Il metodo di preparazione dell'espresso<br />
consiste nell'estrarre le sostanze contenute nel caffè macinato mediante il flusso d'acqua calda sotto pressione<br />
(circa 9 bar) per un tempo variabile dai 25 ai 35 secondi; in questo modo le sostanze solubili (zuccheri e<br />
proteine) ed insolubili (grassi e colloidi) contenute nel caffè sono "trascinate" nella tazzina formando la crema<br />
caratteristica del vero espresso. <strong>La</strong> preparazione dell'espresso è un'operazione molto delicata; esistono diversi<br />
fattori che influiscono sulla riuscita di quest'operazione: la conservazione del caffè in grani, il <strong>macinadosatore</strong><br />
e la macinatura, la conservazione del macinato, la macchina per caffè espresso, la variabilità delle condizioni<br />
climatiche, l'attenzione e la competenza dell'operatore addetto alla preparazione del caffè espresso.<br />
1.2 <strong>La</strong> conservazione del caffè in grani<br />
Le varietà di caffè presenti in natura sono due: la qualità "arabica" e la qualità "robusta". Solitamente il caffè torrefatto<br />
utilizzato per produrre l'espresso contiene una miscela delle due varietà, opportunamente mescolate in<br />
percentuali variabili, che tengono conto delle caratteristiche organolettiche dei singoli componenti. <strong>La</strong> miscela di<br />
caffè torrefatto deve essere conservata chiusa ermeticamente all'interno della sua confezione. Il caffè in grani,<br />
dopo la torrefazione, contiene al suo interno tutte le sostanze e gli aromi caratteristici della varietà o della miscela;<br />
tali aromi svaniscono rapidamente quando i grani di caffè vengono a contatto con l'aria, la luce e l'umidità.<br />
1.3 Il <strong>macinadosatore</strong> e la macinatura<br />
Il <strong>macinadosatore</strong> è un apparecchio che provvede alla macinazione del caffè in grani e alla sua dosatura. Per<br />
ottenere un buon espresso occorrono particelle di caffè macinato con diametro variabile da circa 1 mm, fino<br />
a polvere inferiore a 150 µm. Il caffè in polvere offre una maggiore superficie di contatto all'acqua, consentendo<br />
una più elevata estrazione delle sostanze solubili ed insolubili; variando la granulometria del macinato<br />
si potrà così modificare la resistenza offerta al passaggio dell'acqua. Se il macinato è composto di granuli<br />
troppo grossi, l'erogazione avviene in maniera troppo veloce, l'acqua non riesce ad estrarre completamente<br />
le qualità del macinato e si ottiene così un espresso di colore chiaro, acquoso, senza il gusto e l'aroma caratteristico<br />
del caffè. Quando il macinato è troppo fine, invece, l'espresso è di colore scuro, bruciato e freddo;<br />
il tempo d'erogazione è troppo lungo e l'acqua filtra con difficoltà in quanto la polvere offre una resistenza<br />
eccessiva al suo passaggio. Il caffè espresso risulta sovraestratto.<br />
1.4 <strong>La</strong> macchina per caffè espresso<br />
<strong>La</strong> macchina per caffè espresso è quell'apparecchiatura sostanzialmente costituita da una caldaia e da una<br />
serie di scambiatori, nella quale il riscaldamento dell'acqua è realizzato per mezzo di una resistenza elettrica<br />
o di un bruciatore a gas. L'acqua, portata ad elevata temperatura, attraversa il caffè macinato posto nella<br />
coppa porta filtro e ne estrae gli aromi. Quando nel presente manuale si parlerà di macchina per caffè espresso,<br />
, ci si riferirà sia a modelli ad erogazione tramite pompa sia a quelli in cui l’erogazione avviene tramite<br />
pistone idraulico (dette a leva). I macinadosatori che <strong>La</strong> <strong>San</strong> <strong>Marco</strong> S.p.A. produce sono apparecchi professionali<br />
progettati e costruiti per essere affiancati a questi tipi di macchina per caffè espresso.<br />
1.5 Condizioni climatiche - operatore<br />
Per ottenere un buon espresso, come detto, è indispensabile macinare il caffè secondo una certa granulometria.<br />
Il caffè macinato è molto igroscopico; "assorbe", in altre parole, l'umidità ambientale. <strong>La</strong> macinatura<br />
deve essere modificata al variare delle condizioni climatiche; un macinato con un tasso d'umidità elevato<br />
aumenta la resistenza al passaggio dell'acqua. Altri fattori importanti per la preparazione del caffè espresso<br />
sono la quantità e la pressatura del macinato all'interno della coppa porta filtro. Questi ultimi fattori (umidità,<br />
quantità e granulometria del macinato, pressatura) devono essere considerati e valutati dall'operatore addetto<br />
alla realizzazione dell'espresso. Per questi motivi l'operatore ha un ruolo fondamentale nel percorso della<br />
preparazione del caffè espresso.<br />
3<br />
italiano
italiano<br />
2. introduzione<br />
2.1 Consultazione del manuale<br />
2.2 Avvertenze<br />
4<br />
• Il presente manuale fornisce tutte le informazioni necessarie all'installazione, all'avviamento,<br />
all'utilizzo e alla manutenzione del <strong>macinadosatore</strong>.<br />
• Il personale addetto al normale uso e alla manutenzione ordinaria e il personale tecnico<br />
adibito agli interventi di manutenzione straordinaria e di riparazione devono aver<br />
letto attentamente ed assimilato il contenuto di tale manuale.<br />
• Questo manuale è parte integrante della macchina, deve essere conservato per tutta<br />
la durata della macchina a cui si riferisce e deve essere trasferito a qualsiasi altro utente<br />
o successivo proprietario.<br />
• Il manuale o copia di esso deve essere sempre vicino alla macchina per la consultazione<br />
da parte dell'operatore; deve essere conservato con cura, in luogo protetto da calore,<br />
umidità, polvere e agenti corrosivi.<br />
• Il <strong>macinadosatore</strong> <strong>La</strong> <strong>San</strong> <strong>Marco</strong> S.p.A. deve essere usato secondo le modalità<br />
descritte dal presente manuale; ogni uso improprio o difforme di tale apparecchio<br />
preclude ogni condizione di garanzia o responsabilità del costruttore.<br />
• Il <strong>macinadosatore</strong> è stato progettato e costruito per provvedere alla macinazione del<br />
caffè in grani e alla sua dosatura. Ogni uso al di fuori di quanto specificato nel presente<br />
manuale è da considerarsi improprio e pertanto non autorizzato. Il costruttore<br />
declina ogni responsabilità per danni derivanti dall'uso improprio dell'apparecchio.<br />
• L'utilizzatore deve essere una persona adulta e responsabile, il quale deve attenersi<br />
alle norme di sicurezza vigenti nel paese d'installazione oltre che alle regole dettate<br />
dal comune buon senso. Per un uso corretto e sicuro della macchina, l'operatore deve<br />
osservare le regole di prevenzione degli infortuni ed ogni altro requisito di medicina e<br />
igiene del lavoro.<br />
• L'utilizzo dell'apparecchio e le operazioni di manutenzione ordinaria e pulizia sono<br />
riservate al solo personale addetto, delegato dal cliente sotto la sua responsabilità.<br />
• È severamente vietato far funzionare la macchina con le protezioni fisse e/o mobili<br />
<strong>sm</strong>ontate o con i dispositivi di sicurezza esclusi; è severamente vietato rimuovere o<br />
manomettere i dispositivi di sicurezza.<br />
• Mentre il <strong>macinadosatore</strong> è in funzione, non introdurre all'interno della tramoggia o del<br />
dosatore oggetti, quali utensili o simili (cacciaviti, cucchiai, ecc.).<br />
• Prima di effettuare qualsiasi operazione di manutenzione ordinaria o pulizia, staccare<br />
la spina d'alimentazione elettrica dalla presa di rete.<br />
• Per le operazioni di pulizia evitare l'utilizzo di prodotti quali alcool, benzina o solventi<br />
in genere; utilizzare acqua o solventi neutri.<br />
• Per le operazioni di pulizia della carrozzeria è sufficiente utilizzare un panno umido o<br />
una spugna; non utilizzare mai getti d'acqua.<br />
• Gli interventi di manutenzione straordinaria e riparazione devono essere eseguiti dal<br />
personale tecnico specializzato dei centri di assistenza tecnica <strong>La</strong> <strong>San</strong> <strong>Marco</strong> S.p.A.<br />
• Se il cavo di alimentazione è danneggiato, esso deve essere sostituito dal costruttore<br />
o dal suo servizio assistenza tecnica.<br />
• In caso di guasti o rottura di qualche componente del <strong>macinadosatore</strong> rivolgersi al<br />
centro di assistenza autorizzato e richiedere l'utilizzo di ricambi originali <strong>La</strong> <strong>San</strong> <strong>Marco</strong><br />
S.p.A.; l'utilizzo di ricambi non originali fa decadere le certificazioni di conformità e la<br />
garanzia che accompagnano la macchina.<br />
• È severamente vietato effettuare operazioni per le quali non si ha la necessaria autorizzazione<br />
o non si sono capite le esatte modalità; contattare la casa costruttrice per ogni<br />
necessità di informazioni, ricambi o accessori.<br />
• In caso di messa in disuso e <strong>sm</strong>antellamento della macchina rivolgersi al fornitore<br />
oppure alle aziende municipalizzate che si occupano dello <strong>sm</strong>altimento dei rifiuti solidi<br />
urbani. Non disperdere nell'ambiente.
3. caratteristiche tecniche<br />
3.1 Caratteristiche generali dei vari modelli<br />
I macinadosatori <strong>La</strong> <strong>San</strong> <strong>Marco</strong> sono attrezzature professionali che provvedono alla macinazione del caffè in<br />
grani e alla sua dosatura. <strong>La</strong> <strong>San</strong> <strong>Marco</strong> S.p.A. produce tre modelli di macinadosatori e sono: SM <strong>92</strong><br />
INSTANT;SM <strong>97</strong> INSTANT; Conico (TK INSTANT). Sono essenzialmente composti da :<br />
• Una carrozzeria 1 in alluminio verniciato. Le dimensioni, la forma e il volume sono identiche per tutti i<br />
modelli, tranne per il modello “SM TK INSTANT”, in cui alla carrozzeria standard viene aggiunto uno zoccolo<br />
2, che contiene i componenti elettrici ed elettronici.<br />
• Una tramoggia 4, in materiale plastico trasparente, posizionata nella parte superiore del <strong>macinadosatore</strong>.<br />
<strong>La</strong> tramoggia (4,6 lt.) è fissata al <strong>macinadosatore</strong> con una vite speciale 8; la rimozione della tramoggia è<br />
possibile solamente con l'ausilio di un utensile. All’interno della tramoggia c’è una griglia di protezione 7,<br />
che impedisce l’accesso alle macine con gli arti superiori.<br />
• Un motore elettrico sul quale viene collegato il gruppo di macinazione. Sul modello di <strong>macinadosatore</strong><br />
conico al motore elettrico viene collegato un riduttore epicicloidale e quindi il gruppo di macinazione.<br />
• Un gruppo di macinazione. Il modello SM <strong>92</strong> INSTANT e il modello SM <strong>97</strong> INSTANT sono equipaggiati con<br />
un gruppo di macinazione a macine piane aventi il diametro di 64 mm il primo e di 84 mm il secondo; il<br />
modello SM TK INSTANT ha un gruppo di macinazione a macine coniche.<br />
• Una ghiera di regolazione della macinatura 10 con il pulsante di sblocco 9. Sulla parte superiore della<br />
ghiera ci sono le indicazioni per la regolazione della macinatura. Per modificare la granulometria del caffè<br />
macinato bisogna ruotare la ghiera in senso orario o antiorario.<br />
• Una forcella 15 di sostegno per la coppa porta filtro con il micro di avvio macinatura 13 (a richiesta).<br />
• Una centralina elettronica che controlla l’avvio e l’arresto della macinatura. Programmando la centralina<br />
elettronica tramite pannello TOUCH è possibile regolare il tempo di macinatura.<br />
• Un interruttore generale 3 on/off con LED verde.<br />
• Una tastiera touch 11 utilizzata sia per avviare la macinatura sia la programmazione del <strong>macinadosatore</strong>.<br />
• Un carter di supporto della tastiera touch 12.<br />
3.2 Caratteristiche tecniche<br />
modello<br />
<strong>sm</strong> <strong>92</strong><br />
<strong>instant</strong><br />
<strong>sm</strong> <strong>92</strong><br />
<strong>instant</strong><br />
micro<br />
<strong>sm</strong> <strong>97</strong><br />
<strong>instant</strong><br />
<strong>sm</strong> <strong>97</strong><br />
<strong>instant</strong><br />
micro<br />
<strong>sm</strong> tK<br />
<strong>instant</strong><br />
<strong>sm</strong> tK<br />
<strong>instant</strong><br />
micro<br />
velocità<br />
motore<br />
(g/min)<br />
PotenZa<br />
motore<br />
(W)<br />
PotenZa<br />
assorbita<br />
(W)<br />
tiPo di<br />
macine<br />
caPacità di<br />
macinaZione<br />
(kg/h)<br />
dimensione<br />
macine<br />
Ø (mm)<br />
velocità<br />
macine<br />
(g/min)<br />
emissione<br />
esonora<br />
db(a)<br />
1350 220 350 PIANE 8,5 64 1350 72 13,8<br />
1350 220 350 PIANE 8,5 64 1350 72 13,8<br />
880 245 460 PIANE 13 84 880 69 13,8<br />
880 245 460 PIANE 13 84 880 69 13,8<br />
1350 373 650 CONICHE 18 / 400 68 17<br />
1350 373 650 CONICHE 18 / 400 68 17<br />
I modelli di macinadosatori <strong>La</strong> <strong>San</strong> <strong>Marco</strong> S.p.A. sono predisposti per le seguenti tensioni:<br />
• 110 V-1~ 60 Hz (disponibile solo per i modelli SM <strong>92</strong> INSTANT / SM <strong>97</strong> INSTANT)<br />
• 230 V-1~ 50 Hz<br />
• 230 / 400 V-3N ~ 50 Hz<br />
• 240 V-1 ~ 50 Hz<br />
Le dimensioni esterne dell’imballo sono: 641 x 467 x 293 mm.<br />
Peso<br />
(Kg)<br />
5<br />
italiano
italiano<br />
3.3 Disegno complessivo<br />
6<br />
9<br />
11<br />
12<br />
14<br />
13<br />
15<br />
16<br />
LEGENDA<br />
1 CARROZZERIA IN ALLUMINIO<br />
2 ZOCCOLO PER CARROZZERIA<br />
3 INTERRUTTORE GENERALE<br />
4 TRAMOGGIA<br />
5 COPERCHIO TRAMOGGIA<br />
6 SERRANDA PER TRAMOGGIA<br />
7 GRIGLIA DI PROTEZIONE MACINE<br />
8 VITE SPECIALE DI BLOCCO TRAMOGGIA<br />
9 PULSANTE DI SBLOCCO GHIERA<br />
10 GHIERA DI REGOLAZIONE MACINATURA<br />
11 TASTIERA TOUCH<br />
12 CARTER SUPPORTO TASTIERA<br />
13 MICRO AVVIO MACINATURA<br />
14 PRESSINO<br />
15 FORCELLA PER COPPA PORTA FILTRO<br />
16 VASCHETTA RACCOGLI CAFFÈ<br />
17 PIEDINO IN GOMMA<br />
6<br />
5<br />
4<br />
7<br />
10<br />
8<br />
1<br />
3<br />
2<br />
17
4. installazione<br />
4.1 Avvertenze<br />
L'installazione deve essere eseguita dal personale tecnico qualificato e autorizzato <strong>La</strong><br />
<strong>San</strong> <strong>Marco</strong> S.p.A.<br />
Il <strong>macinadosatore</strong> è consegnato ai clienti in un apposito imballo di cartone e polistirolo.<br />
L'imballo contiene: il <strong>macinadosatore</strong>, i suoi accessori, il manuale d'uso e la dichiarazione<br />
di conformità. Dopo aver aperto l'imballo, assicurarsi dell'integrità del <strong>macinadosatore</strong><br />
e dei suoi componenti; in caso di dubbio non utilizzare l'apparecchio e rivolgersi a<br />
personale qualificato e autorizzato dei centri d'assistenza tecnica <strong>La</strong> <strong>San</strong> <strong>Marco</strong> S.p.A..<br />
L'imballo deve essere <strong>sm</strong>altito presso gli appositi centri di raccolta dei rifiuti, secondo le<br />
leggi vigenti nel paese d'installazione. Non disperdere nell'ambiente. Gli elementi dell'imballo (cartone, polistirolo,<br />
punti metallici, ecc.) possono causare una fonte di pericolo. Non lasciarli alla portata dei bambini.<br />
Il <strong>macinadosatore</strong> deve essere posto su un piano perfettamente orizzontale, sufficientemente robusto per<br />
sostenerlo, stabile e asciutto.<br />
4.2 Collegamento elettrico<br />
Disposizioni per un corretto collegamento elettrico del <strong>macinadosatore</strong>:<br />
• Prima di allacciare l'apparecchio alle rete elettrica, assicurarsi che i dati di targa del <strong>macinadosatore</strong> corrispondano<br />
con quelli dell'impianto di distribuzione elettrica; la targa è situata sotto il piattino raccogli fondi.<br />
• L'allacciamento deve essere eseguito conformemente alle disposizioni del paese d'installazione.<br />
• L'impianto elettrico predisposto dal cliente deve rispettare le norme vigenti; la presa di corrente deve<br />
essere dotata di un efficace impianto di messa a terra. <strong>La</strong> <strong>San</strong> <strong>Marco</strong> S.p.A. declina ogni responsabilità<br />
qualora le prescrizioni di legge non vengano rispettate. Un errata installazione può causare danni a persone<br />
o cose per le quali il costruttore non può essere considerato responsabile.<br />
• Nel caso si rendesse necessario l'uso di adattatori, prese multiple e prolunghe, è necessario utilizzare<br />
solamente prodotti conformi alle norme di sicurezza vigenti nel paese di installazione.<br />
• Per evitare eventuali surriscaldamenti del cavo d'alimentazione si raccomanda di svolgerlo per tutta la<br />
sua lunghezza.<br />
• I macinadosatori monofase sono equipaggiati con un cavo d'alimentazione a tre conduttori munito di<br />
spina per il collegamento elettrico alla presa di rete.<br />
• Per il collegamento elettrico dei modelli trifase è necessario installare un interruttore generale onnipolare<br />
a monte dell'impianto d'alimentazione elettrica, il quale deve essere dimensionato secondo le caratteristiche<br />
elettriche (potenza e tensione) riportate sulla targa dell'apparecchio. L'interruttore onnipolare si<br />
deve disinserire dalla rete con una apertura dei contatti di almeno 3 mm.<br />
• I macinadosatori trifase sono equipaggiati con un cavo d'alimentazione a cinque conduttori; il collegamento<br />
dei modelli trifase deve essere eseguito nel seguente modo: (collegamento a stella per la tensione<br />
400V-3N~ e collegamento a triangolo per i modelli con alimentazione 230V-3~)<br />
Tensione<br />
400V-3N~<br />
230V-3~<br />
Collegamento alla presa<br />
d’alimentazione elettrica<br />
L 3<br />
L 2<br />
L 1<br />
N<br />
GI/VE<br />
L 3<br />
L 2<br />
L 1<br />
N<br />
GI/VE<br />
Collegamento alla centralina elettronica<br />
all’interno dell’apparecchio<br />
1<br />
2<br />
GI BL BI NE VE MA<br />
2<br />
4 6<br />
3 4 5<br />
6<br />
GI BL BI NE VE MA<br />
LEGENDA:<br />
L 3 = marrone<br />
L 2 = nero<br />
L 1 = grigio<br />
N = neutro (blu)<br />
GI/VE = terra<br />
1 = rosso<br />
2 = bianco<br />
3 = blu<br />
4 = nero<br />
5 = grigio<br />
6 = marrone<br />
• Al termine del collegamento elettrico accertarsi che il senso di rotazione del motore sia orario (guardando<br />
l'apparecchio dall'alto); se il senso è antiorario, invertire due fasi d'alimentazione.<br />
• Qualora si esegua una trasformazione da 400V-3N~ a 230V-3~ o viceversa, utilizzare le etichette adesive previste<br />
nel corredo, per aggiornare i dati riportati sull'etichetta incollata all'estremità del cavo d'alimentazione.<br />
1<br />
3<br />
5<br />
7<br />
italiano
italiano<br />
4.3 Regolazione della macinatura<br />
Disposizioni per una corretta regolazione:<br />
• Riempire la tramoggia 4 con il caffè in grani e aprire la serranda 6.<br />
• Macinare una piccola quantità di caffè per erogare uno o più caffè espressi e verificare l’erogazione in<br />
tazzina (l’erogazione “ideale” si ottiene con 6÷8 grammi di caffè macinato per tazzina con un tempo di<br />
25÷35 secondi). Si possono verificare tre casi:<br />
a) L’erogazione del caffè in tazzina è lenta: la granulometria del caffè macinato è troppo fine (deve essere<br />
aumentata). <strong>La</strong> regolazione della granulosità si effettua premendo il pulsante di sblocco 9 e ruotando la<br />
ghiera di regolazione 10 in senso orario.<br />
b) L’erogazione del caffè in tazzina è veloce: la granulosità del caffè macinato è troppo grossa (deve essere<br />
diminuita). <strong>La</strong> regolazione della granulosità si effettua premendo il pulsante di sblocco 9 e ruotando la<br />
ghiera di regolazione 10 in senso antiorario.<br />
c) L’erogazione avviene in maniera corretta.<br />
4.4 Sostituzione delle macine<br />
Quando si sostituiscono le macine è da tenere presente che la ghiera di regolazione deve essere inserita in<br />
modo che la vite di bloccaggio tramoggia (1) non interferisca con il perno di arresto macine (2).<br />
Il metodo corretto per eseguire l’operazione di sostituzione delle macine è il seguente:<br />
1. Svitare completamente la vite di bloccaggio della tramoggia ed estrarre la tramoggia stessa.<br />
2. Svitare i tre grani M5x12 che si trovano sulla ghiera porta macina ed estrarre la ghiera di regolazione.<br />
3. Svitare il porta macina superiore ed estrarlo dalla propria sede.<br />
4. Sostituire le macine e centrare la macina inferiore rispetto ai tre denti raschiatori (la distanza da tali denti<br />
è di 0.9 mm, per centrare la macina si consiglia l’uso di uno spessimetro).<br />
5. Pulire accuratamente le sedi porta macine e la filettatura del porta macina superiore.<br />
6. Avvitare il porta macina superiore fino a portare la macina superiore a sfiorare quella inferiore; tale manovra<br />
va eseguita con il <strong>macinadosatore</strong> in rotazione al fine di intercettare, con esattezza, il punto in cui le<br />
due macine cominciano a venire in contatto.<br />
7. Infine, inserire la ghiera di regolazione facendo attenzione che la vite di bloccaggio della tramoggia si trovi<br />
in anticipo, in senso antiorario, rispetto al perno di arresto macine, così come rappresentato in figura 1.<br />
In fig.2 è mostrato, invece, un errato inserimento della ghiera di regolazione: la vite di bloccaggio tramoggia<br />
(1) si trova dopo il perno di arresto macine (2). E’ di fondamentale importanza far notare che in questo<br />
caso la vite di bloccaggio tramoggia non consentirà lo scavalcamento del perno di arresto macine in fase<br />
di apertura delle macine stesse per cui, trovandosi le macine già a contatto, risulterà impossibile raggiungere<br />
la giusta granulometria del macinato ed il caffè non scenderà dal beccuccio o scenderà a gocce.<br />
1 2<br />
2 1<br />
Fig. 1 - Montaggio corretto. Fig. 2 - Montaggio errato<br />
5. istruzioni per il funzionamento<br />
5.1 Dosi erogabili<br />
5.a dose singola (icona di una tazzina di caffè),<br />
5.b dose doppia (icona di due tazzine di caffè)<br />
5.c dose continua (icona ∞).<br />
8
5.2 Stand by<br />
Led tasto dose attivo illuminato con elevata intensità (il significato di tasto attivo sarà più chiaro nel seguito<br />
del testo). L’altro tasto illuminato con luce a bassa intensità.<br />
5.3 Erogazione dosi programmabili<br />
Una volta premuto il tasto dose singola o dose doppia la CPU terrà in memoria questo tasto come unico<br />
tasto attivo per la successiva erogazione per modelli con micro.<br />
modelli senza micro<br />
L’erogazione di caffè macinato avverrà, per i modelli sprovvisti di micro, tramite la tastiera touch.<br />
Premendo un tasto di erogazione (singola o doppia) , inizierà la macinatura e, sul display, inizierà il countdown<br />
della dose selezionata; terminata l’erogazione, sul display, sarà visualizzato il valore 00.0 per 2 secondi.<br />
Premendo la dose continua (simbolo ∞) il <strong>macinadosatore</strong> lavorerà in modalità start/stop (è previsto uno stop<br />
di sicurezza dopo 3 minuti).<br />
modelli muniti di micro<br />
Al momento della preselezione della dose desiderata (singola o doppia),sul display comparirà, in stand by, il<br />
tempo programmato per quella dose; successivamente,se il micro viene attivato, inizierà la macinatura e, sul<br />
display, inizierà il countdown; terminata l’erogazione, sul display, sarà visualizzato il valore 00.0 per 2 secondi.<br />
L’erogazione di caffè macinato quindi avverrà, solo quando verrà azionato il micro 13 tramite la coppa portafiltro.<br />
Passato questo tempo sul display ritornerà l’indicazione del tempo dose relativo al tasto illuminato con elevata<br />
intensità (ovvero quello attivo per la successiva erogazione).<br />
Tramite tastiera è poi possibile by-passare il consenso del micro e lasciare il pieno comando alla pulsantiera<br />
touch.<br />
Ovvero,dando alimentazione al macinino tramite l’interruttore generale, si avranno circa 3-4 secondi di tempo<br />
per premere il tasto in alto a destra (tasto +) per entrare in un menù dove sarà possibile, tramite il tasto +,<br />
cambiare la modalità di funzionamento : micro SI (M s) o micro NO (M n).<br />
Se in questa fase si preme il tasto ∞ (∞ è il simbolo del continuo) per 5 secondi, sul display apparirà la scritta<br />
“i s” (infinito si) o “i n” (infinito no). Per passare da “i s” a “i n” e viceversa sarà sufficiente premere il tasto<br />
+. Ripremendo per 5 secondi il tasto continuo il display visualizzerà di nuovo l’opzione micro Si micro No.<br />
Il tasto in alto a sinistra (tasto -) servirà per uscire da codesta modalità, sempre che non si sia già usciti per<br />
raggiungimento del time out ( 30 secondi).<br />
5.4 Erogazione continua<br />
Il tasto di erogazione continua (∞) farà partire la macinatura senza la necessità di azionare il micro.<br />
Per sicurezza tra il momento del tocco del tasto continuo e l’avvio dell’erogazione vi sarà un time delay di 1<br />
secondo; ciò eviterà le partenze involontarie. Per bloccare l’erogazione continua sarà sufficiente sfiorare il<br />
tasto medesimo (∞). Durante l’erogazione continua sul display è presente la scritta inF.<br />
9<br />
italiano
italiano<br />
5.5 Programmazione:<br />
DOSI<br />
a. Spostare da OFF a ON la posizione dell’interruttore 3 del <strong>macinadosatore</strong>.<br />
b. Entro 5 secondi, dall’accensione dei led sulla tastiera touch, premendo per 5 secondi il tasto della dose<br />
che si vuole programmare,dose singola oppure dose doppia,il relativo tasto lampeggerà lentamente,<br />
assieme alle cifre del display.<br />
c. Rilasciare il tasto e, attraverso i tasti di regolazione (+/-), situati a fianco del display, aumentare o diminuire<br />
il tempo di macinatura, sino al raggiungimento del valore desiderato.<br />
d. Una volta inserito il tempo premere nuovamente il tasto,il cui led è ancora lampeggiante, per memorizzare<br />
il tempo così programmato.<br />
e. Memorizzando la dose per un caffè è possibile programmare l’altra dose, indipendentemente dall’altra,<br />
oppure copiarla raddoppiata sul tasto doppia dose o, dimezzata, sul tasto singola dose.<br />
f. Per memorizzare la dose singola e contestualmente copiarla raddoppiata sul tasto doppio sarà sufficiente<br />
confermare la programmazione effettuata sul tasto singolo premendo,invece, il tasto doppio. Per<br />
memorizzare la dose doppia, e contestualmente copiarla dimezzata sul tasto singolo, sarà sufficiente<br />
confermare la programmazione effettuata sul tasto doppio premendo, invece, il tasto singolo.<br />
g. I tre digit permetteranno di programmare il tempo con la precisione del decimo di secondo; quindi due<br />
digit per i secondi ed uno per i decimi.<br />
h. Se dopo l’operazione descritta al punto a, viene premuto uno dei tre tasti (dose singola,doppia o continua),<br />
per 10 secondi, si entrerà in “modalità contatori”.<br />
Sul display verrà mostrato, in modalità scorrimento, il numero di caffè erogati dal particolare tasto: un<br />
trattino sul display separerà due indicazioni successive nello scorrimento delle cifre.<br />
Per azzerare il contatore di un tasto sarà sufficiente premere per 10 secondi il tasto di cui si vuole azzerare<br />
il contatore.<br />
Per uscire dalla modalità contatori sarà sufficiente premere il tasto (-) in alto a sinistra, sempre che non si sia<br />
già usciti per raggiungimento del time out (30 secondi).<br />
5.6 Abilitazione /disabilitazione del cicalino<br />
Un cicalino udibile quando vengono toccati i tasti sulla tastiera touch, al termine di ogni erogazione e all’accensione<br />
del <strong>macinadosatore</strong> può essere programmato operando alla seguente maniera.<br />
Una volta entrati in programmazione con il tasto (+) occorrerà premere il tasto dose singola per 3 secondi.<br />
Un bip lungo segnalerà la scelta di cicalino off, 2 bip brevi segnaleranno all’utente l’attivazione della modalità<br />
cicalino on.<br />
5.7 Allarme consumo eccessivo delle macine<br />
(opzione abilitabile solo tramite palmare,dispositivo non a corredo del <strong>macinadosatore</strong>)<br />
<strong>La</strong> programmazione, tramite palmare, avviene inserendo un tempo di lavoro, in ore, del motore. Una volta<br />
raggiunto il numero di ore di lavoro del motore, sul display comparirà la scritta GRN, per dieci secondi alla fine<br />
di ogni erogazione. Memorizzando il numero 000, sempre tramite palmare, l’allarme risulterà disabilitato.<br />
6. consigli pratici per l’operatore<br />
• Conservare il caffè in grani all’interno di contenitori ermetici in ambiente secco e a temperatura ambiente.<br />
• Verificare periodicamente la granulometria del caffè macinato e la sua dosatura, tenendo presente che le<br />
condizioni atmosferiche (umidità ambientale) influiscono notevolmente sulla preparazione del caffè<br />
espresso. Aumentare la granulosità del macinato quando aumenta l’umidità ambientale e diminuirla quando<br />
l’umidità cala.<br />
• Far verificare periodicamente dal personale tecnico autorizzato lo stato di usura delle macine, tenendo<br />
presente che le macine piane possono trattare non più di 300÷600 kg di caffè prima di essere sostituite,<br />
mentre quelle coniche non più di 600÷1200 kg.; è bene ricordare che la sostituzione deve riguardare<br />
entrambe le macine, ovvero quella fissa e quella mobile, in quanto una sostituzione parziale comporterebbe<br />
un sicuro mal funzionamento del <strong>macinadosatore</strong>. <strong>La</strong> sostituzione deve essere effettuata dal personale<br />
autorizzato dell’assistenza tecnica.<br />
• Pulire periodicamente la tramoggia.<br />
• In caso di sosta prolungata (ferie, lavoro stagionale, ecc.) svuotare completamente la tramoggia e pulirla<br />
accuratamente.<br />
10
7. informazione agli utenti<br />
Ai sensi dell’art. 13 del Decreto legislativo 25 luglio 2005, n. 151 ”Attuazione delle Direttive 2002/95/CE,<br />
2002/96/CE e 2003/108/CE, relative alla riduzione dell’uso di sostanze pericolose nelle apparecchiature<br />
elettriche ed elettroniche, nonché allo <strong>sm</strong>altimento dei rifiuti”<br />
• Il simbolo del cassonetto barrato riportato sull’apparecchiatura o sulla sua confezione<br />
indica che il prodotto alla fine della propria vita utile deve essere raccolto separatamente<br />
dagli altri rifiuti.<br />
• <strong>La</strong> raccolta differenziata della presente apparecchiatura giunta a fine vita è organizzata<br />
e gestita dal produttore. L’utente che vorrà disfarsi della presente apparecchiatura<br />
dovrà quindi contattare il produttore e seguire il sistema che questo ha adottato per<br />
consentire la raccolta separata dell’apparecchiatura giunta a fine vita.<br />
• L’adeguata raccolta differenziata per l’avvio successivo dell’apparecchiatura di<strong>sm</strong>essa al<br />
riciclaggio, al trattamento e allo <strong>sm</strong>altimento ambientalmente compatibile contribuisce ad evitare possibili<br />
effetti negativi sull’ambiente e sulla salute e favorisce il reimpiego e/o riciclo dei materiali di cui è composta<br />
l’apparecchiatura.<br />
• Lo <strong>sm</strong>altimento abusivo del prodotto da parte del detentore comporta l’applicazione delle sanzioni<br />
amministrative previste dalla normativa vigente.<br />
8. Garanzia<br />
<strong>La</strong> garanzia decade se:<br />
• Non si rispettano le istruzioni del presente manuale.<br />
• Le operazioni di manutenzione ordinaria e straordinaria e riparazione sono eseguite da personale<br />
non autorizzato.<br />
• Si utilizza l'apparecchio in modo diverso da quello previsto dal manuale d'uso.<br />
• I componenti originali sono stati sostituiti con parti di diversa fabbricazione.<br />
• <strong>La</strong> garanzia non si applica a danni provocati da incuria, uso ed installazione errati e non conformi a quanto<br />
prescritto dal presente manuale, cattivo uso, maltrattamento, fulmini e fenomeni atmosferici, sovratensioni<br />
e sovracorrenti, insufficiente o irregolare alimentazione elettrica.<br />
9. dichiarazione di conformità<br />
<strong>La</strong> società costruttrice:<br />
la san marco s.p.a.<br />
34072 Gradisca d’Isonzo (GO) Italia – Via Padre e Figlio Venuti, 10<br />
telefono (+39) 0481 967111 – fax (+39) 0481 960166 – http://www.lasanmarco.com<br />
dichiara sotto la propria responsabilità che il <strong>macinadosatore</strong> descritto in questo manuale ed identificato dai<br />
dati di targa posti sull’apparecchio è conforme alle direttive: 2006/42/CE, 2006/95/CE, 2004/108/CE,<br />
Regolamento (CE) n° 1935/2004. Per la verifica della conformità alle suddette direttive sono state applicate<br />
le norme armonizzate: EN ISO 12100, EN 60335-1, EN 60335-2-64<br />
PERSONA AUTORIZZATA A<br />
COSTITUIRE IL FASCICOLO TECNICO<br />
Ing. Roberto Marri<br />
Via Padre e Figlio Venuti,10<br />
34072 Gradisca d’Isonzo - ITALIA<br />
Gradisca d’Isonzo, Marzo 2011<br />
Ing. Roberto Marri<br />
Amministratore delegato<br />
11<br />
italiano
italiano<br />
10. Problemi e soluzioni<br />
Prima di richiedere l'intervento dell'assistenza tecnica eseguire i controlli sotto elencati:<br />
12<br />
difetto causa soluZione<br />
1) Il caffè scende velocemente<br />
dal beccuccio d'erogazione;<br />
la crema del caffè in tazzina è<br />
chiara.<br />
2) Il caffè scende lentamente (a<br />
gocce) dal beccuccio; la crema<br />
del caffè in tazzina è scura.<br />
3) Presenza di fondi di caffè nella<br />
tazzina.<br />
a) macinatura troppo grossa.<br />
b) dose scarsa.<br />
c) pressatura debole.<br />
a) macinatura troppo fine.<br />
b) dose elevata.<br />
c) pressatura forte.<br />
a) macinatura troppo fine.<br />
b) macine consumate.<br />
a) diminuire la granulometria.<br />
b) aumentare la dose.<br />
c) aumentare la pressatura.<br />
a) aumentare la granulometria.<br />
b) diminuire la dose.<br />
c) ridurre la pressatura.<br />
a) aumentare la granulometria.<br />
b) sostituire le macine.<br />
Se non è possibile risolvere il problema nei modi sopradescritti, oppure si è verificato qualche altro difetto,<br />
rivolgersi al centro di assistenza tecnica autorizzato <strong>La</strong> <strong>San</strong> <strong>Marco</strong> S.p.A.<br />
<strong>La</strong> <strong>San</strong> <strong>Marco</strong> S.p.A. si riserva di applicare modifiche tecniche alle<br />
attrezzature, qualora lo ritenesse necessario, senza preavviso.
Grinder-disPenser <strong>sm</strong> <strong>92</strong> <strong>instant</strong><br />
<strong>sm</strong> <strong>97</strong> <strong>instant</strong>- <strong>sm</strong> tK <strong>instant</strong><br />
Translation of the original instructions<br />
enGlish
enGlish<br />
General Notes<br />
1. General notes ....................................pag. 15<br />
1.1 The espresso coffee ............................................. pag. 15<br />
1.2 Storing the coffee beans. . . . . . . . . . . . . . . . . . . . . . . . . . . . . . . . . . . . . . . . . . pag. 15<br />
1.3 The grinder-dispenser and the grinding process ....................... pag. 15<br />
1.4 The espresso coffee machine ...................................... pag. 15<br />
1.5 Climatic conditions - operator . . . . . . . . . . . . . . . . . . . . . . . . . . . . . . . . . . . . . pag. 15<br />
2. Introduction . . . . . . . . . . . . . . . . . . . . . . . . . . . . . . . . . . . . . pag. 16<br />
2.1 Using the manual . . . . . . . . . . . . . . . . . . . . . . . . . . . . . . . . . . . . . . . . . . . . . . . pag. 16<br />
2.2 Warnings ...................................................... pag. 16<br />
3. Technical characteristics . . . . . . . . . . . . . . . . . . . . . . . . . . . pag. 17<br />
3.1 General characteristics of the different models . . . . . . . . . . . . . . . . . . . . . . . . pag. 17<br />
3.2 Technical characteristics .......................................... pag. 17<br />
3.3 Machine assembly . . . . . . . . . . . . . . . . . . . . . . . . . . . . . . . . . . . . . . . . . . . . . . pag. 18<br />
4. Installation . . . . . . . . . . . . . . . . . . . . . . . . . . . . . . . . . . . . . . pag. 19<br />
4.1 Warnings ...................................................... pag. 19<br />
4.2 Electrical connection ............................................. pag. 19<br />
4.3 Grinding Adjustment ............................................. pag. 20<br />
4.4 Changing the coffee grinders ...................................... pag. 20<br />
5. Operating instructions . . . . . . . . . . . . . . . . . . . . . . . . . . . . . pag. 20<br />
5.1 Dispensable doses . . . . . . . . . . . . . . . . . . . . . . . . . . . . . . . . . . . . . . . . . . . . . . pag. 20<br />
5.2 Stand by . . . . . . . . . . . . . . . . . . . . . . . . . . . . . . . . . . . . . . . . . . . . . . . . . . . . . . pag. 21<br />
5.3 Dispensing programmable doses ................................... pag. 21<br />
5.4 Continuous dispensing ........................................... pag. 21<br />
5.5 Programming: doses ............................................. pag. 22<br />
5.6 Enabling/disabling the buzzer ...................................... pag. 22<br />
5.7 Excessive grinder consumption alarm . . . . . . . . . . . . . . . . . . . . . . . . . . . . . . . pag. 22<br />
6. Advice for users ..................................pag. 22<br />
7. Information for users in the European community . . . . . . . pag. 23<br />
8. Warranty ........................................pag. 23<br />
9. Declaration of conformity ..........................pag. 23<br />
10. Problem solving ..................................pag. 24<br />
MANUALE CODICE 7770.051<br />
Rev. 03.11<br />
14
1. General notes<br />
• The first part of this user's manual briefly explains the method of making espresso coffee, the modern<br />
equipment used and the function of the grinder-dispenser in this delicate process.<br />
1.1 The espresso coffee<br />
Espresso is a coffee prepared with a particular brewing process, which makes it possible to make a very<br />
concentrated, syrupy beverage of intense taste and aroma. The method of preparation of espresso consists<br />
of extracting the substances contained in ground coffee by passing through it a flow of hot water under pressure<br />
(about 9 bar) for 25 to 35 seconds. In this manner, the soluble substances (sugars and proteins) and the<br />
insoluble materials (fats and colloids) in the coffee are "drawn out" into the cup, forming the characteristic<br />
cream of real espresso. The preparation of espresso is a very delicate process; various factors affect the<br />
success of this operation: the preservation of the coffee beans, the grinder-dispenser and the grinding process,<br />
the preservation of the ground coffee, the espresso coffee machine itself, the changeable weather conditions,<br />
and the care and attention of the operator in making the espresso coffee.<br />
1.2 Storing the coffee beans<br />
There are two varieties of coffee found in nature: the "arabica" variety and the "robusta" strain. Normally, the<br />
roasted coffee used to make espresso contains a mixture of the two varieties, suitably blended in varying<br />
percentages, taking into account the organoleptic characteristics of the individual components. The blend of<br />
roasted coffee must be kept hermetically sealed inside its package. The roasted coffee beans contain within<br />
them all the principles and characteristic aromas of the variety or the blend; these aromas fade rapidly when<br />
the coffee beans come into contact with air, light and humidity.<br />
1.3 The grinder-dispenser and the grinding process<br />
The grinder-dispenser is a device designed to grind and dispense the coffee. To make a good espresso, the<br />
coffee should be ground to particle sizes ranging from about 1 mm to a powder finer than 150 µm. Powdered<br />
coffee offers a greater contact surface to water, allowing a greater extraction of soluble and insoluble substances.<br />
By varying the particle sizes of ground coffee, it is thus possible to modify the resistance offered<br />
against the passage of water. If the ground coffee is made up of excessively coarse particles, the serving<br />
time is too short, the water does not manage to extract all the qualities of the ground coffee, and the resulting<br />
espresso is light in colour, thin, bland and lacking the characteristic coffee aroma. When the ground coffee<br />
is too fine, the espresso brewed is dark, burnt and cold; the serving time is too long and the water passage<br />
is too sluggish since the fine powder offers an excessive resistance to the water flow. The resulting<br />
espresso is too strong.<br />
1.4 The espresso coffee machine<br />
The espresso machine is a device that consists essentially of a boiler and a series of heat exchangers, in which<br />
water is heated by an electric heating element or a gas burner. Water heated to a high temperature is made to flow<br />
through the ground coffee placed in the filter cup and extracts its aromas. When this manual talks about espresso<br />
coffee machines, this refers to all continuous serving models with hydraulic unit, and to the manual piston type<br />
(known as lever operated). <strong>La</strong> <strong>San</strong> <strong>Marco</strong> S.p.A. grinder-dispensers are professional devices designed and built to<br />
be used with this type of espresso coffee machine.<br />
1.5 Climatic conditions - Operator<br />
As already mentioned, to make a good espresso it is essential that the coffee be ground to a proper particle<br />
size. Ground coffee is very hygroscopic; in other words, it "senses" the moisture in the air and grinding should<br />
therefore be modified to suit varying climatic conditions; a ground coffee with a high moisture content increases<br />
the resistance to the passage of water. Other important factors in the making of espresso are the quantity<br />
and compactness of the ground coffee inside the filter cup. These factors (moisture, quantity and coarseness<br />
of the ground coffee, compactness) must be considered and weighed by the operator making the espresso.<br />
For these reasons, the operator has a very important role in the espresso coffee-making process.<br />
15<br />
enGlish
enGlish<br />
2. introduction<br />
2.1 Using the manual<br />
2.2 Warnings<br />
16<br />
• This manual provides all the necessary information for the installation, start-up, use<br />
and maintenance of the grinder-dispenser.<br />
• The persons in charge of normal use and maintenance and the technical personnel<br />
authorized to carry out extraordinary maintenance and repairs are expected to<br />
have read and adopted the contents of this manual.<br />
• This manual is an integral part of the machine. It should be kept for the life of the<br />
machine and transferred to any other user or subsequent owner.<br />
• The manual or a copy of the same should always be kept near the machine where the<br />
operator can readily look it up; it should be kept with care, in a place away from heat,<br />
moisture, dust and corrosive agents.<br />
• The <strong>La</strong> <strong>San</strong> <strong>Marco</strong> S.p.A. grinder-dispenser must be used in the manners described<br />
in this manual; all other improper or inappropriate uses of this device void the warranty<br />
conditions and the liability of the manufacturer.<br />
• The grinder-dispenser is designed and built for metering and grinding the coffee<br />
beans in the desired amounts. All other uses outside those specified in this manual<br />
must be considered inappropriate and therefore not authorized. The manufacturer<br />
declines any liability for damage resulting from the improper use of the device.<br />
• The user must be a responsible adult, who is expected to comply with the safety<br />
procedures that apply in the country where the machine is installed, in addition to the<br />
rules of common sense. For a proper and safe use of the machine, the operator must<br />
comply with the rules of accident prevention and with all other requirements of health<br />
and hygiene in the workplace.<br />
• The use of the machine and the routine maintenance and cleaning operations are<br />
reserved exclusively for personnel authorized by the customer and under his own<br />
responsibility.<br />
• The machine must not be operated with the fixed and/or mobile guards removed or<br />
with the safety devices cut off; the safety devices must absolutely not be removed or<br />
tampered with.<br />
• While the grinder-dispenser is in operation, do not introduce any objects (screwdrivers,<br />
spoons, etc.) into the hopper or the dispenser.<br />
• Before carrying out any routine maintenance or cleaning of the machine, switch off<br />
the machine and pull out the plug from the power socket, if possible, or disconnect<br />
the omnipolar switch upstream of the machine.<br />
• Avoid using products such as alcohol, petroleum products or solvents in general to<br />
clean the machine; use water or neutral solvents.<br />
• A moist cloth or sponge is sufficient to clean the machine housing; never use jets of<br />
water. Use a brush to clean the internal parts of the dispenser, the grinding unit and<br />
the hopper.<br />
• Any extraordinary maintenance or repairs must be carried out exclusively by specialized<br />
personnel at <strong>La</strong> <strong>San</strong> <strong>Marco</strong> S.p.A. service centres.<br />
• If the power cord is damaged, it must be replaced by the manufacturer, the manufacturer’s<br />
service centre or a similarly qualified organization.<br />
• In case of malfunctions or breakdown of any grinder-dispenser components contact<br />
the authorised service centre and request the use of original <strong>La</strong> <strong>San</strong> <strong>Marco</strong> S.p.A.<br />
spare parts. The use of any but original spare parts voids the conformity and the warranty<br />
certificates provided with the machine.<br />
• The user must not carry out any unauthorized operations or any work without understanding<br />
the exact procedures; contact the manufacturer for any information, spare<br />
parts or accessories.<br />
• It is strictly prohibit to carry out operations for which you are not properly authorised<br />
or if the exact methods were not understood; contact the manufacturer for all necessary<br />
information, spare parts or accessories.<br />
• If the machine is to be discarded or disposed of, contact the supplier or the public utilities<br />
in charge of municipal waste disposal. Do not discard the machine in the environment!
3. technical characteristics<br />
3.1 General characteristics of the different models<br />
The <strong>La</strong> <strong>San</strong> <strong>Marco</strong> grinders-dispensers are professional equipment designed for grinding and metering coffee<br />
beans. <strong>La</strong> <strong>San</strong> <strong>Marco</strong> S.p.A. produces three grinder-dispenser models: SM <strong>92</strong> INSTANT;SM <strong>97</strong> INSTANT;<br />
Conical (TK INSTANT). They are essentially made up of:<br />
• A painted aluminium housing 1. The size, shape and volume are identical for all models, except “SM TK<br />
INSTANT” model , in which the standard housing is provided with a base 2 that contains the electrical and<br />
electronic components.<br />
• A hopper 4, made of transparent plastic material, positioned on top of the grinder-dispenser.The hopper<br />
(4.6 litre) is fixed to the grinder-dispenser by a special screw 8; the hopper can only be removed with the<br />
help of an appropriate tool. Inside the hopper there is a safety grid 7 that prevents the upper limbs from<br />
accidentally coming into contact with the grinders.<br />
• An electric motor on which the grinding unit is connected. On the grinder-dispenser unit, model SM MK,<br />
an epicycloid reduction is connected between the motor and the grinding unit.<br />
• A grinding unit. Model SM <strong>92</strong> INSTANT and model SM <strong>97</strong> INSTANT are equipped with a grinding unit with<br />
flat grinders of 64 mm and 84 mm diameter, respectively. Model SM TK INSTANT has a grinding unit with<br />
conical grinders.<br />
• A grind adjustment ring 10 with a release button 9. The top of the ring shows the grinding adjustments<br />
possible. The ring is turned clockwise or counterclockwise to change the fineness of the ground coffee.<br />
• A fork 15 that supports the filter cup, with a grinder start micro 13 (upon request).<br />
• An electronic control unit that controls the coffee grinder start and stop. The grinding time can be adjusted<br />
by programming the electronic control unit, using the TOUCH panel.<br />
• An on/off main switch 3 with green LED.<br />
• A touch keypad 11 used both to start grinding as well as to program the grinder-dispenser.<br />
• A touch keypad support casing 12.<br />
3.2 Technical characteristics<br />
model<br />
<strong>sm</strong> <strong>92</strong><br />
<strong>instant</strong><br />
<strong>sm</strong> <strong>92</strong><br />
<strong>instant</strong><br />
micro<br />
<strong>sm</strong> <strong>97</strong><br />
<strong>instant</strong><br />
<strong>sm</strong> <strong>97</strong><br />
<strong>instant</strong><br />
micro<br />
<strong>sm</strong> tK<br />
<strong>instant</strong><br />
<strong>sm</strong> tK<br />
<strong>instant</strong><br />
micro<br />
motor<br />
sPeed<br />
(rpm)<br />
motor<br />
inPut<br />
(W)<br />
PoWer<br />
inPut<br />
(W)<br />
tyPe of<br />
Grinder s<br />
GrindinG<br />
caPacity<br />
(kg/h)<br />
Grinder<br />
siZe<br />
Ø (mm)<br />
Grinders<br />
sPeed<br />
(rpm)<br />
noise<br />
level<br />
db(a)<br />
WeiGht<br />
(Kg)<br />
1350 220 350 FLAT 8,5 64 1350 72 13,8<br />
1350 220 350 FLAT 8,5 64 1350 72 13,8<br />
880 245 460 FLAT 13 84 880 69 13,8<br />
880 245 460 FLAT 13 84 880 69 13,8<br />
1350 373 650 CONICAL 18 / 400 68 17<br />
1350 373 650 CONICAL 18 / 400 68 17<br />
The <strong>La</strong> <strong>San</strong> <strong>Marco</strong> S.p.A. grinder-dispensers are prearranged for the following voltages:<br />
• 110 V-1~ 60 Hz (available only for SM <strong>92</strong> INSTANT / SM <strong>97</strong> INSTANT models)<br />
• 230 V-1~ 50 Hz<br />
• 230 / 400 V-3N~ 50 Hz<br />
• 240 V-1 ~ 50 Hz<br />
The external dimensions of the pack are: 641 x 467 x 293 mm.<br />
17<br />
enGlish
enGlish<br />
3.3 Machine assembly<br />
6<br />
9<br />
11<br />
12<br />
14<br />
13<br />
15<br />
16<br />
LEGEND<br />
1 ALUMINIUM HOUSING<br />
2 BASE FOR GRINDER HOUSING<br />
3 MAIN SWITCH<br />
4 HOPPER<br />
5 GROUND-COFFEE HOPPER LID<br />
6 HOPPER GATE<br />
7 GRINDER SAFETY GRID<br />
8 SPECIAL HOPPER LOCKING SCREW<br />
9 GRIND ADJUSTMENT RING RELEASE BUTTON<br />
10 GRIND ADJUSTMENT RING<br />
11 TOUCH KEYPAD<br />
12 KEYPAD SUPPORT CASING<br />
13 GRINDER START MICRO<br />
14 PRESS<br />
15 FORK FOR FILTER CUP<br />
16 COFFEE COLLECTING TRAY<br />
17 RUBBER FOOT<br />
18<br />
5<br />
4<br />
7<br />
10<br />
8<br />
1<br />
3<br />
2<br />
17
4. installation<br />
4.1 Warnings<br />
The machine must be installed by qualified technical personnel authorized by <strong>La</strong> <strong>San</strong><br />
<strong>Marco</strong> S.p.A.<br />
The grinder-dispenser is delivered to the customers in a suitable cardboard and styrofoam<br />
package. The package contains the grinder-dispenser, its accessories, the user manual<br />
and the compliance declaration. After having opened the package, check the integrity of<br />
the grinder-dispenser and its components; in case of doubt, do not use the appliance and<br />
contact the qualified personnel of the <strong>La</strong> <strong>San</strong> <strong>Marco</strong> S.p.A. service centres. The package<br />
should be disposed of through the proper waste collection centres, in compliance with the<br />
laws of the country where it is installed. Do not discard it in the environment. The packing<br />
elements (carton, styrofoam, metal staples, etc.) can be hazardous. Keep away from children!<br />
Place the grinder-dispenser on a perfectly horizontal surface that is sufficiently sturdy to support it, stable<br />
and dry.<br />
4.2 Electrical connection<br />
Instructions for a proper electrical connection of the grinder-dispenser:<br />
• Before connecting the appliance to the power supply, make sure that the tag data of the grinder-dispenser<br />
are the same as the network power supply; the rating tag is located under the grounds collecting tray.<br />
• The connection must be made in accordance with the provisions of the country where the machine is<br />
in-stalled.<br />
• The electrical system prearranged by the customer must be in compliance with applicable standards. The<br />
power socket must be provided with a suitable ground conductor. <strong>La</strong> <strong>San</strong> <strong>Marco</strong> S.p.A. declines any<br />
liability if the prescriptions of the law are not complied with. An improper installation can cause damage<br />
or personal in-jury, for which the manufacturer cannot be considered liable.<br />
• If it is necessary to use adapters, multiple sockets and extensions, use only products in compliance with<br />
the safety standards in force.<br />
• Unwind the power cable completely to avoid overheating it.<br />
• The single-phase grinder-dispensers are provided with a three-conductor power cable and a plug for<br />
connec-tion to the power socket.<br />
• For the electrical connection of the three-phase models, install an omnipolar main switch upstream of the<br />
power supply; the main switch must have the same electrical characteristics (power and voltage) as<br />
shown on the machine rating tag. The main switch must be able to break the power supply with a contact<br />
gap of at least 3 mm.<br />
• The three-phase grinder-dispensers are equipped with a five-conductor power cable. The connection of<br />
the three-phase models must be carried out as follows: (star connection for the models with 400V-3N~<br />
power supply and delta connection for the models with 230V-3~ power supply).<br />
Voltage<br />
400V-3N~<br />
230V-3~<br />
L 3<br />
L 2<br />
L 1<br />
N<br />
GI/VE<br />
L 3<br />
L 2<br />
L 1<br />
N<br />
GI/VE<br />
Connection to<br />
the power socket<br />
Connection to the electronic control unit<br />
inside the machine<br />
1<br />
2<br />
GI BL BI NE VE MA<br />
2<br />
4 6<br />
3 4 5 6<br />
GI BL BI NE VE MA<br />
LEGEND:<br />
L 3 = brown<br />
L 2 = black<br />
L 1 = grey<br />
N = neutral (blue)<br />
GI/VE = ground<br />
1 = red<br />
2 = white<br />
3 = blue<br />
4 = black<br />
5 = grey<br />
6 = brown<br />
• At the completion of the electrical connection, check that the motor turns in a clockwise direction (looking<br />
at the appliance from above); if it turns counterclockwise, reverse two power phases.<br />
• If the power is transformed from 400V-3N~ to 230V-3N~ or vice versa, use the adhesive labels provided<br />
with the machine to update the data shown on the label glued at the end of the power cable.<br />
1<br />
3<br />
5<br />
19<br />
enGlish
enGlish<br />
4.3 Grinding Adjustment<br />
Instructions for a proper adjustment:<br />
• Fill the hopper 4 with the coffee beans and open the gate 6.<br />
• Grind a <strong>sm</strong>all amount of coffee to dispense one or more espresso coffees and check the dispensed<br />
amount in the cup (the "ideal" serving is obtained with 6-8 grams of ground coffee per cup with a time of<br />
25 to 35 seconds). There may be three different cases:<br />
a) The coffee brews too slowly: the coffee is ground too fine (it should be coarser). To make a coarser grind,<br />
press the release button 9 and turn the adjustment ring 10 clockwise.<br />
b) The coffee brews too fast: the coffee is ground too coarse (it should be finer). To make a finer grind, press<br />
the release button 9 and turn the adjustment ring 10 counterclockwise.<br />
c) The coffee brews at the proper speed.<br />
4.4 Changing the coffee grinders<br />
When changing the coffee grinders, the adjusting ring nut must be inserted so that the hopper locking screw<br />
(1) does not interfere with the grinders stop pin (2).<br />
The proper grinder change procedure is as follows:<br />
Loosen the hopper locking screw completely and pull out the hopper.<br />
Loosen the three M5x12 grub screws located on the grinder support ring nut and remove the adjusting ring nut.<br />
Unscrew the upper grinder support and remove it from its seat.<br />
Replace the grinders and align the lower grinder with the three scraping teeth (the distance from these teeth<br />
is 0,9 mm; to center the machine we suggest using a thickness gauge).<br />
Clean the grinder seats and the thread of the upper grinder support accurately.<br />
Screw the upper grinder support down to where the upper grinder grazes the lower one; this operation<br />
should be carried out with the coffee grinder-dispenser in rotation in order to determine the exact point at<br />
which the two grinders come into contact with each other.<br />
Finally, insert the adjusting ring nut, making sure that the hopper locking screw is slightly ahead of the<br />
grinder stop pin, in a counterclockwise direction, as shown in figure 1. Figure 2 shows a faulty installation of<br />
the adjusting ring nut: the hopper locking screw (1) is after the grinder stop pin (2).<br />
It is important to remember that in this case the hopper locking screw will not allow the grinder stop pin to<br />
be passed in the grinder opening phase, which, since the grinders are already in contact with each other,<br />
would make it impossible to grind the coffee to the proper degree of fineness, and the brewed coffee would<br />
not flow out of the spout or would just drip out.<br />
1 2<br />
2 1<br />
Fig. 1 - Proper installation. Fig. 2 - Faulty installation<br />
5. operating instructions<br />
5.1 Dispensable doses<br />
5.a single dose (icon with one cup of coffee),<br />
5.b double dose (icon with two cups of coffee)<br />
5.c continuous dose (icon ∞).<br />
20
5.2 Stand by<br />
Active dose key LED illuminated with high intensity (the meaning of the active key will become more clear<br />
below). The other key illuminated with low intensity light.<br />
5.3 Dispensing programmable doses<br />
Once the single or double dose key is pressed, the CPU will store this key in its memory as the only active<br />
key for the next serving for models with a micro.<br />
models without a micro<br />
For models without a micro, the ground coffee will be served using the touch keypad.<br />
Pressing a dispensing key (single or double), grinding will start and the display will show the countdown of<br />
the selected dose; once dispensing is completed, the display will show a value of 00.0 for 2 seconds. If the<br />
continuous dose is pressed (symbol ∞) the grinder-dispenser will work in start/stop mode (there is a safety<br />
stop after 3 minutes).<br />
models with a micro<br />
When preselecting the desired dose (single or double) in standby, the display will show the programmed time<br />
for the dose; then if the micro is activated, grinding will start and the countdown will start on the display;<br />
once dispensing is completed, the display will show a value of 00.0 for 2 seconds.<br />
The dispensing of the ground coffee will only start when the micro 13 is activated by the filter cup.<br />
After this time has passed, the display will again show the dose time related to the key illuminated with high<br />
intensity (that is, the one active for subsequent dispensing).<br />
Using the keypad, it is possible to by-pass the consent of the micro and provide full control to the touch<br />
control panel.<br />
If providing power to the grinder using the main switch, there will be 3-4 seconds to press the key to the<br />
upper right (key +) to access a menu where it will be possible, using the + key, to change the operating mode:<br />
micro YES (M s) or micro NO (M n).<br />
If this key ∞ (∞ the continuous symbol) is pressed for 5 seconds during this phase, the display will show “i<br />
s” (infinite yes) or “i n” (infinite no). To switch from “i s” to “i n” and vice versa, simply press the + key.<br />
Repressing the continuous key for 5 seconds, the display will again show the option micro Yes micro NO.<br />
The key to the upper left (- key) is used to exit this mode unless it was already exited due to a time out<br />
(30 seconds).<br />
5.4 continuous dispensing<br />
The continuous dispensing key (∞) starts the grinding without having to activate the micro.<br />
For safety reasons, there will be a time delay of 1 second between touching the continuous key and starting<br />
with the dispensing; this prevents involuntary starts. To stop the dispensing, simply touch the same key (∞).<br />
During continuous dispensing, the display will show inF.<br />
21<br />
enGlish
enGlish<br />
5.5 Programming: doses<br />
a. Switch the position of the grinder-dispenser switch 3 from OFF to ON .<br />
b. Within 5 seconds of the LED lighting up on the touch keypad, pressing the key of the dose to program for 5<br />
seconds, single or double dose, the relative key will flash slowly together with the numbers on the display.<br />
c. Release the key and use the adjustment keys (+/-) located next to the display to increase or decrease the<br />
grinding time until reaching the desired value.<br />
d. Once the time is entered, press the key with the flashing led again to store the programmed time.<br />
e. Storing the dose for one coffee makes it possible to program the other dose, independently of the other,<br />
or copy it doubled to the double dose key or, halved, to the single dose key.<br />
f. To store the single dose and at the same time copy it doubled to the double key, simply confirm the programming<br />
for the single key by instead pressing the double key. To store the double dose and at the same<br />
time copy it halved to the single key, simply confirm the programming for the double key by instead pressing<br />
the single key.<br />
g. The three digits make it possible to program the time with the precision of a tenth of a second; therefore<br />
two digits for seconds and one for the decimals.<br />
h. If one of the three keys (single, double or continuous dose) is pressed after the operation described in<br />
point a, the "counter mode” is accessed.<br />
i. The display will show the number of coffees distributed from that particular key, in scrolling mode. A dash<br />
on the display separates two subsequent indications when scrolling the numbers.<br />
To reset the counter for a key, simply press the key for which you want to reset the counter for 10 seconds.<br />
To exit the counter mode, simply press the (-) key to the upper left, providing that the mode has not been<br />
exited due to a time out (30 seconds).<br />
5.6 Enabling/disabling the buzzer<br />
As described below, it is possible to program a buzzer that is heard when the keys on the touch keypad are<br />
touched, each time dispensing is complete and when the grinder-dispenser is turned on.<br />
Once accessing programming with the (+) key, press the single dose key for 3 seconds.<br />
A long beep will signal the buzzer off selection, 2 brief beeps signal the activation of the buzzer on mode.<br />
5.7 Excessive grinder consumption alarm<br />
(option can only be enabled using a Pda, a device that is not provided with the grinder-dispenser)<br />
Using a PDA, an operating time can be programmed in hours for the motor. Once the number of operating<br />
hours is reached for the motor, GRN will appear on the display for ten seconds each time dispensing is complete.<br />
Storing the number 000, using a PDA, will disenable the alarm.<br />
6. advice for users<br />
• Keep the coffee beans in sealed containers in a dry environment at room temperature.<br />
• Check from time to time the fineness of the ground coffee and the quantities dispensed, bearing in mind<br />
that weather conditions (ambient humidity) have a considerable effect on the preparation of espresso<br />
coffee. Increase the coarseness of the ground coffee when ambient humidity increases and decrease it<br />
when the humidity decreases.<br />
• Have the state of wear of the grinders checked from time to time by authorised technical service personnel,<br />
bearing in mind that the flat grinding wheels cannot grind more than 300÷600 kg of coffee beans<br />
before becoming useless, while the limit for conical ones is 600÷1200 kg.; remember that both grinders<br />
must be replaced, i.e. both the fixed and the moving grinder, since replacement of one would inevitably<br />
cause malfunctioning of the grinder-dispenser. Replacement must be carried out by authorised technical<br />
service personnel.<br />
• Clean the hopper periodically.<br />
• If the machine is not used for a prolonged period of time (vacation, seasonal work, etc.) completely open<br />
the hopper and clean it carefully.<br />
22
7. information for users in the european community<br />
Pursuant to European Directive 2002/96/EC on electrical waste (WEEE), users in the European community<br />
are advised of the following.<br />
The symbol with the crossed-out dustbin on the appliance or its packaging indicates that<br />
at the end of the product’s life cycle, it must be collected separately from other waste.<br />
Suitable separate collection of the equipment for subsequent recycling, treatment and<br />
disposal contributes to preventing possible negative consequences for the environment<br />
and health, and favours the recycling of materials that the unit is made of.<br />
In accordance with European Directive 2002/96/EC, abusive disposal of the product by the user will result in<br />
application of penalties as set forth by local law.<br />
8. Warranty<br />
The warranty becomes void if:<br />
• The instructions in this manual are not complied with.<br />
• The ordinary and extraordinary maintenance and repair operations are carried out by unauthorized personnel.<br />
• The machine is used in manners not provided for in this user manual.<br />
• The original components are replaced with parts from different manufacturers.<br />
• The warranty does not cover damage caused by carelessness, improper use and installation and/or not<br />
in accordance with this manual, rough handling, lightning and weather agents, overvoltage and overcurrents,<br />
insufficient or irregular electrical power supply.<br />
9. declaration of conformity<br />
The manufacturer:<br />
la san marco s.p.a.<br />
34072 Gradisca d’Isonzo (GO) Italy – Via Padre e Figlio Venuti, 10<br />
phone (+39) 0481 967111 – fax (+39) 0481 960166 – http://www.lasanmarco.com<br />
declares under its own responsibility that the grinder-dispenser described in this manual and identified by<br />
the data on the tag located on the machine, is compliant with directives 2006/42/CE, 2006/95/EC, 2004/108/<br />
EC, Regulation (EC) No 1935/2004. For verification of compliance with said directives, the following harmonized<br />
standards have been applied: EN ISO 12100, EN 60335-1, EN 60335-2-64<br />
AUTHORISED PERSON TO<br />
COMPILE THE TECHNICAL FILE<br />
Eng. Roberto Marri<br />
Via Padre e Figlio Venuti,10<br />
34072 Gradisca d’Isonzo - ITALIA<br />
Gradisca d’Isonzo, March 2011<br />
Mr. Roberto Marri<br />
Managing director<br />
23<br />
enGlish
enGlish<br />
10. Problem solving<br />
Before requesting the technical assistance of the service centre, carry out the following checks:<br />
24<br />
Problem cause solution<br />
1) The coffee flows out of the<br />
serving nozzle fast; the cream<br />
of the coffee in the cup is light.<br />
2) The coffee flows out of the<br />
nozzle slowly (drop by drop);<br />
the cream of the coffee in the<br />
cup is dark.<br />
3) Presence of coffee grounds in<br />
the cup.<br />
a) coffee ground too coarse.<br />
b) insufficient batch.<br />
c) weak pressing.<br />
a) coffee ground too fine.<br />
b) batch too large.<br />
c) excessive pressing<br />
a) coffee ground too fine.<br />
b) grinders worn out.<br />
a) grind coffee finer.<br />
b) increase the batch amount.<br />
c) increase the pressing force.<br />
a) grind coffee coarser.<br />
b) decrease the batch amount<br />
c) reduce the pressing force.<br />
a) grind coffee coarser.<br />
b) replace the grinders.<br />
If it is not possible to solve the problem as suggested, or if problems other than those described above occur,<br />
please contact the <strong>La</strong> <strong>San</strong> <strong>Marco</strong> S.p.A. authorized technical service centre.<br />
<strong>La</strong> <strong>San</strong> <strong>Marco</strong> S.p.A. reserves the right to apply technical changes to the equipment<br />
should they become necessary, without advance notice.
moulin doseur <strong>sm</strong> <strong>92</strong> <strong>instant</strong><br />
<strong>sm</strong> <strong>97</strong> <strong>instant</strong> - <strong>sm</strong> tK <strong>instant</strong><br />
Traduction de la version originale du mode d'emploi<br />
français
français<br />
Sommaire<br />
1. Notes de caractère général .........................pag. 27<br />
1.1 Le café express ................................................. pag. 27<br />
1.2 <strong>La</strong> conservation du café en grains .................................. pag. 27<br />
1.3 Le moulin doseur et la mouture . . . . . . . . . . . . . . . . . . . . . . . . . . . . . . . . . . . . pag. 27<br />
1.4 <strong>La</strong> machine pour café express ..................................... pag. 27<br />
1.5 Conditions climatiques - Opérateur . . . . . . . . . . . . . . . . . . . . . . . . . . . . . . . . . pag. 27<br />
2. Introduction . . . . . . . . . . . . . . . . . . . . . . . . . . . . . . . . . . . . . pag. 28<br />
2.1 Consultation du manuel . . . . . . . . . . . . . . . . . . . . . . . . . . . . . . . . . . . . . . . . . . pag. 28<br />
2.2 Avertissements . . . . . . . . . . . . . . . . . . . . . . . . . . . . . . . . . . . . . . . . . . . . . . . . . pag. 28<br />
3. Caractéristiques techniques . . . . . . . . . . . . . . . . . . . . . . . . pag. 29<br />
3.1 Caractéristiques des différents modeles . . . . . . . . . . . . . . . . . . . . . . . . . . . . . pag. 29<br />
3.2 Caractéristiques techniques ....................................... pag. 29<br />
3.3 Vue d’ensemble . . . . . . . . . . . . . . . . . . . . . . . . . . . . . . . . . . . . . . . . . . . . . . . . pag. 30<br />
4. Installation . . . . . . . . . . . . . . . . . . . . . . . . . . . . . . . . . . . . . . pag. 31<br />
4.1 Avertissements . . . . . . . . . . . . . . . . . . . . . . . . . . . . . . . . . . . . . . . . . . . . . . . . . pag. 31<br />
4.2 Connexion électrique . . . . . . . . . . . . . . . . . . . . . . . . . . . . . . . . . . . . . . . . . . . . pag. 31<br />
4.3 Réglage de la mouture . . . . . . . . . . . . . . . . . . . . . . . . . . . . . . . . . . . . . . . . . . . pag. 32<br />
4.4 Remplacement des broyeurs . . . . . . . . . . . . . . . . . . . . . . . . . . . . . . . . . . . . . . pag. 32<br />
5. Instructions pour le fonctionnement . . . . . . . . . . . . . . . . . . pag. 32<br />
5.1 Doses pouvant être produites . . . . . . . . . . . . . . . . . . . . . . . . . . . . . . . . . . . . . pag. 32<br />
5.2 Stand-by ...................................................... pag. 33<br />
5.3 Production de doses programmables . . . . . . . . . . . . . . . . . . . . . . . . . . . . . . . pag. 33<br />
5.4 Production continue . . . . . . . . . . . . . . . . . . . . . . . . . . . . . . . . . . . . . . . . . . . . . pag. 33<br />
5.5 Programmation: doses . . . . . . . . . . . . . . . . . . . . . . . . . . . . . . . . . . . . . . . . . . . pag. 34<br />
5.6 Activation /désactivation du buzzer . . . . . . . . . . . . . . . . . . . . . . . . . . . . . . . . . pag. 34<br />
5.7 Alarme de consommation excessive des broyeurs . . . . . . . . . . . . . . . . . . . . . pag. 34<br />
6. Conseils pratiques pour l'opérateur ..................pag. 34<br />
7. Information pour les usagers de la Communauté Européenne pag. 35<br />
8. Garantie . . . . . . . . . . . . . . . . . . . . . . . . . . . . . . . . . . . . . . . . pag. 35<br />
9. Déclaration de conformité . . . . . . . . . . . . . . . . . . . . . . . . . pag. 35<br />
10. Problèmes et solutions . . . . . . . . . . . . . . . . . . . . . . . . . . . . pag. 36<br />
MANUEL CODE 7770.051<br />
Révision 03.11<br />
26
1. notes de caractère général<br />
• <strong>La</strong> première partie de ce manuel contient de brèves explications sur la méthode de production du café express,<br />
les équipements modernes utilisés et la fonction du moulin doseur à l'intérieur de ce délicat processus.<br />
1.1 Le café express<br />
L'express est un café préparé avec une méthode d'extraction particulière qui permet d'obtenir une boisson très<br />
concentrée, sirupeuse, d'un goût et d'un arôme intenses. <strong>La</strong> méthode de préparation du café express consiste<br />
à extraire les substances contenues dans le café moulu avec un flux d'eau chaude sous pression (environ 9<br />
bars) pendant un temps variable de 25 à 35 secondes; de cette manière, les substances solubles (sucres et<br />
protéines) et insolubles (graisses et colloïdes) contenues dans le café sont "entraînées" dans la tasse en formant<br />
l'écume caractéristique du vrai café express. <strong>La</strong> préparation du café express est une opération très délicate;<br />
différents facteurs peuvent influencer la réussite de cette opération: la conservation du café en grains, le<br />
moulin doseur et la mouture, la conservation du café moulu, la machine pour café express, la variabilité des<br />
conditions climatiques, l'attention et la compétence de l'opérateur chargé de la préparation du café express.<br />
1.2 <strong>La</strong> conservation du café en grains<br />
Il existe deux variétés de café présentes dans la nature: la qualité "arabica" et la qualité "robusta".<br />
Généralement, le café torréfié utilisé pour produire l'express contient un mélange des deux variétés, opportunément<br />
dosées en pourcentages variables qui tiennent compte des caractéristiques organoleptiques de<br />
chaque composant. Le mélange de café torréfié doit être conservé hermétiquement fermé à l'intérieur de son<br />
emballage. Le café en grains, après la torréfaction, contient toutes les substances et les arômes caractéristiques<br />
de la variété ou du mélange; ces arômes se perdent rapidement quand les grains de café entrent au<br />
contact de l'air, de la lumière et de l'humidité.<br />
1.3 Le moulin doseur et la mouture<br />
Le moulin doseur est un appareil servant à moudre le café en grains et à le doser. Pour obtenir un bon<br />
express, il faut des particules de café moulu d'un diamètre variable d'environ 1 mm, jusqu'à une poudre<br />
inférieure à 150 µm. Le café finement moulu offre une plus grande surface de contact avec l'eau en permettant<br />
une extraction plus élevée des substances solubles et insolubles; en variant la granulométrie du café<br />
moulu, on pourra modifier ainsi la résistance offerte au passage de l'eau. Si le café moulu est composé de<br />
particules trop grosses, la sortie du café est trop rapide et l'eau ne parvient pas à extraire complètement les<br />
substances du café moulu et l'on obtient ainsi un express de couleur claire, aqueux, dépourvu du goût et de<br />
l'arôme caractéristique du café. Quand la mouture est trop fine, au contraire, l'express est de couleur foncée,<br />
brûlé et froid; le temps de passage de l'eau est trop long et l'eau filtre avec difficulté dans la mesure où la<br />
mouture offre une résistance trop élevée à son passage. Le café express subit une extraction excessive.<br />
1.4 <strong>La</strong> machine pour café express<br />
<strong>La</strong> machine à café express est un appareil constitué substantiellement d'une chaudière et d'une série<br />
d'échangeurs, dans lequel le chauffage de l'eau est activé par une résistance électrique ou un brûleur à gaz.<br />
L'eau, portée à haute température, traverse le café moulu situé dans le porte-filtre et en extrait les arômes.<br />
Quand dans le présent manuel on parle de machine pour café express, on se réfère aussi bien aux modèles<br />
avec production moyennant pompe qu'aux modèles avec production moyennant piston hydraulique (dite à<br />
levier). Les moulins doseurs produits par <strong>La</strong> <strong>San</strong> <strong>Marco</strong> S.p.A. sont des appareils professionnels conçus et<br />
fabriqués pour être associés à ces types de machine pour café express.<br />
1.5 Conditions climatiques - Opérateur<br />
Pour obtenir un bon café express, comme nous l'avons dit, il est indispensable de moudre le café avec une<br />
certaine granulométrie. Le café moulu est très hygroscopique; il "sent", en d'autres termes, l'humidité<br />
ambiante et par conséquent, la mouture doit être modifiée selon les variations des conditions climatiques ;<br />
un café moulu avec un taux d'humidité élevé augmente la résistance au passage de l'eau. Les autres facteurs<br />
importants pour la préparation du café express sont la quantité et le pressage du café moulu dans le portefiltre.<br />
Ces facteurs (humidité, quantité et granulométrie du café moulu, pressage) doivent être considérés et<br />
évalués par l'opérateur chargé de la préparation de l'express. C'est pourquoi ce dernier a un rôle fondamental<br />
dans le parcours de la préparation du café express.<br />
27<br />
français
français<br />
2. introduction<br />
2.1 Consultation du manuel<br />
2.2 Avertissements<br />
28<br />
• Le personnel préposé à l'utilisation et à l'entretien courant et le personnel technique<br />
préposé aux interventions de maintenance extraordinaire et de réparation doivent<br />
avoir lu attentivement et assimilé le contenu de ce manuel.<br />
• Ce manuel est partie intégrante de l'appareil, il doit être conservé pendant toute la<br />
durée de vie de l'appareil auquel il se réfère et doit être remis à tous les autres utilisateurs<br />
ou propriétaires successifs.<br />
• Le manuel ou une copie doit toujours se trouver près de l'appareil pour toute consultation<br />
de la part de l'opérateur; il doit être conservé avec soin, à l'abri de la chaleur, de l'humidité,<br />
de la poussière et de tout agent corrosif.<br />
• Le moulin doseur <strong>La</strong> <strong>San</strong> <strong>Marco</strong> S.p.A. doit être utilisé selon les modalités décrites par<br />
le présent manuel; toute utilisation impropre ou non conforme de cet appareil fait<br />
perdre le droit à la garantie et libère le constructeur de toute responsabilité.<br />
• Le moulin doseur a été projeté et construit pour moudre le café en grains et doser le<br />
café moulu. Toute utilisation autre que celle qui est précisée dans le présent manuel doit<br />
être considérée comme impropre et donc non autorisé. Le constructeur décline toute<br />
responsabilité pour les dommages dérivant d'une utilisation impropre de l'appareil.<br />
• L'utilisateur doit être une personne adulte et responsable qui doit s'en tenir aux normes<br />
de sécurité en vigueur dans le pays d'installation ainsi qu'aux règles dictées par<br />
le bon sens. Pour une utilisation correcte et sûre de l'appareil, l'opérateur doit observer<br />
les règles de prévention des accidents et toutes les autres conditions requises par<br />
la médecine et l'hygiène du travail.<br />
• L'utilisation de l'appareil et les opérations d'entretien courant et de nettoyage sont réservées<br />
exclusivement au personnel préposé, délégué par le client sous sa responsabilité.<br />
• Il est rigoureusement interdit de faire fonctionner l'appareil avec les protections fixes<br />
et/ou mobiles démontées ou avec les dispositifs de sécurité exclus; il est rigoureusement<br />
interdit d'enlever ou de modifier les dispositifs de sécurité.<br />
• Quand le moulin doseur est en fonction, ne pas introduire dans la trémie ou dans le<br />
doseur des objets tels que des ustensiles ou similaires (tournevis, cuillères, etc.).<br />
• Avant d'effectuer n'importe quelle opération d'entretien courant ou de nettoyage, retirer la<br />
fiche d'alimentation électrique de la prise de courant, si possible, ou bien actionner l'interrupteur<br />
omnipolaire en amont de l'appareil.<br />
• Pour les opérations de nettoyage, éviter l'utilisation de produits tels que l'alcool, l'essence<br />
ou les solvants en général; utiliser de l'eau ou des solvants neutres.<br />
• Pour le nettoyage de la carrosserie, il suffit d'utiliser un chiffon humide ou une éponge; ne<br />
jamais utiliser de jets d'eau. Pour le nettoyage des parties internes du doseur, du groupe de<br />
mouture et de la trémie, utiliser une brosse.<br />
• Les interventions de maintenance extraordinaire et de réparation doivent être effectuées<br />
par le personnel technique spécialisé des centres de service après-vente <strong>La</strong><br />
<strong>San</strong> <strong>Marco</strong> S.p.A.<br />
• Si le câble d’alimentation est endommagé, celui-ci doit être remplacé par le constructeur<br />
ou par son service d’assistance technique ou dans tous les cas par un personnel<br />
avec une qualification analogue.<br />
• En cas de pannes ou de rupture d’un composant quelconque du moulin doseur,<br />
s'adresser au centre de service après-vente agréé et demander l'utilisation de pièces<br />
de rechange originales <strong>La</strong> <strong>San</strong> <strong>Marco</strong> S.p.A.; l'utilisation de pièces de rechange non<br />
originales annule la validité des certifications de conformité et la garantie qui accompagnent<br />
l'appareil.<br />
• Il est strictement interdit d'effectuer des opérations en l'absence des autorisations<br />
nécessaires ou si on n'en a pas compris les modalités exactes; contacter le constructeur<br />
pour toute information, pour les pièces de rechange ou pour les accessoires.<br />
• En cas de mise hors service et de démantèlement de l'appareil, s'adresser au fournisseur<br />
ou aux organi<strong>sm</strong>es municipaux qui s'occupent du ramassage et du recyclage<br />
des ordures. Ne pas abandonner l'appareil dans la nature!
3. caractéristiques techniques<br />
3.1 Caractéristiques des différents modeles<br />
Les moulins doseurs <strong>La</strong> <strong>San</strong> <strong>Marco</strong> sont des appareils professionnels servant à moudre le café en grains et<br />
à doser le café moulu. <strong>La</strong> <strong>San</strong> <strong>Marco</strong> S.p.A. produit trois modèles de moulins doseurs et sont : SM <strong>92</strong><br />
INSTANT ;SM <strong>97</strong> INSTANT ; Conique (TK INSTANT). Ils sont composés essentiellement de:<br />
• Une carrosserie 1 en aluminium laqué. Les dimensions, la forme et le volume sont identiques pour tous<br />
les modèles, sauf pour le modèle “SM TK INSTANT”, où la carrosserie standard est complétée par un<br />
socle 2, qui contient les composants électriques et électroniques.<br />
• Une trémie 4, en matière plastique transparente, positionnée dans la partie supérieure du moulin doseur.<br />
<strong>La</strong> trémie (4,6 litres) est fixée au moulin doseur par une vis spéciale 8; le retrait de la trémie est possible<br />
uniquement à l'aide d'un outil. À l’intérieur de la trémie se trouve une grille de protection 7, qui empêche<br />
d’accéder aux broyeurs avec les mains.<br />
• Un moteur électrique sur lequel est connecté le groupe de broyage. Sur le modèle de moulin doseur conique,<br />
le moteur électrique est connecté d’abord à un réducteur épicycloïdal puis au groupe de broyage.<br />
• Un groupe de broyage. Le modèle SM <strong>92</strong> INSTANT et le modèle SM <strong>97</strong> INSTANT sont équipés d'un<br />
groupe de broyage à broyeurs plats d’un diamètre de 64 mm pour le premier et de 84 mm pour le second.<br />
Le modèle SM TK INSTANT a un groupe de broyage à broyeurs coniques.<br />
• Une bague de réglage de la mouture 10 avec bouton de déblocage 9. Les indications pour le réglage du<br />
broyage se trouvent sur la partie supérieure de la bague. Pour modifier la granulométrie du café moulu, il<br />
faut tourner la bague dans le sens des aiguilles d’une montre ou dans le sens contraire..<br />
• Une fourche 15 de soutien pour le porte-filtre, avec le micro de mise en marche de la mouture 13<br />
(sur demande).<br />
• Une centrale électronique qui contrôle la mise en marche et l'arrêt de la mouture. En programmant la<br />
centrale électronique moyennant le panneau TOUCH, il est possible de régler le temps de mouture.<br />
• Un interrupteur général 3 on/off avec VOYANT vert.<br />
• Un clavier touch 11 utilisé aussi bien pour mettre en marche la mouture que pour la programmation du<br />
moulin doseur.<br />
• Un carter di support du clavier touch 12.<br />
3.2 Caractéristiques techniques<br />
modèle<br />
<strong>sm</strong> <strong>92</strong><br />
<strong>instant</strong><br />
<strong>sm</strong> <strong>92</strong><br />
<strong>instant</strong><br />
micro<br />
<strong>sm</strong> <strong>97</strong><br />
<strong>instant</strong><br />
<strong>sm</strong> <strong>97</strong><br />
<strong>instant</strong><br />
micro<br />
<strong>sm</strong> tK<br />
<strong>instant</strong><br />
<strong>sm</strong> tK<br />
<strong>instant</strong><br />
micro<br />
vitesse<br />
moteur<br />
(tr/mn)<br />
Puissance<br />
moteur<br />
(tr/mn)<br />
Puissance<br />
absorbée<br />
(W)<br />
tyPe de<br />
broyeurs<br />
caPacité de<br />
mouture<br />
(kg/h)<br />
dimension<br />
broyeurs<br />
Ø (mm)<br />
vitesse<br />
broyeurs<br />
(g/min)<br />
Puissance<br />
sonore<br />
db(a)<br />
Poids<br />
(Kg)<br />
1350 220 350 PLATS 8,5 64 1350 72 13,8<br />
1350 220 350 PLATS 8,5 64 1350 72 13,8<br />
880 245 460 PLATS 13 84 880 69 13,8<br />
880 245 460 PLATS 13 84 880 69 13,8<br />
1350 373 650 CONIQUES 18 / 400 68 17<br />
1350 373 650 CONIQUES 18 / 400 68 17<br />
Les modèles de moulins doseurs <strong>La</strong> <strong>San</strong> <strong>Marco</strong> S.p.A. sont prévus pour les tensions suivantes:<br />
• 110 V-1~ 60 Hz (disponible seulement pour les modèles SM <strong>92</strong> INSTANT / SM <strong>97</strong> INSTANT)<br />
• 230 V-1~ 50 Hz<br />
• 230 / 400 V-3N~ 50 Hz<br />
• 240 V-1 ~ 50 Hz<br />
Les dimensions extérieures de l’emballage sont: 641 x 467 x 293 mm.<br />
29<br />
français
français<br />
3.3 Vue d’ensemble<br />
6<br />
9<br />
11<br />
12<br />
14<br />
13<br />
15<br />
16<br />
LEGENDA<br />
1 CARROSSERIE EN ALUMINIUM<br />
2 SOCLE POUR CARROSSERIE<br />
3 INTERRUPTEUR GÉNÉRAL<br />
4 TRÉMIE<br />
5 COUVERCLE TRÉMIE<br />
6 CLAPET TRÉMIE<br />
7 GRILLE DE PROTECTION BROYEURS<br />
8 VIS SPÉCIALE DE BLOCAGE TRÉMIE<br />
9 BOUTON DE DÉBLOCAGE FRETTE<br />
10 FRETTE DE RÉGLAGE MOUTURE<br />
11 CLAVIER TOUCH<br />
12 CARTER SUPPORT CLAVIER<br />
13 MICRO MISE EN MARCHE MOUTURE<br />
14 PRESSE-CAFÉ<br />
15 FOURCHE POUR PORTE-FILTRE<br />
16 BAC COLLECTEUR CAFÉ<br />
17 TAMPON EN CAOUTCHOUC<br />
30<br />
5<br />
4<br />
7<br />
10<br />
8<br />
1<br />
3<br />
2<br />
17
4. installation<br />
4.1 Avertissements<br />
L'installation doit être effectuée par du personnel technique qualifié et agréé par <strong>La</strong> <strong>San</strong><br />
<strong>Marco</strong> S.p.A.<br />
Le moulin doseur est livré aux clients dans un emballage en carton et polystyrène.<br />
L'emballage contient: le moulin doseur, ses accessoires, le mode d'emploi et la déclaration<br />
de conformité. Après avoir ouvert l'emballage, s'assurer de l'intégrité du moulin<br />
doseur et de ses composants; en cas de doute, ne pas utiliser l'appareil et s'adresser à<br />
du personnel qualifié et agréé des centres de service après-vente <strong>La</strong> <strong>San</strong> <strong>Marco</strong> S.p.A.<br />
L'emballage doit être mis au rebut dans les centres de recyclage des déchets conformément<br />
aux lois en vigueur dans le pays d'installation. Ne pas abandonner dans la nature Les éléments de<br />
l'emballage (carton, polystyrène, agrafes métalliques, etc.) peuvent constituer une source de danger. Ne pas<br />
le laisser à la portée des enfants!<br />
Le moulin doseur doit être placé sur un plan parfaitement horizontal, suffisamment robuste pour le soutenir,<br />
stable et sec.<br />
4.2 Connexion électrique<br />
Dispositions pour une connexion électrique correcte du moulin doseur:<br />
• Avant de brancher l'appareil, s'assurer que les données de la plaque du moulin doseur correspondent à<br />
ceux du secteur; la plaque est située sous le bac collecteur du marc.<br />
• <strong>La</strong> connexion doit être effectuée conformément aux dispositions du pays d'installation.<br />
• L'installation électrique prévue par le client doit respecter les normes en vigueur; la prise de courant doit<br />
être munie d'une mise à la terre efficace. <strong>La</strong> <strong>San</strong> <strong>Marco</strong> S.p.A. décline toute responsabilité si les prescriptions<br />
ne sont pas respectées. Une installation incorrecte peut causer des dommages aux personnes et<br />
aux choses desquels le constructeur ne peut pas être considéré comme responsable.<br />
• Si l’utilisation d'adaptateurs, prises multiples ou rallonges est nécessaire, il faut utiliser exclusivement des<br />
produits conformes aux normes de sécurité en vigueur dans le pays où l'appareil est installé.<br />
• Pour éviter les éventuelles surchauffes du câble d'alimentation, il est recommandé de le dérouler sur toute<br />
sa longueur.<br />
• Les moulins doseurs monophasés sont équipés d'un câble d'alimentation à trois conducteurs munis de<br />
fiche pour la connexion électrique au secteur.<br />
• Pour la connexion des modèles triphasés, il faut installer un interrupteur général omnipolaire en amont de<br />
l'installation d'alimentation électrique, qui doit être calibré suivant les caractéristiques électriques (puissance<br />
et tension) indiquées sur la plaque de l'appareil. L'interrupteur omnipolaire doit se déclencher avec<br />
une ouverture des contacts d'au moins 3 mm.<br />
• Les moulins doseurs triphasés sont équipés d'un câble d'alimentation à cinq conducteurs; la connexion<br />
des modèles triphasés doit être effectuée de la façon suivante: (connexion en étoile pour la tension 400V-<br />
3N~ et connexion en triangle pour les modèles avec alimentation 230V-3~).<br />
Tension<br />
400V-3N~<br />
230V-3~<br />
Connexion à la prise<br />
d’alimentation électrique<br />
L 3<br />
L 2<br />
L 1<br />
N<br />
GI/VE<br />
L 3<br />
L 2<br />
L 1<br />
N<br />
GI/VE<br />
Connexion au bornier à l’intérieur<br />
de l’appareil<br />
1<br />
2<br />
GI BL BI NE VE MA<br />
2<br />
4 6<br />
3 4 5<br />
6<br />
GI BL BI NE VE MA<br />
LÉGENDE:<br />
L 3 = brun<br />
L 2 = noir<br />
L 1 = gris<br />
N = neutre (bleu)<br />
GI/VE = terre<br />
1 = rouge<br />
2 = blanc<br />
3 = bleu<br />
4 = noir<br />
5 = gris<br />
6 = brun<br />
• Après avoir connecté la machine, s'assurer que le moteur tourne bien dans le sens des aiguilles d'une montre<br />
(avec l'appareil vu d'en haut); s'il tourne dans le sens contraire, inverser deux phases d'alimentation.<br />
• En cas de transformation de 400V-3N~ à 230V-3~ ou vice versa, utiliser les étiquettes autocollantes fournies avec<br />
l'appareil pour mettre à jour les données figurant sur l'étiquette collée à l'extrémité du câble d'alimentation.<br />
1<br />
3<br />
5<br />
31<br />
français
français<br />
4.3 Réglage de la mouture<br />
Dispositions pour un réglage correct:<br />
• Remplir la trémie 4 avec le café en grains et ouvrir le clapet 6.<br />
• Moudre une petite quantité de café pour faire un ou plusieurs cafés express et vérifier la sortie du café<br />
dans la tasse (le café “idéal” s'obtient avec 6÷8 grammes de café moulu par tasse avec un temps de<br />
25÷35 secondes). Il existe trois cas de figure:<br />
a) <strong>La</strong> sortie du café dans la tasse est lente: la granulométrie du café moulu est trop fine (il faut l’augmenter).<br />
Ce réglage s’effectue en pressant le bouton de déblocage 9 et en tournant la frette de réglage 10 dans le<br />
sens des aiguilles d’une montre.<br />
b) <strong>La</strong> sortie du café dans la tasse est rapide: la granulométrie du café moulu est trop grosse (il faut la diminuer).<br />
Ce réglage s’effectue en pressant le bouton de déblocage 9 et en tournant la frette de réglage 10<br />
dans le sens contraire aux aiguilles d’une montre.<br />
c) <strong>La</strong> sortie du café s’effectue de manière correcte.<br />
4.4 Remplacement des broyeurs<br />
Quand on remplace les broyeurs, il faut tenir compte du fait que la bague filetée de réglage doit être montée<br />
de manière que la vis de blocage de la trémie (1) n’interfère pas avec le goujon d’arrêt des broyeurs (2).<br />
<strong>La</strong> méthode correcte pour remplacer les broyeurs est la suivante:<br />
1. Dévisser complètement la vis de blocage de la trémie et extraire la trémie proprement dite.<br />
2. Dévisser les trois goujons M5x12 qui se trouvent sur la bague filetée porte-broyeur et extraire la bague<br />
de réglage.<br />
3. Dévisser le porte-broyeur supérieur et l’extraire de son logement.<br />
4. Remplacer les broyeurs et centrer le broyeur inférieur par rapport aux trois dents racleuses (la distance par<br />
rapport à ces dents est de 0.9 mm, pour centrer le broyeur il est conseillé d’utiliser une jauge d’épaisseur).<br />
5. Nettoyer soigneusement les logements des porte-broyeurs et le filet du porte-broyeur supérieur.<br />
6. Visser le porte-broyeur jusqu’à ce que le broyeur supérieur effleure le broyeur inférieur; cette manoeuvre<br />
doit être effectuée avec le moulin-doseur en rotation afin de trouver le point précis où les deux broyeurs<br />
entrent en contact.<br />
7. Pour finir, mettre en place la bague filetée de réglage en faisant attention que la vis de blocage de la<br />
trémie se trouve en avant, dans le sens contraire aux aiguilles d’une montre, par rapport au goujon d’arrêt<br />
des broyeurs, comme l’indique la figure 1.<br />
<strong>La</strong> fig. 2 illustre quant à elle le montage erroné de la bague de réglage: la vis de blocage de la trémie (1) se<br />
trouve après le goujon d’arrêt des broyeurs (2).<br />
Il est très important de souligner que dans ce cas, la vis de blocage de la trémie ne permettra pas le dépassement<br />
du goujon d’arrêt des broyeurs en phase d’ouverture de ces derniers; par conséquent, les broyeurs<br />
se trouvant déjà en contact, il sera impossible d’obtenir la bonne granulométrie pour le café moulu et le café<br />
ne sortira pas du bec ou coulera au goutte à goutte.<br />
1 2<br />
2 1<br />
Fig. 1 - Montage correct Fig. 2 - Montage erroné<br />
5. instructions pour le fonctionnement<br />
5.1 Doses pouvant être produites<br />
5.a dose simple (icône d'une tasse de café),<br />
5.b dose double (icône de deux tasses de café)<br />
5.c dose continue (icône ∞).<br />
32
5.2 Stand-by<br />
Voyant de la touche dose allumé avec intensité élevée (la signification de cette touche active est expliquée<br />
ci-dessous). Autre touche allumée avec basse intensité.<br />
5.3 Production de doses programmables<br />
Après avoir appuyé sur la touche dose simple ou dose double, la CPU gardera en mémoire cette touche<br />
comme unique touche active pour la production successive (pour les modèles avec micro).<br />
Modèles sans micro<br />
<strong>La</strong> production de café moulu s'effectuera, pour les modèles sans micro, moyennant le clavier.<br />
En appuyant sur une touche de production (simple ou double), commencera la mouture et, sur l'afficheur,<br />
commencera le compte à rebours de la dose sélectionnée ; une fois terminée la production, sur l'afficheur<br />
apparaitra la valeur 00.0 pendant 2 secondes. En appuyant sur la dose continue (symbole ∞), le moulin<br />
doseur fonctionnera en modalité marche/arrêt (un arrêt de sûreté est prévu après 3 minutes).<br />
Modèles avec micro<br />
Lors de la pré-sélection de la dose souhaitée (simple ou double),sur l'afficheur apparaitra, en stand-by, le<br />
temps programmé pour cette dose; par la suite, si le micro est activé, commencera la mouture et, sur l'afficheur,<br />
commencera le compte à rebours ; une fois terminée la production, sur l'afficheur, apparaitra la valeur<br />
00.0 pendant 2 secondes.<br />
<strong>La</strong> production de café moulu s'effectuera donc uniquement lorsque sera actionné le micro 13 moyennant le<br />
porte-filtre.<br />
Une fois ce temps écoulé, sur l'afficheur réapparaitra l'indication du temps de la dose relative à la touche<br />
allumée avec intensité élevée (soit celle active pour la production suivante).<br />
Moyennant le clavier, il est possible de by-passer le consentement du micro et de laisser la commande totale<br />
au clavier.<br />
Soit, en donnant de l'alimentation au moulin moyennant l'interrupteur général, on aura environ 3-4 secondes<br />
pour appuyer sur la touche en haut à droite (touche +) pour entrer dans un menu où il sera possible, moyennant<br />
la touche +, de changer la modalité de fonctionnement : micro OUI (M s) ou micro NON (M n).<br />
Si durant cette phase, on appuie sur la touche ∞ (∞ est le symbole du continu) pendant 5 secondes, sur<br />
l'afficheur apparaitra le message “i s” (infini oui) ou “i n” (infini non). Pour passer de “i s” à “i n” et vice-versa,<br />
il suffit d'appuyer sur la touche +. En appuyant de nouveau pendant 5 secondes sur la touche continue, sur<br />
l'afficheur apparaitra de nouveau l'option micro Oui micro Non.<br />
<strong>La</strong> touche en haut à droite (touche -) servira pour sortir de cette modalité, au cas où on ne serait pas déjà<br />
sorti pour avoir atteint le time out ( 30 secondes).<br />
5.4 Production continue<br />
<strong>La</strong> touche de production continue (∞) fera partir la mouture sans devoir actionner le il micro.<br />
Par sûreté, entre le moment où est enfoncée la touche continue et la mise en marche de la production, il y a<br />
un time delay de 1 seconde ; ceci évitera les démarrages involontaires. Pour bloquer la production continue,<br />
il suffit d'effleurer la touche (∞). Durant la production continue, sur l'afficheur est présent le message inF.<br />
33<br />
français
français<br />
5.5 Programmation: doses<br />
a. Déplacer de OFF à ON la position de l'interrupteur 3 du moulin doseur.<br />
b. Dans les 5 secondes qui suivent, à partir de l'allumage des voyants sur le clavier et en appuyant pendant<br />
5 secondes sur la touche de la dose que l'on souhaite programmer, la touche correspondante clignotera<br />
lentement, en même temps que les chiffres sur l'afficheur.<br />
c. Relâcher la touche et, moyennant les touches de réglage (+/-), situées sur le côté de l'afficheur, augmenter<br />
ou diminuer le temps de mouture, jusqu'à atteindre la valeur souhaitée.<br />
d. Une fois saisi le temps, appuyer de nouveau sur la touche, dont le voyant clignote encore, pour mémoriser<br />
le temps programmé.<br />
e. En mémorisant la dose pour un café, il est possible de programmer l'autre dose, indépendamment de l'autre,<br />
ou bien de la copier redoublée sur la touche dose double ou réduite de moitié sur la touche dose simple.<br />
f. Pour mémoriser la dose simple et la copier redoublée sur la touche double, il suffit de confirmer la programmation<br />
effectuée sur la touche simple en appuyant sur la touche double. Pour mémoriser la dose<br />
double et la copier réduite de moitié sur la touche simple, il suffit de confirmer la programmation effectuée<br />
sur la touche double en appuyant sur la touche simple.<br />
g. Les trois digits permettront de programmer le temps avec une précision au dixième de seconde; deux<br />
digits pour les secondes et un pour les dixièmes.<br />
h. Si après l'opération décrite au point a, on appuie sur une des trois touches (dose simple, double ou<br />
continue), pendant 10 secondes, on entrera en “modalité compteurs”.<br />
i. Sur l'afficheur apparaitra, en modalité de défilement, le nombre de cafés produits par cette touche ; un<br />
tiret sur l'afficheur séparera deux indications successives lors du défilement des chiffres.<br />
Pour remettre à zéro le compteur d'une touche, il suffit d'appuyer pendant 10 secondes sur la touche<br />
pour laquelle on souhaite remettre à zéro le compteur.<br />
Pour sortie de la modalité des compteurs, il suffit d'appuyer sur la touche (-) en haut à gauche, au cas où on<br />
ne serait pas déjà sorti pour avoir atteint le time out (30 secondes).<br />
5.6 Activation /désactivation du buzzer<br />
Un buzzer lorsque sont enfoncées les touches sur le clavier touch, à la fin de chaque production et lors de<br />
l'allumage du moulin doseur peut être programmé en opérant de la manière suivante.<br />
Une fois entré dans la programmation avec la touche (+), appuyer sur la touche dose simple pendant<br />
3 secondes.<br />
Un bip long signalera le choix de buzzer off, 2 bips brefs signaleront à l'utilisateur l'activation de la modalité<br />
buzzer on.<br />
5.7 Alarme de consommation excessive des broyeurs<br />
(option pouvant être validée uniquement depuis pc de poche, dispositif non fourni avec le moulin doseur)<br />
<strong>La</strong> programmation, moyennant pc de poche, s'effectue en saisissant un temps de fonctionnement, en heures,<br />
du moteur. Une fois atteint le nombre d'heures de fonctionnement du moteur, sur l'afficheur apparaitra<br />
le message GRN, pendant dix secondes à la fin de chaque production. En mémorisant le numéro 000, toujours<br />
moyennant pc de poche, l'alarme sera désactivée.<br />
6. conseils pratiques pour l'opérateur<br />
• Conserver le café en grains à l'intérieur de récipients hermétiques dans un endroit sec et à température<br />
ambiante.<br />
• Vérifier périodiquement la granulométrie du café moulu et son dosage, en tenant compte que les conditions<br />
atmosphériques (humidité ambiante) ont une influence considérable sur la préparation du café<br />
express. Augmenter la granulométrie du café moulu quand l'humidité ambiante augmente et la réduire<br />
quand elle diminue.<br />
• Faire vérifier périodiquement par le personnel technique agrée l'état des broyeurs, en tenant compte que<br />
les broyeurs plats peuvent traiter environ 300÷600 kg de café avant d'être remplacés, tandis que ceux<br />
coniques environ 600÷1200 kg ; il est bon de rappeler que le remplacement doit concerner les deux broyeurs,<br />
aussi bien le fixe que le mobile, car un remplacement partiel comporterait un dysfonctionnement<br />
du moulin doseur. L’éventuel remplacement doit être effectué par le personnel du service après-vente.<br />
• Nettoyer périodiquement la trémie.<br />
• En cas d'arrêt prolongé (vacances, travail saisonnier, etc.), vider complètement la trémie et la nettoyer<br />
soigneusement.<br />
34
7. information pour les usagers de la communauté<br />
européenne<br />
Conformément à la Directive Européenne 2002/96/CE concernant les déchets électriques<br />
(WEEE), nous informons les usagers de la communauté européenne de ce qui suit :<br />
Le symbole de la poubelle barrée reportée sur l’appareil ou sur l’emballage indique que le<br />
produit à la fin de sa vie utile doit être collecté séparément des autres déchets.<br />
L’adéquat ramassage différencié pour l’envoi successif de l’appareil mis au rebut au<br />
recyclage, au traitement et à l’élimination compatible continue à éviter de possibles effets<br />
négatifs sur l’environnement et sur la santé et favorise la réutilisation et/ou le recyclage des matériaux avec<br />
lesquels est composé l’appareil.<br />
Conformément à la Directive Européenne 2002/96/CE, l’élimination abusive du produit, de la part du détenteur,<br />
comporte l’application des sanctions prévues par les normes locales en vigueur.<br />
8. Garantie<br />
<strong>La</strong> garantie perd effet si:<br />
• Les instructions du présent manuel ne sont pas respectées.<br />
• Les opérations d'entretien ordinaire et extraordinaire et de réparation sont effectuées par du personnel<br />
non agréé.<br />
• L’appareil est utilisé de manière différente par rapport aux indications données dans le manuel.<br />
• Les pièces d'origine ont été remplacées par des pièces de fabrication différente.<br />
• <strong>La</strong> garantie ne couvre pas les dommages provoqués par une négligence, une utilisation et une installation<br />
incorrectes et/ou non conformes à ce qui est prescrit dans ce manuel, un mauvais fonctionnement, un<br />
mauvais traitement, la foudre et des phénomènes atmosphériques, les surtensions et les surintensités,<br />
une alimentation électrique insuffisante ou irrégulière.<br />
9. déclaration de conformité<br />
<strong>La</strong> société constructrice:<br />
la san marco s.p.a.<br />
34072 Gradisca d’Isonzo (GO) Italie – Via Padre e Figlio Venuti, 10<br />
téléphone (+39) 0481 967111 – fax (+39) 0481 960166 – http://www.lasanmarco.com<br />
déclare sous sa responsabilité que le moulin doseur décrit dans ce manuel et identifié par les données sur<br />
la plaque d'identification placée sur l'appareil est conforme aux directives: 2006/42/CE, 2006/95/CE,<br />
2004/108/CE, Règlement (CE) n° 1935/2004. Pour la vérification de la conformité à ces directives, les normes<br />
harmonisées suivantes ont été appliquées : EN ISO 12100, EN 60335-1, EN 60335-2-64<br />
PERSONNE AUTORISÉE A<br />
CONSTITUER LE DOSSIER TECHNIQUE<br />
Ing. Roberto Marri<br />
Via Padre e Figlio Venuti,10<br />
34072 Gradisca d’Isonzo - ITALIA<br />
Gradisca d’Isonzo, Mars 2011<br />
Ing. Roberto Marri<br />
Administrateur délégué<br />
35<br />
français
français<br />
10. Problèmes et solutions<br />
Avant de demander l'intervention du service après-vente, effectuer les contrôles ci-dessous:<br />
36<br />
défaut cause solution<br />
1) Le café coule rapidement du<br />
bec de sortie; la crème du<br />
café dans la tasse est claire.<br />
2) Le café coule lentement<br />
(goutte à goutte) du bec; la<br />
crème du café dans la tasse<br />
est foncée.<br />
3) Présence de marc de café<br />
dans la tasse.<br />
a) mouture trop grosse.<br />
b) dose insuffisante.<br />
c) café peu pressé.<br />
a) mouture trop fine.<br />
b) dose élevée.<br />
c) café trop pressé.<br />
a) mouture trop fine.<br />
b) broyeurs usés.<br />
a) diminuer la granulométrie.<br />
b) augmenter la dose.<br />
c) presser davantage le café.<br />
d) augmenter la granulométrie.<br />
b) diminuer la dose<br />
c) presser moins le café.<br />
g) augmenter la granulométrie.<br />
h) remplacer les meules.<br />
S'il n'est pas possible de résoudre le problème de la manière décrite ou en présence d'un défaut diffèrent<br />
de ceux qui sont décrits ici, s'adresser au centre de service après-vente agréé par <strong>La</strong> <strong>San</strong> <strong>Marco</strong> S.p.A.<br />
<strong>La</strong> <strong>San</strong> <strong>Marco</strong> S.p.A. se réserve d'appliquer des modifications techniques à ses produits,<br />
si elle le juge nécessaire, sans obligation de préavis.
dosiermühle <strong>sm</strong> <strong>92</strong> <strong>instant</strong><br />
<strong>sm</strong> <strong>97</strong> <strong>instant</strong> - <strong>sm</strong> tK <strong>instant</strong><br />
Übersetzung der Original-Anweisungen<br />
deutsch
deutsch<br />
Inhalt<br />
1. Allgemeine hinweise. . . . . . . . . . . . . . . . . . . . . . . . . . . . . . . pag. 39<br />
1.1 Der espresso ................................................... pag. 39<br />
1.2 <strong>La</strong>gerung der kaffeebohnen . . . . . . . . . . . . . . . . . . . . . . . . . . . . . . . . . . . . . . . pag. 39<br />
1.3 Dosiermühle und mahlvorgang ..................................... pag. 39<br />
1.4 Espressomaschine . . . . . . . . . . . . . . . . . . . . . . . . . . . . . . . . . . . . . . . . . . . . . . pag. 39<br />
1.5 Luftfeuchtigkeit - Zubereitung . . . . . . . . . . . . . . . . . . . . . . . . . . . . . . . . . . . . . pag. 39<br />
2. Empfehlungen . . . . . . . . . . . . . . . . . . . . . . . . . . . . . . . . . . . pag. 40<br />
2.1 Nachschlagen der betriebsanleitung . . . . . . . . . . . . . . . . . . . . . . . . . . . . . . . . pag. 40<br />
2.2 Wichtige hinweise ............................................... pag. 40<br />
3. Technische eigenschaften . . . . . . . . . . . . . . . . . . . . . . . . . . pag. 41<br />
3.1 Allgemeine merkmale der einzelnen modelle .......................... pag. 41<br />
3.2 Technische eigenschaften ......................................... pag. 41<br />
3.3 Gesamtzeichnung ............................................... pag. 42<br />
4. Installation . . . . . . . . . . . . . . . . . . . . . . . . . . . . . . . . . . . . . . pag. 43<br />
4.1 Wichtige hinweise ............................................... pag. 43<br />
4.2 Elektrischer anschluss . . . . . . . . . . . . . . . . . . . . . . . . . . . . . . . . . . . . . . . . . . . pag. 43<br />
5. Anleitungen für den betrieb .........................pag. 44<br />
5.1 Abgabedosierungen . . . . . . . . . . . . . . . . . . . . . . . . . . . . . . . . . . . . . . . . . . . . . pag. 44<br />
5.2 Standby ....................................................... pag. 45<br />
5.3 Programmierbare abgabedosierung ................................. pag. 45<br />
5.4 Dauerabgabe . . . . . . . . . . . . . . . . . . . . . . . . . . . . . . . . . . . . . . . . . . . . . . . . . . pag. 45<br />
5.5 Programmierung: dosierung ....................................... pag. 46<br />
5.6 Aktivierung / deaktivierung des summers . . . . . . . . . . . . . . . . . . . . . . . . . . . . pag. 46<br />
5.7 Alarm zu hoher verbrauch der mahlsteine . . . . . . . . . . . . . . . . . . . . . . . . . . . . pag. 46<br />
6. Praktische hinweise für den benutzer . . . . . . . . . . . . . . . . . pag. 46<br />
7. Information für die benutzer innerhalb der<br />
Europäischen Gemeinschaft . . . . . . . . . . . . . . . . . . . . . . . . pag. 47<br />
8. Garantie . . . . . . . . . . . . . . . . . . . . . . . . . . . . . . . . . . . . . . . . pag. 47<br />
9. Konformitäts-erklärung . . . . . . . . . . . . . . . . . . . . . . . . . . . . pag. 47<br />
10. Probleme und Lösungen . . . . . . . . . . . . . . . . . . . . . . . . . . . pag. 48<br />
BEDIENUNGSANLEITUNG CODE 7770.051<br />
Version 03.11<br />
38
1. allgemeine hinweise<br />
• Der erste Teil dieser Bedienungsanleitung enthält eine kurze Beschreibung der Bereitung von Espresso, der<br />
modernen Geräte, die dazu eingesetzt werden und der Funktion der Dosiermühle in diesem heiklen Prozess.<br />
1.1 Der espresso<br />
Der Espresso ist ein Kaffee, der nach einem besonderen Extrahierverfahren bereitet wird und ein sehr konzentriertes,<br />
dickflüssiges Getränk mit intensivem Geschmacksaroma ergibt. Die Methode der Bereitung von<br />
Espresso besteht in der Extrahierung der im gemahlenen Kaffee enthaltenen Substanzen durch Durchfluss<br />
von Heißwasser unter Druck (ca. 9 bar) für eine variable Dauer von 25 bis 35 Sekunden; auf diese Weise<br />
werden die im Kaffee enthaltenen löslichen (Zucker und Eiweiß) und unlöslichen (Fette und Kolloide)<br />
Substanzen in die Kaffeetasse "mitgerissen", wo sich die cremeartige Flüssigkeit bildet, die für den echten<br />
Espresso charakteristisch ist. Die Bereitung von Espresso ist ein sehr heikler Vorgang; verschiedene Faktoren<br />
beeinflussen seine Qualität: <strong>La</strong>gerung der Kaffeebohnen, Dosiermühle und Mahlvorgang, <strong>La</strong>gerung des<br />
gemahlenen Kaffee, Espressomaschine, Luftfeuchtigkeit, Sorgfalt und Sachkenntnis bei der Zubereitung.<br />
1.2 <strong>La</strong>gerung der kaffeebohnen<br />
In der Natur kommen vorwiegend zwei Kaffeesorten vor: der "arabische" Kaffee und der "Robusta"-Kaffee.<br />
Gewöhnlich besteht der geröstete Kaffee, der für die Bereitung von Espresso verwendet wird, aus einer<br />
Mischung der beiden Sorten in unterschiedlichen Anteilen, wobei die organoleptischen Merkmale jeder Sorte<br />
entsprechend berücksichtigt werden. Die geröstete Kaffeemischung muss hermetisch verschlossen in ihrer<br />
Verpackung aufbewahrt werden. Nach dem Rösten enthalten die Kaffeebohnen alle Substanzen und die<br />
charakteristischen Aromastoffe der Sorte oder Mischung; diese Aromastoffe verflüchtigen sich sehr rasch,<br />
wenn sie mit Luft, Licht oder Feuchtigkeit in Kontakt kommen.<br />
1.3 Dosiermühle und mahlvorgang<br />
Die Dosiermühle ist ein Gerät, mit dem Kaffeebohnen gemahlen und der gemahlene Kaffee dosiert wird. Für<br />
einen guten Espresso benötigt man gemahlenen Kaffee in einer Körnung, die von rund 1 mm Durchmesser bis<br />
zu Kaffeepulver von unter 150 µm variieren kann. Kaffee in Pulverform bietet dem Wasser eine größere<br />
Angriffsfläche, wodurch eine höhere Extrahierung der löslichen und unlöslichen Substanzen erfolgt; so kann<br />
durch Einstellung der Feinheit des Mahlvorganges der Widerstand, der dem Durchfluss von Wasser entgegengesetzt<br />
wird, verändert werden. Bei zu grober Körnung des gemahlenen Kaffee erfolgt die Ausgabe sehr rasch,<br />
das Wasser kann die Substanzen nur teilweise extrahieren; der so erhaltene Kaffee ist von heller Farbe, wässrig,<br />
ohne das für Kaffee charakteristische Geschmacksaroma. Ist der Kaffee hingegen zu fein gemahlen, erhält<br />
man einen Espresso von dunkler Farbe, verbrannt und kalt; die Ausgabezeit ist zu lang, das Wasser sickert nur<br />
schwer durch, da ihm das Pulver einen zu hohen Widerstand entgegensetzt. Der Espresso ist überextrahiert.<br />
1.4 Espressomaschine<br />
Die Espressomaschine ist das im Wesentlichen aus einem Kessel und einer Reihe von Wärmetauschern<br />
bestehende Gerät, in dem die Erwärmung des Wassers durch einen elektrischen Heizwiderstand oder einen<br />
Gasbrenner durchgeführt wird. Das auf eine hohe Temperatur erhitzte Wasser fließt durch den gemahlenen<br />
Kaffee, der in den Filter einer Ausgabegruppe gefüllt wurde, und extrahiert die Aromastoffe. Unter<br />
Espressomaschinen versteht man in dieser Betriebsanleitung sowohl Modelle mit Ausgabe durch Pumpe als<br />
auch Modelle, bei denen die Ausgabe durch Hydraulikkolben (Modelle mit Hebelbedienung) erfolgt. Die von<br />
<strong>La</strong> <strong>San</strong> <strong>Marco</strong> S.p.A. hergestellten Dosiermühlen sind gewerbliche Geräte, die für die Kombination mit dieser<br />
Art von Espressomaschinen konzipiert und konstruiert sind.<br />
1.5 Luftfeuchtigkeit - Zubereitung<br />
Um einen guten Espresso zu erhalten, muss der Kaffee, wie bereits erwähnt, auf eine bestimmte Feinheit<br />
gemahlen werden. Gemahlener Kaffee ist äußerst hygroskopisch; das heißt in anderen Worten, er "absorbiert"<br />
die Feuchtigkeit der Raumluft, so dass bei jeder Änderung der Raumfeuchtigkeit auch der Mahlvorgang<br />
geändert werden muss; gemahlener Kaffee mit hohem Feuchtigkeitsgehalt erhöht den Widerstand gegen<br />
den Wasserdurchlauf. Weitere wichtige Faktoren für die Qualität des Espresso sind die in den Filter eingefüllte<br />
Kaffeemenge und ihre Pressung. Diese Faktoren (Raumfeuchtigkeit, Menge und Feinheit des gemahlenen<br />
Kaffee, Pressung) müssen bei der Bereitung von Espresso erwogen und berücksichtigt werden. Aus diesem<br />
Grund wird die Qualität des fertigen Kaffee wesentlich vom Bedienungspersonal beeinflusst.<br />
39<br />
deutsch
deutsch<br />
2. empfehlungen<br />
2.1 Nachschlagen der betriebsanleitung<br />
2.2 Wichtige hinweise<br />
40<br />
1. Diese Betriebsanleitung liefert alle Informationen, die für Installation, Inbetriebnahme,<br />
Gebrauch und Wartung der Dosiermühle erforderlich sind.<br />
2. Das für normalen Betrieb und ordentliche Wartung des Gerätes zuständige Personal<br />
sowie das technische Personal für außerordentliche Wartung und Reparaturen muss<br />
den Inhalt der Betriebsanleitung aufmerksam gelesen und verstanden haben.<br />
3. Die Betriebsanleitung ist integrierender Bestandteil des Gerätes; sie muss für die<br />
gesamte Lebensdauer aufbewahrt und jedem allfällig späteren Benutzer oder<br />
Eigentümer gemeinsam mit dem Gerät übergeben werden.<br />
4. Die Betriebsanleitung oder eine Kopie derselben muss stets in der Nähe des Gerätes<br />
zum raschen Nachschlagen für das Bedienungspersonal aufliegen; sie ist geschützt<br />
vor Hitze, Feuchtigkeit, Staub und korrosiven Wirkstoffen zu verwahren.<br />
5. Die Dosiermühle <strong>La</strong> <strong>San</strong> <strong>Marco</strong> S.p.A. darf nur auf die in dieser Betriebsanleitung<br />
beschriebene Weise verwendet werden; eine unbefugte bzw. abweichende Verwendung<br />
des Gerätes führt zum Verfall jeglicher Garantie bzw. Haftung des Herstellers.<br />
• Die Dosiermühle ist geeignet konstruiert und hergestellt, um Kaffeebohnen zu mahlen<br />
und den gemahlenen Kaffee zu dosieren. Jede andere als die in dieser Betriebsanleitung<br />
beschriebene Verwendung gilt als unbefugt und ist daher unzulässig. Der Hersteller lehnt<br />
jede Haftung für eventuelle Schäden durch unzulässigen Gebrauch des Gerätes ab.<br />
• Das Gerät darf nur von einer verantwortungsbewussten, erwachsenen Person bedient<br />
werden, die neben den Regeln nach gesundem Menschenverstand alle in ihrem <strong>La</strong>nd<br />
geltenden Sicherheitsvorschriften einhalten muss. Für einen korrekten und sicheren<br />
Gebrauch sind durch den Benutzer außerdem alle Vorschriften zur Verhütung von Unfällen<br />
und sonstigen Regeln im Rahmen von Arbeit<strong>sm</strong>edizin und Hygiene zu beachten.<br />
• Der Betrieb des Gerätes und die Arbeiten im Rahmen der ordentlichen Wartung und<br />
Reinigung, sind ausschließlich dem Personal vorbehalten, das vom Kunden eigenverantwortlich<br />
damit betraut wurde.<br />
• Es ist streng verboten, das Gerät mit ausgebauten fixen und/oder beweglichen<br />
Schutzvorrichtungen bzw. mit ausgeschlossenen Sicherheitseinrichtungen zu betreiben;<br />
es ist streng verboten, Sicherheitseinrichtungen des Gerätes auszubauen oder<br />
zu verändern.<br />
• Während das Gerät in Betrieb steht, keine Werkzeuge oder andere Gegenstände<br />
(Schraubenzieher, Löffel, usw.) in den Trichter oder Dosierbehälter einführen.<br />
• Bevor mit der Ausführung von Arbeiten zur ordentlichen Wartung oder Reinigung<br />
begonnen wird, unbedingt die Stromzufuhr zum Gerät abschalten; dazu, wenn<br />
möglich, das Gerätekabel aus der Steckdose ziehen, ansonsten den allpoligen<br />
Hauptschalter auf der Stromzuleitung der Dosiermühle ausschalten.<br />
• Zur Reinigung keine Produkte wie Putzalkohol, Benzin oder Lösung<strong>sm</strong>ittel im allgemeinen<br />
einsetzen; nur Wasser oder neutrale Reinigung<strong>sm</strong>ittel verwenden.<br />
• Die Außenflächen mit einem feuchten Tuch oder Schwamm reinigen; keinesfalls<br />
Druckwasser einsetzen. Die Innenreinigung des Dosierbehälters, des Mahlwerks und<br />
des Trichters kann mit einer Bürste vorgenommen werden.<br />
• Alle außerordentlichen Wartungs- und Reparaturarbeiten dürfen nur vom<br />
Kundendienstpersonal <strong>La</strong> <strong>San</strong> <strong>Marco</strong> S.p.A. ausgeführt werden.<br />
• Falls das Stromkabel beschädigt ist, muss es vom Hersteller, seinem technischen<br />
Kundendienst oder einem hierzu fachlich ausgebildetem Techniker ausgetauscht werden.<br />
• Bei einem eventuellen Defekt oder Bruch von Bestandteilen der Dosiermühle sich an<br />
einen autorisierten Kundendienst wenden und den Einbau von Originalersatzteilen <strong>La</strong><br />
<strong>San</strong> <strong>Marco</strong> S.p.A. verlangen; der Einsatz von anderen als Originalersatzteilen führt zum<br />
Verfall der Konformitätserklärung und der Garantie, die mit dem Gerät geliefert werden.<br />
• Es ist streng verboten, Eingriffe am Gerät vorzunehmen, zu denen man nicht befugt<br />
ist bzw. deren korrekte Ausführung nicht verstanden wurde; bei Bedarf, sich für<br />
Informationen, Ersatzteile oder Zubehör mit dem Hersteller in Verbindung setzen.<br />
• Bei Außergebrauchnahme oder Abbau des Gerätes sich an den Lieferanten oder eine<br />
konzessionierte Fachfirma für die Entsorgung von festem Stadtmüll wenden. Altgeräte<br />
unbedingt vorschrift<strong>sm</strong>äßig entsorgen!
3. technische eigenschaften<br />
3.1 Allgemeine merkmale der einzelnen modelle<br />
Dosiermühlen <strong>La</strong> <strong>San</strong> <strong>Marco</strong> sind gewerbliche Geräte, die zum Mahlen von Kaffeebohnen und zur Dosierung<br />
von gemahlenem Kaffee dienen. <strong>La</strong> <strong>San</strong> <strong>Marco</strong> S.p.A. stellt die Dosiermühlen in drei Modellen her, diese sind:<br />
SM <strong>92</strong> INSTANT;SM <strong>97</strong> INSTANT; Konisch (TK INSTANT). Ihre wichtigsten Bauteile sind:<br />
• Ein Gehäuse 1 aus lackiertem Aluminium. Abmessungen, Form und Volumen sind für alle Modelle gleich,<br />
ausgenommen das Modell “SM TK INSTANT”, bei dem das Standardgehäuse durch einen Sockel 2<br />
ergänzt wird, in dem die elektrischen und elektronischen Bauteile untergebracht sind.<br />
• Ein durchsichtiger Trichter 4 aus Kunststoff, der oben auf der Dosiermühle angeordnet ist. Der Trichter (4,6<br />
l) ist an der Dosiermühle mit einer Spezialschraube 8 befestigt; der Trichter kann nur mit Hilfe eines<br />
Werkzeugs abgenommen werden. Im Inneren des Trichters ist ein Schutzgitter 7 vorgesehen, das den<br />
Zugang mit den Händen zu den Mahlsteinen verhindert.<br />
• Ein elektrischer Motor, der mit dem Mahlwerk verbunden wird. Bei den konischen Modellen der<br />
Dosiermühle mit Elektromotor wird dieser mit einem Planetenuntersetzungsgetriebe verbunden, das seinerseits<br />
mit dem Mahlwerk verbunden ist.<br />
• Ein Mahlwerk. Die Modelle SM <strong>92</strong> INSTANT und SM <strong>97</strong> INSTANT sind mit einem Mahlwerk mit flachen<br />
Mahlsteinen ausgestattet, Durchmesser der Mahlsteine beim ersten Modell 64 mm und 84 mm beim<br />
zweiten. Das Modell SM TK INSTANT besitzt ein Mahlwerk mit konischen Mahlsteinen.<br />
• Eine Nutmutter zur Regulierung der Mahlstärke 10 und eine Taste zu ihrer Lösung 9. Im oberen Bereich<br />
der Nutmutter sind die Hinweise zur Regulierung der Mahlstärke angegeben. Die Körnung des gemahlenen<br />
Kaffee kann verändert werden, wenn die Nutmutter im Uhrzeigersinn oder gegen den Uhrzeigersinn<br />
gedreht wird.<br />
• Eine Gabel 15 für die <strong>La</strong>gerung des Filters, mit dem Mikroschalter zum Starten des Mahlvorgangs<br />
13 (optional).<br />
• Eine elektronische Steuerung für die Kontrolle von Start und Stopp der Dosiermühle. Über die<br />
Programmierung der elektronischen Steuerung durch das TOUCHPANEL kann die Zeit für das Mahlen<br />
eingestellt werden.<br />
• Ein Hauptschalter 3 on/off mit grüner LED.<br />
• Ein Touchpanel 11, das sowohl für den Mahlvorgang als auch für die Programmierung der Dosiermühle<br />
verwendet wird.<br />
• Eine Halterung für das Touchpanel 12.<br />
3.2 Technische eigenschaften<br />
modell<br />
<strong>sm</strong> <strong>92</strong><br />
<strong>instant</strong><br />
<strong>sm</strong> <strong>92</strong><br />
<strong>instant</strong><br />
micro<br />
<strong>sm</strong> <strong>97</strong><br />
<strong>instant</strong><br />
<strong>sm</strong> <strong>97</strong><br />
<strong>instant</strong><br />
micro<br />
<strong>sm</strong> tK<br />
<strong>instant</strong><br />
<strong>sm</strong> tK<br />
<strong>instant</strong><br />
micro<br />
motor- motor-<br />
GeschWinGeschWindiGKeitdiGKeit leistunGs-<br />
aufnahme<br />
(W)<br />
art der<br />
mahlsteine<br />
mahl-<br />
leistunG<br />
(kg/h)<br />
durchmesser<br />
mahlsteine<br />
Ø (mm)<br />
mahlGeschWindiGKeit<br />
(g/min)<br />
schall-<br />
PeGel<br />
db(a)<br />
GeWicht<br />
(Kg)<br />
1350 220 350 FLACH 8,5 64 1350 72 13,8<br />
1350 220 350 FLACH 8,5 64 1350 72 13,8<br />
880 245 460 FLACH 13 84 880 69 13,8<br />
880 245 460 FLACH 13 84 880 69 13,8<br />
1350 373 650 KONISCH 18 / 400 68 17<br />
1350 373 650 KONISCH 18 / 400 68 17<br />
Dosiermühlen <strong>La</strong> <strong>San</strong> <strong>Marco</strong> S.p.A. sind für folgende Spannungen vorgerüstet:<br />
* 110 V-1 ~ 60 Hz (Verfuegbar nur fuer Modelle SM <strong>92</strong> INSTANT / SM <strong>97</strong> INSTANT)<br />
* 230 V-1~ 50 Hz<br />
* 230 / 400 V-3N~ 50 Hz<br />
* 240 V-1 ~ 50 Hz<br />
Außenmaße der Verpackung: 641 x 467 x 293 mm.<br />
41<br />
deutsch
deutsch<br />
3.3 Gesamtzeichnung<br />
6<br />
9<br />
11<br />
12<br />
14<br />
13<br />
15<br />
16<br />
LEGENDE<br />
1 ALUMINIUMGEHÄUSE<br />
2 GEHÄUSESOCKEL<br />
3 HAUPTSCHALTER<br />
4 TRICHTER<br />
5 TRICHTERDECKEL<br />
6 ABSPERRSCHIEBER FÜR TRICHTER<br />
7 SCHUTZGITTER FÜR MAHLSTEINE<br />
8 SPEZIALSCHRAUBE FÜR DIE FIXIERUNG DES TRICHTERS<br />
9 TASTE LÖSUNG NUTMUTTER<br />
10 NUTMUTTER REGULIERUNG DER MAHLSTÄRKE<br />
11 TOUCHPANEL<br />
12 HALTERUNG TOUCHPANEL<br />
13 MIKROSCHALTER ZUM STARTEN DES MAHLENS<br />
14 KAFFEESTOPFER<br />
15 LAGERGABEL FÜR FILTER<br />
16 SAMMELWANNE KAFFEERÜCKSTÄNDE<br />
17 GUMMIFUSS<br />
42<br />
5<br />
4<br />
7<br />
10<br />
8<br />
1<br />
3<br />
2<br />
17
4. installation<br />
4.1 Wichtige hinweise<br />
Die Installation darf nur durch befugtes Personal des technischen Kundendienstes <strong>La</strong> <strong>San</strong><br />
<strong>Marco</strong> S.p.A. ausgeführt werden.<br />
Die Dosiermühle wird in einer eigenen Verpackung aus Karton und Styropor geliefert. Die<br />
Verpackung enthält: die Dosiermühle und das Zubehör, die Betriebsanleitung und die<br />
Konformitätserklärung. Nach dem Auspacken die Dosiermühle und ihre Bauteile auf<br />
eventuelle Beschädigungen untersuchen; im Zweifelsfall das Gerät nicht in Betrieb nehmen<br />
und sich an befugtes Personal des technischen Kundendienstes <strong>La</strong> <strong>San</strong> <strong>Marco</strong><br />
S.p.A. wenden. Die Verpackung ist über die eigenen Müllsammelstellen nach den im <strong>La</strong>nd<br />
des Benutzers geltenden Vorschriften zu entsorgen. Unbedingt vorschrift<strong>sm</strong>äßig entsorgen.<br />
Verpackung<strong>sm</strong>aterialien (Karton, Styropor, Metallspitzen, usw.) können eine Gefahrenquelle für spielende<br />
Kinder darstellen. Sie sind daher für Kinder unzugänglich zu verwahren.<br />
Die Dosiermühle ist auf einer vollkommen waagerechten, für ihr Gewicht ausreichend robusten, stabilen und<br />
trockenen Unterlage aufzustellen.<br />
4.2 Elektrischer anschluss<br />
Anleitungen für den korrekten elektrischen Anschluss der Dosiermühle:<br />
• Bevor das Gerät an das Stromnetz angeschlossen wird, die Übereinstimmung der auf dem Typenschild<br />
der Dosiermühle angegebenen Daten mit den Daten der Verteileranlage überprüfen; das Typenschild ist<br />
unter der Sammeltasse für Kaffeerückstände angebracht.<br />
• Der Anschluss ist nach den im <strong>La</strong>nd des Benutzers geltenden Vorschriften auszuführen.<br />
• Die vom Kunden erstellte elektrische Anlage muss den geltenden Vorschriften entsprechen; die Stromzuleitung<br />
muss über eine wirksame Erdung verfügen. <strong>La</strong> <strong>San</strong> <strong>Marco</strong> S.p.A. lehnt jede Haftung ab, sollten die gesetzlichen<br />
Vorschriften nicht eingehalten werden. Durch fehlerhafte Installation können Personen- oder<br />
Sachschäden verursacht werden, für die der Hersteller nicht haftbar gemacht werden kann.<br />
• Müssen Adapter, Mehrfachsteckdosen oder Verlängerungskabel eingesetzt werden, ausschließlich<br />
Produkte verwenden, die den geltenden Sicherheitsvorschriften im <strong>La</strong>nd der Installation entsprechen.<br />
• Um eine Überhitzung des Speisekabels zu vermeiden, muss es in seiner ganzen Länge abgewickelt werden.<br />
• Einphasige Dosiermühlen sind mit einem Speisekabel mit drei Leitern und Stecker für den Anschluss an<br />
die Netzsteckdose ausgestattet.<br />
• Für den elektrischen Anschluss der Drehstrom-Modelle ist ein allpoliger Hauptschalter auf der<br />
Stromzuleitung des Gerätes zu installieren, der entsprechend den elektrischen Daten (Stromstärke und<br />
Spannung) auszulegen ist, die am Typenschild des Gerätes angegeben sind. Der allpolige Hauptschalter<br />
muss eine Unterbrecherleistung mit einer Trennstrecke von zumindest 3 mm aufweisen.<br />
• Drehstrom-Dosiermühlen sind mit einem Speisekabel mit fünf Leitern ausgestattet; der Anschluss der<br />
Drehstrom-Modelle ist wie folgt auszuführen: (Sternschaltung bei Spannung 400V-3N~ und<br />
Dreiecksschaltung bei Modellen mit Speisespannung 230V-3~).<br />
Spannung<br />
400V-3N~<br />
230V-3~<br />
L 3<br />
L 2<br />
L 1<br />
N<br />
GI/VE<br />
L 3<br />
L 2<br />
L 1<br />
N<br />
GI/VE<br />
Anschluss an die<br />
Steckdose<br />
Anschluss and das Klemmbrett im Gerät<br />
1<br />
2<br />
GI BL BI NE VE MA<br />
2<br />
4 6<br />
3 4 5 6<br />
GI BL BI NE VE MA<br />
1<br />
3<br />
5<br />
LEGENDE:<br />
L 3 = braun<br />
L 2 = schwarz<br />
L 1 = grey<br />
N = Nulleiter (blau)<br />
GI/VE = Erde<br />
1 = rot<br />
2 = weiß<br />
3 = blau<br />
4 = schwarz<br />
5 = grey<br />
6 = braun<br />
• Nach Beendigung des elektrischen Anschlusses sich von der korrekten Drehrichtung des Motors nach rechts<br />
überzeugen (von oben gesehen); dreht der Motor nach links, zwei Phasen der Speiseleitung vertauschen.<br />
• Wird die Spannung von 400V-3N~ auf 230V-3~ bzw. umgekehrt geändert, das in der Geräteausstattung<br />
enthaltene Klebeetikett verwenden, um die Daten am Etikett zu berichtigen, das am Ende des Speisekabels<br />
aufgeklebt ist.<br />
43<br />
deutsch
deutsch<br />
4.3 Einstellung der mahlstärke<br />
Anleitungen für eine korrekte Regulierung:<br />
• Trichter 4 mit Kaffeebohnen füllen und Absperrschieber 6 öffnen.<br />
• Eine kleine Menge Kaffee mahlen, um einen oder mehrere Espresso zu bereiten und die Ausgabe in die<br />
Tasse kontrollieren (die “ideale” Ausgabe erhält man mit 6-8 Gramm gemahlenem Kaffee pro Tasse bei<br />
einer Mahlzeit von 25-35 Sekunden). Es gibt drei mögliche Fälle:<br />
a) Die Ausgabe in die Tasse erfolgt sehr langsam: die Mahlstärke des gemahlenen Kaffee ist zu fein (muß<br />
erhöht werden). Die Regulierung der Mahlstärke erfolgt durch Drücken der Auslösetaste 9 und Drehen der<br />
Nutmutter 10 im Uhrzeigersinn.<br />
b) Die Ausgabe in die Tasse erfolgt sehr schnell: die Mahlstärke des gemahlenen Kaffee ist zu grob (muß<br />
verringert werden). Die Regulierung der Mahlstärke erfolgt durch Drücken der Auslösetaste 9 und Drehen<br />
der Nutmutter 10 gegen den Uhrzeigersinn.<br />
c) Die Ausgabe erfolgt korrekt.<br />
4.4 Austausch der mahlsteine<br />
Bei einem Austausch der Mahlsteine darauf achten, daß die Verstellmutter so eingesetzt wird, daß die<br />
Befestigungsschraube des Trichters (1) nicht in den Haltestift der Mahlsteine (2) eingreift.<br />
Für den Austausch wie folgt verfahren:<br />
1. Befestigungsschraube des Trichters vollständig ausschrauben und Trichter ausziehen.<br />
2. Die drei Gewindestifte M5x12 auf der Befestigung<strong>sm</strong>utter der Mahlsteine abschrauben und Verstellmutter<br />
ausziehen.<br />
3. Oberen Mahlsteinhalter abschrauben und aus seinem Sitz ausziehen.<br />
4. Mahlsteine auswechseln und den neuen unteren Mahlstein mittig gegenüber den drei Abstreifzähnen<br />
einsetzen (der Abstand von den Zähnen beträgt 0.9 mm, für die mittige Einstellung wird der Einsatz eines<br />
Dickenmessers empfohlen).<br />
5. Sitz der Mahlsteinhalter und Gewinde des oberen Mahlsteinhalters gründlich reinigen.<br />
6. Oberen Mahlsteinhalter einschrauben, bis der obere Mahlstein am unteren Mahlstein streift; diese<br />
Einstellung ist bei eingeschalteter Dosiermühle auszuführen, damit die genaue Position erfaßt wird, in<br />
welcher der Kontakt der beiden Mahlsteine einsetzt.<br />
7. Abschließend die Verstellmutter montieren und darauf achten, daß sich die Befestigungsschraube des<br />
Trichters im Gegenuhrzeigersinn vor dem Haltestift der Mahlsteine befindet, wie dies in Abb. 1 gezeigt ist.<br />
Abb. 2 zeigt hingegen eine unrichtige Montage der Verstellmutter: die Befestigungsschraube des Trichters<br />
(1) befindet sich hinter dem Haltestift der Mahlsteine (2). Es wird dringend darauf hingewiesen, daß in<br />
diesem Fall die Befestigungsschraube des Trichters eine Überwindung des Haltestiftes in der<br />
Öffnungsphase der Mahlsteine nicht zuläßt; da daher die Mahlsteine bereits in Kontakt sind, kann die<br />
korrekte Feinheit der gemahlenen Kaffeebohnen nicht mehr eingestellt werden und es erfolgt keine oder<br />
eine nur tropfenweise Kaffeeausgabe.<br />
1 2<br />
2 1<br />
Abb. 1 - korrekte Montage Abb. 2 - falsche Montage<br />
5. anleitungen für den betrieb<br />
5.1 Abgabedosierungen<br />
5.a Einzelabgabe (Symbol mit einer Kaffeetasse),<br />
5.b Doppelabgabe (Symbol mit zwei Kaffeetassen)<br />
5.c Dauerabgabe (Symbol ∞).<br />
44
5.2 Standby<br />
Die aktive LED-Dosiertaste leuchtet heller (die Bedeutung der aktiven Taste wird später genauer erklärt). Die<br />
andere Taste ist leuchtet schwach.<br />
5.3 Programmierbare abgabedosierung<br />
Nachdem die Taste Einzel- oder Doppelabgabe gedrückt wurde, wird diese Taste als einzig aktive Taste für<br />
nachfolgende Abgaben bei Modellen mit Mikroschalter in der CPU gespeichert.<br />
Modelle ohne Mikroschalter<br />
Bei Modellen ohne Mikroschalter erfolgt die Abgabe des gemahlenen Kaffees über das Touchpanel.<br />
Wird eine Abgabetaste (Einzel oder Doppel) gedrückt, beginnt der Mahlvorgang und auf dem Display startet<br />
der Countdown der gewählten Dosierung; nach Abschluss der Abgabe wird auf dem Display für 2 Sekunden<br />
der Wert 00.0 angezeigt. Drückt man auf Dauerabgabe (Symbol ∞), arbeitet die Dosiermühle in der Betriebsart<br />
Start/Stopp (nach 3 Minuten ist ein Sicherheitsstopp vorgesehen).<br />
Modelle mit Mikroschalter<br />
Beim Vorwählen der gewünschten Dosierung (Einzel oder Doppel) erscheint auf dem Display im Standby die<br />
programmierte Zeit für diese Dosierung; wird der Mikroschalter aktiviert, beginnt anschließend der<br />
Mahlvorgang und auf dem Display startet der Countdown; nach Abschluss der Abgabe wird auf dem Display<br />
für 2 Sekunden der Wert 00.0 angezeigt.<br />
Die Abgabe des gemahlenen Kaffees erfolgt daher nur, wenn der MIkroschalter 13 durch den Filter aktiviert wird.<br />
Nach Ablauf dieser Zeit wird auf dem Display wieder die Zeit für die Dosierung angezeigt, die sich auf die<br />
entsprechende stärker leuchtende Taste bezieht (d.h. für die Taste, die für nachfolgende Abgaben aktiv ist).<br />
Über die Tastatur kann der Mikroschalter umgangen werden und die Steuerung erfolgt ausschließlich über<br />
das Touchpanel.<br />
Das heißt, nachdem das Mahlwerk durch den Hauptschalter eingeschaltet wurde, hat man zirka 3-4<br />
Sekunden Zeit, um die Taste oben rechts (Taste +) zu drücken und zu einem Menü zu gelangen, in dem durch<br />
die Taste + die Betriebsart geändert werden kann : micro SI (M s) für die Aktivierung oder micro NO (M n) für<br />
die Deaktivierung.<br />
Wird in dieser Phase die Taste ∞ (∞ ist das Symbol für unendlich) für 5 Sekunden gedrückt, erscheint auf<br />
dem Display die Aufschrift “i s” (unendlich ja) oder “i n” (unendlich nein). Um von “i s” nach “i n” zu wechseln,<br />
oder umgekehrt, genügt es, die Taste + zu drücken. Wird die Taste Unendlich erneut für 5 gedrückt,<br />
erscheint auf dem Display wieder die Option micro Si micro No.<br />
Die Taste oben links (Taste -) dient dazu, diese Betriebsart zu verlassen, wenn diese nicht bereits durch ein<br />
Timeout (30 Sekunden) verlassen wurde.<br />
5.4 Dauerabgabe<br />
Mit der Taste für die Dauerabgabe (∞) startet der Mahlvorgang, ohne dass der Mikroschalter betätigt werden<br />
muss.<br />
Aus Sicherheitsgründen gibt es zwischen dem Moment, in dem die Dauertaste gedrückt wird und dem<br />
Beginn der Ausgabe eine Verzögerungszeit von 1 Sekunde, damit unbeabsichtigte Abgaben verhindert werden.<br />
Um die Dauerabgabe zu beenden, genügt es, die gleiche Taste (∞) nochmals zu berühren. Während der<br />
Dauerabgabe erscheint auf dem Bildschirm die Schrift inF.<br />
45<br />
deutsch
deutsch<br />
5.5 Programmierung: dosierung<br />
a. Den Hauptschalter 3 der Dosiermühle von OFF auf ON stellen.<br />
b. Innerhalb von 5 Sekunden, ab Aufleuchten der LED am Touchpanel, für 5 Sekunden die Taste der<br />
Dosierung drücken, die programmiert werden soll, Einzelabgabe oder Doppelabgabe, die entsprechende<br />
Taste blinkt langsam, zusammen mit den Ziffern des Displays.<br />
c. Nachdem die Taste wieder losgelassen wurde, mit den Einstelltasten (+/-) an der Seite des Displays die<br />
Zeit für den Mahlvorgang erhöhen oder vermindern, bis der gewünschte Wert erreicht ist.<br />
d. Nachdem die Zeit eingegeben wurde, die Taste, deren LED blinkt, erneut drücken, um die so programmierte<br />
Zeit zu speichern.<br />
e. Ist die Dosierung für einen Kaffee gespeichert, kann die andere Dosierung unabhängig davon programmiert<br />
werden, oder sie kann kopiert werden, verdoppelt für die Doppelabgabe oder halbiert für<br />
die Taste Einzelabgabe.<br />
f. Um die Dosierung der Einzelabgabe zu speichern und gleichzeitig die doppelte Menge auf die Taste<br />
Doppelabgabe zu kopieren, genügt es, die ausgeführte Programmierung für die Einzeltaste durch Drücken<br />
der Doppeltaste zu bestätigen. Um die Dosierung der Doppelabgabe zu speichern und gleichzeitig die<br />
halbierte Menge auf die Taste Einzelabgabe zu kopieren, genügt es, die ausgeführte Programmierung für<br />
die Doppeltaste durch Drücken der Einzeltaste zu bestätigen.<br />
g. Durch die drei Ziffern kann die Zeit mit einer Genauigkeit von Zehntelsekunden eingestellt werden; also<br />
zwei Ziffern für die Sekunden und eine für die Zehntelsekunden.<br />
h. Wenn nach dem unter Punkt a beschriebenen Vorgang eine der drei Tasten (Einzel-, Doppel- oder<br />
Dauerabgabe) für 10 Sekunden gedrückt wird, kommt man in die “Betriebsart Zähler”.<br />
i. Auf dem Display erscheint in <strong>La</strong>ufschrift die Anzahl der abgegebenen Kaffeeportionen einer speziellen<br />
Taste: die beiden nachfolgenden Angaben der <strong>La</strong>ufschrift auf dem Display werden durch Bindestrich<br />
getrennt. Um den Zähler einer Taste auf Null zu stellen, genügt es, für 10 Sekunden die Taste zu drücken,<br />
deren Zähler man zurücksetzen möchte.<br />
Um die Betriebsart Zähler zu verlassen, genügt es, die Taste (-) oben links zu drücken, wenn die Betriebsart<br />
nicht bereits durch Erreichen des Timeouts (30 Sekunden) verlassen wurde.<br />
5.6 Aktivierung / deaktivierung des summers<br />
Ein hörbares Summen bei Berührung der Tasten des Touchpanels, nach Abschluss jeder Abgabe und beim<br />
Einschalten der Dosiermühle kann wie nachfolgend beschrieben programmiert werden.<br />
Nachdem mit der Taste (+) der Programmiermodus aufgerufen wurde, muss die Taste Einzelabgabe für 3<br />
Sekunden gedrückt werden.<br />
Ein langer Piepton zeigt an, dass der Summer ausgeschaltet wurde, 2 kurze Pieptone zeigen dem Nutzer an,<br />
dass der Summer aktiviert ist.<br />
5.7 Alarm zu hoher verbrauch der mahlsteine<br />
(diese option kann nur über ein Palmtop aktiviert werden, dieses Gerät gehört nicht zur ausstattung<br />
der dosiermühle)<br />
Bei der Programmierung über Palmtop wird eine Betriebszeit des Motors in Stunden eingegeben. Sind die<br />
Betriebsstunden des Motors erreicht, erscheint auf dem Display nach jeder Abgabe für zehn Sekunden die<br />
Aufschrift GRN. Wird über das Palmtop die Zahl 000, gespeichert, wird der Alarm deaktiviert.<br />
6. Praktische hinweise für den benutzer<br />
• Kaffeebohnen in luftdicht verschlossenen Behältern in trockenen Räumlichkeiten und bei<br />
Raumtemperatur aufbewahren.<br />
• Regelmäßig Feinheit und Dosierung des gemahlenen Kaffee kontrollieren; dabei ist zu berücksichtigen,<br />
dass die Bedingungen der Raumluft (Raumfeuchtigkeit) die Qualität des fertigen Kaffee erheblich beeinflussen.<br />
Bei Zunahme der Raumfeuchtigkeit eine gröbere Einstellung und bei Abnahme der Feuchtigkeit<br />
eine größere Feinheit wählen.<br />
• Regelmäßig durch befugtes Personal des technischen Kundendienstes den Verschleißzustand der<br />
Mahlsteine überprüfen lassen; dabei ist zu berücksichtigen, dass flache Mahlsteine nach dem Mahlen<br />
von maximal 300-600 kg Kaffee ersetzt werden müssen, konische hingegen nach maximal 600-1200<br />
kg. Es wird daran erinnert, dass beide Mahlsteine, der fixe und der bewegliche, ausgetauscht werden<br />
müssen, da ein nur teilweiser Austausch zu einer Verformung der Dosiermühle führen würde. Der<br />
Austausch ist durch befugtes Kundendienstpersonal auszuführen.<br />
• Der Trichter muss regelmäßig gereinigt werden.<br />
• Bei längerem Stillstand (Betriebsurlaub, Saisonbetrieb, usw.) Trichter vollständig entleeren und gründlich<br />
reinigen.<br />
46
7. information für die benutzer innerhalb<br />
der europäischen Gemeinschaft<br />
Gemäß der Europäischen Richtlinie 2002/96/CE über elektrischen Abfall (WEEE) wird zur Kenntnisnahme für<br />
die Benutzer innerhalb der Europäischen Gemeinschaft folgendes erklärt.<br />
• Das Symbol des durchgestrichenen Müllcontainers auf dem Gerät oder seiner<br />
Verpackung bedeutet, dass dieses Produkt bei seiner Unbrauchbarkeit nicht mit dem<br />
Hau<strong>sm</strong>üll, sondern getrennt gesammelt werden muss.<br />
• Die Sammelstelle der getrennten Müllbeseitigung sorgt für die Weitergabe des Altgerätes<br />
an die Wiederverwertung, Behandlung und umweltfreundliche Entsorgung und trägt<br />
damit zum Vermeiden negativer Auswirkungen auf Umwelt und Gesundheit und zur<br />
Wiederverwertung des Materials, aus dem sich das Gerät zusammensetzt, bei.<br />
• Gemäß der Europäischen Richtlinie 2002/96/CE hat die gesetzeswidrige Entsorgung<br />
des Produkts durch den Benutzer, die Anwendung der von der örtlich geltenden, gesetzlichen Regelung<br />
vorgesehenen Strafmaßnahmen zur Folge.<br />
8. Garantie<br />
Der Garantieanspruch verfällt wenn:<br />
• Die Anleitungen dieser Betriebsanleitung nicht eingehalten werden.<br />
• Ordentliche und außerordentlichen Wartungs- oder Reparaturarbeiten durch unbefugtes Personal durchgeführt<br />
werden.<br />
• Die Verwendung des Gerätes nicht der in dieser Betriebsanleitung beschriebenen entspricht.<br />
• Originalteile durch Ersatzteile anderer Hersteller ersetzt werden.<br />
• Von jeder Garantie ausgenommen sind Schäden, die durch Nachlässigkeit, falsche und nicht den<br />
Anleitungen in dieser Betriebsanleitung entsprechende Installation und/oder Bedienung, unachtsame<br />
Verwendung, grobe Behandlung, Blitzschlag oder Witterungseinflüsse, Überspannung oder Überstrom,<br />
ungenügende oder unregelmäßige Stromversorgung entstanden sind.<br />
9. Konformitäts-erklärung<br />
Der Hersteller:<br />
la san marco s.p.a.<br />
34072 Gradisca d’Isonzo (GO) Italien – Via Padre e Figlio Venuti, 10<br />
Telefon (+39) 0481 967111 – Fax (+39) 0481 960166 – http://www.lasanmarco.com<br />
erklärt auf eigene Verantwortung, dass die dosiermühle, die in diesem Handbuch beschrieben und durch die<br />
Daten auf dem Typenschild des Gerätes identifiziert wird, den Richtlinien: 2006/42/EG, 2006/95/EG,<br />
2004/108EG, Verordnung (EG) Nr. 1935/2004 entspricht. Für die Feststellung der Konformität mit besagten<br />
Richtlinien wurden folgende harmonisierte Normen angewendet: EN ISO 12100, EN 60335-1,<br />
EN 60335-2-64<br />
AUTORISIERTE PERSONE ZUR<br />
ERSTELLUNG DER TECHNISCHEN UNTERLAGEN<br />
Ing. Roberto Marri<br />
Via Padre e Figlio Venuti,10<br />
34072 Gradisca d’Isonzo - ITALIA<br />
Gradisca d’Isonzo, März 2011<br />
Ing. Roberto Marri<br />
Vertriebsleiter<br />
47<br />
deutsch
deutsch<br />
10. Probleme und lösungen<br />
Bevor der technische Kundendienst angefordert wird, folgende Kontrollen durchführen:<br />
48<br />
störunG ursache behebunG<br />
1) Der Kaffee fließt sehr rasch<br />
aus dem Ausgießer; der Kaffee<br />
in der Tasse ist hell.<br />
2) Der Kaffee fließt langsam<br />
(tropfenweise) aus dem<br />
Ausgießer; der Kaffee in der<br />
Tasse ist dunkel.<br />
3. Sudrückstände in der Tasse.<br />
a) Mahlvorgang zu grob.<br />
b) Ungenügende Dosierung.<br />
c) Kaffee zu wenig gepresst.<br />
a) Mahlvorgang zu fein.<br />
b) Zu hohe Dosierung.<br />
c) Kaffee zu stark gepresst.<br />
a) Mahlvorgang zu fein.<br />
b) Mahlsteine abgenutzt.<br />
a) Feinere Einstellung wählen.<br />
b) Dosierung erhöhen.<br />
c) Stärker zusammenpressen.<br />
a) Gröbere Einstellung wählen.<br />
b) Dosierung verringern<br />
c) Weniger stark zusammenpressen.<br />
a) Gröbere Einstellung wählen.<br />
b) Mahlsteine austauschen.<br />
Kann die Störung auf die beschriebene Weise nicht behoben werden bzw. bei sonstigen als den beschriebenen<br />
Fehlern, sich an einen autorisierten Kundendienst <strong>La</strong> <strong>San</strong> <strong>Marco</strong> S.p.A. wenden.<br />
<strong>La</strong> <strong>San</strong> <strong>Marco</strong> S.p.A. behält sich technische Änderungen<br />
an den Geräten ohne vorherige Ankündigung vor.
molinillo-dosificator <strong>sm</strong> <strong>92</strong> <strong>instant</strong><br />
<strong>sm</strong> <strong>97</strong> <strong>instant</strong> - <strong>sm</strong> tK <strong>instant</strong><br />
Traducción de las instrucciones originales<br />
esPaÑol
esPaÑol<br />
Índice<br />
1. Notas generales ..................................pag. 51<br />
1.1 El café exprés .................................................. pag. 51<br />
1.2 <strong>La</strong> conservación del café en granos ................................. pag. 51<br />
1.3 El molinillo-dosificador y la moledura ................................ pag. 51<br />
1.4 <strong>La</strong> máquina para café exprés ...................................... pag. 51<br />
1.5 Condiciones climáticas - Operador . . . . . . . . . . . . . . . . . . . . . . . . . . . . . . . . . pag. 51<br />
2. Introducción .....................................pag. 52<br />
2.1 Consultar el manual . . . . . . . . . . . . . . . . . . . . . . . . . . . . . . . . . . . . . . . . . . . . . pag. 52<br />
2.2 Advertencias ................................................... pag. 52<br />
3. CaracterÍsticas técnicas. . . . . . . . . . . . . . . . . . . . . . . . . . . . pag. 53<br />
3.1 Características generales de los varios modelos ....................... pag. 53<br />
3.2 Características técnicas . . . . . . . . . . . . . . . . . . . . . . . . . . . . . . . . . . . . . . . . . . pag. 53<br />
3.3 Diseño general . . . . . . . . . . . . . . . . . . . . . . . . . . . . . . . . . . . . . . . . . . . . . . . . . pag. 54<br />
4. Instala´cion ......................................pag. 55<br />
4.1 Advertencias ................................................... pag. 55<br />
4.2 Conexión eléctrica . . . . . . . . . . . . . . . . . . . . . . . . . . . . . . . . . . . . . . . . . . . . . . pag. 55<br />
5. Instrucciones de funcionamiento .....................pag. 56<br />
5.1 Dosis distribuibles ............................................... pag. 56<br />
5.3 Distribución de dosis programables ................................. pag. 57<br />
5.4 Distribución continua . . . . . . . . . . . . . . . . . . . . . . . . . . . . . . . . . . . . . . . . . . . . pag. 57<br />
5.5 Programación : dosis . . . . . . . . . . . . . . . . . . . . . . . . . . . . . . . . . . . . . . . . . . . . pag. 58<br />
5.6 Habilitación / deshabilitación del zumbador . . . . . . . . . . . . . . . . . . . . . . . . . . pag. 58<br />
5.7 Alarma por consumo excesivo de las muelas . . . . . . . . . . . . . . . . . . . . . . . . . pag. 58<br />
6. Consejos prácticos para el operador . . . . . . . . . . . . . . . . . pag. 58<br />
7. Información para los usuarios de la Comunidad Europea . pag. 59<br />
8. Garantía . . . . . . . . . . . . . . . . . . . . . . . . . . . . . . . . . . . . . . . . pag. 59<br />
9. Declaración de conformidad . . . . . . . . . . . . . . . . . . . . . . . . pag. 59<br />
10. Problemas y soluciones ............................pag. 60<br />
MANUAL CÓDIGO 7770.051<br />
Revisión 03.11<br />
50
1. notas generales<br />
• En la primera parte de este manual de uso se explica brevemente el método para la producción del café exprés,<br />
los equipos modernos usados y la función que cumple el molinillo-dosificador en este delicado proceso.<br />
1.1 El café exprés<br />
El exprés es un café preparado con un método de extracción especial, que permite obtener una bebida muy<br />
concentrada, almibarada, de gusto y aroma intensos. El método de preparación del exprés consiste en extraer<br />
las sustancias contenidas en el café molido mediante un flujo de agua caliente a presión (aprox. 9 bar) por un<br />
tiempo variable que va de 25 a 35 segundos; de esta manera las sustancias solubles (azúcares y proteínas) e<br />
insolubles (grasas y coloides) contenidas en el café son "arrastradas" en la taza formando la característica crema<br />
del verdadero café exprés. <strong>La</strong> preparación del café exprés es una operación muy delicada; son muchos los<br />
factores que influyen en el resultado exitoso de esta operación: la conservación del café en granos, el molinillodosificador<br />
y la moledura, la conservación del café molido, la máquina del café exprés, la variabilidad de las<br />
condiciones climáticas, la atención y la capacidad del operador encargado de la preparación del café exprés.<br />
1.2 <strong>La</strong> conservación del café en granos<br />
<strong>La</strong>s variedades naturales de café son dos: la calidad "arábica" y la calidad "robusta". Por lo general el café<br />
torrefacto utilizado para producir el exprés contiene una mezcla de las dos variedades, oportunamente mezcladas<br />
en porcentajes variables, que tienen en cuenta las características organolépticas de cada componente.<br />
<strong>La</strong> mezcla del café torrefacto se debe conservar herméticamente cerrada adentro de su confección. El<br />
café en granos, después de la torrefacción, contiene todas las sustancias y los aromas característicos de la<br />
variedad o de la mezcla, estos aromas se evaporan rápidamente cuando los granos de café entran en contacto<br />
con el aire, la luz y la humedad.<br />
1.3 El molinillo-dosificador y la moledura<br />
El molinillo-dosificador es un aparato que muele el café en granos y lo dosifica. Para obtener un buen exprés<br />
se necesitan partículas de café molido con diámetro variable que va de aproximadamente 1 mm hasta polvo<br />
inferior a 150 µm. El café en polvo ofrece una superficie mayor de contacto con el agua, permitiendo una<br />
extracción más elevada de las sustancias solubles e insolubles; variando la granulometría de la moledura,<br />
se podrá modificar la resistencia al pasaje del agua. Si el café molido está compuesto por gránulos demasiado<br />
gruesos, el pasaje del agua es muy rápido y no llega a aprovechar completamente la calidad del café<br />
molido, se obtiene un exprés de color claro, aguoso, sin el gusto y el aroma característico del café. Cuando<br />
el café molido es demasiado fino, al contrario el exprés es de color oscuro, quemado y frío; el tiempo de<br />
pasaje del agua es muy largo y el agua filtra con dificultad, pues el polvo ofrece una resistencia excesiva al<br />
pasaje del agua. El café exprés resulta superconcentrado.<br />
1.4 <strong>La</strong> máquina para café exprés<br />
<strong>La</strong> máquina para café exprés es un equipo constituido esencialmente por una caldera y por una serie de<br />
intercambiadores, en el cual se activa el calentamiento del agua mediante una resistencia eléctrica o un<br />
quemador de gas. El agua, puesta a una temperatura elevada, atraviesa el café molido colocado en la copa<br />
porta filtro y extrae sus aromas. Cuando en este manual se habla de máquina para café exprés, se hace<br />
referencia tanto a los modelos de distribución mediante bomba como a aquellos en los que la distribución<br />
se realiza mediante pistón hidráulico (llamados de palanca) . Los molinillos-dosificadores fabricados por <strong>La</strong><br />
<strong>San</strong> <strong>Marco</strong> S.p.A. son aparatos profesionales diseñados y fabricados para ser usados junto con estos tipos<br />
de máquina para café exprés.<br />
1.5 Condiciones climáticas - Operador<br />
Como ya se ha dicho, para obtener un buen café exprés, es indispensable moler el café según una cierta<br />
granulometría. El café molido es muy higroscópico; en otras palabras, “absorbe” la humedad ambiente, por<br />
lo cual la moledura debe ser modificada cuando varían las condiciones climáticas; una moledura con un<br />
porcentaje de humedad elevado aumenta la resistencia al paso del agua. Otros factores importantes para la<br />
preparación del café exprés son la cantidad y el prensado del café molido en el interior de la copa porta<br />
filtro. Estos últimos factores (humedad, cantidad y granulometría de la moledura, prensado) deben ser considerados<br />
y evaluados por el operador encargado de la preparación del exprés. Por este motivo el operador<br />
desempeña un papel fundamental durante la preparación del café exprés.<br />
51<br />
esPaÑol
esPaÑol<br />
2. introducción<br />
2.1 Consultar el manual<br />
• Este manual ofrece todas las informaciones necesarias para la instalación, el arranque,<br />
el uso y el mantenimiento del molinillo-dosificador.<br />
• El personal encargado del uso normal y del mantenimiento de rutina así como el personal<br />
técnico encargado de las operaciones de mantenimiento extraordinario y de<br />
reparación debe haber leído atentamente y comprendido el contenido de este<br />
manual.<br />
• Este manual es parte integrante de la máquina, se debe guardar junto con la mi<strong>sm</strong>a<br />
y debe ser entregado a cualquier otro usuario o propietario sucesivo.<br />
• El manual o copia del mi<strong>sm</strong>o debe estar siempre cerca de la máquina para que el<br />
operador lo pueda consultar; debe ser guardado con mucho cuidado, en lugar protegido<br />
contra el calor, la humedad, el polvo y los agentes corrosivos.<br />
• El molinillo-dosificador de <strong>La</strong> <strong>San</strong> <strong>Marco</strong> S.p.A. se debe usar de acuerdo con las modalidades<br />
descriptas en este manual; cualquier uso impropio o no conforme de este aparato excluye<br />
cualquier condición de garantía o responsabilidad del constructor.<br />
2.2 Advertencias<br />
• El molinillo-dosificador ha sido proyectado y construido para moler el café en granos y<br />
para dosificarlo. Cualquier uso diferente al especificado en este manual debe considerarse<br />
impropio y por lo tanto no autorizado. El fabricante declina cualquier responsabilidad<br />
por daños derivados del uso impropio de este aparato.<br />
• El usuario debe ser una persona adulta y responsable, que debe respetar las normas<br />
de seguridad en vigor en el país de instalación, junto a las reglas dictadas por el sentido<br />
común. Para usar la máquina en forma segura y correcta, el operador debe respetar<br />
las reglas de prevención de los accidentes y todos los requisitos de medicina e<br />
higiene del trabajo.<br />
• El uso del aparato y las operaciones de mantenimiento de rutina y de limpieza están<br />
reservadas solamente al personal encargado, delegado por el cliente bajo su propia<br />
responsabilidad.<br />
• Queda severamente prohibido hacer funcionar la máquina con las protecciones fijas<br />
y/o móviles de<strong>sm</strong>ontadas o con los dispositivos de seguridad desactivados; a su vez<br />
está terminantemente prohibido alterar los dispositivos de seguridad.<br />
• Durante el funcionamiento del molinillo-dosificador, no introducir en la tolva o en el<br />
dosificador objetos como utensilios u otros similares (destornilladores, cucharas,<br />
etc.).<br />
• Antes de efectuar cualquier operación de mantenimiento de rutina o limpieza, desconectar<br />
la alimentación eléctrica, si es posible desenchufando el aparato, de lo contrario<br />
desconectar el interruptor omnipolar antes de la máquina.<br />
• Para las operaciones de limpieza no usar productos con alcohol, gasolina o solventes<br />
en general; utilizar agua o solventes neutros.<br />
• Para las operaciones de limpieza de la estructura es suficiente utilizar un trapo húmedo<br />
o una esponja; nunca usar chorros de agua. Para la limpieza de las partes internas<br />
del dosificador, del grupo de moledura y de la tolva, utilizar un cepillo.<br />
• <strong>La</strong>s operaciones de mantenimiento extraordinario y de reparación deben ser efectuadas<br />
por personal técnico especializado de los centros de asistencia técnica de <strong>La</strong> <strong>San</strong><br />
<strong>Marco</strong> S.p.A.<br />
• Si el cable de alimentación está dañado, debe ser sustituido por el fabricante o por<br />
su servicio de asistencia técnica, o una entidad de cualificación similar.<br />
• En caso de averías o roturas de algún componente del molinillo-dosificador acuda al<br />
centro de asistencia autorizado y solicite el uso de repuestos originales <strong>La</strong> <strong>San</strong> <strong>Marco</strong><br />
S.p.A.; el uso de repuestos no originales anula los certificados de conformidad y la<br />
garantía que acompañan a la máquina.<br />
• Queda terminantemente prohibido efectuar operaciones no autorizadas o de las cuales<br />
no se han comprendido las modalidades exactas; póngase en contacto con el<br />
fabricante para cualquier necesidad de información, repuestos o accesorios.<br />
• En caso de desuso o de<strong>sm</strong>antelamiento de la máquina, dirigirse al proveedor o a<br />
las empresas municipalizadas que se ocupan de la eliminación de los desperdicios<br />
sólidos urbanos. ¡No abandonar en el ambiente!<br />
52
3. caracterÍsticas técnicas<br />
3.1 Características generales de los varios modelos<br />
Los molinillos-dosificadores <strong>La</strong> <strong>San</strong> <strong>Marco</strong> son equipos profesionales que muelen el café en granos y lo<br />
dosifican. <strong>La</strong> <strong>San</strong> <strong>Marco</strong> S.p.A. produce tres modelos de molinillos-dosificadores: SM <strong>92</strong> INSTANT;SM <strong>97</strong><br />
INSTANT; Cónico (TK INSTANT). Están compuestos esencialmente por:<br />
• Una estructura 1 de aluminio pintado. <strong>La</strong>s dimensiones, la forma y el volumen son idénticos para todos<br />
los modelos, excepto para el modelo “SM TK INSTANT” en el cual a la estructura estándar se añade un<br />
zócalo 2, que contiene los componentes eléctricos y electrónicos.<br />
• Una tolva 4 en material plástico transparente, situada en la parte superior del molinillo-dosificador.<strong>La</strong><br />
tolva (4,6 litros) está fijada al molinillo-dosificador con un tornillo especial 8; la tolva se puede quitar de<br />
su posición solamente con la ayuda de una herramienta Dentro de la tolva hay una rejilla de protección<br />
7, que impide llegar a las muelas con las extremidades superiores.<br />
• Un motor eléctrico con el cual se conecta el grupo de moledura. En el modelo de molinillo-dosificador<br />
cónico, al motor eléctrico se conecta un reductor epicicloidal y por tanto el grupo de moledura.<br />
• Un grupo de moledura. El modelo SM <strong>92</strong> INSTANT y el modelo SM <strong>97</strong> INSTANT están equipados con un<br />
grupo de moledura de muelas planas cuyo diámetro es de 64 mm el primero y de 84 mm el segundo El<br />
modelo SM TK INSTANT tiene un grupo de moledura con muelas cónicas.<br />
• Un casquillo de regulación de la moledura 10 con un botón de desbloqueo 9. En la parte superior del casquillo<br />
se encuentran las indicaciones para la regulación de la moledura. Para modificar la granulometría del<br />
café molido es necesario hacer girar el casquillo en el sentido de las agujas del reloj o en el contrario.<br />
• Una horquilla 15 de soporte para la copa porta filtro,con el microinterruptor de inicio de moledura 13<br />
(bajo pedido).<br />
• Una centralita electrónica que controla la puesta en marcha y la parada de la moledura. Programando la<br />
centralita electrónica mediante el panel táctil se puede regular el tiempo de moledura.<br />
• Un interruptor general 3 on/off con LED verde.<br />
• Una teclado táctil 11 utilizado tanto para iniciar la moledura como para programar el molinillo dosificador.<br />
• Un cárter de soporte del teclado táctil 12.<br />
3.2 Características técnicas<br />
modelo<br />
<strong>sm</strong> <strong>92</strong><br />
<strong>instant</strong><br />
<strong>sm</strong> <strong>92</strong><br />
<strong>instant</strong><br />
micro<br />
<strong>sm</strong> <strong>97</strong><br />
<strong>instant</strong><br />
<strong>sm</strong> <strong>97</strong><br />
<strong>instant</strong><br />
micro<br />
<strong>sm</strong> tK<br />
<strong>instant</strong><br />
<strong>sm</strong> tK<br />
<strong>instant</strong><br />
micro<br />
velocidad<br />
motor<br />
(rpm)<br />
Potencia<br />
motor<br />
(W)<br />
Potencia<br />
absorbida<br />
(W)<br />
tiPo de<br />
muelas<br />
caPacidad de<br />
moledura<br />
(kg/h)<br />
dimensión<br />
muelas<br />
Ø (mm)<br />
velocidad<br />
muelas<br />
(rpm)<br />
nivel de<br />
ruido<br />
db(a)<br />
1350 220 350 PLANAS 8,5 64 1350 72 13,8<br />
1350 220 350 PLANAS 8,5 64 1350 72 13,8<br />
880 245 460 PLANAS 13 84 880 69 13,8<br />
880 245 460 PLANAS 13 84 880 69 13,8<br />
1350 373 650 CÓNICAS 18 / 400 68 17<br />
1350 373 650 CÓNICAS 18 / 400 68 17<br />
Los modelos de molinillos-dosificadores <strong>La</strong> <strong>San</strong> <strong>Marco</strong> S.p.A. están predispuestos para las siguientes tensiones:<br />
* 110 V-1~ 60 Hz (disponible sólo para los modelos SM <strong>92</strong> INSTANT / SM <strong>97</strong> INSTANT)<br />
* 230 V-1~ 50 Hz<br />
* 230 / 400 V-3N~ 50 Hz<br />
* 240 V-1 ~ 50 Hz<br />
<strong>La</strong>s dimensiones externas del embalaje son: 641 x 467 x 293 mm.<br />
Peso<br />
(Kg)<br />
53<br />
esPaÑol
esPaÑol<br />
3.3 Diseño general<br />
6<br />
9<br />
11<br />
12<br />
14<br />
13<br />
15<br />
16<br />
LEYENDA<br />
1 ESTRUCTURA DE ALUMINIO<br />
2 ZÓCALO PARA LA ESTRUCTURA<br />
3 INTERRUPTOR GENERAL<br />
4 TOLVA<br />
5 TAPA DE LA TOLVA<br />
6 COMPUERTA PARA TOLVA<br />
7 REJILLA DE PROTECCIÓN MUELAS<br />
8 TORNILLO ESPECIAL DE BLOQUEO TOLVA<br />
9 BOTÓN DE DESBLOQUEO VIROLA<br />
10 VIROLA PARA REGULAR LA MOLEDURA<br />
11 TECLADO TÁCTIL<br />
12 CÁRTER DE SOPORTE DEL TECLADO<br />
13 MICROINTERRUPTOR DE INICIO DE MOLEDURA<br />
14 PRENSA<br />
15 HORQUILLA PARA COPA PORTA FILTRO<br />
16 RECIPIENTE PARA RECOGER EL CAFÉ<br />
17 PATITA DE GOMA.<br />
54<br />
5<br />
4<br />
7<br />
10<br />
8<br />
1<br />
3<br />
2<br />
17
4. instalaćion<br />
4.1 Advertencias<br />
<strong>La</strong> instalación debe ser efectuada por el personal técnico especializado y autorizado por<br />
<strong>La</strong> <strong>San</strong> <strong>Marco</strong> S.p.A.<br />
El molinillo-dosificador se entrega a los clientes en un embalaje apropiado de cartón y<br />
poliestireno. El embalaje contiene: el molinillo-dosificador, sus accesorios, el manual de<br />
uso y Ia declaración de conformidad. Tras abrir el embalaje, compruebe el buen estado<br />
del molinillo-dosificador y de sus componentes; si tiene dudas no use el aparato y diríjase<br />
al personal especializado y autorizado de los centros de asistencia técnica de <strong>La</strong> <strong>San</strong> <strong>Marco</strong> S.p.A. El embalaje<br />
se debe eliminar a través de los centros de recogida de residuos apropiados, conforme a las leyes vigentes<br />
en el país de instalación. Evítese su liberación al medio ambiente. Los elementos del embalaje (cartón,<br />
poliestireno, puntas metálicas, etc.) pueden ser peligrosos. No dejar al alcance de los niños.<br />
El molinillo-dosificador debe ser colocado sobre una superficie perfectamente horizontal, lo suficientemente<br />
robusta para sostenerlo, estable y seca.<br />
4.2 Conexión eléctrica<br />
Disposiciones para una correcta conexión eléctrica del molinillo-dosificador:<br />
• Antes de conectar el aparato a la red eléctrica, verificar que los datos de placa del molinillo-dosificador<br />
correspondan con aquellos de la instalación de distribución eléctrica; la placa está situada debajo del<br />
plato recolector de fondos.<br />
• <strong>La</strong> conexión se debe efectuar en conformidad con las disposiciones del país de instalación.<br />
• <strong>La</strong> instalación eléctrica predispuesta por el cliente debe respetar las normas en vigor; la toma de corriente<br />
debe estar dotada de un sistema eficaz de puesta a tierra. <strong>La</strong> <strong>San</strong> <strong>Marco</strong> S.p.A. declina cualquier<br />
responsabilidad si no se respetan las prescripciones de ley. Una instalación incorrecta puede causar<br />
daños a personas o cosas para las cuales el fabricante no puede ser considerado responsable.<br />
• Si fuera necesario usar adaptadores, tomas múltiples o prolongaciones, use solamente productos conformes<br />
a las normas de seguridad vigentes en el país de instalación.<br />
• Para evitar posibles recalentamientos del cable de alimentación se recomienda desenrollarlo completamente.<br />
• Los molinillos-dosificadores monofásicos están equipados con un cable de alimentación de tres conductores<br />
dotado de clavija para la conexión eléctrica a la toma de red.<br />
• Para la conexión eléctrica de los modelos trifásicos es necesario instalar un interruptor general omnipolar<br />
antes de la instalación de alimentación eléctrica, dimensionado según las características eléctricas<br />
(potencia y tensión) indicadas en la placa del aparato. El interruptor omnipolar se debe desconectar de<br />
la red con una abertura de los contactos de al menos 3 mm.<br />
• Los molinillos dosificadores trifásicos están equipados con un cable de alimentación de cinco conductores;<br />
la conexión de los modelos trifásicos debe ser efectuada de la siguiente manera: (conexión a estrella<br />
para la tensión 400V-3N~ y conexión a triángulo para los modelos con alimentación 230V-3~).<br />
Tensión<br />
400V-3N~<br />
230V-3~<br />
L 3<br />
L 2<br />
L 1<br />
Conexión a la toma de<br />
alimentación eléctrica<br />
N<br />
GI/VE<br />
L 3<br />
L 2<br />
L 1<br />
N<br />
GI/VE<br />
1<br />
Conexión a la bornera en<br />
ele interior del aparato<br />
2<br />
4 6<br />
GI BL BI NE VE MA<br />
2<br />
3 4 5 6<br />
GI BL BI NE VE MA<br />
1<br />
3<br />
5<br />
LEYENDA:<br />
L 3 = marrón<br />
L 2 = negro<br />
L 1 = gris<br />
N = neutro (azul)<br />
GI/VE = tierra<br />
1 = rojo<br />
2 = blanco<br />
3 = azul<br />
4 = negro<br />
5 = gris<br />
6 = marrón<br />
• Al final de la conexión eléctrica verificar que el sentido de rotación del motor sea horario (mirando el<br />
aparato desde arriba); si el sentido es antihorario, invertir dos fases de alimentación.<br />
• Si se efectúa una transformación de 400V-3N~ a 230V-3~ o viceversa, utilizar las etiquetas adhesivas previstas en<br />
el equipo, para actualizar los datos indicados en la etiqueta pegada en la extremidad del cable de alimentación.<br />
55<br />
esPaÑol
esPaÑol<br />
4.3 Regulación de la moledura<br />
Disposiciones para una correcta regulación:<br />
• Llenar la tolva 5 ó 6 con el café en granos y abrir el registro 8.<br />
• Muela una pequeña cantidad de café para distribuir uno o varios cafés exprés y compruebe la distribución<br />
en la taza (la distribución “ideal” se obtiene con 6÷8 gramos de café molido por taza con un tiempo<br />
de 25÷35 segundos). Se pueden dar tres casos:<br />
a) <strong>La</strong> distribución del café en la tacita es lenta: la granulometría del café molido es demasiado fina (debe ser<br />
aumentada). <strong>La</strong> regulación de la granulosidad se efectúa apretando el pulsador de desbloqueo 11 y<br />
girando la virola de regulación 12 en sentido horario.<br />
b) <strong>La</strong> distribución del café en la tacita es rápida: la granulosidad del café molido es demasiado gruesa (debe<br />
ser di<strong>sm</strong>inuida). la regulación de la granulosidad se efectúa apretando el pulsador de desbloqueo 11 y<br />
girando la virola de regulación 12 en sentido antihorario.<br />
c) <strong>La</strong> distribución se efectúa correctamente.<br />
4.4 Sustitución de las muelas del molinillo<br />
Cuando se sustituyen las muelas recordar que el casquillo de regulación debe estar instalado en manera que<br />
el tornillo de bloqueo de la tolva (1) no interfiera con el perno de parada de las muelas (2).<br />
El método correcto para efectuar la sustitución de las muelas es el siguiente:<br />
1. Destornillar completamente el tornillo de bloqueo de la tolva y extraerla.<br />
2. Destornillar los tres tornillos prisioneros M5x12 que se encuentran en el casquillo portamuela y extraer el<br />
casquillo de regulación.<br />
3. Destornillar el portamuela de arriba y sacarlo de su alojamiento.<br />
4. Sustituir las muelas y centrar la muela de abajo respecto a los tres dientes raspadores (la distancia de<br />
estos dientes es de 0.9 mm, para centrar la muela se aconseja usar un calibre de espesor).<br />
5. Limpiar cuidadosamente los alojamientos del portamuelas y la rosca del portamuelas de arriba.<br />
6. Enroscar el portamuelas de arriba hasta que la muela de arriba llegue casi a rozar la de abajo; esta mani<br />
bra se debe efectuar con el molinillo dosificador en rotación para poder interceptar, con exactitud, el<br />
punto en el cual los dos muelas empiezan a entrar en contacto.<br />
7. Para terminar, introducir el casquillo de regulación haciendo atención a que el tornillo de bloqueo de la<br />
tolva se encuentre antes, en sentido antihorario, respecto al perno de parada de las muelas, tal como se<br />
representa en la figura 1.<br />
En la Fig. 2 se muestra una instalación incorrecta del casquillo de regulación: el tornillo de bloqueo de la<br />
tolva (1) se encuentra después del perno de parada de las muelas (2).<br />
Es de fundamental importancia hacer notar que en este caso el tornillo de bloqueo de la tolva no permitirá<br />
que se supere el perno de parada de las muelas durante la abertura de las mi<strong>sm</strong>as, por lo cual, estando los<br />
muelas ya a contacto, resultará imposible obtener la granulometría exacta del café, el cual no bajará del<br />
vaporizador o bajará a gotas.<br />
1 2<br />
2 1<br />
Abb. 1 - Montaje correcto Abb. 2 - Montaje incorrecto<br />
5. instrucciones de funcionamiento<br />
5.1 Dosis distribuibles<br />
5.a dosis individual (icono de una taza de café),<br />
5.b dosis doble (icono de dos tazas de café)<br />
5.c dosis continua (icono ∞).<br />
56
5.2 Stand-by<br />
Led de la tecla de dosis encendido con alta intensidad (el significado de la tecla quedará más claro en el<br />
texto que sigue). <strong>La</strong> otra tecla encendida con luz a baja intensidad.<br />
5.3 Distribución de dosis programables<br />
Una vez pulsada la tecla de dosis individual o dosis doble, la CPU guardará en la memoria esta tecla como<br />
la única activa para la distribución sucesiva en modelos con microinterruptor.<br />
Modelos sin microinterruptor<br />
En los modelos que no incluyan microinterruptor, la distribución de café molido se realizará mediante el<br />
teclado táctil.<br />
Pulsando una tecla de distribución (individual o doble), comenzará la moledura y en el display empezará la<br />
cuenta atrás de la dosis seleccionada; una vez concluida la distribución, el display mostrará el valor 00.0<br />
durante 2 segundos. Pulsando la dosis continua (símbolo ∞), el molinillo-dosificador funcionará en modalidad<br />
start/stop (se prevé una parada de seguridad después de 3 minutos).<br />
Modelos con microinterruptor<br />
En el momento de la preselección de la dosis deseada (individual o doble), el display mostrará, en stand-by, el<br />
tiempo programado para esa dosis; luego, si se activa el microinterruptor, comenzará la moledura y en el display<br />
empezará la cuenta atrás; una vez concluida la distribución, aparecerá el valor 00.0 durante 2 segundos.<br />
Así pues, la distribución de café molido solo se producirá cuando se accione el microinterruptor 13 mediante<br />
la copa porta filtro.<br />
Transcurrido este tiempo, el display volverá a indicar el tiempo de dosis correspondiente a la tecla encendida<br />
con alta intensidad (es decir, la activa para la posterior distribución).<br />
Mediante el teclado se puede ignorar la habilitación del microinterruptor y dejar todo el control al teclado táctil.<br />
Es decir, al conectar la alimentación del molinillo mediante el interruptor general, se dispondrá de 3-4 segundos<br />
de tiempo para pulsar la tecla de arriba a la derecha (tecla +) para entrar en un menú en el que, mediante<br />
la tecla +, se podrá cambiar la modalidad de funcionamiento: microinterruptor SÍ (M s) o microinterruptor<br />
NO (M n).<br />
Si durante esta fase se pulsa la tecla ∞ (∞ es el símbolo de continuo) durante 5 segundos, el display mostrará<br />
el mensaje “i s” (infinito sí) o “i n” (infinito no). Para pasar de “i s” a “i n” y viceversa bastará con pulsar<br />
la tecla +. Volviendo a pulsar durante 5 segundos la tecla de continuo, el display mostrará de nuevo la opción<br />
de Microinterruptor Sí o microinterruptor No.<br />
<strong>La</strong> tecla de arriba a la izquierda (tecla -) servirá para salir de esta modalidad, siempre que no se haya salido<br />
ya por haber expirado el tiempo límite (30 segundos).<br />
5.4 Distribución continua<br />
<strong>La</strong> tecla de distribución continua (∞) activará la moledura sin necesidad de accionar el microinterruptor.<br />
Por motivos de seguridad, entre el momento en que se toque la tecla de continuo y el inicio de la distribución<br />
transcurrirá 1 segundo de retraso; esto evitará puestas en marcha involuntarias. Para bloquear la distribución<br />
continua bastará con tocar la mi<strong>sm</strong>a tecla (∞). Durante la distribución continua el display muestra el mensaje<br />
inF.<br />
57<br />
esPaÑol
esPaÑol<br />
5.5 Programación : dosis<br />
a. Cambie de OFF a ON la posición del interruptor 3 del molinillo dosificador.<br />
b. Antes de 5 segundos desde el encendido de los leds del teclado táctil, pulsando durante 5 segundos la<br />
tecla de la dosis que se desea programar (dosis individual o dosis doble), la tecla correspondiente parpadeará<br />
lentamente, junto a los dígitos del display.<br />
c. Suelte la tecla y, usando las teclas de regulación (+/-), situadas al lado del display, aumente o reduzca el<br />
tiempo de moledura hasta llegar al valor deseado.<br />
d. Una vez ajustado el tiempo, vuelva a pulsar la tecla, cuyo led sigue parpadeando, para memorizar el<br />
tiempo programado de esta manera.<br />
e. Memorizando la dosis para un café se puede programar la otra dosis, independientemente de la primera,<br />
o copiarla duplicada a la tecla de dosis doble, o dividida a la mitad a la tecla de dosis individual.<br />
f. Para memorizar la dosis individual y copiarla duplicada a la tecla de dosis doble, bastará con confirmar<br />
la programación realizada para la tecla de dosis individual pulsando la tecla de dosis doble. Para memorizar<br />
la dosis doble y copiarla dividida a la mitad a la tecla de dosis individual, bastará con confirmar la<br />
programación realizada para la tecla de dosis doble pulsando la tecla de dosis individual.<br />
g. Los tres dígitos permitirán programar el tiempo con precisión de décima de segundo; por tanto, dos<br />
dígitos para los segundos y uno para las décimas.<br />
h. Si tras la operación descrita en el punto a se pulsa una de las tres teclas (dosis individual, doble o continua)<br />
durante 10 segundos, se entrará en la “modalidad de contadores”.<br />
i. El display mostrará, en modalidad de desplazamiento, el número de cafés distribuidos mediante la tecla<br />
en concreto: un guión en el display separará dos indicaciones consecutivas durante el desplazamiento<br />
de los dígitos. Para poner a cero el contador de una tecla, bastará con pulsar durante 10 segundos la<br />
tecla cuyo contador se desea poner a cero.<br />
Para salir de la modalidad de contadores, bastará con pulsar la tecla (-) de arriba a la izquierda, siempre que<br />
no se haya salido ya por haber expirado el tiempo límite (30 segundos).<br />
5.6 Habilitación / deshabilitación del zumbador<br />
Puede programarse un zumbador (audible cuando se tocan las teclas del teclado táctil, al final de cada<br />
distribución y al encenderse el molinillo-dosificador) siguiendo los pasos descritos a continuación.<br />
Tras entrar en la modalidad de programación con la tecla (+), se deberá pulsar la tecla de dosis individual<br />
durante 3 segundos.<br />
Un pitido largo indicará que se ha seleccionado el apagado del zumbador, 2 pitidos breves avisarán al usuario<br />
de que se ha activado la modalidad de zumbador encendido.<br />
5.7 Alarma por consumo excesivo de las muelas<br />
(opción activable solo mediante ordenador de mano, dispositivo no incluido con el molinillo-dosificador)<br />
<strong>La</strong> programación mediante ordenador de mano se realiza definiendo un tiempo de funcionamiento del motor,<br />
en horas. Una vez alcanzado el número de horas de funcionamiento del motor, el display mostrará el mensaje<br />
GRN durante diez segundos al final de cada distribución. Memorizando el número 000, siempre mediante<br />
ordenador de mano, la alarma quedará deshabilitada.<br />
6. consejos prácticos para el operador<br />
• Conserve el café en grano dentro de los contenedores herméticos en un ambiente seco y a temperatura<br />
ambiente.<br />
• Verifique periódicamente la granulometría del café molido y su dosificación, recordando que las condiciones<br />
atmosféricas (humedad ambiente) influyen considerablemente en la preparación del café exprés.<br />
Aumente la granulometría de la moledura cuando aumenta la humedad ambiente y redúzcala cuando la<br />
humedad di<strong>sm</strong>inuya.<br />
• Haga revisar periódicamente el estado de desgaste de las muelas por el personal técnico autorizado,<br />
recordando que las muelas planas pueden tratar un máximo de 300÷600 kg de café antes de ser sustituidas,<br />
mientras que para las muelas cónicas el máximo es de 600÷1 200 kg. Es importante recordar<br />
que la sustitución se refiere a ambas muelas, o sea la muela fija y la muela móvil, pues una sustitución<br />
parcial provocaría seguramente un mal funcionamiento del molinillo-dosificador. <strong>La</strong> sustitución debe ser<br />
efectuada por el personal autorizado de la asistencia técnica.<br />
• Limpie periódicamente la tolva.<br />
• En caso de parada prolongada (vacaciones, trabajo de temporada, etc.) vacíe completamente la tolva<br />
y límpiela en profundidad.<br />
58
7. información para los usuarios de la comunidad<br />
europea<br />
De acuerdo con la Directiva Europea 2002/96/CE sobre los residuos eléctricos (WEEE), se pone en conocimiento<br />
de los usuarios de la Comunidad Europea lo siguiente.<br />
• El símbolo del contenedor tachado indicado en el aparato o en su embalaje indica<br />
que, al final de su vida útil, el producto debe ser recogido de manera separada de los<br />
demás residuos.<br />
• Una adecuada recogida separada, para el posterior reciclaje, tratamiento y eliminación<br />
del aparato desechado compatibles con el medio ambiente, contribuye a evitar<br />
posibles efectos negativos para el medio ambiente y para la salud, y favorece la reutilización<br />
y/o el reciclaje de los materiales de los que se compone el aparato.<br />
• De acuerdo con la Directiva Europea 2002/96/CE, la eliminación incorrecta del producto<br />
por parte de su poseedor comportará la aplicación de las sanciones previstas<br />
por la normativa local vigente.<br />
8. Garantía<br />
<strong>La</strong> garantía decae si:<br />
• No se cumplen las instrucciones de este manual.<br />
• <strong>La</strong>s operaciones de mantenimiento ordinario y extraordinario o de reparación son efectuadas por personal<br />
no autorizado.<br />
• Se utiliza el aparato de manera diferente respecto a la prevista en el manual de uso.<br />
• Los componentes originales han sido sustituidos con piezas de fabricación diferente.<br />
• <strong>La</strong> garantía no se aplica si los daños han sido provocados por negligencia, uso e instalación incorrectos<br />
y/o no conformes a lo descrito en este manual, uso inapropiado, maltrato, rayos y fenómenos atmosféricos,<br />
sobretensiones y sobreintensidades, alimentación eléctrica insuficiente o irregular.<br />
9. declaración de conformidad<br />
<strong>La</strong> empresa fabricante:<br />
la san marco s.p.a.<br />
34072 Gradisca d’Isonzo (GO) Italia – Via Padre e Figlio Venuti, 10<br />
teléfono (+39) 0481 967111 – fax (+39) 0481 960166 – http://www.lasanmarco.com<br />
declara bajo su propia responsabilidad que el molinillo-dosificator descrito en este manual e identificado con<br />
los datos de servicio de la placa colocada sobre el aparato se ajusta a las directivas: 2006/42/CE, 2006/95/<br />
CE, 2004/108/CE, Reglamento (CE) n° 1935/2004. Para asegurar la conformidad con dichas directivas se<br />
han aplicado las normas armonizadas: EN ISO 12100, EN 60335-1, EN 60335-2-64<br />
PERSONA AUTORIZADA PARA<br />
ELABORAR EL EXPEDIENTE TÉCNICO<br />
Ing. Roberto Marri<br />
Via Padre e Figlio Venuti,10<br />
34072 Gradisca d’Isonzo - ITALIA<br />
Gradisca d’Isonzo, De marzo 2011<br />
Ing. Roberto Marri<br />
Administrador delegado<br />
59<br />
esPaÑol
esPaÑol<br />
10. Problemas y soluciones<br />
Antes de solicitar la intervención de la asistencia técnica, efectuar los controles aquí indicados:<br />
60<br />
defecto causa solución<br />
1) El café baja rápidamente del<br />
pico de distribución; la crema<br />
del café en la tacita es clara.<br />
2) El café baja lentamente<br />
(a gotas) por el pico; la crema<br />
del café en la tacita es oscura.<br />
3) Presencia de fondos de café<br />
en la tacita.<br />
a) moledura demasiado gruesa.<br />
b) dosis insuficiente.<br />
c) prensado débil.<br />
a) moledura demasiado fina.<br />
b) dosis elevada.<br />
c) prensado fuerte.<br />
a) moledura demasiado fina.<br />
b) muelas desgastadas.<br />
a) di<strong>sm</strong>inuir la granulometría.<br />
b) aumente la dosis.<br />
c) aumente el prensado.<br />
a) aumentar la granulometría.<br />
b) reduzca la dosis<br />
c) reduzca el prensado.<br />
a) aumentar la granulometría.<br />
b) sustituir las muelas.<br />
Si no se puede resolver el problema en el modo descripto o bien si se verificaran defectos distintos de los<br />
indicados, consultar el centro de asistencia técnica autorizado de <strong>La</strong> <strong>San</strong> <strong>Marco</strong> S.p.A.<br />
<strong>La</strong> <strong>San</strong> <strong>Marco</strong> S.p.A. se reserva la facultad de aplicar las modificaciones técnicas en los<br />
equipos sin previo aviso, si lo considerase necesario.
moinho-doseador <strong>sm</strong> <strong>92</strong> <strong>instant</strong><br />
<strong>sm</strong> <strong>97</strong> <strong>instant</strong> - <strong>sm</strong> tK <strong>instant</strong><br />
Tradução das instruções originais<br />
PortuGuÊs
PortuGuÊs<br />
ÍNDICE<br />
1. Informações de caracter geral .......................pag. 63<br />
1.1 O café expresso . . . . . . . . . . . . . . . . . . . . . . . . . . . . . . . . . . . . . . . . . . . . . . . . pag. 63<br />
1.2 A conservação do café em grãos ................................... pag. 63<br />
1.3 O moinho-doseador e a moagem . . . . . . . . . . . . . . . . . . . . . . . . . . . . . . . . . . pag. 63<br />
1.4 A máquina de café expresso . . . . . . . . . . . . . . . . . . . . . . . . . . . . . . . . . . . . . . pag. 63<br />
1.5 Condições climáticas - Operador ................................... pag. 63<br />
2. Introdução . . . . . . . . . . . . . . . . . . . . . . . . . . . . . . . . . . . . . . pag. 64<br />
2.1 Como consultar o manual . . . . . . . . . . . . . . . . . . . . . . . . . . . . . . . . . . . . . . . . pag. 64<br />
2.2 Advertências ................................................... pag. 64<br />
3. Características técnicas ............................pag. 65<br />
3.1 Características gerais dos diversos modelos .......................... pag. 65<br />
3.2 Características técnicas . . . . . . . . . . . . . . . . . . . . . . . . . . . . . . . . . . . . . . . . . . pag. 65<br />
3.3 Desenho . . . . . . . . . . . . . . . . . . . . . . . . . . . . . . . . . . . . . . . . . . . . . . . . . . . . . . pag. 66<br />
4. Instalaçao .......................................pag. 67<br />
4.1 Advertências ................................................... pag. 67<br />
4.2 Ligação eléctrica ................................................ pag. 67<br />
4.3 Regulação da moagem ........................................... pag. 68<br />
4.4 Substituição das lâminas . . . . . . . . . . . . . . . . . . . . . . . . . . . . . . . . . . . . . . . . . pag. 68<br />
5. Instruções para o funcionamento . . . . . . . . . . . . . . . . . . . . pag. 68<br />
5.1 Doses de distribuição ........................................... pag. 68<br />
5.2 Stand-by ...................................................... pag. 69<br />
5.3 Distribuição de doses programáveis . . . . . . . . . . . . . . . . . . . . . . . . . . . . . . . . pag. 69<br />
5.4 Distribuição contínua . . . . . . . . . . . . . . . . . . . . . . . . . . . . . . . . . . . . . . . . . . . . pag. 69<br />
5.5 Programação: doses ............................................. pag. 70<br />
5.6 Activação/desactivação do sinal sonoro. ............................. pag. 70<br />
5.7 Alarme consumo excessivo das mós ................................ pag. 70<br />
6. Conselhos práticos para o operador .................pag. 70<br />
7. Informação aos utentes da comunidade europeia . . . . . . . pag. 71<br />
8. Garantia . . . . . . . . . . . . . . . . . . . . . . . . . . . . . . . . . . . . . . . . pag. 71<br />
9. Declaração de conformidade .......................pag. 71<br />
10. Problemas e soluções . . . . . . . . . . . . . . . . . . . . . . . . . . . . . pag. 72<br />
MANUAL CÓDIGO 7770.051<br />
Revisão 03.11<br />
62
1. informações de caracter geral<br />
• Na primeira parte deste manual de uso, foi explicado rapidamente o método para fazer o café expresso,<br />
os equipamentos modernos utilizados e a função do moinho-doseador neste processo delicado.<br />
1.1 O café expresso<br />
O café expresso é preparado com um método especial, que permite obter uma bebida muito concentrada,<br />
com consistência de xarope e de sabor e aroma intensos. O método de preparação do café expresso consiste<br />
em extrair as substâncias contidas no café moído mediante o fluxo de água quente sob pressão (cerca de 9<br />
bar) por um tempo que varia de 25 a 35 segundos; desta maneira, as substâncias solúveis (açúcares e<br />
proteínas) e insolúveis (gorduras e colóides) presentes no café são "arrastadas" para a chávena e formam o<br />
creme característico do verdadeiro café expresso. A preparação do café expresso é uma operação muito<br />
delicada; há diversos factores que influenciam o resultado desta operação: a conservação do café em grãos,<br />
o moinho-doseador e a moagem, a conservação do café moído, a máquina de café expresso, a variabilidade<br />
das condições climáticas, a atenção e a competência do operador responsável pela preparação do café.<br />
1.2 A conservação do café em grãos<br />
As variedades de café presentes na natureza são duas: a qualidade "arábica" e a qualidade "robusta".<br />
Geralmente, o café torrado utilizado para produzir o café expresso contém uma mistura das duas variedades,<br />
adequadamente misturadas em porcentagens variáveis, que consideram as características organolépticas<br />
de cada um dos componentes. A mistura de café torrado deve ser conservada fechada hermeticamente<br />
dentro da sua embalagem. O café em grãos, após a torrefacção, contém no seu interior todas as substâncias<br />
e os aromas característicos da variedade ou da mistura; tais aromas se dispersam rapidamente quando os<br />
grãos de café entram em contacto com o ar, a luz e a humidade.<br />
1.3 O moinho-doseador e a moagem<br />
O moinho-doseador é um aparelho que mói o café em grãos e faz a sua dosagem. Para obter um bom café<br />
expresso, são necessárias partículas de café moído que tenham um diâmetro variável de cerca de 1 mm, até<br />
ao pó inferior a 150 µm. O café em pó oferece uma superfície maior de contacto com a água e permite uma<br />
extracção superior das substâncias solúveis e insolúveis; variando a granulometria do café moído, poder-se-á<br />
modificar a resistência oferecida à passagem da água. Se o café moído for composto de grãos muito grossos,<br />
o café sai de maneira muito rápida, a água não consegue extrair completamente as qualidades do café moído<br />
e obtém-se um café expresso de cor clara, aquoso, sem o sabor e o aroma característicos do café. Quando<br />
o café moído for muito fino, ao contrário, o café expresso terá uma cor escura, ficará queimado e frio; será<br />
necessário mais tempo para obter o café e a água filtrará com dificuldade, pois o pó oferece uma resistência<br />
excessiva à sua passagem. O café expresso resultará sobreextraído.<br />
1.4 A máquina de café expresso<br />
A máquina de café expresso é o aparelho formado basicamente de uma caldeira e de uma série de<br />
permutadores, na qual activa-se o aquecimento da água mediante uma resistência eléctrica ou um queimador<br />
a gás. A água, que alcança uma temperatura elevada, atravessa o café moído que está no suporte do filtro e<br />
extrai os aromas. Neste manual, quando se mencionar máquina de café expresso, referir-se-á a todos os<br />
modelos de distribuição contínua com grupo hidráulico e aqueles de pistão manual (de alavanca) . Os<br />
moinhos-doseadores que <strong>La</strong> <strong>San</strong> <strong>Marco</strong> S.p.A. fabrica são aparelhos profissionais projectados e fabricados<br />
para serem utilizados juntamente com estes tipos de máquinas de café expresso.<br />
1.5 Condições climáticas - Operador<br />
Para obter um bom café expresso, como referido anteriormente, é indispensável moer o café com uma certa<br />
granulometria. O café moído é muito higroscópico, ou seja, ele absorve a humidade ambiental e é por este<br />
motivo que a moagem deve ser modificada ao variar as condições climáticas; um café moído com uma taxa<br />
de humidade elevada aumenta a resistência à passagem da água. Outros factores importantes para a<br />
preparação do café expresso são a quantidade e a prensagem do café moído dentro do suporte do filtro.<br />
Estes últimos factores (humidade, quantidade e granulometria do café moído, prensagem) devem ser<br />
considerados e avaliados pelo operador que fará o café expresso. Por estes motivos, o operador desempenha<br />
um papel fundamental durante a preparação do café expresso.<br />
63<br />
PortuGuÊs
PortuGuÊs<br />
2. introdução<br />
2.1 Como consultar o manual<br />
2.2 Advertências<br />
64<br />
• O presente manual contém todas as informações necessárias para a instalação,<br />
partida, utilização e manutenção do moinho-doseador.<br />
• O pessoal responsável pelo uso normal e pela manutenção ordinária e o pessoal<br />
técnico responsável pela manutenção extraordinária e pela reparação devem ter lido<br />
com atenção e devem conhecer o conteúdo deste manual.<br />
• Este manual faz parte integrante da máquina, deve ser conservado durante toda a<br />
vida útil da máquina à qual se refere e deve ser entregue ao novo utente em caso de<br />
transferência da máquina.<br />
• O manual ou cópia do me<strong>sm</strong>o deve ficar sempre próximo da máquina para poder ser<br />
consultado pelo operador; deve ser conservado com cuidado, em lugar protegido<br />
contra o calor, humidade, poeira e agentes corrosivos.<br />
• O moinho-doseador <strong>La</strong> <strong>San</strong> <strong>Marco</strong> S.p.A. deve ser utilizado segundo as instruções<br />
do presente manual; todo uso impróprio ou diferente de tal aparelho exclui a garantia<br />
ou a responsabilidade do fabricante.<br />
• O moinho-doseador foi projectado e fabricado para moer o café em grãos e para<br />
fazer a sua dosagem. Todo uso que não seja aquele especificado no presente manual<br />
deve ser considerado impróprio e não autorizado. O fabricante declina toda e<br />
qualquer responsabilidade por avarias derivantes do uso impróprio do aparelho.<br />
• O utente deve ser uma pessoa adulta e responsável, que deve seguir as normas de<br />
segurança vigentes no país em que for instalado o aparelho, e também deve seguir<br />
as normas ditadas pelo bom senso. Para um uso correcto e seguro da máquina, o<br />
operador deve observar as normas de prevenção contra acidentes e todo outro<br />
requisito de medicina e higiene do trabalho.<br />
• O uso do aparelho, a manutenção ordinária e a limpeza ficam reservadas somente ao<br />
pessoal responsável, delegado pelo cliente sob a sua responsabilidade.<br />
• Fica severamente proibido deixar a máquina funcionar com as protecções fixas e/ou<br />
móveis de<strong>sm</strong>ontadas ou com os dispositivos de segurança desactivados; fica<br />
severamente proibido retirar ou modificar os dispositivos de segurança.<br />
• Quando o moinho-doseador estiver a funcionar, não introduza no interior da tremonha<br />
ou do doseador objectos, tais como utensílios ou similares (chaves de parafuso,<br />
colheres, etc.).<br />
• Antes de fazer toda manutenção ordinária ou limpeza, desligue a ficha de alimentação<br />
eléctrica da tomada da rede, se possível, caso contrário, desligue o interruptor<br />
omnipolar antes da máquina.<br />
• Para a limpeza, evite utilizar produtos tais como álcool, benzina ou solventes em<br />
geral; utilize água ou solventes neutros.<br />
• Para a limpeza do corpo da máquina basta utilizar um pano húmido ou uma esponja;<br />
nunca utilize jactos de água. Para limpar as partes internas do doseador, do grupo de<br />
moagem e da tremonha, utilize uma escova.<br />
• As manutenções extraordinárias e reparações devem ser feitas pelo pessoal técnico<br />
especializado dos centros de assistência técnica <strong>La</strong> <strong>San</strong> <strong>Marco</strong> S.p.A.<br />
• Se o cabo de alimentação estiver danificado, o me<strong>sm</strong>o deve ser substituído pelo<br />
fabricante ou junto ao seu serviço de assistência técnica ou de qualquer forma com<br />
qualificação similar.<br />
• Em caso de defeitos ou ruptura de um componente do moinho-doseador, recorra ao<br />
centro de assistência autorizado e solicite que sejam utilizadas peças de reposição<br />
originais <strong>La</strong> <strong>San</strong> <strong>Marco</strong> S.p.A.; o uso de peças de reposição não originais causa a<br />
invalidação das certificações de conformidade e garantia que acompanham a máquina.<br />
• É rigorosamente proibido realizar operações sem a respectiva autorização e cujas<br />
instruções não foram compreendidas; recorra ao fabricante para solicitar todas as<br />
informações, peças sobresselentes ou acessórios.<br />
• Em caso de desactivação e de<strong>sm</strong>ancho da máquina, recorra ao fornecedor ou às<br />
empresas autorizadas pelo município que se ocupam do tratamento dos resíduos<br />
sólidos urbanos. Não os abandone no ambiente!
3. características técnicas<br />
3.1 Características gerais dos diversos modelos<br />
Os moinhos-doseadores <strong>La</strong> <strong>San</strong> <strong>Marco</strong> são aparelhos profissionais para moer o café em grãos e para fazer<br />
a sua dosagem. <strong>La</strong> <strong>San</strong> <strong>Marco</strong> S.p.A. fabrica tres modelos de moinhos-doseadores, que são: SM <strong>92</strong><br />
INSTANT;SM <strong>97</strong> INSTANT; Cónico (TK INSTANT). São compostos essencialmente por:<br />
• Um corpo 1 em alumínio envernizado. As dimensães, a forma e o volume são idênticos para todos os<br />
modelos, com excepção dos modelos "SM TK INSTANT", cujo corpo standard possui uma base 2 que<br />
contém os componentes eléctricos e electrónicos.<br />
• Uma tremonha 4, em material plástico transparente, posicionada na parte superior do moinho-doseador.A<br />
tremonha (4,6 litros) é fixada no moinho-doseador com um parafuso especial 8; é possível retirar a<br />
tremonha somente se for utilizada uma ferramenta. Dentro da tremonha há uma grelha de protecção 7,<br />
que impede o acesso dos membros superiores às mós.<br />
• Um motor eléctrico no qual é ligado o grupo de moagem. No modelo de moinho-doseador SM TK, ao<br />
motor eléctrico é ligado um redutor epicicloidal e, então, o grupo de moagem.<br />
• Um grupo de moagem. O modelo SM <strong>92</strong> INSTANT e o modelo SM <strong>97</strong> INSTANT são equipados com um<br />
grupo de moagem de mós planas de 64 mm de diâmetro e de 84 mm respectivamente. O modelo SM<br />
TK INSTANT possui um grupo de moagem com mós cónicas .<br />
• Um disco de regulação da moagem 10 com o botão de desbloqueio 9. Na parte superior do disco<br />
encontram- se as indicações para a regulação da moagem. Para modificar a granulometria do café<br />
moído, é necessário girar o disco no sentido dos ponteiros do relógio ou no sentido contrário aos<br />
ponteiros do relógio.<br />
• Uma forquilha 15 de apoio para o porta-filtro,com o micro de arranque moagem 13 (mediante<br />
solicitação).<br />
• Uma central electrónica que controla o arranque e a paragem da moagem. Programando a central<br />
electrónica através do painel TOUCH é possível regular o tempo de moagem.<br />
• Um interruptor geral 3 on/off com LED verde.<br />
• Um teclado touch 11 utilizado seja para arrancar a moagem seja a programação do moinho-doseador.<br />
• Um cárter de apoio do teclado touch 12.<br />
3.2 Características técnicas<br />
modelo<br />
<strong>sm</strong> <strong>92</strong><br />
<strong>instant</strong><br />
<strong>sm</strong> <strong>92</strong><br />
<strong>instant</strong><br />
micro<br />
<strong>sm</strong> <strong>97</strong><br />
<strong>instant</strong><br />
<strong>sm</strong> <strong>97</strong><br />
<strong>instant</strong><br />
micro<br />
<strong>sm</strong> tK<br />
<strong>instant</strong><br />
<strong>sm</strong> tK<br />
<strong>instant</strong><br />
micro<br />
velocidade<br />
do motor<br />
(rpm)<br />
PotÊncia<br />
do motor<br />
(W)<br />
PotÊncia<br />
absorvida<br />
(W)<br />
tiPo de<br />
lÂmina<br />
caPacidade<br />
de moaGem<br />
(kg/h)<br />
dimensÃo<br />
das lÂminas<br />
Ø (mm)<br />
velocidade<br />
das lÂminas<br />
(rpm)<br />
Pot.<br />
absorvida<br />
db(a)<br />
1350 220 350 CHATAS 8,5 64 1350 72 13,8<br />
1350 220 350 CHATAS 8,5 64 1350 72 13,8<br />
880 245 460 CHATAS 13 84 880 69 13,8<br />
880 245 460 CHATAS 13 84 880 69 13,8<br />
1350 373 650 CÓNICAS 18 / 400 68 17<br />
1350 373 650 CÓNICAS 18 / 400 68 17<br />
Os modelos de moinhos-doseadores <strong>La</strong> <strong>San</strong> <strong>Marco</strong> S.p.A. são preparados<br />
• 110 V-1~ 60 Hz (disponível somente para os modelos SM <strong>92</strong> INSTANT / SM <strong>97</strong> INSTANT)<br />
• 230 V-1~ 50 Hz<br />
• 230 / 400 V-3N~ 50 Hz<br />
• 240 V-1 ~ 50 Hz<br />
As dimensões externas da embalagem são: 641 x 467 x 293 mm.<br />
Peso<br />
(Kg)<br />
65<br />
PortuGuÊs
PortuGuÊs<br />
3.3 Desenho<br />
6<br />
9<br />
11<br />
12<br />
14<br />
13<br />
15<br />
16<br />
LEGENDA<br />
1 CORPO EM ALUMÍNIO<br />
2 BASE PARA O CORPO<br />
3 INTERRUPTOR GERAL<br />
4 TREMONHA<br />
5 TAMPA DA TREMONHA<br />
6 FECHO PARA TREMONHA<br />
7 GRELHA DE PROTECÇÃO DAS LÂMINAS<br />
8 PARAFUSO ESPECIAL DE BLOQUEIO DA TREMONHA<br />
9 BOTÃO DE DESBLOQUEIO DO DISCO<br />
10 DISCO DE REGULAÇÃO DA MOAGEM<br />
11 TECLADO TOUCH<br />
12 CÁRTER SUPORTE TECLADO<br />
13 MICRO ARRANQUE MOAGEM<br />
14 CALCADOR<br />
15 FORQUILHA PARA SUPORTE DO FILTRO<br />
16 BANDEJA DE RECOLHER CAFÉ<br />
17 PÉ DE BORRACHA<br />
66<br />
5<br />
4<br />
7<br />
10<br />
8<br />
1<br />
3<br />
2<br />
17
4. instalaçao<br />
4.1 Advertências<br />
A instalação deve ser feita por um técnico qualificado e autorizado de <strong>La</strong> <strong>San</strong> <strong>Marco</strong> S.p.A.<br />
O moinho-doseador é entregue aos clientes numa embalagem especial de papelão e poliestireno. A embalagem<br />
contém: o moinho-doseador, os seus acessórios, o manual de uso e a declaração de conformidade.<br />
Após ter aberto a embalagem, certifique-se de que o moinho-doseador e os seus componentes estejam<br />
íntegros; se houver dúvida, não utilize o aparelho e recorra a pessoal qualificado e autorizado dos centros<br />
de assistência técnica <strong>La</strong> <strong>San</strong> <strong>Marco</strong> S.p.A. A embalagem deve ser tratada pelos centros de recolha dos<br />
resíduos, segundo as leis vigentes no país onde a máquina será instalada. Não os abandone no ambiente!<br />
Os componentes da embalagem (cartão, poliestireno, grampos metálicos, etc.) podem ser uma fonte de<br />
perigo. Não deixe ao alcance das crianças!<br />
O moinho-doseador deve ser colocado numa superficie perfeitamente horizontal, suficientemente sólida<br />
para servir de suporte, estável e seca.<br />
4.2 Ligação eléctrica<br />
Instruções para a ligação eléctrica correcta do moinho-doseador:<br />
• Antes de fazer a ligação do aparelho com a rede eléctrica, certifique-se de que os dados da placa do<br />
moinho-doseador correspondam àqueles da instalação eléctrica; a placa encontra-se sob a bandeja de<br />
recolher o pó.<br />
• A ligação deve ser feita em conformidade com as disposições do país de instalação.<br />
• A instalação eléctrica feita pelo cliente deve respeitar as normas vigentes; a tomada de corrente deve ser<br />
dotada de uma ligação à terra eficiente. <strong>La</strong> <strong>San</strong> <strong>Marco</strong> S.p.A. declina toda e qualquer responsabilidade<br />
se tais prescrições legais não forem respeitadas. Uma instalação irregular pode causar danos a pessoas<br />
ou coisas, pelos quais o fabricante não pode ser considerado responsável.<br />
• Se for necessário utilizar adaptadores, tomadas múltiplas e extensões, é preciso utilizar somente produtos<br />
em conformidade com as normas de segurança vigentes.<br />
• Para evitar o sobreaquecimento do cabo de alimentação, recomenda-se desenrolá-lo completamente.<br />
• Os moinhos-doseadores monofásicos são dotados de um cabo de alimentação de três condutores com<br />
ficha para a ligação eléctrica com a tomada de rede.<br />
• Para a ligação eléctrica dos modelos trifásicos, é necessário instalar um interruptor geral omnipolar antes<br />
da instalação de alimentação eléctrica, o qual deve ser dimensionado segundo as características<br />
eléctricas (potência e tensão) transcritas na placa do aparelho. O interruptor omnipolar deve-se desligar<br />
da rede com uma abertura dos contactos de pelo menos 3 milímetros.<br />
• Os moinhos-doseadores trifásicos são dotados de um cabo de alimentação de cinco condutores; a<br />
ligação dos modelos trifásicos deve ser feita da seguinte maneira: ligação em estrela para a tensão 400V-<br />
3N~ e ligação em triângulo para os modelos com alimentação 230V-3~.<br />
Tensão<br />
400V-3N~<br />
230V-3~<br />
Ligação com a tomada de<br />
alimentação eléctrica<br />
L 3<br />
L 2<br />
L 1<br />
N<br />
GI/VE<br />
L 3<br />
L 2<br />
L 1<br />
N<br />
GI/VE<br />
Ligação com a placa de terminais<br />
no interior do aparelho<br />
1<br />
2<br />
4 6<br />
GI BL BI NE VE MA<br />
2<br />
3 4 5 6<br />
GI BL BI NE VE MA<br />
1<br />
3<br />
5<br />
LEGENDA:<br />
L 3 = castanho<br />
L 2 = preto<br />
L 1 = cinzento<br />
N = neutro (azul)<br />
GI/VE = terra<br />
1 = vermelho<br />
2 = branco<br />
3 = azul<br />
4 = preto<br />
5 = cinzento<br />
6 = castanho<br />
• Ao terminar de fazer a ligação eléctrica, certifique-se de que o sentido de rotação do motor seja horário<br />
(a olhar o aparelho pela parte superior); se o sentido for anti-horário, inverta duas fases de alimentação.<br />
• Se for feita uma transformação de 400V-3N~ para 230V-3~ ou vice-versa, utilize as etiquetas adesivas<br />
entregues com o aparelho, para actualizar os dados da etiqueta colada na extremidade do cabo de<br />
alimentação.<br />
67<br />
PortuGuÊs
PortuGuÊs<br />
4.3 Regulação da moagem<br />
Instruções para uma regulação correcta:<br />
• Encher a tremonha 4 com o café em grãos e abrir o fecho 6.<br />
• Moa uma pequena quantidade de café para distribuir um ou mais cafés expresso e verificar a distribuição<br />
na chávena (a distribuição “ideal” obtém-se com 6÷8 gramas de café moído por chávena num tempo de<br />
de 25÷35 segundos). Podem ocorrer três casos:<br />
a) O café escorre para a chávena lentamente: o café foi moído muito fino (deve ser mais grosso). A regulação<br />
da granulosidade é feita carregando no botão de desbloqueio 9 e girando o disco de regulação 10 no<br />
sentido horário.<br />
b) O café escorre para a chávena rapidamente: o café foi moído muito grosso (deve ser mais fino). A<br />
regulação da granulosidade é feita carregando no botão de desbloqueio 9 e girando o disco de regulação<br />
10 no sentido anti-horário.<br />
c) O café escorre para a chávena de maneira correcta.<br />
4.4 Substituição das lâminas<br />
Ao substituir as lâminas, deve-se recordar de que o disco de regulação deve estar posicionado de modo<br />
que o parafuso de bloqueio da tremonha (1) não interfira com o perno de paragem das lâminas (2).<br />
O método correcto para substituir as lâminas é o seguinte:<br />
1. Soltar completamente o parafuso de bloqueio da tremonha e retirar esta última.<br />
2. Soltar os três parafusos sem cabeça M5x12 que se encontram no disco de suporte da lâmina e retirar o<br />
disco de regulagem.<br />
3. Soltar o suporte da lâmina superior e retirá-lo da sua sede.<br />
4. Substituir as lâminas e centrar a lâmina inferior em relação aos três dentes raspadores (a distância de tais<br />
dentes é de 0.9 mm, para centrar a lâmina recomenda-se utilizar um calibrador de folga).<br />
5. Limpar muito bem as sedes das lâminas e o filete do suporte da lâmina superior.<br />
6. Fixar o suporte da lâmina superior até que esta última fique rente àquela inferior; tal operação deve ser<br />
feita com o moinho-doseador em rotação a fim de localizar com exactidão o ponto no qual as duas<br />
lâminas começam a entrar em contacto.<br />
7. Por fim, colocar o disco de regulação prestando atenção para que o parafuso de bloqueio da tremonha<br />
se encontre, no sentido anti-horário, antes do perno de paragem das lâminas, conforme ilustrado na<br />
figura 1.<br />
Na fig. 2 ilustra-se o posicionamento incorrecto do disco de regulação: o parafuso de bloqueio da tremonha<br />
(1) encontra-se depois do perno de paragem das lâminas (2).<br />
É muito importante notar que neste caso o parafuso de bloqueio da tremonha não permitirá superar o perno<br />
de paragem das lâminas durante a abertura das me<strong>sm</strong>as e, estando as lâminas já em contacto, vai ser<br />
impossível alcançar a granulometria correcta de moagem e o café não saíra pelo bico ou sairá em gotas.<br />
1 2<br />
2 1<br />
Abb. 1 - Montagem correcta Abb. 2 - Montagem incorrecta<br />
5. instruções para o funcionamento<br />
5.1 Doses de distribuição<br />
5.a dose individual (ícone de uma chávena de café),<br />
5.b dose dupla (ícone de duas chávenas de café)<br />
5.c dose contínua (ícone ∞).<br />
68
5.2 Stand-by<br />
Led tecla dose activa iluminada com elevada intensidade (o significado de tecla activa será mais claro no<br />
seguimento do texto). A outra tecla iluminada com luz de baixa intensidade.<br />
5.3 Distribuição de doses programáveis<br />
Uma vez premida a tecla de dose individual ou dose dupla, a CPU manterá na memória esta tecla como<br />
única tecla activa para a seguinte distribuição para modelos com micro.<br />
Modelos sem micro<br />
A distribuição de café moído será efectuada, para os modelos sem micro, através do teclado touch.<br />
Ao premir uma tecla de distribuição (individual ou dupla), iniciará a moagem e, no display, iniciará a contagem<br />
descrescente da dose seleccionada; terminada a distribuição, no display, será visualizado o valor 00.0<br />
por 2 segundos. Ao premir a dose contínua (símbolo ∞) o moinho-doseador trabalhará em modalidade start/<br />
stop (é previsto uma paragem de segurança após 3 minutos).<br />
Modelos com micro<br />
No momento da pré-selecção da dose desejada (individual ou dupla), no display aparecerá, em stand-by, o<br />
tempo programado para aquela dose; de seguida, se o micro for activado, iniciará a moagem e no display iniciará<br />
a contagem descrescente; terminada a distribuição, no display, será visualizado o valor 00.0 por 2 segundos.<br />
A distribuição de café será efectuada, apenas quando for accionado o micro 13 através do suporte porta-filtro.<br />
Passado este tempo no display regressará a indicação do tempo de dose relativo à tecla iluminada com<br />
elevada intensidade (ou a activa para a distribuição seguinte).<br />
Através do teclado é então possível efectuar o by-pass da autorização do micro e deixar o pleno comando<br />
à botoneira touch.<br />
Ou seja, dando alimentação ao moinho através do interruptor geral, haverá 3-4 segundos de tempo para<br />
premir a tecla no alto à direita (tecla +) para entrar num menu onde será possível, através da tecla +, alterar<br />
a modalidade de funcionamento: micro SIM (M s) ou micro NÃO (M n).<br />
Se nesta fase se premir a tecla ∞ (∞ é o símbolo do contínuo) durante 5 segundos, no display aparecerá a<br />
mensagem “i s” (infinito sim) ou “i n” (infinito não). Para passar de “i s” a “i n” e vice-versa será suficiente<br />
premir a tecla +. Ao voltar a premir durante 5 segundos a tecla contínua, o display visualizará de novo a<br />
opção Sim micro Não.<br />
A tecla no alto à esquerda (tecla -) servirá para sair da me<strong>sm</strong>a modalidade, desde que não se tenha saído<br />
já por alcançar o time-out ( 30 segundos).<br />
5.4 Distribuição contínua<br />
A tecla de distribuição contínua (∞) fará arrancar a moagem sem a necessidade de accionar o micro.<br />
Por segurança entre o momento do toque na tecla contínua e o arranque da distribuição haverá um tempo<br />
de delay de 1 segundo; isto evitará os arranques involuntários. Para bloquear a distribuição contínua será<br />
eficiente tocar a me<strong>sm</strong>a tecla (∞). Durante a distribuição contínua no display aparece a mensagem inF.<br />
69<br />
PortuGuÊs
PortuGuÊs<br />
5.5 Programação: doses<br />
a. Desligar de OFF a ON a posição do interruptor 3 do moinho-doseador.<br />
b. Até 5 segundos, desde que os leds se acendem no teclado touch, premindo durante 5 segundos a tecla<br />
das doses que se desejam programar, dose individual ou dose dupla, a respectiva tecla tocará lentamente,<br />
juntamente aos números do display.<br />
c. Emitir a tecla e, através as teclas de regulação (+/-), situados ao lado do display, aumentar ou diminuir o<br />
tempo de moagem, até alcançar ao valor desejado.<br />
d. Uma vez inserido o tempo ao premir a tecla, cujo led está ainda intermitente, para memorizar o tempo<br />
assim programado.<br />
e. Memorizando a dose por um café é possível programar a outra dose, independentemente do outro, ou<br />
copiá-la na tecla dose dupla ou, na metade, na tecla de dose individual.<br />
f. Para memorizar a dose individual e simultaneamente copiá-la na tecla dupla será suficiente confirmar a<br />
programação efectuada na tecla individual premindo, por sua vez, na tecla dupla. Para memorizar a dose<br />
dupla e simultaneamente copiá-la na metade na tecla individual, será suficiente confirmar a programação<br />
efectuada na tecla individual premindo, por sua vez, na tecla individual.<br />
g. Os três dígitos permitirão programar o tempo com a precisão do décimo de segundo; portanto, dois<br />
dígitos para os segundos e um para os décimos.<br />
h. Se após a operação descrita no ponto a, é premido uma das três teclas (dose individual, dupla ou contínua),<br />
durante 10 segundos, entrar-se-á em "modalidade contadores”.<br />
i. No display será mostrado, em modalidade de deslizamento, o número de cafés distribuídos pela tecla<br />
particular: um traço no display separará duas indicações no deslizamento dos números.<br />
Para repor a zeros o contador de uma tecla bastará premir durante 10 segundos a tecla relativa ao contador<br />
que se deseja repor a zeros.<br />
Para sair da modalidade contadores bastará premir a tecla (-) em cima à esquerda, desde que não se tenha<br />
saído por alcançar o time-out (30 segundos).<br />
5.6 Activação/desactivação do sinal sonoro.<br />
Um sinal sonoro audível quando forem tocadas as teclas no teclado touch, no final de cada distribuição e<br />
durante a ligação do moinho-doseador pode ser programado operando da seguinte maneira.<br />
Uma vez entrados na programação com a tecla (+) será necessário premir a tecla da dose individual durante<br />
3 segundos.<br />
Um bip longo assinalará a escolha do sinal sonoro off, 2 bips breves assinalarão ao utilizador a activação da<br />
modalidade com o sinal sonoro on.<br />
5.7 Alarme consumo excessivo das mós<br />
(opção activável apenas através de Pda, dispositivo não integrante do moinho-doseador)<br />
A programação, através de PDA, é efectuada inserindo um tempo de trabalho, em horas, do motor. Uma<br />
vez alcançado o número de horas de trabalho do motor, no display aparecerá a mensagem GRN, durante<br />
dez segundos no final de cada distribuição. Memorizando o número 000, sempre através do PDA, o alarme<br />
será desactivado.<br />
6. conselhos práticos para o operador<br />
• Conserve o café em grãos dentro de recipientes herméticos em ambiente seco e em temperatura<br />
ambiente.<br />
• Verifique periodicamente a granulosidade do café moído e a sua dosagem, e lembre-se de que as<br />
condições atmosféricas (humidade ambiental) influem notavelmente na preparação do café expresso.<br />
Aumente a granulosidade do café moído quando aumenta a humidade ambiental e diminua-a quando a<br />
humidade abaixar.<br />
• Mandar controlar periodicamente, por técnico autorizado, o desgaste das mós, e lembrar-se de que as<br />
mós planas não podem tratar mais de 300÷600 kg e as mós cónicas não podem tratar mais de<br />
600÷1200 kg do café. Lembrar-se de que a substituição se refere a ambas as mós, ou seja, a fixa e a<br />
móvel, pois uma substituição parcial causaria certamente um funcionamento irregular do moinhodoseador.<br />
. A substituição deve ser feita por pessoal autorizado da assistência técnica.<br />
• Limpe periodicamente a tremonha.<br />
• Em caso de paragem prolongada (férias, trabalho temporário, etc.) esvazie completamente a tremonha<br />
e limpe-a cuidadosamente.<br />
70
7. informação aos utentes da comunidade<br />
europeia<br />
Nos termos da Directiva Europeia 2002/96/CE sobre os lixos eléctricos (WEEE) comunicase<br />
aos utentes da comunidade europeia quanto a seguir.<br />
O símbolo do caixote de lixo barrado contido no aparelho ou na sua embalagem indica que<br />
o produto no fim da própria vida útil deve ser recolhido separadamente dos outros lixos.<br />
A recolha diferenciada apropriada para o encaminhamento sucessivo do aparelho<br />
desactivado à reciclagem, ao tratamento e à eliminação compatível com o ambiente,<br />
contribui para evitar possíveis efeitos negativos no ambiente e na saúde e favorece a reutilização e/ou a<br />
reciclagem dos materiais com os quais o aparelho é composto.<br />
De acordo com a Directiva Europeia 2002/96/CE a eliminação abusiva do produto, por parte do detentor,<br />
implica na aplicação das penalidades previstas pela norma local vigente.<br />
8. Garantia<br />
A garantia decai se:<br />
• não forem respeitadas as instruçães do presente manual;<br />
• as operaçães de manutenção ordinária e extraordinária e reparação forem feitas por pessoa não autorizada;<br />
• o aparelho for utilizado de maneira diferente daquela prevista pelo manual de uso;<br />
• os componentes originais forem substituldos por peças de fabrico diferentes;<br />
• a garantia não é aplicada a danos provocados por descuido, uso e instalação irregulares e/ou não em<br />
conformidade com o quanto prescrito pelo presente manual, uso incorrecto, tratamento indevido, raios e<br />
fenómenos atmosféricos, sobretemperatura e sobretensão, alimentação eléctrica insuficiente ou irregular.<br />
9. declaração de conformidade<br />
O fabricante_<br />
la san marco s.p.a.<br />
34072 Gradisca d’Isonzo (GO) Itália – Via Padre e Figlio Venuti, 10<br />
telefone (+39) 0481 967111 – fax (+39) 0481 960166 – http://www.lasanmarco.com<br />
declara sob a própria responsabilidade que o moinho-doseador descrito neste manual e identificado pelos<br />
dados da placa aplicada no aparelho, é conforme às directivas: 2006/42/CE, 2006/95/CE, 2004/108/CE,<br />
Regulamento (CE) n° 1935/2004. Para a verificação da conformidade a tais directivas foram aplicadas as<br />
normas harmonizadas: EN ISO 12100, EN 60335-1, EN 60335-2-64<br />
PESSOA AUTORIZADA PARA<br />
ELABORAR O MANUAL TÉCNICO<br />
Eng. Roberto Marri<br />
Via Padre e Figlio Venuti,10<br />
34072 Gradisca d’Isonzo - ITALIA<br />
Gradisca d’Isonzo, Março 2011<br />
Eng. Roberto Marri<br />
Administrador delegado<br />
71<br />
PortuGuÊs
PortuGuÊs<br />
10. Problemas e soluções<br />
Antes de recorrer à assistência técnica, faça os controlos enumerados abaixo:<br />
72<br />
defeito causa soluçÃo<br />
1. O café sai rapidamente do<br />
bico de distribuição; o creme<br />
do café na chávena é claro.<br />
2. O café sai lentamente (em<br />
gotas) do bico de distribuição;<br />
o creme do café na<br />
chávena é escuro.<br />
3. Presença de pó de café na<br />
chávena.<br />
a) moagem muito grossa.<br />
b) dose insuficiente.<br />
c) prensagem fraca.<br />
a) moagem muito fina.<br />
b) dose elevada.<br />
c) prensagem forte.<br />
a) moagem muito fina.<br />
b) lâminas desgastadas.<br />
a) diminua a granulometria.<br />
b) aumente a dose.<br />
c) aumente a prensagem.<br />
a) aumente a granulometria.<br />
b) diminua a dose<br />
c) reduza a prensagem.<br />
a) aumente a granulometria.<br />
b) substitua as lâminas.<br />
Se não for possível solucionar o problema no modo descrito, ou se ocorrer um outro defeito que não se<br />
encontre entre aqueles enumerados, recorra ao centro de assistência técnica autorizado <strong>La</strong> <strong>San</strong> <strong>Marco</strong><br />
S.p.A.<br />
<strong>La</strong> <strong>San</strong> <strong>Marco</strong> S.p.A. reserva-se o direito de efectuar modificações técnicas nos<br />
aparelho, se considerar necessário, sem aviso prévio.
<strong>La</strong> <strong>San</strong> <strong>Marco</strong> S.p.A.<br />
Via Padre e Figlio Venuti, 10<br />
34072 Gradisca d’Isonzo - Gorizia - Italy<br />
Tel. +39.0481.967111 Fax +39.0481.960166<br />
http://www.lasanmarco.com<br />
E-mail: info@lasanmarco.com