
Create successful ePaper yourself
Turn your PDF publications into a flip-book with our unique Google optimized e-Paper software.
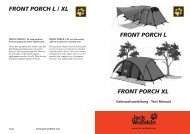
<strong>Front</strong> <strong>Porch</strong><br />
Gebrauchsanleitung · Tent Manual<br />
Livret d’instructions de montage
<strong>Front</strong> <strong>Porch</strong><br />
ZELtPAcKSAcKInhALt<br />
· 1 Zeltplane<br />
· 10 Heringe, Reparaturmaterial<br />
& Nahtabdichter im Heringspack -<br />
beutel<br />
· 1 Stangenpackbeutel<br />
· 2 Stahlstangen<br />
· 1 Reparaturhülse<br />
contEntS oF tEnt PAcK SAcK<br />
· 1 tarp<br />
· 10 pegs, repair material &<br />
seam sealant in peg bag<br />
· 1 pole bag<br />
· 2 steel pole sections<br />
· 1 pole repair sleeve<br />
contEnU DU SAc DE tEntE<br />
· 1 toile<br />
· 10 piquets, matériel de réparation<br />
& mastic d’étanchéité dans le petit<br />
sac de piquets<br />
· 1 sac d’armatures<br />
· 2 arceaux en acier<br />
· 1 douille de réparation<br />
<strong>JACK</strong> <strong>WOLFSKIN</strong> entwickelt seine Produkte ständig weiter. Wir behalten uns vor, einzelne Komponenten zu verändern.<br />
Abbildungen der Aufbauanleitung können vom aktuellen Produkt abweichen.<br />
At <strong>JACK</strong> <strong>WOLFSKIN</strong> we are continually improving and upgrading our products. We therefore reserve the right to make<br />
changes to individual components. Diagrams used for the pitching instructions may differ slightly from the actual product.<br />
<strong>JACK</strong> <strong>WOLFSKIN</strong> développe et améliore ses produits en permanence. De ce fait nous nous réservons la possibilité de modifier<br />
certains composants. Les illustrations du mode de montage peuvent différer légèrement de celles du produit actuel.<br />
2
PFLEGE<br />
Reinigen Sie Ihr Tarp in aufgebautem<br />
Zustand ausschließlich mit Wasser und<br />
wenig Seife.<br />
Auf keinen Fall in die Waschmaschine<br />
oder Reinigung geben, da hier die<br />
Beschichtung irreversibel zerstört<br />
werden kann. Geeignete Silikonschmiermittel<br />
schützen Stangen vor<br />
Korrosion und Reißverschlüsse vor<br />
dem Einfrieren.<br />
FEUEr<br />
Offenes Feuer und Flammen sind<br />
eine Gefahr für Zeltgewebe und Ihre<br />
Sicher-heit. Vermeiden Sie offenes<br />
Feuer in unmittelbarer Nähe des<br />
Zeltes.<br />
cArE AnD MAIntEnAncE<br />
Clean your tarp when pitched, using<br />
only a little soap and water.<br />
On no account should the tarp be<br />
machine washed or dry cleaned, since<br />
this could cause irreversible damage<br />
to the protective coating on the fabric.<br />
Suitable silicone-based lubricants<br />
protect poles from corrosion and<br />
prevent zips freezing.<br />
FIrE PrEVEntIon<br />
Open fires and flames are a hazard<br />
for tarp materials and your safety.<br />
Avoid naked flames in the immediate<br />
vicinity of the tarp.<br />
EntrEtIEn<br />
Nettoyez votre tente montée, uniquement<br />
à l’eau un peu savonneuse. Les<br />
fermetures à glissière doivent être<br />
nettoyées régulièrement pour les<br />
débarrasser de la saleté et du sable.<br />
Ne surtout pas laver la tente à la<br />
machine, ne pas faire à nettoyer à sec,<br />
ces types de nettoyage causeraient<br />
une altération irréversible de l’enduit<br />
protecteur de la toile. Des lubrifiants<br />
appropriés à base de silicone, protègent<br />
les arceaux de la corrosion et les<br />
fermetures à glissière du gel.<br />
FEU<br />
Le feu confiné et toute flamme en<br />
général représentent un risque pour<br />
la toile. Évitez d’approcher toute<br />
flamme nue de la toile.<br />
3
PhASE 1<br />
Beim ersten Aufbau: Sie sollten Ihr<br />
neues Tarp erst einmal probeweise<br />
aufbauen und sich vor Antritt der<br />
ersten Reise mit allen Aufbauschritten<br />
vertraut machen.<br />
Wählen Sie zunächst die geeignete<br />
Seite Ihres Familiezeltes und schätzen<br />
Sie ab, wo Ihr Vordach am besten<br />
aufgespannt werden kann. Breiten Sie<br />
Ihr Tarp flach auf dem Boden aus und<br />
fügen Sie die Segmente der Stahlstangen<br />
sorgfältig zusammen, so dass diese<br />
fest ineinander sitzen (1). Führen Sie<br />
die lange (farblich markierte) Stange<br />
vorsichtig in den quer verlaufenden<br />
(farblich markierten) Stangenkanal<br />
an der <strong>Front</strong> und die etwas kürzere<br />
Stange in den mittig verlaufenden<br />
Stangenkanal ein (2). Setzen Sie sie<br />
unter Spannung, indem Sie die Stangenenden<br />
in die dafür vorgesehenen<br />
RING & PIN Vorrichtung am Bodenband<br />
einstecken (3). Die Bandverstellungen<br />
helfen bei der mittigen Ausrichtung<br />
der Dachplane und können mit den<br />
Clips an den Stangen fixiert werden.<br />
4<br />
Pitching your tarp for the first time:<br />
We recommend you do a dry run<br />
pitching your new tarp in order to familiarise<br />
yourself with all the steps<br />
in the pitching procedure before embarking<br />
on your first trip.<br />
First, decide which is the best side of<br />
your tent to erect the roof tarp. Spread<br />
the tarp out flat on the ground and<br />
slot the segments of the steel poles<br />
together carefully, ensuring that they<br />
lock together firmly (1). Slide the long<br />
(colour coded) pole section carefully<br />
into the diagonal (colour coded) pole<br />
channel (2). Place the poles under tension<br />
by inserting the RING & PIN pole<br />
pins at the bottom edge of the tarp (3)<br />
into the pole ends.<br />
The adjuster tapes can be used to help<br />
to centre the tarp and then clipped to<br />
the poles.
Dressez votre toile pour la première<br />
fois: Afin de vous familiariser avec<br />
toutes les opérations de montage nous<br />
vous recommandons de faire un essai<br />
de montage de votre nouvelle toile<br />
avant de l’emporter pour la première<br />
fois en voyage.<br />
Choisissez tout d’abord un endroit<br />
approprié pour votre tente familiale et<br />
décidez de l’endroit le plus approprié<br />
pour placer votre auvent. Déployez<br />
votre Tarp plat au sol et ajointez avec<br />
soin les segments de mâts en acier, afin<br />
que ceux-ci soient stables (1). Passez<br />
le long mât (marqué en couleur) avec<br />
soin dans la glissière (marquée en couleur)<br />
en travers de l’entrée et le mât<br />
plus court dans la glissière centrée (2).<br />
Tendez les, pendant que vous mettez<br />
les extrémités pointues des mâts dans<br />
les oeillets prévus à cet effet sur la<br />
bande placée sur la bâche (3). Le changement<br />
de bande aide à l’alignement<br />
centré de la toile et peut être fixé avec<br />
les clips aux mâts.<br />
FAMILIENZELT / FAMILY TENT<br />
5
PhASE 2<br />
Platzieren und fixieren Sie die mittlere<br />
Rundbogenstange direkt vor einem<br />
der Eingänge Ihres Familienzeltes<br />
mit Heringen durch die Befestigungsschlaufen<br />
an den Bodenbandeckpunkten<br />
(1/2).<br />
Legen Sie nun den zum Familienzelt<br />
liegenden, schmäleren Teil der Plane<br />
und beide Abspannleinen über das<br />
Zelt, so dass die Plane ca. zur Hälfte<br />
das Familienzeltdach überdeckt. Am<br />
besten hält eine Person währenddessen<br />
die beiden Stangen fest. Fixieren<br />
Sie die beiden Abspannleinen entweder<br />
an schon vorhandenen Heringen<br />
des Familienzeltes oder spannen Sie sie<br />
mit zusätzlichen Heringen aus (3).<br />
6<br />
Position the middle arched pole<br />
section directly in front of the tent<br />
entrance you have selected and anchor<br />
it by pegging out the anchor loops at<br />
the lower corner points (1/2).<br />
Now lay narrower section of the tarp<br />
and the two guy lines over the tent in<br />
such a way that the tarp covers approx.<br />
half of the roof of the tent. It may be<br />
helpful to have someone hold the two<br />
poles steady while you do this. Anchor<br />
the two guylines either by attaching<br />
them to the pegs of the main tent<br />
already in place or by using additional<br />
pegs (3).
Placez et fixez l’arceau centré directement<br />
avant l’une des entrées de votre<br />
tente familiale avec des piquets dans<br />
les tirants de coins de la bande de sol<br />
(1/2).<br />
Mettez ensuite la partie plus étroite<br />
de la toile de votre tente familiale et<br />
les deux haubans à travers la tente,<br />
de sorte que la toile bâche environ la<br />
moitié du toit de votre tente familiale.<br />
Pendant ce temps une autre personne<br />
tient les deux mâts. Fixez les deux<br />
haubans aux piquets déjà disponibles<br />
de la tente familiale ou tendez les<br />
avec des piquets additionnels (3).<br />
7
PhASE 3<br />
Ziehen Sie nun das breite, gegenüber<br />
liegende Planenende mit der langen<br />
Rundbogenstange so weit wie möglich<br />
parallel von dem Zelteingang weg,<br />
so dass ein großes Vordach entsteht.<br />
Spannen sie die lange Rundbogenstange<br />
nach vorne hin mit den beiden<br />
Abspannleinen ab und fixieren Sie das<br />
Bodenband mit Heringen (1).<br />
Als Schlechtwetterschutz können die<br />
Seitenflügel zwischen den beiden<br />
Stangen mit den Kunststoffhaken an<br />
den Ringen in den Bodenbändern<br />
abgespannt werden (2).<br />
Fixieren Sie nun auch die beiden Abspannleinen<br />
der mittleren Stange zur<br />
Seite hin mit den restlichen Heringen.<br />
Der finale Sitz der Plane muss nun über<br />
und vor dem Familienzelt durch Regulieren<br />
der Abspannleinenspannung<br />
austariert werden.<br />
Bei Nässe kann sich das Planenmaterial<br />
dehnen. Es muss dann etwas nachgespannt<br />
werden (1/3).<br />
8<br />
Pull the wide opposite end of the<br />
tarp with the arched pole section as<br />
far as possible away from the side<br />
of the main tent, keeping it parallel<br />
to the tent, to create a large roofed<br />
porch area. Guy the long arched pole<br />
section out away from the tent and<br />
anchor peg it out using the lower<br />
anchor tapes (1).<br />
For extra protection in poor weather,<br />
the side wings between the two<br />
poles can be anchored to the plastic<br />
rings on the lower tape loops (2).<br />
Next, use the remaining pegs to anchor<br />
the two guylines on the middle<br />
pole out to the sides. Fine tune the<br />
final position of the tarp by adjusting<br />
the tension on the guy lines.<br />
When wet the fabric of the tarp may<br />
stretch slightly. Re-guy where necessary<br />
(1/3).
Tirez ensuite l’extrémité opposée et<br />
large de la toile avec le grand arceau<br />
le plus loin parallèlement de l’entrée<br />
pour faire un grand auvent. Tendez les<br />
grands arceaux vers l’avant avec les<br />
deux haubans et fixez les bandes au<br />
sol avec les piquets (1).<br />
En guise d’auvent contre les intempéries<br />
vous pouvez tendre les deux ailes<br />
entre les deux mâts avec les crochets<br />
en plastique dans les bandes de sol<br />
(2). Fixez également les deux haubans<br />
de mâts centrés vers le côté avec les<br />
piquets restants. Il faut équilibrer la<br />
bonne fixation de la toile afin pour<br />
régler la tension des haubans.<br />
Il se peut que la toile se détende en<br />
cas d’humidité, auquel cas il suffira de<br />
la retendre (1/3).<br />
9
InFo<br />
rEPArAtUrEn<br />
Reparaturmaterialien für kleine Reparaturen<br />
unterwegsliegen bei. Produktionsfehler<br />
werden im Rahmen der Garantieleistungen<br />
repariert. Andere Reparaturen<br />
führen wir gegen eine Gebühr gerne aus.<br />
Schicken Sie das gereinigte Zelt mit klarer<br />
Repa-raturkennzeichnung/-anweisung und<br />
Ihrem Kaufbeleg über Ihren Fachhändler ein.<br />
LAGErUnG<br />
Bevor Sie Ihr Tarp längere Zeit lagern, muss es<br />
vollkommen durchgetrocknet sein, sonst besteht<br />
die Gefahr von Schimmel- und Stockflecken-bildung.<br />
UV StrAhLUnG<br />
Ultraviolette (UV) Strahlung zerstört mit<br />
der Zeit alle modernen Zeltmaterialien. Das<br />
spezielle Polyester-Zeltmaterial erhöht die Lebensdauer<br />
gegenüber herkömmlichen Nylon-<br />
Zeltmaterialien, kann aber auch auf Dauer<br />
der Natur nicht trotzen. Bitte vermeiden Sie<br />
deshalb dauerhafte intensive Sonneneinwirkung.<br />
Jack Wolfskin übernimmt keine Garantie<br />
für Schäden durch UV Strahlung.<br />
rEPAIrS<br />
Repair materials for minor repairs during usage<br />
are provided. Production faults will be repaired<br />
under the terms of our guarantee. Our service<br />
department will be pleased to perform other<br />
repairs for a small charge. Please send in your<br />
cleaned tent via your nearest dealer, enclosing<br />
clear repair instructions and proof of purchase.<br />
StorAGE<br />
Allow your tarp to dry thoroughly while still<br />
assembled before storing it for any longer<br />
period. This will prevent mildew and damp<br />
stains forming.<br />
UV LIGht<br />
Ultraviolet (UV) radiation reduces the tearstrength<br />
of all tent materials in the course<br />
of time. The special polyester tent material<br />
increases the service life in comparison with<br />
conventional nylon materials. Tarp materials,<br />
however, cannot permanently defy the effects<br />
of nature. Therefore, please avoid subjecting<br />
the tarp to intensive sunlight for extended periods<br />
of time. <strong>JACK</strong> <strong>WOLFSKIN</strong> will not assume<br />
any liability for damage caused by ultraviolet<br />
light.<br />
10<br />
rÉPArAtIonS<br />
Le matériel pour les petites réparations en cours<br />
de voyage est fourni avec la tente. Tout défaut<br />
de fabrication est couvert par la garantie. Nous<br />
effectuons volontiers les autres réparations<br />
contre paiement à un tarif raisonnable. Veuillez<br />
nous envoyer la tente nettoyée, en joignant<br />
le ticket de caisse, par l’intermédiaire de votre<br />
magasin spécialisé le plus proche, avec de claires<br />
instructions de réparation.<br />
StocKAGE<br />
Avant d’être stockée pendant une durée prolongée,<br />
la tente doit être entièrement sèche, afin<br />
de prévenir la formation de moisissures et de<br />
tâches d‘humidité.<br />
rAYonnEMEnt ULtrAVIoLEt<br />
Avec le temps, les rayons ultraviolets réduisent la<br />
résistance de toutes les toiles de tente. La toile<br />
spéciale en polyester accroît la longévité de la<br />
tente par rapport à celles en Nylon traditionnelles,<br />
mais à la longue, elle ne peut résister de<br />
manière permanente aux effets de la nature.<br />
De ce fait nous vous prions donc d’éviter toute<br />
exposition intensive de longue durée au soleil.<br />
<strong>JACK</strong> WOLSKIN n’assume aucune garantie pour<br />
les dommages causés par les rayons ultraviolets.
WEItErE tIPPS<br />
Die stramme Grundspannung der Stangen,<br />
des Zeltdachs und der Abspannleinen sind die<br />
Vorraussetzung für beste Wetterstabilität.<br />
Überprüfen Sie den Sitz der Plane und korrigieren<br />
Sie ihn wenn nötig. Investieren Sie beim<br />
Aufbau ruhig ein paar Minuten mehr an Zeit<br />
und Mühe, dann können Sie beim nächsten<br />
Wettereinbruch ganz „entspannt“ sein.<br />
nAhtDIchtEr<br />
Die wichtigsten Nähte sind mit einer speziellen<br />
Nahtbandversiegelung versehen. Es<br />
empfiehlt sich Nahtstellen, in die Bänder oder<br />
Gummilitzen mit eingefasst sind und die so<br />
die Bandabklebung unterbrechen von innen<br />
und außen zusätzlich mit beiliegendem PU<br />
Nahtdichter abzudichten. Eine Garantie für die<br />
Verklebung ist ausgeschlossen.<br />
FUrthEr tIPS<br />
Correct initial tensioning of the poles, the roof<br />
tarp and the guy lines are the prerequisites for<br />
a secure pitch and optimum wind stability.<br />
Check that the tarp is correctly positioned<br />
and guylines correctly tensioned and correct if<br />
necessary. Take your time; a few minutes spent<br />
checking the tarp during pitching will mean<br />
that you can relax when the weather next<br />
turns bad!<br />
SEAM SEALAnt<br />
The important seams are specially tape sealed.<br />
However we do recommend additional sealing<br />
with the PU seam sealant provided, particularly<br />
at those points of the seam where tapes or<br />
rubber tensioning loops are integrated into<br />
seam and thus interrupt the continuity of the<br />
tape seal. We offer no guarantee on the seam<br />
taping of the seams.<br />
conSEILS SUPPLEMEntAIrES<br />
Une tension initiale correcte des arceaux, de la<br />
toile de toit et des haubans est la condition requise<br />
pour votre tente tienne le mieux possible<br />
et offre une résistance maximale au vent.<br />
Vérifiez que la toile du toit soit correctement<br />
positionnée et que les haubans soient biens<br />
tendus, fixez de nouveau si nécessaire. Prenez<br />
votre temps; quelques minutes de plus passer<br />
à bien vérifier votre toile pendant le montage<br />
vous assurera d’être détendu quand le temps<br />
passe au mauvais!<br />
coLLE IMPErMEABILISAntE<br />
Les coutures importantes ont été recouvertes<br />
d’une bande scellée spéciale. Mais nous vous<br />
recommandons de traiter de nouveau avec la<br />
colle imperméabilisante PU fournie, spécialement<br />
sur les endroits où les bandes et cordons<br />
en caoutchouc sont insérés dans la couture<br />
et interrompent donc le collage des bandes.<br />
Le collage des bandes scellées est exclu de la<br />
garantie.<br />
11
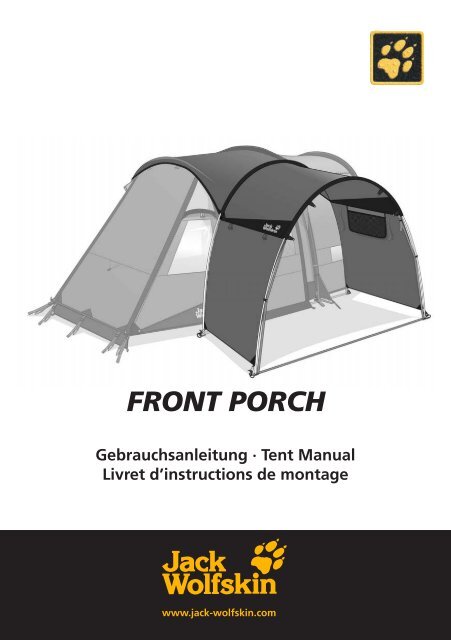
<strong>Front</strong> <strong>Porch</strong><br />
FRONT PORCH ist die perfekte Erweiterung<br />
für jedes Familienzelt.<br />
Durch das Rundbogengestänge kann ein<br />
großer sonnen- oder regengeschützter<br />
Bereich als Veranda vor dem Zelteingang<br />
aufgespannt werden, der zum Beispiel<br />
Platz für eine komplette Klapptischgarnitur<br />
bietet.<br />
FRONT PORCH is the perfect add-on module<br />
for any Jack Wolfskin Family tent.<br />
The long arched pole section creates a<br />
weatherproof, shaded veranda area in<br />
front of the tent entrance with plenty of<br />
extra space. There is even room for the<br />
complete set of camping furniture, e.g.<br />
folding table and chairs.<br />
08/11<br />
FRONT PORCH est un agrandissement parfait<br />
pour toutes les tentes familiales.<br />
Grâce aux arceaux la grande entrée se<br />
transforme aisément en auvent qui offre<br />
un grand espace et la protection contre le<br />
sol et la pluie et qui offre par exemple un<br />
espace pour une garniture complète de la<br />
table pliante.