User's Manual - Quik Shade - The Instant Canopy
User's Manual - Quik Shade - The Instant Canopy
User's Manual - Quik Shade - The Instant Canopy

Create successful ePaper yourself
Turn your PDF publications into a flip-book with our unique Google optimized e-Paper software.
Please read completely before setting up your <strong>Quik</strong> <strong>Shade</strong> Go <strong>Canopy</strong><br />
It is responsibility to read and save these instructions before attempting to set up your <strong>Quik</strong> <strong>Shade</strong> Go <strong>Canopy</strong>.<br />
We would also like to suggest that you follow these safety precautions, care and maintenance tips when using<br />
your <strong>Quik</strong> <strong>Shade</strong> Go <strong>Canopy</strong>:<br />
1. Never set up or continue to use in any rain, wind or storm conditions, especially lightning storms. Damage can<br />
occur to your <strong>Quik</strong> <strong>Shade</strong> Go <strong>Canopy</strong> and put you and others in potential danger.<br />
2. We suggest that you take your time to avoid bending the frame or pinching your fingers or hands while<br />
opening or closing the frame.<br />
3. Avoid setting up your <strong>Quik</strong> <strong>Shade</strong> Go <strong>Canopy</strong> on steep inclines.<br />
4. Always use the provided stakes to secure your <strong>Quik</strong> <strong>Shade</strong> Go <strong>Canopy</strong> to the ground unless you set up on<br />
concrete or asphalt.<br />
5. Do not use your <strong>Quik</strong> <strong>Shade</strong> Go <strong>Canopy</strong> for permanent shelter. It was designed for temporary use only.<br />
6. Keep your <strong>Quik</strong> <strong>Shade</strong> Go <strong>Canopy</strong> away from heat and flames at all times. Do not barbecue or build fires<br />
under your <strong>Quik</strong> <strong>Shade</strong> Go <strong>Canopy</strong>.<br />
7. Never leave your <strong>Quik</strong> <strong>Shade</strong> Go <strong>Canopy</strong> unattended.<br />
8. Hand wash the canopy using only mild soap and water. Never use harsh detergents, abrasives or bleach.<br />
Do not machine wash.<br />
9. Never fold or store your <strong>Quik</strong> <strong>Shade</strong> Go <strong>Canopy</strong> when it is wet or damp. Let it dry completely to avoid<br />
mildew.<br />
10. ALWAYS USE COMMON SENSE.<br />
WARNING: KEEP ALL FLAME AND HEAT SOURCES AWAY FROM THIS TENT FABRIC.<br />
This tent meets the flammability requirements of CPAI-84. <strong>The</strong> fabric if left in continuous<br />
contact with any flame source. <strong>The</strong> application of any foreign substance to the tent fabric may<br />
render the flame resistant properties ineffective.<br />
LIMITED WARRANTY<br />
Subject to the following limitations, in addition to any imposed by virtue of applicable law, <strong>Quik</strong> <strong>Shade</strong> warrants this <strong>Instant</strong> <strong>Canopy</strong> to be free of<br />
defects in material or workmanship for a period of two years from the date of original purchase. This warranty is limited to the repair and/or replacement<br />
of defective parts only.<br />
1. This Limited Warranty will apply only if the <strong>Quik</strong> <strong>Shade</strong> and/or its parts are properly returned to the dealer customer service department listed below<br />
and are determined by the dealer in its sole discretion, to be defective.<br />
2. This Limited Warranty applies only to <strong>Quik</strong> <strong>Shade</strong> Multi-Purpose Canopies purchased from authorized dealers. This Limited Warranty is extended<br />
only to the original consumer purchaser and is not transferable.<br />
3. Be sure to retain your original purchase sales receipt for any warranty claim. All warranty claims must be accompanied by the original purchase receipt<br />
from the authorized dealer.<br />
4. This Limited Warranty does not cover damage or loss from: wind, rain, fire, snow, ice, or other forces of nature; accident; normal wear; improper<br />
assembly, disassembly,or adjustment during set-up or take-down; or any abuse, neglect or misuse of this <strong>Quik</strong> <strong>Shade</strong> <strong>Instant</strong> <strong>Canopy</strong> and/or its parts.<br />
5. To the extent allowed by applicable law, any implied warranty of merchantability or fitness applicable to this <strong>Quik</strong> <strong>Shade</strong> <strong>Instant</strong> <strong>Canopy</strong> is limited<br />
to the duration of this Limited Warranty. <strong>Quik</strong> <strong>Shade</strong> does not warrant against, and in no event shall <strong>Quik</strong> <strong>Shade</strong> or its authorized agents be liable for,<br />
any personal loss, injury, or direct or indirect incidental or consequential damage resulting from the use of this product. Please note that some states do<br />
not allow the exclusion or limitation of incidental or consequential damages, so the above limitation or exclusion may not apply to you. This Limited<br />
Warranty gives you specific legal rights and you may have other rights which vary from state to state.<br />
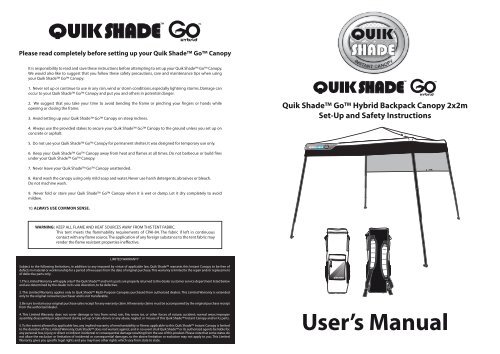
<strong>Quik</strong> <strong>Shade</strong> Go Hybrid Backpack <strong>Canopy</strong> 2x2m<br />
Set-Up and Safety Instructions<br />
User’s <strong>Manual</strong>
set<br />
Hybrid<br />
up<br />
Backpack <strong>Canopy</strong> 2x2m<br />
Set Up<br />
How to set up your Backpack canopy: How to take down your Backpack canopy:<br />
Step 1<br />
Remove the canopy from the backpack and stand it up<br />
so the feet are on the ground (figure A).<br />
Step 2<br />
Pull opposite corners away from each other to expand<br />
canopy (figure B & C).<br />
Step 3<br />
Slide brackets in all four corners up, until the pull-pins<br />
snap in place (figure D & E).<br />
Drape the canopy top over the frame and attach hook and<br />
loop fasteners on canopy top to those on frame (figure F & G).<br />
Adjust canopy legs to desired height (figure H).<br />
Wrap half-wall straps around leg below push-pins to keep<br />
wall taught (figure I).<br />
take Take Down down<br />
Step 1<br />
Release and push in all canopy legs to their inner most positions (figure J).<br />
Step 2<br />
Detach canopy top from frame and fold it up so it will easily fit back into<br />
backpack. Do not place in bag yet (figure K).<br />
Step 3<br />
Use the pull-pins at the corners to release corner brackets and loosen eave<br />
tension (figure L).<br />
Step 4<br />
With all pull-pins released, pick up and walk one corner of canopy toward<br />
the opposite corner (figure M).<br />
Step 5<br />
Fully compress frame so it will fit easily into the bag.<br />
Step 6<br />
Slide canopy frame back into canopy backpack, add in the canopy top<br />
and Go (figure N).<br />
WHERE DO YOU ??<br />
© 2010 QUIK SHADE<br />
Xero Wheels s.r.l.<br />
Via Mure 65 - 31030 Altivole (TV) - Italy<br />
Phone: +39 0423 569499 Fax: +39 0423 915332<br />
E-mail: info@quik-shade.eu Check us out at: www.quik-shade.eu
Leggere attentamente le istruzioni prima di montare il vostro<br />
Gazebo <strong>Quik</strong> <strong>Shade</strong> Go<br />
Suggeriamo inoltre di seguire queste precauzioni di sicurezza; alcuni consigli di mantenimento quando si usa un<br />
Gazebo <strong>Quik</strong> <strong>Shade</strong> Go :<br />
1. Non montare o utilizzare il Gazebo <strong>Quik</strong> <strong>Shade</strong> Go in caso di pioggia o durante un temporale, specialmente<br />
in presenza di fulmini. Si rischia di recare danni al vostro Gazebo <strong>Quik</strong> <strong>Shade</strong> Go e di mettere voi e altri in<br />
potenziale pericolo.<br />
2. Fare attenzione durante l‘apertura o la chiusura del Gazebo <strong>Quik</strong> <strong>Shade</strong> Go per evitare di piegare la struttura<br />
o pizzicarsi dita, mani e telo.<br />
3. Evitare di montare il vostro Gazebo <strong>Quik</strong> <strong>Shade</strong> Go su forti pendenze.<br />
4. Usare sempre i picchetti forniti per fissare il vostro Gazebo <strong>Quik</strong> <strong>Shade</strong> Go sulla terra a meno che non si<br />
monti su calcestruzzo o asfalto.<br />
5. Non usare il vostro Gazebo <strong>Quik</strong> <strong>Shade</strong> Go per rifugi fissi. E’ stato progettato per un uso temporaneo.<br />
6. Tenere sempre il vostro Gazebo <strong>Quik</strong> <strong>Shade</strong> Go lontano da fonti di calore e fiamme. Non fare barbecue<br />
o accendere fuochi sotto il vostro Gazebo <strong>Quik</strong> <strong>Shade</strong> Go.<br />
7. Non lasciare il vostro Gazebo <strong>Quik</strong> <strong>Shade</strong> Go incustodito.<br />
8. Lavare a mano il Gazebo <strong>Quik</strong> <strong>Shade</strong> Go solo usando sapone neutro e acqua. Non usare detergenti<br />
aggressivi,abrasivi e/o candeggina,etc. Non lavare in lavatrice.<br />
9. Non piegare o chiudere il vostro <strong>Quik</strong> <strong>Shade</strong> Go quando è umido.<br />
10. USARE SEMPRE IL BUONSENSO<br />
ATTENZIONE: TENERE FIAMME E FONTI DI CALORE LONTANE DAL TELO DI COPERTURA. Questo Gazebo<br />
soddisfa i requisiti di infiammabilità della CPAI-84. Se il tessuto viene messo a contatto<br />
continuo con qualsiasi fiamma libera può incendiarsi. L'applicazione di qualsiasi sostanza<br />
aggressiva al tessuto della tenda può rendere le proprietà di resistenza alla fiamma inefficaci.<br />
CONDIZIONI DI GARANZIA<br />
La garanzia è conforme alle seguenti condizioni, con nessuna eccezione e in virtù di legge applicabile. <strong>Quik</strong> <strong>Shade</strong> garantisce che questo Gazebo è<br />
esente da difetti sia nel materiale che nelle lavorazioni per un periodo di due anni dalla data di acquisto. Questa garanzia è limitata a riparazione e/o<br />
sostituzione della sola parte difettata.<br />
1. La garanzia verrà applicata solo se il Gazebo <strong>Quik</strong> <strong>Shade</strong> e/o una sua parte saranno debitamente restituiti al rivenditore autorizzato; il difetto dovrà<br />
essere a sua volta comprovato da <strong>Quik</strong> <strong>Shade</strong> prima di procedere alla sostituzione.<br />
2. La garanzia è applicata solamente ai Gazebo <strong>Quik</strong> <strong>Shade</strong> acquistati da rivenditori autorizzati. E’ estesa soltanto all‘acquirente originale e non è<br />
trasferibile.<br />
3. Assicurarsi di conservare la ricevuta di acquisto originale emessa dal rivenditore autorizzato per qualsiasi reclamo di garanzia.<br />
4. La garanzia non copre danni o perdite causati da: vento, pioggia, incendio, neve, ghiaccio o altri eventi naturali; incidenti, usura,<br />
assemblaggio/disassemblaggio impropri, modifiche durante il montaggio o smontaggio, qualsiasi abuso o cattivo uso o negligenza di questo Gazebo<br />
<strong>Quik</strong> <strong>Shade</strong> o di una sua parte.<br />
5. Per l’estensione permessa dalla legge applicabile, nussuna tacita garanzia di commerciabiltà o idoneità applicabile a questo Gazebo <strong>Quik</strong> <strong>Shade</strong> è<br />
limitata per la durata di queste condizioni di garanzia. <strong>Quik</strong> <strong>Shade</strong> o i suoi agenti autorizzati non sono in nessun modo responsabili per, qualsiasi<br />
perdita personale, ferita o caso fortuito diretto o indiretto o danno conseguente che deriva dall'uso di questo prodotto.<br />
<strong>Quik</strong> <strong>Shade</strong> Go Hybrid Backpack <strong>Canopy</strong> 2x2m<br />
Montaggio e istruzioni di sicurezza<br />
<strong>Manual</strong>e utente
montaggio<br />
Hybrid Backpack <strong>Canopy</strong> 2x2m<br />
Montaggio<br />
Come montare la tua Backpack: Come smontare la tua Backpack:<br />
Step 1<br />
Sfilare il telaio dallo zainetto e posizionarlo verticale con<br />
i piedini che toccano il terreno (figura A).<br />
Step 2<br />
Afferrare e tirare gli angoli in direzione opposta ed<br />
espandere la struttura (figura B & C).<br />
Step 3<br />
Estendere le mantovane fino a quando i pull-pin si<br />
agganciano nella loro sede (figura D & E).<br />
Stendere il top sopra il telaio e attaccare gli straps del<br />
tessuto sui loro corrispondenti negli angoli del telaio<br />
(figura F & G).<br />
Regolare le gambe del gazebo all’altezza desiderata<br />
(figura H).<br />
Allacciare gli straps della parete sulla gamba al di<br />
sotto dei push-pin per mantenere muro teso (figura I).<br />
smontaggio<br />
Smontaggio<br />
Step 1<br />
Premere i pulsanti di sgancio (push-pin) e abbassare la tenda alla sua<br />
posizione più bassa (figura J).<br />
Step 2<br />
Staccare il top dal frame e piegarlo in modo da essere comodamente<br />
riposto nello zaino. Non riporlo in zaino per ora (figura K).<br />
Step 3<br />
Sganciare gli anelli (pull-pin) posizionati su ogni angolo per togliere<br />
tensione alle mantovane. (figura L).<br />
Step 4<br />
Una volta sganciati i pull-pin, sollevare leggermente un angolo e<br />
avanzare l’angolo opposto (figura M).<br />
Step 5<br />
Comprimere completamente il telaio in modo che si adatti facilmente<br />
allo zaino.<br />
Step 6<br />
Far scivolare il telaio nello zaino, inserire il top precedentemente<br />
piegato e Go! (figura N).<br />
WHERE DO YOU ??<br />
© 2010 QUIK SHADE<br />
Xero Wheels s.r.l.<br />
Via Mure 65 - 31030 Altivole (TV) - Italy<br />
Phone: +39 0423 569499 Fax: +39 0423 915332<br />
E-mail: info@quik-shade.eu Check us out at: www.quik-shade.eu
Lesen Sie bitte vor Aufbau Ihres <strong>Quik</strong> <strong>Shade</strong> Go <strong>Canopy</strong> Falt Pavillion<br />
aufmerksam nachfolgende Gebrauchs- und Sicherheitshinweise.<br />
Herzlichen Glückwunsch zum Kauf eines original <strong>Quik</strong> <strong>Shade</strong> Go Falt Pavillions! Es obliegt Ihrer Verantwortung<br />
die nachfolgenden Sicherheitshinweise sorgfältig zu lesen, sowie sie entsprechend aufzubewahren, bevor Sie<br />
Ihren <strong>Quik</strong> <strong>Shade</strong> Go Falt Pavillion aufstellen. Wir empfehlen Ihnen die nachfolgenden Sicherheits-, Pflege-<br />
und Montagehinweise wie nachfolgend beschrieben stets genau zu befolgen:<br />
1. Verwenden Sie das Zelt nicht bei Regen, Schnee, Wind oder Sturm, insbesondere nicht bei Gewitter oder<br />
aufziehender Gewitterlage! Ihr Pavillion könnte beschädigt werden, und für Sie selbst und / oder andere Personen<br />
zur potentiellen Gefahr werden.<br />
2. Lassen Sie sich beim Öffnen und Schließen des Rahmens die nötige Zeit, um ihn nicht zu verbiegen. Achten Sie<br />
besonders darauf, Ihre Finger und Hände nicht einzuklemmen und zu verletzen.<br />
3. Stellen Sie Ihren QUIK SHADE® Pavillion nicht an steilen Hängen oder Gefällen auf.<br />
4. Verwenden Sie zur Stabilisierung immer die mitgelieferten Heringe, außer Sie stellen das Zelt auf geschlossener<br />
Asphalt- oder Betondecke auf.<br />
5. Verwenden Sie ihr QUIK SHADE® nicht als dauerhafte Langzeitüberdachung. Das Zelt wurde ausschließlich für<br />
den temporären Einsatz entwickelt.<br />
6. Halten Sie Ihr QUIK SHADE® von Flammen und anderen Hitzequellen fern. Stellen Sie niemals einen befeuerten<br />
Grill unter das Zelt, oder entzünden, oder lassen Sie offenes Feuer und andere Hitzequellen darunter zu.<br />
7. Lassen Sie Ihr Zelt niemals unbeaufsichtigt stehen.<br />
8. Reinigen Sie das Zelt ausschließlich per Hand mit Wasser und milder Seife. Verwenden Sie keine scharfen<br />
Reiniger, Scheuermittel oder Bleichmittel. Das Zelt nicht in der Waschmaschine waschen!<br />
9. Lagern Sie ihr QUIK SHADE® niemals im nassen oder feuchten Zustand ein, bzw. Falten Sie es nicht nass oder<br />
feucht zusammen. Lassen Sie die Plane in jedem Fall komplett trocknen, da sonst die Gefahr von Schimmelbildung<br />
und Stockflecken besteht. Der Gestängemechanismus kann durch Nässe und Feuchtigkeit rosten.<br />
10. Verwenden Sie das Zelt ausschließlich im Sinne des allgemeinen gesunden Menschenverstandes.<br />
ACHTUNG: HALTEN SIE ALLE OFFENEN FLAMMEN UND ALLE HITZEQUELLEN VON DER ZELTPLANE FERN.<br />
Dieses Zelt erfüllt den amerikanischen Entflammbarkeitsstandart CPAI-84. Zusätzliche<br />
Behandlung oder das Aufbringen fremder Stoffe auf die Zeltplane kann die Kriterien und den<br />
Wirkungsgrad des Entflammbarkeitsstandarts negativ beeinflussen oder aufheben.”<br />
GARANTIEBESTIMMUNGEN<br />
Unter Berücksichtigung der nachfolgend angeführten Ausschlüsse und Beschränkungen, sowie auf Basis der rechtlich zulässigen Bestimmungen<br />
gewährt Xero Wheels s.r.l. auf diesen QUIK SHADE® Pavillion eine Garantie von 2 Jahren ab Kaufdatum (Einzelhändler) auf Defekte der verwendeten<br />
Materialen, sowie auf deren Verarbeitung. Xero Wheels s.r.l. behält sich vor, Mängel im Rahmen der gesetzlichen Fristen und Bestimmungen durch<br />
Reparatur, Nachbesserung oder den Austausch defekter Komponenten zu beseitigen.<br />
AUSSCHLÜSSE UND BESCHRÄNKUNGEN<br />
1. Die Garantie kann ausschließlich über einen von QUIK SHADE® authorisierten Fachhändler geltend gemacht werden.<br />
2. Die Garantie ist nur gültig, wenn dieses Zelt bei einem authorisierten Fachhändler erworben wurde. Die Garantie ist ausschließlich dem Erstkonsumenten<br />
vorbehalten. Der Garantieanspruch ist nicht auf Dritte übertragbar.<br />
3. Die Garantie kann ausschließlich unter Vorlage des original Kassenbons / Rechnung des authorisierten Fachhändlers geltend gemacht werden.<br />
4. Diese Garantie schließt Schäden oder Verlust die durch Wind, Regen, Feuer, Schnee, Eis, andere naturbedingte Einflüsse, Unfälle, übliche Gebrauchsspuren,<br />
falsche Handhabung bei Auf- und Abbau oder Verstellmaßnahmen, sowie zweckentfremdeten Einsatz und Gebrauch aus. Dieser Ausschluss<br />
betrifft den Pavillion selbst, sowie dessen Teile und Anbauteile.<br />
5. Soweit rechtlich zulässig, schliesst Xero Wheels s.r.l. und deren Agenten oder Distributeure, jede Verantwortung für unmittelbare Schäden, besondere<br />
Schäden, mittelbare Schäden und Folgeschäden aus, die, gleich aus welchem Rechtsgrund, durch die Verletzung einer Gewährleistung oder Bedingung<br />
entstehen können. Hierzu zählen persönliche Verluste und Nachteile, Verletzungen, direkt oder indirekt verursachte Vorkommnisse und daraus<br />
resultierende Schäden und Konsequenzen, sowie Nutzungsausfall, Einnahmeausfall, entgangener tatsächlicher oder erwarteter Gewinn (einschließlich<br />
der Gewinne aus Verträgen), entgangene Geschäftsgelegenheiten, Verlust an Reputation, und jeglicher sonstiger mittelbarer und unmittelbarer<br />
Schäden und Folgeschäden, wie immer diese entstanden sein mögen, einschließlich des Ersatzes von Gerätschaften und Eigentum, und der Kosten der<br />
Wiederherstellung.<br />
<strong>Quik</strong> <strong>Shade</strong> Go Hybrid Backpack <strong>Canopy</strong> 2x2m<br />
Aufbauanleitung und Sicherheitshinweise<br />
Benutzerhandbuch
aufbau<br />
Aufbau<br />
Aufbau Ihres Backpack Pavillion: Abbau des Backpack Pavillions:<br />
Step 1<br />
Nehmen Sie das Pavillion aus dem Rucksack und stellen<br />
Sie es auf den Boden (figure A).<br />
Step 2<br />
Ziehen Sie die gegenüberliegenden Ecken auseinander<br />
um das Pavillion zu vergrößern (figure B & C).<br />
Step 3<br />
Öffnen Sie in allen vier Ecken die Klammern bis die<br />
Feststeller an der gewünschten Stelle einrasten<br />
(figure D & E).<br />
Drapieren Sie das Dach über dem Rahmen und<br />
befestigen Sie es dort mit Hilfe der Klettverschlüsse<br />
(figure F & G).<br />
Justieren Sie die Pavillion Beine in der gewünschten<br />
Höhe (figure H).<br />
Wickeln Sie die Bänder der Seitenteile um die Beine<br />
unterhalb der Feststeller um das Seitenteil zu straffen<br />
(figure I).<br />
Hybrid Backpack <strong>Canopy</strong> 2x2m<br />
abbau<br />
Abbau<br />
Step 1<br />
Lösen Sie an allen vier Pavillion-Beinen die Feststeller und schieben<br />
Sie die Beine, in ihre kürzeste Position (figure J).<br />
Step 2<br />
Lösen Sie das Dach von dem Rahmen und falten Sie es so damit es<br />
wieder leicht in den Rucksack passt. Packen Sie es noch nicht in den<br />
Rucksack (figure K).<br />
Step 3<br />
Benutzen Sie die Feststeller in den Ecken um die Eckklammern zu lösen<br />
und um die Spannung des Pavillions zu lösen (figure L).<br />
Step 4<br />
Wenn alle Feststeller gelöst sind, schieben Sie jeweils zwei<br />
gegenüberliegende Beine aufeinander zu (figure M).<br />
Step 5<br />
Wenn das Gestell vollständig zusammen geschoben ist wird es leicht<br />
in die Tasche passen.<br />
Step 6<br />
Schieben das Gestell zurück in den Rucksack fügen Sie das Dach<br />
hinzu und fertig (figure N).<br />
WHERE DO YOU ??<br />
© 2010 QUIK SHADE<br />
Xero Wheels s.r.l.<br />
Via Mure 65 - 31030 Altivole (TV) - Italy<br />
Phone: +39 0423 569499 Fax: +39 0423 915332<br />
E-mail: info@quik-shade.eu Check us out at: www.quik-shade.eu
Veuillez lire complètement avant de installer de votre abri <strong>Quik</strong> <strong>Shade</strong> Go<br />
Nous vous recommandons fortement de lire et conserver ces instructions avant de commencer l’installation de<br />
Votre abri <strong>Quik</strong> <strong>Shade</strong> Go. Nous vous suggérons egalement d’observer le consignes de sécurité et les conseils<br />
d'entretien suivants:<br />
1. Vous ne devez jamais installer ou utiliser l'abri sous la pluie, le vent ou une tempête, particulièrement lors d'un<br />
orage électrique. Vous risqueriez alors d'endommager votre abri <strong>Quik</strong> <strong>Shade</strong> Go et de mettre ses occupants<br />
dans une situation dangereuse.<br />
2. Lorsque vous ouvrez ou fermez l'armature, il est suggéré de prendre votre temps pour éviter de vous pincer un<br />
doigt ou de déformer accidentellement un composant.<br />
3. Evitez d'installer votre abri <strong>Quik</strong> <strong>Shade</strong> Go sur un terrain fortement incliné.<br />
4. Utilisez toujours les piquets inclus avec l'abri <strong>Quik</strong> <strong>Shade</strong> Go pour le fixer au sol, sauf si vous l'installez sur<br />
une surface en béton ou en asphalte.<br />
5. L'abri <strong>Quik</strong> <strong>Shade</strong> Go ne doit pas servir d'abri permanent. Il a été conçu uniquement pour un usage<br />
temporaire.<br />
6. Tenez toujours votre abri <strong>Quik</strong> <strong>Shade</strong> Go loin des flammes et de toute source de chaleur. Il ne faut jamais<br />
faire un feu ou un barbecue sous votre abri <strong>Quik</strong> <strong>Shade</strong> Go.<br />
7. Ne laissez jamais votre abri <strong>Quik</strong> <strong>Shade</strong> Go sans surveillance.<br />
8. L'abri instantané peut être lavé uniquement à la main avec de l'eau et du savon doux. N'utilisez jamais de<br />
détergent fort, d'abrasif, d'eau de javel, etc. Ne le lavez jamais à la machine.<br />
9. Il ne faut jamais plier ou ranger votre abri <strong>Quik</strong> <strong>Shade</strong> Go lorsqu'il est humide ou mouillé. Laissez-le sécher<br />
complètement pour éviter la moisissure.<br />
10.UTILISEZ TOUJOURS VOTRE BON SENS.<br />
AVERTISSEMENT: LE TISSU DE CET ABRI DOIT TOUJOURS DEMEURER LOIN DES FLAMMES ET DE TOUTE<br />
SOURCE DE CHALEUR. Cet abri respecte la norme d'inflammabilité CPAI-84. Si le tissu est<br />
placé en contact continu avec une flamme, il risque de bruler. L'application d'une substance<br />
étrangère sur le tissu de l'abri peut en annuler les propriétés ignifuges.<br />
GARANTIE LIMITÉE<br />
Sous réserve des limitations suivantes et en sus des restrictions imposées par la loi, Ia société <strong>Quik</strong> <strong>Shade</strong> garantit que cet abri <strong>Quik</strong> <strong>Shade</strong> ne présentera<br />
pas de défaut de matériau ou de maind'oeuvre pendant une période deux années à compter de la date d'achat original. Cette garantie limitée couvre<br />
uniquement la réparation ou le remplacement des composants défectueux.<br />
1. Cette garantie limitée s'applique uniquement si l'abri <strong>Quik</strong> <strong>Shade</strong> et/ou ses composants sont correctement retournés au service au clientèle de la société<br />
Variflex Inc. (dont les coordonnées sont indiquées cidessous) et si la société <strong>Quik</strong> <strong>Shade</strong> détermine, à son entière discrétion, qu'un composant est<br />
défectueux.<br />
2. Cette garantie limitée s'applique uniquement aux abris polyvalents <strong>Quik</strong> <strong>Shade</strong> de la société Xero Wheels ayant été achetés auprès d'un détaillant agréé.<br />
Cette garantie limitée est offerte uniquement à l'acheteur original et n'est pas transférable.<br />
3. N'oubliez pas de conserver votre reçu de caisse original pour le cas où vous désireriez présenter une réclamation sous garantie. Toutes les réclamations<br />
sous garantie doivent être accompagnées d'un reçu de caisse original émis par un détaillant agréé.<br />
4. Cette garantie limitée ne s'applique pas aux dommages ou pertes attribuables au vent, à la pluie, au feu, à la neige, à la glace ou à d'autres forces de la nature,<br />
de même qu'à un accident, une usure normale, une erreur de montage, de démontage ou de réglage durant le montage ou le démontage, ou encore à un<br />
usage abusif, une négligence ou une mauvaise utilisation de l'abri <strong>Quik</strong> <strong>Shade</strong> et/ou de ses composants.<br />
5. Dans la mesure où les lois en vigueur le permettent, toute garantie implicite de commercialisation ou de convenance à un usage s'appliquant à cet abri <strong>Quik</strong><br />
<strong>Shade</strong> ne peut durer plus longtemps que cette garantie limitée. La société Xero Wheels et ses agents agréés n'offrent aucune garantie et n'acceptent<br />
aucune responsabilité relativement à quelque perte personnelle, blessure ou dommage direct, indirect ou consécutif résultant de l'utilisation de ce produit.<br />
Puisque certaines juridictions interdisent d'exclure ou limiter les responsabilités relatives à des dommages fortuits ou consécutifs, il est possible que les<br />
limitations et exclusions cidessus ne s'appliquent pas à vous.<br />
<strong>Quik</strong> <strong>Shade</strong> Go Hybrid Backpack <strong>Canopy</strong> 2x2m<br />
Instructions d’installation et de sécurité<br />
Manuel de l’utilisateur
montage<br />
Hybrid Backpack <strong>Canopy</strong> 2x2m<br />
Montage<br />
Comment monter votre Backpack: Comment demonter votre Backpack:<br />
Step 1<br />
Retirer la structure du sac a dos et poser le au sol sur<br />
ses pieds (figure A).<br />
Step 2<br />
Saisir et tirer les angles en direction opposés de maniere<br />
a ouvrir la structure (figure B & C).<br />
Step 3<br />
Etirer les bras jusqu’a ce que l’ergot s’encastre dans son<br />
trou (figure D & E).<br />
Etaler la toile sur la structure et attacher les velcro prevu<br />
a chaque angle (figure F & G).<br />
Regler a la hauteur desirée les pieds de la tonnelle<br />
(figure H)<br />
Attacher les velcro sur les pieds sous les ergots pour<br />
tendre la paroi (figure I).<br />
demontage<br />
Demontage<br />
Step 1<br />
Presser les ergots de blocage (push-pin) et baisser la tonnelle sur sa position<br />
la plus basse (figure J).<br />
Step 2<br />
Detacher la toile de sa structure et plier-la de maniere a etre remise dans<br />
le sac a dos, ne pas la ranger pour le moment (figure K).<br />
Step 3<br />
Detacher les anneaux (pull-pin) de chaque angles pour debloquer les<br />
bras (figure L).<br />
Step 4<br />
Une fois les ergots debloqués, soulever legerement un angle et approcher<br />
le de l’angle opposé (figure M).<br />
Step 5<br />
Replier completement la structure de maniere a pouvoir la faire entrer<br />
dans le sac a dos.<br />
Step 6<br />
Glisser la structure dans le sac a dos, puis la toile plié précédemment et<br />
….GO! (figure N).<br />
WHERE DO YOU ??<br />
© 2010 QUIK SHADE<br />
Xero Wheels s.r.l.<br />
Via Mure 65 - 31030 Altivole (TV) - Italy<br />
Phone: +39 0423 569499 Fax: +39 0423 915332<br />
E-mail: info@quik-shade.eu Check us out at: www.quik-shade.eu
Antes de ensamblar su tienda <strong>Quik</strong> <strong>Shade</strong> Go ea detenidamente las instrucciones<br />
Es su responsabilidad leer y consevar estas instrucciones antes de intendar instalar su tienda <strong>Quik</strong> <strong>Shade</strong> Go.<br />
Además deseamos sugerirle que siga estas precaucciones de seguridad y consejos para el ciudado y mantenimiento<br />
al usar su tienda <strong>Quik</strong> <strong>Shade</strong> Go:<br />
1. Nunca instale ni continúe usando la tienda en condiciones de lluvia, viento o tormenta, especialmente durante<br />
tormentas eléctricas. Pueden ocurrir daños a su tienda <strong>Quik</strong> <strong>Shade</strong> Go y exponerle a usted y a otras personas<br />
a peligros potenciales.<br />
2. Le sugerimos tomarse el tiempo necesario al abrir o cerrar el manco para evitar doblarlo o pincharse los dedos<br />
o las manos.<br />
3. Evite instalar su tienda <strong>Quik</strong> <strong>Shade</strong> Go en superficies con pendientes inclinadas.<br />
4. Siempre use las estacas suministradas para fijar su tienda <strong>Quik</strong> <strong>Shade</strong> Go al piso a menos que lo instale<br />
sobre hormigón o asfalto.<br />
5. No use su tienda <strong>Quik</strong> <strong>Shade</strong> Go como rifugio permanente. Está diseñado para uso provisional únicamente.<br />
6. Mantenga su tienda <strong>Quik</strong> <strong>Shade</strong> Go alejado del calor y las llamas en todo momento. No use asadores ni<br />
encienda fuegos debajo de su tienda <strong>Quik</strong> <strong>Shade</strong> Go.<br />
7. Nunca deje desatendido su tienda <strong>Quik</strong> <strong>Shade</strong> Go.<br />
8. Lave a mano la cubierta usando únicamente agua y jabón suave. Nunca use detergentes fuertes, abrasivos ni<br />
lejÍa. No la lave a máquina.<br />
9. Nunca pliegue ni guarde su tienda <strong>Quik</strong> <strong>Shade</strong> Go cuando esté húmedo o mojado. Deje que seque completamente<br />
para evitar la formación de moho.<br />
10. SIEMPRE USE EL SENTIDO COMÚN.<br />
ADVERTENCIA: MANTENGA ALEJADAS DE LA TELA DE LA CUBIERTA LAS LLAMAS Y LAS FUENTES DE CALOR.<br />
Esta tienda cumple con los requisitos de inflamabilidad de la norma CPAI-84. La tela se incendiará<br />
si se deja en contacto continuo con cualquier fuente de llama. La aplicación de cualquier<br />
sustancia extraña a la tela de la cubierta puede anular las propiedades ignífugas del material.<br />
GARANTÍA LIMITADA<br />
Sujeta a las limitaciones indicadas a continuación, además de cualquier otra limitación impuesta por las leyes aplicables, Bravo Sports garantiza que esta<br />
tienda <strong>Quik</strong> <strong>Shade</strong> está exento de defectos de materiales y de fabricación durante un período de dos años a partir de la fecha de compra original. Esta<br />
garantía está limitada únicamente a la reparación o reemplazo de las partes defectuosas.<br />
1. Esta Garantía Limitada aplicará únicamente si la tienda <strong>Quik</strong> <strong>Shade</strong> y/o cualquiera de sus partes se devuelve apropiadamente al departamento de<br />
servicio al cliente de Bravo Sports que se indica más adelante y Bravo Sports determina, a su sola discreción, que el producto está defectuoso.<br />
2. Garantía aplica únicamente a las tiendas de usos múltiples <strong>Quik</strong> <strong>Shade</strong> que se adquieran a través de los distributores autorizados. Esta Garantía Limitada<br />
se proporciona solamente al comprador y consumidor original y no es trasferible.<br />
3. Asegúrese de conservar su recibo original de compra para cualquier reclamación en virtud de esta garantía. Todas la reclamaciones bajo garantía deberán<br />
acompañarse con el recibo de compra original emitido por el distribudor autorizado.<br />
4. Esta Garantía Limitada no cubre daños ni pérdidas causadas por: viento, lluvia, fuego, nieve, hielo y otras fuerzas de la naturaleza, accidente, desgaste<br />
normal, ensamblaje, desensamblaye o ajustes erróneos durante la installación o el desmontaje, ni cualquier abuso, abandono o uso indebido de esta tienda<br />
<strong>Quik</strong> <strong>Shade</strong> y/o de sus partes.<br />
5. Hasta el alcance de lo permitido por las leyes aplicables,<br />
cualquier garanciá de comerciabilidad o idoneidad aplicable a esta tienda <strong>Quik</strong> <strong>Shade</strong> estará limitada a la duración de esta Garanciá Limitada. Bravo Sports<br />
no ofrece garanciá, y en ningún caso Bravo Sports o sus agentes autorizados habrán de ser responsables por cualquier pérdida personal, lesión o daños<br />
directos o indirectos, secundarios o consiguientes que resulten del uso de este producto. Tenga presente que algunos estados no permiten la exclusión o<br />
limitación de los daños secundarios o consiguientes, así que la limitación o exclusión antes descrita quizá no sea aplicable a usted. Esta Garanciá Limitada le<br />
otorga derechos legales específicos y además podría tener otros derechos que varían de estado a estado.<br />
<strong>Quik</strong> <strong>Shade</strong> Go Hybrid Backpack <strong>Canopy</strong> 2x2m<br />
Instrucciones de Installación y Seguridad<br />
<strong>Manual</strong> del usuario
montaje<br />
Montaje<br />
Como montar su tienda Backpack: Como desmontar su tienda Backpack:<br />
Step 1<br />
Quite la cubierta de la mochila y coloque el soporte de<br />
modo que los pies están en el suelo (figura A).<br />
Step 2<br />
Tire de las esquinas en el sentido opuesto a las otras<br />
para expandir la tienda (figura B y C).<br />
Step 3<br />
Deslice los soportes en las cuatro esquinas, hasta que<br />
la enganches encajen en su lugar (figura D y E).<br />
Coloque la tela sobre la estructura y fije la tela a la<br />
estructura con los enganches de la parte superior<br />
(figura F & G).<br />
Ajuste las patas de la tienda a la altura deseada<br />
(figura H).<br />
Coja a las patas ,las correas de la pared de tela,<br />
hasta que se mantenga firme (figura I).<br />
Hybrid Backpack <strong>Canopy</strong> 2x2m<br />
desmontar<br />
Desmontar<br />
Step 1<br />
Suelte y empuje las patas de la tienda hasta que queden completamente<br />
plegadas en el interior (figura J).<br />
Step 2<br />
Separar la tela superior de la estructura y plegar hacia arriba para que se<br />
ajuste fácilmente de nuevo en la mochila. No la coloque en una mochila<br />
todavía (figura K).<br />
Step 3<br />
Utilice los enganches de las esquinas para liberar los soportes y destensar<br />
la tienda (figura L).<br />
Step 4<br />
Con todos los enganches sueltos, levante y lleve las esquinas de la tienda<br />
hacia la esquina opuesta (figura H).<br />
Step 5<br />
Comprima la estructura de la tienda para que quepa fácilmente en la bolsa.<br />
Step 6<br />
Introduzca la estructura de la tienda en la mochila, ponga encima la tela<br />
de la tienda y listo (Figura N).<br />
WHERE DO YOU ??<br />
© 2010 QUIK SHADE<br />
Xero Wheels s.r.l.<br />
Via Mure 65 - 31030 Altivole (TV) - Italy<br />
Phone: +39 0423 569499 Fax: +39 0423 915332<br />
E-mail: info@quik-shade.eu Check us out at: www.quik-shade.eu