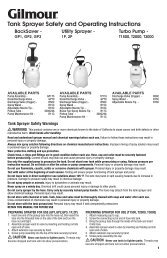
Tank Sprayer Safety and Operating Instructions - Gilmour
Tank Sprayer Safety and Operating Instructions - Gilmour
Tank Sprayer Safety and Operating Instructions - Gilmour

Create successful ePaper yourself
Turn your PDF publications into a flip-book with our unique Google optimized e-Paper software.
Step 2. Hose at tank. (Fig. 6)<br />
a. Release air pressure.<br />
b. Inspect hose, if end is split or worn, cut off clean <strong>and</strong> straight just<br />
above damaged area <strong>and</strong> reassemble as described below using<br />
c. replacement hose clamp.<br />
Note: Do not attempt to reuse original factory installed crimped clamp<br />
d. Slide clamp on hose<br />
e. Holding end of hose under hot water for approximately 3 minutes<br />
will allow hose to slide on tank connector easier.<br />
f. Slide clamp into position shown in (Fig. 6).<br />
g. Tighten clamp until a snug fit is obtained. (Test for leakage by<br />
pressurizing with plain water.)<br />
Step 3. Where hose enters valve body.<br />
a. Insert small blade screwdriver into notch <strong>and</strong> twist 1/4 turn to<br />
separate valve body from valve head. (Fig. 7)<br />
b. Slide valve body back along hose to expose connection of<br />
hose with valve head. (Fig. 8)<br />
c. Plastic sleeve must be tight on hose; if not grip sleeve firmly with<br />
thumb <strong>and</strong> forefinger <strong>and</strong> push toward end of hose until snug.<br />
d. If leakage is due to cracked or damaged hose, cut off behind<br />
sleeve, remove sleeve with pliers as shown then cut<br />
remaining hose off valve head hose fitting. (Fig. 9)<br />
e. To reassemble.<br />
(1a) Slide plastic sleeve over hose (larger end of tapered sleeve<br />
toward end of hose). (Fig. 8)<br />
(1b) Push hose fully on valve head fitting (soaking end of hose in hot<br />
water first will make this operation much easier).<br />
(1c) Push sleeve snugly on hose as described above.<br />
(1d) Align valve body with valve head <strong>and</strong> snap together tightly. (Fig. 7)<br />
Step 4. If leak is from any other area of valve, replace valve assembly using Kit.<br />
Problem: <strong>Sprayer</strong> Nozzle Does Not Spray Or Is Missing ( Fig. 10)<br />
Solution: a. Clean nozzle.<br />
b. Remove nozzle cap.<br />
c. Clean nozzle body <strong>and</strong> cap orifice using a toothpick or broom straw.<br />
d. Replace nozzle.<br />
e. If damaged or lost, replace using parts from kit.<br />
GENERAL SPRAYING HINTS<br />
1. Mix spray solution as directed on container.<br />
2. Spray in the cool of the day, never when wind is blowing.<br />
3. Dress right…cover arms, legs <strong>and</strong> wear eye protection.<br />
SPRAYING TIPS<br />
1. Spray all around to catch trouble wherever<br />
it may start.<br />
2. High pressure for fine spray, lower for medium<br />
<strong>and</strong> coarse.<br />
3. Over spraying is harmful <strong>and</strong> wastes<br />
expensive material.<br />
4. Fine spray for flowers. Medium for shrubs <strong>and</strong> bushes.<br />
Coarse spray for weeds.<br />
5. Always be sure to wash <strong>and</strong> rinse your sprayer<br />
after each time it is used.<br />
2B<br />
GRIP BODY<br />
GRIP BODY<br />
HOSE SHOWN<br />
CUT OFF<br />
SCREWDRIVER<br />
NOTCH<br />
ALIGNMENT<br />
NOTCH<br />
LARGE END OF<br />
SLEEVE<br />
Position clamp head<br />
away from tank neck<br />
<strong>and</strong> h<strong>and</strong>le.<br />
<strong>Tank</strong> Outlet<br />
Fig. 6<br />
Fig. 7<br />
HOSE<br />
PLASTIC SLEEVE<br />
Fig. 8<br />
PLASTIC SLEEVE<br />
Fig. 9<br />
VALVE HEAD<br />
1/4 TWIST<br />
VALVE HEAD<br />
VALVE HEAD<br />
HOSE FITTING<br />
SQUEEZE OFF<br />
SLEEVE AS SHOWN<br />
Fig. 10<br />
3