FUNZIONI SPECIALI 1.Il modulo deve essere disinserito. Le ...
FUNZIONI SPECIALI 1.Il modulo deve essere disinserito. Le ...
FUNZIONI SPECIALI 1.Il modulo deve essere disinserito. Le ...
You also want an ePaper? Increase the reach of your titles
YUMPU automatically turns print PDFs into web optimized ePapers that Google loves.
No forest has been destroyed to<br />
produce this 100% recycled paper.<br />
REMOTE CONTROL HOMOLOGATION ETSI 300 220<br />
By GEMINI TRADING S.R.L. via Luigi Galvani, 12 Bodio Lomnago (VA) – ITALY<br />
Tel. (+39) 0332/943211 – Fax (+39) 0332/948080<br />
CONDIZIONI DI GARANZIA - WARRANTY’S TERMS - CONDITIONS DE GARANTIE<br />
GARANTIELEISTUNG - CONDICIONES DE GARANTIA - GARANTIEVOORWAARDEN<br />
Questo apparecchio è garantito contro ogni difetto di costruzione o di funzionamento per<br />
12 mesi dalla data di installazione e comunque per un massimo di 24 mesi dalla data di<br />
fabbricazione. La ditta costruttrice declina ogni responsabilità per eventuali anomalie o<br />
guasti all’impianto elettrico della vettura dovuti ad una cattiva installazione o al<br />
superamento delle caratteristiche indicate.<br />
This device is guaranteed against construction or working faults for 12 months from<br />
purchase date and for a maximum of 24 months from manufacturing date. The<br />
manufacturer declines every responsibility for any possible defect or failure to the device<br />
and to the vehicle’s electric system due to incorrect installation or to the alteration of the<br />
indicated Technical Features. The alarm system has only a dissuasive function against<br />
possible thefts.<br />
Cet appareil est garanti contre tous les défaults de fabrication ou de fonctionnement<br />
pour 12 mois à compter de la date d’installation et pour un maximum de 24 mois à<br />
compter de la date de fabrication. <strong>Le</strong> fabriquant décline toute responsabilité pour<br />
eventuelles anomalies ou pannes à l'alarme ou à l'équipement électrique du vèhicule dû<br />
à une mauvaise installation ou au dépassement des caractéristiques techniques<br />
indiquées. L'alarme à une fonction exclusivement dissuasive contre les vols.<br />
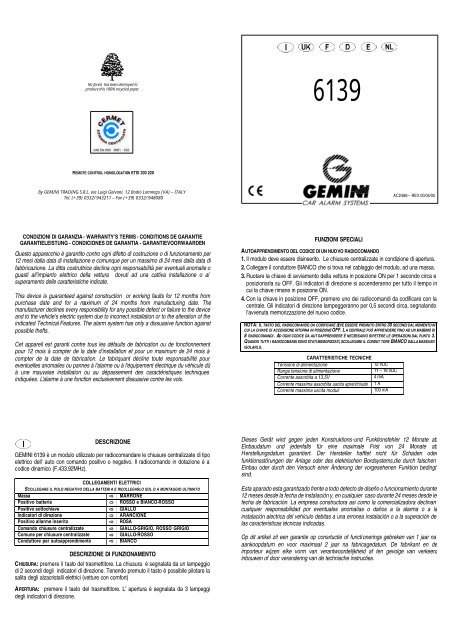
DESCRIZIONE<br />
GEMINI 6139 è un <strong>modulo</strong> utilizzato per radiocomandare le chiusure centralizzate di tipo<br />
elettrico dell’ auto con comando positivo o negativo. Il radiocomando in dotazione è a<br />
codice dinamico (F.433.92MHz).<br />
COLLEGAMENTI ELETTRICI<br />
SCOLLEGARE IL POLO NEGATIVO DELLA BATTERI A E RICOLLEGARLO SOL O A MONTAGGIO ULTIMATO<br />
Massa MARRONE<br />
Positivo batteria ROSSO e BIANCO-ROSSO<br />
Positivo sottochiave GIALLO<br />
Indicatori di direzione ARANCIONE<br />
Positivo allarme inserito ROSA<br />
Comando chiusure centralizzate GIALLO-GRIGIO, ROSSO GRIGIO<br />
Comune per chiusure centralizzate GIALLO-ROSSO<br />
Conduttore per autoapprendimento BIANCO<br />
DESCRIZIONE DI FUNZIONAMENTO<br />
CHIUSURA: premere il tasto del trasmettitore. La chiusura è segnalata da un lampeggio<br />
di 2 secondi degli indicatori di direzione. Tenendo premuto il tasto è possibile pilotare la<br />
salita degli alzacristalli elettrici (vetture con comfort)<br />
APERTURA: premere il tasto del trasmettitore. L’ apertura è segnalata da 3 lampeggi<br />
degli indicatori di direzione.<br />
6139<br />
<strong>FUNZIONI</strong> <strong>SPECIALI</strong><br />
AC2488 – REV.00/05/00<br />
AUTOAPPRENDIMENTO DEL CODICE DI UN NUOVO RADIOCOMANDO<br />
1. Il <strong>modulo</strong> <strong>deve</strong> <strong>essere</strong> <strong>disinserito</strong>. <strong>Le</strong> chiusure centralizzate in condizione di apertura.<br />
2. Collegare il conduttore BIANCO che si trova nel cablaggio del <strong>modulo</strong>, ad una massa.<br />
3. Ruotare la chiave di avviamento della vettura in posizione ON per 1 secondo circa e<br />
posizionarla su OFF. Gli indicatori di direzione si accenderanno per tutto il tempo in<br />
cui la chiave rimane in posizione ON.<br />
4. Con la chiave in posizione OFF, premere uno dei radiocomandi da codificare con la<br />
centrale. Gli indicatori di direzione lampeggeranno per 0,5 secondi circa, segnalando<br />
l’avvenuta memorizzazione del nuovo codice.<br />
NOTA: IL TASTO DEL RADIOCOM ANDO DA CODIFICARE DEVE ESSERE PREMUTO ENTRO 30 SECONDI DAL MOMENTO IN<br />
CUI LA CHIAVE DI ACCENSIONE RITORNA IN POSIZIONE OFF. L A CENTRALE PUÒ APPRE NDERE FINO AD UN MASSIMO DI<br />
8 RADIOCOMANDI. AD OGNI CODICE DA AUT OAPPRENDERE È NECESSARIO RIPETERE LE OPERAZIONI DAL PUNTO 3.<br />
QUANDO TUTTI I RADIOCOMANDI SONO STATI MEMORIZZATI, SCOLLEGARE IL CONDUT TORE BIANCO DALLA MASSA ED<br />
ISOLARLO.<br />
CARATTERISTICHE TECNICHE<br />
Tensione di alimentazione<br />
12 VDC<br />
Range tensione di alimentazione<br />
11 – 18 VDC<br />
Corrente assorbita a 13,5V<br />
4 mA<br />
Corrente massima assorbita uscita apre/chiude 1 A<br />
Corrente massima uscita moduli<br />
100 mA<br />
Dieses Gerät wird gegen jeden Konstruktions-und Funktionsfehler 12 Monate ab<br />
Einbaudatum und jedenfalls für eine maximale Frist von 24 Monate ab<br />
Herstellungsdatum garantiert. Der Hersteller hafftet nicht für Schaden oder<br />
funktionsstörungen der Anlage oder des elektrischen Bordsystems,die durch falschen<br />
Einbau oder durch den Versuch einer Änderung der vorgesehenen Funktion bedingt<br />
sind.<br />
Esta aparado esta garantizado frente a todo defecto de diseño o funcionamiento durante<br />
12 meses desde la fecha de instalación y, en cualquier caso durante 24 meses desde le<br />
fecha de fabricación. La empresa constructora asi como la comercializadora declinan<br />
cualquier responsabilidad por eventuales anomalías o daños a la alarma o a la<br />
instalación alectrica del vehículo debitas a una erronea instalación o a la superación de<br />
las características técnicas indicadas.<br />
Op dit artikel zit een garantie op consrtuctie of functionerings gebreken van 1 jaar na<br />
aankoopdatum en voor maximaal 2 jaar na fabricagedatum. De fabrikant en de<br />
importeur wijzen elke vorm van verantwoordelijkheid af ten gevolge van verkeerd<br />
inbouwen of door verandering van de technische instructies.
DESCRIPTION<br />
GEMINI 6139 is a module studied to control the vehicle electric central door locking with<br />
positive or negative control. It is supplied with a dynamic code transmitter<br />
(F.433.92MHz).<br />
WIRING CONNECTIONS<br />
DISCONNECT THE NEGATIVE TERMINAL OF THE B ATTERY AND ONLY RE-CONNECT AFTER THE IN STALLATION IS COMPLETED<br />
Earth BROWN<br />
Battery positive terminal RED and WHITE-RED<br />
Ignition live YELLOW<br />
Direction indicator lights ORANGE<br />
Positive alarm armed PINK<br />
Central door locking control YELLOW-GREY, RED -GREY<br />
Common for door locking signal YELLOW-RED<br />
Self-learning wire WHITE<br />
OPERATING INSTRUCTIONS<br />
TO CLOSE: press the transmitter’s button. ONE pulse of the direction indicator lights will<br />
signal the door closure. For selected vehicles equipped with «Comfort Closing Systems»<br />
it is possible to control the electric windows by pushing on the transmitter’s button.<br />
TO OPEN: press the transmitter’s button. THREE pulses of the direction indicator lights<br />
will signal the door opening.<br />
DESCRIPTION<br />
GEMINI 6139 c’est un module étudié pour commander les fermetures centralisées<br />
éléctriques du véhicule à commande positive et négative. Il est fournit avec un émetteur<br />
à code dy namique ( 433.92 MHz).<br />
CONNEXIONS ELECTRIQUES<br />
DEBRANCHER LE NEGATIF DE LA BATTERIES ET LE CONNECTER SEULEMENT A INSTALLATION TERMINEE<br />
Masse MARRON<br />
Positif de la baterie ROUGE et BLANC-ROUGE<br />
Positif après contact JAUNE<br />
Indicateurs de direction ORANGE<br />
Positif alarme activée ROSE<br />
Commande pour fermetures centralisées JAUNE-GRIS, ROUGE-GRIS<br />
Comun pour fermetures centralisées JAUNE-ROUGE<br />
Conducteur utilisé pour l’auto-apprentissage BLANC<br />
FONCTIONNEMENT<br />
FERMER: appuyer sur le poussoir de l’émetteur. La fermeture des portes est signalée par<br />
1 clignotement des indicateurs de direction. Pour véhicules équipés du Système Pac -<br />
confort on peut commander les vitres éléctriques en appuyant sur le poussoir de<br />
l’émetteur.<br />
OUVRIR: appuyer sur le poussoir de l’émetteur. L’ouverture des portes est signalée par<br />
3 clignotements des indicateurs de direction.<br />
BESCHREIBUNG<br />
Die GEMINI 6139 wurde entwickelt, um elektrische Zentralverriegelungen (positiv oder<br />
negativ) per Funkfernbedienung anzusteuern. Sender und Empfänger arbeiten mit<br />
cryptografischem Wechselcode. Der Sender ist Selbstanlernbar.<br />
ANSCHLUß DER KABEL<br />
VOR DER INSTALLATION ENTFERNEN SIE DEN MASSEANSCHLUß DER BATTERIE (NACH DER INSTALLATION WIEDER ANSCHLIEßEN)<br />
Masse BRAUN<br />
Batterie Plus ROT und ROT/WEIß<br />
Geschaltetes Plus GELB<br />
Blinkeransteuerung ORANGE<br />
Positiver Ausgang ROSA<br />
ZV – Ansteuerkabel GELB/GRAU und ROT/GRAU<br />
Je nach ZV GELB/ROT<br />
Anlernen eines Handsenders WEIß<br />
BEDIENUNG<br />
TÜR ZU PER FUNK: Einmal Druck auf die Sendertaste; 1 mal blinken der Fahrzeugblinker<br />
als Quittierung. Für Fahrzeuge mit Komfortschließung ist es möglich diese mit langem<br />
Druck auf die Sendertaste anzusteuern.<br />
TÜR AUF PER FUNK: Einmal Druck auf die Sendertaste; 3 mal blinken der Fahrzeugblinker<br />
als Quittierung.<br />
ANLERNEN EINES HANDSENDERS<br />
SPEZIAL FUNKTION<br />
1. Die Anlage muß deaktiviert sein (Tür auf per Funk fernbedienung)<br />
2. Das im Kabelbaum befindliche WEIßE Kabel mit Masse verbinden.<br />
3. Den Zündschlüssel für 1 Sekunde auf EIN schalten (Fahrzeugblinker blinken kurz auf)<br />
und gleich wieder Zündung auf AUS schalten.<br />
4. Innerhalb von 30 Sekunden den neu anzulernenden Handsender betätigen. Eine 0,5<br />
sekunden dauernde Blinkerquittierung bestätigt den erfolgreichen Anlernversuch.<br />
ACHTUNG! E S IST MÖGLICH BIS Z U 8 HANDSENDER ANZULERNEN. SIE MÜSSEN JEDESMAL<br />
VON SCHRITT 3 BEGINNEN. NACH DER ERFOLGREICHE N PROGRAMMIERUNG DES S ENDERS<br />
ENTFERNEN SIE DAS WEIßE KABEL VON MASSE.<br />
Spannungsversorgung<br />
Spannungsbereich<br />
Ruhestrombedarf bei 13,5 V<br />
MAX Strom ZV<br />
MAX Strom positiver Ausgang<br />
SPECIALE FUNCTIES<br />
SELF-LEARNING VAN GECODEERDE HANDZENDERS:<br />
1. Schakel het systeem uit met een handzender.<br />
2. Verbindt de WITTE draad, vlakbij de ZWARTE lus, met de massa.<br />
3. Zet het contact 1 seconde aan (knipperlichten gaan branden) en dan weer uit.<br />
4. Druk, om te coderen, op de handzender met het contact in de UIT-stand. Het codegeheugen<br />
wordt aangegeven door een 0,5 seconde puls van de richtingaanwijzers.<br />
NOTA: D RUK BINNEN 30 SECONDEN NADAT HET CONTACT IS UITGEZET OP DE HANDZENDER. ER KUNNEN<br />
MAXIMAAL 8 HANDZENDERS INGELEERD WORDEN. VOLG DE PROCEDURE VANAF PUNT 3. NA HET INLEREN<br />
VAN DE HANDZENDERS DIENT U DE WITTE DRAAD LOS TE MAKEN EN AF TE ISOLEREN.<br />
TECHNISCHE GEGEVENS<br />
Voeding<br />
Voedingsspanning<br />
Verbruik bij 13,5 Volt<br />
Centrale portiervergrendelingsuitgang<br />
Positieve uitgang<br />
FUNCIONES ESPECIALES<br />
TECHNISCHE DATEN<br />
12 VDC<br />
11 – 18 VDC<br />
4 mA<br />
1 A<br />
100 mA<br />
AUTO-CODIFICACIÓN DE UN NUEVO TRANSMISOR:<br />
1. El módulo debe estar en la posición de puertas abiertas.<br />
2. Conectar el cable BLANCO que se encuentra en el cableado del módulo, a una masa.<br />
3. Girar la llave de contacto del vehículo a la posición ON durante 1 segundo y después<br />
girarla a la posición OFF. Los intermitentes permanecerán encendidos durante todo el<br />
tiempo que la llave de contacto esté en la posición ON.<br />
4. Con la llave de contacto en la posición de OFF, pulsar el botón del transmisor a<br />
codificar con la central. Los intermitentes destellarán durante 0,5 segundos,<br />
señalando que se ha efectuado la memorización del nuevo código.<br />
NOTA: EL BOTÓN DEL TRANSMISOR A CODIFICAR DEBE SER PULSADO DENTRO DE LOS 30 SEGUNDOS<br />
DESDE EL MOMENTO EN QUE LA LLAVE DE CONTACTO SE VUELVE A LA POSICIÓN OFF. L A CENTRAL PUEDE<br />
MEMORIZAR HASTA UN MÁXIMO DE 8 TRANSMISORES. PARA CADA NUEV O CÓDIGO A MEMORIZAR ES<br />
NECESARIO REPETIR LAS OPERACIONES DESDE EL PUNTO 3. CUANDO TODOS LOS TRANSMISORES HAYAN<br />
SIDO MEMORIZADOS, DESCONECTAR EL CABLE BLANCO DE MASA Y AISLARLO.<br />
CARACTERISTICAS TECNICAS<br />
Tensión de alimentación<br />
Rango tensión de alimentación<br />
Corriente absorvida 13,5V<br />
Corriente maxima absorvida salida apertura/cierre<br />
Corriente maxima salida para módulos<br />
12 VDC<br />
11 – 18 VDC<br />
4 mA<br />
1 A<br />
100 mA<br />
12 VDC<br />
11 – 18 VDC<br />
4 mA<br />
1 A<br />
100 mA
DESCRIPCION<br />
GEMINI 6139 es un módulo utilizado para mandar a distancia los cierres centralizados<br />
de tipo eléctrico del vehiculo, activados por positivo ó negativo. El transmisor en<br />
dotación es a código dinámico (F. 433.92 MHz).<br />
CONEXIONES ELECTRICAS<br />
DESCONECTAR EL POLO NEGATIVO DE LA BATERI A Y VOLVERLO A CONECTAR SÓLO CUANDO HAYA FINALIZADO EL MONTAJE<br />
Masa MARRON<br />
Positivo Bateria ROYO y BLANCO<br />
Positivo bajo llave de contacto AMARILLO<br />
Intermitentes NARANJAS<br />
Salida positiva con alarma conectada ROSA<br />
Cierre de puertas por negativo AMARILLO-GRIS, ROJO-GRIS<br />
Comun por cierre de puertas AMARILLO-ROJO<br />
Autocodificación transmisores BLANCO<br />
DESCRIPCION DE FUNCIONAMIENTO<br />
CIERRE : pulsar el botón del transmisor. El cierre es señalado por un destello de 2<br />
segundos de los intermitentes. Manteniendo pulsado el botón es posible pilotar la<br />
subída de las ventanas eléctricas (vehículos con Pack-comfort).<br />
APERTURA : pulsar el botón del transmisor. La apertura es señalada con 3 destellos de<br />
los intermitentes.<br />
Dispositivo tipo:<br />
Type of product:<br />
Produktartikel:<br />
Dispositivo ciclo:<br />
Tipo de dispositivo:<br />
Typenummer:<br />
Installato su auto modello:<br />
Installed on car model:<br />
Installé sur véhicule modèle:<br />
Auf pkw marke/modell<br />
eingebaut:<br />
Montado en un vehìculo:<br />
Gemonteerd in merk auto:<br />
Da:<br />
By:<br />
Par:<br />
Von:<br />
Por:<br />
Dealer:<br />
6139<br />
BESCHRIJVING<br />
De GEMINI 6139 is een afstandsbediende centrale portiervergrendelingsmodule voor<br />
positieve en negatieve sturing. De afstandsbedieningen worden met een dynamische code<br />
geleverd (Frequentie 433.92MHz).<br />
AANSLUITGEGEVENS<br />
MAAK DE NEGATIEVE ACCUPOOL LOS EN SLUIT PAS WEER AAN ALS DE UNIT IS GEÏNSTALLEERD<br />
Massa BRUINE<br />
Positieve accupool RODE en ROOD-WITTE<br />
Contactslot + 15 GELE<br />
Richtingaanwijzers ORANJE<br />
Positief gestuurd alarm aan ROZE<br />
Centrale portiervergrendeling GEEL/GRIJZE, ROOD-GRIJZE<br />
Gemeenschappelijk GEEL/ROOD<br />
Autolearning WITTE<br />
BESCHRIJVING VAN DE WERKING<br />
SLUITEN VAN DE CEN TRALE PORTIERVERGREN DELING: druk op de knop van de handzender. De<br />
inschakeling wordt gesignaleerd door 1-maal knipperen van de richtingaanwijzers. Bij auto’s<br />
met comfortsturing via de sluitdraad kunnen we door de afstandsbediening in te blijven<br />
drukken, ook de ramen sluiten. Bij auto’s met comfortsturing via een aparte stuurdraad kunnen<br />
we een Gemini 2355-comfortmodule monteren.<br />
OPENEN VAN DE CENTRALE PORTIERVERGRENDELING: druk op de knop van de handzender. De<br />
uitschakeling wordt weergegeven door 3-maal knipperen van de richtingaanwijzers.<br />
Venduto il:<br />
Sold on:<br />
Vendu le:<br />
Verkauft am:<br />
Vendido el:<br />
Verkoopdatum:<br />
FONCTIONS SPECIALES<br />
AUTO-APPRENTISSAGE D’UN CODE D’UN NOUVEAU EMETTEUR<br />
1. <strong>Le</strong> module doit être désactivé.<br />
2. Connecter à la masse le fil BLANC qui se trouve dans le câblage du module.<br />
3. Tourner la clef d’allumage en position ON pour 1 second (les indicateurs de direction<br />
s’allument) et puis en position OFF.<br />
4. Avec la clef en position OFF appuyer sur le poussoir de l’émetteur à codifier. La<br />
mémorisation du code est signalée par un clignotement des indicateurs de direction<br />
de 0,5 sec..<br />
NOTE: APPUYER SUR LE POUSSOIR DE L’EMETTEUR 30 SECONDES APRES AVOIR TOURNE LA CLEF<br />
D’ALLUMAGE EN POSITION OFF. IL EST POSSIBLE D’APPRENDRE UN NOMBRE MAXIMUN DE 8 EMETTEURS EN<br />
SUIVANT LES OPERATIONS DU POINT 3. A MEMORISATION TERMINEE DECONNECTER ET ISOLER LE FIL<br />
BLANC.<br />
CARACTERISTIQUES TECHNIQUES<br />
Tension d’alimentation<br />
12 VDC<br />
Tension d’alimentation (Range)<br />
11 – 18 VDC<br />
Courant consommée à 13,5V<br />
4 mA<br />
Max. Courant consommeée sortie ouvre/ferme 1 A<br />
Max. Courant consommée sortie module 100 mA<br />
SPECIAL FUNCTIONS<br />
SELF-LEARNING OF THE CODE OF A NEW TRANSMITTER.<br />
1. The module must be de-activated.<br />
2. Connect the WHITE wire located in the harness to a body earth.<br />
3. Turn the ignition key to ON position for 1 second (the direction indicator lights will<br />
switch ON) and then to OFF.<br />
4. With the key to OFF position, press the button of one transmitter to codify. A 0,5-sec.<br />
pulse of the direction indicator lights signals the code memorisation.<br />
NOTE: PRESS THE TRANSMITTER’S BUTTON WITHIN 30 SECONDS AFTER THE IGNITION KEY IS TURNED TO<br />
OFF POSITION. IT IS POSSIBLE TO LEARN A MAXIMUM NUMBER OF 8 TRANSMITTERS FOLLOWI NG THE<br />
OPERATION FROM POINT 3. AT THE END OF THE MEMORISATION DISCONNECT THE WHITE WIRE AD ISOLATE IT.<br />
Power supply<br />
Power supply range<br />
Current drawn at 13,5V<br />
Max. Current open/close outlet<br />
Max. Current modules outlet<br />
TECHNICAL DATA<br />
12 VDC<br />
11 – 18 VDC<br />
4 mA<br />
1 A<br />
100 mA


