

Modo de empleo - inicio
Modo de empleo - inicio
Modo de empleo - inicio

Create successful ePaper yourself
Turn your PDF publications into a flip-book with our unique Google optimized e-Paper software.
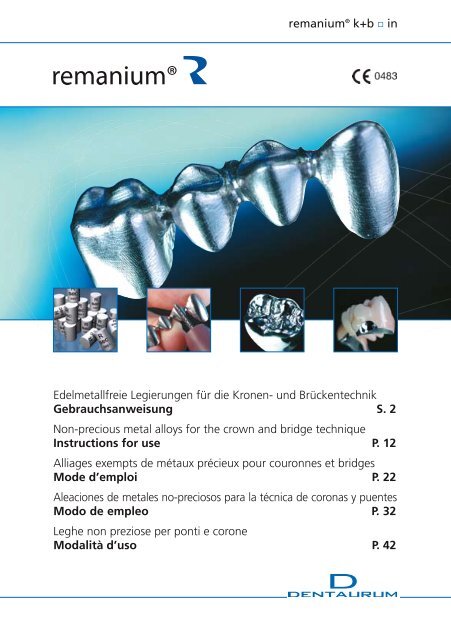
emanium ® k+b in<br />
E<strong>de</strong>lmetallfreie Legierungen für die Kronen- und Brückentechnik<br />
Gebrauchsanweisung S. 2<br />
Non-precious metal alloys for the crown and bridge technique<br />
Instructions for use P. 12<br />
Alliages exempts <strong>de</strong> métaux précieux pour couronnes et bridges<br />
Mo<strong>de</strong> d’emploi P. 22<br />
Aleaciones <strong>de</strong> metales no-preciosos para la técnica <strong>de</strong> coronas y puentes<br />
<strong>Modo</strong> <strong>de</strong> <strong>empleo</strong> P. 32<br />
Leghe non preziose per ponti e corone<br />
Modalità d’uso P. 42
DE<br />
Sehr geehrte Kundin, sehr geehrter Kun<strong>de</strong><br />
Vielen Dank, dass Sie sich für ein Qualitätsprodukt aus <strong>de</strong>m Hause Dentaurum entschie<strong>de</strong>n haben.<br />
Damit Sie dieses Produkt sicher und einfach zum größtmöglichen Nutzen für sich und die Patienten<br />
einsetzen können, muss diese Gebrauchs anweisung sorgfältig gelesen und beachtet wer<strong>de</strong>n.<br />
In einer Gebrauchsanweisung können nicht alle Gegebenheiten einer möglichen Anwendung<br />
beschrieben wer<strong>de</strong>n. Deshalb steht Ihnen unsere Hotline gerne für Fragen und Anregungen<br />
zur Verfügung.<br />
Aufgrund <strong>de</strong>r ständigen Weiterentwicklung unserer Produkte empfehlen wir Ihnen auch bei<br />
häufiger Verwendung <strong>de</strong>s gleichen Produktes immer wie<strong>de</strong>r das aufmerksame Durchlesen<br />
<strong>de</strong>r jeweils aktuell beiliegen<strong>de</strong>n bzw. im Internet unter www.<strong>de</strong>ntaurum.<strong>de</strong> hinterlegten<br />
Gebrauchsanweisung.<br />
1. Hersteller<br />
Dentaurum GmbH & Co. KG · Turnstraße 31 · 75228 Ispringen · Deutschland<br />
2. Qualitätshinweise<br />
Dentaurum versichert <strong>de</strong>m Anwen<strong>de</strong>r eine einwandfreie Qualität <strong>de</strong>r Produkte. Der Inhalt dieser<br />
Gebrauchs anweisung beruht auf eigener Erfahrung. Der Anwen<strong>de</strong>r ist für die Verarbeitung <strong>de</strong>r<br />
Produkte selbst verantwortlich. In Ermangelung einer Einflussnahme von Dentaurum auf die<br />
Verarbeitung durch <strong>de</strong>n Anwen<strong>de</strong>r besteht keine Haftung für fehlerhafte Ergebnisse.<br />
2 remanium ® k+b <strong>de</strong>
Inhaltsverzeichnis<br />
Allgemeine Hinweise zur Verarbeitung ....................................................................................4<br />
Mo<strong>de</strong>llation ............................................................................................................................4<br />
Gusskanalsystem .....................................................................................................................5<br />
Errechnen <strong>de</strong>r Metallmenge ....................................................................................................5<br />
Einbetten ................................................................................................................................5<br />
Auswachsen und Vorwärmen .................................................................................................6<br />
Schmelzen und Gießen ...........................................................................................................6<br />
Schmelztiegel ..........................................................................................................................6<br />
Wie<strong>de</strong>rverwendung von Gusskegeln .............................................................................................6<br />
Angießen ...............................................................................................................................6<br />
Gießanlagen ...........................................................................................................................6<br />
Hochfrequenzaufschmelzung mit Vakuumdruckguss-Anlagen .................................................7<br />
Hochfrequenzaufschmelzung mit Schleu<strong>de</strong>rguss-Anlagen .......................................................7<br />
Offene Flammenaufschmelzung ..........................................................................................7- 8<br />
Schmelzbild bei Flammenaufschmelzung .......................................................................................8<br />
Überhitzen ..............................................................................................................................8<br />
Abkühlen <strong>de</strong>r Muffel ..............................................................................................................8<br />
Ausbetten und Abstrahlen ......................................................................................................8<br />
Ausarbeiten ....................................................................................................................... 8 - 9<br />
Arbeitsschritte für Ausarbeiten und Polieren ...........................................................................9<br />
Vorbereitung <strong>de</strong>r keramisch zu verblen<strong>de</strong>n<strong>de</strong>n Flächen ...........................................................9<br />
Oxidbrand .............................................................................................................................10<br />
Keramische Verblendung ......................................................................................................10<br />
Löten ....................................................................................................................................10<br />
Löten nach <strong>de</strong>m Keramikbrand .................................................................................................11<br />
Laserschweißen .....................................................................................................................11<br />
Reinigung .............................................................................................................................11<br />
Gegenanzeigen und Nebenwirkungen ..................................................................................11<br />
DE<br />
remanium ® k+b <strong>de</strong> 3
DE<br />
Allgemeine Hinweise zur Verarbeitung<br />
Die vorliegen<strong>de</strong> Gebrauchsanweisung behan<strong>de</strong>lt die wesentlichen Verarbeitungsschritte für die<br />
e<strong>de</strong>lmetallfreien remanium ® Kronen- und Brückenlegierungen.<br />
Davon abweichen<strong>de</strong> Beson<strong>de</strong>rheiten und ergänzen<strong>de</strong> Informationen zu unseren e<strong>de</strong>lmetallfreien<br />
remanium ® Kronen- und Brückenlegierungen fin<strong>de</strong>n Sie in <strong>de</strong>n Informationen, die <strong>de</strong>n<br />
einzelnen Legierungen beigepackt sind o<strong>de</strong>r im Internet unter www.<strong>de</strong>ntaurum.<strong>de</strong>.<br />
Für weitergehen<strong>de</strong> Fragen steht Ihnen auch unsere Zahntechnische Anwendungs beratung<br />
(Hotline) zur Verfügung (Telefon + 49 72 31 / 803 - 410).<br />
Zu Gegenanzeigen und Nebenwirkungen beachten Sie bitte die Ausführungen am En<strong>de</strong> dieser<br />
Gebrauchsanweisung.<br />
Mo<strong>de</strong>llation<br />
Die Mo<strong>de</strong>llation <strong>de</strong>r Wachsobjekte erfolgt nach <strong>de</strong>n bekannten zahntechnischen Regeln.<br />
Verwen<strong>de</strong>n Sie nur Wachse o<strong>de</strong>r Mo<strong>de</strong>lliermaterialien, die rückstandslos verbrennen, z. B.<br />
StarWax von Dentaurum.<br />
<br />
<br />
4 remanium ® k+b <strong>de</strong><br />
<br />
<br />
<br />
Vor <strong>de</strong>m Mo<strong>de</strong>llieren sind die Stümpfe mit Stumpf lack<br />
zu überziehen. Die Form <strong>de</strong>r Metallkronen soll verkleinert<br />
<strong>de</strong>n rekonstru ierten Kronen ent sprechen, fehlen<strong>de</strong> Zahnteile<br />
wer<strong>de</strong>n ausgeglichen, siehe bis .<br />
Eine Wandstärke von 0,4 mm bei <strong>de</strong>n Kappen gewährleistet<br />
ein sicheres Ausfließen.<br />
Gleichmäßige Keramikstärken sorgen für spannungsfreie<br />
Verbindungen, siehe bis .<br />
Überproportionales Aufbringen von Keramik vermei<strong>de</strong>n.<br />
Um Abplatzungen zu vermei<strong>de</strong>n, muss <strong>de</strong>r linguale<br />
Metallabschluss unterhalb <strong>de</strong>r inzisa len Zone liegen.<br />
Kontaktflächen, die für Lötungen vorgesehen sind, flächig<br />
gestalten, siehe , und .<br />
Run<strong>de</strong> Gestaltung <strong>de</strong>r Übergänge vom Metall zur Keramik<br />
er geben saubere Randschlüsse sowie eine ästhetische<br />
Farbgebung, siehe bis .<br />
Brückenglie<strong>de</strong>r müssen Girlan<strong>de</strong>n o<strong>de</strong>r aber min<strong>de</strong>stens<br />
inter<strong>de</strong>ntale Verstärkungen aufweisen (Wärmeableitung).
Durch die ausge zeichneten physikalischen Eigenschaften <strong>de</strong>r e<strong>de</strong>lmetallfreien remanium ®<br />
Kronen- und Brückenlegierungen können die Ver bindungen zwischen <strong>de</strong>n Glie<strong>de</strong>rn und Kronen<br />
sehr dünn gehalten wer<strong>de</strong>n. Beim späteren Separieren können die einzelnen Zähne <strong>de</strong>utlicher<br />
von <strong>de</strong>n Nachbar zähnen abgesetzt wer<strong>de</strong>n. Ein Blockeffekt wird dadurch vermie<strong>de</strong>n.<br />
Gusskanalsystem<br />
Errechnen <strong>de</strong>r Metallmenge<br />
Für Brücken: Mo<strong>de</strong>llation mit Gussbalken<br />
Gusskanal vom Kegel ø 3,5 bis 4 mm<br />
Gusskanal quer ø 4 bis 5 mm<br />
Verbindung zur Krone ø 2,5 bis 3 mm<br />
Länge 2,5 bis 3 mm<br />
Für Einzelkronen o<strong>de</strong>r kleine Brücken die direkte Metho<strong>de</strong><br />
Gusskanal ø 3 mm<br />
Länge 15 bis 20 mm<br />
Voluminöse Kronen ø 3,5 bis 4 mm<br />
Länge 15 bis 20 mm<br />
Faustregel: Wachsgewicht <strong>de</strong>r Mo<strong>de</strong>llation inklusive Gusskanäle multiplizieren mit <strong>de</strong>r Dichte<br />
<strong>de</strong>r Legierung (8,2 – 8,6 g / cm 3 ) und 1 bis 2 Zylin<strong>de</strong>r (ca. 10 g) für <strong>de</strong>n Kegel hinzuaddieren.<br />
Einbetten<br />
Spezielle Einbettmassen für e<strong>de</strong>lmetallfreie Legierungen wie<br />
z. B. Castorit ® all speed, Castorit ® -super C, Trivest o<strong>de</strong>r rema ® TT (Dentaurum) mit hoher<br />
Gesamtexpansion einsetzen.<br />
Für eine exakte Kontrolle <strong>de</strong>r Passgenauigkeit wer<strong>de</strong>n Metallmuffelringe mit entsprechen<strong>de</strong>r<br />
Vlieseinlage empfohlen. „Kera-Vlies ® “ in 1 o<strong>de</strong>r 2 mm Stärke eignet sich hierfür beson<strong>de</strong>rs.<br />
DE<br />
remanium ® k+b <strong>de</strong> 5
DE<br />
Auswachsen und Vorwärmen<br />
Die Beson<strong>de</strong>rheiten bei Normalvorwärmung o<strong>de</strong>r Speedbetrieb sind <strong>de</strong>r Gebrauchsanweisung<br />
<strong>de</strong>r entsprechen<strong>de</strong>n Einbettmasse zu entnehmen.<br />
Die Endtemperatur liegt im Regelfall für alle remanium ® Legierungen bei 950 °C.<br />
Je nach Gießanlage kann diese aber vom Standardwert abweichen. Die Einwirkzeit liegt<br />
zwischen 30 und 60 Minuten je nach Muffelgröße.<br />
Schmelzen und Gießen<br />
Schmelztiegel<br />
Nur für e<strong>de</strong>lmetallfreie Legierungen geeignete Schmelztiegel auf keramischer Basis (Magnesium-,<br />
Silizium-, Aluminiumoxid) verwen<strong>de</strong>n.<br />
Keine Graphittiegel einsetzen.<br />
Schmelztiegel ohne Metall im Ofen vorwärmen, Tiegel nur für eine Legierung verwen<strong>de</strong>n und<br />
nach je<strong>de</strong>m Guss reinigen.<br />
Spezielle Schmelzpulver (Flussmittel) dürfen nicht eingesetzt wer<strong>de</strong>n!<br />
Bei größeren Mengen Gussmetall empfiehlt sich ein Vorschmelzen <strong>de</strong>s Metalls (Gussverzugszeit).<br />
Wie<strong>de</strong>rverwendung von Gusskegeln<br />
Durch das Aufschmelzen <strong>de</strong>r Legierung geht ein Teil <strong>de</strong>r haftoxidbil<strong>de</strong>n<strong>de</strong>n Elemente verloren.<br />
Wird die Legierung z. B. in Form von Gusskegeln mehrmals aufgeschmolzen, können diese<br />
Elemente bis zum vollständigen Verlust reduziert wer<strong>de</strong>n. Daher für keramisch zu verblen<strong>de</strong>n<strong>de</strong><br />
Arbeiten nur Neumaterial verwen<strong>de</strong>n.<br />
Angießen<br />
Angießbare Metalle und Geschiebe aus hochplatinhaltigen Legierungen können in Kombination<br />
mit <strong>de</strong>n e<strong>de</strong>lmetallfreien remanium ® Kronen- und Brückenlegierungen nicht verwen<strong>de</strong>t wer<strong>de</strong>n.<br />
Gießanlagen<br />
Geeignete Schmelz- und Gießverfahren für die e<strong>de</strong>lmetallfreien remanium ® Kronen- und<br />
Brückenlegierungen sind Hochfrequenzaufschmelzung mit Vakuumdruckguss- o<strong>de</strong>r Schleu<strong>de</strong>r-<br />
guss-Anlagen, Lichtbogenaufschmelzung mit Vakuumdruckguss, offene Aufschmelzung mit<br />
Propan / Sauerstoff, Azetylen / Sauerstoff o<strong>de</strong>r an<strong>de</strong>ren Gasgemischen, mit <strong>de</strong>nen die erfor<strong>de</strong>rlichen<br />
Gießtemperaturen erreicht wer<strong>de</strong>n können.<br />
6 remanium ® k+b <strong>de</strong>
Hochfrequenzaufschmelzung mit Vakuumdruckguss-Anlagen<br />
Vakuum auf 250 – 450 mbar einstellen (Empfohlener Druck: 450 mbar).<br />
Vorschmelzen<br />
Die Gusszylin<strong>de</strong>r nur bis zur Rotglut vorschmelzen (noch keine sichtbare Kantenverrundung <strong>de</strong>r<br />
Gusszylin<strong>de</strong>r).<br />
Hauptschmelzen<br />
Hauptschmelzen, bis die Schmelze aufreißt und sofort abgießen.<br />
Ausnahme remanium ® LFC: nach Verschwin<strong>de</strong>n <strong>de</strong>s Glutschattens 2 – 4 s weiterschmelzen ohne<br />
dass die Schmelze aufreißt und dann Gießvorgang auslösen (siehe Legierungsinfoblatt).<br />
Den Aufschmelzvorgang beobachten und <strong>de</strong>n Gießvorgang manuell auslösen. Während<br />
<strong>de</strong>s Schmelzens aufsteigen<strong>de</strong> Oxi<strong>de</strong> (siehe auch Schmelzbil<strong>de</strong>r in <strong>de</strong>r Betriebsanweisung <strong>de</strong>s<br />
Druckgussgeräts) verbleiben nach <strong>de</strong>m Gießvorgang als Schlacke im Tiegel und sind nach <strong>de</strong>m<br />
Guss leicht zu entfernen. Bei entsprechen<strong>de</strong>r Schmelz- und Gießführung verbleibt nur ein<br />
geringer Tiegelrest und die Schmelze wird nicht überhitzt.<br />
Das automatische Abgießen durch Pyrometersteuerung ist nicht geeignet, da hierbei <strong>de</strong>r<br />
Zeitpunkt <strong>de</strong>r Schmelzspiegelung nicht reproduzierbar sicher erkannt wird.<br />
Hochfrequenzaufschmelzung mit Schleu<strong>de</strong>rguss-Anlagen<br />
Nach <strong>de</strong>m Zusammenfallen <strong>de</strong>s letzten Gusszylin<strong>de</strong>rs warten, bis die Oxidhaut aufreißt und<br />
sofort abgießen.<br />
Ausnahme remanium ® LFC: nach Verschwin<strong>de</strong>n <strong>de</strong>s Glutschattens Gießvorgang auslösen<br />
(siehe Legierungsinfoblatt).<br />
Bei größeren Mengen Gussmetall empfiehlt sich ein Vorschmelzen <strong>de</strong>s Metalls.<br />
Offene Flammenaufschmelzung<br />
Die e<strong>de</strong>lmetallfreien remanium ® Kronen- und Brückenlegierungen zeigen ein sauberes Schmelzbild<br />
ohne Funkenflug. Achtung! Brenner mit Brausekopf einsetzen!<br />
4 – 5 mm<br />
a) Propan / Sauerstoff-Aufschmelzung<br />
Maximale Brennereinstellung laut Herstellerangaben wählen.<br />
Sauerstoff: 2 – 3 bar.<br />
b) Azetylen / Sauerstoff-Aufschmelzung<br />
Anleitung <strong>de</strong>s Brennerherstellers beachten.<br />
Azetylen: 0,7 bar / Sauerstoff 3 bar.<br />
DE<br />
remanium ® k+b <strong>de</strong> 7
DE<br />
Der blaue Kern <strong>de</strong>r Flamme direkt am Brausekopf sollte 4 bis 5 mm lang sein. Schmelztiegel<br />
ohne Metall vorwärmen. Metall im Schmelztiegel mit leicht kreisen<strong>de</strong>r Flammenbewegung<br />
aufschmelzen. Der Abstand <strong>de</strong>s Brennerbrausekopfes vom Gussmetall ist abhängig vom<br />
verwen<strong>de</strong>ten Brennerkopf und <strong>de</strong>m verwen<strong>de</strong>ten Gasgemisch.<br />
Schmelzbild bei Flammenaufschmelzung<br />
Beim Aufschmelzen mit <strong>de</strong>r offenen Flamme bil<strong>de</strong>t sich nach <strong>de</strong>m Zusammenfallen <strong>de</strong>s letzten<br />
Gussstückes eine Oxidhaut. Bei leicht kreisen<strong>de</strong>r Flammenbewegung so lange aufschmelzen,<br />
bis sich das Gussmetall unter <strong>de</strong>r Oxidhaut durch <strong>de</strong>n Flammendruck sichtbar bewegen lässt.<br />
Gießvorgang auslösen bevor die Oxidhaut aufreißt.<br />
Überhitzen<br />
Bei allen Schmelz- und Gießverfahren ist eine Überhitzung <strong>de</strong>r Schmelze unbedingt zu<br />
vermei<strong>de</strong>n. Überhitzung kann zu Lunkern, Mikroporositäten und Grobkornbildung führen. Diese<br />
Gussfehler sind oft die Ursachen für Frakturen o<strong>de</strong>r von Sprüngen in <strong>de</strong>r Verblendkeramik.<br />
Abkühlen <strong>de</strong>r Muffel<br />
Muffel vorsichtig aus <strong>de</strong>r Gießanlage entnehmen und an <strong>de</strong>r Luft auskühlen lassen.<br />
Achtung! Brandgefahr. Muffeln nur auf hitzebeständigem Material ablegen.<br />
Sicherheitsabstän<strong>de</strong> zu brandgefähr<strong>de</strong>ten Objekten beachten.<br />
Ausbetten und Abstrahlen<br />
Inhalation von Staub vermei<strong>de</strong>n!<br />
Zum staubarmen Ausbetten Muffel wässern!<br />
Nicht mit <strong>de</strong>m Hammer auf <strong>de</strong>n Gusskegel schlagen!<br />
Abstrahlen mit reinem Aluminiumoxid, Körnung ca.125 µm.<br />
Ausarbeiten<br />
Allgemeiner Hinweis:<br />
Achtung: Beim Schleifen, Trennen und Polieren Absauganlagen einsetzen!<br />
Die höheren physikalischen Werte <strong>de</strong>r e<strong>de</strong>lmetallfreien Legierungen bedingen an<strong>de</strong>re Schleifund<br />
Polierwerkzeuge wie dies bei <strong>de</strong>r Verarbeitung von E<strong>de</strong>lmetall-Legierungen üblich ist.<br />
8 remanium ® k+b <strong>de</strong>
Die zur Anwendung kommen<strong>de</strong>n Schleifkörper dürfen nur für eine Legierung eingesetzt wer<strong>de</strong>n.<br />
Auf minimale Käppchenstärke 0,2 – 0,3 mm achten.<br />
Aufgrund <strong>de</strong>r hohen physikalischen Werte <strong>de</strong>r e<strong>de</strong>lmetallfreien Legierungen kann sowohl die<br />
Kronenwandstärke als auch die Stärke <strong>de</strong>r Brücken-Verbindungsstellen um ca. 30 % dünner<br />
gestaltet wer<strong>de</strong>n als bei durchschnittlichen E<strong>de</strong>lmetall-Legierungen.<br />
Auf einheitliche Schleifrichtung und einen geringen Anpressdruck achten. Überlappungen<br />
vermei<strong>de</strong>n. Unsauberkeiten wie Porositäten und Einschlüsse beseitigen.<br />
Arbeitsschritte für Ausarbeiten und Polieren<br />
Arbeitsschritt Verwen<strong>de</strong>te Werkzeuge REF Bemerkungen<br />
Trennen <strong>de</strong>r<br />
Supercut STM-Trennscheibe 130-111-00<br />
Guss kanäle<br />
130-113-00<br />
Ausarbeiten – grob Schleifrä<strong>de</strong>r 131-322-50<br />
Supercut STM-Trennscheibe 130-112-00<br />
Ausarbeiten – fein Hartmetallfräsen 123-582-00<br />
123-584-00<br />
123-585-00<br />
123-601-00<br />
Feinschliff Aloxin-Schleifer 135-852-00<br />
135-853-00<br />
Gummieren Silichrom-Polierer 138-645-00<br />
138-640-00<br />
Gummi-Polierer grau 138-102-00<br />
138-302-00<br />
Gummi-Polierer grün 138-101-00<br />
138-301-00<br />
Polieren Polierbürste 141-800-00<br />
Polierpaste Tiger brillant<br />
Universal Finish Polierpaste<br />
190-350-00<br />
Tiger Starshine 190-301-00<br />
Glänzen von Kronen-<br />
innenflächen<br />
Al 2O 3 - 50 µm + 128-017-00<br />
Glanzstrahlperlen 128-211-00<br />
Vorbereitung <strong>de</strong>r keramisch zu verblen<strong>de</strong>n<strong>de</strong>n Flächen<br />
Die Metallflächen mit Hartmetallfräsen überschleifen, so dass weiche Übergänge entstehen.<br />
Mit <strong>de</strong>m Einweg-Griffelstrahler Flächen mit reinem Aluminiumoxid und mittlerer Korngröße<br />
(125 µm) unter schwachem Druck von 2 – 3 bar abstrahlen. Säuberung mit <strong>de</strong>stilliertem Wasser<br />
im Ultraschall.<br />
DE<br />
Hohe Schleifleistung und Standzeit<br />
Universell einsetzbar<br />
Verschleifen <strong>de</strong>s Gusskanalansatzes<br />
Grobes Ausarbeiten z. B. <strong>de</strong>r Inter<strong>de</strong>ntalräume.<br />
(Keramisch zu verblen<strong>de</strong>n<strong>de</strong><br />
Flächen müssen mit Hartmetallfräsen<br />
überarbeitet wer<strong>de</strong>n).<br />
Allgemein mit groben, kreuzverzahnten<br />
HM-Fräsen ausarbeiten.<br />
Ein Nachschliff kann mit feinen HM-Fräsen<br />
durchgeführt wer<strong>de</strong>n.<br />
Mit <strong>de</strong>n feinen Aluminiumoxidschleifern<br />
erzielt man glatte und weiche Übergänge,<br />
beson<strong>de</strong>rs bei Metallkauflächen.<br />
Schneller effektiver Abtrag<br />
(grobes Gummieren)<br />
Schleifleistung mittel<br />
Schleifleistung fein<br />
Zur Universalpolitur mit Handstück<br />
Schnell schleifen<strong>de</strong> und<br />
hochglanzpolieren<strong>de</strong> Paste<br />
I<strong>de</strong>al für besten Hochglanz<br />
Zur Verwendung mit Griffelstrahler<br />
Achtung! Keramikrän<strong>de</strong>r mit Wachs<br />
ab<strong>de</strong>cken.<br />
remanium ® k+b <strong>de</strong> 9
DE<br />
Oxidbrand<br />
Ein Oxidbrand ist bei remanium ® Aufbrennlegierungen nicht notwendig. Empfehlenswert ist<br />
ein Oxidbrand zur visuellen Kontrolle <strong>de</strong>r Gerüstkonditionierung (5 Minuten ohne Vakuum<br />
bei Opaker-Brand-Temperatur, wenn vom Keramikhersteller nicht an<strong>de</strong>rs angegeben). Danach<br />
ist das Oxid mit Einwegstrahlmittel Aluminiumoxid, Körnung 125 µm und niedrigem Druck von<br />
2 – 3 bar abzustrahlen und die Oberfläche erneut zu reinigen.<br />
Keramische Verblendung<br />
remanium ® Aufbrennlegierungen können mit allen geeigneten Keramikmassen, z. B. Carmen ® ,<br />
CCS o<strong>de</strong>r DentCeram LF (Dentaurum) verblen<strong>de</strong>t wer<strong>de</strong>n, die auf <strong>de</strong>n jeweils angegebenen<br />
WAK-Wert <strong>de</strong>r EMF-Legierung angepasst sind, siehe Legierungsinfoblatt.<br />
Der Wärmeaus<strong>de</strong>hnungskoeffizient (WAK) vieler Verblend-Keramiken än<strong>de</strong>rt sich mit <strong>de</strong>r<br />
Anzahl <strong>de</strong>r Brän<strong>de</strong> und <strong>de</strong>r Verweildauer im Ofen.<br />
Je länger und öfter gebrannt wird, <strong>de</strong>sto höher wird <strong>de</strong>r WAK <strong>de</strong>r Keramik. Die Anpassung an<br />
<strong>de</strong>n konstant bleiben<strong>de</strong>n WAK <strong>de</strong>r Legierung erfolgt durch die Abkühlgeschwindigkeit von <strong>de</strong>r<br />
Brenn- auf die Bereitschaftstemperatur.<br />
Auf das abgestrahlte und gereinigte Gerüst wird die Grundmasse nach Angaben <strong>de</strong>s Keramikherstellers<br />
aufgetragen.<br />
Auf gutes Trocknen und einen genau kalibrierten Keramikofen achten!<br />
Alle weiteren Brän<strong>de</strong> nach Gebrauchsanweisung <strong>de</strong>r Keramik.<br />
Wenn vom Keramikhersteller nicht an<strong>de</strong>rs angegeben, wird Abkühlung gemäß Legierungsinfoblatt<br />
empfohlen.<br />
Achtung: Gerüst nach je<strong>de</strong>m Brand unter fließend Wasser abbürsten und trocknen.<br />
Löten<br />
Zur Vermeidung eines Materialmix sind Lötungen, wo immer möglich, zu vermei<strong>de</strong>n.<br />
Ist eine Lötung <strong>de</strong>nnoch erfor<strong>de</strong>rlich, ist ein für die Zusammensetzung und das Schmelz intervall<br />
<strong>de</strong>r zu löten<strong>de</strong>n Legierung geeignetes Lot zu verwen<strong>de</strong>n.<br />
Lötflächen mit feinen Korundsteinen aufrauen.<br />
Kronen mit Wachs o<strong>de</strong>r Kunststoff verbin<strong>de</strong>n, abheben und in Löteinbettmasse einbetten. Ausbrühen.<br />
Die zu löten<strong>de</strong>n Flächen mit Flussmittel bestreichen. Lötblock vortrocknen und dann<br />
10 min bei 600 °C vorwärmen. Flussmittel durch neues Auftragen auf frischen und Gerüst bis<br />
auf Rotglut erhitzen. In Flussmittel getauchte und auf die erfor<strong>de</strong>rliche Länge abgeschnittene<br />
10 remanium ® k+b <strong>de</strong>
Lötstücke in die Lötfuge platzieren. Das Flussmittel auf <strong>de</strong>n Lötstückchen und <strong>de</strong>r Lötfuge muss<br />
mit einer heißen Flamme soweit erwärmt wer<strong>de</strong>n, dass es die Lötstelle vollständig ab<strong>de</strong>ckt. Erst<br />
dann voll mit <strong>de</strong>r Flamme das Lot zum Fließen bringen.<br />
Achtung: Gelötete Objekte nach <strong>de</strong>m Brennen <strong>de</strong>r Keramik langsam abkühlen.<br />
Löten nach <strong>de</strong>m Keramikbrand<br />
Von Lötungen nach <strong>de</strong>m Keramikbrand wird abgeraten. Aufgrund <strong>de</strong>r vermin<strong>de</strong>rten Korrosionsfestigkeit<br />
und einer geringen Diffusion <strong>de</strong>r E<strong>de</strong>lmetalllote mit <strong>de</strong>n EMF-Legierungen wird auf<br />
alternative Fügetechniken wie Laserschweißen, WIG-Schweißen o<strong>de</strong>r Kleben verwiesen.<br />
Laserschweißen<br />
Mit <strong>de</strong>r Laserschweißtechnik können lotfreie, mechanisch hochfeste und korrosions beständige<br />
Verbindungen hergestellt wer<strong>de</strong>n.<br />
Dabei sind die Geometrie, die Oberflächen, die Schweißreihenfolge sowie die je nach<br />
Gerät empfohlenen Schweiß-Parameter zu beachten. Als Schweißzusatzmaterial geeignete<br />
artgleiche Laserschweißdrähte sind für alle e<strong>de</strong>lmetallfreien remanium ® Kronen- und Brückenlegierungen<br />
erhältlich.<br />
Reinigung<br />
Kronen und Brücken aus e<strong>de</strong>lmetallfreien remanium ® Kronen- und Brückenlegierungen können<br />
nach <strong>de</strong>r Fertigstellung mit Ultraschalllösung P gereinigt wer<strong>de</strong>n.<br />
Gegenanzeigen und Nebenwirkungen<br />
Unverträglichkeitserscheinungen gegen e<strong>de</strong>lmetallfreie remanium ® Kronen- und Brückenlegierungen<br />
sind bei Beachtung <strong>de</strong>r Herstellung gemäß Gebrauchsanweisung äußerst selten.<br />
Bei einer nachgewiesenen Allergie gegen einen Bestandteil <strong>de</strong>r Legierung ist diese aus<br />
Sicherheitsgrün<strong>de</strong>n nicht zu verwen<strong>de</strong>n.<br />
Im Einzelfall wer<strong>de</strong>n elektrochemisch bedingte, örtliche Irritationen beschrieben.<br />
Bei <strong>de</strong>r Verwendung unterschiedlicher Legierungsgruppen können galvanische Effekte auftreten.<br />
DE<br />
remanium ® k+b <strong>de</strong> 11
EN<br />
Dear Customer<br />
Thank you for having chosen a quality product from Dentaurum.<br />
In or<strong>de</strong>r to use this product at its best for you and your patients, it is important to study and<br />
follow these directions for use carefully.<br />
The written instructions cannot cover all eventualities during operation. For this reason our<br />
Hotline is available to answer any other questions and i<strong>de</strong>as that may arise.<br />
Due to a constant <strong>de</strong>velopment we recommend, even when you use the same products<br />
frequently, to study the enclosed latest issue of the instructions for use or refer to our website<br />
at www.<strong>de</strong>ntaurum.<strong>de</strong>.<br />
1. Manufacturer<br />
Dentaurum GmbH & Co. KG · Turnstraße 31 · 75228 Ispringen · Germany<br />
2. With reference to our quality standards<br />
Dentaurum ensures a faultless quality of the products manufactured by us. These recommendations<br />
are based upon our own experiences. The user himself is responsible for the processing<br />
of the products. Responsibility for failures cannot be taken, as we have no influence on the<br />
processing on site.<br />
12 remanium ® k+b en
Contents<br />
General instructions for use ................................................................................................ 14<br />
Waxing-up .......................................................................................................................... 14<br />
Spruing ............................................................................................................................... 15<br />
Calculation of metal quantity .............................................................................................. 15<br />
Investing ............................................................................................................................. 15<br />
Wax burn-out and pre-heating ........................................................................................... 16<br />
Melting and casting ........................................................................................................... 16<br />
Crucible ............................................................................................................................. 16<br />
Re-use of casting cones ......................................................................................................... 16<br />
Casting-on ......................................................................................................................... 16<br />
Casting equipment ............................................................................................................... 16<br />
High-frequency melting with vacuum pressure casting machines ........................................ 17<br />
High-frequency melting with centrifugal casting machines .................................................. 17<br />
Melting with the torch ................................................................................................... 17-18<br />
Observing the melt during torch casting .................................................................................... 18<br />
Overheating ........................................................................................................................ 18<br />
Cooling of the casting ring ................................................................................................ 18<br />
Divesting and sandblasting ................................................................................................. 18<br />
Finishing ........................................................................................................................ 18-19<br />
Processing and polishing steps ............................................................................................ 19<br />
Preparation of surfaces for ceramic veneering ..................................................................... 19<br />
Oxi<strong>de</strong> bake ......................................................................................................................... 20<br />
Ceramic veneering ............................................................................................................. 20<br />
Sol<strong>de</strong>ring ............................................................................................................................ 20<br />
Sol<strong>de</strong>ring after firing ............................................................................................................ 21<br />
Laser welding ..................................................................................................................... 21<br />
Cleaning ............................................................................................................................. 21<br />
Contra-indications and si<strong>de</strong> effects ..................................................................................... 21<br />
EN<br />
remanium ® k+b en 13
EN<br />
General instructions for use<br />
These are the instructions for use when working with non-precious remanium ® crown and<br />
bridge alloys.<br />
Any <strong>de</strong>viations to the norm or specialized additional information about our non-precious<br />
remanium ® crown and bridge alloys can be found in the specific alloy supplement supplied<br />
in each individual alloy package or in the internet un<strong>de</strong>r www.<strong>de</strong>ntaurum.<strong>de</strong>.<br />
Our <strong>de</strong>ntal technical team is available to answer any questions that may arise. Dental Technical<br />
Hotline Tel No: + 49 72 31 / 803-410.<br />
Information on contraindications and si<strong>de</strong> effects can be found at the end of these instructions<br />
for use.<br />
Waxing-up<br />
The wax pattern is fabricated in the usual manner according to standard <strong>de</strong>ntal technical rules.<br />
Please only use waxes or mo<strong>de</strong>lling materials which burn out fully without leaving a residue<br />
eg StarWax from Dentaurum.<br />
<br />
<br />
14 remanium ® k+b en<br />
<br />
<br />
<br />
Before waxing-up, the dies should be coated with a<br />
die spacer. The shape of the metal copings should<br />
correspond in a reduced scale to the final shape of the<br />
finished crowns. Missing portions of teeth should be<br />
compensated like fig. to .<br />
In or<strong>de</strong>r to ensure that the metal fills the investment<br />
mould completely, the copings must be waxed to a<br />
minimum thickness of 0.4 mm.<br />
A uniform thickness of ceramic ensures stress free<br />
adhesion to metal, see fig. to .<br />
Apply ceramic to the framework in an equal thick ness.<br />
The ceramic layer should cover the incisal edge of<br />
crown in or<strong>de</strong>r to prevent chipping.<br />
Areas to be sol<strong>de</strong>red after casting (or firing), should be<br />
waxed up spaciously, see fig. , and . Rounding<br />
the metal / ceramic interfaces to will provi<strong>de</strong> neat<br />
junctures and aesthetic shading.<br />
Pontics must be <strong>de</strong>signed with either a collar or at least<br />
inter<strong>de</strong>ntal reinforcement. (Thermal conduction).
The outstanding properties of non-precious remanium ® crown and bridge alloys allow very thin<br />
connections to be used between the crown and pontics. Thus the teeth can be shaped more<br />
individually and a ”block appearance” can be avoi<strong>de</strong>d.<br />
Spruing<br />
Calculation of metal quantity<br />
For bridges: Wax pattern with bar sprues<br />
Casting button sprue ø 3.5 – 4 mm<br />
Runner bar ø 4 – 5 mm<br />
Connection to the crowns ø 2.5 – 3 mm<br />
length 2.5 – 3 mm<br />
Use the direct method for single crowns and small bridges<br />
Sprue ø 3 mm<br />
length 15 – 20 mm<br />
Voluminous crowns ø 3.5 – 4 mm<br />
length 15 – 20 mm<br />
General Rule: Wax weight of pattern including casting sprues multiplied by (8.2 – 8.6 g / cm 3 )<br />
plus 1 to 2 cylin<strong>de</strong>r (approx. 10 g) for the casting button.<br />
Investing<br />
Special investment material for non-precious alloys<br />
eg Castorit ® all speed, Castorit ® -super C or Trivest (Dentaurum) with a high expansion.<br />
A casting ring system using corresponding ceramic ring liners is recommen<strong>de</strong>d in or<strong>de</strong>r to have<br />
exact control over the final fit. ”Kera-Vlies ® ” in 1 or 2 mm thickness is especially advisable.<br />
EN<br />
remanium ® k+b en 15
EN<br />
Wax burn-out and pre-heating<br />
For explicit information concerning normal heating and speed heating of the investment<br />
material, please see the relevant manufacturer’s instructions for use.<br />
In general the final temperature for all remanium ® alloys should be 950 °C / 1742 °F.<br />
This standard temperature however, could vary according to the type of casting system used.<br />
The final temperature should be held for between 30 and 60 minutes according to the size<br />
of the casting ring.<br />
Melting and casting<br />
Crucible<br />
Use a ceramic based crucible (i. e. magnesium oxi<strong>de</strong>, silicon oxi<strong>de</strong> or aluminium oxi<strong>de</strong>).<br />
Do not use carbon crucibles.<br />
Pre-heat empty melting crucible in the furnace. Use one crucible per alloy and clean after<br />
each casting.<br />
Do not use special flux pow<strong>de</strong>r!<br />
For larger quantities of metal, a preliminary melting phase (casting <strong>de</strong>lay phase) is recommen<strong>de</strong>d.<br />
Re-use of casting cones<br />
When the alloy is melted, some of the elements which later form the adhesive oxi<strong>de</strong> are lost.<br />
If the alloy (e. g. in the form of a casting button) is re-melted several times, these elements may<br />
be diminished until they are completely <strong>de</strong>stroyed. If the metal framework is later to be bon<strong>de</strong>d<br />
with ceramic, then only new material should be used when casting.<br />
Casting-on<br />
Metals used for casting on and high platinum content attachments cannot be used in combination<br />
with non-precious remanium ® crown and bridge alloys.<br />
Casting equipment<br />
Melting and casting techniques suitable for casting non-precious remanium ® crown and bridge<br />
alloys are those which are capable of reaching the necessary temperatures. These inclu<strong>de</strong><br />
induction casting machines with vacuum-pressure or centrifuge, arc light melting with vacuum<br />
pressure casting, or torch melting with Propane / Oxygen or Acetylene / Oxygen or other gas<br />
mixtures strong enough to reach the melting temperature.<br />
16 remanium ® k+b en
High-frequency melting with vacuum pressure casting machines<br />
Set vacuum to 250 – 450 mbar (recommen<strong>de</strong>d pressure: 450 mbar).<br />
Pre-melt<br />
Premelt the ingots until they are red hot (no visible rounding at the corners of the ingots).<br />
Main melt<br />
Melt until the oxi<strong>de</strong> layer of the molten metal breaks open, then cast immediately.<br />
With exception of remanium ® LFC: after the molten shadow disappears, continue heating for<br />
2 – 4 seconds before the oxi<strong>de</strong> layer cracks up, and then cast. (see alloy info supplement).<br />
Observe the melting procedure and initiate the casting procedure manually. Oxi<strong>de</strong>s formed<br />
during melting (cf. melting illustrations in the operating instructions for the pressure casting<br />
machine) remain as slag in the crucible after casting and can be easily removed. If the correct<br />
melting and casting technique is used, there is only minimum residue in the crucible and the<br />
molten metal is not overheated.<br />
Automatic casting with a pyrometer control is unsuitable, as the pyrometer cannot always<br />
accurately recognise the point at which the molten metal has a shiny surface.<br />
High-frequency melting with centrifugal casting machines<br />
Wait until the last casting cylin<strong>de</strong>r has melted, the oxi<strong>de</strong> layer of the molten metal has broken<br />
and then cast immediately.<br />
With exception of remanium ® LFC: after the molten shadow disappears, cast immediately<br />
(see alloy info supplement).<br />
We recommend premelting the metal if a large amount of metal is to be cast.<br />
Melting with the torch<br />
When melting, the non-precious remanium ® crown and bridge alloys show a clean melt<br />
without sparks. Caution! Use torch with appropriate nozzle!<br />
4 – 5 mm<br />
a) Propane / Oxygen Melting<br />
Select maximum burner setting as stated by manufacturer.<br />
Oxygen 2 – 3 bar.<br />
b) Acetylene / Oxygen Melting<br />
Follow instructions of burner manufacturer.<br />
Acetylene: 0.7 bar, oxygen 3 bar.<br />
EN<br />
remanium ® k+b en 17
EN<br />
The blue core of the flame at the burner head should be 4 – 5 mm in length. Pre-heat the<br />
empty crucible. Melt the metal in the crucible with a loose circular movement of the flame.<br />
The distance at which the torch nozzle should be held <strong>de</strong>pends upon the type of nozzle and<br />
the gas mixture used.<br />
Observing the melt during torch casting<br />
When melting with a torch, an oxi<strong>de</strong> layer forms when the last metal piece has collapsed.<br />
With a loose circular motion of the flame, continue the melting process until the metal un<strong>de</strong>r<br />
the oxi<strong>de</strong> skin is seen to move un<strong>de</strong>r the pressure of the flame. Begin the casting process<br />
before the oxi<strong>de</strong> layer cracks open.<br />
Overheating<br />
As with all melting and casting techniques, overheating the metal must be avoi<strong>de</strong>d at all<br />
costs. Overheating results in shrinkage holes, micro porosities and grain coarsening. These casting<br />
imperfections are frequently reasons for cracking of a restoration or cracks in the ceramics.<br />
Cooling of the casting ring<br />
Remove the casting ring carefully and allow to cool in the air.<br />
Caution! Danger of fire! Always place hot casting rings onto heat resistant surfaces.<br />
Ensure of a safe distance away from flammable objects.<br />
Divesting and sandblasting<br />
Avoid inhaling the dust!<br />
Moisten the casting ring before divesting in or<strong>de</strong>r to reduce the amount of dust produced!<br />
Do not strike the casting button with a hammer!<br />
Sandblast using pure aluminium oxi<strong>de</strong>, grain size approx. 125 µm.<br />
Finishing<br />
General information:<br />
Caution: always use the extraction unit when grinding, cutting and polishing!<br />
The higher physical characteristics of the non precious alloys require grinding and polishing<br />
tools different to those normally used for processing precious metal alloys.<br />
The grinding tools selected should only be used for one alloy.<br />
18 remanium ® k+b en
Observe the minimal coping thickness of 0.2 – 0.3 mm.<br />
Due to the high physical properties of non precious alloys, both the wall thickness of the<br />
crown and the thickness of the bridge connecting points can be reduced by approx. 30 % in<br />
comparison to average precious metal alloys.<br />
Always grind in one direction without implying too much pressure. Avoid overlapping of the<br />
metal. Remove irregularities such as porosities and enclosures.<br />
Processing and polishing steps<br />
Steps Tools REF Remarks<br />
Removal of<br />
Supercut STM separating discs 130-111-00<br />
casting sprues<br />
130-113-00<br />
Processing, rough Grinding wheel 131-322-50<br />
Supercut STM separating discs 130-112-00<br />
Processing, fine Tungsten carbi<strong>de</strong> burs 123-582-00<br />
123-584-00<br />
123-585-00<br />
123-601-00<br />
Fine grinding Aloxin stones 135-852-00<br />
135-853-00<br />
Buffing Silichrom polishers 138-645-00<br />
138-640-00<br />
Grey rubber polishers 138-102-00<br />
138-302-00<br />
Green rubber polishers 138-101-00<br />
138-301-00<br />
Polishing Polishing brushes 141-800-00<br />
Polishing paste Tiger brillant<br />
Universal Finishing Paste<br />
190-350-00<br />
Tiger Starshine 190-301-00<br />
Burnishing of<br />
crown‘s inner<br />
surfaces<br />
Al 2O 3 - 50 µm, 128-017-00<br />
high lustre shot blasting beads 128-211-00<br />
Preparation of surfaces for ceramic veneering<br />
Grind the metal surfaces with tungsten carbi<strong>de</strong> tools to ensure a gradual transition. Blast the<br />
surfaces with a fine „pen-type“ shot blasting tool using pure aluminium oxi<strong>de</strong> of medium grain<br />
(125 µm) at a low pressure of 2 – 3 bar. Clean with ultrasound in distilled water.<br />
EN<br />
High cutting power and long life span<br />
Universal in application<br />
Grinding of sprue attachments<br />
Rough processing, e. g. of inter<strong>de</strong>ntal<br />
spaces (surfaces inten<strong>de</strong>d for ceramic<br />
coating must be processed with tungsten<br />
carbi<strong>de</strong> tools)<br />
General processing with “rough“ tungsten<br />
carbi<strong>de</strong> burs. Fine grinding work can be<br />
done with fine tungsten carbi<strong>de</strong> burs.<br />
Pure aluminium oxi<strong>de</strong> abrasives for<br />
smooth even transitions, especially<br />
metal masticatory surfaces<br />
Fast effective material removal<br />
(rough buffing)<br />
Medium abrasive effect<br />
Fine abrasive effect<br />
Universal polish with hand tool<br />
Fast acting high shine polishing paste<br />
The i<strong>de</strong>al paste for final finishing<br />
For use with pen-type blasting tool.<br />
Important! Cover ceramic edges with wax.<br />
remanium ® k+b en 19
EN<br />
Oxi<strong>de</strong> bake<br />
Oxidation bake is not required with remanium ® bonding alloys. It is advisable to fire an oxi<strong>de</strong><br />
bake in or<strong>de</strong>r to visually check the framework condition (5 minutes without vacuum at the baking<br />
temperature of the opaque, unless otherwise indicated by the ceramic manufacturer). Following<br />
the bake, the oxi<strong>de</strong> should be removed by blasting with single use aluminium oxi<strong>de</strong> abrasiv, grain<br />
size 125 µm and low pressure of 2 – 3 bar. Afterwards the surface must be cleaned again.<br />
Ceramic veneering<br />
remanium ® bonding alloys can be veneered using conventional ceramics such as Carmen ®<br />
or CCS (Dentaurum) as long as the CTE value is suitable with the non-precious metal alloy<br />
(see alloy info supplement).<br />
The coefficient of thermal expansion (CTE) of many ceramic varieties changes according to the<br />
amount of times the ceramic is fired and the length of time within the firing furnace.<br />
The longer and the more often the ceramic is fired, the higher the CTE value. The metal CTE<br />
remains constant; the adaptation takes place by adjusting cooling times after firing and standby<br />
temperatures.<br />
The opaque material can then be applied to the sandblasted and cleaned metal framework<br />
according to the ceramic manufacturer’s recommendation.<br />
It is important to dry the opaque thoroughly. Always ensure the ceramic furnace is correctly<br />
calibrated!<br />
The ceramic is then applied according to the ceramic instructions for use!<br />
If no other information is given via the ceramic manufacturer, the object is cooled as recommen<strong>de</strong>d<br />
in the alloy info supplement.<br />
Important: After each firing, brush the framework un<strong>de</strong>r running water and allow<br />
it to dry.<br />
Sol<strong>de</strong>ring<br />
Try to avoid sol<strong>de</strong>ring if possible in or<strong>de</strong>r to prevent a material mixture. If however, it is<br />
necessary to sol<strong>de</strong>r, please ensure a suitable sol<strong>de</strong>r with the correct constituents and melting<br />
temperature which is appropriate for the metal alloy is used.<br />
Roughen the joint areas with fine corundum stones.<br />
Assemble the castings using wax or acrylic, remove from the dies and invest in<br />
sol<strong>de</strong>ring investment. Boil out. Apply a coat of flux to the sol<strong>de</strong>r joint areas. Allow the<br />
investment mo<strong>de</strong>l to dry, then preheat at 600 °C / 1112 °F for 10 min Apply a further<br />
coating of flux and heat the casting until it glows red. Cut the sol<strong>de</strong>r to the appropriate<br />
20 remanium ® k+b en
length, dip the pieces in flux and place them on the sol<strong>de</strong>ring gap. The flux on the pieces<br />
of sol<strong>de</strong>r and sol<strong>de</strong>ring gap must be heated with a hot flame until it covers the joint area<br />
completely. Only then should the sol<strong>de</strong>r be ma<strong>de</strong> to flow fully, using the flame.<br />
Caution: Sol<strong>de</strong>red units should cool slowly after the ceramic has been fired.<br />
Sol<strong>de</strong>ring after firing<br />
It is not advisable to sol<strong>de</strong>r after having applied the ceramic. The reason for this is the corrosive<br />
resistance is reduced and the low diffusion ability of precious metal sol<strong>de</strong>r to non-precious<br />
metal alloys. Recommen<strong>de</strong>d alternatives are joining techniques such as laser welding, WIG<br />
welding and adhesive joining.<br />
Laser welding<br />
The laser welding technique produces a sol<strong>de</strong>r-free, mechanically strong and corrosion<br />
resistant joint.<br />
It is important to observe the framework <strong>de</strong>sign, the surface structures, the welding sequence<br />
and the welding parameter of each individual laser machine. Suitable welding material is laser<br />
welding wire in the same metal as the non-precious remanium ® crown and bridge alloy.<br />
Cleaning<br />
Crowns and bridgework ma<strong>de</strong> in non-precious remanium ® crown and bridge alloys can be<br />
cleaned, after finishing, with ultrasonic solution P.<br />
Contra-indications and si<strong>de</strong> effects<br />
Signs of intolerance to non-precious remanium ® -crown and bridge alloys after correct<br />
processing are rare.<br />
If the patient has a proven allergy against any constituent within the alloy, for safety reasons<br />
this alloy must not be used.<br />
Some patient cases have shown traces of local irritation caused by electrochemical reactions.<br />
If various alloys have been used, it is possible that galvanic effects may occur.<br />
EN<br />
remanium ® k+b en 21
FR<br />
Chère Cliente, Cher Client<br />
Nous vous remercions d’avoir choisi un produit <strong>de</strong> la qualité Dentaurum.<br />
Pour une utilisation sûre et pour que vous et vos patients puissiez profiter pleinement <strong>de</strong>s divers<br />
champs d’utilisation que couvre ce produit, nous vous conseillons <strong>de</strong> lire très attentivement son<br />
mo<strong>de</strong> d’emploi et d’en respecter toutes les instructions.<br />
Ne pouvant décrire tous les aspects résultant <strong>de</strong> l’utilisation <strong>de</strong> ce produit dans un mo<strong>de</strong><br />
d’emploi, les techniciens <strong>de</strong> notre support technique sont à votre service pour répondre à vos<br />
questions et prendre note <strong>de</strong> vos suggestions.<br />
En raison du développement constant <strong>de</strong> nos produits, nous vous recommandons, malgré<br />
l’utilisation fréquente du même produit, la relecture attentive du mo<strong>de</strong> d’emploi actualisé<br />
joint (cf. également sur internet sous www.<strong>de</strong>ntaurum.<strong>de</strong>).<br />
1. Fabricant<br />
Dentaurum GmbH & Co. KG · Turnstraße 31 · 75228 Ispringen · Allemagne<br />
2. Remarques au sujet <strong>de</strong> la qualité<br />
Dentaurum garantit à l’utilisateur une qualité irréprochable <strong>de</strong>s produits. Le contenu du<br />
présent mo<strong>de</strong> d’emploi repose sur notre propre expérience. L’utilisateur est personnellement<br />
responsable <strong>de</strong> la mise en œuvre <strong>de</strong>s produits. N’ayant aucune influence sur leur manipulation<br />
par ce <strong>de</strong>rnier, Dentaurum ne peut être tenu pour responsable <strong>de</strong> résultats inexacts.<br />
22 remanium ® k+b fr
Table <strong>de</strong>s matières<br />
Consignes générales <strong>de</strong> manipulation ................................................................................. 24<br />
Mo<strong>de</strong>lage ............................................................................................................................ 24<br />
Conception <strong>de</strong>s canaux <strong>de</strong> coulée ........................................................................................ 25<br />
Calcul <strong>de</strong> la quantité <strong>de</strong> métal ............................................................................................. 25<br />
Revêtement ......................................................................................................................... 25<br />
Elimination <strong>de</strong> la cire et préchauffage .................................................................................. 26<br />
Fusion et coulée ................................................................................................................. 26<br />
Creuset .............................................................................................................................. 26<br />
Réutilisation <strong>de</strong>s cônes <strong>de</strong> coulée .............................................................................................. 26<br />
Coulée <strong>de</strong> raccord ................................................................................................................ 26<br />
Type d’appareil <strong>de</strong> fusion et coulée ........................................................................................... 26<br />
Fusion à haute fréquence à l’ai<strong>de</strong> d’appareils <strong>de</strong> coulée sous vi<strong>de</strong>........................................ 27<br />
Fusion à haute fréquence à l’ai<strong>de</strong> d’appareils <strong>de</strong> coulée par centrifugation ......................... 27<br />
Fusion à la flamme (chalumeau) ..................................................................................... 27 - 28<br />
Aspect <strong>de</strong> la fonte lors <strong>de</strong> la fusion au chalumeau ........................................................................ 28<br />
Surfusion ............................................................................................................................. 28<br />
Refroidissement <strong>de</strong>s cylindres .............................................................................................. 28<br />
Délitage et sablage ............................................................................................................. 28<br />
Comment le travailler .................................................................................................... 28 - 29<br />
Meulage et polissage, étape par étape ................................................................................ 29<br />
Préparation <strong>de</strong>s surfaces à recouvrir <strong>de</strong> céramique ............................................................... 29<br />
Cuisson d’oxydation ............................................................................................................ 30<br />
Recouvrement en céramique ................................................................................................ 30<br />
Brasures ............................................................................................................................... 30<br />
Brasures après cuisson <strong>de</strong> la céramique ..................................................................................... 31<br />
Soudure au laser .................................................................................................................. 31<br />
Nettoyage ............................................................................................................................ 31<br />
Contre- indications et effets secondaires .............................................................................. 31<br />
FR<br />
remanium ® k+b fr 23
FR<br />
Consignes générales <strong>de</strong> manipulation<br />
Le présent mo<strong>de</strong> d’emploi décrit les principales étapes <strong>de</strong> manipulation <strong>de</strong>s alliages exempts<br />
<strong>de</strong> métaux précieux remanium ® pour couronnes et bridges. Vous trouverez quelques<br />
particularités et <strong>de</strong>s informations complémentaires quant à nos alliages remanium ® pour<br />
couronnes et bridges sur la feuille d’information jointe à chaque produit respectif ou sur<br />
Internet www.<strong>de</strong>ntaurum.<strong>de</strong>.<br />
Si toutefois vous avez encore <strong>de</strong>s questions, une équipe <strong>de</strong> prothésistes est à votre<br />
disposition pour vous conseiller : hotline prothèse <strong>de</strong>ntaire + 49 72 31 / 803 - 410<br />
En ce qui concerne les contre-indications et les effets secondaires, référez-vous aux informations<br />
à la fin <strong>de</strong> ce mo<strong>de</strong> d’emploi.<br />
Mo<strong>de</strong>lage<br />
Le mo<strong>de</strong>lage <strong>de</strong>s pièces en cire s’effectue selon les règles habituelles. Sont à utiliser uniquement<br />
les cires et les matières à combustion sans résidus, comme par exemple les cires StarWax<br />
<strong>de</strong> Dentaurum.<br />
<br />
<br />
24 remanium ® k+b fr<br />
<br />
<br />
<br />
Avant le mo<strong>de</strong>lage, il est conseillé <strong>de</strong> revêtir les<br />
moignons avec du vernis spécial. La forme <strong>de</strong>s<br />
armatures doit être homothétique , voir <strong>de</strong> à .<br />
Une épaisseur <strong>de</strong>s parois <strong>de</strong>s coiffes <strong>de</strong> 0,4 mm<br />
garantit un écoulement idéal. Une épaisseur<br />
régulière <strong>de</strong> céramique garantit une liaison exempte<br />
<strong>de</strong> tensions avec l’armature, voir <strong>de</strong> à .<br />
Eviter toute épaisseur excessive <strong>de</strong> céramique. Afin<br />
d’éviter <strong>de</strong>s éclats, la limite linguale ou palatine <strong>de</strong> métal<br />
doit se situer au-<strong>de</strong>ssous <strong>de</strong> la zone d’occlu sion. Les<br />
surfaces <strong>de</strong> contact qui sont prévues pour la brasure<br />
doivent être planes , et .<br />
Les passages arrondis entre le métal et la céramique<br />
permettent d’obtenir une finition nette <strong>de</strong>s bords<br />
ainsi qu’une teinte esthétique – .<br />
Les éléments intermédiaires <strong>de</strong>s bridges doivent<br />
comporter <strong>de</strong>s ban<strong>de</strong>aux ou au minimum <strong>de</strong>s renforts<br />
inter<strong>de</strong>ntaires (dissipation <strong>de</strong> la chaleur).
Grâce aux remarquables propriétés physiques <strong>de</strong>s alliages remanium ® pour couronnes et<br />
bridges, les liaisons entre les éléments inters et les coiffes piliers peuvent être très minces; on<br />
peut ainsi donner à chaque <strong>de</strong>nt une forme anatomique suffisamment prononcée pour éviter<br />
l’effet <strong>de</strong> «-bloc-».<br />
Conception <strong>de</strong>s canaux <strong>de</strong> coulée<br />
Calcul <strong>de</strong> la quantité <strong>de</strong> métal<br />
Pour bridges : mo<strong>de</strong>lage avec tige <strong>de</strong> coulée<br />
Canal <strong>de</strong> coulée du cône ø 3,5 à 4 mm<br />
Canal <strong>de</strong> coulée transversal ø 4 à 5 mm<br />
Raccord avec la couronne ø 2,5 à 3 mm<br />
longueur 2,5 à 3 mm<br />
Pour les couronnes isolées et les petits bridges, on a recours<br />
à la métho<strong>de</strong> directe<br />
Canal <strong>de</strong> coulée ø 3 mm<br />
longueur 15 à 20 mm<br />
Couronnes volumineuses ø 3,5 à 4 mm<br />
longueur 15 à 20 mm<br />
Règle approximative : Poids <strong>de</strong> la maquette, y compris les canaux <strong>de</strong> coulée, multiplié par la<br />
<strong>de</strong>nsité (8,2 – 8,6 g / cm 3 ) et additionner 1 à 2 lingotins (environ 10 g) pour le cône.<br />
Revêtement<br />
Utiliser <strong>de</strong>s masses <strong>de</strong> revêtement spécifiques pour alliages exempts <strong>de</strong> métaux précieux<br />
tels que Castorit ® all speed, Castorit ® -super C ou Trivest (Dentaurum) avec une expansion<br />
générale élevée.<br />
Pour un contrôle exact <strong>de</strong> la précision, nous recommandons <strong>de</strong>s cylindres métalliques avec<br />
ban<strong>de</strong> <strong>de</strong> Liner. Les ban<strong>de</strong>s <strong>de</strong> Liner «Kera-Vlies ® » d’une épaisseur <strong>de</strong> 1 ou 2 mm conviennent<br />
particulièrement bien.<br />
FR<br />
remanium ® k+b fr 25
FR<br />
Elimination <strong>de</strong> la cire et préchauffage<br />
Les informations quant aux particularités du préchauffage normal et rapi<strong>de</strong> sont indiquées dans<br />
le mo<strong>de</strong> d’emploi respectif du produit. La température finale est, en règle générale, i<strong>de</strong>ntique<br />
pour tous les alliages remanium ® (950 °C). Selon le type d’appareil <strong>de</strong> coulée, celle-ci peut<br />
néanmoins varier <strong>de</strong> la valeur standard.<br />
La durée du palier final est <strong>de</strong> 30 à 60 minutes suivant la grosseur et le nombre <strong>de</strong> cylindres.<br />
Fusion et coulée<br />
Creuset<br />
Utiliser uniquement un creuset base céramique (oxy<strong>de</strong> <strong>de</strong> magnésium, oxy<strong>de</strong> <strong>de</strong> silicium,<br />
oxy<strong>de</strong> d’aluminium).<br />
Ne pas employer <strong>de</strong> creuset en graphite.<br />
Préchauffer le creuset sans métal dans le four et l’utiliser uniquement pour un seul alliage.<br />
Nettoyer le creuset après chaque coulée.<br />
Ne pas utiliser <strong>de</strong> poudres <strong>de</strong> coulée (flux) !<br />
Avec <strong>de</strong>s quantités plus importantes <strong>de</strong> métal <strong>de</strong> coulée, il est recommandé <strong>de</strong> prévoir une<br />
préfusion du métal afin d’eviter un prolongement du temps <strong>de</strong> fusion.<br />
Réutilisation <strong>de</strong>s cônes <strong>de</strong> coulée<br />
La fusion <strong>de</strong> l’alliage entraîne la perte d’une partie <strong>de</strong>s éléments constituant les oxy<strong>de</strong>s <strong>de</strong><br />
liaison métal-céramique. En cas d’une fusion répétée <strong>de</strong> l’alliage, par exemple sous forme<br />
<strong>de</strong> cônes <strong>de</strong> coulée, ces éléments peuvent être réduits jusqu’à leur perte complète. Pour <strong>de</strong>s<br />
travaux céramo-métalliques, il est donc recommandé <strong>de</strong> n’utiliser que du matériau neuf.<br />
Coulée <strong>de</strong> raccord<br />
Les alliages et attachements à forte teneur <strong>de</strong> platine ne peuvent être utilisés conjointement<br />
aux alliages remanium ® pour couronnes et bridges exempts <strong>de</strong> métaux précieux.<br />
Installations <strong>de</strong> coulée<br />
Les procédés les plus adaptés aux alliages remanium ® pour couronnes et bridges exempts <strong>de</strong><br />
métaux précieux sont la fusion et la coulée à haute fréquence sous vi<strong>de</strong> ou par centrifugation, la<br />
fusion à l’arc avec coulée sous pression et sous vi<strong>de</strong>, la fusion ouverte au propane / oxygène ou<br />
à l’acétylène / oxygène ou tout autre mélange <strong>de</strong> gaz permettant d’atteindre les températures<br />
requises pour la coulée.<br />
26 remanium ® k+b fr
Fusion à haute fréquence à l’ai<strong>de</strong> d’appareils <strong>de</strong> coulée sous vi<strong>de</strong><br />
Réglez le vi<strong>de</strong> à une valeur comprise entre 250 et 450 mbar (pression recommandée : 450 mbar).<br />
Préchauffe<br />
Préchauffez les plots <strong>de</strong> coulée au rouge (avant l’arrondissement visible <strong>de</strong>s arrêtes <strong>de</strong>s plots).<br />
Fusion principale<br />
Au moment du miroitement, arrêtez la fusion principale et procé<strong>de</strong>z à la coulée sans attendre.<br />
A l’exception <strong>de</strong> remanium ® LFC : après disparition <strong>de</strong> l’ ombre d’incan<strong>de</strong>scence, continuez la<br />
fusion pendant 2 à 4 s sans attendre le déchirement <strong>de</strong> la pellicule <strong>de</strong> surface, puis déclenchez<br />
la coulée (voir la feuille d’information jointe à l’alliage).<br />
Observez le processus <strong>de</strong> fusion et déclenchez la coulée manuellement si nécessaire. Les oxy<strong>de</strong>s<br />
faisant surface pendant le processus <strong>de</strong> fusion (voir aussi images <strong>de</strong> fusion, instructions d’emploi<br />
<strong>de</strong> l’appareil <strong>de</strong> coulée) se trouvent après la coulée sous forme <strong>de</strong> langue <strong>de</strong> fusion dans le<br />
creuset, duquel ils sont faciles à enlever. Selon la conduite <strong>de</strong> la fusion et <strong>de</strong> la coulée, peu <strong>de</strong><br />
résidus <strong>de</strong>meurent dans le creuset et il est possible d’éviter la surchauffe <strong>de</strong> la masse fondue.<br />
La coulée automatique pyrométrique ne convient pas, car elle ne permet pas <strong>de</strong> reconnaître<br />
<strong>de</strong> façon sûre et reproductible le moment <strong>de</strong> la formation <strong>de</strong> la crevasse (miroitement).<br />
Fusion à haute fréquence avec coulée par centrifugation<br />
Après l’affaissement du <strong>de</strong>rnier plot <strong>de</strong> coulée, atten<strong>de</strong>z que la pellicule d’oxy<strong>de</strong> s’ouvre,<br />
puis procé<strong>de</strong>z immédiatement à la coulée.<br />
A l’exception <strong>de</strong> remanium ® LFC : après assimilation complète du <strong>de</strong>rnier plot et disparition<br />
<strong>de</strong> l’ombre résiduelle, déclenchez la coulée (voir la feuille d’information jointe à l’alliage).<br />
Lorsqu’il s’agit <strong>de</strong> fondre <strong>de</strong>s quantités d’alliage importantes, nous recommandons <strong>de</strong><br />
préchauffer le métal.<br />
Fusion à la flamme (chalumeau)<br />
Les alliages remanium ® exempts <strong>de</strong> métaux précieux pour couronnes et bridges présentent un comportement<br />
<strong>de</strong> fusion sans pétillement. Attention ! Utilisez un chalumeau à pomme d’arrosoir !<br />
4 – 5 mm<br />
a) Fusion au propane / oxygène<br />
Sélectionner le réglage maximal du brûleur, en fonction<br />
<strong>de</strong>s indications du fabricant. Oxygène : 2 à 3 bar.<br />
b) Fusion à l’acétylène / oxygène<br />
Tenir compte <strong>de</strong>s instructions du fabricant du brûleur.<br />
Acétylène: 0,7 bar / oxygène : 3 bar.<br />
FR<br />
remanium ® k+b fr 27
FR<br />
Le noyau bleu <strong>de</strong> la flamme, tout près <strong>de</strong> la tête en arrosoir, <strong>de</strong>vrait avoir une longueur <strong>de</strong><br />
4 à 5 mm. Préchauffer le creuset sans métal. Porter le métal à température <strong>de</strong> fusion dans<br />
le creuset par légers mouvements circulaires <strong>de</strong> la flamme. La distance entre la pomme et le<br />
métal dépend <strong>de</strong> la pomme et du mélange <strong>de</strong> gaz que vous utilisez.<br />
Aspect <strong>de</strong> la fonte lors <strong>de</strong> la fusion au chalumeau<br />
Lors <strong>de</strong> la fusion à la flamme, il y a formation d’une pellicule d’oxy<strong>de</strong>s après l’affaisse ment du<br />
<strong>de</strong>rnier plot <strong>de</strong> coulée. Continuer la fusion par légers mouvements circulaires <strong>de</strong> la flamme jusqu’à<br />
ce que le métal <strong>de</strong> coulée puisse être visiblement déplacé par suite <strong>de</strong> la pression <strong>de</strong> la flamme<br />
sous la pellicule d’oxy<strong>de</strong>. Faire démarrer le processus <strong>de</strong> coulée avant la déchirure <strong>de</strong> celle-ci.<br />
Surfusion<br />
Il est absolument indispensable pour tous les procédés <strong>de</strong> fusion et <strong>de</strong> coulée, d’éviter une<br />
surfusion. Une surfusion peut occasionner <strong>de</strong>s retassures, <strong>de</strong>s porosités ou encore entraîner<br />
la formation d'une structure à gros grains. Ces erreurs <strong>de</strong> coulée peuvent impliquer la rupture<br />
d'un pont ou encore <strong>de</strong>s fêlures dans la céramique.<br />
Refroidissement <strong>de</strong>s cylindres<br />
Prélevez les cylindres du poste <strong>de</strong> coulée avec précaution et laisser refroidir à l’air.<br />
Attention ! Risque d’incendie. Poser les cylindres uniquement sur un matériau résistant<br />
aux températures élevées.<br />
Respectez les distances <strong>de</strong> sécurité par rapport aux objets facilement inflammables.<br />
Délitage et sablage<br />
Eviter d’inhaler la poussière !<br />
Afin d’éviter la formation <strong>de</strong> poussières lors du délitage, faire tremper les cylindres dans l’eau.<br />
Ne pas taper avec un marteau sur le cône !<br />
Sabler à l’oxy<strong>de</strong> d’aluminium <strong>de</strong> grain moyen d’environ 125 µm.<br />
Comment le travailler<br />
N.B.<br />
Attention : Lors du meulage, <strong>de</strong> la coupe et du polissage, utiliser une hotte aspirante !<br />
En raison <strong>de</strong>s propriétés physiques spécifiques <strong>de</strong>s alliages à base <strong>de</strong> métaux non précieux il<br />
faut d’autres outils <strong>de</strong> meulage et <strong>de</strong> polissage que ceux généralement utilisés pour travailler<br />
les alliages à base <strong>de</strong> métaux précieux.<br />
28 remanium ® k+b fr
Réserver chaque instrument rotatif à un alliage spécifique.<br />
Respecter une épaisseur minimale <strong>de</strong>s coiffes <strong>de</strong> 0,2 à 0,3 mm.<br />
Grâce aux propriétés physiques spécifiques <strong>de</strong>s alliages à base <strong>de</strong> métaux non précieux, il est<br />
possible <strong>de</strong> diminuer <strong>de</strong> 30 % l’épaisseur <strong>de</strong>s parois <strong>de</strong>s couronnes ainsi que <strong>de</strong>s jonctions <strong>de</strong><br />
bridges, par rapport à celle en moyenne nécessaire avec <strong>de</strong>s alliages à base <strong>de</strong> métaux précieux.<br />
Veiller à gar<strong>de</strong>r le même sens <strong>de</strong> grattage et <strong>de</strong> n’exercer qu’une pression faible. Eviter d’écraser<br />
les copeaux sur la surface. Eliminer les imperfections telles que porosités et inclusions.<br />
Meulage et polissage, étape par étape<br />
Etape <strong>de</strong> travail Outils utilisés REF Remarques<br />
Séparation <strong>de</strong>s Disque <strong>de</strong> séparation Supercut STM 130-111-00<br />
canaux <strong>de</strong> coulée<br />
130-113-00<br />
Meulage grossier Meules abrasives 131-322-50<br />
Disque <strong>de</strong> séparation Supercut STM 130-112-00<br />
Dégrossissage fin Fraises en métal dur 123-582-00<br />
123-584-00<br />
123-585-00<br />
123-601-00<br />
Meulage <strong>de</strong> finition Meules Aloxin 135-852-00<br />
135-853-00<br />
Polissage Meules <strong>de</strong> polissage Silichrom 138-645-00<br />
138-640-00<br />
Meules <strong>de</strong> polissage 138-102-00<br />
en caoutchouc, grises 138-302-00<br />
Meules <strong>de</strong> polissage 138-101-00<br />
en caoutchouc, vertes 138-301-00<br />
Polissage <strong>de</strong> finition Brosse à polir 141-800-00<br />
Pâte à polir Tigre (brillante) 190-350-00<br />
Lustrage <strong>de</strong>s<br />
intrados <strong>de</strong>s<br />
couronnes<br />
Pâte <strong>de</strong> lustrage universelle<br />
Tiger Starshine 190-301-00<br />
Perles <strong>de</strong> polissage 128-017-00<br />
Al 2O 3 – 50 µm 128-211-00<br />
Préparation <strong>de</strong>s surfaces à recouvrir <strong>de</strong> céramique<br />
Les surfaces métalliques sont retravaillées à l’ai<strong>de</strong> <strong>de</strong> fraises en métal dur, <strong>de</strong> façon à produire<br />
<strong>de</strong>s jonctions arrondies. A l’ai<strong>de</strong> du crayon <strong>de</strong> sablage à usage unique, l’on sable les surfaces<br />
avec <strong>de</strong> l’oxy<strong>de</strong> d’aluminium pur <strong>de</strong> grain moyen (125 µm) sous pression faible (2 – 3 bar).<br />
Nettoyage aux ultrasons avec <strong>de</strong> l’eau distillée.<br />
FR<br />
Pouvoir abrasif élevé et gran<strong>de</strong> durabilité<br />
Utilisation universelle<br />
Elimination <strong>de</strong>s jonctions <strong>de</strong> tiges <strong>de</strong> coulées<br />
Meulage grossier, par ex. <strong>de</strong>s espaces<br />
inter<strong>de</strong>ntai res (les surfaces à recouvrir <strong>de</strong><br />
céramique doivent être retravaillées avec<br />
<strong>de</strong>s fraises en métal dur)<br />
Commencer par utiliser <strong>de</strong>s fraises en<br />
métal dur à forte <strong>de</strong>nture croisée.<br />
Un rectifiage peut être exécuté à l’ai<strong>de</strong><br />
<strong>de</strong> fraises en métal dur à fine <strong>de</strong>nture<br />
Avec les instruments abrasifs fins en oxy<strong>de</strong><br />
d’alu minium, on obtient <strong>de</strong>s jonctions lisses<br />
et arrondies, en particulier au niveau <strong>de</strong>s<br />
faces occlusales<br />
Pré-polissage rapi<strong>de</strong> et efficace (polissage gros)<br />
Polissage moyen<br />
Polissage fin<br />
Pour polissage universel avec pièce à main<br />
Pâte <strong>de</strong> polissage rapi<strong>de</strong>, obtention d’un<br />
brillant extrême<br />
Pâte <strong>de</strong> finition idéale pour apporter une<br />
<strong>de</strong>rnière touche <strong>de</strong> polissage<br />
Pour utilisation avec sableuse à crayon.<br />
Attention ! Recouvrir les bords <strong>de</strong> la<br />
céramique <strong>de</strong> cire.<br />
remanium ® k+b fr 29
FR<br />
Cuisson d’oxydation<br />
Les alliages céramo-métalliques remanium ® ne nécessitent pas <strong>de</strong> cuisson d’oxydation. Il est<br />
toutefois recommandé d’effectuer une cuisson d’oxydation afin <strong>de</strong> permettre un contrôle visuel<br />
<strong>de</strong> la préparation <strong>de</strong> l’armature (5 minutes sans vi<strong>de</strong> à la température <strong>de</strong> cuisson <strong>de</strong> l‘opaque,<br />
sauf indication contraire du fabricant <strong>de</strong> céramique). Enlevez ensuite l’oxy<strong>de</strong> par sablage à<br />
l’ai<strong>de</strong> d’un produit <strong>de</strong> sablage à emploi unique avec une granulométrie 125 µm sous pression<br />
faible (2 – 3 bar), et procé<strong>de</strong>z à un nouveau nettoyage <strong>de</strong> la surface.<br />
Recouvrement en céramique<br />
Les alliages remanium ® peuvent recevoir <strong>de</strong>s masses céramiques comme Carmen ® ou CCS<br />
(Dentaurum), adaptées au coefficient <strong>de</strong> dilatation <strong>de</strong>s alliages exempts <strong>de</strong> métaux précieux,<br />
voir la feuille d’information.<br />
Le coefficient <strong>de</strong> dilatation <strong>de</strong> nombreuses céramiques varie en fonction du nombre et <strong>de</strong> la<br />
durée <strong>de</strong> cuissons.<br />
Plus les cuissons sont nombreuses et longues, plus élevé sera le coefficient <strong>de</strong> dilatation <strong>de</strong><br />
la céramique. L’adaptation au coefficient <strong>de</strong> dilatation <strong>de</strong> l’alliage peut être optimisée par la<br />
vitesse <strong>de</strong> refroidissement <strong>de</strong> la température <strong>de</strong> cuisson à la température <strong>de</strong> base du four.<br />
La masse d’opaque est appliquée sur l’armature sablée et nettoyée selon les instructions du<br />
fabricant <strong>de</strong> la céramique.<br />
Veiller à ce que l’armature sèche bien et que le four soit bien calibré ! Toutes les autres cuissons<br />
s’effectuent selon les indications du fabricant <strong>de</strong> la céramique.<br />
Nous recommandons un refroidissement comme décrit sur la feuille d’information, sauf<br />
mention contraire du fabricant <strong>de</strong> la céramique.<br />
Attention : Après chaque cuisson, brosser l’armature sous l’eau courante, puis la sécher.<br />
Brasures<br />
Pour ne pas mélanger les matériaux, éviter les brasures à chaque fois que cela est possible.<br />
Si toutefois une brasure s’avère nécessaire, utiliser un alliage d’apport adapté à la composition<br />
et l’intervalle <strong>de</strong> fusion <strong>de</strong> l’alliage à braser.<br />
Rendre les surfaces <strong>de</strong> brasure rugueuses avec <strong>de</strong> la pierre <strong>de</strong> corindon.<br />
Solidariser les éléments avec <strong>de</strong> la cire ou une matière synthétique, les <strong>de</strong>sinserrer et les introduire<br />
dans le revêtement <strong>de</strong> brasure. Ebouillanter. Enduire les surfaces à braser avec un décapant.<br />
Effectuer un préséchage du bloc <strong>de</strong> brasure puis le préchauffer pendant 10 min à 600 °C.<br />
30 remanium ® k+b fr
Régénérer le décapant par une nouvelle application et chauffer la structure jusqu’au rouge clair.<br />
Placer dans le joint à braser <strong>de</strong>s morceaux <strong>de</strong> brasure trempés dans le décapant et coupés à<br />
la longueur nécessaire. Le décapant placé sur les morceaux <strong>de</strong> brasure et dans le joint à braser<br />
doit être chauffé avec une flamme jusqu’à ce qu’il recouvre entièrement l’endroit <strong>de</strong> la brasure.<br />
Ce n’est qu’à ce moment là que l’on peut faire fondre la brasure au moyen <strong>de</strong> la flamme.<br />
Attention : Les éléments qui ont été brasés doivent être refroidis lentement après la<br />
cuisson <strong>de</strong> la céramique.<br />
Brasures après cuisson <strong>de</strong> la céramique<br />
Nous vous déconseillons d’effectuer <strong>de</strong>s brasures après la cuisson <strong>de</strong> la céramique en raison<br />
d’une résistance à la corrosion moins élevée et d’une moins bonne diffusion <strong>de</strong>s alliages<br />
d’apport en métaux précieux avec les alliages exempts <strong>de</strong> métaux précieux. Nous vous signalons<br />
l’existence <strong>de</strong> techniques d’assemblage alternatives comme le soudage laser, le soudage au<br />
tungstène ou le collage.<br />
Soudure au laser<br />
Le soudage au laser permet <strong>de</strong> réaliser <strong>de</strong>s assemblages sans brasures particulièrement soli<strong>de</strong>s<br />
et résistants à la corrosion.<br />
Il convient <strong>de</strong> respecter la géométrie, les surfaces, l’ordre et les paramètres <strong>de</strong> soudage<br />
recommandés selon l’appareil utilisé. Des fils d’apport <strong>de</strong> soudage laser semblables à l’alliage<br />
sont disponibles pour tous les alliages remanium ® pour couronnes et bridges exempts <strong>de</strong><br />
métaux précieux.<br />
Nettoyage<br />
Les couronnes et bridges bridges à base d’alliages remanium ® pour couronnes et bridges<br />
exempts <strong>de</strong> métaux précieux peuvent être nettoyés avec la solution à ultra-sons après finition.<br />
Contre-indications et effets secondaires<br />
Des symptômes d’incompatibilité avec les alliages remanium ® pour couronnes et bridges<br />
exempts <strong>de</strong> métaux précieux sont extrêmement rares si les instructions du mo<strong>de</strong> d’emploi sont<br />
respectées.<br />
En cas d’allergie à l’une <strong>de</strong>s composantes <strong>de</strong> l’alliage, celui-ci ne doit pas être utilisé.<br />
Un cas isolé d’irritations locales dues à <strong>de</strong>s réactions électrochimiques nous a été signalé. En cas<br />
d’utilisation <strong>de</strong> plusieurs groupes d’alliages différents, il peut se produire un effet <strong>de</strong> « pile ».<br />
FR<br />
remanium ® k+b fr 31
ES<br />
Estimado cliente<br />
Mucho le agra<strong>de</strong>cemos que se haya <strong>de</strong>cidido usted por un producto <strong>de</strong> calidad <strong>de</strong> la casa<br />
Dentaurum.<br />
Para que usted pueda emplear este producto <strong>de</strong> forma segura y fácil y obtener los mayores<br />
beneficios posibles <strong>de</strong>l mismo para usted y los pacientes, <strong>de</strong>be ser leido <strong>de</strong>tenidamente y<br />
observado este modo <strong>de</strong> <strong>empleo</strong>.<br />
En un modo <strong>de</strong> <strong>empleo</strong> no pue<strong>de</strong>n ser <strong>de</strong>scritos todos los datos y pormenores <strong>de</strong> una posible<br />
aplicación o utilización. Por eso nuestra línea telefónica directa (Hotline) está a su disposición<br />
para preguntas o sugerencias.<br />
Debido al permanente <strong>de</strong>sarrollo <strong>de</strong> nuestros productos, recomendamos leer una y otra vez<br />
atentamente el modo <strong>de</strong> <strong>empleo</strong> actualizado anexo al producto o bien el modo <strong>de</strong> <strong>empleo</strong><br />
que Ud. encontrará en internet bajo www.<strong>de</strong>ntaurum.<strong>de</strong>, aún cuando Ud. utilice el mismo<br />
producto frecuentemente.<br />
1. Fabricante<br />
Dentaurum GmbH & Co. KG · Turnstraße 31 · 75228 Ispringen · Alemania<br />
2. Indicaciones <strong>de</strong> calidad<br />
Dentaurum garantiza al usuario una calidad impecable <strong>de</strong> los productos. Las indicaciones en<br />
este modo <strong>de</strong> <strong>empleo</strong> se basan en experiencias propias. El usuario mismo tiene la responsabilidad<br />
<strong>de</strong> trabajar correctamente con los productos. No respon<strong>de</strong>mos por resultados incorrectos,<br />
<strong>de</strong>bido a que Dentaurum no tiene influencia alguna en la forma <strong>de</strong> utilización por el usuario.<br />
32 remanium ® k+b es
Índice<br />
Indicaciones generales <strong>de</strong> elaboración ..................................................................................34<br />
Mo<strong>de</strong>lación ...........................................................................................................................34<br />
Colocación <strong>de</strong> bebe<strong>de</strong>ros ......................................................................................................35<br />
Cálculo <strong>de</strong> la cantidad <strong>de</strong> metal ............................................................................................35<br />
Revestimiento .......................................................................................................................35<br />
Desencerar y precalentamiento .............................................................................................36<br />
Fusión y colado .....................................................................................................................36<br />
Crisol..................................................................................................................................36<br />
Reutilización <strong>de</strong> conos <strong>de</strong> colado ............................................................................................36<br />
Colado adosado ...................................................................................................................36<br />
Máquinas <strong>de</strong> colado .............................................................................................................36<br />
Máquina <strong>de</strong> fundición por alta frecuencia y colado a presión al vacío ...................................37<br />
Fusión con centrífugas <strong>de</strong> alta frecuencia ..............................................................................37<br />
Fusión con soplete a plena llama ................................................................................... 37 - 38<br />
Aspecto <strong>de</strong>l material en caso <strong>de</strong> fusión con soplete a plena llama ................................................38<br />
Sobrecalentamiento ..............................................................................................................38<br />
Enfriamiento <strong>de</strong>l cilindro .......................................................................................................38<br />
Sacar <strong>de</strong> mufla y arenado .....................................................................................................38<br />
Desbastado y pulido ...................................................................................................... 38 - 39<br />
Etapas <strong>de</strong> trabajo para el repasado y el pulido ......................................................................39<br />
Preparación <strong>de</strong> las superficies que se han <strong>de</strong> recubrir con cerámica ......................................39<br />
Cocción oxidante ..................................................................................................................40<br />
Aplicación <strong>de</strong> la cerámica .....................................................................................................40<br />
Soldadura .............................................................................................................................40<br />
Soldadura <strong>de</strong>spués <strong>de</strong> la cocción <strong>de</strong> la cerámica. .......................................................................41<br />
Soldadura con láser ..............................................................................................................41<br />
Limpieza ...............................................................................................................................41<br />
Contraindicaciones y efectos secundarios .............................................................................41<br />
ES<br />
remanium ® k+b es 33
ES<br />
Indicaciones generales <strong>de</strong> elaboración<br />
El presente modo <strong>de</strong> <strong>empleo</strong> se ocupa <strong>de</strong> cada una <strong>de</strong> las fases <strong>de</strong> trabajo <strong>de</strong> las aleaciones<br />
exentas <strong>de</strong> metales preciosos remanium ® para coronas y puentes.<br />
Peculiarida<strong>de</strong>s y otras informaciones complementarias sobre nuestras aleaciones exentas <strong>de</strong><br />
metales preciosos remanium ® para coronas y puentes halla usted en las informaciones que se<br />
adjuntan a cada caja con el material o en Internet en www.<strong>de</strong>ntaurum.<strong>de</strong>.<br />
Para preguntas está a su disposición nuestro asesoramiento odontotécnico para el <strong>empleo</strong> <strong>de</strong><br />
materiales en la línea telefónica directa (Hotline): Tel. + 49 72 31 / 803 - 410.<br />
Para contraindicaciones y efectos secundarios tener en cuenta las explicaciones al respecto al<br />
final <strong>de</strong> este modo <strong>de</strong> <strong>empleo</strong>.<br />
Mo<strong>de</strong>lación<br />
El mo<strong>de</strong>lado <strong>de</strong> cera <strong>de</strong> los objetos se lleva a cabo <strong>de</strong> conformidad con las conocidas reglas<br />
odontotécnicas. Utilice sólo ceras o materiales <strong>de</strong> mo<strong>de</strong>lar que se quemen sin <strong>de</strong>jar residuos,<br />
p.ej. StarWax <strong>de</strong> Dentaurum.<br />
<br />
<br />
34 remanium ® k+b es<br />
<br />
<br />
<br />
Antes <strong>de</strong>l mo<strong>de</strong>lado habrá que cubrir los muñones<br />
con laca para muñones. La forma <strong>de</strong> las coronas<br />
metálicas <strong>de</strong>berá ser más reducida que la <strong>de</strong> las<br />
correspondientes coronas reconstruidas, las piezas<br />
<strong>de</strong>ntarias faltantes se nivelan hasta .<br />
Un espesor <strong>de</strong> la pared <strong>de</strong> las cofias <strong>de</strong> 0,4 mm<br />
garantiza una flui<strong>de</strong>z segura <strong>de</strong>l colado.<br />
Espesores uniformes <strong>de</strong> la cerámica evitan tensiones en<br />
las conexiones hasta .<br />
Evitar aplicar exceso <strong>de</strong> cerámica. Para evitar <strong>de</strong>sprendimientos,<br />
el bor<strong>de</strong> metálico lingual <strong>de</strong>berá quedar por<br />
<strong>de</strong>bajo <strong>de</strong> la zona incisal. Las superficies <strong>de</strong> contacto,<br />
previstas para las soldaduras, <strong>de</strong>berán construirse <strong>de</strong><br />
forma plana , y .<br />
La configuración redon<strong>de</strong>ada <strong>de</strong> las zonas <strong>de</strong> transición<br />
entre el metal y la cerámica permiten obtener<br />
bor<strong>de</strong>s limpios y <strong>de</strong> coloración estética hasta .<br />
Los elementos <strong>de</strong> los puentes <strong>de</strong>ben tener guirnaldas o<br />
al menos refuerzos inter<strong>de</strong>ntales (evacuación <strong>de</strong>l calor).
Gracias a las excelentes características físicas <strong>de</strong> las aleaciones remanium ® exentas <strong>de</strong> metal<br />
precioso para coronas y puentes, las conexiones entre coronas y los <strong>de</strong>más elementos pue<strong>de</strong>n<br />
hacerse muy <strong>de</strong>lgadas. Al efectuar la posterior separación, las piezas podrán distinguirse mejor<br />
unas <strong>de</strong> otras, lo que evitará el aspecto <strong>de</strong> “bloque“.<br />
Colocación <strong>de</strong> bebe<strong>de</strong>ros<br />
Para puentes: mo<strong>de</strong>lación con barras transversales <strong>de</strong> colado<br />
Bebe<strong>de</strong>ro <strong>de</strong>l cono ø 3,5 a 4 mm<br />
Barra transversal ø 4 a 5 mm<br />
Conexión a la corona ø 2,5 a 3 mm<br />
Longitud 2,5 a 3 mm<br />
Cálculo <strong>de</strong> la cantidad <strong>de</strong> metal<br />
Método directo para puentes pequeños y coronas aisladas<br />
Bebe<strong>de</strong>ro ø 3 mm<br />
Longitud 15 a 20 mm<br />
Coronas voluminosas ø 3,5 a 4 mm<br />
Longitud 15 a 20 mm<br />
Regla aproximativa: Peso <strong>de</strong> cera <strong>de</strong> la mo<strong>de</strong>lación, incl. canales <strong>de</strong> colado, multiplicado por<br />
la <strong>de</strong>nsidad (8,2 – 8,6 g / cm 3 ) y sumándole 1 a 2 cubitos cillíndricos (aprox. 10 g) para el cono.<br />
Revestimiento<br />
Emplear revestimientos especiales para aleaciones exentas <strong>de</strong> metales preciosos como<br />
p. ej. Castorit ® all speed, Castorit ® -super C o Trivest (Dentaurum) con alta expansión total.<br />
Para un exacto control <strong>de</strong>l ajuste se recomienda utilizar anillos metálicos para cilindros con el<br />
correspondiente forro muy apropiado <strong>de</strong> “Kera-Vlies ® “ <strong>de</strong> 1 ó 2 mm <strong>de</strong> espesor.<br />
ES<br />
remanium ® k+b es 35
ES<br />
Eliminación <strong>de</strong> la cera y precalentamiento<br />
Las peculiarida<strong>de</strong>s sobre precalentamiento convencional o rápido (speed) las halla usted en el<br />
modo <strong>de</strong> <strong>empleo</strong> <strong>de</strong>l respectivo revestimiento.<br />
Por regla general la temperatura final para todas las aleaciones remanium ® es <strong>de</strong> 950 °C.<br />
Pero la misma pue<strong>de</strong> diferir <strong>de</strong>l valor standard según el tipo <strong>de</strong> centrífuga utilizado. Tener en<br />
cuenta que la temperatura final se mantenga entre 30 y 60 minutos según tamaño <strong>de</strong>l cilindro.<br />
Fusión y colado<br />
Crisol<br />
Utilizar los <strong>de</strong> material a base <strong>de</strong> cerámica (óxido <strong>de</strong> magnesio, <strong>de</strong> silicio o aluminio).<br />
No utilizar crisoles <strong>de</strong> carbón.<br />
Precalentar el crisol sin metal en el horno. Utilizar un crisol sólo para un tipo <strong>de</strong> aleación y<br />
limpiarlo <strong>de</strong>spués <strong>de</strong> cada colado.<br />
No se <strong>de</strong>ben emplear polvos especiales <strong>de</strong> fundición (fun<strong>de</strong>ntes).<br />
En caso <strong>de</strong> mayor cantidad <strong>de</strong> metal se recomienda una fusión previa <strong>de</strong>l metal para evitar un<br />
retardo <strong>de</strong>l colado.<br />
Reutilización <strong>de</strong> conos <strong>de</strong> colado<br />
Al fundir la aleación, se pier<strong>de</strong> una parte <strong>de</strong> los elementos que forman el óxido adhesivo. Si la<br />
aleación es fundida varias veces, p.ej. en forma <strong>de</strong> conos <strong>de</strong> fundición, estos elementos pue<strong>de</strong>n<br />
quedar reducidos hasta la pérdida completa. Por lo tanto, se recomienda utilizar únicamente<br />
material nuevo para los trabajos <strong>de</strong>stinados al uso con cerámica.<br />
Colado adosado / sobrefusión<br />
Metales y attaches <strong>de</strong> aleaciones con alto contenido <strong>de</strong> platino colables no pue<strong>de</strong>n ser<br />
empleados en combinación con las aleaciones exentas <strong>de</strong> metales preciosos remanium ® para<br />
coronas y puentes.<br />
Máquinas <strong>de</strong> colado<br />
Sistemas <strong>de</strong> fusión y colado apropiados para las aleaciones <strong>de</strong> metales no-preciosos remanium ®<br />
para coronas y puentes con fusión por alta frecuencia con colado por presión al vacío o con<br />
centrífuga, fundición por arco voltaico y colado a presión al vacío, fusión abierta con soplete a<br />
plena llama con propano / oxígeno o acetileno / oxígeno o con otras mezclas <strong>de</strong> gas que puedan<br />
alcanzar las temperaturas <strong>de</strong> colado requeridas.<br />
36 remanium ® k+b es
Máquina <strong>de</strong> fundición por alta frecuencia y colado a presión al vacío<br />
Regular el vacío a 250 – 450 mbar (Presión recomendada: 450 mbar).<br />
Fusión previa<br />
Fundir los cubitos o lingotes <strong>de</strong> metal sólo hasta la incan<strong>de</strong>scencia roja (sin que aún se vea un<br />
redon<strong>de</strong>o <strong>de</strong> los bor<strong>de</strong>s <strong>de</strong> los cubitos cilíndricos).<br />
Fusión principal<br />
Fundición principal hasta que la masa fundida se abra y empiece a romperse su super ficie y a<br />
relucir, entonces colar <strong>de</strong> inmediato.<br />
Excepción remanium ® LFC: <strong>de</strong>spués <strong>de</strong> <strong>de</strong>saparecer la sombra <strong>de</strong> incanescencia seguir fundiendo<br />
durante 2 – 4 segundos más sin que se rompe la capa <strong>de</strong> óxido, entonces colar <strong>de</strong> inmediato.<br />
(Véase hoja informativa <strong>de</strong> la aleación).<br />
Observar el proceso <strong>de</strong> fusión y realizar el proceso <strong>de</strong> colado manualmente. Los óxidos<br />
ascen<strong>de</strong>ntes que se producen durante la fundición quedan como escoria en el crisol <strong>de</strong>spués<br />
<strong>de</strong>l colado y son fáciles <strong>de</strong> quitar (véanse también aspecto <strong>de</strong> la fusión, modo <strong>de</strong> <strong>empleo</strong> <strong>de</strong>l<br />
aparato para el colado a presión). Realizando así la fusión y el colado sólo queda un pequeño<br />
resto en el crisol y no se sobrecalienta la fusión.<br />
No es apropiado el colado automático mediante control <strong>de</strong> pirómetro, porque con el mismo no<br />
es seguro que se pueda reconocer el momento <strong>de</strong> reflexión <strong>de</strong> la fusión.<br />
Fusión con centrífugas <strong>de</strong> alta frecuencia<br />
Después <strong>de</strong> hundirse el último cubito o lingote <strong>de</strong> metal esperar hasta que se rompa la capa <strong>de</strong><br />
óxido superficial <strong>de</strong> la masa fundida y entonces colar <strong>de</strong> inmediato.<br />
Excepción remanium ® LFC: <strong>de</strong>spués <strong>de</strong> <strong>de</strong>saparecer la sombra <strong>de</strong> incan<strong>de</strong>scencia colar <strong>de</strong><br />
inmediato (véase hoja informativa sobre esta aleación).<br />
En caso <strong>de</strong> emplear mayores cantida<strong>de</strong>s <strong>de</strong> metal se recomienda una fusión previa <strong>de</strong>l metal.<br />
Fusión con soplete a plena llama<br />
Las aleaciones <strong>de</strong> metales no-preciosos remanium ® para coronas y puentes muestran un aspecto<br />
claro <strong>de</strong> fusión sin formación <strong>de</strong> chispas. Atención: Utilizar soplete con cabeza <strong>de</strong> ducha.<br />
4 – 5 mm<br />
ES<br />
a) Fusión con propano / oxígeno<br />
Seleccionar la posición máxima <strong>de</strong>l soplete según las<br />
indicaciones <strong>de</strong>l fabricante <strong>de</strong>l soplete. Oxígeno: 2 – 3 bar.<br />
b) Fusión con acetileno / oxígeno<br />
Observar las instrucciones <strong>de</strong>l fabricante <strong>de</strong>l soplete.<br />
Acetileno: 0,7 bar / Oxígeno: 3 bar.<br />
remanium ® k+b es 37
ES<br />
El núcleo azul <strong>de</strong> la llama directamente en la boquilla <strong>de</strong> toberas múltiples <strong>de</strong>bería medir unos<br />
4 a 5 mm. Precalentar el crisol sin metal. Fundir el metal en el crisol con un ligero movimiento<br />
circular <strong>de</strong> la llama. La distancia <strong>de</strong> la cabeza <strong>de</strong> ducha <strong>de</strong>l soplete <strong>de</strong>l metal <strong>de</strong>pen<strong>de</strong> <strong>de</strong>l tipo<br />
<strong>de</strong> cabeza <strong>de</strong> soplete utilizada y <strong>de</strong> la mezcla <strong>de</strong> gas empleada.<br />
Aspecto <strong>de</strong>l material en caso <strong>de</strong> fusión con soplete a plena llama<br />
Al fundir el metal con soplete se forma <strong>de</strong>spués <strong>de</strong> <strong>de</strong>rrumbarse el último cubito, una película<br />
<strong>de</strong> óxido. Seguir fundiendo con un ligero movimiento circular <strong>de</strong> la llama hasta que el metal<br />
fundido se <strong>de</strong>je mover visiblemente <strong>de</strong>bajo <strong>de</strong> la película <strong>de</strong> óxido por la presión <strong>de</strong> la llama.<br />
Iniciar el proceso <strong>de</strong> colado antes <strong>de</strong> que se rompa la película <strong>de</strong> óxido.<br />
Sobrecalentamiento<br />
Con todos los sistemas <strong>de</strong> fusión y colado: hay que evitar sin falta un sobrecalentamiento<br />
<strong>de</strong> la masa fundida. El sobrecalentamiento pue<strong>de</strong> producir rechupes, microporosida<strong>de</strong>s y la<br />
formación <strong>de</strong> grano grueso. Esos errores en el colado son el motivo <strong>de</strong> la rotura <strong>de</strong> un puente<br />
o <strong>de</strong> grietas en la cerámica.<br />
Enfriamiento <strong>de</strong>l cilindro<br />
Sacar con cuidado el cilindro <strong>de</strong> la centrífuga y <strong>de</strong>jarlo enfriar al aire.<br />
Atención: Peligro <strong>de</strong> quemaduras. Poner los cilindros sólo sobre material termoresistente.<br />
Cuidar las distancias <strong>de</strong> seguridad <strong>de</strong> objetos con peligro <strong>de</strong> incendios.<br />
Sacar <strong>de</strong> mufla y arenado<br />
Evitar la inhalación <strong>de</strong> polvo.<br />
Para reducir la formación <strong>de</strong> polvo al sacar <strong>de</strong> mufla, remojar el cilindro.<br />
No golpear con martillo el cono <strong>de</strong> colado .<br />
Chorrear con óxido <strong>de</strong> aluminio puro, tamaño granular aprox. 125 µm.<br />
Desbastado y pulido<br />
Sugerencias generales<br />
Atención: Utilizar instalaciones <strong>de</strong> aspiración al tallar, separar y pulir.<br />
Las elevadas cualida<strong>de</strong>s físicas <strong>de</strong> las aleaciones exentas <strong>de</strong> metales preciosos condicionan<br />
otros utensilios para la abrasión y el pulido que los que se utilizan habitualmente para el<br />
acabado <strong>de</strong> las aleaciones <strong>de</strong> metales preciosos.<br />
38 remanium ® k+b es
Los elementos abrasivos que se empleen <strong>de</strong>ben utilizarse sólamente para una aleación.<br />
Tener en cuenta los espesores mínimos <strong>de</strong> 0,2 – 0,3 mm <strong>de</strong> las cofias.<br />
Debido a las elevadas cualida<strong>de</strong>s físicas <strong>de</strong> las aleaciones no-preciosas, tanto los espesores <strong>de</strong><br />
las pare<strong>de</strong>s <strong>de</strong> las coronas como los espesores <strong>de</strong> los puntos <strong>de</strong> unión <strong>de</strong> los puentes se pue<strong>de</strong>n<br />
reducir aproximadamente un 30 % con respecto a los espesores <strong>de</strong> las aleaciones <strong>de</strong> metales<br />
preciosos <strong>de</strong> tipo medio.<br />
Observar una sola dirección abrasiva <strong>de</strong> tallado y una baja presión <strong>de</strong> apriete. Evitar solapaduras<br />
o superposiciones. Eliminar impurezas, como porosida<strong>de</strong>s e inclusiones.<br />
Etapas <strong>de</strong> trabajo para el repasado y el pulido<br />
Etapas <strong>de</strong> trabajo Utensilios necesarios REF Observaciones<br />
Corte <strong>de</strong> los<br />
bebe<strong>de</strong>ros<br />
Disco <strong>de</strong> separar Supercut STM 130-111-00<br />
130-113-00<br />
Desbastado grueso Ruedas abrasivas 131-322-50<br />
Disco <strong>de</strong> separar Supercut STM 130-112-00<br />
Desbastado fino Fresas <strong>de</strong> tungsteno 123-582-00<br />
123-584-00<br />
123-585-00<br />
123-601-00<br />
Abrasión fina Puntas Aloxin 135-852-00<br />
135-853-00<br />
Pulido con goma Pulidor Silichrom 138-645-00<br />
138-640-00<br />
Pulidor <strong>de</strong> goma gris 138-102-00<br />
138-302-00<br />
Pulidor <strong>de</strong> goma ver<strong>de</strong> 138-101-00<br />
138-301-00<br />
Pulido Cepillo <strong>de</strong> pulir 141-800-00<br />
Pasta para pulir Tiger brillant 190-350-00<br />
Pasta universal <strong>de</strong> brillo final<br />
Tiger Starshine<br />
190-301-00<br />
Abrillantado <strong>de</strong><br />
superficies interiores<br />
<strong>de</strong> coronas<br />
Al 2O 3 – 50 µm 128-017-00<br />
+ perlas para chorreado brillante 128-211-00<br />
Preparación <strong>de</strong> las superficies que se han <strong>de</strong> recubrir con cerámica<br />
Las estructuras se repasan con fresas <strong>de</strong> tungsteno para lograr superficies satinadas homogeneas.<br />
Las superficies se chorrean en la micro-arenadora <strong>de</strong> uso único con óxido <strong>de</strong> aluminio<br />
puro <strong>de</strong> grano medio <strong>de</strong> 125 µm, aplicando presión débil <strong>de</strong> 2 – 3 bar. Limpiar con agua<br />
<strong>de</strong>stilada y ultrasonido.<br />
ES<br />
Elevada potencia abrasiva y duración <strong>de</strong>l disco<br />
De aplicación universal<br />
Repasar conexión <strong>de</strong> bebe<strong>de</strong>ros<br />
Desbastar, p. ej. los espacios inter<strong>de</strong>ntales<br />
(las superficies que se han <strong>de</strong> recubrir con<br />
cerámica se <strong>de</strong>ben repasar antes con fresas<br />
<strong>de</strong> tungsteno)<br />
Repasar primero con fresas <strong>de</strong> tungsteno<br />
<strong>de</strong> <strong>de</strong>ntado cruzado<br />
Se pue<strong>de</strong> repasar a continuación con fresas<br />
finas <strong>de</strong> tungsteno<br />
Con estos abrasivos finos <strong>de</strong> óxido <strong>de</strong><br />
aluminio se logran transiciones lisas y<br />
suaves, en especial en las superficies<br />
metálicas <strong>de</strong> las caras triturantes<br />
Abrasión rápida y efectiva<br />
(pulido basto con goma)<br />
Pulido medio<br />
Pulido fino<br />
Para el pulido universal con pieza <strong>de</strong> mano<br />
Pasta para pulido rápido y <strong>de</strong> alto brillo<br />
Pasta i<strong>de</strong>al para pulido final a alto brillo.<br />
Para utilizarlo con buril <strong>de</strong> microarenadora.<br />
Advertencia: cubrir los bor<strong>de</strong>s cerámicos<br />
con cera.<br />
remanium ® k+b es 39
ES<br />
Cocción oxidante<br />
Con las aleaciones remanium ® para cerámica no es necesaria una cocción <strong>de</strong> oxidación. Es<br />
recomendable una cocción oxidante para control visual <strong>de</strong>l acondicionamiento <strong>de</strong> la estructura<br />
(5 min sin vacío a la temperatura <strong>de</strong> cocción <strong>de</strong>l opaco, si no hay otra indicación <strong>de</strong>l fabricante<br />
<strong>de</strong> cerámica). Según esto hay que chorrear el óxido con abrasivo <strong>de</strong> óxido <strong>de</strong> aluminio <strong>de</strong> un<br />
solo uso, granulado <strong>de</strong> 125 µm con presión débil <strong>de</strong> 2 – 3 bar, y volver a limpiar la superficie.<br />
Aplicación <strong>de</strong> la cerámica<br />
A las aleaciones para cerámica remanium ® les pue<strong>de</strong>n ser aplicadas todas las cerámicas<br />
apropiadas, p. ej. Carmen ® o CCS (Dentaurum), que se adapten al respectivo valor CET<br />
indicado <strong>de</strong> la aleación <strong>de</strong> metales no-preciosos, véase la hoja informativa <strong>de</strong> la aleación.<br />
El coeficiente <strong>de</strong> expansión térmica (CET) <strong>de</strong> muchas cerámicas <strong>de</strong>ntales cambia con el número<br />
<strong>de</strong> cocciones y la duración <strong>de</strong> permanencia en el horno.<br />
Cuanto más tiempo duren y más frecuentes sean las cocciones tanto más aumenta el CET <strong>de</strong><br />
la cerámica. La adaptación al CET constante <strong>de</strong> la aleación se efectúa mediante la velocidad<br />
<strong>de</strong> enfriamiento <strong>de</strong> la temperatura <strong>de</strong> cocción y la temperatura inicial.<br />
Sobre la estructura chorreada y limpia se aplica la masa <strong>de</strong> opaco <strong>de</strong> acuerdo con las<br />
especificaciones <strong>de</strong>l fabricante <strong>de</strong> la cerámica empleada.<br />
Procurar un buen secado y <strong>de</strong> que el horno <strong>de</strong> cerámica esté bien calibrado.<br />
Todas las otras cocciones realizarlas según el modo <strong>de</strong> <strong>empleo</strong> <strong>de</strong> la cerámica.<br />
Si el fabricante <strong>de</strong> la cerámica no indica otra cosa, el enfriamiento se realizará según se<br />
recomien<strong>de</strong> en la hoja informativa <strong>de</strong> la aleación.<br />
Atención: Después <strong>de</strong> cada cochura, cepille la estructura bajo agua corriente y séquela.<br />
Soldadura<br />
Para impedir una mezcolanza <strong>de</strong> materiales, evitar las soldaduras en lo posible.<br />
Pero si una soldadura es necesaria, hay que emplear una soldadura apropiada a la composición<br />
y al intervalo <strong>de</strong> fusión <strong>de</strong> la aleación que se vaya a soldar.<br />
Poner rugosas las superficies <strong>de</strong> soldadura con piedras finas <strong>de</strong> corindón. Unir las coronas con<br />
cera o acrílico, levantarlas y montarlas en revestimiento <strong>de</strong> soldar. Escaldar. Untar un fun<strong>de</strong>nte<br />
en las superficies que serán soldadas. Presecar el tajo para soldar y entonces precalentarlo a<br />
600 °C durante 10 minutos. Renovar el fun<strong>de</strong>nte aplicando nueva capa <strong>de</strong>l mismo y calentar<br />
el armazón hasta que se ponga al rojo vivo. Colocar los trozos <strong>de</strong> soldadura en la junta <strong>de</strong><br />
soldadura, <strong>de</strong>spués <strong>de</strong> haberlos cortado en la longitud necesaria y <strong>de</strong> haberlos sumergido en<br />
40 remanium ® k+b es
el fun<strong>de</strong>nte. Con una llama caliente calentar el fun<strong>de</strong>nte sobre los trocitos <strong>de</strong> soldadura en la<br />
junta hasta que el punto <strong>de</strong> soldadura que<strong>de</strong> cubierto por completo. Sólo entonces hacer correr<br />
la soldadura a plena llama.<br />
Atención: Objetos soldados con un fun<strong>de</strong>nte <strong>de</strong>berán ser enfriados lentamente <strong>de</strong>spués<br />
<strong>de</strong> la cochura <strong>de</strong> la cerámica.<br />
Soldadura <strong>de</strong>spués <strong>de</strong> la cocción <strong>de</strong> la cerámica<br />
No es aconsejable realizar soldaduras <strong>de</strong>spués <strong>de</strong> la cocción <strong>de</strong> la cerámica. Debido a la limitada<br />
resistencia contra la corrosión y a la baja difusión <strong>de</strong> las soldaduras <strong>de</strong> metales preciosos, se<br />
recomiendan técnicas <strong>de</strong> unión alternativas, como soldadura con láser, soldadura WIG o pegar.<br />
Soldadura con láser<br />
Con la técnica <strong>de</strong> soldadura láser pue<strong>de</strong>n construirse uniones <strong>de</strong> alta resistencia mecánica,<br />
estables contra la corrosión y exentas <strong>de</strong> soldadura.<br />
Con la misma hay qe tener en cuenta la geometría, las superficies, las soldaduras en serie, así<br />
como los parámetros <strong>de</strong> sol<strong>de</strong>o recomendados según el tipo <strong>de</strong> aparato. Como material <strong>de</strong><br />
aportación adicional para soldar son apropiados alambres <strong>de</strong> la misma especie disponibles para<br />
todas las aleaciones exentas <strong>de</strong> metales preciosos remanium ® para coronas y puentes.<br />
Limpieza<br />
Las aleaciones exentas <strong>de</strong> metales preciosos remanium ® para coronas y puentes se podrán<br />
limpiar, una vez acabadas, con la solución para limpieza ultrasónica P.<br />
Contraindicaciones y efectos secundarios<br />
Teniendo en cuenta la elaboración según el modo <strong>de</strong> <strong>empleo</strong>, son sumamente raras las<br />
manifestaciones <strong>de</strong> intolerancia contra las aleaciones exentas <strong>de</strong> metales preciosos remanium ®<br />
para coronas y puentes.<br />
Por motivos <strong>de</strong> seguridad en caso <strong>de</strong> alergia comprobada contra alguno <strong>de</strong> los componentes<br />
<strong>de</strong> la aleación, ésta no <strong>de</strong>berá ser aplicada.<br />
En casos excepcionales se <strong>de</strong>scriben irritaciones tópicas ocasionadas por reacciones<br />
electroquímicas.<br />
Si se emplean diversos tipos <strong>de</strong> aleaciones pue<strong>de</strong>n generarse efectos galvánicos.<br />
ES<br />
remanium ® k+b es 41
IT<br />
Egregio Cliente<br />
La ringraziamo per aver scelto un prodotto Dentaurum di qualità.<br />
Le consigliamo di leggere e di seguire attentamente queste modalità d’uso per utilizzare questo<br />
prodotto in modo sicuro ed efficiente.<br />
In ogni manuale d’uso non possono essere <strong>de</strong>scritti tutti i possibili utilizzi <strong>de</strong>l prodotto e pertanto<br />
rimaniamo a Sua completa disposizione qualora inten<strong>de</strong>sse ricevere ulteriori ragguagli.<br />
Il continuo sviluppo e miglioramento <strong>de</strong>i nostri prodotti, impone sempre da parte <strong>de</strong>ll’utilizzatore<br />
la rilettura <strong>de</strong>lle allegate modalità d’uso anche in caso <strong>de</strong> ripetuto utilizzo <strong>de</strong>gli stessi. Le stesse<br />
informazioni sono anche pubblicate nel nostro sito internet www.<strong>de</strong>ntaurum.<strong>de</strong> alla sezione<br />
download.<br />
1. Produttore<br />
Dentaurum GmbH & Co. KG · Turnstraße 31 · 75228 Ispringen · Germania<br />
2. Avvertenze sulla qualità<br />
La Dentaurum assicura la massima qualità <strong>de</strong>i prodotti fabbricati. Il contenuto di queste modalità<br />
d’uso è frutto di nostre personali esperienze e pertanto l’utilizzatore è responsabile <strong>de</strong>l corretto<br />
impiego <strong>de</strong>l prodotto. In mancanza di condizionamenti di Dentaurum sull’utilizzo <strong>de</strong>l materiale<br />
da parte <strong>de</strong>ll’utente non sussiste alcuna responsabilità oggettiva per eventuali insuccessi.<br />
42 remanium ® k+b it
Indice<br />
Avvertenze d'uso generale. ...................................................................................................44<br />
Mo<strong>de</strong>llazione ........................................................................................................................44<br />
Preparazione <strong>de</strong>l canale di fusione ........................................................................................45<br />
Quantità di metallo necessario ..............................................................................................45<br />
Messa in rivestimento ...........................................................................................................45<br />
Ceratura e preriscaldo ...........................................................................................................46<br />
Fusione e colata ....................................................................................................................46<br />
Crogiolo di fusione ...............................................................................................................46<br />
Riutilizzo <strong>de</strong>lla materozza .......................................................................................................46<br />
Sovrafusione ........................................................................................................................46<br />
Fonditrici .............................................................................................................................46<br />
Presso-fusione con fonditrice ad alta frequenza ....................................................................47<br />
Fusione ad alta frequenza con centrifuga ..............................................................................47<br />
Fusione a cannello .......................................................................................................... 47-48<br />
Aspetto <strong>de</strong>lla fusione con il cannello .......................................................................................48<br />
Surriscaldamento ..................................................................................................................48<br />
Raffreddamento <strong>de</strong>l cilindro. .................................................................................................48<br />
Smuffolamento e sabbiatura .................................................................................................48<br />
Lavorazione .................................................................................................................... 48-49<br />
Passaggi di rifinitura e lucidatura ..........................................................................................49<br />
Preparazione <strong>de</strong>lle superfici da ceramizzare...........................................................................49<br />
Ossidazione ..........................................................................................................................50<br />
Ceramizzazione ....................................................................................................................50<br />
Saldatura ..............................................................................................................................50<br />
Saldatura secondaria .............................................................................................................51<br />
Saldatura laser ......................................................................................................................51<br />
Pulitura .................................................................................................................................51<br />
Controindicazioni ed effetti collaterali ...................................................................................51<br />
IT<br />
remanium ® k+b it 43
IT<br />
Avvertenze d'uso generale<br />
Le presenti modalità d'uso si riferiscono al <strong>de</strong>ttagliato impiego di tutte le leghe non preziose<br />
remanium ® per ponti e corone.<br />
Eventuali specifiche ed integrazioni a tali informazioni relative alle nostre leghe non preziose<br />
remanium ® per ponti e corone sono disponibili nelle modalità d'uso che accompagnano le<br />
confezioni di ciascuna lega oppure sul nostro sito internet www.<strong>de</strong>ntaurum.it.<br />
Ulteriori doman<strong>de</strong> in merito potranno essere rivolte al nostro servizio di assistenza al numero<br />
051 / 86.50.084.<br />
Si consiglia di leggere attentamente le controindicazioni e gli effetti collaterali riportati alla fine<br />
<strong>de</strong>l presente opuscolo.<br />
Mo<strong>de</strong>llazione<br />
Per la mo<strong>de</strong>llazione <strong>de</strong>gli oggetti in cera si seguono le ben note regole odontotecniche.<br />
Si consiglia di utilizzare solo cere o materiali da mo<strong>de</strong>llazione a totale combustione, ad es.<br />
StarWax di Dentaurum.<br />
Prima di mo<strong>de</strong>llare, isolare i monconi con ‘Die Lube’ (REF 112-000-00). La forma <strong>de</strong>lle corone<br />
fuse dovrà essere più piccola di quella <strong>de</strong>lle corone ricostruite, mentre gli elementi mancanti<br />
dovranno essere riequilibrati fino a .<br />
<br />
<br />
44 remanium ® k+b it<br />
<br />
<br />
<br />
Uno spessore <strong>de</strong>lle cappette di 0,4 mm garantisce una<br />
fusione perfetta, mentre spessori uniformi di ceramica, a<br />
loro volta, garantiscono una stabile a<strong>de</strong>sione fino a .<br />
Evitare, comunque, spessori di ceramica sproporzionati.<br />
Per non avere distaccamenti, è necessario che la chiusura<br />
linguale in metallo si trovi sotto la zona incisale. Eventuali<br />
piani di contatto, preparati per successive saldature,<br />
dovranno essere costruiti a forma piatta , e .<br />
Se le zone di connessione tra metallo e ceramica vengono<br />
mo<strong>de</strong>llate in forma arrotondata, si otterranno bordi di<br />
chiusura precisi, oltre ad un colore esteticamente migliore<br />
fino a .<br />
Le strutture di ponte <strong>de</strong>vono presentare <strong>de</strong>i rinforzi<br />
inter<strong>de</strong>ntali a<strong>de</strong>guati (mo<strong>de</strong>llazione a caldo).
Grazie agli ottimi valori fisici presentati dalle leghe non preziose remanium ® per ponti e corone,<br />
è possibile costruire connessioni molto sottili tra ceramica e metallo. I <strong>de</strong>nti possono poi essere<br />
separati tra loro, in modo da evitare un effetto a „blocco”.<br />
Preparazione <strong>de</strong>l canale di fusione<br />
Quantità di metallo necessario<br />
Per ponti: mo<strong>de</strong>llazione con barra stabilizzatrice<br />
Canale di fusione <strong>de</strong>l cono da ø 3,5 a 4 mm<br />
Canale di fusione obliquo da ø 4 a 5 mm<br />
Collegamento con la corona da ø 2,5 a 3 mm<br />
lungo 2,5 a 3 mm<br />
Per corone singole e piccoli ponti, utilizzare una pernatura diretta<br />
Canale di fusione ø 3 mm<br />
lungo ca. 15 – 20 mm<br />
Corone voluminose ø 3,5 – 4 mm<br />
lungo ca. 15 – 20 mm<br />
Regola: moltiplicare il peso <strong>de</strong>lla mo<strong>de</strong>llazione in cera, perni inclusi, per il peso specifico <strong>de</strong>l<br />
metallo (8,2 – 8,6 g / cm 3 ) ed aggiungere 1 o 2 lingotti (ca. 10 g) per il cono.<br />
Messa in rivestimento<br />
Utilizzare rivestimenti speciali per leghe non preziose<br />
tipo Castorit ® all speed, Castorit ® -super C o Trivest (Dentaurum) con elevata espansione totale.<br />
Per l'esatto controllo <strong>de</strong>lla precisione, si consiglia l'uso di anelli metallici rivestiti con nastro<br />
ceramico. A tal fine è particolarmente indicato il „Kera-Vlies ® “ disponibile in spessore di 1 o 2 mm.<br />
IT<br />
remanium ® k+b it 45
IT<br />
Ceratura e preriscaldo<br />
Osservare le indicazioni d'uso specifiche <strong>de</strong>l rivestimento impiegato, sia per quanto riguarda il<br />
ciclo di preriscaldo normale (notturno) che quello veloce.<br />
Per tutte le leghe remanium ® la temperatura finale è, di regola, di 950 °C.<br />
Tale temperatura può differenziarsi in funzione <strong>de</strong>l tipo di fonditrice. Mantenere la temperatura<br />
finale da 30 a 60 minuti, a seconda <strong>de</strong>lla dimensione <strong>de</strong>l cilindro.<br />
Fusione e colata<br />
Crogiolo di fusione<br />
Utilizzare solo crogioli di tipo ceramico (ossido di magnesio, silicio, alluminio).<br />
Non inserire crogioli in grafite.<br />
Preriscaldare il crogiolo vuoto nel forno, utilizzandone uno diverso per ciascun tipo di lega e<br />
pulendolo dopo ogni fusione.<br />
Non <strong>de</strong>vono essere impiegati polveri speciali (fluenti)!<br />
Per grandi quantità di metallo è consigliabile iniziare la fusione prima <strong>de</strong>l prelievo <strong>de</strong>l cilindro<br />
dal forno.<br />
Riutilizzo <strong>de</strong>lla materozza<br />
Con la fusione, la lega per<strong>de</strong> una parte <strong>de</strong>gli elementi ritentivi che la compongono. Rifon<strong>de</strong>ndo<br />
più volte il metallo, tali elementi vengono ulteriormente ridotti fino alla loro completa scomparsa.<br />
Si consiglia, pertanto, di utilizzare sempre materiale nuovo se la struttura fusa verrà ceramizzata.<br />
Sovrafusione<br />
Non possono essere utilizzati metalli in sovrafusione o attacchi ad alto titolo di platino in<br />
combinazione con le leghe non preziose remanium ® per ponti e corone.<br />
Fonditrici<br />
I sistemi di fusione più indicati per le leghe non preziose remanium ® per ponti e corone sono<br />
le fonditrici ad alta frequenza per presso-fusione sottovuoto o per centrifugazione, la fusione<br />
ad arco voltaico sottovuoto, la fusione a cannello con ossigeno-propano o ossi-acetilene o altri<br />
miscugli di gas con i quali è possibile raggiungere le temperature di fusione.<br />
46 remanium ® k+b it
Presso-fusione con fonditrice ad alta frequenza<br />
Impostare il vuoto a 250 – 450 mbar (pressione consigliata: 450 mbar).<br />
Pre-fusione<br />
Riscaldare i lingotti fino all’incan<strong>de</strong>scenza (colore rosso) e non arrivare all’arrotondamento<br />
<strong>de</strong>gli spigoli.<br />
Fusione<br />
Fon<strong>de</strong>re fino alla rottura <strong>de</strong>lla pellicola superficiale, poi colare il metallo fuso.<br />
Eccezione remanium ® LFC: alla scomparsa <strong>de</strong>ll'ombra di fusione, proseguire per altri 2 – 4 s<br />
senza rompere la pellicola superficiale. (vedi specifiche modalità d'uso).<br />
Osservare le indicazioni di fusione e colare manualmente. Gli ossidi che si formano durante<br />
la fusione (vedi anche Aspetto <strong>de</strong>lla fusione, Modalità d’uso <strong>de</strong>lla fonditrice a pressione)<br />
rimangono come scorie sul crogiolo dopo la colata e possono essere facilmente rimossi. Se la<br />
fusione e la colata sono state corrette, sul crogiolo <strong>de</strong>ve rimanere solo una piccola quantità di<br />
residuo ed il metallo non viene surriscaldato.<br />
Sconsigliamo l’utilizzo di sistemi a pirometro per stabilire il punto di fusione, in quanto con<br />
questi strumenti non può essere riconosciuto con sufficiente precisione l’esatto momento di<br />
rottura <strong>de</strong>lla pellicola superficiale.<br />
Fusione ad alta frequenza con centrifuga<br />
Dopo la fusione <strong>de</strong>ll'ultimo lingotto di metallo, atten<strong>de</strong>re la rottura <strong>de</strong>lla pellicola superficiale<br />
prima di rilasciare la centrifuga.<br />
Eccezione remanium ® LFC: alla scomparsa <strong>de</strong>ll'ombra di fusione rilasciare la centrifuga<br />
(vedi specifiche modalità d'uso).<br />
Per grandi quantità di metallo, si consiglia la pre-fusione <strong>de</strong>lla lega.<br />
Fusione a cannello<br />
Le leghe non preziose remanium ® per ponti e corone si fondono in maniera ottimale senza<br />
formare scintille. Attenzione! Utilizzare solo cannelli con ugelli a doccia!<br />
4 – 5 mm<br />
a) Fusione con ossigeno-propano<br />
scegliere l’impostazione massima secondo le modalità indicate<br />
dal costruttore <strong>de</strong>l cannello. Ossigeno: 2 – 3 bar.<br />
b) Fusione con ossi-acetilene<br />
Attenersi alle modalità d’uso indicate dal costruttore <strong>de</strong>l<br />
cannello. Acetilene: 0,7 bar – Ossigeno: 3 bar.<br />
IT<br />
remanium ® k+b it 47
IT<br />
Il nucleo blu <strong>de</strong>lla fiamma <strong>de</strong>ve essere lungo da 4 a 5 mm. Preriscaldare il crogiolo ed iniziare<br />
poi la fusione <strong>de</strong>l metallo con movimento rotatorio <strong>de</strong>lla fiamma. La distanza <strong>de</strong>l cannello dal<br />
metallo dipen<strong>de</strong> dal tipo di ugello e dalla qualità <strong>de</strong>i gas utilizzati.<br />
Aspetto <strong>de</strong>lla fusione con il cannello<br />
Durante la fusione <strong>de</strong>lla lega con fiamma libera, si forma, in superficie, una pellicola protettiva<br />
di ossido. Continuare la fusione con piccole rotazioni <strong>de</strong>l cannello fino a quando si vedrà,<br />
attraverso la pellicola, il metallo fuso che comincia a muoversi sotto la spinta <strong>de</strong>lla fiamma.<br />
Centrifugare prima che la pellicola si apra.<br />
Surriscaldamento<br />
Con tutti i sistemi di fusione <strong>de</strong>ve essere evitato il surriscaldamento <strong>de</strong>lla lega. Il surriscaldamento<br />
può provocare porosità, microporosità e la formazione di grana grossa. Tale errore<br />
è spesso la causa <strong>de</strong>lla rottura <strong>de</strong>i ponti o <strong>de</strong>l distacco <strong>de</strong>lla ceramica.<br />
Raffreddamento <strong>de</strong>l cilindro<br />
Prelevare con cautela il cilindro dalla fonditrice e lasciarlo raffreddare all'aria.<br />
Attenzione! Pericolo di incendio. Appoggiare il cilindro solo su superfici termorepellenti.<br />
Tenere il cilindro caldo lontano da sostanze facilmente infiammabili.<br />
Smuffolamento e sabbiatura<br />
Evitare di inalare la polvere generata!<br />
Per evitare la formazione di polvere durante lo smuffolamento, inumidire il cilindro!<br />
Non picchiare con il martello sulla materozza!<br />
Sabbiare con ossido di alluminio puro, grana ca. 125 µm.<br />
Lavorazione<br />
Consigli generali<br />
Attenzione: inserire l'aspirazione durante la sgrossatura, la rifinitura e la lucidatura!<br />
Gli alti valori fisici presentati dalle leghe, obbligano all‘utilizzo di differenti sistematiche rispetto<br />
a quelle abitualmente impiegate per la lavorazione di strutture in lega preziosa.<br />
48 remanium ® k+b it
Tutti gli strumenti rotanti sotto riportati <strong>de</strong>vono essere impiegati esclusivamente con un tipo<br />
di metallo solo.<br />
Mantenere lo spessore minimo <strong>de</strong>lle cappette di 0,2 – 0,3 mm.<br />
Gli alti valori fisici presentati dalle leghe non preziose, permettono di ridurre gli spessori <strong>de</strong>lle<br />
cappette e <strong>de</strong>lle connessioni di ca. Un 30 % rispetto a quelli di analoghe strutture fuse con<br />
metallo prezioso.<br />
Proce<strong>de</strong>re sempre nella stessa direzione senza eccessiva pressione. Evitare le sovrappo-sizioni.<br />
Eliminare le impurità e le porosità.<br />
Passaggi di rifinitura e lucidatura<br />
Passaggio Strumenti necessari REF Note<br />
Taglio <strong>de</strong>i perni<br />
di fusione<br />
Dischi separatori Supercut STM 130-111-00<br />
130-113-00<br />
Sgrossatura Dischi abrasvi 131-322-50<br />
Dischi separatori Supercut STM 130-112-00<br />
Tiratura Frese in tungsteno 123-582-00<br />
123-584-00<br />
123-585-00<br />
123-601-00<br />
Rifinitura Abrasivi Aloxin 135-852-00<br />
135-853-00<br />
Lucidatura Abrasivi Silichrom 138-645-00<br />
138-640-00<br />
Gommini abrasivi grigi 138-102-00<br />
138-302-00<br />
Gommini abrasivi verdi 138-101-00<br />
138-301-00<br />
Politura Spazzola 141-800-00<br />
Pasta per lucidare Tiger<br />
Pasta universale per lucidare<br />
190-350-00<br />
Tiger Starshine 190-301-00<br />
Lucidatura<br />
<strong>de</strong>ll´interno<br />
<strong>de</strong>lle corone<br />
Al 2O 3 - 50 µm + 128-017-00<br />
perle autolucidanti 128-211-00<br />
Preparazione <strong>de</strong>lle superfici da ceramizzare<br />
Le strutture <strong>de</strong>vono essere tirate con frese in tungsteno in modo da ottenere una superficie<br />
satinata omogenea. Si proce<strong>de</strong>, quindi, con la sabbiatura impiegando ossido di alluminio puro<br />
a grana media (125 µm) e bassa pressione (2 – 3 bar). Ripulire, infine, il tutto in acqua distillata<br />
con apparecchio ad ultrasuoni.<br />
IT<br />
Ad alto potere abrasivo e duraturi nel tempo<br />
Ad impiego universale<br />
Levigare le zone di collegamento <strong>de</strong>i perni<br />
Per lavori di sgrossatura ad esempio <strong>de</strong>lla<br />
zona inter-prossimale (le superfici da ceramizzare<br />
<strong>de</strong>vono essere tirate con frese in<br />
tungsteno)<br />
Inizialmente lavorare il pezzo con frese in<br />
tungsteno a taglio incrociato; successivamente<br />
é possibile ripassare le superfici con<br />
frese in tungsteno a taglio più fine<br />
Con questi abrasivi in ossido di alluminio si<br />
ottengono superfici particolarmente lisce<br />
I<strong>de</strong>ali per asportare e lucidare contemporaneamente<br />
(prelucidatura)<br />
Lucidatura media<br />
Lucidatura fine<br />
Per lucidature universali a manipolo<br />
Per lucidature rapi<strong>de</strong> e brillantissime <strong>de</strong>lle<br />
superfici metalliche<br />
I<strong>de</strong>ale per lucidature brillanti<br />
Da utilizzare con micro-sabbiatrici.<br />
Attenzione! Protteggere i bordi ricoprendoli<br />
di cera.<br />
remanium ® k+b it 49
IT<br />
Ossidazione<br />
Con le leghe remanium ® per ceramica l’ossidazione <strong>de</strong>lle superfici non è necessaria. L’ossidazione<br />
è tuttavia consigliabile per verificare il condizionamento superficiale <strong>de</strong>lle strutture (5 minuti<br />
in atmosfera alla temperatura di cottura <strong>de</strong>ll‘opaco, se il produttore <strong>de</strong>lla ceramica non ha<br />
rilasciato indicazioni diverse). Successivamente sabbiare le superfici con ossido di alluminio,<br />
grana 125 µm e bassa pressione (2 – 3 bar), e ripulire accuratamente la struttura.<br />
Ceramizzazione<br />
Le leghe per ceramica remanium ® possono essere ceramizzate con qualsiasi ceramica<br />
<strong>de</strong>ntale, ad es. Carmen ® o CCS (Dentaurum), il cui valore CET sia appropriato per l'uso su<br />
leghe non preziose.<br />
Il coefficiente di espansione termica (CET) di molte note ceramiche si modifica in funzione <strong>de</strong>l<br />
numero di cotture e <strong>de</strong>l mantenimento in forno.<br />
Più le cotture sono numerose e lunghe, tanto maggiore è il CET <strong>de</strong>lla ceramica. La taratura ad<br />
un valore costante di CET <strong>de</strong>lla lega si ottiene con la velocità di raffreddamento <strong>de</strong>lla cottura<br />
alla temperatura assegnata.<br />
Applicare l'opaco sulla struttura sabbiata e pulita secondo le modalità prescritte dal produttore<br />
<strong>de</strong>lla ceramica.<br />
Asciugare bene la struttura ed assicurarsi che il forno sia ben tarato!<br />
Per le altre cotture attenersi alle specifiche indicazioni.<br />
Se non diversamente disposto dal produttore <strong>de</strong>lla ceramica, per il raffreddamento attenersi alle<br />
indicazioni riportate sulle istruzioni <strong>de</strong>lla lega impiegata.<br />
Attenzione: Dopo ciascuna cottura spazzolare la struttura sotto acqua corrente e<br />
asciugare.<br />
Saldatura<br />
Per evitare il mix di materiali diversi sarebbe opportuno, se possibile, evitare la saldatura.<br />
In caso contrario, utilizzare sempre e solo saldami con composizione chimica ed intervallo di<br />
fusione adatti alla lega da saldare.<br />
Irruvidire le parti da saldare con un abrasivo al corindone.<br />
Collegare le corone con cera o resina e mettere il tutto in rivestimento. Ripulire con un getto di<br />
vapore caldo ed applicare un fluente, lasciandolo asciugare per qualche minuto. Preriscaldare<br />
in forno a 600 °C per 10 minuti. Ripassare con un altro strato di fluente le parti da saldare<br />
e surriscaldare il pezzo fino a ren<strong>de</strong>rlo rovente (colore rosso). Appli care il pezzo di saldame<br />
50 remanium ® k+b it
necessario dopo averlo cosparso di fluente. Quest’ultimo dovrà essere surriscaldato affinchè<br />
possa ricoprire interamente tutta la zona di saldatura. Insistere, quindi, con la fiamma fino a<br />
completo scioglimento <strong>de</strong>l saldame.<br />
Attenzione: parti saldate con un fluente <strong>de</strong>vono essere raffreddate lentamente dopo<br />
ciascuna cottura di ceramica.<br />
Saldatura secondaria<br />
Si sconsigliano le saldature secondarie. A causa <strong>de</strong>lla riduzione <strong>de</strong>lla resistenza alla corrosione<br />
ed alla irrilevante diffusione <strong>de</strong>l saldame con la lega non preziosa si consiglia di passare ad una<br />
tecnica di connessione alternativa come la saldatura al laser, la saldatura WIG o l'incollaggio.<br />
Saldatura laser<br />
Con la saldatura al laser possono essere realizzate connessioni senza apporto di saldame,<br />
meccanicamente stabili ed altamente resistenti alla corrosione.<br />
Devono pertanto essere osservate le geometrie, le superfici, l'ordine di saldatura nonché i<br />
parametri di saldatura secondo il tipo di macchinario impiegato. Come materiale d'apporto<br />
possono essere impiegati fili di saldatura con la stessa composizione chimica <strong>de</strong>lle leghe<br />
remanium ® per ponti e corone.<br />
Pulitura<br />
Le corone ed i ponti realizzati in lega non preziosa remanium ® possono essere ripuliti con<br />
apparecchio ad ultrasuoni e liquido P.<br />
Controindicazioni ed effetti collaterali<br />
L'intollerabilità alle leghe non preziose remanium ® per ponti e corone è estremamente rara se<br />
vengono rispettate le indicazioni d'uso riportate nello specifico opuscolo.<br />
In caso d'insorgenza di allergia ad uno specifico elemento contenuto nella lega, per motivi di<br />
sicurezza se ne sconsiglia l'uso.<br />
In casi particolari vengono <strong>de</strong>scritte limitate e locali irritazioni elettrochimiche.<br />
L'utilizzo di differenti gruppi di leghe può generare effetti galvanici.<br />
IT<br />
remanium ® k+b it 51
Für Ihre Fragen zur Verarbeitung unserer Produkte steht Ihnen unser Customer Support<br />
gerne zur Verfügung.<br />
Stand <strong>de</strong>r Information:<br />
Date of information:<br />
Mise à jour :<br />
Fecha <strong>de</strong> la información:<br />
Data <strong>de</strong>ll’informazione:<br />
01/10<br />
Hotline Tel.-Nr. Zahntechnik +49 72 31 / 803 - 410<br />
Gebührenfreie Fax-Nr. 0 800 / 4 14 24 34<br />
Telefonische Auftragsannahme +49 72 31 / 803 - 210<br />
Mehr Informationen zu Dentaurum Produkten fin<strong>de</strong>n Sie im Internet.<br />
Sie können unsere Produkte auch online bestellen unter:<br />
www.<strong>de</strong>ntaurum.<strong>de</strong><br />
Turnstraße 31 · 75228 Ispringen · Germany · Telefon + 49 72 31 / 803-0 · Fax +49 72 31 / 803-295<br />
www.<strong>de</strong>ntaurum.<strong>de</strong> · E-Mail: info@<strong>de</strong>ntaurum.<strong>de</strong><br />
989-448-00 Printed by Dentaurum Germany 01/10/B/R1-3