
Create successful ePaper yourself
Turn your PDF publications into a flip-book with our unique Google optimized e-Paper software.
VECTIS - <strong>220</strong> - <strong>032</strong> - <strong>026</strong> - <strong>020</strong><br />
FR - EN - D - I - SP
Modèle / Model / Modell / Modello / Modelo<br />
. . . . . . . . . . . . . . . . . . . . . . . . . . . . . . . . . . . . . . . . . . . . . . . . . . . . . . . . . . . . . . . . . . . . . . . . . . . .<br />
Numéro de série / Serial number / Seriennummer / Numero di serie /<br />
Numero de serie<br />
. . . . . . . . . . . . . . . . . . . . . . . . . . . . . . . . . . . . . . . . . . . . . . . . . . . . . . . . . . . . . . . . . . . . . . . . . . . .<br />
Calibre / Gauge-Caliber / Durchmesser-Kaliber / Calibro / Calibre<br />
. . . . . . . . . . . . . . . . . . . . . . . . . . . . . . . . . . . . . . . . . . . . . . . . . . . . . . . . . . . . . . . . . . . . . . . . . . . .<br />
Prix de vente / Purchase Price / Kaufpreis / Prezzo di acquisto /<br />
Precio de compra<br />
. . . . . . . . . . . . . . . . . . . . . . . . . . . . . . . . . . . . . . . . . . . . . . . . . . . . . . . . . . . . . . . . . . . . . . . . . . . .<br />
Acheté chez / Purchased from / Gekautt von / Rivenditore / Comprado a<br />
. . . . . . . . . . . . . . . . . . . . . . . . . . . . . . . . . . . . . . . . . . . . . . . . . . . . . . . . . . . . . . . . . . . . . . . . . . . .<br />
. . . . . . . . . . . . . . . . . . . . . . . . . . . . . . . . . . . . . . . . . . . . . . . . . . . . . . . . . . . . . . . . . . . . . . . . . . . .<br />
. . . . . . . . . . . . . . . . . . . . . . . . . . . . . . . . . . . . . . . . . . . . . . . . . . . . . . . . . . . . . . . . . . . . . . . . . . . .<br />
. . . . . . . . . . . . . . . . . . . . . . . . . . . . . . . . . . . . . . . . . . . . . . . . . . . . . . . . . . . . . . . . . . . . . . . . . . . .<br />
. . . . . . . . . . . . . . . . . . . . . . . . . . . . . . . . . . . . . . . . . . . . . . . . . . . . . . . . . . . . . . . . . . . . . . . . . . . .<br />
. . . . . . . . . . . . . . . . . . . . . . . . . . . . . . . . . . . . . . . . . . . . . . . . . . . . . . . . . . . . . . . . . . . . . . . . . . . .<br />
Date d’achat / Date of purchase / Kaufdatum / Data di acquisto /<br />
Fecha de compra<br />
. . . . . . . . . . . / . . . . . . . . . . /<br />
. . . . . . . . . . . . . . . . . . . . . . . . . . . . . . . . . . . . . . . . . . . . . . . . . . . . . . .<br />
Français p. 1<br />
English p. 5<br />
Deutch p. 9<br />
Italiano p. 13<br />
Español p. 17
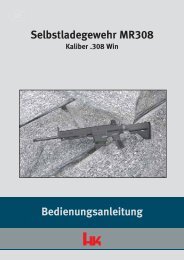
VECTIS <strong>220</strong> - VECTIS <strong>032</strong> - VECTIS <strong>026</strong> - VECTIS <strong>020</strong><br />
La carabine que vous venez d'acquérir fait partie<br />
de la longue gamme des produits BROWNING .<br />
L'étude et la fabrication de votre VECTIS ont fait<br />
l'objet des soins les plus attentifs, afin que cette<br />
carabine vous procure le maximum de satisfaction.<br />
MESURES DE PRECAUTION<br />
De par leur conception, les carabines à air comprimé<br />
à double effet sont des armes qui peuvent<br />
être manipulées avec une grande sécurité.<br />
Nous vous recommandons cependant de les utiliser<br />
avec prudence et de respecter les conseils<br />
suivants;<br />
1. Avant toute manipulation, assurez-vous que<br />
votre arme n'est pas chargée.<br />
2. Gardez toujours votre arme en position de<br />
sécurité tant que vous ne tirez pas, même si<br />
vous êtes certain qu'elle est vide<br />
3. Ne posez l'index sur la détente que lorsque<br />
vous êtes sur le point de tirer, sinon, tenez-le<br />
contre le pontet.<br />
4. Ne pointez jamais votre arme vers quelqu’un,<br />
même si vous êtes certain qu'elle est déchargée.<br />
Considérez-la toujours avec l'attention<br />
dûe à une arme chargée.<br />
5. Ayez toujours connaissance de l'endroit où vos<br />
projectiles vont retomber et ne tirez que lorsqu'il<br />
n'y a aucun risque d'accident. Attention<br />
aux ricochets.<br />
6. Dans votre intérêt comme dans celui de votre<br />
arme, évitez l'introduction de tout corps étranger<br />
dans le canon.<br />
7. N'utilisez votre arme que dans les endroits ne<br />
présentant aucun danger ni nuisance pour les<br />
personnes.<br />
8. Ne rangez jamais votre arme chargée.<br />
Rangez votre arme et les munitions dans des<br />
endroits séparés et hors de portée des enfants.<br />
9. Pour des raisons de sécurité autant que de<br />
rendement balistique, n'utilisez que des projectiles<br />
de qualité et du calibre exact de votre<br />
arme.<br />
10. Choisissez une cible qui vous permet de tirer<br />
en toute sécurité et capable d'arrêter les projectiles.<br />
N'utilisez pas de cible pouvant provoquer<br />
des ricochets. Nous vous conseillons<br />
l'utilisation d'un piège à plomb ou, à défaut,<br />
un panneau d'aggloméré de faible densité et<br />
de 22 mm d'épaisseur.<br />
11. Toute modification du mécanisme de l'arme<br />
peut entrainer un mauvais fonctionnement de<br />
celle-ci. Modifier l'arme peut rendre son utilisation<br />
dangereuse.<br />
12. Tout fonctionnement anormal, tel le que la<br />
diminution excessive de la force de départ ou<br />
de la course de la détente indiquent une<br />
usure possible. Il est alors nécessaire de faire<br />
contrôler votre arme par un armurier afin de<br />
remplacer ou de réparer la pièce défectueuse .<br />
13. Si, suite à une chute, votre arme présente un<br />
fonctionnement anormal, n'hésitez pas à la<br />
faire vérifier par un armurier.<br />
14. Lorsque vous réglez la force de départ en<br />
dessous de 800 à 9OO g. il y a danger de tir<br />
intempestif si l'arme tombe ou subit un choc.<br />
15. Pour la VECTIS 22O, ne placez jamais votre<br />
main entre le levier d'armement et le fusil.<br />
Assurez-vous qu'il n'y a personne sur la trajectoire<br />
du levier d'armement.<br />
ATTENTION :<br />
L'usage de cette cararabine est réservé exclusivement<br />
aux adultes. Une utilisation irréfléchie<br />
peut entrainer de sérieuses blessures ou la mort.<br />
La munition est dangereuse jusqu'à 1000 mètres<br />
dans des conditions normales d'utilisation.<br />
1
SPECIFICATIONS TECHNIQUES<br />
MODELE<br />
CANON<br />
Longueur<br />
Calibre<br />
Hausse<br />
CROSSE (*)<br />
Finition<br />
Quadrillage<br />
LONGUEUR TOTALE<br />
POIDS TOTAL<br />
CARCASSE<br />
SURETE<br />
VO (*) VITESSE<br />
UTILISATION<br />
Nous vous recommandons de lire attentivement<br />
les instructions suivantes avant la première<br />
utilisation. Assurez - vous que votre arme n'est<br />
pas chargée avant de la manipuler.<br />
SECURITE<br />
Certaines carabines VECTIS(<strong>032</strong> - <strong>220</strong>) sont<br />
équipées d'une sécurité automatique qui<br />
s'enclanche après chaque réarmement.<br />
Il convient donc d'enlever cette sécurité avant<br />
chaque tir.<br />
Concernant le modèle VECTIS <strong>220</strong>, pour armer la<br />
carabine,placez la sécurité sur ON. Il n'est pas<br />
possible d'actionner le levier si la sécutité est sur<br />
OFF (point rouge). Si le déplacement du levier<br />
n'est pas possible avec la sécurité sur ON , c' est<br />
que la carabine est probablement déjà armée.<br />
Pour placer la sécurité sur ON, enfoncez le petit<br />
2<br />
Vectis <strong>020</strong><br />
basculant<br />
47 cm<br />
4,5 mm<br />
micrométrique<br />
hêtre<br />
vernie satinée<br />
non<br />
101 cm<br />
2,9 kg<br />
à rail 11 mm<br />
non auto<br />
<strong>220</strong> m/s<br />
(*) Adaptables selon les législations en vigueur.<br />
Vectis <strong>026</strong><br />
basculant<br />
47 cm<br />
4,5 mm<br />
micrométrique<br />
hêtre<br />
vernie satinée<br />
oui<br />
111 cm<br />
3,15 kg<br />
à rail 11 mm<br />
non auto<br />
270 m/s<br />
Vectis <strong>032</strong><br />
basculant<br />
47 cm<br />
4,5 mm<br />
micrométrique<br />
hêtre<br />
vernie satinée<br />
oui<br />
114 cm<br />
3,4 kg<br />
à rail 11 mm<br />
automatique<br />
312 m/s<br />
Vectis <strong>220</strong><br />
basculant<br />
46 cm<br />
4,5 mm<br />
micrométrique<br />
montée sur<br />
queue d'aronde<br />
hêtre<br />
vernie satinée<br />
oui<br />
105,5 cm<br />
4,22 kg<br />
à rail 11 mm<br />
automatique<br />
280 m/s<br />
levier se trouvant sous le levier d'armement.<br />
Maintenant, vous pouvez armer votre carabine.<br />
Après avoir armé la carabine, appuyez sur le petit<br />
levier en face de la queue de détente pour retirer<br />
la sécutité<br />
Maintenant, votre arme est prête à tirer.<br />
ARMEMENT<br />
Pour tous les modèles excepté la<br />
VECTIS <strong>220</strong>, le mode de réarmement s'effectue<br />
par basculage du canon. Il suffit donc de prendre<br />
le canon par son extrémité et de le ramener vers<br />
la sous-garde jusqu'à son point de butée.<br />
Ramenez le ensuite dans sa position initiale,votre<br />
arme est prête pour le tir.<br />
Pour le modèle <strong>220</strong>, appuyez fermement la<br />
plaque de couche sur votre hanche ou sur une<br />
surface rigide.
Assurez- vous que vous pouvez maintenir cette<br />
position pendant toute la course du levier. Prenez<br />
fermemnt le levier par son extrémité en vérifiant<br />
que vous ne risquez pas de vous coincer les<br />
doigts entre le levier et la crosse.<br />
Ne déplacez pas votre main sur le levier durant<br />
l'armement.<br />
Le mécanisme d'armement à DOUBLE EFFET est<br />
basé sur le principe de l'armement en deux<br />
étapes.<br />
1. Déverrouillez le levier d'armement en appuyant<br />
sur le petit levier setrouvant sur le levier<br />
d'armement. Ecartez le levier d'armement<br />
jusqu'au verrouillage en bout de course confirmé<br />
par un "click".<br />
ATTENTION!<br />
Ne pas déplcer brutalement le levier d'armement<br />
2. Ramenez le levier vers sa position initiale de<br />
telle façon qu'il soit entièrement encastré dans la<br />
crosse. Lors des premières manipulations,<br />
n'hésitez pas à insister lors du mouvement du<br />
retour afin d'être sûr que le levier soit bien<br />
positionné.<br />
Votre VECTIS <strong>220</strong> est maintenant armée. La<br />
sécurité est enclenchée automatiquement.<br />
ATTENTION!<br />
Ne sous-estimez pas la force nécessaire à<br />
l'armement, tout particulièrement lors de la<br />
course de retour. NE LACHEZ JAMAIS LE<br />
LEVIER! Celà peut provoquer des dommages au<br />
mécanisme et rendre la carabine inutilisable. Si<br />
celà arrivait malgré tout et que levier restait<br />
bloqué en position ouverte, demandez à votre<br />
armurier d'examiner votre carabine.<br />
MISE EN PLACE DU PLOMB<br />
Pour profiter au mieux des performances de votre<br />
carabine, n'utilisez que des munitions de qualité<br />
du calibre 4,5 mm (.177) Pour les modèles<br />
VECTIS <strong>032</strong> - <strong>026</strong> - <strong>020</strong>, disposez le plomb dans<br />
son logement lorsque votre canon est basculé.<br />
Pour le modèle <strong>220</strong>, ouvrez le dispositif de<br />
chargement en actionnant le levier vers le haut.<br />
Introduisez le plomb dans le sens correct comme<br />
indiqué par le dessin à côté du logement.<br />
Rabaissez le levier jusqu' à encliquetage<br />
complet.<br />
TIRER EN TOUTE SECURITE<br />
Lorsque vous choisissez un endroit de tir, vérifiez<br />
que personne ne se trouve dans la ligne de tir et<br />
qu'il n'y a pas de risque de ricochets sur des<br />
surfaces dures.<br />
Dirigez le canon vers la cible. Désengagez la<br />
sécurité, installez - vous dans la position correcte<br />
avec plaque de couche positionnée dans le<br />
creux de l'épaule.<br />
Avant de tirer, assurez-vous que toutes les<br />
mesures de sécurité sont respectées.<br />
Visez la cible et appuyez sur la détente. Avant de<br />
ranger votre arme, assurez-vous qu'elle est<br />
déchargée et désarmée. Avec le modèle <strong>220</strong>,<br />
pour contrôler que votre carabine n'est pas<br />
armée vous devez être capable de déplacer le<br />
levier d'armement.<br />
Replacez celui-ci dans la crosse et appuyez sur<br />
le levier se trouvant sous le levier d'armement.<br />
Les modèles <strong>220</strong>, <strong>026</strong> et <strong>032</strong> sont équipés d'une<br />
détente dont le poids de départ est réglable à<br />
l'aide d'une vis située dans la sous-garde. Pour<br />
augmenter le poids de la détente tournez la vis<br />
dans le sens horlogique.<br />
VISEE<br />
La première fois que vous utilisez votre arme, tirez<br />
plusieurs coups pour la régler.<br />
GUIDON<br />
Pour s'adapter aux préférences de différents<br />
tireurs, la carabine S est livrée avec un jeu de<br />
lames-guidons interchangeables.<br />
3
Ces lames-guidon sont maintenues dans le corps<br />
du guidon par une douille filetée et moletée.<br />
Pour changer la lame, déserrez partiellement la<br />
douille, dégagez la lame et placez la<br />
nouvelle.Veillez à revisser fermement la douille<br />
tout en vous assurant que la nouvelle lame est<br />
bien engagée dans les encoches. Maniez ces<br />
lames avec précaution.<br />
HAUSSE<br />
L'ensemble de la gamme VECTIS est équipée de<br />
hausses micrométriques permettant un réglage<br />
du point d'impact aussi bien en vertical qu'en<br />
horizontal.<br />
Si le point d'impact du plomb se situe :<br />
Trop à gauche : tournez la molette située sur la<br />
face droite de la hausse dans le sens horlogique<br />
° trop à droite : tournez la molette située sur la<br />
face droite de la hausse dans le sens opposé<br />
° trop haut : tournez la molette située sur la face<br />
supérieure de la hausse dans le sens horlogique<br />
° trop bas : tournez la molette située sur la face<br />
supérieure de la hausse dans le sens opposé<br />
Procédez pas à pas en contrôlant la position de<br />
l' impact jusqu'à ce que vous soyez satisfait de la<br />
précision de votre arme.<br />
Les réglages que vous venez d'effectuer sont<br />
valables pour une distance, si vous effectuez des<br />
tirs à une autre distance, vous devez de nouveau<br />
procéder au réglage.<br />
MAINTENANCE<br />
Un minimum d'entretien après chaque tir<br />
assurera à votre carabine une longéivité accrue.<br />
Un entretien minimum est nécessaire après<br />
chaque tir pour profiter pendant de longues<br />
années des performances de votre carabine.<br />
Les pièces métalliques externes sont bien<br />
protégées de la corrosion par le bronzage. Il est<br />
cependant nécessaire de les protéger de l'action<br />
de l'humidité en les essuyant après chaque<br />
utilisation avec un chiffon imbibé d'huile fine pour<br />
armes.<br />
4<br />
ll est nécessaire de lubrifier de temps en temps<br />
les pièces internes (tous les 1.000 coups ou plus<br />
régulièrement si vous tirez peu).<br />
Armez la carabine (sans insérer de plomb) et<br />
versez quelques gouttes d'huile par l'orifice de<br />
chargement. Dirigez le canon vers le haut pour<br />
que l'huile s'écoule dans la chambre de<br />
compression. Terminez en tirant quelques coups<br />
avec un plomb afin d'éliminer le surplus d'huile.<br />
Effectuez cette opération en respectant les<br />
consignes de sécurité. Une détonation forte et un<br />
nuage d'huile accompagnant le tir sont des<br />
phénomènes normaux. Cela est dû à la<br />
combustion de l'huile.<br />
DANS TOUS LES CAS, NE TIREZ<br />
JAMAIS SANS PROJECTILE.<br />
Dans ce cas, les pièces mobiles ne sont pas<br />
amorties et peuvent être endommagées. Le<br />
canon doit être nettoyé à intervalles réguliers<br />
(après quelques milliers de coups), avec une<br />
brosse douce ou un chiffon imbibé d'huile.<br />
L'emploi de brosses métalliques est à proscrire<br />
car elles peuvent endommager l'intérieur du<br />
canon.<br />
Ne rangez jamais une arme à air dont le piston<br />
est armé. Outre le danger d'un tir accidentel, le<br />
ressort s'avachirait et la carabine perdrait de sa<br />
puissance.<br />
GARANTIE<br />
Cette carabine bénéficie d'une garantie totale<br />
d'un (1) an couvrant tout vice de fabrication.<br />
Les dommages résultant d'une mauvaise<br />
manipulation ou d'une usure normale sont exclus<br />
du champ d'application de la garantie.<br />
Nos obligations de garantie sont<br />
automatiquement caduques si la carabine a été<br />
démontée.
VECTIS <strong>220</strong> - VECTIS <strong>032</strong> - VECTIS <strong>026</strong> - VECTIS <strong>020</strong><br />
The rifle you have just purchased is part of the<br />
wide range of BROWNING products. Great care<br />
has been taken in the design and manufacture of<br />
your VECTIS to ensure that this rifle gwes you<br />
complet satisfaction.<br />
SAFETY MEASURES<br />
Thanks to their design, double effect air rifles are<br />
weapons which can be handled very safely.<br />
However, we advise you to take great care and to<br />
respect the following safety recommendations :<br />
1. Before handling the rifle, ensure that it is not<br />
loaded.<br />
2. Always keep your weapon in the safety position<br />
when you are not shooting, even if you are sure<br />
that it is not loaded.<br />
3. Only put your index finger on the trigger when<br />
you are ready to fire, otherwise hold it against<br />
the trigger guard.<br />
4. Never point your weapon at anyone, even if you<br />
are sure it is unloaded.<br />
When unloaded, always treat your rifle as if it<br />
were loaded.<br />
5. Always be sure where your pellets will strike<br />
and fire only when there is no risk of accidents.<br />
Look out for any ricochets.<br />
6. For you own interests as well as that of your<br />
weapon, do not introduce any foreign ogjects<br />
get into the barrel.<br />
7. Only use your weapon in places where it does<br />
not constitute a danger to others and where the<br />
noise will not disturb others.<br />
8. Unload you rifle when not in use. Store the rifle<br />
and ammunition in different places and out of<br />
the reach of children.<br />
9. For safety reasons as well as ballistic performance,<br />
only use high quality pellets which are<br />
exactly the correct calibre for your weapon.<br />
10. Choose a target which allows you to fire safely<br />
and which is able to stop<br />
projectiles. Do not use a target which could<br />
cause ricochets. We would advise you to use<br />
a pellet trap box or, if this is not possible, a low<br />
density 22mm-thick chip board panel.<br />
11. Any alteration to the rifle mechanism may lead<br />
to a malfunction of the rifle. Altering the rifle<br />
may make its use dangerous.<br />
12. Any unusual functioning of the rifle, such as<br />
excessive reduction of the trigger pull or the<br />
trigger stroke may indicate wear. If this occurs,<br />
the weapon should be checked by a gunsmith.<br />
13. If your rifle falls over and subsequently functions<br />
abnormally have it checked immediately<br />
by a gunsmith.<br />
14. If you set the trigger pull below 800 to 900 g,<br />
there is a risk of accidental firing fire if the<br />
weapon falls over or receives an impact.<br />
15. For the VECTIS <strong>220</strong>, never put your hand<br />
between the lever and the rifle. Ensure that<br />
nobody is in the lever’s path.<br />
WARNING :<br />
The use of this rifle is reserved for adults only.<br />
Misuse can lead to serious injury or even death.<br />
Ammunition is dangerous up to 1000 metres<br />
under normal circumstances.<br />
5
TECHNICAL SPECIFICATIONS<br />
MODEL VECTIS <strong>020</strong> VECTIS <strong>026</strong> VECTIS <strong>032</strong> VECTIS <strong>220</strong><br />
BARREL Pivoting Pivoting Pivoting Fixed<br />
Length 47 cm 47 cm 47 cm 46 cm<br />
Calibre 4.5 mm 4.5 mm 4.5 mm 4.5 mm<br />
Rear sights micrometric micrometric micrometric Micrometric<br />
mounted on<br />
dovetail<br />
STOCK Beech wood Beech wood Beech wood Beech wood<br />
Finish Satin-finished varnish Satin-finished varnish Satin-finished varnish Satin-finished varnish<br />
Chequering no yes yes yes<br />
TOTAL LENGTH 101 cm 111 cm 114 cm 115.5 cm<br />
TOTAL WEIGHT 2.9 kg 3.15 kg 3.4 kg 4.22 kg<br />
SHELL 11 mm track 11 mm track 11 mm track 11 mm track<br />
SAFETY Non automatic Non automatic automatic automatic<br />
V0 (*)SPEED <strong>220</strong> m/sec 270 m/sec 312 m/sec 280 m/sec<br />
(*) Adaptable according to the legislation in force.<br />
USE<br />
We would advise you to read the following instructions<br />
carefully before using the rifle for the first<br />
time. Ensure that your weapon is not loaded<br />
before you handle it.<br />
SAFETY<br />
Some VECTIS rifles (<strong>032</strong> – <strong>220</strong>) have an automatic<br />
safety catch which is engaged each time it is<br />
re-loaded. You simply have to remove the safety<br />
catch before you fire.<br />
For the VECTIS <strong>220</strong> model, to cock the rifle, set<br />
the safety catch to ON. It is impossible to activate<br />
the lever if the safety catch is in the OFF position<br />
(red dot). If you cannot move the lever when the<br />
safety catch is in the ON position, this probably<br />
means that the rifle is already cocked.<br />
To set the safety catch to the ON position, press<br />
6<br />
down on the small lever which is under the cocking<br />
lever. Now you can cock your rifle. Once the<br />
rifle is cocked, press down on the small lever<br />
which is opposite the trigger to remove the safety<br />
catch.<br />
Your weapon is now ready to fire.<br />
COCKING<br />
For all models except the VECTIS <strong>220</strong>, re-loading<br />
is carried out by pivoting the barrel. You simply<br />
take the barrel by the far end and bring it back<br />
towards the hand guard until it reaches the stopping<br />
point. Then return it to its initial position. Your<br />
weapon is now ready to fire.
For the <strong>220</strong> model, press the butt plate firmly<br />
against your hip or a hard surface.<br />
Ensure that you can maintain this position<br />
throughout the entire procedure.<br />
Grip the far end of the lever firmly making sure that<br />
you don’t catch your fingers, between the lever<br />
and the stock.<br />
Whilst cocking, do not move the hand which is on<br />
the lever.<br />
The DOUBLE EFFECT cocking mechanism is<br />
based on the two-step principle.<br />
1.Unlock the cocking lever by pushing the small<br />
lever which is on the cocking lever. Move the cocking<br />
lever forward as far as it will go until you hear<br />
a click, which means it is locked .<br />
WARNING!<br />
Warning do not move the lever suddenly.<br />
2.Return the lever to its initial position so that it is<br />
completely embedded in the stock. The first few<br />
times you use it do not hesitate to insist on the<br />
return action to be sure that the lever is correctly<br />
positioned.<br />
Your VECTIS <strong>220</strong> is now cocked. The safety catch<br />
is automatically engaged.<br />
WARNING!<br />
Do not under-estimate the force required for the<br />
cocking process, particularly for the return action.<br />
NEVER LET GO OF THE LEVER! This could<br />
result in the mechanism being damaged, which<br />
would make the rifle unusable.<br />
However, if this does occur and the lever remains<br />
blocked in the open position, you would have to<br />
ask your gunsmith to examine your rifle.<br />
INSERTING THE PELLET<br />
In order to obtain the best results from your rifle,<br />
only use high quality 4,5 mm (.177) calibre ammunition.<br />
For the VECTIS <strong>032</strong> - <strong>026</strong> – <strong>020</strong> models,<br />
insert the lead into its compartment when the barrel<br />
is pivoted. For the <strong>220</strong> model, open the loading<br />
device by pulling the lever upwards. Insert the pellet<br />
the right way round as shown in the diagram<br />
next to the compartment.<br />
Push the lever down so that it locks completely.<br />
FIRING SAFELY<br />
When you choose the place where you are going<br />
to fire, check that no-one is in the firing line and<br />
that there is no risk of ricochets off hard surfaces.<br />
Point the barrel at the target. Release the safety<br />
catch, take up the correct firing position with the<br />
butt plate positioned in the hollow of your shoulder.<br />
Before you fire, ensure that all of the safety measures<br />
are being respected.<br />
Take aim at the target and pull the trigger. Before<br />
putting your weapon away, ensure that it is<br />
unloaded and de-cocked. With the <strong>220</strong> model, you<br />
should be able to move the cocking lever to check<br />
that your rifle is not cocked.<br />
Replace the latter in the stock and press the lever<br />
which is under the cocking lever. The <strong>220</strong>, <strong>026</strong> and<br />
<strong>032</strong> models are equipped with a trigger whose<br />
triggering weight can be adjusted using a screw<br />
which is situated in the hand guard. To increase<br />
the trigger’s weight, turn the screw clockwise.<br />
AIMING<br />
The first time that you use your weapon, fire several<br />
shots in order to adjust it.<br />
FRONT SIGHT<br />
To adapt itself to different users’ preference, the S<br />
rifle is provided with a set of interchangeable front<br />
sight blades.<br />
7
These front sight blades are held in the front sight<br />
body by a threaded, knurled cartridge. To change<br />
the blade, partly unscrew the cartridge, remove<br />
the blade and insert the new one. Ensure that you<br />
screw the cartridge back firmly into place, whilst<br />
checking that the new blade is correctly clipped<br />
into the notches. Handle these blades with great<br />
care.<br />
REAR SIGHTS<br />
The entire VECTIS range is equipped with micrometric<br />
rear sights which enable the point of impact<br />
to be adjusted vertically as well as horizontally.<br />
If the pellet impact point is :<br />
Too far left : turn the knob which is on the right side<br />
of the rear sights clockwise.<br />
Too far right : turn the knob which is on the right<br />
side of the rear sights in the opposite direction.<br />
Too high : turn the knob which is on the upper side<br />
of the rear sights clockwise.<br />
Too low : : turn the knob which is on the upper side<br />
of the rear sights in the opposite direction.<br />
Continue step by step checking the position of<br />
impact until you are satisfied with your weapon’s<br />
accuracy.<br />
The adjustments which you have just made are<br />
valid for a distance ; if you fire shots at another distance,<br />
you will have to carry out these adjustments<br />
again.<br />
MAINTENANCE<br />
After each shot a minimum amount of maintenance<br />
will ensure that your rifle has a longer life.<br />
A minimum amount of maintenance is required<br />
after each shot to enjoy your rifle’s performance<br />
for many long years.<br />
The external metallic parts are well protected from<br />
corrosion by bronzing. However it is necessary to<br />
protect them from damp by wiping them with a<br />
cloth soaked in thin-bodied oil. After use weapons<br />
after each use.<br />
From time to time, the internal parts should be<br />
lubricated (every 1000 shots, or more regularly if<br />
you don’t shoot very much).<br />
Cock the rifle (without inserting pellets)<br />
8<br />
and pour a few drops of oil into the loading port.<br />
Hold the barrel upwards so that the oil runs down<br />
into the compression chamber.<br />
Finish by firing a few shots with a pellet to eliminate<br />
any surplus oil.<br />
When carrying out this operation, ensure that the<br />
safety measures are respected. Do not be surprised<br />
by a strong detonation and a cloud of oil<br />
when you fire the first shot. This is due to oil combustion.<br />
NEVER FIRE WITHOUT A<br />
PROJECTILE..<br />
If this happens, the moving parts are not buffered<br />
and could be damaged. The barrel should be<br />
cleaned at regular intervals (after several thousand<br />
shots), using a soft brush and a cloth soaked<br />
in oil.<br />
The use of metal brushes should be avoided, as<br />
they can damage the inside of the barrel.<br />
Never store an air rifle with its piston cocked. Apart<br />
from the risk of it going off accidentally, the spring<br />
will wear out and the rifle will lose power.<br />
WARRANTY<br />
This rifle is subject to a full one (1) year warranty<br />
which covers any manufacturing defects.<br />
Damage resulting from incorrect handling or normal<br />
wear and tear are excluded from the warranty.<br />
Our warranty obligations are automatically void if<br />
the rifle has been taken apart.
VECTIS <strong>220</strong> - VECTIS <strong>032</strong> - VECTIS <strong>026</strong> - VECTIS <strong>020</strong><br />
Sie haben eine Waffe aus dem großen Sortiment<br />
der BROWNING - Produkte gekauft. Die<br />
Entwicklung und Herstellung Ihrer VECTIS wurde<br />
mit größter Sorgfalt vorgenommen, damit diese<br />
Waffe Ihren Ansprüchen maximal entspricht.<br />
VORSICHTSMASSNAHMEN<br />
Die Luftgewehre mit doppeltem Druckluft - Antrieb<br />
sind so entworfen, dass Sie mit diesen Waffen in<br />
aller Sicherheit umgehen können. Wir empfehlen<br />
Ihnen jedoch, Vorsicht zu bewahren und die folgenden<br />
Vorschriften zu beachten;<br />
1. Vor jeder Handhabung, versichern Sie sich,<br />
dass die Waffe nicht geladen ist.<br />
2. Solange Sie nicht schießen, lassen Sie grundsätzlich<br />
die Sicherheitsvorrichtung eingeschaltet,<br />
selbst wenn Sie sicher sind, dass sie nicht<br />
geladen ist.<br />
3. Legen Sie den Zeigefinger erst auf den Abzug,<br />
wenn Sie sicher sind, abdrücken zu wollen,<br />
ansonsten halten Sie Ihn gegen den<br />
Abzugsbügel.<br />
4. Richten Sie nie Ihre Waffe auf jemanden, selbst<br />
wenn Sie sicher sind, dass sie nicht geladen<br />
ist. Betrachten Sie sie immer so, als wäre sie<br />
geladen.<br />
5. Achten Sie immer darauf, wo Ihre Geschosse<br />
landen werden und schießen Sie nur, wenn<br />
wirklich keine Unfallgefahr besteht.<br />
Beachten Sie die Gefahr von Querschlägern.<br />
6. Vermeiden Sie Ihnen und Ihrer Waffe zuliebe<br />
jegliche Einführung von Fremdkörpern in den<br />
Lauf.<br />
7. Benutzen Sie die Waffe nur an Orten, an denen<br />
jegliche Gefahr oder Belästigung für andere<br />
Personen ausgeschlossen ist.<br />
8. Bewahren Sie Ihre Waffe nie in geladenem<br />
Zustand auf. Ihre Waffe und die Munition<br />
müssen getrennt und außer Reichweite von<br />
Kindern aufbewahrt werden.<br />
9. Benutzen Sie sowie aus Sicherheitsgründen<br />
als auch für den bestmöglichen ballistischen<br />
nur Geschosse, die von der Qualität und vom<br />
Kaliber her Ihrer Waffe genau entsprechen.<br />
10. Wählen Sie eine Zielscheibe, die Ihnen<br />
erlaubt, in Sicherheit zu schießen und welche<br />
in der Lage ist, die Geschosse abzubremsen.<br />
Benutzen Sie keine Zielscheibe, welche<br />
Querschläger erzeugen könnte.<br />
Wir empfehlen ihnen, eine Blei falle zu<br />
benutzen, oder, wenn nicht vorhanden, eine<br />
weiche dicke von 22 mm Pressholzplatte.<br />
11. Jede mechanische Veränderung der Waffe<br />
kann ein schlechtes Funktionieren mit sich<br />
bringen. Die Benutzung der Waffe kann nach<br />
einer Veränderung gefährlich sein.<br />
12. Jede Funktionseinschränkung, wie ein starkes<br />
Nachlassen der Auslösungskraft oder des<br />
Abzugslaufes, kann auf eine Abnutzung hinweisen.<br />
In diesem Falle ist es angebracht, Ihre<br />
Waffe von einem Waffenhändler prüfen zu<br />
lassen und das defekte Teil reparieren oder<br />
auswechseln zu lassen.<br />
13. Falls Ihre Waffe heruntergefallen ist und nicht<br />
mehr normal funktioniert, sollten Sie sie von<br />
einem Waffenhändler überprüfen lassen.<br />
14. Wenn Sie die Auslösungskraft niedriger als auf<br />
800 bis 900 g einstellen, besteht Gefahr, dass<br />
die Waffe beim Herunterfallen oder nach erhaltenem<br />
Stoß ungewollt einen Schuß abgibt.<br />
15. Bei der VECTIS <strong>220</strong> dürfen Sie auf keinem Fall<br />
Ihre Hand zwischen den Spannhebel und das<br />
Gewehr legen. Achten Sie darauf, dass sich<br />
niemand im Bereich des Spannhebels befindet.<br />
ACHTUNG<br />
Diese Waffe darf nur von Erwachsenen verwendet<br />
werden. Ihre unüberlegte Benutzung kann zu<br />
schweren Verletzungen oder zum Tod führen.<br />
Die Munition ist bei normalen<br />
Benutzungsbedingungen bis zu 1000 m<br />
Entfernung gefährlich.<br />
9
TECHNISCHE SPEZIFIKATIONEN<br />
MODELL VECTIS <strong>020</strong> VECTIS <strong>026</strong> VECTIS <strong>032</strong> VECTIS <strong>220</strong><br />
LAUF aufklappbar aufklappbar aufklappbar aufklappbar<br />
Länge 47 cm 47 cm 47 cm 46 cm<br />
Kaliber 4,5 mm 4,5 mm 4,5 mm 4,5 mm<br />
Visier mikrometrisch mikrometrisch mikrometrisch mikrometrisch auf<br />
Zinke montiert<br />
SCHAFT (*) Buchenholz Buchenholz Buchenholz Buchenholz<br />
Oberfläche satiniert lackiert satiniert lackiert satiniert lackiert satiniert lackiert<br />
kariertes Muster nein ja ja ja<br />
GESAMTLÄNGE 101 cm 111 cm 114 cm 115.5 cm<br />
GESAMTGEWICHT 2,9 kg 3,15 kg 3,4 kg 4,22 kg<br />
GESTELL auf Schiene 11 mm auf Schiene 11 mm auf Schiene 11 mm auf Schiene 11 mm<br />
SICHERHEIT nicht automatisch nicht automatisch automatisch automatisch<br />
GESCHWINDIGKEIT <strong>220</strong> m/s 270 m/s 312 m/s 280 m/s<br />
(*) je nach den gültigen Regelungen<br />
BENUTZUNG<br />
Bitte lesen Sie vor der ersten Benutzung aufmerksam<br />
die folgenden Anweisungen. Versichern Sie<br />
sich davon, dass Ihre Waffe nicht geladen ist,<br />
bevor Sie sie handhaben.<br />
SICHERHEIT<br />
Einige der Waffen (VECTIS <strong>032</strong> - <strong>220</strong>) sind mit<br />
einer automatischen Sicherheitsvorrichtung ausgestattet,<br />
welche nach jedem erneuten Spannen<br />
ausgelöst wird. Es ist deshalb angebracht, die<br />
Sicherheitsvorrichtung vor jedem Schuss<br />
abzustellen.<br />
Um die Waffen vom Modell VECTIS <strong>220</strong> zu spannen,<br />
schalten Sie die Sicherung auf ON. Der<br />
Spannhebel kann nicht bedient werden, wenn die<br />
Sicherung auf OFF (roter Punkt) steht. Falls die<br />
Bedienung des Spannhebels in der Stellung ON<br />
nicht möglich ist, dann ist die Büchse höchst<br />
10<br />
wahrscheinlich schon gespannt.<br />
Um die Sicherung auf ON zu stellen, drücken Sie<br />
auf den kleinen Hebel, der sich unter dem<br />
Spannhebel befindet. Jetzt können Sie Ihre<br />
Büchse spannen. Nach dem Spannen der Büchse<br />
drücken Sie auf den kleinen Hebel, der sich<br />
gegenüber des Abzuges befindet. Jetzt ist Ihre<br />
Waffe schussbereit.<br />
DAS SPANNEN<br />
Alle Modelle außer der VECTIS <strong>220</strong> werden durch<br />
Kippen des Laufes gespannt. Sie fassen den Lauf<br />
am äußeren Ende und kippen ihn Richtung<br />
Unterhebel bis zum Anschlag. Bringen Sie Ihn<br />
anschließend in die Ausgangsposition; Ihre Waffe<br />
ist schussbereit.
Bei dem Modell <strong>220</strong> wird der Kolbenboden fest auf<br />
Ihre Hüfte oder eine feste Oberfläche gedrückt.<br />
Achten Sie darauf, dass Sie diese Position<br />
während des ganzen Hebellaufes beibehalten<br />
können.<br />
Fassen Sie den Hebel fest an seinem äußeren<br />
Ende an und gehen Sie sicher, dass Sie sich nicht<br />
die Finger zwischen dem Hebel und dem Schaft<br />
einklemmen.<br />
Fassen Sie den Hebel fest an seinem äußeren<br />
Ende an und gehen Sie sicher, dass Sie sich nicht<br />
die Finger zwischen dem Hebel und dem Schaft<br />
einklemmen.<br />
Der Spannmechanismus mit DOPPELEFFEKT<br />
geht in zwei Etappen vor sich.<br />
1. Entriegeln Sie den Spannhebel indem Sie auf<br />
den kleinen Hebel drücken, der sich auf dem<br />
Spannhebel befindet. Ziehen Sie den Spannhebel<br />
soweit heraus, bis er mit einem "Klick" einrastet.<br />
ACHTUNG !<br />
Bewegen Sie den Spannhebel nicht zu heftig.<br />
2. Bringen Sie den Spannhebel erneut in seine<br />
Ausgangsposition, er sollte sich ganz in den<br />
Schaft einfügen. Achten Sie bei den ersten<br />
Handhabungen gezielt auf die Rückführung des<br />
Hebels und versichern Sie dich, dass er sich in<br />
der richtigen Position befindet.<br />
Ihre VECTIS <strong>220</strong> ist jetzt gespannt. Die<br />
Sicherheitsvorrichtung rastet von selbst ein.<br />
ACHTUNG!<br />
Unterschätzen Sie nicht die zum Spannen<br />
benötigte Kraft, besonders beim Rücklauf.<br />
LASSEN SIE DEN HEBEL NIE LOS! Dies könnte<br />
den Mechanismus beschädigen und die Waffe<br />
unbrauchbar machen.<br />
Falls dieses trotz allem passiert und sich der<br />
Hebel in geöffneter Position blockiert, bitten Sie<br />
Ihren Waffenhändler darum, die Büchse zu überprüfen.<br />
DAS EINLEGEN DER<br />
SCHROTKÖRNER<br />
Wenn Sie von der vollen Leistungsfähigkeit der<br />
Büchse profitieren wollen, dann benutzen Sie nu<br />
Qualitätsmunition vom Kaliber 4,5 mm. (.177)<br />
Setzen Sie das Schrotkorn bei den Modellen VEC-<br />
TIS <strong>032</strong> - <strong>026</strong> - <strong>020</strong> bei gekipptem Lauf in seine<br />
Kerbe.<br />
Beim Modell <strong>220</strong> öffnen Sie die Ladevorrichtung<br />
indem Sie den Hebel nach oben bewegen. Setzen<br />
Sie das Schrotkorn, wie auf der Zeichnung neben<br />
der Kerbe angegeben, richtig herum ein. Schieben<br />
Sie den Hebel bis zum Einrasten zurück.<br />
SCHIESSEN IN VÖLLIGER<br />
SICHERHEIT<br />
Überprüfen Sie bei der Auswahl des Ortes, an<br />
dem Sie schießen wollen, dass sich niemand in<br />
der Schusslinie befindet und dass Sie keine<br />
Querschläger auf harten Oberflächen riskieren.<br />
Richten Sie den Lauf auf die Zielscheibe.<br />
Entsichern Sie und nehmen Sie mit dem<br />
Kolbenboden gegen die Schulterbeuge eine korrekte<br />
Haltung ein.<br />
Versichern Sie sich vor dem Schießen davon,<br />
dass alle Sicherheitsmaßnahmen eingehalten<br />
sind.<br />
Zielen Sie auf die Scheibe und drücken Sie auf<br />
den Abzug. Überzeugen Sie sich vor dem<br />
Weglegen der Waffe davon, dass sie entladen und<br />
nicht gespannt ist. Beim Modell <strong>220</strong> bewegen Sie<br />
zur Kontrolle den Spannhebel. Dies ist nur möglich<br />
wenn die Waffe nicht gespannt ist. Bringen Sie<br />
den Spannhebel wieder in seine<br />
Ausgangsstellung im Schaft und drücken Sie auf<br />
den Hebel, der sich unter dem Spannhebel befindet.<br />
Die Modelle <strong>220</strong>, <strong>026</strong> und <strong>032</strong> sind mit einem<br />
Abzug ausgestattet, dessen Auslösekraft mit Hilfe<br />
einer Schraube einstellbar ist, die sich im<br />
Unterhebel befindet. Um den Widerstand des<br />
Abzugs zu vergrößern, drehen Sie die Schraube<br />
im Uhrzeigersinn.<br />
DAS ZIELEN<br />
Wenn Sie Ihre Waffe zum ersten Mal benutzen,<br />
sollten Sie mehrere Schüsse abgeben, um die<br />
zum Zielen benötigten Einstellungen<br />
vorzunehmen.<br />
GUIDON<br />
11
DAS RICHTKORN<br />
Die Waffe wird mit einem Satz auswechselbarer<br />
Richtkornbalken geliefert, um den Vorlieben unterschiedlicher<br />
Schützen zu entsprechen.<br />
Diese Richtkornbalken sind mit Hilfe einer<br />
gerädelten Schraubbuchse am Richtkorn befestigt.<br />
Um die Balken auszuwechseln, schrauben<br />
Sie die Buchse leicht auf, ziehen den Balken heraus<br />
und setzen einen neuen ein. Schrauben Sie<br />
die Buchse wieder fest zu und versichern Sie sich,<br />
dass der Balken richtig in den vorgesehenen<br />
Einkerbungen sitzt. Gehen Sie vorsichtig mit den<br />
Balken um.<br />
DAS VISIER<br />
Das ganze VECTIS - Sortiment ist mit<br />
mikrometrischen Visieren ausgerüstet, welche<br />
sowie die vertikale als auch die horizontale<br />
Aufschlagpunkteinzustellung ermöglichen.<br />
Befindet sich der Aufschlagpunkt des Schrotkorns :<br />
Zu weit links : Drehen Sie das an der rechten Seite<br />
des Visiers angebrachte Rädchen im<br />
Uhrzeigersinn.<br />
Zu weit rechts : Drehen Sie das an der rechten<br />
Seite des Visiers angebrachte Rädchen in die entgegengesetzte<br />
Richtung.<br />
Zu weit oben : Drehen Sie das oberhalb des<br />
Visiers angebrachte Rädchen im Uhrzeigersinn.<br />
Zu weit unten : Drehen Sie das oberhalb des<br />
Visiers angebrachte Rädchen in die entgegengesetzte<br />
Richtung.<br />
Kontrollieren Sie den Aufschlag Schritt für Schritt<br />
bis Sie mit der Genauigkeit Ihrer Waffe zufrieden<br />
sind.<br />
Die Einstellungen, die Sie vorgenommen haben,<br />
gelten nur für eine Entfernung. Wenn Sie aus einer<br />
anderen Entfernung schießen wollen, müssen Sie<br />
eine erneute Einstellung vornehmen.<br />
WARTUNG<br />
Eine minimale Wartung nach jedem Schießen<br />
erhöht die Lebensdauer Ihrer Büchse. Diese minimale<br />
Wartung nach jedem Schießen ist nötig,<br />
damit Sie jahrelang von der Leistungsfähigkeit<br />
Ihrer Büchse profitieren.<br />
Die metallischen Außenteile sind durch Brünieren<br />
12<br />
rostgeschützt. Es ist jedoch angebracht, sie nach<br />
jeder Benutzung mit einem in Waffenöl getränkten<br />
Lappen abzureiben, um sie gegen Feuchtigkeit zu<br />
schützen.<br />
Von Zeit zu Zeit (alle 1000 Schüsse oder öfter,<br />
wenn Sie wenig schießen) sollten die Innenteile<br />
geölt werden.<br />
Spannen Sie die Büchse (ohne Schrot einzulegen)<br />
und geben Sie einige Tropfen Waffenöl in die<br />
Ladeöffnung.<br />
Halten Sie den Lauf nach oben, damit das Öl bis<br />
in die Druckkammer läuft. Anschließend feuern<br />
Sie ein paar Schüsse ab, um das überflüssige Öl<br />
zu beseitigen. Beachten Sie bei diesem Vorgang<br />
die Sicherheitsvorschriften. Es ist ein normales<br />
Phänomen, dass dieser Vorgang von einem lauten<br />
Knall und einer Rauchwolke begleitet wird.<br />
Dies rührt von der Ölverbrennung her.<br />
UNTER ALLEN UMSTÄNDEN<br />
SCHIESSEN SIE NIE OHNE<br />
GESCHOSS<br />
In diesem Fall werden die beweglichen Teile nicht<br />
gedämpft und können beschädigt werden.<br />
Der Lauf sollte in regelmäßigen Abständen (nach<br />
einigen tausend Schüssen) mit einer weichen<br />
Bürste oder mit einem in Öl getränkten Lappen<br />
gereinigt werden.<br />
Es ist nicht angebracht, hierfür eine Drahtbürste<br />
zu benutzen, da sie das Laufinnere beschädigen<br />
könnte.<br />
Räumen Sie nie ein Luftgewehr mit gespanntem<br />
Kolben weg. Sie gehen nicht nur die Gefahr ein,<br />
dass ein ungewollter Schuss abgeht, sondern die<br />
Feder könnte ausleiern und die Büchse ihre<br />
Leistungsfähigkeit verlieren.<br />
GARANTIE<br />
Diese Büchse steht für alle Fabrikationsfehler ein<br />
(1) Jahr lang unter voller Garantie. Schäden, die<br />
von unsachgemäßer Behandlung oder von normaler<br />
Abnutzung herrühren, sind von der Garantie<br />
ausgeschlossen.<br />
Unsere Garantie-Verpflichtungen sind nicht mehr<br />
gültig wenn die Büchse demontiert wurde.
VECTIS <strong>220</strong> - VECTIS <strong>032</strong> - VECTIS <strong>026</strong> - VECTIS <strong>020</strong><br />
La carabina che avete appena acquistato fa parte<br />
della vasta gamma di prodotti BROWNING. La<br />
progettazione e la fabbricazione del vostro VEC-<br />
TIS hanno fatto l’oggetto di attente cure, affinché<br />
questa vi procuri una totale soddisfazione.<br />
MISURE DI SICUREZZA<br />
Le carabine ad aria compressa a doppio effetto,<br />
grazie alla loro particolare concezione, sono delle<br />
armi che possono essere maneggiate con grande<br />
sicurezza Vi consigliamo nonostante tutto di utilizzarle<br />
con prudenza e di rispettare i seguenti consigli<br />
:<br />
1. Prima di ogni maneggio, assicurarsi che l’arma<br />
non sia carica.<br />
2. Finché non si spari, tenere sempre l’arma in<br />
posizione di sicurezza, anche se si è sicuri che<br />
sia vuota<br />
3. Posizionare il dito indice sul grilletto soltanto<br />
quando si è sul punto di sparare, altrimenti, tenerlo<br />
sul ponticello.<br />
4. Non puntare mai l’arma in direzione di qualcuno,<br />
anche se si è certi che sia scarica.<br />
Apportargli sempre l’attenzione dovuta ad<br />
un’arma carica.<br />
5. Sincerarsi sempre del luogo di caduta dei proiettili<br />
e sparare soltanto quando non vi sia alcun<br />
rischio d’incidente. Attenzione ai rimbalzi.<br />
6. Nel vostro interesse come in quello della vostra<br />
arma, evitare l’introduzione di corpi estranei<br />
nella canna.<br />
7. Utilizzare la vostra arma soltanto in luoghi reputati<br />
sicuri e senza inquinamento acustico per<br />
le persone.<br />
8. Non riporre mai la vostra arma scarica. Riporre<br />
l’arma e le cartucce separatamente e al di fuori<br />
della portata dei bambini.<br />
9. Per ragioni di sicurezza e di rendimento balistico,<br />
utilizzare esclusivamente proiettili di qualità<br />
e del calibro corrispondente alla vostra arma.<br />
10. Scegliere un bersaglio che vi permetta di<br />
sparare in tutta tranquillità e capace di bloccare<br />
i proiettili. Non utilizzare bersagli che possano<br />
provocare dei rimbalzi. Vi consigliamo<br />
l’utilizzo di una trappola per pallini oppure di un<br />
pannello agglomerato di debole densità e di<br />
uno spessore di 22 mm.<br />
11. Ogni modifica del meccanismo dell’arma può<br />
provocare un malfunzionamento di quest’ultima.<br />
Alterare l’arma può rendere pericolosa la<br />
sua utilizzazione.<br />
12. Qualsiasi funzionamento anormale, come la<br />
diminuzione eccessiva della forza di partenza<br />
o della corsa del grilletto, indicano una possibile<br />
usura. Sarà allora necessario ricorrere ad<br />
un armaiolo per far controllare l’arma e sostituire<br />
o riparare il pezzo difet toso.<br />
13. Se la vostra arma, a seguito di una caduta,<br />
dovesse presentare un funzionamento anormale,<br />
rivolgetevi ad un armaiolo per farla verificare.<br />
14. Quando si regola la forza di partenza al di<br />
sotto di 800 a 900 gr, esiste un pericolo di tiro<br />
intempestivo se l’arma cade o subisce un<br />
colpo.<br />
15. Per la VECTIS <strong>220</strong>, non porre mai la mano tra<br />
la leva di caricamento e il fucile. Assicurarsi<br />
che non vi sia nessuno sulla traiettoria della<br />
leva di caricamento.<br />
ATTENZIONE :<br />
L’uso di questa carabina è riservata esclusivamente<br />
agli adulti. Una utilizzazione inconsiderata<br />
può causare ferite serie o letale. Il piombo è pericoloso<br />
fino a 1000 metri in condizioni normali di<br />
utilizzo.<br />
13
SPECIFICHE TECNICHE<br />
MODELLO VECTIS <strong>020</strong> VECTIS <strong>026</strong> VECTIS <strong>032</strong> VECTIS <strong>220</strong><br />
CANNA A BASCULA A BASCULA A BASCULA FISSA<br />
Lunghezza 47 cm 47 cm 47 cm 46 cm<br />
Calibro 4,5 mm 4,5 mm 4,5 mm 4,5 mm<br />
Tacca di mira Micrometrica micrometrica micrometrica Micrometrica montata<br />
su coda di rondine<br />
CALCIO Faggio Faggio Faggio Faggio<br />
Finitura Vernice satinata Vernice satinata Vernice satinata Vernice satinata<br />
Zigrinatura no si si si<br />
LUNGHEZZA TOTALE 101 cm 111 cm 114 cm 115.5 cm<br />
PESO TOTALE 2,9 kg 3,15 kg 3,4 kg 4,22 kg<br />
FUSTO Su rotaia 11 mm Su rotaia 11 mm Su rotaia 11 mm Su rotaia 11 mm<br />
SICUREZZA Non automatica Non automatica automatica automatica<br />
V0 (*)VELOCITÀ <strong>220</strong> m/sec 270 m/sec 312 m/sec 280 m/sec<br />
(*) Adattabile a seconda delle norme in vigore<br />
UTILIZZAZIONE<br />
Alla prima utilizzazione, vi consigliamo di leggere<br />
attentamente le istruzioni seguenti. Assicurarsi<br />
che la vostra arma non sia caricata prima di<br />
maneggiarla.<br />
SICUREZZA<br />
Alcune carabine VECTIS (<strong>032</strong> – <strong>220</strong>) sono dotate<br />
di una sicura automatica che si innesca dopo ogni<br />
riarmo.<br />
È necessario pertanto togliere questa sicura<br />
prima di ogni tiro.<br />
Sul modello VECTIS <strong>220</strong>, per caricare la carabina,<br />
posizionare la sicura su ON. Non è possibile<br />
azionare la leva se la sicura è su OFF (punto<br />
rosso). Se lo spostamento della leva non è possibile<br />
con la sicura su ON, probabilmente significa<br />
che la carabina è già caricata.<br />
14<br />
Per posizionare la sicura su ON, premere a fondo<br />
la piccola leva situata sotto la leva di caricamento.<br />
Adesso, potete caricare la vostra carabina. Dopo<br />
aver caricato la carabina, premere sulla piccola<br />
leva situata di fronte alla coda del grilletto per ritirare<br />
la sicura.<br />
La vostra arma è pronta al fuoco.<br />
CARICAMENTO<br />
Per tutti i modelli a l’eccezione del VECTIS <strong>220</strong>, il<br />
riarmo si effettua per bascula della canna. Occorre<br />
di conseguenza prendere la canna all’estremità e<br />
riportarla verso il guardamano fino al suo punto di<br />
arresto. Riportarla poi nella posizione iniziale, la<br />
vostra arma è pronta al fuoco.
Per il modello <strong>220</strong>, premere con fermezza il cuscinetto<br />
ammortizzatore sulla vostra anca o su una<br />
superficie rigida.<br />
Assicurarsi di poter mantenere questa posizione<br />
durante tutta la corsa della leva.<br />
Prendere con fermezza la leva all’estremità stando<br />
attenti a non inscrastrare le dita tra la leva e il<br />
calcio.<br />
Non spostare la mano sulla leva durante il caricamento.<br />
Il meccanismo di caricamento a DOPPIO EFFET-<br />
TO si basa sul principio di caricamento in due<br />
tappe.<br />
1.Aprire la leva di caricamento premendo sulla<br />
piccola leva situata sulla leva stessa. Portare la<br />
leva fino al " clic " di chiusura di fine corsa.<br />
ATTENZIONE!<br />
Non spostare brutalmente la leva di armamento.<br />
2.Riportare la leva nella posizione iniziale in modo<br />
che sia interamente incastrata nel calcio. Durante<br />
i primi maneggi, non esitate ad insistere durante il<br />
movimento di ritorno per essere sicuri che la leva<br />
sia ben posizionata.<br />
Il vostro VECTIS <strong>220</strong> è caricato. La sicura è<br />
innescata automaticamente.<br />
ATTENZIONE!<br />
Non sottovalutare la forza necessaria al caricamento,<br />
particolarmente durante la corsa di ritorno.<br />
NON LASCIARE MAI LA LEVA! Si potrebbero<br />
verificare dei danni al meccanismo che potrebbero<br />
rendere inutilizzabile la vostra carabina.<br />
Se, nonostante tutto, questo dovesse succedere e<br />
che la leva dovesse restare bloccata in posizione<br />
aperta, chiedere al vostro armaiolo di esaminare<br />
la carabina.<br />
INSERIMENTO DEL PIOMBO<br />
Per ottenere le migliori performance dalla vostra<br />
carabina, utilizzare soltanto munizioni di qualità<br />
del calibro 4,5 mm (.177). Per i modelli VECTIS<br />
<strong>032</strong> - <strong>026</strong> – <strong>020</strong>, porre il piombo nel compartimento<br />
quando la canna è a bascula.<br />
Per il modello <strong>220</strong>, aprire il dispositivo di caricamento<br />
azionando la leva verso l’alto. Introdurre il<br />
piombo correttamente così come indicato nella<br />
figura accanto al compartimento.<br />
Abbassare la leva sino ad ottenere lo scatto di<br />
agganciamento in chiusura.<br />
SPARARE IN TUTTA SICUREZZA<br />
Quando scegliete un luogo dove sparare, verificare<br />
che nessuno si trovi nella linea di tiro e che<br />
non ci siano rischi di rimbalzi su superfici dure.<br />
Puntare la canna verso il bersaglio. Togliere la<br />
sicura, installarsi in posizione corretta con il cuscinetto<br />
ammortizzatore posizionato nel cavo della<br />
spalla.<br />
Prima di sparare, assicurarsi che tutte le misure di<br />
sicurezza siano rispettate.<br />
Mirare il bersaglio e premere sul grilletto. Prima di<br />
riporre l’arma, assicurarsi che sia scarica e disarmata.<br />
Con il modello <strong>220</strong>, per controllare che la<br />
vostra carabina sia scarica, dovete essere in<br />
grado di spostare la leva di caricamento.<br />
Riposizionare quest’ultima nel calcio e premere<br />
sulla leva situata sotto la leva di caricamento. I<br />
modelli <strong>220</strong>, <strong>026</strong> e <strong>032</strong> sono dotati di un grilletto il<br />
cui peso di partenza può essere regolato con l’aiuto<br />
di una vite situata nel guardamano. Per<br />
aumentare il peso del grilletto, avvitare in senso<br />
orario.<br />
MIRA<br />
Alla prima utilizzazione della vostra arma, sparare<br />
diversi colpi per regolarla.<br />
MIRINO<br />
Per adattarsi alle esigenze dei vari tiratori, la carabina<br />
S è fornita con un set di lame-mirini intercambiabili.<br />
15
Queste lame-mirino sono mantenute nel corpo del<br />
mirino tramite una bussola filettata e zigrinata. Per<br />
sostituire la lama, allentare parzialmente la bussola,<br />
togliere la lama e inserire la nuova. Avvitare<br />
con fermezza la bussola assicurandosi allo stesso<br />
tempo che la nuova lama sia ben posizionata nelle<br />
tacche. Maneggiare queste lame con precauzione.<br />
TACCA DI MIRA<br />
L’insieme della gamma VECTIS è dotata di tacche<br />
di mira micrometriche che permettono una regolazione<br />
del punto d’impatto sia in verticale che in<br />
orizzontale.<br />
Se il punto d’impatto del piombo si situa :<br />
Troppo a sinistra : girare la molla situata sulla<br />
parte destra della tacca di mira nel senso orario.<br />
Troppo a destra : girare la molla situata sulla parte<br />
destra della tacca di mira nel senso opposto.<br />
Troppo in alto : girare la molla situata sulla parte<br />
superiore della tacca di mira nel senso orario.<br />
Troppo in basso : girare la molla situata sulla parte<br />
superiore della tacca di mira nel senso opposto.<br />
Procedere a passo a passo controllando la<br />
posizione d’impatto finchè si è completamente<br />
soddisfatti della precisione della vostra arma.<br />
Le regolazioni appena effettuate sono valide per<br />
una data distanza ; se volete effettuare dei tiri ad<br />
un’altra distanza, dovete precedere ad una nuova<br />
regolazione.<br />
MANUTENZIONE<br />
Dopo ogni tiro, un minimo di manutenzione assicurerà<br />
alla vostra carabina un aumento della durata<br />
di vita.<br />
Un minimo di manutenzione è indispensabile<br />
dopo ogni tiro per profittare a lungo delle performance<br />
della vostra carabina.<br />
Le parti metalliche esterne sono ben protette dalla<br />
corrosione tramite la bronzatura. È comunque<br />
indispensabile proteggerle dall’umidità asciugandole<br />
dopo ogni utilizzazione con un panno bagnato<br />
con olio per armi.<br />
Ogni tanto, lubrificare le parti interne (ogni 1000<br />
colpi o più regolarmente se sparate poco)<br />
Armate la carabina (senza inserire piombo) e ver-<br />
16<br />
sate alcune goccie d’olio tramite la bocchetta di<br />
caricamento.<br />
Dirigete la canna verso l’alto affinchè l’olio scorri<br />
nella camera di compressione.<br />
Concludete sparando qualche colpo con un piombo<br />
per eliminare il sovrappiù d’olio.<br />
Effettuate questa operazione rispettando le consegne<br />
di sicurezza. Una forte detonazione ed una<br />
nuvola d’olio durante il tiro sono fenomeni normali.<br />
Ciò è dovuto alla combustione dell’olio.<br />
IN OGNI CASO, NON SPARATE MAI<br />
SENZA PROIETTILE.<br />
In questo caso, le parti mobili non sono ammortizzate<br />
e possono essere danneggiate. La canna<br />
deve essere pulita ad intervalli regolari (dopo<br />
alcune migliaia di colpi), con uno scovolo o con un<br />
panno intriso d’olio.<br />
L’impiego di spazzole metalliche è sconsigliato<br />
poichè possono danneggiare l’interno della<br />
canna.<br />
Non riporre mai un’arma ad aria il cui pistone è<br />
armato. Oltre al pericolo di tiro accidentale, la<br />
molla si sformerebbe e la carabina perderebbe<br />
della sua potenza.<br />
GARANZIA<br />
Questa carabina fa l’oggetto di una garanzia integrale<br />
di un (1) anno e copre ogni vizio di fabbricazione.<br />
I danni causati da un cattivo maneggio o a seguito<br />
di una usura normale sono esclusi dal campo di<br />
applicazione della detta garanzia.<br />
I nostri obblighi di garanzia sono automaticamente<br />
nulli se la carabina è stata smontata.
VECTIS <strong>220</strong> - VECTIS <strong>032</strong> - VECTIS <strong>026</strong> - VECTIS <strong>020</strong><br />
La carabina que acaba de adquirir forma parte de<br />
la extensa gama de productos BROWNING. Su<br />
carabina VECTIS ha sido objeto de una concepción<br />
y una fabricación esmeradas, a fin de que le<br />
proporcione las mayores satisfacciones.<br />
MEDIDAS DE PRECAUCIÓN<br />
En razón de su concepción, las carabinas de aire<br />
comprimido de doble efecto son armas que<br />
pueden manipularse con enorme seguridad.<br />
No obstante, le recomendamos que las utilice con<br />
prudencia y que observe los siguientes consejos:<br />
1. Antes de cualquier manipulación, asegúrese<br />
de que el arma no está cargada.<br />
2. Mientras no dispare, mantenga su arma en<br />
posición segura, incluso si está convencido<br />
de que se encuentra vacía.<br />
3. No coloque el índice en el disparador hasta<br />
que esté a punto de disparar. En caso contrario,<br />
manténgalo fuera del guardamonte.<br />
4. En ningún caso apunte su arma contra<br />
alguien, incluso estando seguro de que se<br />
halla descargada. Cónsiderela siempre como<br />
si fuera un arma cargada.<br />
5. Conozca siempre el lugar en el que van a<br />
impactar sus proyectiles y dispare sólo cuando<br />
no haya riesgo de accidentes. Atención a<br />
los rebotes.<br />
6. Tanto en beneficio suyo como de su arma,<br />
evite introducir cualquier cuerpo extraño en el<br />
cañón.<br />
7. Utilice su arma sólo en aquellos lugares que<br />
no presenten peligro ni molestia alguna para<br />
las personas.<br />
8. No guarde nunca su arma estando cargada.<br />
Guarde su arma y las municiones en lugares<br />
separados y fuera del alcance de los niños.<br />
9. Por razones de seguridad y de rendimiento<br />
balístico, utilice únicamente proyectiles de<br />
calidad y del calibre justo de su arma.<br />
10. Escoja un blanco que le permita disparar con<br />
completa seguridad y que esté en condiciones<br />
de detener los proyectiles. No utilice<br />
nunca un blanco que pueda originar rebotes.<br />
Le aconsejamos que utilice una trampa para<br />
balines o, en su defecto, un tablero de aglomerado<br />
de poca densidad y de 22 mm de<br />
espesor.<br />
11. Toda modificación introducida en el mecanismo<br />
del arma puede conllevar el funcionamiento<br />
defectuoso de la misma y puede<br />
hacer que su utilización resulte peligrosa.<br />
12. Cualquier funcionamiento anormal, como la<br />
disminución excesiva de la fuerza de salida o<br />
del recorrido del disparador, indica la existencia<br />
de un posible desgaste. En tal caso, es<br />
necesario que un armero revise su arma,<br />
para sustituir o reparar la pieza defectuosa.<br />
13. Si, a raíz de una caída, su arma muestra un<br />
funcionamiento anormal, no dude en hacer<br />
que un armero la revise.<br />
14. Cuando ajuste presion del disparador por<br />
debajo de 900 g, existe el peligro de que el<br />
arma se dispare inesperadamente si cae o<br />
sufre cualquier golpe.<br />
15. En la VECTIS <strong>220</strong>, no coloque nunca la<br />
mano entre la palanca de armado y la carabina.<br />
Asegúrese de que no haya nadie en la<br />
trayectoria de la palanca de armado.<br />
ATENCIÓN :<br />
El empleo de esta carabina está reservado exclusivamente<br />
a los adultos. Un uso irreflexivo de la<br />
misma puede causar graves heridas, incluso la<br />
muerte. En condiciones normales de utilización, la<br />
munición es peligrosa hasta una distancia de<br />
1000 metros.<br />
17
ESPECIFICACIONES TÉCNICAS<br />
MODELO Vectis <strong>020</strong> Vectis <strong>026</strong> Vectis <strong>032</strong> Vectis <strong>220</strong><br />
CAÑÓN basculante basculante basculante fijo<br />
Longitud 47 cm 47 cm 47 cm 46 cm<br />
Calibre 4,5 mm 4,5 mm 4,5 mm 4,5 mm<br />
Alza micrométrica micrométrica micrométrica micrométrica<br />
montada sobre<br />
cola de milano<br />
CULATA haya haya haya haya<br />
Acabado barniz satinado barniz satinado barniz satinado barniz satinado<br />
Moleteado no sí sí sí<br />
LONGITUD TOTAL 101 cm 111 cm 114 cm 115,5 cm<br />
PESO TOTAL 2,9 kg 3,15 kg 3,4 kg 4,22 kg<br />
CARCASA sobre raíl 11 mm sobre raíl 11 mm sobre raíl 11 mm sobre raíl 11 mm<br />
SEGURO no autom. no autom. automático automático<br />
VELOCIDAD (*) <strong>220</strong> m/s 270 m/s 312 m/s 280 m/s<br />
(*) Adaptables según las vigentes legislaciones.<br />
UTILIZACIÓN<br />
Antes de utilizar su arma por vez primera, le<br />
recomendamos lea atentamente las instrucciones<br />
que siguen. Asegúrese de que el arma no está<br />
cargada antes de cualquier manipulación.<br />
SEGURO<br />
Determinadas carabinas VECTIS (<strong>032</strong>-<strong>220</strong>) van<br />
dotadas de un seguro automático que se activa<br />
después de cada rearme.<br />
Por tanto, procede retirar este seguro antes de<br />
cada disparo.<br />
En relación con el modelo VECTIS <strong>220</strong>, para<br />
armar la carabina coloque el seguro en ON. Si el<br />
seguro está en OFF (punto rojo) es imposible<br />
accionar la palanca. Si, estando el seguro puesto<br />
en ON, no fuera posible desplazar la palanca,<br />
probablemente la carabina ya está armada.<br />
18<br />
Para colocar el seguro en ON, presione el resorte<br />
situada bajo la palanca de armado. Ahora ya<br />
puede armar su carabina. Después de haberla<br />
armado, empuje el resorte situado frente al disparador<br />
para retirar el seguro.<br />
Ahora su arma ya está lista para ser disparada.<br />
ARMADO<br />
En todos los modelos, excepto en la VECTIS <strong>220</strong>,<br />
el modo de rearme se efectúa por basculación del<br />
cañón. Basta coger el cañón por su extremo y<br />
bajarlo hacia el guardamano, hasta que haga<br />
tope. Acto seguido, devuélvalo a su posición inicial<br />
y ya tiene su arma lista para ser disparada.
En el modelo <strong>220</strong>, presione con firmeza la cantonera<br />
en la cadera o sobre una superficie rígida.<br />
Asegúrese de que puede conservar esta posición<br />
durante todo el recorrido de la palanca.<br />
Coja con firmeza la palanca por su extremo y<br />
compruebe que no corre peligro de pillarse los<br />
dedos entre la palanca y la culata.<br />
Durante el armado no desplace la mano por la<br />
palanca.<br />
El mecanismo de armado de DOBLE EFECTO se<br />
basa en el principio del armado en dos etapas.<br />
1. Desbloquee la palanca de armado presionando<br />
el resorte que se encuentra en la palanca. Lleve la<br />
palanca de armado hasta que se produzca el bloqueo<br />
de final de recorrido, que notará al oír un<br />
“clic”.<br />
ATENCIÓN<br />
No desplace bruscamente la palanca de armado.<br />
2. Devuelva la palanca a su posición inicial, de<br />
forma que quede completamente encajada en la<br />
culata. Durante las primeras manipulaciones, no<br />
dude en insistir en el movimiento de retorno, para<br />
asegurarse de que la palanca está debidamente<br />
colocada.<br />
Ahora su VECTIS <strong>220</strong> ya está armada. El seguro<br />
se activa de forma automática.<br />
No subestime la fuerza que hace falta para el<br />
armado, especialmente durante el recorrido de<br />
retorno. NO SUELTE NUNCA LA PALANCA. Ello<br />
podría ocasionar daños en el mecanismo y volver<br />
inutilizable la carabina.<br />
Si a pesar de todo ocurriera tal cosa y la palanca<br />
quedara bloqueada en posición abierta, haga que<br />
un armero examine la carabina.<br />
COLOCACIÓN DEL PERDIGÓN<br />
Para aprovechar al máximo las prestaciones de su<br />
carabina, utilice solamente municiones de calidad,<br />
del calibre 4,5 mm (.177). En los modelos VECTIS<br />
<strong>032</strong> – <strong>026</strong> – <strong>020</strong>, coloque el perdigón en su alojamiento<br />
cuando el cañón ha basculado.<br />
En el modelo <strong>220</strong>, abra el dispositivo de carga<br />
accionando la palanca hacia arriba. Introduzca<br />
perdigón en el sentido correcto, tal como lo indica<br />
el dibujo que figura junto a su alojamiento.<br />
Vuelva a bajar la palanca hasta que se bloquee<br />
por completo.<br />
DISPARAR CON TOTAL SEGURIDAD<br />
Cuando escoja un espacio para disparar, compruebe<br />
que no hay nadie en la línea de tiro y que<br />
no existe riesgo de que se produzcan rebotes en<br />
superficies duras.<br />
Dirija el cañón hacia el blanco. Libere el seguro,<br />
instálese en posición correcta, con la cantonera<br />
en el hueco del hombro.<br />
Antes de disparar, asegúrese de que se han<br />
observado todas las medidas de seguridad.<br />
Apunte al blanco y apriete el disparador. Antes de<br />
guardar el arma, asegúrese de que está descargada<br />
y desarmada. En el modelo <strong>220</strong>, para comprobar<br />
que su carabina no está armada debe<br />
poder desplazar la palanca de armado.<br />
Vuelva a colocarla en la culata y empuje el resorte<br />
encuentra bajo la palanca de armado. Los modelos<br />
<strong>220</strong>, <strong>026</strong> y <strong>032</strong> van dotados de un disparador<br />
cuya presión puede regularse por medio de un<br />
tornillo situado en el guardamano. Para incrementar<br />
presión del disparador, haga girar el tornillo en<br />
el sentido de las agujas del reloj.<br />
PUNTERÍA<br />
La primera vez que utilice el arma, efectúe varios<br />
disparos para regularla.<br />
PUNTO DE MIRA<br />
Para adaptarse a las preferencias de los diversos<br />
tipos de tiradores, la carabina S se entrega con un<br />
juego de placas de mira intercambiables.<br />
Estas placas de mira se aguantan en el cuerpo<br />
del punto de mira gracias a un casquillo fileteado<br />
y moleteado<br />
Para cambiar de placa, afloje parcialmente el<br />
casquillo, extraiga la placa y coloque la nueva.<br />
Apriete de nuevo con fuerza el casquillo, al tiempo<br />
que se asegura de que la nueva placa queda<br />
perfectamente encajada en las muescas. Maneje<br />
las placas con precaución.<br />
19
ALZA<br />
Toda la gama VECTIS va equipada con alzas<br />
micrométricas que permiten ajustar el punto de<br />
impacto tanto en sentido vertical como horizontal.<br />
Si el punto de impacto rueda se sitúa:<br />
Demasiado a la izquierda: haga girar la rueda situada<br />
a la derecha del alza en sentido de las agujas<br />
del reloj.<br />
Demasiado a la derecha: haga girar la rueda situada<br />
a la derecha del alza en sentido opuesto.<br />
Demasiado arriba: haga girar la rueda situada en<br />
la cara superior del alza en sentido de las agujas<br />
del reloj.<br />
Demasiado abajo: haga girar la rueda situada en<br />
la cara superior del alza en sentido opuesto.<br />
Proceda paso a paso, controlando la posición del<br />
impacto hasta que esté satisfecho con la precisión<br />
de su arma.<br />
Los ajustes que acaba de efectuar son válidos<br />
para una distancia. Si efectúa disparos a otra distancia,<br />
debe proceder a un nuevo ajuste.<br />
MANTENIMIENTO<br />
Un mantenimiento mínimo después de cada<br />
sesión de disparos asegurará mayor longevidad a<br />
su carabina.<br />
Después de cada sesión de disparos es necesario<br />
un mantenimiento mínimo para que pueda conseguir<br />
las mejores prestaciones de su carabina<br />
durante muchos años.<br />
Las piezas metálicas exteriores están debidamente<br />
protegidas contra la corrosión mediante<br />
pavonado. No obstante, es necesario protegerlas<br />
de la acción de la humedad secándolas después<br />
de cada utilización con un paño impregnado de<br />
aceite fino para armas.<br />
Cada cierto tiempo, es necesario lubricar las<br />
piezas internas (cada 1.000 disparos o con mayor<br />
frecuencia si la dispara poco).<br />
Arme la carabina (sin introducir el perdigón) y vierta<br />
algunas gotas de aceite por el orificio de carga.<br />
Dirija el cañón hacia arriba para que el aceite<br />
fluya en la cámara de compresión.<br />
Termine efectuando algunos disparos con<br />
perdigón, a fin de eliminar el excedente de aceite.<br />
Realice esta operación observando las consignas<br />
20<br />
de seguridad. Las detonaciones fuertes y las<br />
nubes de aceite que acompañan a los disparos<br />
son fenómenos normales, ya que se deben a la<br />
combustión del aceite.<br />
NO DISPARE NUNCA SIN<br />
PROYECTIL<br />
Si lo hiciera, las piezas móviles no recibirían la<br />
debida amortiguación y podrían sufrir daños. El<br />
cañón debe limpiarse a intervalos regulares (tras<br />
unos cuantos miles de disparos) con una bagueta<br />
con grata suave? A con una grata de tela o lana<br />
empapada en aceite..<br />
Hay que evitar por completo el empleo gratas<br />
metálicas, ya que pueden dañar el interior del<br />
cañón.<br />
No guarde nunca un arma de aire cuyo pistón<br />
esté armado. Además del peligro de que se produzca<br />
un disparo accidental, el resorte se debilitarió<br />
y la carabina perdería su potencia.<br />
GARANTÍA<br />
La garantia se rescinde si la carabina ha sido desmentada<br />
o manipulado par personal no autorizado.<br />
Esta carabina goza de una garantía total de un (1)<br />
año, que cubre cualquier defecto de fabricación.<br />
Quedan excluidos del ámbito de aplicación de la<br />
garantía los daños derivados de una manipulación<br />
incorrecta o del desgaste normal.<br />
Nuestras obligaciones de garantía caducan de<br />
forma automática si se ha desmontado la carabina.
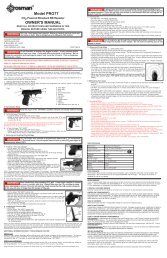
Modèle VECTIS <strong>220</strong> (1/3)<br />
202<br />
203<br />
204<br />
205<br />
206<br />
207<br />
208<br />
Crosse<br />
Vis de montage arrière<br />
Vis de montage avant<br />
Rondelle montage canon<br />
Goupille tôle support<br />
Vis tôle support<br />
Ecrou de sécurité<br />
Modèle VECTIS <strong>220</strong> (2/3)<br />
209<br />
210<br />
211<br />
212<br />
213<br />
214<br />
215<br />
222<br />
222B<br />
222D<br />
225<br />
226<br />
227<br />
228<br />
229<br />
230<br />
231<br />
701A<br />
701B<br />
702B<br />
703<br />
704A<br />
704B<br />
705<br />
706<br />
707A<br />
707B<br />
708<br />
710<br />
711<br />
712<br />
713<br />
713A<br />
Cylindre support<br />
Guide ressort<br />
Ressort de puissance<br />
Piston<br />
Joint piston<br />
Guidon<br />
Réticule guidon<br />
Mécanisme de départ<br />
Accroche<br />
Ressort accroche<br />
Vis de réglage<br />
Goupille ø4<br />
Levier de bandage<br />
Bielle de bandage<br />
Goupille bielle<br />
Centreur goupille bielle<br />
Star Lock ø5<br />
Canon<br />
Cylindre canon<br />
Crosse<br />
Vis avant pontet<br />
Vis arrière pontet<br />
Vis latérale crosse<br />
Rondelle latérale crosse<br />
Pontet<br />
Vis axe canon<br />
Rondelle canon<br />
Vis de blocage<br />
Guide ressort<br />
Ressort de puissance<br />
Piston<br />
Joint piston<br />
Rondelle joint piston<br />
216<br />
217<br />
218<br />
219<br />
<strong>220</strong><br />
221<br />
Modèle VECTIS <strong>220</strong> (3/3)<br />
Modèle VECTIS <strong>020</strong><br />
232<br />
233<br />
234C<br />
234D<br />
235<br />
236<br />
237<br />
238<br />
239<br />
240<br />
713B<br />
714B<br />
715<br />
716<br />
717<br />
718B<br />
718C<br />
718D<br />
719<br />
720<br />
721<br />
722<br />
723<br />
724<br />
725A<br />
725B<br />
Levier de chargement<br />
Joint torique chargement<br />
Oeilleton<br />
Axe levier de chargement<br />
Clips levier de chargement<br />
Goupille cylindre support<br />
Axe levier<br />
Poussoir<br />
Axe poussoir<br />
Axe départ<br />
Tôle support<br />
Tôle départ<br />
Renvoi<br />
Levier départ<br />
Ressort levier<br />
Ressort bielle/accroche<br />
Vis joint piston<br />
Guidon<br />
Réticule guidon<br />
Poussoir de sécurité<br />
Joint torique canon<br />
Oeilleton<br />
Vis réglage hausse<br />
Vis montage oeilleton<br />
Vis spéciale canon<br />
Bielle de compression<br />
Goupille ø5 L30<br />
Mécanisme de départ<br />
Ressort poussoir de sécurité<br />
Guide ressort<br />
Axe bielle<br />
Rondelle axe bielle<br />
21
22<br />
Modèle VECTIS <strong>026</strong><br />
501A<br />
501B<br />
502B<br />
503<br />
504A<br />
504B<br />
505<br />
506B<br />
507A<br />
507B<br />
508<br />
509<br />
510<br />
511<br />
512<br />
513<br />
Canon<br />
Cylindre canon<br />
Crosse<br />
Vis arrière pontet<br />
Vis avant pontet<br />
Vis latérale crosse<br />
Rondelle latérale crosse<br />
Pontet<br />
Vis axe canon<br />
Rondelle canon<br />
Vis de blocage<br />
Cylindre support<br />
Guide ressort<br />
Ressort de puissance<br />
Piston<br />
Guidon<br />
Modèle VECTIS <strong>032</strong><br />
901A<br />
901B<br />
902B<br />
903<br />
904A<br />
904B<br />
905<br />
906B<br />
907A<br />
907B<br />
908<br />
909<br />
910<br />
911<br />
912<br />
913<br />
914B<br />
Canon<br />
Cylindre canon<br />
Crosse<br />
Vis arrière pontet<br />
Vis avant pontet<br />
Vis latérale crosse<br />
Rondelle latérale crosse<br />
Pontet<br />
Vis axe canon<br />
Rondelle canon<br />
Vis de blocage<br />
Cylindre support<br />
Guide ressort<br />
Ressort de puissance<br />
Piston<br />
Joint piston<br />
Guidon<br />
514B<br />
515<br />
516<br />
517<br />
518B<br />
518C<br />
518D<br />
519<br />
520<br />
521<br />
522<br />
523<br />
524<br />
525A<br />
525B<br />
915<br />
916<br />
917<br />
918B<br />
918C<br />
918D<br />
919<br />
920<br />
921A<br />
921B<br />
921C<br />
922<br />
923<br />
924<br />
925A<br />
925B<br />
Guidon<br />
Réticule guidon<br />
Mécanisme de sécurité<br />
Joint torique canon<br />
Oeilleton<br />
Vis réglage hausse<br />
Vis montage oeilleton<br />
Vis spéciale canon<br />
Bielle de compression<br />
Goupille ø5<br />
Mécanisme de départ<br />
Ressort index sécurité<br />
Bille index sécurité<br />
Axe bielle<br />
Rondelle bielle<br />
Réticule guidon<br />
Poussoir de sécurité<br />
Joint torique canon<br />
Oeilleton<br />
Vis réglage hausse<br />
Vis montage oeilleton<br />
Vis spéciale canon<br />
Bielle de compression<br />
Goupille ø6<br />
Goupille ø4<br />
Goupille ø3<br />
Mécanisme de départ<br />
Ressort index sécurité<br />
Bille index sécurité<br />
Axe bielle<br />
Rondelle bielle
Modèle VECTIS <strong>220</strong> (1/3)<br />
Modèle VECTIS <strong>220</strong> (2/3)<br />
Modèle VECTIS <strong>220</strong> (3/3)<br />
23
Modèle VECTIS <strong>020</strong><br />
Modèle VECTIS <strong>026</strong><br />
Modèle VECTIS <strong>032</strong><br />
24
Printed in Belgium 2/02
BROWNING INTERNATIONAL S.A.<br />
Parc Industriel des Hauts-Sarts, 3 e Avenue 25<br />
B-4040 HERSTAL (BELGIQUE)