


Create successful ePaper yourself
Turn your PDF publications into a flip-book with our unique Google optimized e-Paper software.
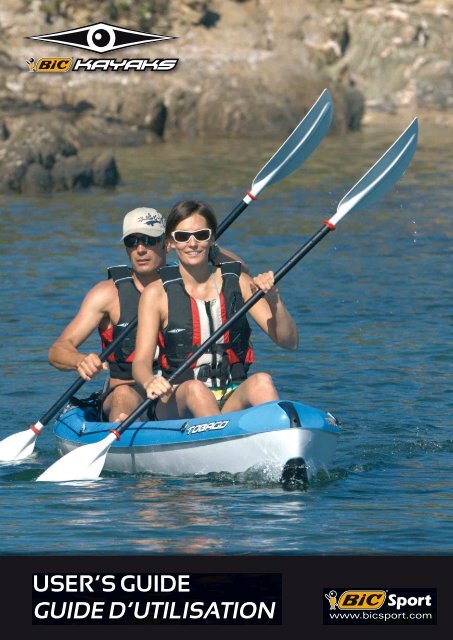
USER’S <strong>GUIDE</strong><br />
<strong>GUIDE</strong> D’UTILISATION
P. 2 Introduction and safety warning<br />
P. 4 Safety rules<br />
P. 6 Transport and storage<br />
P. 8 Maintenance and repairs<br />
P. 10 Installing the lifelines,<br />
and the accessories<br />
You have chosen a kayak designed and made in Europe by one of the major Sit-on-Top<br />
specialists. Your new kayak has been made using the exclusive thermoformed polyethylene<br />
technology called “Twin Sheet” which gives your new boat an excellent fi nish and makes it<br />
highly shock-resistant. With proper care your kayak will give you years of paddling enjoyment.<br />
To begin your adventure, check with your local dealer or paddling club for paddling<br />
opportunities in your area. Other paddlers are your best source for information regarding<br />
put-ins, take-outs, trips, etc.<br />
SAFETY WARNING<br />
Paddlesports can be very dangerous and physically demanding. The user of this product<br />
should understand that participating in paddlesports may involve serious injury or death.<br />
Observe the following safety standards whenever using this product.<br />
The user of this product acknowledges both an understanding and an assumption of the risk<br />
involved in paddlesports. If you have any questions about this or any of our products, do not<br />
hesitate to call us.<br />
REGISTERING YOUR BOAT<br />
We would ask you to register your new kayak on our website www.bicsport.com<br />
Much of the information requested on the warranty form is voluntary and we use it for one<br />
reason only: to learn to serve you better. We will not sell this information to another company.<br />
Registering your boat is for your protection and convenience only.<br />
P. 2<br />
TABLE OF CONTENTS<br />
SOMMAIRE<br />
INTRODUCTION, SAFETY WARNING<br />
P. 3 Introduction, mise en garde<br />
P. 5 Sécurité<br />
P. 7 Transport, stockage,<br />
P. 9 Entretien, réparations<br />
P. 10 Montage des lignes de vie,<br />
et des accessoires
INTRODUCTION, MISE EN GARDE<br />
Vous avez choisi un kayak mis au point et fabriqué en Europe par un des plus grands<br />
spécialistes du Sit on Top. Merci pour votre confi ance ! Il a été fabriqué avec la technologie<br />
exclusive du polyéthylène thermoformé « Twin Sheet » qui assure à votre nouveau kayak<br />
une excellente fi nition et une très bonne résistance aux chocs. Avec un minimum d’entretien,<br />
votre kayak vous procurera des années de plaisir sur l’eau. Commencez votre aventure en<br />
vous adressant à votre détaillant ou votre club de pagaie local. Ces professionnels vous<br />
renseigneront sur les plans d’eau de votre région et où pratiquer les sports de pagaie.<br />
Autre mine d’information : les pratiquants de kayaks qui pourront vous donner des infos sur<br />
les sites de mise à l’eau et de sortie, les excursions, etc.<br />
MISE EN GARDE<br />
Les sports de pagaie sont potentiellement dangereux et physiquement éprouvants.<br />
L’utilisateur du présent produit doit comprendre que la pratique des sports de pagaie peut<br />
entraîner des blessures graves ou la mort. Respectez les normes de sécurité suivantes à<br />
chaque utilisation du produit.<br />
L’utilisateur du présent produit reconnaît qu’il comprend et accepte les risques associés aux<br />
sports de pagaie. Si vous avez des questions au sujet de ce produit ou de tout autre produit,<br />
n’hésitez pas à communiquer avec nous.<br />
ENREGISTREMENT<br />
Nous vous demandons d’enregistrer votre nouveau kayak sur notre site web www.bicsport.com<br />
La plupart des renseignements demandés sur le formulaire de garantie sont à fournir de façon<br />
volontaire et nous les utilisons uniquement pour apprendre à mieux vous servir. Nous ne<br />
vendons pas ces renseignements à des tiers. L’enregistrement de votre embarcation ne vise<br />
qu’à vous protéger et à vous être utile.<br />
P. 3
P. 4<br />
SAFETY RULES<br />
IMPORTANT SAFETY ADVICE<br />
Paddling enables people of all ages and ability to experience nature with unrivalled closeness.<br />
Whether on a several-day adventure or a short outing, precautions must be taken and some<br />
basic safety rules must be followed.<br />
Consult your physician prior to beginning your paddlesports’ training.<br />
Start slow and if necessary obtain paddlesports instruction.<br />
Always wear a nationally-approved personal fl oatation device.<br />
Always wear a helmet where appropriate.<br />
Do not exceed your paddling ability; be aware of your limitations.<br />
Do not paddle alone.<br />
Always inform someone of your paddling route, the time and location of your departure and<br />
your intended time and location of arrival.<br />
Do not use alcohol or mind altering drugs prior to using this product.<br />
Dress appropriately for the given weather conditions.<br />
In winter wear neoprene clothing to avoid hypothermia in case of capsize.<br />
In summer, protect your eyes from the glare and your legs which are very exposed on a<br />
sit-on-top kayak. To prevent insulation or cold shock, dampen your clothing.<br />
Always carry water and energy bars and eat and drink regularly.<br />
Check weather forecasts and weather conditions prior to your outing so as not to be taken<br />
by surprise by sudden wind or cold weather. Weather conditions can change quickly out on<br />
the water.<br />
Obtain local knowledge of the waters you’re setting out on.<br />
On rivers, be aware of water levels. Scout unfamiliar water if necessary.<br />
Do not paddle in fl ood conditions. Never approach lock gates and sluices either from<br />
upstream or downstream. The current can trap you and suck you inside.<br />
Paddle preferably inside of bends. Beware of branches hanging down which could be dangerous.<br />
Do not grip them.<br />
Beware of storms which can suddenly swell water levels.<br />
At sea, be aware of tidal changes, dangerous currents and weather changes.<br />
Advice on how to launch your kayak when there are waves: place your boat perpendicular to<br />
the beach and wait for a pause between the series to launch yourself.<br />
IN THE EVENT OF A SOAKING:<br />
Even if our kayaks are stable, capsizing can happen. In this case, while you are swimming,<br />
turn your kayak back upright with the help of the handles or/and the lifeline, do not let go of<br />
your paddles and climb aboard again at the stern. Do note that BIC Sport sells paddle leashes<br />
(see BIC Sport catalogue) to avoid you losing your paddle. Never stand upright in a river,<br />
swim on your back with your feet forward.<br />
In any situation, never abandon your kayak, it remains your best lifebuoy and will help you<br />
being spotted.
SÉCURITÉ<br />
CONSEILS DE SECURITE IMPORTANTS<br />
Les sports de pagaie permettent à tous, quels que soient son âge ou sa forme physique,<br />
de pratiquer une activité fantastique en contact étroit avec la nature. Que ce soit sur un raid<br />
de plusieurs jours ou une promenade de quelques heures, un minimum de précautions et<br />
quelques règles élémentaires de sécurité s’imposent.<br />
Consultez votre médecin avant de commencer un entraînement de sport de pagaie.<br />
Commencez lentement et au besoin suivez une formation pour la pratique de la pagaie.<br />
Portez toujours un gilet de fl ottaison individuel homologué.<br />
Portez toujours un casque lorsque les circonstances l’exigent.<br />
Ne surestimez pas vos capacités physiques et techniques.<br />
Ne partez jamais seul.<br />
Informez toujours un proche de votre destination et de votre heure prévue de retour.<br />
Ne consommez pas d’alcool ou de psychotropes avant d’aller sur l’eau.<br />
Adaptez votre habillement en fonction des conditions météo.<br />
En hiver, porter un vêtement néoprène qui évitera un choc thermique en cas de chavirage<br />
En été, protégez-vous du soleil, surtout les jambes qui sont très exposées en sit-on-top et les<br />
yeux à cause de la réverbération. Mouillez-vous régulièrement, attention au risque d’insolation<br />
ou d’hydrocution.<br />
Emportez toujours de quoi boire et quelques barres énergétiques. Alimentez-vous et buvez<br />
régulièrement.<br />
Avant d’aller sur l’eau, consultez la météo et son évolution dans la journée pour ne pas vous<br />
faire surprendre par le vent ou le froid. Sur l’eau, les conditions météorologiques peuvent<br />
changer rapidement !<br />
Informez vous sur les conditions spécifi ques du plan d’eau sur lequel vous avez choisi<br />
de naviguer.<br />
En rivière, surveillez particulièrement les niveaux d’eau des rivières, faites une reconnaissance<br />
à pied si besoin.<br />
Ne pagayez pas en conditions d’inondation. N’approchez jamais ni par l’aval, ni par l’amont,<br />
des portes d’écluses et vannes. Le courant peut vous attirer et vous aspirer vers l’intérieur.<br />
Naviguez de préférence à l’intérieur des virages. Les branches qui s’accumulent parfois à<br />
l’extérieur peuvent être dangereuses. Ne pas s’y accrocher.<br />
Méfi ez-vous des orages qui peuvent grossir brutalement le débit d’un cours d’eau.<br />
En mer, surveillez les changements de marée, les courants dangereux et l’évolution de la météo.<br />
Conseil pour partir quand il y a des vagues : posez votre bateau perpendiculaire à la plage et<br />
attendez une pause entre les séries pour vous élancer.<br />
EN CAS DE CHAVIRAGE…<br />
Même si nos kayaks sont stables, un chavirage est toujours possible. Dans ce cas, tout en<br />
nageant, retournez votre kayak en vous servant des poignées et/ou des lignes de vie, ne lâchez<br />
pas votre pagaie et remontez à bord par l’arrière. Notez qu’un leash de pagaie (au catalogue<br />
BIC Sport) assure la pagaie pour éviter de la perdre.<br />
En rivière, ne vous mettez jamais debout, nagez sur le dos les pieds en avant.<br />
En toutes situations, surtout n’abandonnez jamais votre kayak, il reste votre meilleure bouée<br />
de sauvetage et un bon repère pour vous retrouver.<br />
P. 5
TRANSPORTATION<br />
Most kayak accidents occur on the road, during transportation. Here are some tips on how to<br />
transport your kayak safely and avoid serious accidents to yourselves or to others.<br />
Buy a good quality roof-rack that is suitable to your car and strong enough to withstand<br />
heavy weights.<br />
Whatever position you decide to place your kayak in (upside down, on its side, with the help<br />
of “cradle-type” supports, right way up), you must run two straps around the hull and under<br />
the roof rack. We strongly recommend that a line be run from the bow and stern of the kayak<br />
to the car’s towing rings.<br />
To avoid the kayak losing its shape (particularly in warm weather), the straps running under<br />
the hull must not be too tight. We advise you to wrap around the bars of the roof-rack special<br />
foam protection (available in the BIC Sport catalogue).<br />
If you use soft foam pads that sit between the kayak and the roof of your car, run the straps<br />
around the kayak and through the car doors to secure the boat to the roof, in addition to tying<br />
it to your towing rings at the bow and stern.<br />
As in the case of a roof rack, straps should be secure but not overly tight.<br />
Stock and check your load as you drive.<br />
STORAGE<br />
Your new kayak has been carefully crafted to ensure optimum durability. But improper storage<br />
can quickly degrade hull shape, colour and UV protection. Storage is key!<br />
Above all else, store your kayak out of the sun. Despite it being treated against UV rays,<br />
over-exposure to the sun will alter your kayak’s look and performance. Signs of sun damage<br />
include fading, a loss of fl exibility and cracking that cannot be repaired.<br />
If possible, keep your kayak inside or under cover, especially if you live in a sunny climate.<br />
A tarp properly suspended above the kayak will protect it from ultraviolet light. Do not cover<br />
your kayak by laying a tarp directly on it. With the heat of the sun, the tarp creates an oven that<br />
can damage, distort or discolour the hull. Simply leave an air space to allow for air circulation.<br />
If you must store your kayak outside, we recommend you tie it down to prevent it being<br />
caught in strong winds.<br />
Store your kayak cockpit-side down, on its side or on end, even if it’s only for one night.<br />
The best way to store your kayak is to run webbing straps under the bulkhead points<br />
(or widest points) and hang the boat or place on cradle-type saw horses. Do not store your<br />
kayak on its hull. If the hull warps, your kayak will not perform as it should.<br />
P. 6<br />
TRANSPORT AND STORAGE
TRANSPORT, STOCKAGE<br />
LE TRANSPORT<br />
La plupart des accidents de kayaks ont lieu sur la route, lors du transport du kayak vers le lieu<br />
de navigation. Voici quelques conseils pour bien transporter votre kayak et éviter des accidents<br />
graves pour vous et pour les autres.<br />
Achetez des barres de toit de qualité adaptées à votre véhicule et qui résistent à des<br />
charges lourdes.<br />
Quelle que soit la position que vous avez choisie pour l’arrimer (à l’envers; sur le côté,<br />
à l’aide de porte - kayaks « berceau » à l’endroit), veillez à faire passer deux sangles autour de<br />
la coque et sous les barres de toit. Attachez également les pointes avant et arrière aux anneaux<br />
de remorquage du véhicule.<br />
Attention, pour ne pas déformer votre kayak (particulièrement par temps chaud), les sangles<br />
passant sur la coque ne doivent pas être trop tendues. Nous vous conseillons d’enrober vos<br />
barres avec des protections spéciales en mousse (au catalogue BIC Sport).<br />
Si vous utilisez des tampons amortisseurs en mousse qui se placent directement entre le<br />
toit du véhicule et l’embarcation, faîtes alors passer les sangles autour du kayak et à travers<br />
l’habitacle de manière à fi xer solidement l’embarcation sur le toit.<br />
Attachez également les pointes avant et arrière aux anneaux de remorquage du véhicule.<br />
Comme sur les barres de toit, les sangles doivent être bien tendues, mais pas trop.<br />
Arrêtez-vous de temps en temps pour vérifi er que les sangles ne se sont pas détendues.<br />
LE STOCKAGE<br />
La technique de fabrication moderne de votre kayak lui assure une solidité optimale.<br />
Toutefois, un stockage inadapté peut détériorer la coque en altérant sa forme, sa couleur et sa<br />
protection U.V. Le mode de stockage est donc très important pour sa durabilité.<br />
L’essentiel, c’est de le protéger du soleil. Même s’il est traité anti-UV, les qualités esthétiques<br />
et mécaniques de votre kayak seront altérées par une trop longue exposition au soleil.<br />
Dégâts possibles : décoloration, perte de fl exibilité et même fi ssures irréparables.<br />
Si possible, gardez votre kayak à l’intérieur ou sous couvert, particulièrement en régions<br />
ensoleillées. Une bâche placée au-dessus de l’embarcation la protégera effi cacement des<br />
rayons ultraviolets. Attention toutefois à laisser un espace pour que l’air puisse circuler.<br />
Ne posez pas la bâche directement sur le kayak, car la chaleur ainsi générée pourrait<br />
détériorer, déformer ou décolorer la coque.<br />
Si vous devez laisser le kayak à l’extérieur, nous vous conseillons de l’attacher pour qu’il ne<br />
s’envole pas en cas de tempête.<br />
Entreposez votre kayak toujours à l’envers, sur le côté ou debout, même pour une nuit.<br />
La meilleure méthode consiste à faire passer des sangles au niveau de la largeur maximale et de<br />
suspendre l’embarcation ou de la placer sur des tréteaux de type berceau. Ne l’entreposez pas,<br />
non plus, sur la coque. Si elle se déforme, le kayak perdra une partie de ses qualités marines.<br />
P. 7
MAINTENANCE<br />
Your kayak is designed to require minimal maintenance. A little timely care will ensure a<br />
lifetime of enjoyment.<br />
Rinse your boat and hardware thoroughly after paddling in salt-, brackish or polluted water.<br />
Check neoprene hatch covers, cables, buckles, straps and other moving parts for wear,<br />
and replace them when necessary. Keep all nuts tight. Give your hull and deck a thorough<br />
review annually. Light nicks, scratches and scrapes are part of the paddling experience,<br />
but deep scratches should be repaired.<br />
If the hull on your kayak is distorted due to an accident, improper storage or transportation,<br />
correction may be simple: brief exposure to the heat of the sun often restores a hull to its<br />
original shape. If that fails, hull shape can often be restored by applying a low heat source<br />
(such as a hair dryer) to the deformed area.<br />
CAUTION: overheating can burn you or damage the hull.<br />
REPAIR<br />
Your kayak has been built to withstand shocks but violent impacts may require repair.<br />
We recommend you contact your local dealer for the appropriate repair kit or parts.<br />
To fi nd out who your nearest retailer is, contact us or go onto our site www.bicsport.com<br />
WATERTIGHTNESS<br />
Bear in mind that no kayak is 100% watertight. It is therefore normal if a cupful or two of water<br />
gets in by the inserts or the hatches. If however your kayak takes in a lot of water, this could be<br />
the sign of a hole in the hull, even if it is only the size of a pin hole. In this case, either you try<br />
to fi nd where the hole is by fi lling your kayak up with water, or you bring your kayak to your<br />
retailer for repair.<br />
Contact us if you need assistance.<br />
P. 8<br />
MAINTENANCE AND REPAIRS
ENTRETIEN, RÉPARATIONS<br />
ENTRETIEN<br />
Votre embarcation est conçue de façon à ne demander qu’un entretien minimal qui vous<br />
garantira de nombreuses heures de plaisir.<br />
Après une sortie en eau salée, saumâtre ou polluée, rincez l’embarcation à fond avec de<br />
l’eau douce.<br />
Avant la saison, vérifi ez les couvercles des caissons, les bouts, les sangles et les autres pièces<br />
mobiles pour détecter les signes d’usure et remplacer au besoin.<br />
Serrez bien toute la visserie. Une fois par an, examinez la coque et le pont. Les encoches<br />
et égratignures légères sont tout à fait normales, mais les érafl ures plus profondes doivent<br />
être réparées.<br />
Si la coque de l’embarcation est déformée à la suite d’un accident, d’un entreposage<br />
inadéquat ou de mauvaises conditions de transport, la remise en état peut se révéler simple :<br />
une brève exposition à la chaleur du soleil permet souvent à la coque de retrouver sa forme<br />
d’origine. Si cela ne fonctionne pas, appliquez à la zone déformée une source de chaleur<br />
modérée (telle qu’un séchoir à cheveux).<br />
ATTENTION : surchauffer la coque peut l’endommager ou vous causer des brûlures.<br />
RÉPARATIONS<br />
Votre kayak est conçu et fabriqué pour résister aux impacts, mais en cas de choc très violent,<br />
il peut nécessiter une réparation. Dans ce cas nous vous conseillons de contacter votre<br />
revendeur qui vous donnera de précieux conseils quant au matériel à utiliser pour le réparer.<br />
Il pourra également vous fournir toutes les pièces et kits de réparation pour le polyéthylène.<br />
Pour savoir où se trouve le détaillant le plus près de chez vous, contactez-nous ou allez sur<br />
notre site www.bicsport.com<br />
ETANCHÉITÉ<br />
Gardez à l’esprit qu’aucun kayak n’est étanche à 100%. Il est donc normal qu’il prenne une<br />
tasse ou deux d’eau par le bouchon de vidange percé d’un petit trou de décompression ou les<br />
couvercles des caissons. Cependant, si votre kayak prend des quantités importantes d’eau, il<br />
est possible qu’il y ait dans la coque une perforation, même de la taille d’un trou d’épingle.<br />
Deux solutions : vous trouvez la fuite vous-même (en remplissant l’embarcation d’eau et en<br />
cherchant la fuite), soit vous apportez votre embarcation chez le détaillant pour réparation.<br />
Contactez-nous si vous avez besoin d’aide.<br />
P. 9
P. 10<br />
INSTALLING<br />
MONTAGE<br />
Positioning of the lifelines<br />
The lifelines allow you to get a grip if you capsize and help you get back on board.<br />
We would advise you to slightly burn off the tip of the line in order to soften it and to shape it<br />
into a point with your fi ngers, so that it can be easily threaded through the inserts.<br />
Passage des lignes de vie<br />
Les lignes de vie permettent de s’accrocher en cas de chavirage et de remonter plus facilement<br />
à bord du kayak.<br />
Nous vous conseillons de brûler légèrement l’extrêmité du bout pour le ramollir et de former<br />
une pointe avec vos doigts pour qu’il passe plus facilement dans les inserts.<br />
1 2 3 4<br />
Slip the lifeline<br />
through each insert<br />
starting at the front<br />
of the kayak.<br />
Passez le bout dans<br />
chacun des inserts<br />
en commençant par<br />
l’avant du kayak.<br />
Diag. 1<br />
Sch. 1<br />
1<br />
2 3<br />
At the front, do a<br />
fi gure of eight knot,<br />
to secure the line<br />
(see diagram 1).<br />
À l’avant, faites un<br />
noeud en huit pour<br />
arrêter le bout<br />
(voir schéma 1).<br />
Diag. 2<br />
Sch. 2<br />
Use of the plugs<br />
The Scapa and Tobago are equipped with plugs as they both have a low cockpit.<br />
With heavy loads, the water level can rise up to 1 or 2cm during navigation.<br />
On fl at waters we would therefore advise you to tighten the plugs to avoid this.<br />
However in choppy waters, leave the plugs open to let any excess water out.<br />
Utilisation des bouchons<br />
Le Scapa et le Tobago sont équipés de bouchons car le fond de leur cockpit est situé bas. En cas<br />
de charge importante, il est possible que le niveau monte à un ou deux cm d’eau en navigation.<br />
Sur eau plate, nous vous conseillons donc de visser les bouchons pour éviter ce désagrément.<br />
En revanche, sur mer agitée, ouvrez-les pour évacuer l’eau embarquée.<br />
1<br />
Stretch the line<br />
towards the rear of<br />
the kayak.<br />
Tendez le bout en<br />
tirant vers l’arrière<br />
du kayak.<br />
Secure the line by a<br />
half-hitch knot<br />
(see diagram 2).<br />
Accrochez le bout en<br />
le fi xant au moyen<br />
de demi-clés<br />
(voir schéma 2).<br />
2 3 4
Installing the backrest<br />
BIC Sport kayaks have been designed to give you maximum paddle comfort.<br />
Adding a backrest will give you even more comfort, especially for your back support and will<br />
help you obtain best paddling position to suit your own morphology.<br />
Installation des dosserets<br />
Les kayaks BIC Sport sont conçus pour vous founir un confort de pagaie optimum.<br />
L’ajout d’un dosseret permet d’améliorer ce confort, notamment au niveau du maintien du dos<br />
et de répondre aux exigences de votre morphologie et de votre position de pagaie.<br />
1 2 3 4<br />
Install the backrest<br />
on the seat of the<br />
kayak by pressing<br />
down on the seam<br />
to give it its shape.<br />
Positionnez le<br />
dosseret sur le siège<br />
du kayak en appuyant<br />
sur la jointure pour le<br />
mettre en forme.<br />
Tie the rear straps<br />
onto the rear rings.<br />
Attachez les sangles<br />
arrière sur les<br />
anneaux arrière.<br />
Installing the knee straps<br />
The knee straps are very useful for improving the power of your paddle stroke.<br />
They provide support at the knees to enable the paddler feel “at one” with his kayak,<br />
so that he can paddle more effi ciently.<br />
Installation des knee straps<br />
Les Knee straps (en français : sangles pour les genoux) sont très utiles pour améliorer la<br />
puissance de pagaie. Ils procurent un point d’appui au niveau des genoux qui permet de<br />
«faire corps» avec le kayak et ainsi de pagayer plus effi cacement.<br />
1 Clip each hook onto<br />
the side inserts at<br />
knee level.<br />
2<br />
Placer les mousquetons<br />
sur les insert latéraux<br />
situés au niveau des<br />
genoux.<br />
Tie the front straps<br />
onto the front rings.<br />
Attachez les sangles<br />
avant sur les<br />
anneaux avant.<br />
Gradually adjust the<br />
tension of the rear and<br />
front straps until you<br />
get the most suitable<br />
position for you.<br />
Régler progressivement<br />
les tensions des<br />
sangles arrière et avant<br />
pour obtenir le réglage<br />
souhaité.<br />
Seat yourself in the<br />
kayak, put your knees<br />
inside the straps and<br />
adjust the tension.<br />
Installez vous dans le<br />
kayak, les genoux à<br />
l’intérieur des sangles<br />
et réglez leur tension.<br />
P. 11
DEVELOPED<br />
& PRODUCED<br />
IN EUROPE<br />
BIC Sport, RP 3716, Z.I. du Prat - 56037 Vannes Cedex FRANCE<br />
Tel: 33 (0)2 97 43 75 00 - Fax: 33 (0)2 97 43 75 01 - contact@bicsport.com - www.bicsport.com<br />
BIC Sport, S.A.S.U. au capital de 1.812.075 euros - B 781 626 957 - R.C.S. VANNES<br />
Production : BIC Sport Marketing - Sauf erreurs ou omissions – Sous réserves de changement. / Production: BIC Sport Marketing - We cannot be held responsible for any errors or omissions. Subject to alteration.<br />
Photos: B. Biancotto / B. Thouard / A. Quinquis — <strong>Kayaks</strong> design: FRITSCH Associés.com & Bureau d’Étude BIC Sport