

Instruction Manual for 6072 Refuge - Frabill
Instruction Manual for 6072 Refuge - Frabill
Instruction Manual for 6072 Refuge - Frabill

You also want an ePaper? Increase the reach of your titles
YUMPU automatically turns print PDFs into web optimized ePapers that Google loves.
N173W21121 Northwest Passage<br />
P.O. Box 449 • Jackson, WI 53037<br />
1-800-558-1005 • www.frabill.com<br />
WARNING! (indicates a potential hazardous situation which, if not avoided, could<br />
result in injury or death)<br />
• Death from asphyxiation may occur from propane heaters or lanterns in a non-ventilated area.<br />
• Keep the top of doors unzipped <strong>for</strong> ventilation.<br />
• Keep all flame and heat sources away from this tent fabric.<br />
• This tent is made with flame-resistant fabric, which meets the flammability requirements of CPAI-84. It is not<br />
fire-proof. The fabric will burn if left in continuous contact with any flame source.<br />
• The application of any <strong>for</strong>eign substance to the tent may render the flame-resistant properties ineffective.<br />
• Never use candles, matches, or open flames of any kind near a tent.<br />
• Cooking inside a tent is dangerous.<br />
• Build campfires downwind and several meters away from a tent. Always be sure to extinguish campfires be<strong>for</strong>e<br />
leaving camp or retiring <strong>for</strong> the night.<br />
• Practice extreme caution when using fuel powered lanterns and heaters inside a tent. Use battery operated<br />
equipment whenever possible.<br />
• Never refuel lamps, heaters, or stoves inside a tent.<br />
• Extinguish or turn off all lanterns be<strong>for</strong>e going to sleep.<br />
• Avoid smoking inside a tent.<br />
• Never store flammable liquids inside a tent.<br />
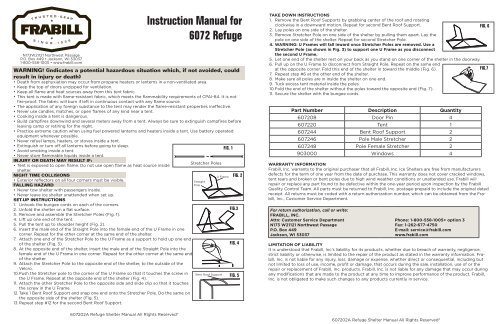
FIG. 1<br />
INJURY OR DEATH MAY RESULT IF:<br />
• Tent is exposed to open flame. Do not use open flame as heat source inside<br />
shelter.<br />
Stretcher Poles<br />
NIGHT TIME COLLISIONS<br />
• Exterior reflectors on all four corners must be visible.<br />
FALLING HAZARD<br />
• Never tow shelter with passengers inside.<br />
• Never leave ice shelter unattended when set up.<br />
SET-UP INSTRUCTIONS<br />
Straight<br />
Pole<br />
U Frame FIG. 2<br />
1. Unhook the bungee cords on each of the corners.<br />
2. Unfold the shelter on a flat surface.<br />
3. Remove and assemble the Stretcher Poles (Fig. 1).<br />
4. Lift up one end of the tent.<br />
5. Pull the tent up to shoulder height (Fig. 2).<br />
6. Insert the male end of the Straight Pole into the female end of the U Frame in one<br />
corner. Repeat <strong>for</strong> the other corner at the same end of the shelter.<br />
FIG.3<br />
7. Attach one end of the Stretcher Pole to the U Frame as a support to hold up one end<br />
of the shelter (Fig. 3).<br />
8. At the opposite end of the shelter, insert the male end of the Straight Pole into the<br />
female end of the U Frame in one corner. Repeat <strong>for</strong> the other corner at the same end<br />
of the shelter.<br />
9. Attach the Stretcher Pole to the opposite end of the shelter, to the outside of the<br />
Velcro.<br />
FIG. 4<br />
10. Push the Stretcher pole to the corner of the U Frame so that it touches the screw in<br />
the U Frame. Repeat at the opposite end of the shelter (Fig. 4).<br />
11. Attach the other Stretcher Pole to the opposite side and slide clip so that it touches<br />
the screw in the U Frame.<br />
12. Take 1 Bent Roof Support and snap one end onto the Stretcher Pole. Do the same on<br />
the opposite side of the shelter (Fig. 5).<br />
13. Repeat step #12 <strong>for</strong> the second Bent Roof Support.<br />
Bent Roof Support FIG. 5<br />
<strong>6072</strong>02A <strong>Refuge</strong> Shelter <strong>Manual</strong> All Rights Reserved®<br />
<strong>Instruction</strong> <strong>Manual</strong> <strong>for</strong><br />
<strong>6072</strong> <strong>Refuge</strong><br />
TAKE DOWN INSTRUCTIONS<br />
1. Remove the Bent Roof Supports by grabbing center of the roof and rotating<br />
clockwise in a downward motion. Repeat <strong>for</strong> second Bent Roof Support.<br />
FIG. 6<br />
2. Lay poles on one side of the shelter.<br />
3. Remove Stretcher Pole on one side of the shelter by pulling them apart. Lay the<br />
pole on one side of the shelter. Repeat <strong>for</strong> second Stretcher Pole.<br />
4. WARNING: U Frames will fall inward once Stretcher Poles are removed. Use a<br />
Stretcher Pole (as shown in Fig. 3) to support one U Frame as you disconnect<br />
the second U Frame.<br />
5. Let one end of the shelter rest on your back as you stand on one corner of the shelter in the doorway.<br />
6. Pull up on the U Frame to disconnect from Straight Pole. Repeat on the same end<br />
at the opposite corner. Fold this end of the shelter in toward the middle (Fig. 6).<br />
FIG.7<br />
7. Repeat step #6 at the other end of the shelter.<br />
8. Make sure all poles are in inside the shelter on one end.<br />
9. Tuck excess tent material inside the poles.<br />
10. Fold the end of the shelter without the poles toward the opposite end (Fig. 7).<br />
11. Secure the shelter with the bungee cords.<br />
Part Number Description Quantity<br />
<strong>6072</strong>08 Door Pin 4<br />
<strong>6072</strong>20 Tent 1<br />
<strong>6072</strong>44 Bent Roof Support 2<br />
<strong>6072</strong>46 Pole Male Stretcher 2<br />
<strong>6072</strong>48 Pole Female Stretcher 2<br />
903000 Windows 4<br />
WARRANTY INFORMATION<br />
<strong>Frabill</strong>, Inc. warrants to the original purchaser that all <strong>Frabill</strong>, Inc. Ice Shelters are free from manufacturers<br />
defects <strong>for</strong> the term of one year from the date of purchase. This warranty does not cover cracked windows,<br />
tent tears and broken or bent poles due to high wind weather conditions or unattended use. <strong>Frabill</strong> will<br />
repair or replace any part found to be defective within the one-year period upon inspection by the <strong>Frabill</strong><br />
Quality Control Team. All parts must be returned to <strong>Frabill</strong>, Inc. postage-prepaid to include the original dated<br />
receipt. All returns must be coded with a return authorization number, which can be obtained from the <strong>Frabill</strong>,<br />
Inc., Customer Service Department.<br />
For return authorization, call or write:<br />
FRABILL, INC.<br />
Attn: Customer Service Department<br />
N173 W21121 Northwest Passage<br />
P.O. Box 449<br />
Jackson, WI 53037<br />
Phone: 1-800-558-1005> option 3<br />
Fax: 1-262-677-4750<br />
E-mail: service@frabill.com<br />
www.frabill.com<br />
LIMITATION OF LIABILITY<br />
It is understood that <strong>Frabill</strong>, Inc’s liability <strong>for</strong> its products, whether due to breach of warranty, negligence,<br />
strict liability or otherwise, is limited to the repair of the product as stated in the warranty in<strong>for</strong>mation. <strong>Frabill</strong>,<br />
Inc. is not liable <strong>for</strong> any injury, loss, damage or expense, whether direct or consequential, including but<br />
not limited to loss of use, income, profit or damage, that occurs during the sale, installation, use of or the<br />
repair or replacement of <strong>Frabill</strong>, Inc. products. <strong>Frabill</strong>, Inc. is not liable <strong>for</strong> any damage that may occur during<br />
any modifications that are made to the product at any time to improve per<strong>for</strong>mance of the product. <strong>Frabill</strong>,<br />
Inc. is not obligated to make such changes to any products currently in service.<br />
<strong>6072</strong>02A <strong>Refuge</strong> Shelter <strong>Manual</strong> All Rights Reserved®
N173W21121 Northwest Passage<br />
P.O. Box 449 • Jackson, WI 53037<br />
1-800-558-1005 • www.frabill.com<br />
Manuel d’utilisation pour modèle<br />
<strong>6072</strong> <strong>Refuge</strong><br />
ATTENTION! (nous indiquons toute sorte de situations dangereuses, qui<br />
en cas de non respect, peuvent entrainer des blessures ou le décès)<br />
• Une mort par asphyxie peut survenir suite à l’utilisation d’un chauffage au propane ou de lanternes dans une enceinte non<br />
ventilée<br />
• Maintenir le haut des portes ouvert pour la ventilation.<br />
• Garder toute flamme ou source de chaleur loin du tissu de la tente.<br />
• Cette tente est fabriquée en tissu résistant aux flammes con<strong>for</strong>mément au code d’inflammabilité CPAI-84. Il n’est pas à<br />
l’épreuve du feu. Ce tissu s’enflammera si laissé en contact avec tout type de flamme.<br />
• L’application de toute substance étrangère à la tente peut rendre les propriétés de résistance aux flammes inefficaces.<br />
• Ne jamais utiliser de bougies, d’allumettes, ou de source de flammes libres de toute sorte vers la tente.<br />
• Cuisiner dans une tente est dangereux.<br />
• Faire les feux de camps à contre vent et éloigné à quelques mètres de la tente. Assurez-vous que le feu est éteint avant de<br />
quitter le camp ou avant de se retirer pour la nuit.<br />
• Faites preuve d’une très grande prudence lorsque vous utilisez des lampes à huile et des réchauds à l’intérieur de la tente.<br />
Utiliser des équipements à piles autant que possible.<br />
• Ne jamais remplir une lampe, un réchaud, un four à huile/essence à l’intérieur de la<br />
FIG. 1<br />
tente.<br />
• Eteindre toutes les lanternes avant d’aller dormir.<br />
• Eviter de fumer dans la tente.<br />
Stretcher Poles<br />
• Ne jamais stocker de produits combustibles à l’intérieur de la tente.<br />
DES BLESSURES OU LA MORT PEUVENT RESULTER DE:<br />
• Piquet de tension<br />
• la tente est sensible aux flammes libres. N’utilisez pas de source de chauffage à flamme libre à<br />
l’intérieur de la tente.<br />
COLLISON DE NUIT<br />
Piquet<br />
Droit<br />
FIG. 2<br />
Cadre en U<br />
• Les réflecteurs extérieurs doivent être disposés aux quatre coins et doivent être visibles.<br />
RISQUE DE CHUTE<br />
•<br />
•<br />
Ne jamais tracter l’abri avec des passagers à l’intérieur.<br />
Ne jamais laisser l’abri glace sans surveillance lors de la phase de montage.<br />
FIG.3<br />
INSTRUCTIONS DE MONTAGE<br />
1. Décrocher les sandows dans chacun des coins.<br />
2. Déplier l’abri sur une surface plate.<br />
3. Enlever et assembler les Piquets de Tension (Fig. 1).<br />
4. Soulever un des côtés de la tente.<br />
5. Tirer la tente à hauteur d’épaule (Fig. 2).<br />
6. Insérer la partie mâle du Piquet Droit dans l’extrémité femelle du Cadre en U dans un des coins.<br />
Répéter l’opération pour l’autre côté sur la même face de l’abri. (Fig.3)<br />
7. Attacher une des extrémités du Piquet de Tension sur le Cadre en U afin de soutenir une des<br />
extrémités de l’abri (Fig. 3).<br />
8. A l’extrémité opposé de l’abri, insérer l’extrémité male du Piquet Droit dans l’extrémité femelle du<br />
Cadre en U dans un des coins. Répéter l’opération pour l’autre côté sur la même face de l’abri<br />
FIG. 4<br />
9. Attacher le Piquet de Tension à l‘extrémité opposé de l’abri, sur l’extérieur du Velcro.<br />
10. Pousser le Piquet de Tension à l’angle du cadre en U pour qu’il soit en contact avec les vis du<br />
Cadre en U. Répéter l’opération à l’autre extrémité de l’abri. (Fig. 4).<br />
11. Attacher le second Piquet de tension à l’opposé et faire glisser le clip jusqu’à être en contact<br />
avec les vis du Cadre en U.<br />
12. Prendre un des supports de Toit en Arc et bloquer une des extrémités dans le Piquet droit. Faire<br />
la même chose sur le côté opposé de l’abri (Fig. 5).<br />
Support de toit en arc FIG. 5<br />
13. Répéter l’étape 12 pour le second Support de Toit en Arc.<br />
<strong>6072</strong>02A manuel pour abri <strong>Refuge</strong> Tous droits réservés®<br />
INSTRUCTIONS DE DEMONTAGE<br />
1. Retirer les Support de Toit en Arc en les saisissant par le centre du toit et les<br />
tournant dans le sens des aiguilles d’une montre dans en mouvement de descente.<br />
Répéter pour le second Support de Toit en Arc.<br />
2. Déposer les piquets sur un des côtés de l’abri.<br />
3. Retirer les Piquets de Tension sur un des côtés de l’abri en les séparant. Déposer<br />
les piquets sur un des côtés de l’abri. Répéter l’opération pour le second Piquet de<br />
Tension.<br />
4. ATTENTION: Les Cadres en U vont tomber de l’avant dès lors que les Piquets de<br />
Tension sont retirés. Utiliser un Piquet de tension (comme indiqué sur Fig. 3) pour<br />
soutenir les Cadres en U lorsque vous déconnectez le deuxième cadre en U.<br />
5. Laisser une des faces de l’abri reposer sur l’arrière alors que vous vous tenez l’une<br />
des extrémités de l’abri en restant proche de la porte.<br />
6. Soulever le carde en U pour le déconnecter. Répéter la même opération à l’angle<br />
opposé. Plier ce côté de l’abri sur sa moitié. (Fig. 6).<br />
7. Répéter l’étape #6 sur l’autre extrémité de l’abri.<br />
8. Assurez-vous que tous les piquets sont à l’intérieur de l’abri et sur une des<br />
extrémités.<br />
9. Tasser l’excédent de toile de tente sous les piquets.<br />
10. Plier la partie de l’abri démunie de piquets sur le côté opposé (Fig. 7).<br />
11. Sécuriser l’abri avec les Sandows.<br />
Des Composant Description Et Quantité<br />
<strong>6072</strong>08 Goupilles de porte 4<br />
<strong>6072</strong>20 Tente 1<br />
<strong>6072</strong>44 Support de tente en Arc 2<br />
<strong>6072</strong>46 Piquet de Tension Male 2<br />
<strong>6072</strong>48 Piquet de Tension Femelle 2<br />
903000 Fenêtres 4<br />
INFORMATION SUR LA GARANTIE<br />
<strong>Frabill</strong>, Inc. garantie à l’acheteur d’origine que, tous les Abris Glace de <strong>Frabill</strong>, Inc. sont sans défaut et ce pour une durée<br />
de 1 an à compter de la date d’achat. Cette garantie ne couvre pas les fenêtres craquées, les déchirures sur la tente, les<br />
piquets cassés ou pliés pour cause de grand vent et les utilisations non appropriées. <strong>Frabill</strong> réparera ou remplacera toute<br />
pièce défectueuse dans la période de garantie des 1 an et ce après inspection par l’équipe du Service de Contrôle Qualité de<br />
<strong>Frabill</strong>.<br />
Toutes les pieces doivent être retournées à <strong>Frabill</strong>, Inc. port prépayé et doit inclure le reçu avec la date d’achat d’origine.<br />
Tous les retours doivent préalablement recevoir un code d’autorisation de retour qui peut être obtenu auprès du service<br />
Clientèle de <strong>Frabill</strong>, Inc.<br />
Pour les autorisations de retour, appeler, faxer ou écrire à:<br />
FRABILL, INC.<br />
Attn: Customer Service Department<br />
N173 W21121 Northwest Passage<br />
P.O. Box 449<br />
Jackson, WI 53037<br />
<strong>6072</strong>02A Manuel de l’Abri <strong>Refuge</strong> tous droits Réservés®<br />
Téléphone: 1-800-558-1005> option 3<br />
Fax: 1-262-677-4750<br />
E-mail: service@frabill.com<br />
www.frabill.com<br />
LIMITE DES RESPONSABILITES<br />
Il est entendu que la responsabilité de <strong>Frabill</strong>, Inc pour ces produits, pour des raisons d’infraction de la garantie, négligence,<br />
responsabilité stricte ou tout autre est limitée à la réparation du produit comme indiqué dans les termes des in<strong>for</strong>mations<br />
sur la garantie. <strong>Frabill</strong>, Inc. n’est pas responsable pour les blessures , la perte, les dégâts ou les dépenses directes ou<br />
consécutives, incluant mais non limitée à la perte d’usage, de revenus, de bénéfices ou de dégâts occasionnés lors de<br />
la vente, l’installation, l’utilisation, la réparation, ou le remplacement de produits de <strong>Frabill</strong>, Inc.. <strong>Frabill</strong>, Inc. n’est pas<br />
responsable pour les dégâts occasionnés par des modifications apportées au produit à tout moment afin d’améliorer les<br />
per<strong>for</strong>mances du dit produit. <strong>Frabill</strong>, Inc. n’est pas obligé de faire ce type de changements sur les produits actuellement en<br />
service.<br />
FIG. 6<br />
FIG.7