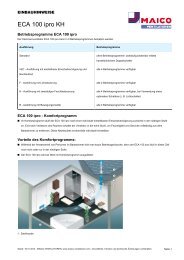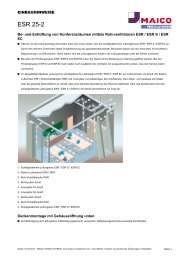
ECA piano - MAICO Ventilatoren
ECA piano - MAICO Ventilatoren
ECA piano - MAICO Ventilatoren

You also want an ePaper? Increase the reach of your titles
YUMPU automatically turns print PDFs into web optimized ePapers that Google loves.
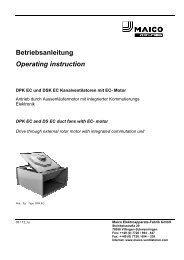
GB<br />
Insert the power cable into the terminal box<br />
[3] such that the cable screw-connection<br />
fits tightly round the power cable.<br />
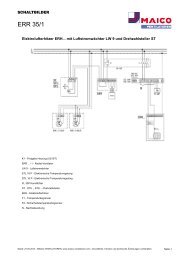
With ESR.. EC units connect a permitted<br />
control unit; see Maico catalogue or the<br />
Internet.<br />
For speed setting at the ESR.. EC units set<br />
a minimum voltage of 0.5 V at the potentiometer<br />
so that the fan motor can start.<br />
i<br />
12<br />
Voltages below 0.5 V are evaluated<br />
as a stop signal.<br />
Connect power cable to connecting<br />
terminal in terminal box [3] as shown in<br />
wiring diagram, see section 14.<br />
Fit terminal box cover and screw down with<br />
4 screws.<br />
8.3 Start-up<br />
Before start-up, ensure that there are no<br />
objects, small parts, dirt, etc., in the ven-<br />
tilation ducts.<br />
Check that the technical data has been<br />
adhered to, by reference to the rating plate.<br />
Ensure that the air can flow unhindered.<br />
Switch on ventilation box with separate<br />
on/off switch.<br />
Check that the fan impeller is running<br />
quietly.<br />
9. Maintenance<br />
The unit is maintenance-free.<br />
10. Cleaning<br />
● ESR.. S, ESR.. EC and DSR.. S units:<br />
The fan can be swung out for cleaning.<br />
<br />
DANGER<br />
Danger to life from electric<br />
shock.<br />
Switch off the mains fuse and<br />
wait for the impeller to stop.<br />
Loosen both clip-locks [4] and remove the<br />
housing cover [6].<br />
Remove both fixing screws from cover [7].<br />
WARNING<br />
Danger of injury from fan unit<br />
swinging out if fitted near<br />
ceiling.<br />
Once you have removed the<br />
fixing screws, carefully and<br />
slowly lower the fan unit.<br />
If the installation location is at<br />
head height, select a location<br />
outside the unit's swing area.<br />
This applies particularly when<br />
using a ladder.<br />
Swing the fan unit [8] out.<br />
Clean the unit with a damp cloth, suck dry<br />
if necessary.<br />
Secure cover [7].<br />
Attach the housing cover [6] and secure<br />
with the two clip-locks [4].