6 - Busse Yachtshop
6 - Busse Yachtshop
6 - Busse Yachtshop

You also want an ePaper? Increase the reach of your titles
YUMPU automatically turns print PDFs into web optimized ePapers that Google loves.
2<br />
2 3<br />
2<br />
E<br />
F<br />
I<br />
•<br />
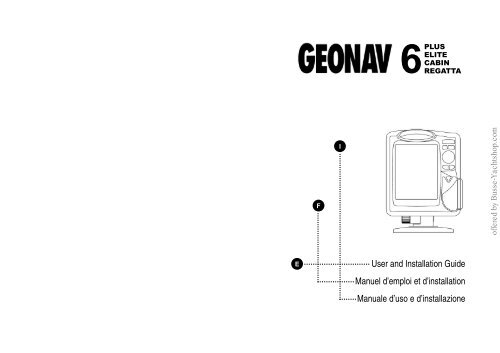
6PLUS<br />
ELITE<br />
CABIN<br />
REGATTA<br />
User and Installation Guide<br />
Manuel d’emploi et d’installation<br />
Manuale d’uso e d’installazione<br />
3<br />
offered by <strong>Busse</strong>-<strong>Yachtshop</strong>.com
2<br />
2 3<br />
2<br />
E<br />
6PLUS<br />
ELITE<br />
CABIN<br />
REGATTA<br />
User and Installation Guide<br />
3<br />
offered by <strong>Busse</strong>-<strong>Yachtshop</strong>.com
2<br />
READ THIS WARNING BEFORE USING THE GEONAV<br />
WARNING<br />
THE ELECTRONIC CHART IS AN AID TO NAVIGATION DESIGNED<br />
TO FACILITATE THE USE OF AUTHORIZED GOVERNMENT CHARTS,<br />
NOT TO REPLACE THEM.<br />
ONLY OFFICIAL GOVERNMENT CHARTS AND NOTICES TO MARI-<br />
NERS CONTAIN ALL INFORMATION NEEDED FOR THE SAFETY OF<br />
NAVIGATION AND, AS ALWAYS, THE CAPTAIN IS RESPONSIBLE FOR<br />
THEIR PROPER USE.<br />
The use of the GEONAV implies knowledge and acceptance of this<br />
warning by the user.<br />
NOTE: This guide applies to GEONAV 6 Plus, GEONAV 6 Elite, GEONAV 6 Cabin and GEONAV<br />
6 Regatta. The functions peculiar to each model are highlighted in the text. Unless otherwise<br />
specified, functions are intended as common to all models.<br />
3<br />
offered by <strong>Busse</strong>-<strong>Yachtshop</strong>.com
Plus<br />
Characteristics<br />
GEONAV 6 PLUS<br />
• Self-contained GPS plotter system<br />
(Plotter + GPS receiver + Antenna)<br />
12 -channel internal GPS<br />
Satellite acquisition time:<br />
2 minutes (cold)<br />
15 minutes first fix (with internal GPS)<br />
Built-in world map<br />
Splash-proof<br />
Weight: 1 kg<br />
Electrical characteristics<br />
Input voltage: 11VDC to 18 VDC with reverse polarity and overvoltage<br />
protection<br />
Power consumption: 0.5 W<br />
Operating temperature: 0° to +60° C, humidity 93%<br />
Storage temperature: -20°C to +70°C, humidity 93%<br />
Monochrome LCD with high visibility under sunlight<br />
Adjustable backlight and contrast<br />
Backlight keypad<br />
Pixel resolution: 240 x 320<br />
32-bit RISC processor<br />
Memory characteristics<br />
1 reversible route<br />
Up to 20 waypoints per route<br />
1 track, up to 500 trackpoints<br />
Up to 99 markers<br />
Accessories<br />
Mounting bracket for fixed installation on boat<br />
Removable bracket with suction cup for installation on cars only<br />
Bracket with power supply cable and car lighter plug<br />
User’s manual<br />
Bracket protection cap<br />
Carrying case<br />
4<br />
Mechanical dimensions<br />
GEONAV 6 PLUS<br />
GEONAV 6 ELITE<br />
GEONAV 6 CABIN<br />
GEONAV 6 REGATTA<br />
5<br />
offered by <strong>Busse</strong>-<strong>Yachtshop</strong>.com
Characteristics<br />
GEONAV 6 ELITE<br />
Elite Elite<br />
6<br />
Self-contained GPS plotter system<br />
(Plotter + GPS receiver + Antenna)<br />
12 -channel internal GPS, differential-ready<br />
Satellite acquisition time:<br />
2 minutes (cold)<br />
15 minutes first fix (with internal GPS)<br />
Possibility to use an external GPS via NMEA 0183<br />
Integrated depth sounder via NMEA 0183 (optional)<br />
Built-in world map<br />
Autopilot<br />
Chart rotation (head-up display)<br />
Splash-proof<br />
Weight: 1 kg<br />
Electrical characteristics<br />
Input voltage: 11VDC to 18 VDC with reverse polarity and overvoltage<br />
protection<br />
Power consumption: 0.5 W<br />
Operating temperature: 0° to +60° C, humidity 93%<br />
Storage temperature: -20°C to 70°C, humidity 93%<br />
4-color LCD with high visibility under sunlight<br />
Adjustable backlight and contrast<br />
Backlight keypad<br />
Pixel resolution: 240 x 320<br />
32-bit RISC processor<br />
Memory characteristics<br />
1 reversible route<br />
Up to 20 waypoints per route<br />
1 track, up to 500 trackpoints<br />
Up to 99 markers<br />
Interface characteristics<br />
Standard NMEA 0183 sentences<br />
- from the position sensor:<br />
GLL, VTG, GGA, RMC, GSV, ZDA, RMA, GSA<br />
- from the depth sounder:<br />
DBT, DBS, DPT, DBK, MTW<br />
- to the autopilot:<br />
APA, APB, XTE, RMB, BWC, GLL, VTG<br />
If received from the GPS, the following sentences are transmitted:<br />
GGA, RMC, ZDA<br />
Protocol RTCM SC-104, BAUD RATE from 300 to 9600 bps<br />
- from the differential antenna<br />
Accessories<br />
Mounting bracket for fixed installation on boat<br />
Removable bracket with suction cup for installation on cars only<br />
Bracket with power supply cable and car lighter plug<br />
Data cable for connection to external GPS, DGPS, depth sounder<br />
and autopilot<br />
User’s manual<br />
Bracket protection cap<br />
Carrying case<br />
7<br />
offered by <strong>Busse</strong>-<strong>Yachtshop</strong>.com
Characteristics<br />
GEONAV 6 CABIN<br />
Cabin Cabin<br />
8<br />
Chart plotter to be connected to any GPS receiver via NMEA 0183<br />
Integrated depth sounder via NMEA 0183 (optional)<br />
Built-in world map<br />
Autopilot<br />
Chart rotation (head-up display)<br />
Splash-proof<br />
Panel mounting<br />
Weight: 1 kg<br />
Electrical characteristics<br />
Input voltage: 11VDC to 18 VDC with reverse polarity and overvoltage<br />
protection<br />
Power consumption: 0.5 W<br />
Operating temperature: 0° to +60° C, humidity 93%<br />
Storage temperature: -20°C to +70°C, humidity 93%<br />
4-color LCD with high visibility under sunlight<br />
Adjustable backlight and contrast<br />
Backlight keypad<br />
Pixel resolution: 240 x 320<br />
32-bit RISC processor<br />
Memory characteristics<br />
1 reversible route<br />
Up to 20 waypoints per route<br />
1 track, up to 500 trackpoints<br />
Up to 99 markers<br />
Interface characteristics<br />
Standard NMEA 0183 sentences<br />
- from the position sensor:<br />
GLL, VTG, GGA, RMC, GSV, ZDA, RMA, GSA<br />
- from the depth sounder:<br />
DBT, DBS, DPT, DBK, MTW<br />
- to the autopilot:<br />
APA, APB, XTE, RMB, BWC, GLL, VTG<br />
If received from the GPS, the following sentences are transmitted:<br />
GGA, RMC, ZDA<br />
Accessories<br />
Bracket for fixed installation<br />
Gasket and drilling template for panel mounting<br />
Power supply cable for connection to external GPS, depth sounder<br />
and autopilot<br />
User’s manual<br />
Protection cap<br />
Carrying case<br />
9<br />
offered by <strong>Busse</strong>-<strong>Yachtshop</strong>.com
Characteristics<br />
GEONAV 6 REGATTA<br />
Regatta Regatta<br />
10<br />
Self-contained GPS plotter system<br />
(Plotter + GPS receiver + Antenna)<br />
12 -channel internal GPS, differential-ready<br />
Satellite acquisition time:<br />
2 minutes (cold)<br />
15 minutes first fix (with internal GPS)<br />
Possibility to use an external GPS via NMEA 0183<br />
Functions designed for sailing<br />
NMEA 0183 input for mast head transducer<br />
Integrated depth sounder via NMEA 0183 (optional)<br />
Built-in world map<br />
Autopilot<br />
Chart rotation (head-up display)<br />
Splash-proof<br />
Panel mounting<br />
Weight: 1 kg<br />
Electrical characteristics<br />
Input voltage: 11VDC to 18 VDC with reverse polarity and overvoltage<br />
protection<br />
Power consumption: 0.5 W<br />
Operating temperature: 0° to +60° C, humidity 93%<br />
Storage temperature: -20°C to 70°C, humidity 93%<br />
4-color LCD with high visibility under sunlight<br />
Adjustable backlight and contrast<br />
Backlight keypad<br />
Pixel resolution: 240 x 320<br />
32-bit RISC processor<br />
Memory characteristics<br />
1 reversible route<br />
Up to 20 waypoints per route<br />
1 track, up to 500 trackpoints<br />
Up to 99 markers<br />
Interface characteristics<br />
Standard NMEA 0183 sentences<br />
- from the position sensor:<br />
GLL, VTG, GGA, RMC, GSV, ZDA, RMA, GSA<br />
- from the mast head transducer:<br />
VWR<br />
- from the depth sounder:<br />
DBT, DBS, DPT, DBK, MTW<br />
- to the autopilot:<br />
APA, APB, XTE, RMB, BWC, GLL, VTG<br />
If received from the GPS, the following sentences are transmitted:<br />
GGA, RMC, ZDA<br />
Accessories<br />
Bracket for fixed installation<br />
Gasket and drilling template for panel mounting<br />
Power supply cable for connection to external GPS, mast head transducer,<br />
depth sounder and autopilot<br />
User’s manual<br />
Protection cap<br />
Carrying case<br />
11<br />
offered by <strong>Busse</strong>-<strong>Yachtshop</strong>.com
Plus<br />
Elite<br />
Regatta<br />
Cabin<br />
Elite<br />
Regatta<br />
Elite<br />
Cabin<br />
Regatta<br />
Regatta<br />
Introduction<br />
INTRODUCTION<br />
The GEONAV is a graphic GPS plotter that displays your boat’s current<br />
position with respect to an electronic chart.<br />
The Plus model is equipped with a built-in GPS receiver.<br />
The Elite and Regatta models are equipped with built-in GPS receivers with<br />
external differential inputs.<br />
The Cabin model must be connected to an external GPS receiver.<br />
The GEONAV can track up to 12 satellites simultaneously and can be<br />
interfaced with:<br />
12<br />
A DGPS antenna when using the built-in GPS<br />
An external GPS<br />
A depth sounder<br />
An autopilot<br />
A mast head transducer<br />
By using a GEONAV and a NAVIONICS electronic chart, you will never<br />
get lost even in bad weather conditions such as fog, rain or dark because<br />
your plotter will always display where you are and where your are<br />
heading to.<br />
The ROUTE function will allow you to plan a trip, MARKERS will allow<br />
you to mark points of interest whereas the TRACK function will allow<br />
you to record your actual route.<br />
NAVIONICS chart cartridges are available for all popular boating areas<br />
around the world and can be used in addition to your official paper<br />
charts. NAVIONICS chart cartridges are available from authorized<br />
NAVIONICS dealers and outlets around the world.<br />
See your local marine electronics dealer for further information.<br />
Plus<br />
Elite<br />
The GEONAV unit is equipped with accessories for installation in your<br />
boat and car.<br />
The GEONAV can also be used for land applications; the GPS receiver<br />
and the new NAVIONICS land charts will allow displaying easily your<br />
position with respect to the most popular roads and city names.<br />
The installation of the GEONAV in your car will take you only a few<br />
seconds; position the plotter on the dashboard with the suitable bracket,<br />
fix the suction cup to the front window, connect the power cable to the<br />
lighter and press the ON key.<br />
Enjoy your trip.<br />
13<br />
offered by <strong>Busse</strong>-<strong>Yachtshop</strong>.com
Elite<br />
Regatta<br />
Installation and Precautions<br />
INSTALLATION AND PRECAUTIONS<br />
SAFE DISTANCES: When installed on a boat, in order to avoid electromagnetic<br />
interference, the GEONAV must be positioned at least 0.15<br />
meters away from magnetic compasses or a flux-gate sensors, such as<br />
those used on autopilots and remote electronic compasses.<br />
ENVIRONMENT: The GEONAV is water resistant, but not waterproof. It<br />
is essential that the rubber cover on the right side of the unit is firmly<br />
inserted into the cartridge slot; the rubber cover should be removed only<br />
when the Navchart has to be inserted or replaced and, in this case, the<br />
unit must be perfectly dry.<br />
NOTE: Any damage caused by water into the cartridge slot is specifically excluded from the<br />
warranty.<br />
Cleaning<br />
It is recommended that you use a non-alcoholic product to clean the<br />
glass, since alcoholic products may damage the glass surface or make it<br />
opaque.<br />
Installation<br />
The GEONAV allows using either the built-in antenna for outdoor installation<br />
or an external GPS antenna for indoor use.<br />
NOTE: At start-up, the plotter will select the internal GPS by default.<br />
14<br />
Internal GPS: For the best reception of satellites, mount your unit in an<br />
open area to allow the built-in antenna to have the best sky visibility.<br />
If the instrument is installed so as to allow full horizon visibility, the<br />
best performance will be ensured.<br />
When using the built-in GPS receiver, the GEONAV can be interfaced<br />
with a DGPS (RTCM).<br />
ATTENTION: The GEONAV can be connected to several DGPS whose function modes are<br />
the following:<br />
a) automatic frequency selection, or<br />
b) manual frequency selection with a wave-change switch.<br />
DGPS: To connect the GEONAV to a DGPS antenna, use the data cable<br />
provided with the unit (see the Connections section).<br />
Elite<br />
Cabin<br />
Regatta<br />
Regatta<br />
Plus<br />
Elite<br />
External GPS: Instead of a built-in antenna, you can use an external<br />
GPS. To connect the GEONAV to an external antenna, use the data<br />
cable provided with the unit (see the Connections section).<br />
Autopilot: To connect the GEONAV to an autopilot, use the data cable<br />
provided with the unit (see the Connections section).<br />
Depth sounder: To connect the GEONAV to a depth sounder, use the<br />
data cable provided with the unit (see the Connections section).<br />
Mast head transducer: To connect the GEONAV to a mast head transducer,<br />
use the data cable provided with the unit (see the Connections<br />
section).<br />
NOTE: Since only one NMEA 0183 input is available in addition to the input used for connecting<br />
to the GPS, the depth sounder must be connected through an NMEA 0183 mixer or a<br />
bridge to instrument networks.<br />
Fixed installation (on boat)<br />
The plotter can be mounted on any surface<br />
using the mounting bracket provided<br />
with the unit (see figure).<br />
Use the 3 flat-head screws (6mm) to fix<br />
the bracket to the desired mounting surface.<br />
Since the bracket does not allow<br />
any left or right rotation, make sure that<br />
the unit is properly installed for the best<br />
view angle.<br />
In the event that you wish to connect<br />
the power cable directly to the boat battery,<br />
cut the car lighter adapter off; we<br />
recommend the installation of a 1A fuse<br />
between the power source and the plotter<br />
to protect the instrument against overvoltage<br />
and/or overcurrent.<br />
When the plotter is taken away from the<br />
bracket, we recommend that you use<br />
the bracket cap supplied with the<br />
GEONAV to protect the electrical contacts<br />
against water.<br />
15<br />
offered by <strong>Busse</strong>-<strong>Yachtshop</strong>.com
Cabin<br />
Regatta<br />
Plus<br />
Elite<br />
Installation and Precautions<br />
Fixed installation<br />
The plotter can be mounted on any surface using the mounting bracket<br />
provided with the unit (see figure). Use the 4 flat-head screws (6mm) to<br />
fix the bracket to the desired mounting surface. Since the bracket does<br />
not allow any left or right rotation, make sure that the unit is properly<br />
installed for the best view angle.<br />
We recommend the installation of a 1A fuse between the power source<br />
and the plotter to protect the instrument against overvoltage and/or<br />
overcurrent.<br />
Car installation<br />
To allow an easy installation on your car,<br />
the GEONAV is supplied with an additional<br />
bracket equipped with a suction<br />
cup. When the unit is installed, make<br />
sure that your car front window has<br />
enough space to allow good road visibility.<br />
The installation procedure is the following:<br />
1. Locate a flat surface on the window<br />
that allows you to position the<br />
bracket base on the dashboard as<br />
well as the internal GPS to have the<br />
best sky visibility (the GPS has to<br />
track satellites and therefore to see<br />
the sky).<br />
2. Clean the entire front window area<br />
suitable for installing the unit. Use<br />
a good window cleaner and paper<br />
towels and dry the area completely.<br />
3. Verify that the GEONAV does not interfere<br />
with levers, airbags and other<br />
car facilities.<br />
4. Pull the suction cup lever back.<br />
5. Place the suction cup firmly on the<br />
clean, flat glass surface and push the<br />
lever forward to make it adhere to<br />
the glass.<br />
6. Make sure that the unit is firmly secured<br />
and correctly positioned and<br />
that will not come off the window.<br />
16<br />
Plus<br />
Elite<br />
Cabin<br />
Regatta<br />
This step is very important to ensure safe operation while driving.<br />
Test the connection between the unit and the window several times<br />
after installation and during use when you start up the car and on<br />
other occasions.<br />
7. Place the mounting bracket on top of the dashboard and position the<br />
plotter so as to ensure the best visibility of the screen and for the<br />
internal GPS antenna.<br />
8. Plug the power cord into the lighter adapter.<br />
NOTE: Some cars disable the power supply, for example when they are switched on. In this case,<br />
the GEONAV will go out as well.<br />
Panel mounting<br />
Locate the area where the GEONAV is to be installed, then make the<br />
holes in the panel using the appropriate drilling template supplied.<br />
Apply the neoprene adhesive gasket to the rear of the plotter to reduce<br />
moisture penetration and vibrations.<br />
Position and fix the unit to the panel by 4 screws 4 mm in diameter and<br />
maximum 5 mm in length, plus panel thickness.<br />
Do not tighten the screws too firmly, in order not to damage the screw<br />
seats.<br />
17<br />
offered by <strong>Busse</strong>-<strong>Yachtshop</strong>.com
Plus<br />
Elite<br />
Elite<br />
Connections<br />
CONNECTIONS<br />
Power supply cable<br />
The car lighter adapter has a little lamp<br />
(LED) that goes on if the car is correctly providing<br />
power to the bracket.<br />
If the lamp is off:<br />
verify that 12V voltage is available from<br />
the lighter plug;<br />
open the adapter and check the fuse.<br />
If the fuse is broken, replace it with a fuse<br />
having the same electrical characteristics.<br />
DO NOT USE ANY BYPASS CIRCUIT.<br />
The fuse ensures that the special protection<br />
circuit inside the plotter works properly<br />
in case of accidental short-circuit, polarity<br />
inversion and overvoltage.<br />
If you has to remove the lighter adapter,<br />
internal connections are the following:<br />
18<br />
red (or white) +(+12V)<br />
black - (ground)<br />
Connector and data cable<br />
1. Auxiliary output voltage (Vaux)<br />
red wire Vaux +, 250mA pin 1*<br />
black wire GND pin 2<br />
2. Data input ext. GPS/DGPS<br />
brown wire ext. GPS in + pin 3<br />
yellow wire ext. GPS in - pin 4<br />
3. Data output<br />
violet wire Autopilot out + pin 5<br />
white wire Autopilot out - pin 6<br />
4. Data input depth sounder<br />
blue wire DS in + pin 7<br />
green wire DS in - pin 8<br />
SHIELD pin 9<br />
* Vaux voltage is the same as the plotter’s input voltage.<br />
LED<br />
fuse<br />
Cabin<br />
Regatta<br />
Elite<br />
Cabin<br />
Regatta<br />
Connector and power supply / data cable<br />
1. Power supply input<br />
red wire Vin + (11-18VDC),<br />
250mA pin 1<br />
black wire Vin - pin 2<br />
2. Ext. GPS data input<br />
brown wire data in + pin 3<br />
yellow wire data in - pin 4<br />
3. Autopilot data output<br />
violet wire data out + pin 5<br />
white wire data out - pin 6<br />
4. Depth sounder data input<br />
blue wire data in + pin 7<br />
green wire data in - pin 8<br />
SHIELD pin 9<br />
Connector and power supply / data cable<br />
1. Power supply input<br />
red wire Vin + (11-18VDC),<br />
250mA pin 1<br />
black wire Vin - pin 2<br />
2. Ext. GPS/DGPS data input<br />
brown wire data in + pin 3<br />
yellow wire data in - pin 4<br />
3. Autopilot data output<br />
violet wire data out + pin 5<br />
white wire data out - pin 6<br />
4. Anemometer/depth sounder<br />
data input<br />
blue wire data in + pin 7<br />
green wire data in - pin 8<br />
SHIELD pin 9<br />
If sent by the autopilot, the following NMEA messages are transmitted to<br />
external devices: GGA - RMC - ZDA<br />
The GEONAV will add the following messages: APA - APB - XTE - RMB -<br />
BWC - GLL - VTG<br />
The data cable is supplied together with the GEONAV plotter.<br />
WARNING: Once the installation is completed, always make sure that all wires are properly connected<br />
since wrong connections may damage the unit.<br />
19<br />
offered by <strong>Busse</strong>-<strong>Yachtshop</strong>.com
Cartridge Installation Keyboard<br />
20<br />
CARTRIDGE INSTALLATION<br />
Installing the cartridge<br />
Remove the rubber cover on the<br />
unit right side protecting the<br />
Navchart cartridge slot.<br />
Insert the cartridge into the slot<br />
paying attention to the reference<br />
groove.<br />
Replace the rubber cover exercising<br />
light pressure and make<br />
sure it is perfectly inserted to<br />
avoid any water infiltration.<br />
Removing the cartridge<br />
Make sure that the unit is perfectly dry.<br />
Remove the rubber cover on the unit right side and extract the cartridge.<br />
ATTENTION: The rubber cover should be removed only when inserting or replacing the cartridge.<br />
KEYBOARD<br />
ZOOM+/ZOOM-<br />
Selects the chart range.<br />
ENTER<br />
Enters a marker or<br />
confirms a selection<br />
from the menu.<br />
PAGE<br />
Navigation mode:<br />
Turns navigation<br />
data pages.<br />
Cursor mode:<br />
Allows switching<br />
from Cursor mode<br />
to Navigation mode.<br />
GOTO<br />
Allows plotting a route<br />
toward a manual cursor<br />
position, desired<br />
marker, port, nearest<br />
port service or specified<br />
position (lat/lon).<br />
CLR<br />
Navigation mode:<br />
Deletes the current<br />
route.<br />
Cursor mode:<br />
Deletes the last<br />
waypoint or the<br />
marker pointed by<br />
the cursor.<br />
CURSOR<br />
Moves the manual<br />
cursor across the<br />
screen.<br />
Allows switching<br />
from Navigation<br />
mode to Cursor<br />
mode.<br />
Allows selecting<br />
from the options in<br />
the menu /<br />
submenu.<br />
At start-up, allows<br />
adjusting screen<br />
contrast.<br />
ON/OFF<br />
Switches the<br />
GEONAV on / off.<br />
Allows adjusting the<br />
screen backlight.<br />
21<br />
offered by <strong>Busse</strong>-<strong>Yachtshop</strong>.com
Elite<br />
Cabin<br />
Regatta<br />
Diagnostic<br />
DIAGNOSTIC<br />
The GEONAV has a diagnostic program to verify its correct performance<br />
once installed and to detect problems that may occur during the unit<br />
operation. To perform these tests, switch the unit on by pressing simultaneously<br />
ON and another key (except for CLR).<br />
The GEONAV will automatically perform a test of the entire system; as<br />
soon as the memory test is completed, the program allows verifying<br />
whether each key works properly. An outline of the keyboard is displayed;<br />
press each key and check whether the corresponding key on the<br />
screen turns black. If the key is faulty, no change in color will occur.<br />
The diagnostic program allows checking the correct connection between<br />
the built-in antenna or an external GPS and the unit (channel 0). The<br />
position sensor should be operating and should transmit NMEA 0183<br />
messages. If the receiver is working, you will see a string of NMEA 0183<br />
messages being displayed to indicate that the whole system is working<br />
correctly.<br />
Keep CLR pressed to freeze the messages on the screen, then release CLR<br />
to keep on displaying NMEA 0183 messages.<br />
To test channel 1 (depth sounder), press ZOOM-, to go back testing channel<br />
0, press ZOOM+.<br />
Press ENTER to exit the diagnostic program.<br />
ATTENTION: It is possible to clear the contents of the GEONAV internal memory (not the<br />
Navchart) and to reset the plotter to the starting point. To perform a memory reset, switch the<br />
unit on by pressing simultaneously the ON and CLR keys.<br />
22<br />
NAVIONICS Electronic Charts<br />
NAVIONICS ELECTRONIC CHARTS<br />
The GEONAV includes a built-in world map<br />
that allows zooming from 4,096 down to<br />
512NM.<br />
Additional cartography details relative to<br />
a specific area of navigation are available<br />
from NAVIONICS Seamless Navchart cartridges.<br />
To display chart boundaries, press PAGE<br />
until the menu bar appears, select SETUP,<br />
DISPLAY MAPS and press ENTER to<br />
confirm. A small square will locate the area covered by the cartridge<br />
installed. To increase/decrease chart details, press ZOOM.<br />
NAVIONICS charts contain the following data:<br />
Main geographical names (continents, oceans, countries, etc.).<br />
Secondary geographical names (cities, towns, shoals, reefs, islands,<br />
etc.).<br />
Navigational aids:<br />
navaids<br />
.......<br />
depth contours<br />
spot soundings<br />
port services<br />
shipwrecks<br />
Displaying depth contours<br />
Press PAGE to display the menu bar, select<br />
SETUP, the set of depth contours, then<br />
ON/OFF.<br />
Displaying geographical names<br />
Press PAGE to display the menu bar, select<br />
SETUP, the NAMES option, then ON/OFF.<br />
Displaying navaid characteristics<br />
To display navaid characteristics, position<br />
the manual cursor on the navaid symbol.<br />
The navaid position is identified by the<br />
symbol .<br />
23<br />
offered by <strong>Busse</strong>-<strong>Yachtshop</strong>.com
Navigational Aids<br />
NAVIGATIONAL AIDS<br />
24<br />
Displaying port services<br />
The symbol identifies a port providing services.<br />
Zoom down to 1 NM, position the<br />
manual cursor on the icon (sailing boat)<br />
relevant to the selected marina; press EN-<br />
TER and a window will list all the services<br />
available in that port. Select the desired<br />
icon by the ENTER key. Port services are<br />
identified by the following icons:<br />
Health services<br />
Engine, boat, electronic<br />
and other repairs<br />
Water<br />
Information and<br />
authorities<br />
Tourist services<br />
and shops<br />
Customer services<br />
The services available depend on the NAVIONICS cartridge used.<br />
Fuel<br />
Elite<br />
Regatta<br />
Elite<br />
Cabin<br />
Regatta<br />
Functional Characteristics<br />
FUNCTIONAL CHARACTERISTICS<br />
This chapter summarizes the most commonly used functions of the<br />
GEONAV and gives also a brief description of the terms that will appear<br />
in the following pages. Additional terms and acronyms can be found in<br />
the Glossary section at the end of this manual.<br />
Internal or external GPS<br />
To make the installation easy, the GEONAV can use either its own internal<br />
GPS receiver or an external receiver, depending on where the unit is<br />
to be installed (indoor or outdoor).<br />
To select the internal/external GPS, press PAGE to display the menu,<br />
select SETUP, then GPS INT or GPS EXT. The selection of GPS INT will<br />
open a new window; select “YES” if the plotter is connected to a DGPS<br />
compatible with the internal GPS, otherwise select “NO”. Confirm the<br />
operation by pressing ENTER.<br />
Depth sounder<br />
When in depth sounder mode, the GEONAV displays the navigation window<br />
in the screen upper part, and, in the bottom part, the sea depth in<br />
graphic form.<br />
The depth value can be expressed in meters (selected by default), feet<br />
and fathoms; press PAGE to display the menu, select SETUP and then<br />
DEPTH UNITS (M/FT/FA).<br />
Navigation mode (Automatic, AUTO)<br />
The GEONAV enters the Navigation mode as soon as the internal or<br />
external GPS receiver transmits a valid fix; when in Navigation mode:<br />
the manual cursor is not displayed;<br />
the depth sounder window can be accessed.<br />
This mode is also called automatic because the unit automatically selects<br />
the chart scale and updates the boat’s position on the screen.<br />
Cursor mode (Manual, MAN)<br />
When in Cursor mode, the manual cursor is displayed. It is possible to<br />
edit a route, insert or delete markers, display navaid information etc.,<br />
but it is not possible to gain access to the depth sounder window.<br />
By pressing one of the four arrows in the CURSOR key, the unit switches<br />
from Cursor to Navigation mode, and the screen is centered in relation<br />
to the manual cursor.<br />
To return to Navigation mode press PAGE.<br />
25<br />
offered by <strong>Busse</strong>-<strong>Yachtshop</strong>.com
Elite<br />
Cabin<br />
Regatta<br />
Functional Characteristics<br />
Chart rotation<br />
Charts are traditionally displayed in north-up<br />
mode. This, however, does not correspond to<br />
reality. For example, when traveling southwards,<br />
the chart shows, on the right side of<br />
the boat, what is actually located on the left<br />
side, and vice versa.<br />
The Chart Rotation function allows rotating the<br />
electronic chart displayed according to the plotted<br />
route (COG - Course Over Ground) as detected<br />
by the GPS receiver. Since the COG value<br />
varies continuously, a filter has been inserted<br />
to prevent the chart from bouncing.<br />
To activate the Chart Rotation function, press<br />
PAGE to display the menu, select SETUP, then<br />
CHART ROTATION and ON. A message will<br />
prompt the user to select the requested maximum<br />
range before activating the chart rotation.<br />
Autozoom<br />
With the Autozoom function the GEONAV will<br />
always display automatically the boat’s position<br />
and the target waypoint at the best available<br />
chart range.<br />
26<br />
without rotation<br />
with rotation<br />
As the boat approaches the target waypoint, the unit will automatically<br />
zoom in. Once the waypoint is passed, the unit will select the best range<br />
to display the boat’s position and the following waypoint. To activate the<br />
Autozoom function, press ZOOM+ until the “AUTOZOOM ? ENTER = YES”<br />
message is displayed. To deactivate the Autozoom function press the<br />
ZOOM key once. When the GEONAV is turned on, and if at least one<br />
waypoint has been previously entered, the Autozoom function is automatically<br />
activated.<br />
Screen Amplifier<br />
This function automatically redraws the chart according to the boat’s<br />
course, to maintain 2/3rds of the screen ahead of the boat.<br />
This function will be activated only if no waypoint has been previously<br />
inserted.<br />
without screen amplifier with screen amplifier<br />
Overzoom<br />
The Overzoom function allows the chart scale<br />
to expand anywhere up to 1/4 NM. The<br />
Overzoom does not provide any additional chart<br />
detail, but improves only the readability of the<br />
existing information, acting as a magnifying<br />
glass.<br />
When the Overzoom is activated, the unit will<br />
warn the user by:<br />
deactivating the land filling function;<br />
replacing RANGE with OVZ (blinking) within<br />
the navigation window.<br />
To activate/deactivate the Overzoom function, press PAGE until the menu<br />
bar is displayed, then select SETUP, OVERZOOM and ON/OFF.<br />
Position calibration<br />
Most position sensors have intrinsic errors that make the boat’s position<br />
incorrect (from few meters to several hundred meters) with respect<br />
to the background display of the chart.<br />
This error is caused by the principle at the root of the satellite-derived<br />
position system. The position calibration allows the user to manually<br />
correct the position error present in all GPS. Press PAGE until the menu<br />
bar is displayed, select SETUP, CALIBRATION and then ON. A message<br />
will prompt the user to move the cursor to the boat’s true position by<br />
using the CURSOR key. Press ENTER to move the GPS boat’s position to the<br />
point indicated by the cursor. This operation will save the calibration for<br />
use in future calculations.<br />
NOTE: When the calibration is activated, the coordinates will be marked by (*) for safety purposes.<br />
To cancel calibration, press PAGE until the menu bar is displayed, select<br />
SETUP, CALIBRATION and then OFF.<br />
27<br />
offered by <strong>Busse</strong>-<strong>Yachtshop</strong>.com
Elite<br />
Cabin<br />
Regatta<br />
Functional Characteristics<br />
Local time<br />
By this function the user can enter local time instead of the Greenwich<br />
time (GMT) supplied by the GPS receiver.<br />
To enter local time, press PAGE until the menu bar is displayed, select<br />
SETUP, REFER. TIME and then LOCAL. A window will allow entering<br />
local time by using the CURSOR key. Press ENTER to confirm the operation.<br />
To cancel local time, press PAGE until the menu bar is displayed, select<br />
SETUP, REFER. TIME and then GMT.<br />
Color<br />
The GEONAV is equipped with a 4-color screen that offers perfect visibility<br />
under sunlight. Green, white, blue and red are the colors available<br />
and cannot be modified.<br />
Earth .......................................................................................red<br />
Sea .......................................................................................white<br />
Menu, windows, navaids, boat’s position ................................blue<br />
• Tracks, waypoints ................................................................green<br />
Contrast<br />
Press PAGE until the menu bar is displayed and adjust the contrast with<br />
the CURSOR key.<br />
The contrast can be adjusted at start-up, when the WARNING message<br />
appears or when the satellite window is displayed; press the CURSOR key<br />
and adjust the contrast.<br />
Brightness<br />
To enable the screen backlight, press repeatedly the ON key at start-up.<br />
28<br />
Plus<br />
Elite<br />
Cabin<br />
Regatta<br />
Operation<br />
OPERATION<br />
At start-up the GEONAV displays a message warning the user that the<br />
electronic chart is a navigation aid designed to facilitate the use of authorized<br />
government charts, not to replace them.<br />
Adjust the contrast by pressing CURSOR or activate the backlight by pressing<br />
ON. Press PAGE to continue; the GEONAV will display the GPS information<br />
window.<br />
The GEONAV is able to display five graphic windows: to switch from one<br />
window to another, press PAGE.<br />
When the fix is valid, the window sequence is the following:<br />
SATELLITES > NAVIGATION > MENU > NAVIG. TO WP > TRIP<br />
SATELLITES > NAVIGATION > MENU > DEPTH SOUNDER > TRIP<br />
By pressing CURSOR the GEONAV switches<br />
to Cursor mode, allowing the user to move<br />
freely within the seamless world of<br />
NAVIONICS charts. The screen will always<br />
be centered with respect to the manual<br />
cursor; the window at the bottom of the<br />
screen displays the following data:<br />
Distance from the boat’s position to the<br />
manual cursor<br />
Time to arrive to the manual cursor position<br />
(estimated with respect to the<br />
current boat’s speed)<br />
Bearing from the boat’s position to the<br />
manual cursor<br />
Chart range<br />
29<br />
offered by <strong>Busse</strong>-<strong>Yachtshop</strong>.com
Satellite Window<br />
30<br />
SATELLITE WINDOW<br />
At start-up the satellite window displays<br />
how many and which satellites are tracked<br />
by the GPS receiver.<br />
The outer circle represents the horizon, the<br />
inner one identifies a 45° elevation with<br />
respect to the horizon, and the central circle<br />
points to the zenith.<br />
The small squares with numbers show the<br />
satellites available.<br />
As soon as a satellite is tracked by the GPS receiver, the number inside<br />
the square is displayed in reverse. The bars displayed on the left identify<br />
the signal quality; the longer the bar, the higher the signal quality.<br />
On the left of each bar two digits indicate numerically the signal quality<br />
relevant to that satellite.<br />
A value greater than 40 indicates a good signal quality.<br />
Additional information:<br />
Day, month, year, local or Greenwich time (at the first start-up the<br />
GEONAV is initialized to Greenwich Time).<br />
Boat’s position (lat/lon) (or the latest valid fix if the GPS is still searching<br />
for satellites).<br />
Data on current satellite situation (number and fix).<br />
SOG, COG and altitude.<br />
The latitude and longitude values relevant to the boat’s position are displayed<br />
as soon as three satellites are tracked and a 2D fix (two dimensions)<br />
is available.<br />
The altitude value is available only if four satellites are tracked and a 3D<br />
fix is obtained. As soon as a valid fix is available, the GEONAV will automatically<br />
switch to Navigation mode and display the boat’s position at<br />
the best chart range available; the window at the bottom of the screen<br />
will indicate the boat’s course, speed and chart range.<br />
Plus<br />
Elite<br />
Regatta<br />
Elite<br />
Regatta<br />
Since the GPS receiver is initialized in Italy, the time to get the first fix<br />
will depend on the areas you want to navigate in; within the Mediterranean<br />
Sea the GEONAV should get the first fix in less than 12 minutes,<br />
whereas in other parts of the world it can take up to 30 minutes.<br />
Once the unit gets the first fix, the time for the following fixes is a few<br />
minutes.<br />
If the boat is in an area covered by a differential station, when the builtin<br />
antenna is used together with a DGPS, the top of the screen will<br />
display the “FIX 3D-DIFF” or “FIX 2D-DIFF” message.<br />
31<br />
offered by <strong>Busse</strong>-<strong>Yachtshop</strong>.com
Plus<br />
Elite<br />
Cabin<br />
Regatta<br />
Navigation Window<br />
NAVIGATION WINDOW<br />
This window is activated automatically as soon as the GPS receiver has<br />
obtained the boat’s position (FIX OK).<br />
If no route is present, speed, course and<br />
chart range are displayed at the bottom of<br />
the screen.<br />
By using the ZOOM key, the chart detail level<br />
can be increased, thus accessing<br />
NAVIONICS chart data.<br />
If a route has been inserted, the screen will<br />
display the following data:<br />
Boat’s speed<br />
Distance from the target waypoint<br />
Time to arrive to the target waypoint<br />
Chart range<br />
If no route is present, the boat’s speed and direction, as well as the chart<br />
range, are displayed at the top of the screen. The window in the lower<br />
left part of the screen displays the speed of true wind. If a route has been<br />
inserted, the window at the top of the screen displays the following data:<br />
Boat’s speed<br />
Distance to the target waypoint<br />
Bearing to the target waypoint<br />
Time to arrive to the target waypoint<br />
If two or more waypoints have been inserted, besides the target waypoint,<br />
a window in the lower right corner displays apparent wind data on the<br />
next leg. The speed of apparent wind is displayed numerically, whereas<br />
the wind direction is shown graphically by an arrow. If a close-hauled or<br />
a run is planned in the next leg, the arrow indicates the apparent wind<br />
on the first beat of the next leg, whereas a single line indicates the direction<br />
of apparent wind on the waypoint. Moreover, at the boat’s position,<br />
the following graphic data is displayed:<br />
Direction of true wind (magnetic), indicated by an arrow showing the<br />
direction towards which the wind blows;<br />
Layline: Displayed as a line, represents the direction the ship will be<br />
able to keep in case of tacking. The layline is displayed if the angle<br />
between the wind direction and the ship’s allows a close-hauled or a<br />
run; it is updated automatically as the wind changes.<br />
32<br />
Elite<br />
Cabin<br />
Regatta<br />
Elite<br />
Regatta<br />
Elite<br />
Cabin<br />
Regatta<br />
Plus<br />
Menu<br />
MENU<br />
The menu bar, displayed at the top of the screen, allows selecting from<br />
the following options:<br />
TRACK: To activate/deactivate the track function and to delete a track<br />
saved.<br />
CONTRAST: To adjust the screen contrast.<br />
ROUTE: To delete and reverse the route and display route information.<br />
SETUP: To activate/deactivate the plotter’s setup.<br />
Chart rotation (ON/OFF)<br />
Enables / disables the chart rotation.<br />
Display maps (ON/OFF)<br />
Enables / disables map boundaries.<br />
Depth contours<br />
(equal to/below 5 meters; equal to 10 meters;<br />
equal to/above 20 meters)<br />
Enables / disables the display of depth contours.<br />
Names (ON/OFF)<br />
Enables / disables the display of geographical names.<br />
Overzoom (ON/OFF)<br />
Enables / disables the Overzoom function.<br />
Calibration (ON/OFF)<br />
Allows entering the position calibration offset.<br />
Distance units (NAUT/METR/STAT)<br />
Allows selecting distance units.<br />
Depth units (M/FT/FA)<br />
Allows selecting depth units.<br />
GPS (INT./EXT.)<br />
Allows selecting the internal GPS or an external antenna.<br />
Reference time (LOCAL/GMT)<br />
Allows entering local time.<br />
Bearings (TRUE/MAGNETIC)<br />
Allows setting the magnetic mode for all bearings.<br />
Language (EN/FR/ES/DE/DK/IT/SV/NL/SU/NO)<br />
Allows selecting the language.<br />
Language (EN/FR/ES/DE/IT)<br />
Allows selecting the language.<br />
33<br />
offered by <strong>Busse</strong>-<strong>Yachtshop</strong>.com
Elite<br />
Cabin<br />
Regatta<br />
Depth Sounder Window Navigation to Waypoint Window<br />
DEPTH SOUNDER WINDOW<br />
A depth sensor can be interfaced with the<br />
GEONAV via NMEA.<br />
In this case, the GEONAV automatically enables<br />
the depth sounder function, displaying<br />
a graph of sea depth.<br />
The depth scale, whose unit can be selected<br />
from the menu in meters, feet or fathoms,<br />
will change automatically to show deeper<br />
or shallower water.<br />
In Navigation mode, press PAGE until the depth sounder window appears.<br />
The window will display the following data:<br />
Sea depth<br />
Depth scale<br />
Sea temperature (if available)<br />
When navigating in waters deeper than sounder access range or if the<br />
boat’s speed is too high for depth sounding, data acquisition will be<br />
interrupted and the number replaced by “—”.<br />
To deactivate the depth sounder window, press PAGE.<br />
34<br />
Plus<br />
NAVIGATION TO WAYPOINT WINDOW<br />
When the navigation to waypoint window<br />
is activated, the active route leg is temporarily<br />
deleted and replaced with a line<br />
constantly connecting the boat’s position<br />
to the current target waypoint. The window<br />
at the bottom of the screen displays<br />
the following data:<br />
Boat’s speed<br />
Distance from the boat’s position to<br />
the target waypoint<br />
Bearing from the boat’s position to the<br />
target waypoint<br />
Steering angle<br />
35<br />
offered by <strong>Busse</strong>-<strong>Yachtshop</strong>.com
Trip Window<br />
36<br />
TRIP WINDOW<br />
The trip window shows the data relating to<br />
the route followed and, in particular:<br />
Average speed<br />
Time elapsed from departure<br />
Partial distance covered<br />
Total distance covered<br />
To reset partial counters before starting a<br />
new journey, press CLR.<br />
Route<br />
3<br />
5<br />
1<br />
6<br />
2<br />
4<br />
ROUTE<br />
The GEONAV allows managing and saving<br />
navigation data.<br />
The GOTO key allows plotting a route. The<br />
figure shows a route made up of three<br />
waypoints.<br />
1 - Boat’s position<br />
The boat’s position is displayed according<br />
to the data received from the GPS receiver.<br />
2 - Leg<br />
Route segment between two waypoints.<br />
3 - Track<br />
Displayed as a dashed line, it allows recording the boat’s actual track.<br />
4 - Waypoint<br />
All waypoints are identified by a circle and a number.<br />
The GEONAV will display the “PROXIMITY TO WAYPOINT” message to<br />
warn the user that, in approximately 25 seconds, he is about to approach<br />
the next target waypoint.<br />
The “END OF TRIP” message is displayed when the user is about to<br />
reach the last waypoint of the route.<br />
The first waypoint is identified by the “X” symbol. The target waypoint<br />
(the next point the boat is navigating to) is identified by a black circle<br />
with the relevant number displayed in reverse.<br />
5 - Heading vector<br />
This vector shows the boat’s current route. If the boat is steady, the<br />
heading vector indication is meaningless.<br />
6 - Cursor<br />
It allows moving the manual cursor across the screen; the relevant geographical<br />
coordinates (latitude and longitude) are displayed in two small<br />
windows.<br />
When the GEONAV switches to Navigation mode, the manual cursor<br />
disappears.<br />
37<br />
offered by <strong>Busse</strong>-<strong>Yachtshop</strong>.com
Route<br />
Creating a route<br />
To create a route, insert at least one waypoint taking the boat’s current<br />
position as a starting point. To insert one waypoint at any time, press<br />
GOTO and select one of the options displayed. A waypoint will be inserted<br />
on the selected position and the route initially composed by a leg connecting<br />
the boat’s position to the target waypoint selected. If you want to<br />
enter additional waypoints, press GOTO and select one of the options<br />
available; the new waypoint will be appended to the existing route. To<br />
insert, move or delete waypoints (e.g. to go round obstacles or change<br />
the route plan), activate the route editing function (see the following<br />
pages).<br />
NOTE: Since the GEONAV is able to manage only one route at a time, the creation of a new route<br />
will automatically delete the route previously entered.<br />
38<br />
Route to the manual cursor position<br />
Press CURSOR to enter the Cursor mode.<br />
Press GOTO, select the CURS option and<br />
press ENTER.<br />
The GEONAV will insert a new waypoint in<br />
the cursor position and append a new leg<br />
to the existing route; if no waypoint had<br />
been previously entered, the leg will be<br />
connected to the boat’s position.<br />
The GEONAV will automatically activate<br />
the Autozoom function as soon as it is<br />
switched to Navigation mode.<br />
Route to a marker<br />
Press GOTO and select the MARK option by<br />
the CURSOR key. The GEONAV will display<br />
the marker catalog (the latest 6 markers<br />
used will be highlighted at the top of the<br />
screen) thus allowing selecting the desired<br />
target marker.<br />
Select a marker and press ENTER to confirm<br />
the operation.<br />
The GEONAV will insert a waypoint in the marker position and will append<br />
the new leg to the existing route; if no route is available, the new<br />
waypoint will be connected to the boat’s position. By pressing PAGE, the<br />
GEONAV will automatically activate the Autozoom function as soon as it<br />
is switched to Navigation mode.<br />
Route to a port<br />
Press GOTO and select the PORT option by<br />
the CURSOR key.<br />
The GEONAV will display the port catalog<br />
(the latest 6 ports used will be highlighted<br />
at the top of the screen), thus allowing selecting<br />
the desired port.<br />
Select a port and press ENTER to confirm<br />
the operation.<br />
The GEONAV will insert a waypoint in the port position and will append<br />
the new leg to the existing route; if no route is available, the new waypoint<br />
will be connected to the boat’s position.<br />
By pressing PAGE, the GEONAV will automatically activate the Autozoom<br />
function as soon as it is switched to Navigation mode.<br />
Route to the nearest service<br />
NOTE: This option is available only with the NAVIONICS<br />
cartridges containing the Port Services feature.<br />
Press GOTO and select the NEAR option by<br />
the CURSOR key; the GEONAV will display<br />
the port services catalog, thus allowing selecting<br />
the desired service.<br />
Select the desired service, press ENTER to<br />
confirm or PAGE to exit. The GEONAV will<br />
display the three ports nearest to the boat’s<br />
position (if in Navigation mode) or to the<br />
manual cursor (if in Cursor mode) containing<br />
the selected service.<br />
By pressing the CURSOR key, highlight one port at a time and check the<br />
relevant distance and time to arrive (estimated on the boat’s current<br />
speed). Press ENTER to confirm the selection.<br />
The GEONAV will insert a waypoint in the port position and will append<br />
the new leg to the existing route, if in Cursor mode, or delete the existing<br />
route and create a new one if in Navigation mode; if no route is available,<br />
before activating the NEAR function, the new leg will connect the waypoint<br />
to the boats’ position, if in Navigation mode, or to the manual cursor if in<br />
Cursor mode.<br />
The GEONAV will automatically activate the Autozoom function as soon<br />
as it is switched to Navigation mode.<br />
39<br />
offered by <strong>Busse</strong>-<strong>Yachtshop</strong>.com
Plus<br />
Elite<br />
Cabin<br />
Regatta<br />
Route<br />
Route to a point (Lat / Lon)<br />
Press GOTO and select L/L by the CURSOR<br />
key. Once the desired value has been entered,<br />
press ENTER to confirm.<br />
Route to a point (Lat / Lon, Range / Bearing)<br />
Press GOTO and select PNT by the CURSOR<br />
key. Choose the waypoint insertion mode<br />
from geographical coordinates (Latitude<br />
and Longitude) and polar coordinates<br />
(Range and Bearing).<br />
Once the desired value has been entered,<br />
press ENTER to confirm.<br />
The GEONAV will position the cursor on the coordinates selected.<br />
To insert the waypoint, press GOTO once again, select the option CURS<br />
and then press ENTER to confirm the operation.<br />
Deleting waypoints in a plotted route<br />
In Cursor mode, it is possible to delete all waypoints by pressing CLR<br />
repeatedly until the “NO WP PRESENT” message appears.<br />
If the waypoint to delete is out of screen (not displayed), the GEONAV<br />
will prompt the user to press ENTER to confirm the deletion.<br />
Deleting the whole route<br />
In Navigation mode, it is possible to delete the whole route by pressing<br />
CLR. Press ENTER to confirm the deletion or PAGE to exit.<br />
40<br />
Editing a route in Manual mode<br />
Sometimes it is necessary to modify the<br />
position of a waypoint or to delete a single<br />
waypoint; the GEONAV allows performing<br />
these functions in a very simple way and<br />
with few keys.<br />
Deleting the waypoint selected<br />
Position the cursor exactly on the<br />
waypoint to delete, then press CLR to<br />
confirm.<br />
Route functions available from the ROUTE menu<br />
Route information<br />
Reversing the route direction<br />
Deleting the route<br />
Moving a waypoint<br />
Position the cursor exactly on the<br />
waypoint to move, then press ENTER to<br />
confirm. Use the CURSOR key to move the<br />
selected waypoint on the new position,<br />
then press ENTER to confirm.<br />
Inserting a new waypoint into the plotted<br />
route<br />
Position the cursor exactly on the route<br />
segment to modify, then press ENTER to<br />
confirm. Move the cursor to the desired<br />
position with CURSOR and press ENTER<br />
to enter a new waypoint.<br />
Route information<br />
To display the navigation data of the plotted route, press PAGE repeatedly<br />
until the menu bar is displayed, select ROUTE and then the INFO<br />
option. By pressing ENTER, the following information will be displayed:<br />
Waypoint N.: Waypoint number<br />
Dist. NM: Distance between the current waypoint and the<br />
starting waypoint<br />
Time: Time of arrival to the next waypoint<br />
Fuel / Litre: Estimated fuel consumption<br />
NOTE: Time and fuel consumption data is displayed only after the estimated values have been<br />
input through the appropriate menu.<br />
Reversing the route direction<br />
To reverse the route direction, press PAGE until the menu bar is displayed;<br />
select ROUTE, the REVERSE option and then press ENTER to<br />
confirm. The waypoint order will be automatically reversed and you will<br />
be able to navigate in the opposite direction.<br />
Deleting the route<br />
In Navigation mode, press CLR and then ENTER to confirm the deletion.<br />
In Cursor mode, hold CLR pressed for two seconds and then press ENTER<br />
to confirm the deletion.<br />
41<br />
offered by <strong>Busse</strong>-<strong>Yachtshop</strong>.com
Track Marker<br />
TRACK<br />
The Track function allows recording the boat’s actual track.<br />
It is possible to activate and deactivate the track function several times<br />
during navigation; in this case, track segments will be automatically<br />
connected to each other to make one single track line.<br />
Starting a track<br />
To activate the Track function, press PAGE repeatedly until the menu bar<br />
is displayed; select TRACK, the START option, and then press ENTER to<br />
confirm the operation. A small circle will indicate the track starting point.<br />
Stopping a track<br />
To deactivate the Track function, press PAGE repeatedly until the menu<br />
bar is displayed; select TRACK, the STOP option, and then press ENTER<br />
to confirm the operation.<br />
Deleting a track<br />
To delete a track, press PAGE repeatedly until the menu bar is displayed;<br />
select TRACK, the DELETE option, and then press ENTER to confirm; a<br />
message will prompt the user to confirm the deletion by pressing ENTER.<br />
42<br />
MARKER<br />
The GEONAV allows entering and storing small symbols (markers) to<br />
mark points of interest (e.g., submerged wrecks, fishing spots, etc.). Each<br />
marker can be assigned a symbol and an 8-character name.<br />
CURSOR MODE<br />
Inserting a marker<br />
Move the cursor to the desired point and<br />
press ENTER. Select the desired marker<br />
shape and name and then press ENTER to<br />
confirm. A new marker will be automatically<br />
entered at the position selected.<br />
NOTE: Marker names are displayed starting from the<br />
32NM chart range.<br />
Deleting a marker<br />
Position the cursor exactly on the marker<br />
to delete, then press CLR to confirm.<br />
Modifying the shape and the name of a marker<br />
Position the cursor on the desired marker; a window will display the<br />
shape and the name of the current marker. Press ENTER to confirm the<br />
marker editing and use the CURSOR key to select the desired shape and<br />
name. Press ENTER to confirm.<br />
NAVIGATION MODE<br />
Inserting a marker<br />
To enter a new marker, press ENTER; select<br />
the desired shape and name of the marker<br />
by the CURSOR key and then press ENTER to<br />
confirm. A new marker will be automatically<br />
entered at the boat’s position.<br />
Deleting a marker<br />
Position the cursor exactly on the marker<br />
to delete and then press CLR to confirm.<br />
Route to a marker<br />
See the Route functions.<br />
43<br />
offered by <strong>Busse</strong>-<strong>Yachtshop</strong>.com
Elite<br />
Cabin<br />
Regatta<br />
Autopilot<br />
AUTOPILOT<br />
The GEONAV allows a boat equipped with an autopilot to follow automatically<br />
the entered route, compensating for any diversion caused by<br />
external conditions (wind, currents, etc.).<br />
The GEONAV will display the “PROXIMITY TO WAYPOINT” message to<br />
warn the user that the boat is about to reach the target waypoint.<br />
The GEONAV will display the “END OF TRIP” message to warn the user<br />
that the boat is about to reach the last waypoint in the route.<br />
IMPORTANT: In order to avoid sudden change of course, it is always recommended to deactivate<br />
the autopilot when editing and / or creating a route.<br />
44<br />
Use with Land Cartography<br />
READ THIS WARNING BEFORE USING THE GEONAV<br />
WARNING<br />
THE CHART PLOTTER, WHEN INSTALLED IN A VEHICLE, MUST NOT<br />
OBSTRUCT THE DRIVER’S VIEW, AND THE UNIT MUST NOT BE<br />
USED BY THE DRIVER, OR DISTRACT THE DRIVER’S ATTENTION,<br />
WHILE THE VEHICLE IS IN MOTION.<br />
The use of the GEONAV implies the knowledge and acceptance of<br />
this warning by the user.<br />
45<br />
offered by <strong>Busse</strong>-<strong>Yachtshop</strong>.com<br />
NO<br />
NO
Elite<br />
Cabin<br />
Regatta<br />
Use with Land Cartography<br />
46<br />
USE WITH LAND CARTOGRAPHY<br />
The GEONAV is now a valuable instrument<br />
also when used and installed in a<br />
car; the GPS receiver and the new<br />
NAVIONICS land charts will allow displaying<br />
easily your position with respect to the<br />
most popular roads and city names. The<br />
installation of the GEONAV in your car<br />
takes only a few seconds. Position the plotter<br />
on the dashboard with the appropriate<br />
bracket and fix the suction cup to the<br />
front window, then connect the power<br />
cable to the lighter and press the ON key.<br />
When inserting a land cartridge into the<br />
unit, the GEONAV will automatically set in “land mode”; all the major<br />
functions will not change with respect to the marine mode and you can<br />
still plot a route, insert markers, record your actual track and activate<br />
all the other functions as when in marine mode. The only differences are<br />
listed below.<br />
SETUP menu<br />
The SETUP menu changes as follows:<br />
Chart rotation (ON/OFF)<br />
Enables/disables the chart rotation.<br />
Display maps (ON/OFF)<br />
Enables/disables map boundaries.<br />
Highways (ON/OFF)<br />
Enables/disables the display of major<br />
roads.<br />
Other roads (ON/OFF)<br />
Enables/disables the display of other<br />
roads.<br />
Road names (ON/OFF)<br />
Enables/disables the display of road names.<br />
NOTE: The display of road names is automatically OFF if both “Highways” and “Other roads”<br />
are OFF.<br />
City names (ON/OFF)<br />
Enables/disables the display of city names.<br />
Calibration (ON/OFF)<br />
Allows entering the position calibration offset.<br />
Elite<br />
Regatta<br />
Elite<br />
Cabin<br />
Regatta<br />
Plus<br />
Distance units (NAUT/METR/STAT)<br />
Allows selecting the distance unit.<br />
NOTE: The unit selected in land mode is independent of the unit selected in marine mode.<br />
GPS (INT/EXT)<br />
Allows selecting the internal GPS or an external antenna.<br />
Reference time (LOCAL /GMT)<br />
Allows entering local time.<br />
Language (EN/FR/ES/DE/DK/IT/SV/NL/SU/NO)<br />
Allows selecting the language.<br />
Language (EN/FR/ES/DE/IT)<br />
Allows selecting the language.<br />
Displaying road names<br />
To display the road name, position the manual cursor on the road symbol;<br />
a window will display the relevant characteristics.<br />
47<br />
offered by <strong>Busse</strong>-<strong>Yachtshop</strong>.com
Main Messages Troubleshooting<br />
MAIN MESSAGES<br />
END OF TRIP<br />
The boat has reached the last waypoint in the route.<br />
SEARCHING SATELLITES or POOR GPS COVERAGE<br />
The GEONAV does not receive any valid fix from the GPS. The boat’s<br />
position is not available.<br />
INVALID FIX<br />
The GPS is not tracking a sufficient number of satellites for computing<br />
the boat’s position.<br />
NO WP PRESENT<br />
The target waypoint cannot be changed since no waypoint is present.<br />
WP ALREADY PRESENT<br />
Two waypoints cannot be assigned the same position.<br />
PROXIMITY TO WAYPOINT<br />
The boat will reach the next waypoint in 25 seconds.<br />
WAYPOINT OVERSHOT<br />
The boat has overtaken the waypoint.<br />
NO MORE WP AVAILABLE<br />
All the available waypoints have been used.<br />
NO MORE MRK AVAILABLE<br />
All the available markers have been used.<br />
MRK ALREADY PRESENT<br />
Two markers cannot be assigned the same position/name.<br />
48<br />
TROUBLESHOOTING<br />
The GEONAV does not turn on<br />
Make sure the unit is powered with a supply voltage between 11 and 18<br />
VDC. Check the polarity of the power supply.<br />
The GEONAV does not get any valid satellite fix<br />
Make sure that no metal obstacle is positioned around the unit acting<br />
as a shield for the GEONAV antenna. If, after 15 minutes, the GEONAV<br />
has not got any valid fix yet, turn the unit off and on again.<br />
The GEONAV does not turn off<br />
If, after pressing ON/OFF for at least 3 seconds, the unit does not turn off,<br />
remove the GEONAV from its bracket or turn the power off.<br />
The GEONAV screen gets dark after a long exposure to direct sunlight<br />
Press PAGE to display the menu bar, select CONTRAST and then adjust<br />
the contrast by pressing CURSOR.<br />
The GEONAV does not respond to any command<br />
Turn the unit off, then on again; if the problem persists, erase memory<br />
by turning the unit on while keeping CLR and ON simultaneously pressed.<br />
This operation will delete all the data (markers, route, tracks, etc.) previously<br />
saved in memory.<br />
49<br />
offered by <strong>Busse</strong>-<strong>Yachtshop</strong>.com
Glossary Table of Contents<br />
GLOSSARY<br />
Azimuth - The angle from the horizon<br />
to a satellite (or another object).<br />
Bearing (BRG) - Compass direction<br />
from the boat’s position to destination<br />
(0° to 360°).<br />
COG (Course Over Ground) - Boat’s direction<br />
with respect to the earth.<br />
Coordinates - Position in terms of latitude<br />
and longitude.<br />
Depth sounder - Device measuring the<br />
depth of the sea bed.<br />
Differential GPS - GPS receiver<br />
equipped with a special beacon<br />
receiver that adds corrections to<br />
signals from satellites.<br />
Fix - Geographical position computed<br />
by the GPS.<br />
GMT - Greenwich Mean Time (Universal<br />
Coordinated Time).<br />
GPS (Global Positioning System) - The<br />
constellation of navigation satel-<br />
50<br />
lites orbiting the earth transmits<br />
precise time and position information.<br />
A GPS receiver uses this information<br />
to triangulate a position<br />
fix. Each GPS satellite transmits its<br />
precise location and the transmission<br />
starting time. A GPS receiver<br />
acquires the signal and measures<br />
the interval between transmission<br />
and reception to determine the distance<br />
between the receiver and the<br />
satellite. Once the receiver has<br />
computed the range for at least 3<br />
satellites, the boat’s position can<br />
be determined.<br />
Heading - Boat’s direction.<br />
Leg - Route segment between two<br />
waypoints.<br />
SOG (Speed Over Ground) - Boat’s speed<br />
with respect to the earth.<br />
Waypoint - Indicates an important<br />
point in the route.<br />
TABLE OF CONTENTS<br />
GEONAV 6 PLUS ................................................................................................ 4<br />
GEONAV 6 ELITE ............................................................................................... 6<br />
GEONAV 6 CABIN .............................................................................................. 8<br />
GEONAV 6 REGATTA ....................................................................................... 10<br />
INTRODUCTION ............................................................................................... 12<br />
CONNECTIONS ................................................................................................ 18<br />
CARTRIDGE INSTALLATION ........................................................................... 20<br />
KEYBOARD ...................................................................................................... 21<br />
DIAGNOSTIC .................................................................................................... 22<br />
NAVIONICS ELECTRONIC CHARTS ............................................................... 23<br />
NAVIGATIONAL AIDS ....................................................................................... 24<br />
FUNCTIONAL CHARACTERISTICS ................................................................. 25<br />
OPERATION ..................................................................................................... 29<br />
SATELLITE WINDOW ....................................................................................... 30<br />
NAVIGATION WINDOW .................................................................................... 32<br />
MENU ................................................................................................................ 33<br />
DEPTH SOUNDER WINDOW ........................................................................... 34<br />
NAVIGATION TO WAYPOINT WINDOW ........................................................... 35<br />
TRIP WINDOW ................................................................................................. 36<br />
ROUTE .............................................................................................................. 37<br />
TRACK .............................................................................................................. 42<br />
MARKER ........................................................................................................... 43<br />
AUTOPILOT ...................................................................................................... 44<br />
USE WITH LAND CARTOGRAPHY .................................................................. 46<br />
MAIN MESSAGES ............................................................................................ 48<br />
TROUBLESHOOTING ...................................................................................... 49<br />
GLOSSARY ....................................................................................................... 50<br />
51<br />
offered by <strong>Busse</strong>-<strong>Yachtshop</strong>.com
2<br />
2 3<br />
2<br />
F<br />
6PLUS<br />
ELITE<br />
CABIN<br />
REGATTA<br />
Manuel d’emploi et d’installation<br />
3<br />
offered by <strong>Busse</strong>-<strong>Yachtshop</strong>.com
2<br />
LIRE CETTE NOTICE AVANT D’UTILISER LE GEONAV<br />
ATTENTION<br />
LA CARTE NAUTIQUE ELECTRONIQUE EST UNE AIDE A LA NAVI-<br />
GATION CONÇUE POUR FACILITER L’EMPLOI DES CARTES AUTO-<br />
RISEES PAR LE GOUVERNEMENT, MAIS NE LES REMPLACE PAS.<br />
SEULS LES CARTES NAUTIQUES OFFICIELLES DU GOUVERNE-<br />
MENT ET LES AVIS AUX NAVIGATEURS CONTIENNENT TOUTES LES<br />
INFORMATIONS CONCERNANT LA SECURITE DE LA NAVIGATION<br />
ET, COMME TOUJOURS, LE CAPITAINE EST RESPONSABLE DE<br />
L’USAGE PRUDENT DE CES CARTES.<br />
L’utilisation du GEONAV comporte de la part de l’utilisateur l’acceptation<br />
et la connaissance de cette notice.<br />
NOTA: Ce manuel concerne les modèles GEONAV 6 Plus, GEONAV 6 Elite, GEONAV 6 Cabin et<br />
GEONAV 6 Regatta. Les fonctions caractéristiques de chaque modèle sont mises en évidence à<br />
côté du texte. Sauf indication contraire, les fonctions décrites s’entendent communes aux quatre<br />
modèles.<br />
2 3<br />
offered by <strong>Busse</strong>-<strong>Yachtshop</strong>.com
Plus<br />
Caractéristiques techniques<br />
GEONAV 6 PLUS<br />
Système intégré traceur GPS (traceur + récepteur GPS + antenne)<br />
Récepteur GPS intégré à 12 canaux<br />
Temps d’acquisition du fix :<br />
2 minutes (conditions normales)<br />
15 minutes premier fix (avec récepteur intégré)<br />
Carte mondiale incorporée<br />
Etanche aux embruns<br />
Poids : 1 kg<br />
Caractéristiques électriques<br />
Alimentation : de 11V CC à 18 V CC protégé contre l’inversion de<br />
polarité et les surtensions<br />
Consommation : 0,5 W<br />
Température d’utilisation : de 0°C à +60°C, humidité 93%<br />
Température de stockage : de -20° à +70°, humidité 93%<br />
Ecran monochromatique à cristaux liquides (LCD), à visibilité élevée<br />
au soleil<br />
Rétro-éclairage et contraste réglables<br />
Clavier rétro-éclairé<br />
Résolution : 240 x 320 pixel<br />
Microprocesseur RISC 32 bit<br />
Caractéristiques de mémoire<br />
1 route réversible<br />
20 waypoint par route<br />
1 trace de 500 points<br />
99 marker<br />
Accessoires<br />
Support de base pour installation fixe<br />
Support spécial démontable avec ventouse pour installation en voiture<br />
Support avec câble d’alimentation et fiche allume-cigares<br />
Manuel d’emploi<br />
Housse de protection du support<br />
Mallette de transport<br />
4<br />
Dimensions<br />
GEONAV 6 PLUS<br />
GEONAV 6 ELITE<br />
GEONAV 6 CABIN<br />
GEONAV 6 REGATTA<br />
4 5<br />
offered by <strong>Busse</strong>-<strong>Yachtshop</strong>.com
Caractéristiques techniques<br />
GEONAV 6 ELITE<br />
Elite Elite<br />
Système intégré traceur GPS (traceur + récepteur GPS + antenne)<br />
Récepteur GPS intégré à 12 canaux (compatible avec DGPS)<br />
Temps d’acquisition du fix :<br />
2 minutes (conditions normales)<br />
15 minutes premier fix (avec récepteur intégré)<br />
Possibilité d’utiliser une antenne active extérieure avec une sortie<br />
NMEA 0183<br />
Echosondeur intégré via NMEA 0183 (optionnel)<br />
Carte mondiale incorporée<br />
Pilote automatique<br />
Rotation de la carte<br />
Etanche aux embruns<br />
Poids : 1 kg<br />
Caractéristiques électriques<br />
Alimentation : de 11V CC à 18 V CC protégé contre l’inversion de<br />
polarité et les surtensions<br />
Consommation : 0,5 W<br />
Température d’utilisation : de 0°C à +60°C, humidité 93%<br />
Température de stockage : de -20° à +70°, humidité 93%<br />
Ecran à cristaux liquides (LCD), 4 couleurs, à visibilité élevée au<br />
soleil<br />
Rétro-éclairage et contraste réglables<br />
Clavier rétro-éclairé<br />
Résolution : 240 x 320 pixel<br />
Microprocesseur RISC 32 bit<br />
Caractéristiques de mémoire<br />
1 route réversible<br />
20 waypoint par route<br />
1 trace de 500 points<br />
99 marker<br />
Interfaces<br />
Protocole standard NMEA 0183<br />
- capteur de position :<br />
GLL, VTG, GGA, RMC, GSV, ZDA, RMA, GSA<br />
- échosondeur :<br />
DBT, DBS, DPT, DBK, MTW<br />
- pilote automatique :<br />
APA, APB, XTE, RMB, BWC, GLL, VTG<br />
6<br />
Si ces données sont en entrée, elles sont répétées en sortie :<br />
GGA, RMC, ZDA<br />
Protocole RTCM, SC-104, BAUD RATE de 300 à 9600 bps<br />
- GPS différentiel<br />
Accessoires<br />
Support de base pour installation fixe<br />
Support spécial démontable avec ventouse pour installation en voiture<br />
Support avec câble d’alimentation et fiche allume-cigares<br />
Cordon de liaison pour GPS externe, GPS différentiel, échosondeur<br />
et pilote automatique<br />
Manuel d’emploi<br />
Housse de protection du support<br />
Mallette de transport<br />
6 7<br />
offered by <strong>Busse</strong>-<strong>Yachtshop</strong>.com
Cabin<br />
Caractéristiques techniques<br />
GEONAV 6 CABIN<br />
Traceur connectable à un récepteur GPS avec une sortie NMEA 0183<br />
Echosondeur intégré via NMEA 0183 (optionnel)<br />
Carte mondiale incorporée<br />
Pilote automatique<br />
Rotation de la carte<br />
Etanche aux embruns<br />
Montage sur panneau<br />
Poids : 1 kg<br />
Caractéristiques électriques<br />
Alimentation : de 11V CC à 18 V CC protégé contre l’inversion de<br />
polarité et les surtensions<br />
Consommation : 0,5 W<br />
Température d’utilisation : de 0°C à +60°C, humidité 93%<br />
Température de stockage : de -20° à +70°, humidité 93%<br />
Ecran à cristaux liquides (LCD), 4 couleurs, à visibilité élevée au soleil<br />
Rétro-éclairage et contraste réglables<br />
Clavier rétro-éclairé<br />
Résolution : 240 x 320 pixel<br />
Microprocesseur RISC 32 bit<br />
Caractéristiques de mémoire<br />
1 route réversible<br />
20 waypoint par route<br />
1 trace de 500 points<br />
99 marker<br />
Interfaces<br />
Protocole standard NMEA 0183<br />
- capteur de position :<br />
GLL, VTG, GGA, RMC, GSV, ZDA, RMA, GSA<br />
- échosondeur :<br />
DBT, DBS, DPT, DBK, MTW<br />
- pilote automatique :<br />
APA, APB, XTE, RMB, BWC, GLL, VTG<br />
Si ces données sont en entrée, elles sont répétées en sortie :<br />
GGA, RMC, ZDA<br />
8<br />
Accessoires<br />
Support de base pour installation fixe<br />
Garniture et gabarit pour montage sur panneau<br />
Câble d’alimentation et de liaison pour GPS externe, échosondeur et<br />
pilote automatique<br />
Manuel d’emploi<br />
Housse de protection<br />
Mallette de transport<br />
8 9<br />
Cabin<br />
offered by <strong>Busse</strong>-<strong>Yachtshop</strong>.com
Caractéristiques techniques<br />
GEONAV 6 REGATTA<br />
Regatta Regatta<br />
Système intégré traceur GPS (traceur + récepteur GPS + antenne)<br />
Récepteur GPS intégré à 12 canaux (compatible avec DGPS)<br />
Temps d’acquisition du fix :<br />
2 minutes (conditions normales)<br />
15 minutes premier fix (avec récepteur intégré)<br />
Possibilité d’utiliser une antenne active extérieure avec une sortie<br />
NMEA 0183<br />
Fonctions pour la navigation à la voile<br />
Entrée NMEA 0183 pour l’anémomètre<br />
Echosondeur intégré via NMEA 0183 (optionnel)<br />
Carte mondiale incorporée<br />
Pilote automatique<br />
Rotation de la carte<br />
Etanche aux embruns<br />
Montage sur panneau<br />
Poids : 1 kg<br />
Caractéristiques électriques<br />
Alimentation : de 11V CC à 18 V CC protégé contre l’inversion de<br />
polarité et les surtensions<br />
Consommation : 0,5 W<br />
Température d’utilisation : de 0°C à +60°C, humidité 93%<br />
Température de stockage : de -20° à +70°, humidité 93%<br />
Ecran à cristaux liquides (LCD), 4 couleurs, à visibilité élevée au<br />
soleil<br />
Rétro-éclairage et contraste réglables<br />
Clavier rétro-éclairé<br />
Résolution : 240 x 320 pixel<br />
Microprocesseur RISC 32 bit<br />
Caractéristiques de mémoire<br />
1 route réversible<br />
20 waypoint par route<br />
1 trace de 500 points<br />
99 marker<br />
Interfaces<br />
Protocole standard NMEA 0183<br />
- capteur de position :<br />
GLL, VTG, GGA, RMC, GSV, ZDA, RMA, GSA<br />
10<br />
- anémomètre :<br />
VWR<br />
- échosondeur :<br />
DBT, DBS, DPT, DBK, MTW<br />
- pilote automatique :<br />
APA, APB, XTE, RMB, BWC, GLL, VTG<br />
Si ces données sont en entrée, elles sont répétées en sortie :<br />
GGA, RMC, ZDA<br />
Accessoires<br />
Support de base pour installation fixe<br />
Garniture et gabarit pour montage sur panneau<br />
Câble d’alimentation et de liaison pour GPS externe, anémomètre,<br />
échosondeur et pilote automatique<br />
Manuel d’emploi<br />
Housse de protection<br />
Mallette de transport<br />
10 11<br />
offered by <strong>Busse</strong>-<strong>Yachtshop</strong>.com
Plus<br />
Elite<br />
Regatta<br />
Cabin<br />
Elite<br />
Regatta<br />
Elite<br />
Cabin<br />
Regatta<br />
Regatta<br />
Introduction<br />
INTRODUCTION<br />
Le GEONAV est un traceur GPS graphique qui affiche la position du<br />
bateau sur une carte.<br />
Le modèle Plus a un récepteur GPS intégré.<br />
Les modèles Elite et Regatta ont un récepteur GPS intégré avec une entrée<br />
différentielle extérieure.<br />
Le modèle Cabin doit être raccordé à un récepteur GPS extérieur.<br />
Le GEONAV peut poursuivre simultanément 12 satellites et peut être<br />
interfacé avec :<br />
un GPS différentiel sans besoin d’ajouter une antenne extérieure ;<br />
une antenne active extérieure ;<br />
un échosondeur/capteur de profondeur ;<br />
un pilote automatique ;<br />
un anémomètre.<br />
Le GEONAV, équipé d’une carte numérique NAVIONICS, vous indiquera<br />
toujours votre position sur une carte locale ainsi que la direction de<br />
votre bateau.<br />
La fonction ROUTE permet de vous assurer que vous suivez exactement<br />
le trajet prévu. Vous pouvez utiliser des MARQUES pour mémoriser des<br />
points d’intérêt sur lesquels il vous sera possible de revenir ultérieurement.<br />
La fonction TRACE permet de mémoriser le trajet réel parcouru<br />
par votre bateau.<br />
L’utilisation de la cartographie numérique NAVIONICS dans le GEONAV<br />
assure la continuité de votre position. Les cartouches NAVIONICS sont<br />
disponibles pour la plupart des zones normales de navigation du monde<br />
entier et peuvent être utilisées en supplément des cartes nautiques officielles.<br />
N’oubliez pas que la cartographie numérique associée à un traceur<br />
GPS ne remplace pas les cartes nautiques officielles. Utilisée en<br />
conjonction avec les cartes papier et les documents de navigation, elle<br />
est une aide précieuse à la sécurité. Les cartouches NAVIONICS sont<br />
disponibles chez les agents et les distributeurs NAVIONICS du monde<br />
entier.<br />
Pour plus d’informations, contactez votre agent local.<br />
12<br />
Votre GEONAV est fourni avec des accessoires permettant de l’utiliser à<br />
bord d’un bateau ou d’une voiture.<br />
Grâce à l’introduction de la nouvelle cartographie terrestre, le GEONAV<br />
devient un précieux instrument dans votre véhicule. Il vous sera en effet<br />
un fidèle auxiliaire pour localiser avec une meilleure précision votre position<br />
et visualiser les noms des routes principales. L’installation est<br />
simple ; avec le câble d’alimentation qui se branche sur l’allume-cigares<br />
et son support à ventouse qui permet de le fixer au pare-brise, le GEONAV<br />
sera opérationnel dans votre voiture en quelques secondes.<br />
12 13<br />
Plus<br />
Elite<br />
offered by <strong>Busse</strong>-<strong>Yachtshop</strong>.com
Elite<br />
Regatta<br />
Installation et précautions<br />
INSTALLATION ET PRECAUTIONS<br />
DISTANCE DE SECURITE<br />
Le GEONAV doit être installé à au moins 0,15 mètres du compas magnétique<br />
afin d’éviter tout risque d’interférences électromagnétiques.<br />
ENVIRONNEMENT<br />
Le GEONAV est résistant à l’eau, mais il ne peut pas être immergé. Le<br />
bouchon en caoutchouc sur l’emplacement de la cartouche doit être<br />
toujours bien emboîté; ne l’enlever que pour ôter ou placer les cartouches<br />
Navchart dans l’appareil, qui doit être rigoureusement sec au<br />
moment de l’opération.<br />
IMPORTANT : Les dommages résultant de l’infiltration d’eau dans la fente réservée aux cartouches<br />
ne sont pas compris dans la garantie.<br />
Nettoyage<br />
On recommande de nettoyer la vitre du GEONAV avec un détergent neutre,<br />
évitant les produits à base d’alcool qui pourraient endommager la<br />
surface de la vitre ou la rendre opaque.<br />
Installation<br />
Le GEONAV permet d’utiliser le GPS intégré en cas d’installation en extérieur<br />
ou une antenne active extérieure lorsque l’appareil est installé en<br />
environnement clos.<br />
NOTA : Le GPS interne est défini par défaut au moment de la mise en route du traceur.<br />
GPS intégré : Choisir un emplacement bien dégagé pour installer l’appareil<br />
en extérieur. Un horizon totalement dégagé assure des performances<br />
optimales. L’utilisation du GPS intégré permet d’interfacer le<br />
traceur à un DGPS avec sortie RTCM.<br />
ATTENTION : Le Geonav peut être connecté à des DGPS fonctionnant selon les modalités<br />
suivantes :<br />
a) sélection automatique de la fréquence de travail, ou<br />
b) sélection manuelle de la fréquence de travail au moyen d’un permutateur.<br />
GPS différentiel : Il est possible de raccorder le GEONAV à un GPS différentiel<br />
au moyen du câble auxiliaire fourni avec l’appareil. Les raccords<br />
électriques sont reportés au chapitre “Raccordements”.<br />
14<br />
GPS extérieur : Il est possible de raccorder le GEONAV à une antenne<br />
active extérieure au moyen du câble fourni avec l’appareil. Les raccords<br />
électriques sont reportés au chapitre “Raccordements”.<br />
Pilote automatique : Il est possible de raccorder le GEONAV à un pilote<br />
automatique au moyen du câble fourni avec l’appareil. Les raccords<br />
électriques sont reportés au chapitre “Raccordements”.<br />
Echosondeur : Il est possible de raccorder le GEONAV à un échosondeur<br />
au moyen du câble fourni avec l’appareil. Les raccords électriques<br />
sont reportés au chapitre “Raccordements”.<br />
Anémomètre : Il est possible de raccorder le GEONAV à un anémomètre<br />
au moyen du câble fourni avec l’appareil. Les raccords électriques<br />
sont reportés au chapitre “Raccordements”.<br />
NOTA : Puisque il est disponible seulement une entrée NMEA 0183 outre l’entrée utilisée<br />
pour connecter le GPS, il est possible de raccorder le GEONAV à l’échosondeur au moyen<br />
d’un mélangeur NMEA 0183 ou d’un pontet vers des réseaux d’instruments.<br />
Installation à bord d’un bateau<br />
La meilleure installation consiste à utiliser<br />
le support de base fourni avec l’appareil.<br />
Fixez le support à l’emplacement<br />
souhaité au moyen des 3 vis à tête plate<br />
(6 mm). Ce type d’installation ne permet<br />
pas les mouvements latéraux du<br />
traceur. Aussi, assurez-vous que la face<br />
avant de l’appareil est bien visible.<br />
Il est possible d’enlever la fiche allumecigares<br />
et de raccorder le câble d’alimentation<br />
directement à l’alimentation du<br />
bateau. Il est recommandé d’insérer un<br />
fusible de 1A entre la source d’alimentation<br />
et l’appareil. Lorsque vous enlevez<br />
l’appareil de son support, utilisez la<br />
housse pour protéger les contacts électriques<br />
et vérifiez que l’alimentation est<br />
sur la position arrêt.<br />
14 15<br />
Elite<br />
Cabin<br />
Regatta<br />
Regatta<br />
Plus<br />
Elite<br />
offered by <strong>Busse</strong>-<strong>Yachtshop</strong>.com
Cabin<br />
Regatta<br />
Plus<br />
Elite<br />
Installation et précautions<br />
Installation fixe<br />
La meilleure installation consiste à utiliser le support de base fourni<br />
avec l’appareil. Fixez le support à l’emplacement souhaité au moyen des<br />
4 vis à tête plate (6 mm). Ce type d’installation ne permet pas les mouvements<br />
latéraux du traceur. Aussi, assurez-vous que la face avant de<br />
l’appareil est bien visible. Il est recommandé d’insérer un fusible de 1A<br />
entre la source d’alimentation et l’appareil.<br />
Installation à bord d’un véhicule<br />
Le support spécial à ventouse permet<br />
d’installer facilement l’appareil dans un<br />
véhicule. Le pare-brise est suffisamment<br />
large pour conserver la visibilité de la<br />
route quand l’appareil est installé.<br />
Préparez l’emplacement de la façon suivante<br />
:<br />
1. Repérez une surface plane qui permettra<br />
à la fois d’installer le support<br />
sur le tableau de bord et de garantir<br />
au récepteur GPS interne la<br />
meilleure visibilité vers le ciel afin de<br />
faciliter la poursuite des satellites.<br />
2. Nettoyez totalement l’emplacement<br />
du pare-brise que vous avez choisi<br />
pour installer l’appareil.<br />
3. Vérifiez que le GEONAV n’interfère<br />
pas avec les commandes, les airbag<br />
et les autres équipements.<br />
4. Poussez le levier de ventouse en arrière.<br />
5. Appliquez fermement la ventouse sur<br />
la vitre et poussez le levier vers<br />
l’avant pour qu’elle adhère sur la<br />
surface.<br />
6. Assurez-vous que le support est fermement<br />
installé et qu’il ne tombera<br />
pas de son emplacement. Cette opération<br />
est très importante pour la<br />
sécurité de la conduite. Après l’installation, vérifiez plusieurs fois le<br />
maintien de l’appareil sur le pare-brise. Pendant l’utilisation, cette<br />
opération doit être effectuée régulièrement, en particulier lorsque vous<br />
montez à l’intérieur du véhicule.<br />
16<br />
7. Placez le support d’étrier sur le tableau de bord et orientez le traceur<br />
vers la meilleure position pour l’antenne GPS interne.<br />
8. Connectez le câble d’alimentation sur la prise allume-cigares.<br />
NOTA : L’alimentation électrique de certains véhicules est désactivée lorsqu’ils sont mis en marche.<br />
Si c’est le cas de votre véhicule, l’appareil sera mis hors fonctionnement.<br />
Montage sur panneau<br />
Le gabarit (drilling template) fourni avec l’appareil sert à délimiter les<br />
trous et les zones à découper dans le panneau des instruments. La<br />
garniture adhésive en néoprène doit être appliquée au dos du traceur<br />
pour éviter des infiltrations d’humidité et pour réduire les vibrations.<br />
Les 4 vis doivent être de 4 mm de diamètre et de 5 mm de longueur<br />
(maximum), plus l’épaisseur du panneau des instruments.<br />
Il est recommandé d’éviter de trop serrer les vis pour ne pas endommager<br />
leur pas de vis.<br />
16 17<br />
Plus<br />
Elite<br />
Cabin<br />
Regatta<br />
offered by <strong>Busse</strong>-<strong>Yachtshop</strong>.com
Plus<br />
Elite<br />
Elite<br />
Raccordements<br />
RACCORDEMENTS<br />
Câble d’alimentation<br />
La figure représente les raccordements de la fiche<br />
fusible<br />
allume-cigares. Cette fiche est équipée d’un petit<br />
voyant qui indique que le support de l’appareil est<br />
correctement raccordé à l’alimentation du véhicule.<br />
Si, après l’insertion, le voyant ne s’allume pas :<br />
vérifiez que la tension d’alimentation soit disponible<br />
dans la prise du véhicule ;<br />
vérifiez que le fusible incorporé au connecteur<br />
LED<br />
fonctionne.<br />
Ouvrez la fiche allume-cigares et contrôlez le fusible.<br />
Si le fusible a sauté, remplacez-le par un fusible<br />
identique.<br />
N’UTILISEZ PAS DE FIL ELECTRIQUE POUR REM-<br />
PLACER LE FUSIBLE. Les caractéristiques du fusible<br />
garantissent le fonctionnement correct du circuit<br />
spécial de protection d’entrée de l’appareil en cas de court-circuit,<br />
d’inversion de polarité ou de surtension. Pour enlever la fiche allumecigares,<br />
le raccordement interne est le suivant :<br />
rouge (ou blanc) +(+ 12V)<br />
noir - (masse)<br />
Cordon de liaison<br />
1. Sortie alimentation auxiliaire (Vaux)<br />
fil rouge Vaux +, 250mA pin 1*<br />
fil noir GND pin 2<br />
2. Entrée données GPS ext./DGPS<br />
fil marron GPS ext. in + pin 3<br />
fil jaune GPS ext. in - pin 4<br />
3. Sortie données<br />
fil violet Pilote autom. out + pin 5<br />
fil blanc Pilote autom. out - pin 6<br />
4. Entrée données échosondeur<br />
fil bleu ES in + pin 7<br />
fil vert ES in - pin 8<br />
ECRAN pin 9<br />
* La tension de Vaux correspond à la tension d’alimentation<br />
de l’appareil.<br />
18<br />
Cordon de liaison et câble d’alimentation / de données<br />
1. Entrée alimentation<br />
fil rouge Vin + (11-18VDC) pin 1<br />
fil noir Vin - pin 2<br />
2. Entrée données GPS ext.<br />
fil marron data in + pin 3<br />
fil jaune data in - pin 4<br />
3. Sortie données pilote automatique<br />
fil violet data out + pin 5<br />
fil blanc data out - pin 6<br />
4. Entrée données échosondeur<br />
fil bleu data in + pin 7<br />
fil vert data in - pin 8<br />
ECRAN pin 9<br />
Cordon de liaison et câble d’alimentation / de données<br />
1. Entrée alimentation<br />
fil rouge Vin + (11-18VDC) pin 1<br />
fil noir Vin - pin 2<br />
2. Entrée données GPS ext./DGPS<br />
fil marron data in + pin 3<br />
fil jaune data in - pin 4<br />
3. Sortie données pilote automatique<br />
fil violet data out + pin 5<br />
fil blanc data out - pin 6<br />
4. Entrée données anémomètre/<br />
échosondeur<br />
fil bleu data in + pin 7<br />
fil vert data in - pin 8<br />
ECRAN pin 9<br />
A travers la sortie du pilote automatique, les messages suivants provenant<br />
du GPS sont envoyés vers d’autres instruments :<br />
GGA - RMC - ZDA<br />
Le GEONAV ajoutera les messages suivants :<br />
APA - APB - XTE - RMB - BWC - GLL - VTG<br />
Le câble de connexion est fourni avec le GEONAV.<br />
ATTENTION : Quand l’installation est terminée, vérifiez que toutes les connexions soient correctes.<br />
Un câblage mal fait peut endommager l’appareil.<br />
18 19<br />
Cabin<br />
Regatta<br />
Elite<br />
Cabin<br />
Regatta<br />
offered by <strong>Busse</strong>-<strong>Yachtshop</strong>.com
Installation des cartouches Clavier<br />
20<br />
INSTALLATION DES CARTOUCHES<br />
Mise en place de la cartouche<br />
Enlevez l’obturateur en caoutchouc<br />
situé sur le côté droit de<br />
l’appareil.<br />
Insérez la cartouche dans le bon<br />
sens.<br />
Remettez l’obturateur en caoutchouc<br />
en exerçant une légère<br />
pression, puis vérifiez qu’il est<br />
mis correctement pour éviter<br />
toute infiltration d’eau.<br />
Extraction de la cartouche<br />
Enlevez l’obturateur en caoutchouc et retirez la cartouche.<br />
Remettez l’obturateur en caoutchouc.<br />
Vérifiez toujours que l’obturateur est bien en place, en particulier si<br />
le GEONAV est installé à l’extérieur car l’eau risque d’endommager<br />
la carte mémoire. N’enlevez l’obturateur que lorsque l’appareil est<br />
parfaitement sec.<br />
20 21<br />
CLAVIER<br />
ZOOM+/ZOOM-<br />
Augmentation et réduction<br />
de l’échelle de<br />
la carte.<br />
Cette touche peut être<br />
utilisée à tout moment<br />
pour agrandir ou diminuer<br />
l’affichage de la<br />
carte.<br />
ENTER<br />
Cette touche permet<br />
d’insérer une marque<br />
ou de valider une sélection<br />
dans le menu.<br />
PAGE<br />
Mode Navigation<br />
Permet de faire<br />
défiler les pages<br />
d’écran.<br />
Mode Curseur<br />
Permet de passer de<br />
mode Curseur à<br />
mode Navigation.<br />
GOTO<br />
En navigation maritime,<br />
cette touche permet<br />
de tracer une route<br />
ayant pour origine la<br />
position actuelle et<br />
pour destination une<br />
marque, la position du<br />
curseur, un port, un<br />
service, une position<br />
(latitude/longitude).<br />
CLR<br />
Mode Navigation<br />
Suppression de la<br />
route si la touche<br />
est maintenue pendant<br />
plus de 3 secondes.<br />
Mode Curseur<br />
Suppression du<br />
dernier waypoint ou<br />
de la marque située<br />
sous le curseur.<br />
CURSOR<br />
Déplacement du<br />
curseur dans toutes<br />
les directions.<br />
Passage du mode<br />
Navigation au mode<br />
Curseur.<br />
Sélection d’une option<br />
dans le menu.<br />
Au démarrage, permet<br />
de régler le contraste<br />
de l’écran.<br />
ON/OFF<br />
Mise en fonctionnement<br />
/extinction de<br />
l’appareil. Lorsque l’appareil<br />
est en fonctionnement,<br />
activation /<br />
désactivation de l’éclairage<br />
de l’écran à cristaux<br />
liquides. Pour arrêter<br />
l’appareil, maintenez<br />
la touche appuyée.<br />
offered by <strong>Busse</strong>-<strong>Yachtshop</strong>.com
Elite<br />
Cabin<br />
Regatta<br />
Diagnostic<br />
DIAGNOSTIC<br />
Pour accéder au programme de diagnostic du GEONAV et vérifier que<br />
l’appareil fonctionne de manière correcte, suivre les instructions suivantes,<br />
appareil à l’arrêt :<br />
1) maintenir appuyée une touche quelconque à l’exception de la touche<br />
CLR;<br />
2) appuyer simultanément sur la touche ON.<br />
Le GEONAV effectue un contrôle du système. Après un test de la mémoire,<br />
le programme de diagnostic contrôle le fonctionnement correct<br />
du clavier. Un clavier apparaît sur l’écran : appuyer sur chaque touche<br />
et contrôler que la touche correspondante sur l’écran devienne noire. Si<br />
la touche ne fonctionne pas, l’écran ne change pas de couleur. Maintenir<br />
appuyée la touche CLR trois secondes pour sortir.<br />
Après le test du clavier, le programme de diagnostic contrôle la bonne<br />
réception des messages transmis par le récepteur GPS intégré ou le GPS<br />
externe (canal 0); si le récepteur fonctionne de manière correcte, une<br />
rapide succession de messages (standard NMEA 0183) est affichée.<br />
Maintenir appuyée la touche CLR pour figer l’écran, puis relâcher CLR<br />
pour reprendre le défilement des messages.<br />
Appuyer sur ZOOM- pour contrôler le canal 1 (échosondeur) et ZOOM+<br />
pour continuer le contrôle du canal 0.<br />
Appuyer sur la touche ENTER pour quitter le programme de diagnostic.<br />
ATTENTION : Il est possible d’effectuer une remise à zéro de la mémoire de la manière suivante:<br />
1) maintenir appuyée la touche CLR ;<br />
2) appuyer simultanément sur la touche ON.<br />
Cette opération permet de supprimer toutes les données (sauf celles contenues dans les<br />
Navchart) mémorisées dans le GEONAV et de revenir à la configuration de base.<br />
22<br />
Cartographie numérique NAVIONICS<br />
CARTOGRAPHIE NUMERIQUE NAVIONICS<br />
La carte du monde réside dans la mémoire<br />
du GEONAV. Il est possible d’agrandir un<br />
point quelconque de cette carte mondiale<br />
en réduisant l’échelle de 4096 jusqu’à 512<br />
milles marins. Pour avoir plus de détails<br />
sur la zone de navigation qui vous intéresse,<br />
vous pouvez insérer la cartouche<br />
NAVIONICS Navchart couvrant cette<br />
zone. Pour afficher le contour de la carte,<br />
appuyez sur la touche PAGE jusqu’à l’affichage<br />
du menu, sélectionnez SETUP, l’option<br />
MONTRER CARTES et, à l’aide de la<br />
touche CURSOR, sélectionnez ON/OFF pour activer ou désactiver l’affichage<br />
du contour de la carte contenue dans la cartouche.<br />
La zone de couverture de la cartouche s’affiche alors sous la forme d’un<br />
carré. Pour augmenter les détails, déplacez le curseur sur cette zone et<br />
utilisez la touche ZOOM+. Le niveau maximum de détail est disponible<br />
pour les plans des ports et est approximativement de 1/8 mille marin<br />
(un point de l’écran correspond alors à environ un mètre).<br />
Les cartes NAVIONICS contiennent les symboles suivants :<br />
Noms des principaux lieux géographiques<br />
Noms des lieux géographiques secondaires<br />
Aides à la navigation<br />
services portuaires<br />
Pour diminuer les détails de la carte, appuyez sur la touche ZOOM-.<br />
Pour augmenter les détails de la carte, appuyez sur la touche ZOOM+.<br />
22 23<br />
phare<br />
profondeur<br />
....... bathymétries<br />
épave de bateaux<br />
offered by <strong>Busse</strong>-<strong>Yachtshop</strong>.com
Cartographie numérique NAVIONICS<br />
24<br />
Affichage des bathymétriques, des noms des localités<br />
et des ports<br />
Appuyez sur la touche PAGE jusqu’à l’affichage<br />
du menu. Sélectionnez SETUP, puis<br />
activez les options voulues en utilisant la<br />
touche CURSOR.<br />
Affichage des caractéristiques des aides à la navigation<br />
Déplacez le curseur sur la position du symbole<br />
de l’aide à la navigation .<br />
Une fenêtre indiquera la position et les caractéristiques<br />
de l’aide à la navigation.<br />
Aides à la navigation<br />
AIDES A LA NAVIGATION<br />
Affichage des services d’un port<br />
Lorsque vous entrez dans un port, déplacez<br />
le curseur sur le voilier indiqué sur la<br />
carte (aux agrandissements d’au moins 1<br />
mille marin), puis appuyez sur la touche<br />
ENTER pour afficher la fenêtre des informations<br />
qui montre les services disponibles<br />
dans ce port. Sélectionnez l’icône au<br />
moyen de la touche CURSOR.<br />
La quantité d’icônes varie d’un port à<br />
l’autre. Elles permettent d’accéder à une<br />
liste des services disponibles dans le port<br />
:<br />
Premiers secours Services touristiques<br />
Réparation mécanique Capitainerie<br />
Eau potable Carburant<br />
Informations<br />
Les icônes des services varient d’une cartouche à l’autre.<br />
Des icônes complémentaires seront disponibles dans les cartouches futures.<br />
24 25<br />
offered by <strong>Busse</strong>-<strong>Yachtshop</strong>.com
Elite<br />
Regatta<br />
Elite<br />
Cabin<br />
Regatta<br />
Caractéristiques fonctionnelles<br />
CARACTERISTIQUES FONCTIONNELLES<br />
Ce chapitre résume les principales fonctions du GEONAV fournit également<br />
une brève description des termes utilisés dans les pages suivantes.<br />
Pour de plus amples détails on pourra se référer au glossaire.<br />
GPS intégré ou extérieur<br />
Afin de permettre une plus grande flexibilité en phase d’installation, le<br />
GEONAV peut utiliser le récepteur GPS intégré ou une antenne active<br />
extérieure selon que l’appareil est installé en environnement fermé ou<br />
en extérieurs. Appuyer sur PAGE jusqu’à l’affichage du menu, sélectionner<br />
SETUP et choisir l’option GPS INT ou GPS EXT. Si le choix porte sur<br />
GPS INT, l’utilisateur doit ensuite confirmer si le GPS intégré est connecté<br />
à un DGPS afin d’activer la fonction de calibrage de la position qui<br />
permet de corriger l’erreur de position propre à tous les récepteurs GPS.<br />
Echosondeur<br />
En mode échosondeur, l’écran du GEONAV est divisé en deux parties:<br />
la partie supérieure affiche les données de navigation ;<br />
la partie inférieure représente le fond de la mer sous forme graphique.<br />
La profondeur peut être visualisée en mètres (valeur par défaut), en pieds<br />
et en brasses; pour choisir une unité de mesure, appuyer sur PAGE jusqu’à<br />
l’affichage du menu, sélectionner SETUP, puis l’option UNITE PROF.<br />
(M/FT/FA).<br />
Mode Navigation (automatique, AUTO)<br />
Le GEONAV entre automatiquement en mode Navigation dès que le récepteur<br />
GPS interne communique un point correct.<br />
En mode Navigation :<br />
le curseur n’est pas affiché ;<br />
il est possible d’accéder à la fenêtre de l’échosondeur.<br />
Ce mode est aussi appelé automatique car le traceur ajourne automatiquement<br />
la position du bateau.<br />
Le mode Navigation est normalement utilisé pendant la navigation.<br />
Mode Curseur (manuel, MAN)<br />
En mode Curseur, le curseur est activé. Il est possible d’afficher une<br />
route, d’insérer, de supprimer ou de déplacer des waypoint, d’insérer ou<br />
de supprimer des marques, de visualiser des informations sur les aides<br />
à la navigation, etc.<br />
Il n’est pas possible d’accéder à la fenêtre de l’échosondeur.<br />
En mode Navigation, la pression sur une des flèches de la touche CURSOR<br />
26<br />
permet de passer en mode Curseur. Pour revenir en mode Navigation,<br />
appuyer sur la touche PAGE.<br />
Rotation de la cartographie<br />
L’affichage traditionnel des cartes montre toujours<br />
le nord en haut de l’écran. Toutefois, cette<br />
représentation ne correspond pas à la réalité.<br />
Ainsi, en naviguant vers le sud, tout ce qui se<br />
trouve à droite du bateau sur la carte est à<br />
gauche du bateau en réalité et vice versa.<br />
La fonction ROTATION CARTES permet<br />
d’orienter la carte électronique affichée sur<br />
l’écran en fonction de la route suivie par le<br />
bateau (COG - Course Over Ground) relevée<br />
par le récepteur GPS. Le COG variant continuellement,<br />
un filtre a été inséré afin d’éviter<br />
que la carte tourne trop souvent.<br />
Pour activer la rotation de la cartographie,<br />
appuyer sur PAGE jusqu’à l’affichage du menu,<br />
sélectionner SETUP, puis ROTATION CARTES<br />
et choisir l’option ON; un message apparaît<br />
invitant l’utilisateur à choisir l’échelle à partir<br />
de laquelle le GEONAV doit activer la rotation<br />
de la carte.<br />
Agrandissement automatique (autozoom)<br />
Cette fonction agrandit automatiquement<br />
l’image à la meilleure échelle disponible et affiche<br />
le segment de la route actuelle (position<br />
du bateau vers le prochain waypoint).<br />
sans rotation<br />
avec rotation<br />
La fonction ne peut donc être activée que si au moins un waypoint a été<br />
inséré. Pour activer cette fonction, appuyer sur la touche ZOOM+ jusqu’à<br />
l’affichage du message “AUTOZOOM ? ENTER = OUI” et puis sur ENTER<br />
pour valider. Au démarrage du GEONAV, lorsqu’une route est activée et<br />
le GPS raccordé, l’agrandissement automatique se met en fonctionnement.<br />
26 27<br />
Elite<br />
Cabin<br />
Regatta<br />
offered by <strong>Busse</strong>-<strong>Yachtshop</strong>.com
Caractéristiques fonctionnelles<br />
sans screen amplifier<br />
avec screen amplifier<br />
Screen amplifier (amplificateur d’écran)<br />
Cette fonction est automatique et règle la position<br />
de la carte, dès que la vitesse du bateau<br />
dépasse les 3 noeuds, afin que les 2/3 de<br />
l’écran affichent la zone située en avant de la<br />
direction suivie par le bateau.<br />
Cette fonction est activée seulement si aucun<br />
waypoint n’a été inséré.<br />
Loupe (overzoom)<br />
Cette fonction n’affiche pas plus de détails mais<br />
facilite la lecture des informations préexistantes.<br />
La même image s’affiche à l’écran avec une<br />
taille supérieure.<br />
Lorsque cette fonction est activée, les méridiens<br />
et les parallèles s’affichent et le remplissage<br />
des terres est désactivé.<br />
Appuyer sur la touche PAGE jusqu’à l’affichage<br />
du menu, sélectionner SETUP, puis<br />
OVERZOOM, enfin activer (ON) ou désactiver<br />
(OFF) la fonction.<br />
overzoom<br />
Calibration de la position<br />
Tous les GPS montrent une erreur qui peut varier de quelques mètres à<br />
quelques centaines de mètres. Cette erreur est due au principe sur lequel<br />
est basé le système de positionnement satellitaire.<br />
La fonction de calibration de la position du GEONAV permet de corriger<br />
manuellement cette erreur.<br />
Pour effectuer la calibration, se mettre à la meilleure échelle possible,<br />
puis appuyer sur la touche PAGE jusqu’à l’affichage du menu, sélectionner<br />
SETUP et CALIBRATION et choisir l’option ON. Un message est alors<br />
affiché qui invite l’utilisateur à déplacer le curseur sur la position réelle<br />
du bateau repérée par exemple dans un port.<br />
Après avoir déplacé le curseur, appuyer sur la touche ENTER pour calibrer<br />
la position.<br />
28<br />
NOTA : Après avoir effectué la calibration, les données relatives à la latitude et à la longitude sont<br />
marquées d’un astérisque.<br />
Pour annuler la calibration, appuyer sur la touche PAGE jusqu’à l’affichage<br />
du menu, sélectionner SETUP et CALIBRATION et choisir l’option<br />
OFF.<br />
Mise à l’heure locale<br />
Cette fonction permet l’utilisation de l’heure locale au lieu de l’heure de<br />
référence (GMT). Appuyer sur la touche PAGE jusqu’à l’affichage du menu,<br />
sélectionner SETUP, HEURE et choisir l’option LOCALE. Un message<br />
est alors affiché qui invite l’utilisateur à entrer, à l’aide de la touche<br />
CURSOR, l’heure correspondant à son fuseau horaire. Confirmer par la<br />
touche ENTER.<br />
Pour annuler la visualisation de l’heure locale, appuyer sur la touche<br />
PAGE jusqu’à l’affichage du menu, sélectionner SETUP, puis HEURE et<br />
choisir l’option GMT.<br />
Couleur<br />
Le GEONAV a un écran en couleur parfaitement visible au soleil. Bleu,<br />
blanc, rouge et vert sont les couleurs primaires sélectionnées; ces couleurs<br />
ne peuvent pas être modifiées.<br />
Terre .................................................................................. rouge<br />
Mer .................................................................................... blanc<br />
Menu, fenêtres, informations, position du bateau .................. bleu<br />
Traces, waypoint .................................................................... vert<br />
Contraste<br />
Appuyer sur la touche PAGE jusqu’à l’affichage du menu, puis régler le<br />
contraste avec la touche CURSOR.<br />
Cette opération peut être effectuée avec le curseur dès la mise en<br />
fonctionnement de l’appareil pendant l’affichage de la fenêtre<br />
d’avertissement ou de la fenêtre satellites.<br />
Luminosité<br />
Lorsque le GEONAV est en fonctionnement, maintenir la pression sur la<br />
touche ON afin de visualiser les divers niveaux de rétro-éclairage de l’écran.<br />
28 29<br />
Elite<br />
Cabin<br />
Regatta<br />
offered by <strong>Busse</strong>-<strong>Yachtshop</strong>.com
Plus<br />
Elite<br />
Cabin<br />
Regatta<br />
Fonctionnement<br />
FONCTIONNEMENT<br />
Après l’affichage de l’écran de présentation pendant quelques secondes,<br />
un message apparaît pour vous rappeler que les cartes nautiques officielles<br />
doivent être utilisées à bord du bateau.<br />
Vous pouvez alors régler la luminosité au moyen de la touche CURSOR ou<br />
activer l’éclairage de l’écran avec la touche ON.<br />
Appuyez sur PAGE pour continuer. Le GEONAV affiche ensuite la fenêtre<br />
des informations des satellites GPS.<br />
Le GEONAV peut afficher cinq fenêtres graphiques qu’il est possible de<br />
faire défiler en appuyant sur la touche PAGE. Avec un point valable, la<br />
séquence de défilement est la suivante :<br />
SATELLITES > NAVIGATION > MENU > NAVIG. AU WP > PARCOURS<br />
SATELLITES > NAVIGATION > MENU > ECHOSONDEUR > PARCOURS<br />
30<br />
La pression sur la touche CURSOR active le<br />
mode Curseur.<br />
Ce mode permet d’éditer la route ou, avec<br />
le curseur, de faire défiler la cartographie<br />
NAVIONICS.<br />
En mode Curseur, l’écran est toujours centré<br />
par rapport au curseur manuel.<br />
La fenêtre en bas de l’écran affiche les<br />
données suivantes :<br />
Distance de la position du bateau au<br />
curseur.<br />
Durée du trajet de la position du bateau<br />
au curseur (estimée à partir de la<br />
vitesse du bateau).<br />
Angle relevé entre la position du bateau<br />
et le curseur.<br />
Echelle de la carte.<br />
Fenêtre satellites<br />
FENETRE SATELLITES<br />
Après la mise en fonctionnement de l’appareil,<br />
la fenêtre satellites apparaît pour<br />
indiquer l’état de la réception du récepteur<br />
GPS.<br />
Le cercle extérieur représente l’horizon, le<br />
cercle intérieur une élévation de 45° par<br />
rapport à l’horizon et le point central correspond<br />
au zénith. Les petits carrés numérotés<br />
représentent les satellites disponibles.<br />
Lorsque les satellites sont reconnus<br />
et leurs signaux acquis, leur position est confirmée et l’étiquette sur<br />
l’écran apparaît en vidéo inverse.<br />
Dans la partie gauche de l’écran apparaissent les barres graphiques<br />
pour indiquer la qualité du signal reçu (plus la barre est importante,<br />
meilleure est la qualité du signal).<br />
En tête de la barre graphique, un chiffre indique la qualité du signal<br />
reçu. Une valeur supérieure à 40 correspond à une bonne qualité de<br />
réception.<br />
Informations complémentaires :<br />
Jour, mois, année, heure locale ou GMT (au premier démarrage,<br />
l’heure GMT est utilisée).<br />
Position actuelle du bateau (ou dernier point correct si le GPS est en<br />
phase de recherche des satellites).<br />
Situation actuelle du satellite (numéro et position).<br />
Vitesse, déclinaison magnétique et altitude.<br />
La position en deux dimensions est disponible dès que trois satellites<br />
sont reçus de manière correcte, et la latitude et longitude relatives à la<br />
position du bateau sont également affichées.<br />
L’acquisition de quatre satellites permet d’obtenir l’altitude.<br />
Lorsque le point est correct, le GEONAV affiche les données de navigation,<br />
votre position et votre direction, ainsi que la carte à la meilleure<br />
échelle disponible.<br />
30 31<br />
offered by <strong>Busse</strong>-<strong>Yachtshop</strong>.com
Plus<br />
Elite<br />
Regatta<br />
Elite<br />
Regatta<br />
Fenêtre satellites Fenêtre navigation<br />
A la première mise en fonctionnement de l’appareil, une à douze minutes<br />
peuvent s’écouler pour obtenir la position, en particulier si vous êtes<br />
situé au milieu de la Méditerranée. Dans certaines parties du monde,<br />
cette période peut atteindre jusqu’à une demi-heure.<br />
Une fois que l’appareil a mémorisé votre position réelle, le GEONAV l’affichera<br />
en quelques minutes au cours des mises en fonctionnement suivantes.<br />
Une fois qu’un point correct est reçu, le GEONAV passe à l’écran<br />
suivant.<br />
Si le bateau se trouve dans une zone couverte par une station différentielle<br />
GPS lorsque le GPS intégré est utilisé avec un DGPS, la barre<br />
horizontale en haut de la fenêtre satellites affichera le message “FIX 3D-<br />
DIFF” ou “FIX 2D-DIFF”.<br />
32<br />
FENETRE NAVIGATION<br />
Cette fenêtre est activée aussitôt que le point est correct (FIX OK).<br />
S’il n’y a pas de route, la vitesse, la route et<br />
l’échelle de la carte s’affichent en bas de<br />
l’écran.<br />
La touche ZOOM peut alors être utilisée pour<br />
augmenter les détails et accéder aux informations<br />
de la cartographie NAVIONICS.<br />
Si une route a été insérée, les données suivantes<br />
sont visualisées en bas de l’écran :<br />
Vitesse<br />
Ddistance au waypoint de destination<br />
Durée du trajet au waypoint de destination<br />
Echelle de la carte<br />
S’il n’y a pas de route, la vitesse, la route et l’échelle de la carte s’affichent<br />
en haut de l’écran. Les informations relatives à la vitesse du vent<br />
vrai s’affichent en bas de l’écran.<br />
Si une route est tracée sur l’écran, les informations suivantes apparaissent<br />
:<br />
Vitesse<br />
Distance au waypoint de destination<br />
Angle relevé entre la position du bateau et le waypoint de destination<br />
Temps nécessaire à l’arrivée au prochain waypoint<br />
Si d’autres waypoint sont présents outre celui de destination, une fenêtre<br />
apparaît contenant les informations relatives au vent apparent sur le<br />
prochain bord. La vitesse du vent apparent est reportée numériquement,<br />
tandis que la direction du vent apparent est indiquée graphiquement<br />
avec une flèche.<br />
Si une allure vent de travers ou vent arrière est prévue sur le prochain<br />
bord, la flèche indiquera la direction du vent apparent sur le premier<br />
bord du prochain segment de route, tandis que la direction du vent<br />
apparent sur le waypoint sera signalée par une ligne.<br />
32 33<br />
Plus<br />
Elite<br />
Cabin<br />
Regatta<br />
offered by <strong>Busse</strong>-<strong>Yachtshop</strong>.com
Regatta<br />
Fenêtre navigation Fenêtre menu<br />
De plus, sur la position du bateau, les éléments graphiques suivants<br />
s’affichent à l’écran :<br />
Direction du vent vrai (magnétique), indiquée avec une flèche qui<br />
signale la direction vers laquelle se dirige le vent.<br />
Layline : Cette ligne indique le parcours que le bateau pourra suivre<br />
en cas de virement. Elle s’affiche lorsque l’angle entre la direction du<br />
vent et la direction du bateau représente une allure vent de travers<br />
ou vent arrière. Elle s’ajourne automatiquement en fonction des variations<br />
du vent.<br />
34<br />
FENETRE MENU<br />
Lorsque le menu est affiché en haut de l’écran, il est possible de sélectionner<br />
les fonctions suivantes :<br />
TRACE : Permet d’activer/désactiver la fonction trace et de supprimer une<br />
trace.<br />
CONTRASTE : Permet de régler le contraste de l’écran.<br />
ROUTE : Permet d’effacer, d’inverser et d’afficher les informations sur la<br />
route.<br />
SETUP : Permet de modifier et d’activer les paramètres généraux et les<br />
modes de fonctionnement du traceur.<br />
Rotation cartes (ON/OFF)<br />
Active/désactive la fonction de Rotation.<br />
Montrer cartes (ON/OFF)<br />
Active/désactive l’affichage du contour de la carte.<br />
Lignes fond<br />
(au-dessous de 5 m; de 10 m; au-dessus de 20 m)<br />
Active/désactive l’affichage des lignes fond.<br />
Noms (ON/OFF)<br />
Active/désactive l’affichage des noms des localités.<br />
Overzoom (ON/OFF)<br />
Active/désactive la fonction de Overzoom.<br />
Calibration (ON/OFF)<br />
Permet de calibrer la position reçue par le GPS.<br />
Unité des distances (NAUT/METR/STAT)<br />
Permet de sélectionner l’unité de mesure des distances.<br />
Unité de profondeur (M/FT/FA)<br />
Permet de sélectionner l’unité de mesure de la profondeur.<br />
GPS (INT/EXT)<br />
Permet de sélectionner le GPS intégré ou une antenne active extérieure.<br />
Heure (LOCALE/GMT)<br />
Permet d’insérer l’heure locale.<br />
Bearings (déclinaison magnétique) (VRAIE/MAG)<br />
Permet d’insérer le mode magnétique pour les relèvements.<br />
Langue (EN/FR/ES/DE/DK/IT/SV/NL/SU/NO)<br />
Permet de sélectionner la langue.<br />
Langue (EN/FR/ES/DE/IT)<br />
Permet de sélectionner la langue.<br />
34 35<br />
Elite<br />
Cabin<br />
Regatta<br />
Elite<br />
Regatta<br />
Elite<br />
Cabin<br />
Regatta<br />
Plus<br />
offered by <strong>Busse</strong>-<strong>Yachtshop</strong>.com
Elite<br />
Cabin<br />
Regatta<br />
Fenêtre échosondeur Fenêtre navigation au waypoint<br />
FENETRE ECHOSONDEUR<br />
Il est possible d’interfacer un échosondeur<br />
avec le GEONAV via NMEA.<br />
Dans ce cas, le GEONAV active automatiquement<br />
la fonction échosondeur et un<br />
graphique du profil du fond apparaît.<br />
L’échelle de profondeur, qui peut être sélectionnée<br />
en mètres, pieds ou brasses<br />
dans le menu, change automatiquement<br />
selon la profondeur.<br />
En mode Navigation, appuyer sur PAGE jusqu’à l’affichage de la fenêtre<br />
échosondeur. La fenêtre affiche les informations suivantes :<br />
Profondeur du fond marin<br />
Echelle de profondeur<br />
Température de l’eau (si disponible)<br />
Lorsque la profondeur du fond marin est supérieure à la capacité de<br />
mesure de l’échosondeur, ou que la vitesse de déplacement du bateau<br />
est trop élevée pour permettre au capteur de profondeur d’effectuer un<br />
relevé correct, le graphique s’interrompt et la valeur est remplacée par<br />
“—”.<br />
Appuyer sur PAGE pour désactiver la fenêtre echosondeur.<br />
36<br />
FENETRE NAVIGATION AU WAYPOINT<br />
Cette fenêtre affiche les informations relatives<br />
à la navigation vers le waypoint<br />
courant. Le segment de route actif est momentanément<br />
supprimé et remplacé par<br />
un élastique qui relie la position du bateau<br />
au waypoint de destination. Dans la<br />
partie inférieure de l’écran, sont affichées<br />
les données suivantes :<br />
Vitesse du bateau<br />
Distance de la position du bateau au<br />
waypoint<br />
Angle relevé entre la position du bateau<br />
et le waypoint de destination<br />
Ecart<br />
36 37<br />
Plus<br />
offered by <strong>Busse</strong>-<strong>Yachtshop</strong>.com
Fenêtre parcours Route<br />
38<br />
FENETRE PARCOURS<br />
Cette fenêtre affiche les informations relatives<br />
au parcours effectué :<br />
Vitesse moyenne<br />
Temps passé depuis le départ<br />
Distance partielle parcourue<br />
Distance totale parcourue<br />
Pour remettre à zéro ces compteurs au<br />
début d’un voyage, appuyer sur la touche<br />
CLR.<br />
38 39<br />
3<br />
5<br />
1<br />
6<br />
2<br />
4<br />
ROUTE<br />
Le GEONAV permet l’enregistrement d’une<br />
route et la navigation le long de cette route.<br />
Pour tracer une route utiliser la touche<br />
GOTO.<br />
La figure représente une route comportant<br />
trois waypoint telle qu’elle est affichée par<br />
le GEONAV.<br />
1- Position du bateau<br />
Position telle qu’elle est reçue par le récepteur<br />
GPS.<br />
2 - Segment<br />
Portion de route comprise entre deux waypoint consécutifs.<br />
3 - Trace<br />
Représentation, sous forme d’une ligne en pointillés, du trajet parcouru<br />
par le bateau.<br />
4 - Waypoint<br />
Représente un point de passage sur la route (souvent unique lorsqu’un<br />
simple aller-retour est effectué). Il est indiqué par un numéro. Lorsqu’on<br />
approche de ce waypoint, le message “PROCHE DU WAYPOINT”<br />
s’affiche à l’écran pendant une durée de 25 secondes. Lorsqu’on approche<br />
du dernier waypoint, le message “FIN DU PARCOURS” s’affiche.<br />
Le point de départ de la route est représenté par le symbole “X”. Le point<br />
de destination est indiqué par un cercle noir.<br />
5 - Vecteur<br />
Représente la route actuelle du bateau. Si celui-ci est immobile, la lecture<br />
ne présente aucun intérêt.<br />
6 - Curseur<br />
Représente une position en coordonnées géographiques.<br />
Il disparaît de l’écran lorsque l’appareil fonctionne en mode Navigation.<br />
Création d’ une route<br />
La création d’une route commence toujours par le point d’arrivée.<br />
Vous pouvez créer un waypoint à tout moment en utilisant la touche<br />
GOTO.<br />
offered by <strong>Busse</strong>-<strong>Yachtshop</strong>.com
Route<br />
La route sera initialement composée d’un segment ayant pour origine la<br />
position actuelle et pour extrémité le dernier waypoint. Vous pouvez toutefois<br />
insérer des waypoint avec la touche GOTO, modifier les segments,<br />
déplacer les waypoint y compris le dernier waypoint.<br />
NOTA : Une seule route peut être utilisée. Chaque nouvelle route supprime la route précédente.<br />
40<br />
Route vers la position du curseur<br />
Appuyez sur la touche CURSOR pour activer<br />
le mode Curseur.<br />
Appuyez sur la touche GOTO pour activer<br />
le menu GOTO, sélectionnez l’option CURS,<br />
puis validez avec la touche ENTER.<br />
Lorsqu’une route est créée entre la position<br />
actuelle et la position du curseur, l’appareil<br />
revient en mode Navigation en permettant<br />
la fonction autozoom.<br />
Route vers une marque<br />
Appuyez sur la touche GOTO, sélectionnez<br />
l’option MARQ à l’aide de la touche CURSOR,<br />
puis appuyez sur la touche ENTER pour afficher<br />
la liste des six dernières marques<br />
utilisées. Sélectionnez une marque, appuyez<br />
sur la touche ENTER pour valider ou<br />
la touche PAGE pour sortir du menu. Le<br />
GEONAV supprime alors la route précédente,<br />
affiche la nouvelle route en fonction<br />
de la marque choisie, puis réactive le<br />
mode Navigation en permettant la fonction<br />
autozoom.<br />
Route vers un port<br />
Appuyez sur la touche GOTO puis sélectionnez<br />
à l’aide de la touche CURSOR, l’option<br />
PORT pour afficher la liste des ports de la<br />
carte utilisée avec les six derniers ports<br />
utilisés mis en évidence.<br />
Sélectionnez un port à l’aide de la touche<br />
CURSOR puis validez avec la touche ENTER.<br />
Le GEONAV supprime alors la route précédente,<br />
affiche la nouvelle route en fonction<br />
du port choisi, puis réactive le mode<br />
Navigation en permettant la fonction<br />
autozoom.<br />
Route vers le service le plus proche<br />
Cette option permet d’atteindre le port le<br />
plus proche de votre position dans lequel<br />
est disponible un service donné.<br />
Appuyez sur la touche GOTO puis sélectionnez,<br />
à l’aide de la touche CURSOR, l’option<br />
PRES pour afficher la liste des services.<br />
Sélectionnez le service voulu, puis validez<br />
avec la touche ENTER ou bien appuyez sur<br />
PAGE pour annuler l’opération. Le GEONAV<br />
affiche trois icônes sur les trois ports ayant<br />
le service choisi, les plus proches à vol<br />
d’oiseau de la position actuelle (si en mode<br />
Navigation) ou du curseur (si en mode Cur-<br />
seur). Une fenêtre affiche le nom du port qui clignote ainsi que la distance<br />
et la durée du trajet pour l’atteindre (remettre à zéro le temps).<br />
Appuyez sur la touche CURSOR pour passer d’un port à l’autre. Sélectionnez<br />
l’un des ports et appuyez sur la touche ENTER pour valider.<br />
En mode Navigation le GEONAV supprime la route précédente, affiche<br />
la nouvelle route en fonction du port choisi, puis réactive le mode Navigation<br />
en permettant la fonction autozoom. Le nouveau point de destination<br />
devient alors le port sélectionné.<br />
En mode Curseur, un nouveau waypoint sera ajouté à la route existante.<br />
40 41<br />
offered by <strong>Busse</strong>-<strong>Yachtshop</strong>.com
Plus<br />
Elite<br />
Cabin<br />
Regatta<br />
Route<br />
Route vers un point (Latitude/Longitude)<br />
Appuyez sur la touche GOTO et sélectionnez,<br />
à l’aide de la touche CURSOR, l’option<br />
L/L. Entrez les coordonnées en utilisant la<br />
touche CURSOR, puis validez avec la touche<br />
ENTER.<br />
Route vers un point (Latitude/Longitude et Distance/<br />
Relèvement)<br />
Appuyez sur la touche GOTO et sélectionnez,<br />
à l’aide de la touche CURSOR, l’option<br />
PNT. Choisissez le mode d’insertion du<br />
waypoint entre Latitude et Longitude (LAT/<br />
LON) et entre Distance et Relèvement<br />
(RANGE/BRG). Entrez les coordonnées en<br />
utilisant CURSOR, puis validez avec ENTER.<br />
Le GEONAV positionne le curseur sur les coordonnées sélectionnées.<br />
Pour insérer le waypoint, appuyez de nouveau sur la touche GOTO et<br />
sélectionnez l’option CURS, puis validez avec la touche ENTER.<br />
Suppression du prochain waypoint sur la route actuelle<br />
En mode Curseur, appuyez sur CLR jusqu’à l’affichage du message “PAS<br />
DE WP DISPONIBLE”. Si le dernier waypoint est situé hors des limites<br />
de l’écran, le traceur demandera de valider la suppression avec ENTER.<br />
Suppression totale de la route<br />
En mode Navigation il est possible de supprimer la route entière en appuyant<br />
sur CLR. Validez la suppression de la route avec ENTER ou appuyez<br />
sur PAGE pour sortir.<br />
42<br />
Modification d’une route en mode Curseur<br />
Lorsqu’une route existe, il est possible de<br />
la modifier en insérant ou en supprimant<br />
des waypoint, en remplaçant des segments<br />
ou en changeant de destination.<br />
Suppression d’un waypoint sélectionné<br />
Positionnez le curseur sur le waypoint<br />
à supprimer au moyen de la touche<br />
CURSOR, puis appuyez sur la touche CLR.<br />
Déplacement d’un waypoint<br />
Activez le curseur avec la touche CURSOR<br />
et positionnez-le sur le waypoint à dé-<br />
placer. Appuyez sur la touche ENTER<br />
pour le capturer, déplacez le curseur<br />
sur la nouvelle position, puis validez<br />
avec la touche ENTER.<br />
Insertion d’un waypoint dans une route<br />
tracée<br />
Positionnez le curseur sur le segment<br />
de route à modifier, appuyez sur la touche<br />
ENTER pour capturer le segment qui<br />
est alors mis en évidence.<br />
Déplacez le curseur sur la position où<br />
vous voulez insérer le nouveau waypoint<br />
et validez avec la touche ENTER.<br />
Fonctions du menu ROUTE<br />
Informations sur la route<br />
Inversion de la route<br />
Remise à zéro de la route<br />
Informations sur la route<br />
Les informations relatives à la route sont visualisées sur deux pages. La<br />
première contient les informations générales sur la route, tandis que la<br />
deuxième fournit les coordonnées géographiques de chaque waypoint.<br />
Appuyez sur la touche PAGE jusqu’à l’affichage du menu principal.<br />
Sélectionnez ROUTE, puis l’option INFO et appuyez sur la touche ENTER.<br />
La première fenêtre affiche les informations suivantes :<br />
WP N. : Nombre du waypoint<br />
Dist NM : Distance entre le waypoint et le waypoint de départ<br />
Heure : Durée du parcours<br />
Ess. litres : Consommation estimée de carburant<br />
NOTA : Les informations relatives à la durée du parcours et à la consommation de carburant ne<br />
s’affichent que lorsque leurs valeurs moyennes sont mises en mémoire. Cette opération s’effectue<br />
par l’option disponible dans la fenêtre d’informations.<br />
Inversion de la route<br />
Appuyez sur la touche PAGE jusqu’à l’affichage du menu principal. Sélectionnez<br />
ROUTE, puis l’option INVERSER et validez avec la touche<br />
ENTER.<br />
L’ordre des waypoint s’inverse automatiquement, permettant de naviguer<br />
sur le trajet de retour.<br />
42 43<br />
offered by <strong>Busse</strong>-<strong>Yachtshop</strong>.com
Route Trace<br />
Remise à zéro de la route<br />
En mode Navigation, appuyez sur la touche CLR et validez avec la touche<br />
ENTER.<br />
En mode Curseur, tenez la touche CLR pressée pour deux secondes et<br />
appuyez sur ENTER pour valider.<br />
44<br />
44 45<br />
TRACE<br />
La fonction Trace permet d’enregistrer le trajet parcouru par le bateau.<br />
On peut activer ou désactiver la trace plusieurs fois pendant un parcours.<br />
Dans ce cas, les différents segments seront reliés automatiquement<br />
pour former une trace unique.<br />
Activation de la trace<br />
Appuyez sur la touche PAGE jusqu’à l’affichage du menu principal. Sélectionnez<br />
TRACE, puis l’option TRACE DEPART et validez avec la touche<br />
ENTER. Sur la position du bateau sera affiché un petit cercle qui<br />
indique le point de départ de la trace.<br />
Désactivation de la trace<br />
Appuyez sur la touche PAGE jusqu’à l’affichage du menu principal. Sélectionnez<br />
TRACE, puis l’option TRACE STOP et validez avec la touche<br />
ENTER.<br />
Suppression de toutes les traces<br />
Appuyez sur la touche PAGE jusqu’à l’affichage du menu principal. Sélectionnez<br />
TRACE, puis l’option EFFACER et validez avec la touche EN-<br />
TER. Un message apparaît alors sur l’écran pour valider la suppression.<br />
offered by <strong>Busse</strong>-<strong>Yachtshop</strong>.com
Marque<br />
MARQUE<br />
Les marques sont des points d’intérêt que vous pouvez mémoriser dans<br />
l’appareil pour une utilisation future. La marque en forme de maison<br />
est normalement utilisée pour identifier le point de départ.<br />
46<br />
MODE CURSEUR<br />
Insertion d’une marque<br />
Positionnez le curseur sur le point choisi et<br />
appuyez sur ENTER. Sélectionnez la forme<br />
de la marque et nommez-la avec CURSOR,<br />
puis validez avec ENTER.<br />
NOTA : Les noms des marques sont visibles à partir de<br />
l’échelle de 32 milles marins.<br />
Suppression d’une marque<br />
Positionnez le curseur sur la marque à supprimer,<br />
puis appuyez sur CLR.<br />
Changement du nom ou de la forme d’une marque<br />
Positionnez le curseur sur la marque à modifier. Une fenêtre affiche<br />
alors la forme et le nom de la marque. Appuyez sur ENTER pour modifier<br />
le nom ou la forme à l’aide de CURSOR. Appuyez sur ENTER pour valider.<br />
MODE NAVIGATION<br />
Insertion d’une marque<br />
Appuyez sur ENTER, sélectionnez la forme<br />
de la marque, nommez-la avec CURSOR et<br />
puis validez avec ENTER. La marque s’affiche<br />
sur la position du bateau. Avec CURSOR<br />
il est possible de modifier le nom ou la forme<br />
de la marque. Appuyez sur ENTER pour valider<br />
la modification.<br />
Suppression d’une marque<br />
Positionnez le curseur sur la marque à supprimer<br />
et appuyez sur la touche CLR.<br />
Navigation vers une marque<br />
Voir les fonctions de route.<br />
Pilote automatique<br />
PILOTE AUTOMATIQUE<br />
Le GEONAV permet à un bateau équipé d’un pilote automatique de suivre<br />
automatiquement la route définie sur le traceur en compensant les<br />
différentes variations dues à des facteurs externes (vents, courants, etc.).<br />
Le GEONAV fournit des informations de route au pilote automatique si<br />
une série de waypoint (ou une route) a été enregistrée dans la page des<br />
informations.<br />
Le GEONAV affiche le message “PROCHE DU WAYPOINT” chaque fois<br />
que le bateau est sur le point de changer de route. Lorsque le waypoint<br />
est atteint, l’appareil émet l’ordre de virer vers le waypoint suivant.<br />
Le GEONAV ne peut pas prédéfinir la distance jusqu’au waypoint pour<br />
le signal d’alarme; le message “PROCHE DU WAYPOINT” apparaît automatiquement<br />
25 secondes avant d’arriver au waypoint.<br />
Le message “FIN DU PARCOURS” apparaît sur l’écran lorsque le bateau<br />
est sur le point d’atteindre le dernier waypoint de la route.<br />
IMPORTANT : Pour éviter de fausses manoeuvres de la part du pilote automatique, il est absolument<br />
indispensable de désactiver celui-ci avant et durant les opérations de modification et/ou de<br />
traçage de la route.<br />
46 47<br />
Elite<br />
Cabin<br />
Regatta<br />
offered by <strong>Busse</strong>-<strong>Yachtshop</strong>.com
Utilisation avec la cartographie routière<br />
LIRE CETTE NOTICE AVANT D’UTILISER LE GEONAV<br />
ATTENTION<br />
LE TRACEUR INSTALLE DANS UN VEHICULE NE DOIT PAS GENER<br />
LA VISIBILITE DU CONDUCTEUR.<br />
DE PLUS, L’UNITE NE DOIT PAS ETRE UTILISEE PAR LE CONDUC-<br />
TEUR OU DISTRAIRE SON ATTENTION PENDANT QUE LE VEHICULE<br />
EST EN MOUVEMENT.<br />
L’utilisation du GEONAV comporte de la part de l’utilisateur l’acceptation<br />
et la connaissance de cette notice.<br />
48<br />
UTILISATION AVEC LA CARTOGRAPHIE<br />
ROUTIERE<br />
Grâce à l’introduction de la nouvelle cartographie<br />
électronique pour les applications<br />
terrestres, le GEONAV devient un<br />
instrument précieux pour tous vos déplacements<br />
en voiture; la cartographie routière<br />
vous aidera en effet à localiser avec<br />
une plus grande précision votre position<br />
et les noms des routes principales.<br />
Quand vous installez une cartouche de<br />
cartographie terrestre, le GEONAV s’active<br />
automatiquement en mode terrestre.<br />
Les fonctions de l’appareil sont inchangées et vous pouvez toujours planifier<br />
une route, insérer une marque, enregistrer votre parcours et activer<br />
toutes les autres fonctions avec les mêmes modalités que celles décrites<br />
pour l’utilisation nautique.<br />
Il existe cependant quelques différences qui sont décrites ci-après.<br />
Menu de SETUP<br />
Le menu de SETUP change de la manière<br />
suivante :<br />
Rotation cartes (ON/OFF)<br />
Active/désactive la fonction de rotation.<br />
Montrer cartes (ON/OFF)<br />
Active/désactive l’affichage du contour<br />
de la carte.<br />
Routes principales (ON/OFF)<br />
Active/désactive l’affichage des routes<br />
principales.<br />
Autres routes (ON/OFF)<br />
Active/désactive l’affichage des routes secondaires.<br />
Noms routes (ON/OFF)<br />
Active/désactive l’affichage des noms des routes.<br />
NOTA : Ce paramètre se met automatiquement OFF si toutes les routes sont désactivées.<br />
48 49<br />
Elite<br />
Cabin<br />
Regatta<br />
offered by <strong>Busse</strong>-<strong>Yachtshop</strong>.com
Elite<br />
Regatta<br />
Elite<br />
Cabin<br />
Regatta<br />
Plus<br />
Utilisation avec la cartographie routière Messages principaux<br />
Noms villes (ON/OFF)<br />
Active/désactive l’affichage des noms des localités.<br />
Calibration (ON/OFF)<br />
Permet de calibrer la position reçue par le GPS.<br />
GPS (INT/EXT)<br />
Permet de sélectionner le GPS intégré ou une antenne active extérieure.<br />
Unité distance (NAUT/METR/STAT)<br />
Permet de sélectionner l’unité de mesure des distances pour l’utilisation<br />
terrestre. Celle-ci est indépendante de celle utilisée pour le fonctionnement<br />
nautique.<br />
Heure (LOCALE/GMT)<br />
Permet d’insérer l’heure locale.<br />
Langue (EN/FR/ES/DE/DK/IT/SV/NL/SU/NO)<br />
Permet de sélectionner la langue.<br />
Langue (EN/FR/ES/DE/IT)<br />
Permet de sélectionner la langue.<br />
Affichage des noms des rues<br />
Cette fonction est équivalente à celle qui permet l’affichage des caractéristiques<br />
d’un phare en mode nautique.<br />
Positionner le curseur sur le symbole du nom de la rue (petit losange).<br />
Une fenêtre s’affiche alors automatiquement avec le nom de la rue sélectionnée.<br />
50<br />
MESSAGES PRINCIPAUX<br />
FIN DU PARCOURS<br />
Le dernier waypoint a été dépassé.<br />
RECHERCHE SATELLITES ou COUV. GPS INSUFF.<br />
Le traceur ne reçoit plus d’informations du récepteur GPS.<br />
INVALID FIX<br />
Le récepteur GPS ne reçoit pas suffisamment de satellites pour permettre<br />
le calcul précis de la position du bateau.<br />
AUCUN WP<br />
Le prochain waypoint ne peut pas être changé parce que il n’y a pas de<br />
waypoint disponible.<br />
WP DEJA PRESENT<br />
Deux waypoint ne peuvent pas avoir la même position.<br />
PROCHE DU WAYPOINT<br />
Le bateau se trouve à environ 25 secondes du prochain waypoint.<br />
WAYPOINT DEPASSE<br />
Le bateau a dépassé le waypoint.<br />
PAS DE WP DISPONIBLE<br />
Il n’y a plus de waypoint disponibles.<br />
PAS DE MARQ. DISPONIBLE<br />
Les marques disponibles ont été utilisées.<br />
MARQ. DEJA PRESENTE<br />
Deux marques ne peuvent pas être mémorisées avec une position ou un<br />
nom identique.<br />
50 51<br />
offered by <strong>Busse</strong>-<strong>Yachtshop</strong>.com
Dépannage<br />
DEPANNAGE<br />
Le GEONAV ne se met pas en fonctionnement<br />
Assurez-vous qu’une tension continue de 11 à 18 V est présente entre<br />
les contacts métalliques du support. Le pôle positif se trouve sur le contact<br />
gauche en regardant le support. Vérifiez aussi que la polarité est<br />
correcte. Contrôlez le fusible.<br />
Le GEONAV ne donne pas le point correct (FIX OK)<br />
Vérifiez qu’aucun obstacle métallique n’est placé autour de l’appareil. Il<br />
pourrait en effet agir comme un écran pour l’antenne du GEONAV. Si<br />
après 15 minutes le point n’est pas correct (FIX OK), mettez l’appareil<br />
sur arrêt puis de nouveau en fonctionnement.<br />
Le GEONAV ne peut pas être arrêté<br />
Si après une pression de 3 secondes sur la touche ON/OFF l’appareil ne<br />
se met pas hors fonctionnement, retirez l’appareil de son support puis<br />
remettez-le en place.<br />
L’écran du GEONAV devient très foncé après une longue exposition à la lumière directe du<br />
soleil<br />
Réglez le contraste.<br />
Pendant le fonctionnement le GEONAV se bloque<br />
Eteignez et allumez l’appareil. Si le problème persiste, videz la mémoire;<br />
allumez l’appareil en appuyant simultanément sur les touches ON et<br />
CLR. Cette opération supprime toutes les données précédentes (marques,<br />
route, trace, etc.) sauvegardées en mémoire.<br />
52<br />
Glossaire<br />
GLOSSAIRE<br />
Azimut - Mesure de l’angle entre l’horizon<br />
et un satellite (ou un autre<br />
objet).<br />
Bearing (relèvement) - Direction du<br />
compas (0°-360°) entre le bateau<br />
et le point visé.<br />
COG (Course Over Ground) - Route sol.<br />
Coordonnées - Position en latitude et<br />
longitude.<br />
Echosondeur - Instrument qui relève<br />
la profondeur du fond marin.<br />
GMT - Greenwich Mean Time<br />
(Universal Coordinated Time).<br />
GPS (Global Positioning System) - Constellation<br />
de satellites de navigation<br />
en orbite autour de la terre qui<br />
transmettent l’heure précise et des<br />
informations de position. Un récepteur<br />
GPS utilise ces informations<br />
pour effectuer un point par<br />
triangulation. Chaque satellite<br />
transmet sa position exacte à un<br />
moment précis. Le récepteur GPS<br />
reçoit le signal et mesure l’intervalle<br />
de temps entre l’émission et<br />
la réception.<br />
Il peut ainsi déterminer la distance<br />
qui le sépare du satellite. Une fois<br />
que le récepteur a calculé les distances<br />
qui le séparent de trois satellites,<br />
il peut déterminer sa position.<br />
GPS différentiel - Une balise placée à<br />
une position connue reçoit et analyse<br />
les signaux des satellites et en<br />
déduit la correction à appliquer<br />
pour réduire l’erreur de position.<br />
Heading (cap) - Direction de déplacement<br />
du bateau.<br />
Point en position - Coordonnées en<br />
position calculées par l’appareil.<br />
Segment - Partie de route comprise<br />
entre deux points consécutifs de<br />
cette même route.<br />
SOG (Speed Over Ground) - Vitesse sol;<br />
vitesse à laquelle se déplace le bateau<br />
par rapport à la terre.<br />
Waypoint - Point de passage appartenant<br />
à une route.<br />
52 53<br />
offered by <strong>Busse</strong>-<strong>Yachtshop</strong>.com
54<br />
PAS DE TEXTE<br />
Table des matières<br />
TABLE DES MATIERES<br />
GEONAV 6 PLUS ................................................................................................ 4<br />
GEONAV 6 ELITE ............................................................................................... 6<br />
GEONAV 6 CABIN .............................................................................................. 8<br />
GEONAV 6 REGATTA ....................................................................................... 10<br />
INTRODUCTION ............................................................................................... 12<br />
INSTALLATION ET PRECAUTIONS ................................................................. 14<br />
RACCORDEMENTS ......................................................................................... 18<br />
INSTALLATION DES CARTOUCHES ............................................................... 20<br />
CLAVIER ........................................................................................................... 21<br />
DIAGNOSTIC .................................................................................................... 22<br />
CARTOGRAPHIE NUMERIQUE NAVIONICS ................................................... 23<br />
AIDES A LA NAVIGATION ................................................................................ 25<br />
CARACTERISTIQUES FONCTIONNELLES ..................................................... 26<br />
FONCTIONNEMENT ........................................................................................ 30<br />
FENETRE SATELLITES .................................................................................... 31<br />
FENETRE NAVIGATION ................................................................................... 33<br />
FENETRE MENU .............................................................................................. 35<br />
FENETRE ECHOSONDEUR............................................................................. 36<br />
FENETRE NAVIGATION AU WAYPOINT .......................................................... 37<br />
FENETRE PARCOURS ..................................................................................... 38<br />
ROUTE .............................................................................................................. 39<br />
TRACE .............................................................................................................. 45<br />
MARQUE .......................................................................................................... 46<br />
PILOTE AUTOMATIQUE ................................................................................... 47<br />
UTILISATION AVEC LA CARTOGRAPHIE ROUTIERE .................................... 49<br />
MESSAGES PRINCIPAUX ................................................................................ 51<br />
DEPANNAGE .................................................................................................... 52<br />
GLOSSAIRE ...................................................................................................... 53<br />
54 55<br />
offered by <strong>Busse</strong>-<strong>Yachtshop</strong>.com
2 3<br />
2<br />
3<br />
2<br />
Manuale d’uso e d’installazione<br />
I<br />
offered by <strong>Busse</strong>-<strong>Yachtshop</strong>.com<br />
6<br />
PLUS<br />
ELITE<br />
CABIN<br />
REGATTA
2<br />
2<br />
LEGGETE QUESTA AVVERTENZA PRIMA DI UTILIZZARE IL VOSTRO<br />
GEONAV<br />
ATTENZIONE<br />
LA CARTA ELETTRONICA È UN AIUTO ALLA NAVIGAZIONE FATTO<br />
PER FACILITARE L’USO DELLE CARTE UFFICIALI, NON PER SOSTI-<br />
TUIRLE. SOLO LE CARTE NAUTICHE UFFICIALI E GLI AVVISI AI NA-<br />
VIGANTI CONTENGONO TUTTE LE INFORMAZIONI NECESSARIE<br />
PER LA SICUREZZA DELLA NAVIGAZIONE E, COME SEMPRE, IL CO-<br />
MANDANTE È RESPONSABILE DEL LORO USO.<br />
L’uso del GEONAV comporta la conoscenza e l’accettazione di questa<br />
avvertenza da parte dell’utente.<br />
NOTA: il presente manuale è applicabile ai modelli GEONAV 6 Plus, GEONAV 6 Elite, GEONAV<br />
6 Cabin e GEONAV 6 Regatta. Le funzioni esclusive di ciascun modello sono evidenziate a lato<br />
del testo. Dove non specificato, le funzioni sono da intendersi comuni a tutti i modelli.<br />
2 3<br />
offered by <strong>Busse</strong>-<strong>Yachtshop</strong>.com
Plus<br />
Caratteristiche tecniche<br />
GEONAV 6 PLUS<br />
Estremamente compatto: plotter + ricevitore GPS + antenna contenuti<br />
in un unico cabinet<br />
Ricevitore GPS a 12 canali<br />
Tempo di acquisizione fix:<br />
2 minuti (condizioni normali)<br />
15 minuti primo fix (con GPS interno)<br />
Carta del mondo incorporata<br />
Resistente agli spruzzi<br />
Peso: 1 kg<br />
Caratteristiche elettriche<br />
Alimentazione: 11-18 Volt c.c. con protezione per sovratensione e<br />
inversione di polarità<br />
Assorbimento: 0,5 W<br />
Temperatura di funzionamento: da 0°C a +60°C, umidità 93%<br />
Temperatura di immagazzinaggio: da -20°C a +70°C, umidità 93%<br />
Cristallo liquido monocromatico visibile al sole<br />
Retroilluminazione schermo e contrasto regolabili<br />
Tastiera retroilluminata<br />
Risoluzione: 240 x 320 pixel<br />
Microprocessore RISC 32 bit<br />
Caratteristiche di memoria<br />
1 rotta<br />
20 waypoint per rotta<br />
1 traccia di 500 punti<br />
99 marker<br />
Accessori a corredo<br />
Montaggio per barca: staffa per installazione fissa<br />
Montaggio per auto: braccio con ventosa<br />
Staffa universale e cavo di alimentazione con presa accendisigari<br />
Manuale utente<br />
Cuffia di protezione staffa<br />
Valigetta<br />
4<br />
4 5<br />
4<br />
Dimensioni d’ingombro<br />
GEONAV 6 PLUS<br />
GEONAV 6 ELITE<br />
GEONAV 6 CABIN<br />
GEONAV 6 REGATTA<br />
offered by <strong>Busse</strong>-<strong>Yachtshop</strong>.com
Caratteristiche tecniche<br />
GEONAV 6 ELITE<br />
Elite Elite<br />
Estremamente compatto: plotter + ricevitore GPS + antenna contenuti<br />
in un unico cabinet<br />
Ricevitore GPS a 12 canali, predisposto per ingresso differenziale<br />
Tempo di acquisizione fix:<br />
2 minuti (condizioni normali)<br />
15 minuti primo fix (con GPS interno)<br />
Possibilità di utilizzare un GPS esterno con uscita NMEA 0183<br />
Ecoscandaglio integrato con uscita NMEA 0183 (opzionale)<br />
Carta del mondo incorporata<br />
Uscita autopilota<br />
Rotazione della cartografia<br />
Resistente agli spruzzi<br />
Peso: 1 kg<br />
Caratteristiche elettriche<br />
Alimentazione: 11-18 Volt c.c. con protezione per sovratensione e<br />
inversione di polarità<br />
Assorbimento: 0,5 W<br />
Temperatura di funzionamento: da 0°C a +60°C, umidità 93%<br />
Temperatura di immagazzinaggio: da -20°C a +70°C, umidità 93%<br />
Cristallo liquido quadricromatico visibile al sole<br />
Retroilluminazione schermo e contrasto regolabili<br />
Tastiera retroilluminata<br />
Risoluzione: 240 x 320 pixel<br />
Microprocessore RISC 32 bit<br />
Caratteristiche di memoria<br />
1 rotta<br />
20 waypoint per rotta<br />
1 traccia di 500 punti<br />
99 marker<br />
Caratteristiche delle interfacce<br />
Protocollo standard NMEA 0183<br />
- dal sensore di posizione:<br />
GLL, VTG, GGA, RMC, GSV, ZDA, RMA, GSA<br />
- dall’ecoscandaglio:<br />
DBT, DBS, DPT, DBK, MTW<br />
- all’autopilota:<br />
APA, APB, XTE, RMB, BWC, GLL, VTG<br />
6<br />
6 7<br />
6<br />
Se ricevuti in ingresso dal sensore di posizione, vengono spediti i seguenti<br />
messaggi:<br />
GGA, RMC, ZDA<br />
Protocollo RTCM, SC-104, BAUD RATE da 300 a 9600 bps<br />
- dall’antenna differenziale<br />
Accessori a corredo<br />
Montaggio per barca: staffa per installazione fissa<br />
Montaggio per auto: braccio con ventosa<br />
Staffa universale e cavo di alimentazione con presa accendisigari<br />
Cavo dati per interfaccia a GPS esterno, GPS differenziale,<br />
ecoscandaglio e autopilota<br />
Manuale utente<br />
Cuffia di protezione staffa<br />
Valigetta<br />
offered by <strong>Busse</strong>-<strong>Yachtshop</strong>.com
Caratteristiche tecniche<br />
GEONAV 6 CABIN<br />
Cabin Cabin<br />
Plotter cartografico collegabile a qualsiasi ricevitore GPS provvisto di<br />
uscita NMEA 0183<br />
Ecoscandaglio integrato con uscita NMEA 0183 (opzionale)<br />
Carta del mondo incorporata<br />
Uscita autopilota<br />
Rotazione della cartografia<br />
Resistente agli spruzzi<br />
Montaggio a pannello<br />
Peso: 1 kg<br />
Caratteristiche elettriche<br />
Alimentazione: 11-18 Volt c.c. con protezione per sovratensione e<br />
inversione di polarità<br />
Assorbimento: 0,5 W<br />
Temperatura di funzionamento: da 0°C a +60°C, umidità 93%<br />
Temperatura di immagazzinaggio: da -20°C a +70°C, umidità 93%<br />
Cristallo liquido quadricromatico visibile al sole<br />
Retroilluminazione schermo e contrasto regolabili<br />
Tastiera retroilluminata<br />
Risoluzione: 240 x 320 pixel<br />
Microprocessore RISC 32 bit<br />
Caratteristiche di memoria<br />
1 rotta<br />
20 waypoint per rotta<br />
1 traccia di 500 punti<br />
99 marker<br />
Caratteristiche delle interfacce<br />
Protocollo standard NMEA 0183<br />
- dal sensore di posizione:<br />
GLL, VTG, GGA, RMC, GSV, ZDA, RMA, GSA<br />
- dall’ecoscandaglio:<br />
DBT, DBS, DPT, DBK, MTW<br />
- all’autopilota:<br />
APA, APB, XTE, RMB, BWC, GLL, VTG<br />
Se ricevuti in ingresso dal sensore di posizione, vengono spediti i seguenti<br />
messaggi:<br />
GGA, RMC, ZDA<br />
8<br />
8 9<br />
8<br />
Accessori a corredo<br />
Staffa per installazione fissa<br />
Guarnizione e dima di foratura per installazione a pannello<br />
Cavo di alimentazione e di collegamento a GPS esterno, ecoscandaglio<br />
e autopilota<br />
Manuale utente<br />
Cuffia di protezione<br />
Valigetta<br />
offered by <strong>Busse</strong>-<strong>Yachtshop</strong>.com
Caratteristiche tecniche<br />
GEONAV 6 REGATTA<br />
Regatta Regatta<br />
Estremamente compatto: plotter + ricevitore GPS + antenna contenuti<br />
in un unico cabinet<br />
Ricevitore GPS a 12 canali, predisposto per ingresso differenziale<br />
Tempo di acquisizione fix:<br />
2 minuti (condizioni normali)<br />
15 minuti primo fix (con GPS interno)<br />
Possibilità di utilizzare un GPS esterno con uscita NMEA 0183<br />
Funzioni progettate per la navigazione a vela<br />
Ingresso per sensore vento NMEA 0183<br />
Ecoscandaglio integrato con uscita NMEA 0183 (opzionale)<br />
Carta del mondo incorporata<br />
Uscita autopilota<br />
Rotazione della cartografia<br />
Resistente agli spruzzi<br />
Montaggio a pannello<br />
Peso: 1 kg<br />
Caratteristiche elettriche<br />
Alimentazione: 11-18 Volt c.c. con protezione per sovratensione e<br />
inversione di polarità<br />
Assorbimento: 0,5 W<br />
Temperatura di funzionamento: da 0°C a +60°C, umidità 93%<br />
Temperatura di immagazzinaggio: da -20°C a +70°C, umidità 93%<br />
Cristallo liquido quadricromatico visibile al sole<br />
Retroilluminazione schermo e contrasto regolabili<br />
Tastiera retroilluminata<br />
Risoluzione: 240 x 320 pixel<br />
Microprocessore RISC 32 bit<br />
Caratteristiche di memoria<br />
1 rotta<br />
20 waypoint per rotta<br />
1 traccia di 500 punti<br />
99 marker<br />
Caratteristiche delle interfacce<br />
Protocollo standard NMEA 0183<br />
- dal sensore di posizione:<br />
GLL, VTG, GGA, RMC, GSV, ZDA, RMA, GSA<br />
- dal sensore vento:<br />
VWR<br />
10<br />
10 11<br />
10<br />
- dall’ecoscandaglio:<br />
DBT, DBS, DPT, DBK, MTW<br />
- all’autopilota:<br />
APA, APB, XTE, RMB, BWC, GLL, VTG<br />
Se ricevuti in ingresso dal sensore di posizione, vengono spediti i seguenti<br />
messaggi:<br />
GGA, RMC, ZDA<br />
Accessori a corredo<br />
Staffa per installazione fissa<br />
Guarnizione e dima di foratura per installazione a pannello<br />
Cavo di alimentazione e di collegamento a GPS esterno, sensore vento,<br />
ecoscandaglio e autopilota<br />
Manuale utente<br />
Cuffia di protezione<br />
Valigetta<br />
offered by <strong>Busse</strong>-<strong>Yachtshop</strong>.com
Plus<br />
Elite<br />
Regatta<br />
Cabin<br />
Elite<br />
Regatta<br />
Elite<br />
Cabin<br />
Regatta<br />
Regatta<br />
Introduzione<br />
INTRODUZIONE<br />
Il GEONAV è un plotter cartografico in grado di visualizzare la vostra<br />
posizione geografica in sovrapposizione a una carta elettronica.<br />
Il modello Plus dispone di un ricevitore GPS incorporato.<br />
I modelli Elite e Regatta dispongono di un ricevitore GPS incorporato con<br />
ingresso differenziale esterno.<br />
Il modello Cabin deve essere collegato a un ricevitore GPS esterno.<br />
Il GEONAV può utilizzare fino a 12 satelliti contemporaneamente e può<br />
essere interfacciato:<br />
con un’antenna GPS differenziale, quando si utilizza il GPS incorporato;<br />
con un GPS esterno;<br />
con un ecoscandaglio/sensore di profondità;<br />
con un autopilota;<br />
con un sensore vento.<br />
Con un GEONAV e una carta elettronica NAVIONICS saprete sempre<br />
dove siete, anche in caso di nebbia, di maltempo o di notte al buio.<br />
Con la funzione ROTTA sarete in grado di pianificare un percorso, con i<br />
MARKER sarete in grado di segnare i punti di vostro interesse per poterci<br />
ritornare con assoluta precisione e con la funzione TRACCIA potrete<br />
registrare e controllare il reale percorso seguito.<br />
Utilizzando le carte nautiche elettroniche NAVIONICS, sarete sempre in<br />
grado di controllare esattamente la vostra posizione.<br />
Le carte nautiche NAVIONICS assicurano una dettagliata copertura per<br />
tutte le aree di navigazione più famose e possono essere utilizzate in<br />
aggiunta alle carte nautiche ufficiali per fornire ulteriori informazioni.<br />
Le carte nautiche NAVIONICS sono disponibili in tutto il mondo (nelle<br />
principali nazioni) presso i rivenditori autorizzati NAVIONICS.<br />
12<br />
12 13<br />
12<br />
Plus<br />
Elite<br />
Il vostro GEONAV è dotato di tutto ciò che serve per il suo utilizzo in<br />
barca e in automobile.<br />
Grazie all’introduzione della nuova cartografia elettronica per applicazioni<br />
terrestri, il GEONAV diventa un prezioso strumento anche per l’uso<br />
in automobile; l’introduzione della cartografia stradale vi sarà infatti di<br />
ausilio nel localizzare con precisione la vostra posizione e i nomi delle<br />
strade principali.<br />
La sua installazione è semplice; grazie al cavo d’alimentazione che si<br />
collega facilmente alla presa accendisigari e alla staffa con ventosa, il<br />
GEONAV sarà funzionante nella vostra autovettura in pochi secondi.<br />
offered by <strong>Busse</strong>-<strong>Yachtshop</strong>.com
Elite<br />
Regatta<br />
Installazione e precauzioni<br />
INSTALLAZIONE E PRECAUZIONI<br />
Per evitare interferenze elettromagnetiche si raccomanda di installare il<br />
GEONAV a una distanza di almeno 0,15 metri dalla bussola magnetica.<br />
Il GEONAV è impermeabile e quindi resistente agli spruzzi, ma non può essere immerso<br />
totalmente nell’acqua.<br />
IMPORTANTE:<br />
i danni dovuti a infiltrazioni d’acqua nell’alloggiamento delle cartucce sono esclusi dalla garanzia.<br />
Il tappo di gomma nero, posizionato sulla parte destra dello strumento,<br />
deve essere sempre perfettamente inserito e rimosso esclusivamente in<br />
occasione della sostituzione delle cartucce. Verificate sempre che la sostituzione<br />
delle cartucce sia eseguita in ambiente asciutto e che durante<br />
tale operazione non entri acqua nell’apparecchio.<br />
Pulizia<br />
Si raccomanda di pulire il vetro del GEONAV con un detergente neutro,<br />
evitando prodotti a base alcolica che potrebbero danneggiare la superficie<br />
del vetro o renderlo opaco.<br />
Installazione<br />
Il GEONAV consente di utilizzare il GPS interno per installazioni all’aperto<br />
o un’antenna GPS esterna per installazioni che prevedono l’uso dello<br />
strumento in ambienti chiusi.<br />
NOTA: all’accensione dell’apparato viene abilitato di default il GPS interno.<br />
GPS interno: in caso di utilizzo del GPS interno, per una migliore ricezione<br />
dei satelliti, montate il vostro strumento all’aperto in un’area<br />
che permetta all’antenna del ricevitore GPS di lavorare con il più ampio<br />
spazio a disposizione. Un montaggio che garantisca la piena visibilità<br />
dell’orizzonte assicurerà le migliori prestazioni.<br />
Quando si utilizza il GPS interno, il GEONAV può essere interfacciato<br />
a un’antenna differenziale con uscita RTCM.<br />
ATTENZIONE: il GEONAV può essere collegato ad antenne differenziali che operano con le<br />
seguenti modalità:<br />
a) frequenza di lavoro selezionabile automaticamente;<br />
b) frequenza di lavoro selezionabile manualmente tramite un commutatore.<br />
GPS differenziale: per collegare il GEONAV a un’antenna differenziale<br />
con uscita RTCM, occorre utilizzare il cavo ausiliario fornito in dotazione<br />
con lo strumento. I collegamenti sono riportati nel capitolo “Collegamenti<br />
elettrici”.<br />
14<br />
14 15<br />
14<br />
Elite<br />
Cabin<br />
Regatta<br />
Regatta<br />
Plus<br />
Elite<br />
GPS esterno: in caso di utilizzo di GPS esterno, il GEONAV deve essere<br />
collegato all’antenna GPS esterna tramite il cavo fornito in dotazione<br />
con lo strumento. I collegamenti sono riportati nel capitolo “Collegamenti<br />
elettrici”.<br />
Autopilota: per collegare il GEONAV a un autopilota, occorre utilizzare<br />
il cavo fornito in dotazione con lo strumento.<br />
I collegamenti sono riportati nel capitolo “Collegamenti elettrici”.<br />
Ecoscandaglio: per collegare il GEONAV a un ecoscandaglio, occorre<br />
utilizzare il cavo fornito in dotazione con lo strumento.<br />
I collegamenti elettrici sono riportati nel capitolo “Collegamenti elettrici”.<br />
Sensore vento: per collegare il GEONAV a un sensore vento, occorre<br />
utilizzare il cavo fornito in dotazione con lo strumento.<br />
I collegamenti elettrici sono riportati nel capitolo “Collegamenti elettrici”.<br />
NOTA: poiché è disponibile un solo ingresso NMEA 0183 in aggiunta a quello utilizzato per il<br />
collegamento al GPS, per collegare anche l’ecoscandaglio occorre utilizzare un miscelatore<br />
NMEA 0183 oppure un bridge verso reti di strumenti.<br />
Installazione fissa (da barca)<br />
Per l’installazione in barca si suggerisce<br />
l’impiego della staffa fornita con lo<br />
strumento. Utilizzate 3 viti da 6mm di<br />
diametro per fissare la base nel posto<br />
prescelto. La base è fissa e non permette<br />
rotazioni né a sinistra né a destra,<br />
pertanto al momento del posizionamento<br />
assicuratevi che la visibilità dello<br />
schermo LCD del plotter sia ottimale.<br />
È possibile rimuovere dal cavo di alimentazione<br />
l’adattatore per la presa accendisigari<br />
e collegare i fili direttamente<br />
alla sorgente di alimentazione della<br />
vostra imbarcazione. Raccomandiamo<br />
l’utilizzo di un fusibile passante rapido<br />
da 1A da posizionare tra la batteria e<br />
l’alimentazione del GEONAV. Quando,<br />
dopo l’utilizzo, rimuovete il plotter dalla<br />
staffa, vi raccomandiamo di utilizzare<br />
la cuffia di protezione e di togliere l’alimentazione<br />
alla staffa.<br />
offered by <strong>Busse</strong>-<strong>Yachtshop</strong>.com
Cabin<br />
Regatta<br />
Plus<br />
Elite<br />
Installazione e precauzioni<br />
Installazione fissa<br />
Per l’installazione fissa si suggerisce l’impiego della staffa fornita con lo<br />
strumento. Utilizzate 4 viti da 6mm di diametro per fissare la base nel<br />
posto prescelto. La base è fissa e non permette rotazioni né a sinistra né<br />
a destra, pertanto al momento del posizionamento assicuratevi che la<br />
visibilità dello schermo LCD del plotter sia ottimale. Raccomandiamo<br />
l’utilizzo di un fusibile passante rapido da 1A da posizionare tra la batteria<br />
e l’alimentazione del GEONAV.<br />
Installazione in automobile<br />
Utilizzate il braccio con ventosa fornito a<br />
corredo per l’installazione sul vetro anteriore<br />
della vostra auto. Ricordatevi di posizionare<br />
lo strumento in modo da garantire<br />
la visibilità per il conducente.<br />
Preparate la zona dove montare il GEONAV<br />
nel seguente modo:<br />
1. Verificate che la zona dove poserà la<br />
base del braccio sia tale da mantenere<br />
in posizione stabile il plotter, e allo stesso<br />
tempo da garantire che l’antenna<br />
GPS abbia una buona visibilità del cielo.<br />
2. Pulite la superficie dove attaccherete la<br />
ventosa.<br />
3. Verificate che il GEONAV non intralci i<br />
comandi della vettura (leve, interruttori)<br />
e che non sia posizionato sulla traiettoria<br />
degli airbag.<br />
4. Tirate indietro la leva della ventosa.<br />
5. Posizionate la ventosa, spingete sul vetro<br />
e premete in avanti la leva della ventosa.<br />
6. Assicuratevi che lo strumento sia stabile<br />
e ben posizionato, provando a verificare<br />
la tenuta della ventosa. Questa<br />
verifica è molto importante per evitare che lo strumento possa staccarsi<br />
durante la guida danneggiandosi e potendo anche intralciare il<br />
conducente.<br />
7. Posizionate la base della staffa e orientate il plotter per garantire la<br />
migliore visibilità dello schermo e dell’antenna GPS per il cielo.<br />
8. Inserite l’adattatore nella presa accendisigari.<br />
16<br />
16 17<br />
16<br />
Plus<br />
Elite<br />
Cabin<br />
Regatta<br />
NOTA: alcune automobili disabilitano l’alimentazione della presa accendisigari durante l’accensione<br />
del motore; se la vostra auto si comporta in questo modo, il plotter si spegnerà.<br />
Montaggio a pannello<br />
Individuate la zona dove volete installare il GEONAV, quindi procedete<br />
con l’esecuzione dei fori sul pannello utilizzando l’apposita dima di<br />
foratura fornita in dotazione (drilling template). Applicate la guarnizione<br />
adesiva in neoprene (questa guarnizione riduce la possibilità di infiltrazioni<br />
d’acqua e assorbe in parte le vibrazioni) sulla parte posteriore del<br />
GEONAV.<br />
Posizionate e bloccate lo strumento al pannello tramite 4 viti del diametro<br />
di 4 mm e della lunghezza massima di 5 mm, più lo spessore del<br />
pannello. Consigliamo di fare attenzione a non serrare le viti più del<br />
necessario, per non danneggiarne le sedi.<br />
offered by <strong>Busse</strong>-<strong>Yachtshop</strong>.com
Plus<br />
Elite<br />
Elite<br />
Collegamenti elettrici<br />
COLLEGAMENTI ELETTRICI<br />
Cavo di alimentazione<br />
La figura a lato riporta i colori e la polarità<br />
dell’adattatore per accendisigari. L’adattatore<br />
ha un piccolo LED che si accende quando<br />
l’alimentazione è fornita correttamente.<br />
Se, dopo aver inserito l’adattatore nella presa<br />
accendisigari, la luce è spenta:<br />
verificate che la tensione sia presente<br />
sulla presa;<br />
verificate che il fusibile dell’adattatore sia<br />
funzionante.<br />
Aprite l’adattatore e verificate il fusibile. Se<br />
il fusibile è rotto, sostituitelo con un fusibile<br />
di caratteristiche simili. NON UTILIZZA-<br />
TE UN CIRCUITO DI BYPASS.<br />
Le caratteristiche del fusibile assicurano che<br />
il circuito di protezione contenuto nel<br />
GEONAV intervenga in caso di corto circuito,<br />
inversione di polarità e sovratensione.<br />
Se volete evitare di utilizzare l’adattatore, le<br />
connessioni interne sono:<br />
rosso (o bianco) + (+ 12V)<br />
nero - (massa)<br />
Connettore e cavo dati<br />
1. Uscita alimentazione ausiliaria (Vaux)<br />
filo rosso Vaux +, 250mA pin 1*<br />
filo nero GND pin 2<br />
2. Ingresso dati GPS Ext./DGPS<br />
filo marrone GPS ext. in + pin 3<br />
filo giallo GPS ext. in - pin 4<br />
3. Uscita dati<br />
filo viola Autopilot out + pin 5<br />
filo bianco Autopilot out - pin 6<br />
4. Ingresso dati ecoscandaglio<br />
filo blu Ecoscand. in + pin 7<br />
filo verde Ecoscand. in - pin 8<br />
CALZA pin 9<br />
* La tensione di Vaux corrisponde alla tensione di alimentazione<br />
dell’apparato.<br />
18<br />
18 19<br />
18<br />
LED<br />
fusibile<br />
Cabin<br />
Regatta<br />
Elite<br />
Cabin<br />
Regatta<br />
Connettore e cavo alimentazione / dati<br />
1. Ingresso alimentazione<br />
filo rosso Vin + (11-18VDC) pin 1<br />
filo nero Vin - pin 2<br />
2. Ingresso dati GPS ext.<br />
filo marrone data in + pin 3<br />
filo giallo data in - pin 4<br />
3. Uscita dati autopilota<br />
filo viola data out + pin 5<br />
filo bianco data out - pin 6<br />
4. Ingresso dati ecoscandaglio<br />
filo blu data in + pin 7<br />
filo verde data in - pin 8<br />
CALZA pin 9<br />
Connettore e cavo alimentazione / dati<br />
1. Ingresso alimentazione<br />
filo rosso Vin + (11-18VDC) pin 1<br />
filo nero Vin - pin 2<br />
2. Ingresso dati GPS ext./DGPS<br />
filo marrone data in + pin 3<br />
filo giallo data in - pin 4<br />
3. Uscita dati autopilota<br />
filo viola data out + pin 5<br />
filo bianco data out - pin 6<br />
4. Ingresso dati sensore vento<br />
/ecoscandaglio<br />
filo blu data in + pin 7<br />
filo verde data in - pin 8<br />
CALZA pin 9<br />
Attraverso l’uscita Autopilota, i seguenti messaggi provenienti dal GPS<br />
sono inviati ad altri dispositivi: GGA - RMC - ZDA<br />
Il GEONAV aggiungerà i seguenti messaggi: APA - APB - XTE - RMB -<br />
BWC - GLL - VTG<br />
Il cavo dati è incluso nella confezione.<br />
ATTENZIONE: è sempre opportuno verificare l’esattezza dei collegamenti, dopo aver effettuato<br />
le connessioni, in quanto cablaggi sbagliati possono danneggiare lo strumento.<br />
offered by <strong>Busse</strong>-<strong>Yachtshop</strong>.com
Installazione delle cartucce La tastiera<br />
20<br />
20 21<br />
20<br />
INSTALLAZIONE DELLE CARTUCCE<br />
Installazione della Navchart<br />
Rimuovere il tappo di gomma<br />
che protegge l’alloggiamento<br />
della Navchart e che è situato<br />
sul lato destro del plotter.<br />
Inserire la cartuccia facendo attenzione<br />
alla scanalatura di riferimento.<br />
Inserire di nuovo il tappo di<br />
gomma esercitando una leggera<br />
pressione e verificare che sia<br />
inserito perfettamente per evitare<br />
eventuali infiltrazioni d’acqua.<br />
Rimozione della Navchart<br />
Effettuare questa operazione in ambiente asciutto.<br />
Rimuovere il tappo di gomma che protegge l’alloggiamento della<br />
Navchart e che è situato sul lato destro del plotter, quindi estrarre<br />
la Navchart.<br />
ATTENZIONE: il tappo di gomma deve essere rimosso solo durante l’installazione o la rimozione<br />
della cartuccia.<br />
LA TASTIERA<br />
ZOOM+/ ZOOM-<br />
Aumenta/diminuisce<br />
la scala della carta<br />
visualizzata.<br />
È attivabile in qualunque<br />
situazione in cui è<br />
visualizzata una carta<br />
elettronica.<br />
ENTER<br />
Serve a inserire un<br />
marker o a confermare<br />
una scelta nella barra<br />
del menu.<br />
PAGE<br />
Modo Navigazione<br />
Permette di accedere<br />
in rotazione alle<br />
varie schermate.<br />
Modo Cursore<br />
Consente di passare<br />
da Modo Cursore<br />
a Modo Navigazione.<br />
GOTO<br />
Questo tasto permette<br />
di disegnare un segmento<br />
di rotta che collega<br />
la vostra posizione<br />
al punto desiderato<br />
(cursore manuale,<br />
marker, porto, servizio<br />
più vicino, un punto di<br />
coordinate specifiche).<br />
CLR<br />
Modo Navigazione<br />
Cancella l’intera rotta.<br />
Modo Cursore<br />
Cancella l’ultimo<br />
waypoint della rotta<br />
o il marker/<br />
waypoint sul quale<br />
è stato posizionato il<br />
cursore.<br />
CURSOR<br />
Permette di muovere<br />
il cursore in tutte<br />
le direzioni, incluse<br />
le diagonali.<br />
Permette di passare<br />
da modo Navigazione<br />
a modo Cursore.<br />
Permette la scelta<br />
delle varie opzioni<br />
nelle finestre dei<br />
menu e dei<br />
sottomenu.<br />
All’accensione, permette<br />
di regolare il<br />
contrasto dello<br />
schermo LCD.<br />
ON/OFF<br />
Tasto di accensione/<br />
spegnimento dello strumento.<br />
Permette la selezione<br />
del livello di luminosità<br />
schermo.<br />
offered by <strong>Busse</strong>-<strong>Yachtshop</strong>.com
Elite<br />
Cabin<br />
Regatta<br />
Diagnostico La cartografia NAVIONICS<br />
DIAGNOSTICO<br />
Nel software dell’apparato è contenuto un programma diagnostico utile<br />
per verificare il corretto funzionamento del GEONAV a installazione avvenuta,<br />
nonché per individuare e localizzare eventuali problemi emersi<br />
durante l’uso.<br />
Per accedere al programma diagnostico del GEONAV seguire le seguenti<br />
istruzioni:<br />
1) premere e mantenere premuto un qualsiasi tasto eccetto CLR;<br />
2) premere simultaneamente il tasto ON.<br />
Il GEONAV si accenderà ed eseguirà automaticamente il programma<br />
diagnostico; terminato il test della memoria, il programma diagnostico<br />
consente di controllare il corretto funzionamento della tastiera: tenere<br />
premuto il tasto CLR per 3 secondi per uscire, altrimenti proseguire con<br />
il test della tastiera.<br />
Terminato il test della tastiera, il programma diagnostico consente di<br />
controllare la corretta ricezione dei messaggi trasmessi dal ricevitore<br />
GPS integrato nel vostro GEONAV; se il ricevitore GPS sta funzionando<br />
regolarmente, sullo schermo saranno elencati in rapida successione i<br />
messaggi provenienti dal GPS (standard NMEA 0183); tenere premuto<br />
CLR per congelare i messaggi sullo schermo e rilasciare il tasto CLR per<br />
continuare a visualizzare i nuovi messaggi spediti dal GPS.<br />
Per testare il canale 1 (ecoscandaglio) premere ZOOM-, per tornare al test<br />
del canale 0, premere ZOOM+.<br />
A questo punto premere ENTER per terminare il programma diagnostico.<br />
ATTENZIONE: si può effettuare un RESET della memoria con la seguente procedura:<br />
1) premere e mantenere premuto il tasto CLR;<br />
2) premere simultaneamente il tasto ON.<br />
Questa operazione consente di cancellare tutti i dati fino a quel momento memorizzati nel GEONAV<br />
e farlo ripartire dalla condizione impostata in fabbrica.<br />
22<br />
22 23<br />
22<br />
LA CARTOGRAFIA NAVIONICS<br />
Il GEONAV possiede memorizzata al suo<br />
interno una carta del mondo che consente<br />
di selezionare scale comprese tra 4096 e<br />
512 NM (miglia nautiche).<br />
Ulteriori dettagli relativi all’area di navigazione<br />
di vostro interesse sono disponibili<br />
attraverso l’uso di cartucce contenenti le<br />
carte nautiche elettroniche NAVIONICS<br />
Seamless Navcharts.<br />
Per visualizzare il contorno della carta elettronica<br />
installata, premere il tasto PAGE fino a visualizzare la barra del<br />
menu, selezionare SETUP, scegliere l’opzione VISUAL. CARTE e, con il<br />
tasto CURSOR, selezionare ON/OFF per attivare/disattivare il disegno del<br />
contorno delle carte contenute nella cartuccia. Un piccolo quadrato indicherà<br />
l’area coperta dalla cartuccia; posizionando il cursore all’interno<br />
del quadrato e quindi diminuendo la scala con il tasto ZOOM, sarà<br />
possibile visualizzare i dettagli relativi alla zona coperta dalla cartuccia.<br />
Il massimo livello di dettaglio corrisponde a quello visualizzato per i piani<br />
dei porti ed è approssimativamente equivalente a 1/8 miglio nautico<br />
(il più piccolo punto sullo schermo equivale approssimativamente a un<br />
metro).<br />
Le carte elettroniche NAVIONICS contengono i seguenti simboli:<br />
Nomi geografici principali e secondari<br />
Aiuti alla navigazione:<br />
fari<br />
profondità<br />
servizi portuali<br />
.......<br />
curve batimetriche<br />
relitti<br />
Per diminuire o aumentare la scala della carta visualizzata, premere il<br />
tasto ZOOM- oppure il tasto ZOOM+.<br />
offered by <strong>Busse</strong>-<strong>Yachtshop</strong>.com
La cartografia NAVIONICS<br />
24<br />
Visualizzazione di dettagli quali batimetriche, nomi<br />
delle località e dei porti<br />
Premere PAGE fino a visualizzare la barra<br />
del menu, selezionare SETUP e quindi abilitare<br />
le opzioni desiderate utilizzando il<br />
tasto CURSOR.<br />
Visualizzazione degli aiuti alla navigazione (fari)<br />
Posizionare il cursore in corrispondenza del<br />
simbolo del faro; sullo schermo apparirà<br />
una finestra con la caratteristica del faro<br />
selezionato.<br />
24 25<br />
24<br />
Aiuti alla navigazione<br />
AIUTI ALLA NAVIGAZIONE<br />
Visualizzazione dei servizi portuali<br />
Entrare in un porto contenente il simbolo<br />
della marina. Posizionare il cursore sull’icona<br />
della marina e premere ENTER. Una<br />
finestra elencherà i servizi portuali disponibili<br />
nel porto selezionato. Scegliere il servizio<br />
desiderato con il tasto CURSOR. I servizi<br />
portuali sono rappresentati dalle seguenti<br />
icone:<br />
Pronto soccorso Servizi turistici<br />
Meccanico Capitaneria di porto<br />
Acqua potabile<br />
Informazioni<br />
Carburante<br />
Il numero e il tipo di servizio visualizzato dipenderà dalla cartuccia<br />
NAVIONICS installata.<br />
offered by <strong>Busse</strong>-<strong>Yachtshop</strong>.com
Elite<br />
Regatta<br />
Elite<br />
Cabin<br />
Regatta<br />
Caratteristiche funzionali<br />
CARATTERISTICHE FUNZIONALI<br />
Questo capitolo, oltre a riassumere alcune delle funzionalità più importanti<br />
del GEONAV, riporta anche una breve descrizione dei termini che<br />
saranno più comunemente utilizzati nelle prossime pagine. Per l’interpretazione<br />
di alcuni vocaboli o simboli che non sono spiegati, si rimanda<br />
al glossario.<br />
Antenna GPS interna o esterna<br />
Per consentire una maggiore flessibilità in fase di installazione, il GEONAV<br />
può utilizzare il GPS interno o essere collegato ad un GPS esterno; questo<br />
permette di installare il GEONAV sia in ambienti aperti che chiusi.<br />
Per selezionare GPS Interno/Esterno, premere PAGE fino a far apparire il<br />
menu, selezionare SETUP e scegliere l’opzione GPS INT/EXT. Se viene<br />
selezionato GPS INT, l’utente deve poi confermare se il GPS interno è<br />
collegato a un’antenna differenziale, in modo da attivare la correzione<br />
dell’errore di posizionamento intrinseco di ogni sensore GPS.<br />
Ecoscandaglio<br />
In funzione ecoscandaglio, il GEONAV mostrerà contemporaneamente i<br />
dati di navigazione e le caratteristiche del fondale in forma grafica.<br />
Il valore relativo alla profondità può essere visualizzato in metri (valore<br />
di default), piedi e braccia; per selezionare l’unità di misura, premere<br />
PAGE fino a far apparire il menu, selezionare SETUP e l’opzione UNITÀ<br />
PROF. (M/FT/FA).<br />
Modo Navigazione (automatico, AUTO)<br />
All’accensione il GEONAV attiva automaticamente il modo Navigazione<br />
non appena il GPS invia un fix valido; in questo caso:<br />
il cursore manuale non è visualizzato sullo schermo;<br />
è possibile accedere alla finestra ecoscandaglio.<br />
Questo modo è anche chiamato automatico perché il plotter seguirà automaticamente<br />
gli spostamenti della vostra imbarcazione aggiornandone<br />
la posizione sullo schermo.<br />
Modo Cursore (manuale, MAN)<br />
Il modo Cursore è riconoscibile per la presenza del cursore manuale<br />
(linee a croce sullo schermo). In questa modalità è possibile inserire,<br />
cancellare e spostare waypoint, accedere alle informazioni di aiuto alla<br />
navigazione, inserire e cancellare marker, controllare le caratteristiche<br />
di un faro, ecc., ma non è possibile accedere alla finestra ecoscandaglio.<br />
Per passare da modo Navigazione a modo Cursore, premere una delle<br />
quattro frecce del tasto CURSOR.<br />
Per tornare in modo 26 Navigazione, premere il tasto PAGE.<br />
26 27<br />
26<br />
Elite<br />
Cabin<br />
Regatta<br />
Rotazione della carta<br />
Le carte nautiche sono tradizionalmente<br />
visualizzate rispetto al nord geografico, che<br />
tuttavia non corrisponde a ciò che si osserva<br />
durante la navigazione. Per esempio,<br />
navigando verso sud tutto ciò che sulla<br />
carta si trova a destra dell’imbarcazione<br />
verrà visto a sinistra e viceversa. La funzione<br />
“rotazione della carta” consente di<br />
ruotare la carta elettronica visualizzata<br />
sullo schermo in funzione della rotta dell’imbarcazione<br />
(COG - Course Over<br />
Ground) ricevuta dal sensore GPS; poiché<br />
questo valore varia continuamente, è stato<br />
inserito un apposito filtro per evitare che<br />
la carta ruoti troppo frequentemente. Per<br />
attivare la rotazione della carta, premere<br />
PAGE fino a far apparire la barra del menu,<br />
selezionare SETUP e ROTAZIONE CARTA<br />
e scegliere l’opzione ON; verrà visualizzato<br />
un messaggio che invita l’utente a selezionare<br />
la scala a partire dalla quale il<br />
GEONAV attiverà la rotazione della carta.<br />
Autozoom<br />
Questa funzione seleziona automaticamente<br />
la scala ottimale per visualizzare<br />
contemporaneamente sullo schermo il<br />
punto nave e il prossimo waypoint di de-<br />
stinazione; la funzione viene quindi atti-<br />
senza rotazione<br />
con rotazione<br />
vata solo se in precedenza è stato inserito almeno un waypoint. Per attivare<br />
la funzione Autozoom premere il tasto ZOOM+ fino a quando il messaggio<br />
“AUTOZOOM ? ENTER = SI” è visualizzato, quindi premere ENTER<br />
per confermare. Per disattivare la funzione Autozoom premere il tasto<br />
ZOOM. All’accensione del GEONAV, e se almeno un waypoint è stato precedentemente<br />
inserito nel plotter, la funzione Autozoom viene automaticamente<br />
attivata.<br />
offered by <strong>Busse</strong>-<strong>Yachtshop</strong>.com
Caratteristiche funzionali<br />
senza screen amplifier<br />
con screen amplifier<br />
28<br />
Screen amplifier<br />
Questa funzione si attiva automaticamente<br />
e posiziona il punto nave, qualora la velocità<br />
dell’imbarcazione sia superiore ai 3<br />
nodi, in un punto dello schermo tale da lasciare<br />
circa 2/3 dello schermo liberi nella<br />
direzione corrente di navigazione.<br />
La funzione si attiva solo se non è stato precedentemente<br />
inserito alcun waypoint.<br />
Overzoom<br />
Il GEONAV consente di ingrandire la carta<br />
elettronica fino ad una scala migliore di<br />
quella della carta nautica originale; questa<br />
funzione si chiama Overzoom.<br />
L’Overzoom non fornisce un maggiore dettaglio<br />
cartografico, ma si limita ad aumentare<br />
la leggibilità delle informazioni esistenti<br />
agendo come una lente di ingrandimento.<br />
Quando la funzione Overzoom è attivata, il<br />
GEONAV avvisa l’utente nel seguente modo:<br />
disattivazione della funzione di colorazione<br />
delle terre;<br />
visualizzazione della scritta OVZ al posto di SCALA nella finestra di<br />
navigazione.<br />
Per attivare/disattivare l’Overzoom, premere PAGE fino a far apparire la<br />
barra del menu, selezionare SETUP e attivare la corrispondente opzione<br />
OVERZOOM ON/OFF.<br />
Calibrazione della posizione<br />
Tutti i sensori di posizione hanno una sorta di errore che può variare da<br />
pochi metri ad alcune centinaia di metri. Tale errore è dovuto al principio<br />
su cui si basa il sistema di posizionamento satellitare.<br />
28 29<br />
28<br />
Elite<br />
Cabin<br />
Regatta<br />
Grazie alla funzione di calibrazione della posizione, il GEONAV permette<br />
di correggere manualmente l’errore di posizione tipico di qualsiasi GPS.<br />
Per effettuare la calibrazione premere il tasto PAGE fino a visualizzare la<br />
barra del menu principale; con il tasto CURSOR selezionare SETUP,<br />
CALIBRAZIONE e scegliere l’opzione ON. Comparirà un messaggio che<br />
invita l’utente a spostare il cursore sulla posizione certa della sua imbarcazione<br />
(per esempio, in un determinato punto della banchina di<br />
ormeggio), opportunamente ingrandita mediante il tasto ZOOM.<br />
La pressione del tasto ENTER sposterà il punto nave nella posizione indicata<br />
dal cursore, memorizzando stabilmente la calibrazione per poterne<br />
tenere conto in tutti i calcoli successivi.<br />
NOTA: dopo che è stata effettuata la calibrazione, i dati relativi alla latitudine e alla longitudine<br />
vengono contrassegnati da un asterisco.<br />
Per annullare la calibrazione premere PAGE fino a visualizzare la barra<br />
del menu principale. Selezionare SETUP, CALIBRAZIONE e, infine, OFF.<br />
Inserimento dell’ora locale<br />
Questa funzione permette l’inserimento dell’ora locale che sostituisce<br />
quella riferita a Greenwich (GMT). Per l’inserimento premere il tasto PAGE<br />
fino a visualizzare la barra del menu principale; con il tasto CURSOR<br />
selezionare SETUP, ORA e scegliere l’opzione LOCALE.<br />
Comparirà una finestra che vi invita a inserire, con l’ausilio del tasto<br />
CURSOR, l’ora corrispondente al vostro fuso orario. La pressione del tasto<br />
ENTER confermerà l’operazione eseguita memorizzando stabilmente l’ora<br />
da visualizzare nelle opportune finestre.<br />
Per annullare la visualizzazione dell’ora locale, premere PAGE fino a<br />
visualizzare la barra del menu principale. Selezionare SETUP, ORA e<br />
infine GMT.<br />
Colore<br />
Il GEONAV è dotato di uno schermo quadricromatico in grado di offrire<br />
una perfetta visibilità alla luce del sole. I colori disponibili sono il verde,<br />
il bianco, il blu e il rosso e non possono essere modificati.<br />
Terra ..................................................................................... rosso<br />
Mare .................................................................................... bianco<br />
Menu, finestre, dati di navigazione, punto nave ......................... blu<br />
Tracce, waypoint ....................................................................verde<br />
offered by <strong>Busse</strong>-<strong>Yachtshop</strong>.com
Caratteristiche funzionali Funzionamento<br />
Contrasto<br />
Premere PAGE fino a far apparire la barra del menu, quindi regolare il<br />
livello desiderato con il tasto CURSOR.<br />
È possibile regolare il contrasto, all’accensione del GEONAV, quando è<br />
visualizzato il messaggio di WARNING o quando è visualizzata la finestra<br />
satelliti; premere il tasto CURSOR e regolare il contrasto con lo stesso<br />
tasto.<br />
Luminosità<br />
La pressione ripetuta del tasto ON, quando il GEONAV è acceso, permette<br />
di attivare i diversi livelli di retroilluminazione dello schermo.<br />
30<br />
30 31<br />
30<br />
Plus<br />
Elite<br />
Cabin<br />
Regatta<br />
FUNZIONAMENTO<br />
All’accensione il plotter visualizzerà un messaggio per ricordare all’utente<br />
che le carte nautiche elettroniche non sostituiscono quelle ufficiali.<br />
Durante questa fase è possibile regolare il contrasto tramite il tasto<br />
CURSOR, oppure attivare la retroilluminazione dello schermo con il tasto<br />
ON. Per proseguire basterà premere il tasto PAGE.<br />
A questo punto il GEONAV visualizzerà la finestra informazioni GPS.<br />
Il GEONAV dispone di 5 principali finestre di informazioni; in qualunque<br />
momento potrete passare da una all’altra premendo il tasto PAGE.<br />
Quando il fix è valido, la sequenza di scorrimento è la seguente:<br />
SATELLITI > NAVIGAZIONE > MENU > NAVIG. AL WP > VIAGGIO<br />
SATELLITI > NAVIGAZIONE > MENU > ECOSCANDAGLIO > VIAGGIO<br />
La pressione del tasto CURSOR sposta invece<br />
il funzionamento del GEONAV nel modo<br />
Cursore.<br />
Questo modo di funzionamento permette<br />
di modificare una rotta oppure di muoversi<br />
con il cursore attraverso il mondo<br />
“seamless” della cartografia NAVIONICS.<br />
In modo Cursore, lo schermo è sempre centrato<br />
rispetto al cursore manuale; la finestra<br />
in basso riporta i seguenti dati:<br />
Distanza dal punto nave al cursore.<br />
Tempo di arrivo dal punto nave al<br />
cursore (stimato sulla velocità dell’imbarcazione).<br />
Rilevamento tra il punto nave e il<br />
cursore.<br />
Scala della carta.<br />
offered by <strong>Busse</strong>-<strong>Yachtshop</strong>.com
Finestra satelliti<br />
32<br />
FINESTRA SATELLITI<br />
All’accensione dello strumento la finestra<br />
satelliti visualizza quanti e quali satelliti<br />
sono al momento agganciati dal GPS.<br />
Il cerchio più esterno rappresenta l’orizzonte,<br />
il mediano corrisponde a un’elevazione<br />
di 45°, mentre il più interno punta allo zenit.<br />
I numeri contenuti all’interno dei<br />
quadratini corrispondono al numero del satellite.<br />
Appena il satellite è agganciato dal<br />
ricevitore GPS il quadratino diventerà scuro.<br />
Sulla sinistra compaiono le barre che rappresentano la qualità del segnale<br />
ricevuto.<br />
Una barra lunga indica la presenza di un segnale più forte.<br />
Il numero posto vicino alla barra indica un valore relativo rispetto alla<br />
qualità del segnale ricevuto; un valore superiore a 40 indica un buon<br />
grado di ricezione.<br />
Altre informazioni disponibili:<br />
Giorno, mese, anno, ora locale rispetto a Greenwich (alla prima accensione,<br />
il GEONAV è inizializzato sulla data e ora rispetto a<br />
Greenwich).<br />
Posizione dell’imbarcazione (oppure ultimo fix, nel caso in cui il GPS<br />
stia cercando i satelliti).<br />
Numero di satelliti ricevuti e stato del fix in forma grafica.<br />
COG, SOG e altitudine.<br />
Un fix a 2D (a due dimensioni senza altitudine) è disponibile non appena<br />
il GEONAV aggancia tre satelliti; a questo punto sono visualizzate<br />
automaticamente anche la latitudine e la longitudine relative al vostro<br />
punto nave.<br />
Per la visualizzazione del valore numerico relativo all’altitudine è necessario<br />
un fix a tre dimensioni, con quattro satelliti agganciati dal ricevitore<br />
GPS.<br />
Appena ottenuto il fix, il GEONAV passerà automaticamente in modo<br />
Navigazione visualizzando graficamente la posizione del punto nave; la<br />
finestra di Navigazione in basso indicherà la direzione e la velocità della<br />
vostra imbarcazione.<br />
32 33<br />
32<br />
Plus<br />
Elite<br />
Regatta<br />
Elite<br />
Regatta<br />
Dato che il ricevitore GPS è inizializzato in Italia, il tempo impiegato per<br />
ottenere un fix dipende da dove desiderate utilizzare lo strumento: ad<br />
esempio, alla prima accensione, il GEONAV potrà impiegare fino a 12<br />
minuti all’interno dell’area mediterranea, ma potrà impiegare fino a 30<br />
minuti in un’altra parte del mondo.<br />
Per le successive accensioni, sono richiesti solo pochi minuti per ottenere<br />
un fix valido.<br />
Nel caso si utilizzi il ricevitore interno insieme a un’antenna differenziale<br />
esterna, e ci si trovi in una zona coperta da una stazione differenziale<br />
GPS, nella barra in alto verrà visualizzato il messaggio “FIX 3D-DIFF”<br />
oppure “FIX 2D-DIFF”.<br />
offered by <strong>Busse</strong>-<strong>Yachtshop</strong>.com
Plus<br />
Elite<br />
Cabin<br />
Regatta<br />
Finestra navigazione<br />
FINESTRA NAVIGAZIONE<br />
Questa finestra è attivata automaticamente non appena il ricevitore GPS<br />
ha calcolato la posizione (FIX OK).<br />
In assenza di rotta, la velocità, la rotta e la<br />
scala della carta nautica sono visualizzate<br />
nella parte inferiore dello schermo.<br />
È possibile, tramite il tasto ZOOM, incrementare<br />
il livello di dettaglio per accedere alle<br />
informazioni della cartografia NAVIONICS.<br />
Se è stata inserita una rotta, nella parte<br />
inferiore dello schermo sono visualizzati i<br />
seguenti dati:<br />
velocità<br />
distanza dal waypoint di destinazione<br />
tempo di arrivo al waypoint di destinazione<br />
scala della carta<br />
In assenza di rotta, la velocità, la rotta e la scala della carta nautica sono<br />
visualizzate nella parte superiore dello schermo. Nella parte inferiore<br />
sinistra dello schermo sono visualizzati i dati relativi alla velocità del<br />
vento vero.<br />
Se è stata inserita una rotta, nella parte superiore dello schermo sono<br />
visualizzati i seguenti dati:<br />
velocità<br />
distanza al waypoint di destinazione<br />
rilevamento al waypoint di destinazione<br />
tempo di arrivo al waypoint di destinazione<br />
Se sono stati inseriti due o più waypoint, una finestra nell’angolo inferiore<br />
destro visualizzerà, oltre al waypoint di destinazione, i dati relativi<br />
al vento apparente sul prossimo lato. La velocità del vento apparente<br />
viene visualizzata in modo numerico, mentre la sua direzione è indicata<br />
in modo grafico da una freccia. Se, sul prossimo lato, è prevista l’effettuazione<br />
di un lasco o di un lasco stretto, la freccia indicherà la velocità<br />
del vento apparente relativa al primo bordo del prossimo lato, mentre la<br />
barra indicherà la direzione del vento apparente relativa al waypoint.<br />
34<br />
34 35<br />
34<br />
Regatta<br />
Inoltre, in corrispondenza del punto nave, vengono visualizzati i seguenti<br />
elementi grafici:<br />
direzione del vento vero (magnetico), indicata da una freccia la cui<br />
punta indica il senso verso il quale soffia il vento;<br />
layline: indicata da una linea, rappresenta la direzione che l’imbarcazione<br />
sarà in grado di mantenere in caso di virata. La layline è<br />
visualizzata solo se l’angolo tra la direzione del vento e quella dell’imbarcazione<br />
consente un lasco o un lasco stretto, ed è automaticamente<br />
aggiornata al variare del vento.<br />
offered by <strong>Busse</strong>-<strong>Yachtshop</strong>.com
Elite<br />
Cabin<br />
Regatta<br />
Elite<br />
Regatta<br />
Elite<br />
Cabin<br />
Regatta<br />
Plus<br />
Finestra menu<br />
FINESTRA MENU<br />
La barra delle opzioni menu, presentata sulla parte superiore dello schermo,<br />
permette di accedere alle seguenti funzioni:<br />
TRACCIA: permette di abilitare/disabilitare la registrazione della traccia<br />
del percorso e di cancellare la traccia memorizzata.<br />
CONTRASTO: permette di regolare il livello di contrasto.<br />
ROTTA: permette di cancellare, invertire, mostrare le informazioni relative<br />
alla rotta.<br />
SETUP: permette di attivare/disattivare e modificare i parametri generali<br />
di funzionamento del plotter.<br />
Rotazione della carta (ON/OFF)<br />
Abilita / disabilita la funzione Rotazione.<br />
Visualizzazione delle carte (ON/OFF)<br />
Abilita / disabilita la visualizzazione del contorno della mappa.<br />
Linee batimetriche<br />
(uguale/inferiore a 5 metri; uguale a 10 metri;<br />
uguale/superiore a 20 metri)<br />
Abilita / disabilita la visualizzazione delle batimetriche.<br />
Nomi (ON/OFF)<br />
Abilita / disabilita la visualizzazione dei nomi delle località.<br />
Overzoom (ON/OFF)<br />
Abilita / disabilita la funzione Overzoom.<br />
Calibrazione (ON/OFF)<br />
Consente di calibrare la posizione del punto nave ricevuta dal GPS.<br />
Unità distanza (NAUT/METR/STAT)<br />
Consente di selezionare l’unità di misura per le distanze.<br />
Unità profondità (M/FT/FA)<br />
Consente di selezionare l’unità di misura per le linee batimetriche.<br />
GPS (INT/EXT)<br />
Consente di selezionare il GPS integrato o un’antenna esterna.<br />
Ora (LOCALE/GMT)<br />
Consente di inserire l’ora locale.<br />
Rilevamento (VERO/MAGNETICO)<br />
Consente d’impostare la modalità magnetica per il rilevamento.<br />
Lingua (EN/FR/ES/DE/DK/IT/SV/NL/SU/NO)<br />
Consente di selezionare la lingua.<br />
Lingua (EN/FR/ES/DE/IT)<br />
Consente di selezionare la lingua.<br />
36<br />
36 37<br />
36<br />
Elite<br />
Cabin<br />
Regatta<br />
Finestra ecoscandaglio<br />
FINESTRA ECOSCANDAGLIO<br />
Al GEONAV è possibile interfacciare un<br />
sensore di profondità via NMEA.<br />
In questo caso, il GEONAV attiverà automaticamente<br />
la funzione ecoscandaglio e<br />
mostrerà il grafico del fondale marino.<br />
La scala delle profondità, la cui unità di<br />
misura può essere selezionata in metri,<br />
piedi o braccia da menu, varierà automaticamente<br />
per visualizzare acque più o<br />
meno profonde.<br />
In modo Navigazione, premere PAGE per visualizzare la finestra<br />
ecoscandaglio.<br />
La finestra mostrerà i seguenti dati:<br />
profondità del fondale marino<br />
scala di profondità<br />
temperatura dell’acqua (se disponibile)<br />
Quando navigate in acque più profonde rispetto alle potenzialità del<br />
sensore, oppure la velocità dell’imbarcazione è troppo elevata per consentire<br />
una corretta rilevazione della profondità, il grafico verrà interrotto<br />
e il valore numerico sostituito da “—”.<br />
Per disattivare la finestra ecoscandaglio, premere PAGE.<br />
offered by <strong>Busse</strong>-<strong>Yachtshop</strong>.com
Plus<br />
Finestra navigazione al waypoint Finestra viaggio<br />
FINESTRA NAVIGAZIONE AL WAYPOINT<br />
È la finestra che riporta le informazioni<br />
relative alla navigazione al waypoint di<br />
destinazione corrente.<br />
Quando questa finestra è attiva, il segmento<br />
di rotta corrente viene momentaneamente<br />
cancellato e sostituito con un<br />
elastico che collega costantemente il punto<br />
nave al waypoint di destinazione.<br />
Nella parte inferiore dello schermo sono<br />
visualizzati i seguenti dati:<br />
velocità dell’imbarcazione<br />
distanza dal punto nave al waypoint di destinazione<br />
rilevamento tra il punto nave e il waypoint di destinazione<br />
angolo di fuori rotta<br />
38<br />
38 39<br />
38<br />
FINESTRA VIAGGIO<br />
È la finestra che riporta le informazioni generali<br />
relative al percorso seguito, e in particolare:<br />
velocità media<br />
tempo trascorso dalla partenza<br />
distanza parziale percorsa<br />
distanza totale percorsa<br />
Per azzerare i contatori parziali prima di<br />
iniziare un nuovo viaggio, premere il tasto<br />
CLR.<br />
offered by <strong>Busse</strong>-<strong>Yachtshop</strong>.com
Rotta<br />
3<br />
5<br />
1<br />
6<br />
2<br />
4<br />
ROTTA<br />
2 - Segmento<br />
Porzione di rotta compresa tra due waypoint.<br />
Il GEONAV è in grado di memorizzare e gestire<br />
la navigazione lungo una rotta.<br />
Per disegnare una rotta si utilizza il tasto<br />
GOTO.<br />
La figura riporta un esempio relativo a una<br />
rotta composta da tre waypoint.<br />
1 - Punto nave<br />
Posizione dell’imbarcazione, così come è riconosciuta<br />
dal GPS.<br />
3 - Traccia<br />
Registrazione del percorso effettivamente seguito dall’imbarcazione; il<br />
percorso è disegnato con una linea tratteggiata.<br />
4 - Waypoint<br />
Indica il punto dove la rotta cambia direzione ed è rappresentato da un<br />
piccolo cerchio contenente un numero. La visualizzazione della finestra<br />
“PROSSIMITÀ WAYPOINT” informa il navigante che, dopo circa 25 secondi,<br />
raggiungerà il waypoint di destinazione, invitandolo a iniziare le<br />
azioni necessarie per la virata.<br />
Quando si raggiunge l’ultimo waypoint viene visualizzato il messaggio<br />
“FINE VIAGGIO”.<br />
Il punto di partenza della rotta è rappresentato dal simbolo “X”.<br />
Il waypoint successivo è indicato da un cerchio scuro.<br />
5 - Heading vector<br />
Indica graficamente la direzione corrente dell’imbarcazione.<br />
6 - Cursore<br />
Indica una posizione in coordinate geografiche su una carta. È presente<br />
a video solo quando il plotter è in modo Cursore.<br />
Creazione di una rotta<br />
La creazione di una rotta richiede l’inserimento di almeno un waypoint,<br />
prendendo come punto di partenza la posizione corrente dell’imbarcazione.<br />
40<br />
40 41<br />
40<br />
L’operazione di inserimento waypoint può essere effettuata in un qualunque<br />
momento premendo il tasto GOTO e selezionando l’opzione desiderata;<br />
la rotta sarà inizialmente composta da un segmento che unisce<br />
la posizione dell’imbarcazione con il waypoint di destinazione finale<br />
prescelto. Se si desidera inserire successivi waypoint, basta ripetere l’operazione:<br />
premere GOTO e selezionare una delle opzioni disponibili; il nuovo<br />
waypoint verrà automaticamente aggiunto in coda alla rotta esistente.<br />
Per inserire waypoint intermedi (ad esempio per aggirare ostacoli o<br />
per cambiare il piano di rotta), muovere waypoint o cancellare waypoint<br />
che non sono di interesse, occorre attivare la funzione di modifica della<br />
rotta (vedi pagine successive).<br />
NOTA: il GEONAV può gestire solamente una rotta, pertanto la creazione di una nuova rotta<br />
cancella automaticamente quella esistente.<br />
Rotta verso la posizione indicata con il cursore<br />
Premere una delle quattro frecce per entrare<br />
in modo Cursore e posizionare il<br />
cursore dove si desidera inserire un<br />
waypoint. Premere GOTO, selezionare l’opzione<br />
CURS e premere ENTER. Il GEONAV<br />
inserirà un waypoint corrispondente alla<br />
posizione del cursore, aggiungerà il nuovo<br />
segmento in coda alla rotta esistente (se<br />
non c’era alcuna rotta, il nuovo waypoint<br />
verrà collegato al punto nave) e ritornerà<br />
infine in modo Navigazione attivando automaticamente<br />
la funzione Autozoom.<br />
Rotta verso un marker<br />
Premere GOTO e scegliere l’opzione MARK<br />
con il tasto CURSOR. Utilizzando il tasto<br />
CURSOR selezionare all’interno del catalogo<br />
il marker di destinazione (gli ultimi sei<br />
marker utilizzati sono evidenziati in un riquadro)<br />
e premere ENTER per confermare<br />
l’operazione. Il GEONAV inserirà un<br />
waypoint in corrispondenza del marker<br />
selezionato, aggiungerà il nuovo segmento<br />
in coda alla rotta esistente (se non c’era<br />
alcuna rotta, il nuovo waypoint verrà collegato<br />
al punto nave) e, premendo PAGE,<br />
ritornerà in modo Navigazione attivando<br />
automaticamente la funzione Autozoom.<br />
offered by <strong>Busse</strong>-<strong>Yachtshop</strong>.com
Rotta<br />
42<br />
Rotta verso un porto<br />
Premere il tasto GOTO e scegliere l’opzione<br />
PORT con il tasto CURSOR. Utilizzando sempre<br />
il tasto CURSOR, scegliere il porto di destinazione<br />
all’interno del catalogo proposto<br />
(gli ultimi sei porti utilizzati sono<br />
evidenziati in un riquadro), premere ENTER<br />
per confermare. Il GEONAV inserirà un<br />
waypoint in corrispondenza del porto selezionato,<br />
aggiungerà il nuovo segmento in<br />
coda alla rotta esistente (se non c’era alcuna<br />
rotta, il nuovo waypoint verrà collegato<br />
al punto nave) e, premendo PAGE, ritornerà<br />
infine in modo Navigazione attivando automaticamente<br />
la funzione Autozoom.<br />
Rotta verso il servizio più vicino<br />
NOTA: questa opzione è disponibile solo con cartucce<br />
NAVIONICS che contengono i SERVIZI PORTUALI e consente<br />
di localizzare e fare rotta al porto più vicino alla vostra<br />
imbarcazione che disponga del servizio selezionato.<br />
Premere il tasto GOTO, scegliere l’opzione<br />
NEAR con il tasto CURSOR, quindi selezionare<br />
il servizio di interesse e confermare<br />
con ENTER, altrimenti premere PAGE per<br />
annullare l’operazione. Il GEONAV<br />
visualizzerà le tre destinazioni più vicine<br />
in linea d’aria alla vostra imbarcazione (se<br />
in modo Navigazione) o al cursore (se in<br />
modo Cursore), posizionandosi automaticamente sulla più vicina (lampeggiante).<br />
Selezionando ciclicamente uno dei tre porti con il tasto CURSOR, una<br />
finestra visualizzerà i dati relativi alla distanza e al tempo di arrivo (stimato<br />
sulla velocità corrente). Confermare la scelta con ENTER.<br />
Il GEONAV inserirà un waypoint in corrispondenza del porto selezionato<br />
e cancellerà automaticamente la rotta esistente, se in modo Navigazione,<br />
oppure aggiungerà il waypoint in coda alla rotta esistente, se in modo<br />
Cursore; ritornerà infine in modo Navigazione attivando automaticamente<br />
la funzione Autozoom.<br />
42 43<br />
42<br />
Plus<br />
Elite<br />
Cabin<br />
Regatta<br />
Rotta verso un punto (Lat / Lon)<br />
Premere il tasto GOTO e scegliere l’opzione<br />
L/L con il tasto CURSOR.<br />
Utilizzando il tasto CURSOR, inserire le coordinate<br />
del punto desiderato e premere<br />
ENTER per confermare.<br />
Rotta verso un punto (Lat / Lon, Distanza / Rilevamento)<br />
Premere il tasto GOTO e selezionare l’opzione<br />
PNT con il tasto CURSOR. Scegliere la<br />
modalità d’inserimento delle coordinate tra<br />
Latitudine e Longitudine oppure tra Distanza<br />
e Rilevamento (coordinate polari).<br />
Utilizzando il tasto CURSOR, inserire le coordinate del punto desiderato e<br />
premere ENTER per confermare.<br />
Il GEONAV posizionerà il cursore in corrispondenza del punto selezionato.<br />
Per inserire il waypoint, premere nuovamente il tasto GOTO e selezionare<br />
l’opzione CURS, quindi premere il tasto ENTER per confermare l’operazione.<br />
Cancellazione di waypoint in sequenza<br />
In modo Cursore è possibile cancellare tutti waypoint premendo<br />
ripetutamente il tasto CLR fino a quando il messaggio “WAYPOINT ESAU-<br />
RITI” è visualizzato sullo schermo; se il waypoint da cancellare si trova<br />
fuori dallo schermo, il plotter chiederà di premere il tasto ENTER per confermare<br />
la cancellazione.<br />
Cancellazione dell’intera rotta<br />
In modo Navigazione è possibile cancellare l’intera rotta premendo il<br />
tasto CLR, confermare con ENTER oppure annullare l’operazione con PAGE.<br />
offered by <strong>Busse</strong>-<strong>Yachtshop</strong>.com
Rotta<br />
Funzioni di rotta accessibili dal menu ROTTA<br />
Informazioni sulla rotta (INFO ROTTA)<br />
Inversione della rotta<br />
Cancellazione della rotta<br />
Modifica di una rotta in modo Cursore<br />
Molte volte è necessaria la modifica della<br />
posizione o la cancellazione di un singolo<br />
waypoint; il GEONAV consente di compiere<br />
queste operazioni in modo molto semplice<br />
e con l’uso di pochi tasti.<br />
Cancellare un waypoint selezionato<br />
Posizionare il cursore manuale con il<br />
tasto CURSOR esattamente in corrispondenza<br />
del waypoint da cancellare e premere<br />
CLR.<br />
Muovere un waypoint<br />
Posizionare il cursore con il tasto<br />
CURSOR esattamente in corrispondenza<br />
del waypoint da muovere, premere<br />
ENTER per catturare il waypoint, quindi<br />
spostare il waypoint nel punto desiderato<br />
e premere ENTER.<br />
Inserire un nuovo waypoint all’interno<br />
della rotta<br />
Portare il cursore esattamente in corrispondenza<br />
del segmento rotta che si<br />
vuole modificare, premere ENTER per<br />
catturare il segmento; una volta catturato,<br />
il segmento verrà disegnato con<br />
una linea più spessa per distinguerlo<br />
più facilmente dagli altri segmenti di<br />
rotta. A questo punto spostare il<br />
cursore manuale nel punto dove si vuole<br />
inserire il nuovo waypoint e premere<br />
ENTER per confermare.<br />
Informazioni sulla rotta<br />
Le informazione relative alla rotta sono visualizzate su due pagine; la<br />
prima contiene informazioni generali sulla rotta, mentre la seconda ri-<br />
44<br />
44 45<br />
44<br />
porta le coordinate geografiche di ogni waypoint.<br />
Premere PAGE ripetutamente fino a visualizzare il menu principale, selezionare<br />
ROTTA, successivamente l’opzione INFO, e quindi premere ENTER;<br />
una finestra visualizzerà le seguenti informazioni:<br />
Waypoint N.: numero del waypoint<br />
Leg Dist.: distanza tra il waypoint e il waypoint di partenza<br />
Ora: tempo di arrivo al waypoint<br />
Car. Litri: consumo stimato di carburante<br />
NOTA: i dati relativi al tempo di arrivo al waypoint e al consumo di carburante sono disponibili solo<br />
dopo aver inserito i valori stimati con l’apposito menu.<br />
Inversione della rotta<br />
Per invertire la rotta, premere PAGE ripetutamente fino a visualizzare il<br />
menu principale, selezionare ROTTA, quindi l’opzione INVERTIRE e premere<br />
ENTER per confermare l’operazione.<br />
Automaticamente l’ordine dei waypoint sarà invertito permettendo di<br />
navigare seguendo il percorso inverso.<br />
Cancellazione della rotta<br />
In modo Navigazione premere CLR, quindi ENTER per confermare l’operazione.<br />
In modo Cursore mantenere premuto CLR per due secondi, quindi premere<br />
ENTER per confermare l’operazione.<br />
offered by <strong>Busse</strong>-<strong>Yachtshop</strong>.com
Traccia Marker<br />
TRACCIA<br />
La funzione Traccia consente di registrare il percorso effettivamente seguito<br />
dall’imbarcazione.<br />
È possibile attivare e disattivare la registrazione del percorso più volte<br />
nel corso della navigazione; in questo caso i vari segmenti saranno automaticamente<br />
uniti per creare una singola traccia.<br />
Attivazione della traccia<br />
Per attivare la funzione traccia, premere PAGE ripetutamente fino a<br />
visualizzare il menu principale, selezionare TRACCIA, quindi l’opzione<br />
INIZIO e premere ENTER per confermare. In corrispondenza del punto<br />
nave verrà disegnato un piccolo cerchio che indica il punto di partenza<br />
della traccia.<br />
Disattivazione della traccia<br />
Per disattivare la funzione traccia, premere PAGE ripetutamente fino a<br />
visualizzare il menu principale, selezionare TRACCIA, quindi l’opzione<br />
STOP e premere ENTER per confermare.<br />
Cancellazione della traccia<br />
Per cancellare la traccia, premere PAGE ripetutamente fino a visualizzare<br />
il menu principale, selezionare TRACCIA, quindi l’opzione CANCELLA e<br />
premere ENTER; verrà visualizzato un messaggio che chiederà di confermare<br />
la cancellazione.<br />
46<br />
46 47<br />
46<br />
MARKER<br />
I marker sono punti d’interesse che possono essere identificati da un<br />
nome e da un simbolo e salvati nella memoria del GEONAV.<br />
MODO CURSORE<br />
Inserimento di un marker<br />
Posizionare il cursore in corrispondenza<br />
del punto desiderato e premere il tasto<br />
ENTER.<br />
Comparirà il simbolo e il nome che il<br />
GEONAV assegna automaticamente al<br />
marker; il tasto CURSOR permetterà di cambiare<br />
sia il simbolo che il nome del marker<br />
in funzione del tipo di marker da memorizzare<br />
(per esempio banchi di pesca, relitto<br />
sommerso, rocce, ecc.).<br />
Premere ENTER per confermare.<br />
NOTA: i nomi dei marker sono visualizzati a partire dalla scala carta di 32NM.<br />
Cancellazione di un marker<br />
Posizionare il cursore manuale in corrispondenza del marker e premere<br />
il tasto CLR.<br />
Modifica del nome e del simbolo di un marker<br />
Posizionare il cursore in corrispondenza del marker desiderato; comparirà<br />
il simbolo e il nome precedentemente assegnati al marker selezionato.<br />
Premendo ENTER sarà possibile, con l’utilizzo del tasto CURSOR, modificare<br />
sia il simbolo che il nome.<br />
Premere ENTER per confermare.<br />
offered by <strong>Busse</strong>-<strong>Yachtshop</strong>.com
Marker<br />
48<br />
MODO NAVIGAZIONE<br />
Inserimento di un marker<br />
Alla pressione del tasto ENTER viene inserito<br />
un marker in corrispondenza del punto<br />
nave. Comparirà il simbolo e il nome che il<br />
GEONAV assegna automaticamente al<br />
marker; il tasto CURSOR permetterà di cambiare<br />
sia il simbolo che il nome del marker<br />
in funzione del tipo di marker da memorizzare<br />
(per esempio banchi di pesca, relitti<br />
sommersi, rocce, ecc.).<br />
Premere ENTER per confermare.<br />
Cancellazione di un marker<br />
Posizionare il cursore manuale in corrispondenza del marker da cancellare<br />
e premere CLR.<br />
Rotta verso un marker<br />
Vedere le funzioni di rotta.<br />
48 49<br />
48<br />
Elite<br />
Cabin<br />
Regatta<br />
Autopilota<br />
AUTOPILOTA<br />
Il GEONAV consente a un’imbarcazione dotata di autopilota di seguire<br />
automaticamente la rotta impostata sul plotter, compensando le varie<br />
deviazioni che possono verificarsi a causa di fattori esterni (vento, correnti,<br />
ecc.).<br />
Il messaggio “PROSSIMITÀ WAYPOINT” avvertirà l’utente 25 secondi<br />
prima dell’arrivo al waypoint di destinazione.<br />
Il messaggio “FINE VIAGGIO” avviserà l’utente che la sua imbarcazione<br />
sta per raggiungere l’ultimo waypoint della rotta.<br />
IMPORTANTE: per evitare improvvisi cambi di direzione dell’imbarcazione, è assolutamente indispensabile<br />
disattivare l’autopilota prima di effettuare operazioni di modifica e/o di tracciamento<br />
di una rotta.<br />
offered by <strong>Busse</strong>-<strong>Yachtshop</strong>.com
Utilizzo con cartografia stradale<br />
LEGGETE QUESTA AVVERTENZA PRIMA DI UTILIZZARE IL VOSTRO<br />
GEONAV<br />
ATTENZIONE<br />
IL PLOTTER CARTOGRAFICO, SE INSTALLATO IN UN VEICOLO, NON<br />
DEVE OSTACOLARE LA VISUALE DEL GUIDATORE.<br />
L’APPARATO NON DEVE ESSERE USATO DAL GUIDATORE, O DI-<br />
STRARRE LA SUA ATTENZIONE, QUANDO IL VEICOLO È IN MOVI-<br />
MENTO.<br />
L’uso del GEONAV comporta la conoscenza e l’accettazione di questa<br />
avvertenza da parte dell’utente.<br />
50<br />
50 51<br />
50<br />
Elite<br />
Cabin<br />
Regatta<br />
UTILIZZO CON CARTOGRAFIA STRADALE<br />
Grazie all’introduzione della nuova<br />
cartografia elettronica per applicazioni terrestri,<br />
il GEONAV diventa un prezioso strumento<br />
anche per l’uso in automobile; l’introduzione<br />
della cartografia stradale vi sarà<br />
infatti di ausilio per individuare con precisione<br />
la vostra posizione e i nomi delle strade<br />
principali.<br />
Quando installate una cartuccia che contiene<br />
cartografia terrestre, il GEONAV si attiverà<br />
automaticamente in modalità terrestre;<br />
le funzionalità dello strumento riman-<br />
gono invariate e potete ancora pianificare una rotta, inserire marker,<br />
registrare una traccia e attivare tutte le altre funzioni con le stesse modalità<br />
descritte per l’uso dello strumento in ambiente nautico. Ci sono<br />
tuttavia alcune differenze che sono strettamente legate alla specifica<br />
applicazione in campo terrestre e che sono elencate di seguito.<br />
Menu di SETUP<br />
Il menu di SETUP diventa il seguente:<br />
Rotazione della carta (ON/OFF)<br />
Abilita/disabilita la funzione rotazione.<br />
Visualizzazione carte (ON/OFF)<br />
Abilita/disabilita la visualizzazione dei<br />
contorni della mappe.<br />
Strade principali (ON/OFF)<br />
Abilita/disabilita la visualizzazione delle<br />
strade principali.<br />
Altre strade (ON/OFF)<br />
Abilita/disabilita la visualizzazione delle<br />
strade secondarie.<br />
Nomi di strade (ON/OFF)<br />
Abilita/disabilita la visualizzazione dei nomi delle strade.<br />
NOTA: questo parametro diventa automaticamente OFF se tutte le strade, sia principali che<br />
secondarie, sono state selezionate OFF.<br />
Nomi di città (ON/OFF)<br />
Abilita/disabilita la visualizzazione dei nomi delle città.<br />
offered by <strong>Busse</strong>-<strong>Yachtshop</strong>.com
Elite<br />
Regatta<br />
Elite<br />
Cabin<br />
Regatta<br />
Plus<br />
Utilizzo con cartografia stradale Principali messaggi<br />
Calibrazione (ON/OFF)<br />
Consente di calibrare la posizione ricevuta dal GPS.<br />
Unità distanza (NAUT/METR/STAT)<br />
Consente di selezionare l’unità di misura per le distanze; l’unità di<br />
misura selezionata per il funzionamento in modalità terrestre è indipendente<br />
dall’unità selezionata quando il plotter è usato con cartucce<br />
nautiche.<br />
GPS (INT/EXT)<br />
Consente di selezionare il GPS integrato oppure un’antenna esterna.<br />
Ora (LOCALE/GMT)<br />
Consente di inserire l’ora locale.<br />
Lingua (EN/FR/ES/DE/DK/IT/SV/NL/SU/NO)<br />
Consente di selezionare la lingua.<br />
Lingua (EN/FR/ES/DE/IT)<br />
Consente di selezionare la lingua.<br />
Visualizzazione dei nomi delle strade<br />
Questa funzione è equivalente alla visualizzazione delle caratteristiche<br />
di un faro quando il GEONAV è utilizzato con carte nautiche.<br />
Posizionare il cursore in corrispondenza del simbolo del nome della strada<br />
(un piccolo rombo); sullo schermo sarà visualizzata automaticamente<br />
una finestra con il nome relativo alla strada selezionata.<br />
52<br />
52 53<br />
52<br />
PRINCIPALI MESSAGGI<br />
FINE VIAGGIO<br />
L’imbarcazione ha raggiunto l’ultimo waypoint.<br />
RICERCA SATELLITI oppure POOR GPS COVERAGE<br />
Il GEONAV non riceve dati dal GPS, pertanto non può indicare il punto<br />
nave.<br />
INVALID FIX<br />
Il GPS non riceve un segnale tale da consentire il calcolo del punto nave.<br />
NESSUN WP<br />
Non è possibile cambiare il waypoint di destinazione perché non esiste<br />
alcun waypoint.<br />
PROSSIMITÀ WAYPOINT<br />
L’imbarcazione è a circa 25 secondi dal prossimo waypoint.<br />
WAYPOINT SUPERATO<br />
L’imbarcazione ha superato il waypoint.<br />
WAYPOINT ESAURITI<br />
Sono stati utilizzati tutti i waypoint disponibili per la rotta.<br />
WP GIÀ INSERITO<br />
Due waypoint non possono avere la stessa posizione.<br />
MARK GIÀ PRESENTE<br />
Due marker non possono avere la stessa posizione e lo stesso nome.<br />
MARKER ESAURITI<br />
Sono stati utilizzati tutti i marker disponibili.<br />
offered by <strong>Busse</strong>-<strong>Yachtshop</strong>.com
Individuazione guasti Glossario<br />
INDIVIDUAZIONE GUASTI<br />
Il GEONAV non si accende<br />
Controllare che sia presente una tensione di alimentazione continua<br />
compresa tra 11 e 18 Volt.<br />
Controllare la polarità dell’alimentazione fornita.<br />
Il GEONAV non riesce a ottenere un fix valido<br />
Verificare che non ci siano ostacoli intorno alla parte antenna dello strumento.<br />
Se, dopo 15 minuti, non è stato ottenuto il fix, spegnere e riaccendere<br />
il plotter.<br />
Il GEONAV non si spegne<br />
Se, premendo più di tre secondi il tasto ON/OFF, non appare la finestra<br />
dello spegnimento, rimuovere direttamente il GEONAV dalla staffa oppure<br />
disconnettere l’alimentazione.<br />
Lo schermo del GEONAV diventa scuro dopo un’esposizione al sole<br />
Regolare il contrasto.<br />
Durante il suo funzionamento il GEONAV si blocca<br />
Spegnere e riaccendere l’apparecchio; se il problema persiste, cancellare<br />
la memoria. A tale scopo accendere lo strumento tendendo contemporaneamente<br />
premuti il tasto ON e CLR. Questa operazione comporta la<br />
cancellazione di tutti i dati (marker, rotta, traccia, ecc.) precedentemente<br />
salvati nella memoria del GEONAV.<br />
54<br />
54 55<br />
54<br />
GLOSSARIO<br />
Azimut - Angolo compreso tra l’orizzonte<br />
e un satellite (o un altro oggetto).<br />
Bearing (BRG) - Direzione (misurata<br />
rispetto al nord, angolo da 0° a<br />
360°) della retta tra il punto nave<br />
e la destinazione.<br />
COG (Course Over Ground) -<br />
Direzione dell’imbarcazione relativa<br />
alla terra.<br />
Coordinate - Descrizione della posizione<br />
(LAT/LON).<br />
Ecoscandaglio - Strumento che rileva<br />
la profondità del fondale marino.<br />
Fix - Posizione geografica calcolata<br />
tramite il dispositivo GPS.<br />
GMT - Ora riferita al meridiano di<br />
Greenwich.<br />
GPS (Global Positioning System) -<br />
Sistema di individuazione della<br />
posizione basato sul sistema<br />
satellitare.<br />
Ogni satellite trasmette la sua posizione<br />
e il tempo di inizio della trasmissione.<br />
Un ricevitore GPS riceve i segnali e,<br />
misurando il tempo tra la trasmissione<br />
e l’arrivo, determina la distanza<br />
tra il ricevitore e il satellite. Utilizzando<br />
tre satelliti è possibile risalire<br />
alle coordinate del ricevitore e<br />
quindi dell’imbarcazione.<br />
GPS differenziale - GPS munito di<br />
un’antenna addizionale in grado di<br />
ricevere i segnali provenienti dalle<br />
stazioni di terra e di correggere i segnali<br />
provenienti dai satelliti.<br />
Heading - Direzione verso la quale si<br />
muove l’imbarcazione.<br />
Leg - Segmento di rotta tra due<br />
waypoint.<br />
SOG (Speed Over Ground) - Velocità alla<br />
quale si muove l’imbarcazione rispetto<br />
alla terra.<br />
Waypoint - Punto verso il quale si vuole<br />
navigare.<br />
offered by <strong>Busse</strong>-<strong>Yachtshop</strong>.com
56<br />
PAGINA BIANCA<br />
56 57<br />
56<br />
Indice<br />
INDICE<br />
GEONAV 6 PLUS ................................................................................................ 4<br />
GEONAV 6 ELITE ............................................................................................... 6<br />
GEONAV 6 CABIN .............................................................................................. 8<br />
GEONAV 6 REGATTA ....................................................................................... 10<br />
INTRODUZIONE ............................................................................................... 12<br />
INSTALLAZIONE E PRECAUZIONI .................................................................. 14<br />
COLLEGAMENTI ELETTRICI ........................................................................... 18<br />
INSTALLAZIONE DELLE CARTUCCE .............................................................. 20<br />
LA TASTIERA .................................................................................................... 21<br />
DIAGNOSTICO ................................................................................................. 22<br />
LA CARTOGRAFIA NAVIONICS ....................................................................... 23<br />
AIUTI ALLA NAVIGAZIONE .............................................................................. 25<br />
CARATTERISTICHE FUNZIONALI ................................................................... 26<br />
FUNZIONAMENTO ........................................................................................... 31<br />
FINESTRA SATELLITI ...................................................................................... 32<br />
FINESTRA NAVIGAZIONE................................................................................ 34<br />
FINESTRA MENU ............................................................................................. 36<br />
FINESTRA ECOSCANDAGLIO ......................................................................... 37<br />
FINESTRA NAVIGAZIONE AL WAYPOINT ....................................................... 38<br />
FINESTRA VIAGGIO......................................................................................... 39<br />
ROTTA .............................................................................................................. 40<br />
TRACCIA .......................................................................................................... 46<br />
MARKER ........................................................................................................... 47<br />
AUTOPILOTA .................................................................................................... 49<br />
UTILIZZO CON CARTOGRAFIA STRADALE ................................................... 51<br />
PRINCIPALI MESSAGGI ................................................................................... 53<br />
INDIVIDUAZIONE GUASTI ............................................................................... 54<br />
GLOSSARIO ..................................................................................................... 55<br />
offered by <strong>Busse</strong>-<strong>Yachtshop</strong>.com
58<br />
58<br />
HEADQUARTERS ITALY<br />
Navionics S.p.A. - Geonav Division<br />
Via Vespucci 289 55049 Viareggio Italy<br />
Tel: +39 0584 961696<br />
Fax: +39 0584 961309<br />
Numero Verde: 800-861215<br />
http://www.geonav.it<br />
http://www.navionics.it<br />
OFFICE USA<br />
Navionics Inc.<br />
6 Thacher Lane Wareham, MA. USA 02571<br />
Tel: +1 (508) 291 6000<br />
Fax: +1 (508) 291 6006<br />
Toll free: 1-800-848-5896<br />
http://www.navionics.com<br />
Copyright © 2001 Navionics S.p.A.<br />
Rev. 2.0 - Feb 2001 N1013680<br />
58 59<br />
offered by <strong>Busse</strong>-<strong>Yachtshop</strong>.com