Toaster Toaster Grille-pain Gebrauchsanweisung Operating ... - Wmf
Toaster Toaster Grille-pain Gebrauchsanweisung Operating ... - Wmf
Toaster Toaster Grille-pain Gebrauchsanweisung Operating ... - Wmf

Create successful ePaper yourself
Turn your PDF publications into a flip-book with our unique Google optimized e-Paper software.
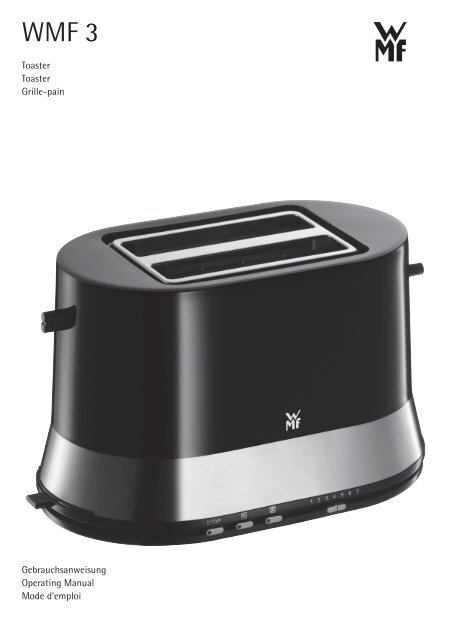
WMF 3<br />
<strong>Toaster</strong><br />
<strong>Toaster</strong><br />
<strong>Grille</strong>-<strong>pain</strong><br />
<strong>Gebrauchsanweisung</strong><br />
<strong>Operating</strong> Manual<br />
Mode d‘emploi<br />
BAL_<strong>Toaster</strong>_BrandLoyalty_148x210_RZ.indd 1 20.04.11 16:02
Vor dem Benutzen<br />
Die <strong>Gebrauchsanweisung</strong> aufmerksam lesen. Sie enthält wichtige<br />
Hinweise für den Gebrauch, die Sicherheit und die Wartung<br />
des Gerätes.<br />
Sie soll sorgfältig aufbewahrt und gegebenenfalls an Nachbenutzer<br />
weitergegeben werden.<br />
Das Gerät darf nur für den vorgesehenen Zweck, gemäß dieser<br />
<strong>Gebrauchsanweisung</strong>, verwendet werden.<br />
Beim Gebrauch die Sicherheitshinweise beachten.<br />
Technische Daten<br />
Nennspannung: 220-240 V 50/60 Hz<br />
Leistungsaufnahme: 800 W<br />
Schutzklasse: I<br />
Sicherheitshinweise<br />
· Gerät nur an eine vorschriftsmäßig installierte Schutzkontaktsteckdose<br />
anschließen. Zuleitung und Stecker müssen<br />
trocken sein.<br />
· Das Gerät darf nicht über eine externe Zeitschaltuhr oder<br />
Fernbedienung betrieben werden.<br />
· Den <strong>Toaster</strong> niemals ohne Aufsicht betreiben.<br />
· Die Anschlussleitung nicht über scharfe Kanten ziehen oder<br />
einklemmen, nicht herunterhängen lassen sowie vor Hitze<br />
und Öl schützen.<br />
· Das Gerät nicht auf heiße Oberflächen wie Herdplatten o. Ä.<br />
stellen und nicht in der Nähe offener Flammen betreiben.<br />
· Den <strong>Toaster</strong> nicht ohne eingeschobene Krümelschublade<br />
betreiben.<br />
· Den Netzstecker nicht an der Leitung oder mit nassen Händen<br />
aus der Steckdose ziehen.<br />
· Dieses Gerät ist nicht dafür bestimmt, durch Personen (einschließlich<br />
Kinder) mit eingeschränkten physischen, sensorischen<br />
oder geistigen Fähigkeiten oder mangels Erfahrung<br />
und/oder mangels Wissen benutzt zu werden, es sei denn,<br />
sie werden durch eine für ihre Sicherheit zuständige Person<br />
beaufsichtigt oder erhielten von ihr Anweisungen, wie das<br />
Gerät zu benutzen ist.<br />
· Achten Sie darauf, dass Kinder keine Gelegenheit erhalten,<br />
mit dem Gerät zu spielen.<br />
· Das Gerät nicht in Betrieb nehmen bzw. sofort Netzstecker<br />
ziehen, wenn:<br />
· Gerät oder Netzkabel beschädigt ist<br />
· der Verdacht auf einen Defekt nach einem<br />
Sturz oder Ähnlichem besteht.<br />
In diesen Fällen das Gerät zur Reparatur geben.<br />
Beim Toasteinlegen beachten, dass sich Brotscheiben nicht<br />
verklemmen. Sollte dies doch einmal passiert sein, erst den<br />
Netzstecker ziehen und dann die Störung beseitigen.<br />
· Achtung: Brotscheiben in <strong>Toaster</strong>n können brennen. Deshalb<br />
das Gerät nicht in der Nähe oder unterhalb von brennbaren<br />
Gegenständen (z.B. Vorhänge, Hängeschränke) benutzen<br />
und stets beaufsichtigen.<br />
· Vorsicht, Verbrennungsgefahr: Die Temperatur der berührbaren<br />
Oberflächen kann sehr heiß werden.<br />
· Nicht mit den Fingern oder Gegenständen wie Gabel, Messer<br />
o. ä. in die Röstschlitze hineinlangen.<br />
· <strong>Toaster</strong> nur aufrecht stehend und frei aufgestellt betreiben.<br />
· Röstschlitze während des Toastens nicht abdecken. Keine<br />
Brotscheiben oder Brötchen auf das Gehäuse legen, da dies<br />
zur Überhitzung im Gerät führt.<br />
· Der Netzstecker ist zu ziehen:<br />
· Bei Störungen während des Betriebes<br />
· Vor jeder Reinigung und Pflege<br />
· Nach dem Gebrauch.<br />
· Den <strong>Toaster</strong> nicht in Wasser tauchen.<br />
· Bei Zweckentfremdung, falscher Bedienung oder nicht<br />
fachgerechter Reparatur wird keine Haftung für eventuelle<br />
Schäden übernommen. Ebenso sind Garantieleistungen in<br />
solchen Fällen ausgeschlossen.<br />
· Das Gerät ist nicht für den gewerblichen Gebrauch bestimmt.<br />
· Wenn die Anschlussleitung dieses Gerätes beschädigt wird,<br />
muss sie durch den zentralen Kundendienst des Herstellers<br />
oder eine ähnlich qualifizierte Person ersetzt werden. Durch<br />
unsachgemäße Reparaturen können erhebliche Gefahren<br />
für den Benutzer entstehen.<br />
Inbetriebnahme<br />
· Die nicht benötigte Länge der Anschlussleitung kann am<br />
Boden aufgewickelt werden. Den Netzstecker an eine<br />
2 3<br />
BAL_<strong>Toaster</strong>_BrandLoyalty_148x210_RZ.indd 2-3 20.04.11 16:02<br />
DE<br />
GB<br />
FR
STOP<br />
Schutzkontaktsteckdose anschließen.<br />
· Vor dem ersten Gebrauch mindestens 3 Toastvorgänge<br />
ohne Brot bei maximaler Einstellung ablaufen lassen, um<br />
den Oberflächenschutz der Heizelemente zu entfernen.<br />
Die dabei auftretende Geruchsbelästigung ist unbedenklich,<br />
trotzdem sollte dabei gut gelüftet werden. Vor jedem<br />
Einschalten das Gerät etwas abkühlen lassen.<br />
· Die Toastscheiben in die Röstschlitze einlegen. Damit<br />
sie nicht verklemmen, dürfen sie nicht dicker als 22 mm<br />
sein. Kleine Scheiben hochkant nebeneinander in einen<br />
Röstschlitz stellen, so können sie nach dem Toasten besser<br />
entnommen werden.<br />
· Den Schieberegler für den Bräunungsgrad vorerst auf Stufe<br />
3 stellen. Die Lifttaste nach unten drücken. Das Gerät schaltet<br />
ein, und der Brotlift wird gehalten, bis nach Ablauf der<br />
Toastzeit das Gerät automatisch abschaltet und der fertige<br />
Toast zur Entnahme aus dem Röstschlitz gehoben wird.<br />
Toast entnehmen<br />
· Um die Scheiben zur Entnahme besser fassen zu können,<br />
kann der Brotlift angehoben werden. Dazu die Lifttaste<br />
nach oben drücken.<br />
Hinweise zum Bräunungsgrad<br />
· Ist der Toast zu hell - eine höhere Reglereinstellung wählen.<br />
Ist er zu dunkel, den Regler niedriger einstellen. Die Ziffern<br />
1 bis 7 dienen nur zur Orientierung. Je höher die Einstellung,<br />
desto dunkler ist die Bräunung.<br />
· Das Röstergebnis kann bei gleicher Einstellung in Abhängigkeit<br />
von der Brotsorte, Größe, Feuchtigkeitsgehalt und Dicke<br />
der Scheiben unterschiedlich sein. Deshalb für weniger<br />
feuchtes Brot, kleinere Scheiben und auch beim Toasten von<br />
nur einer Scheibe eine geringere Einstellung wählen.<br />
· Wird nur eine Scheibe getoastet, ist die Bräunung auf der<br />
innen liegenden Seite etwas intensiver.<br />
Bei zu starker Bräunung entsteht verstärkt Acrylamid. Beim<br />
Toasten ist deshalb ein zu starkes Anbräunen zu vermeiden.<br />
Abbruch des Toastvorganges<br />
· Zum vorzeitigen Abbrechen, kann die leuchtende<br />
Taste gedrückt werden.<br />
Aufwärmen / Nachtoasten<br />
· Wird unmittelbar nach dem Einschalten des Gerätes die<br />
Aufwärm-Taste gedrückt, wird unabhängig vom eingestellten<br />
Bräunungsgrad bereits erkalteter Toast wieder knusprig<br />
aufgewärmt und zu helles Brot etwas nachgetoastet.<br />
Auftauen<br />
· Wird diese Taste unmittelbar nach dem Einschalten gedrückt,<br />
wird der Toastvorgang automatisch verlängert, um<br />
gefrorenes Brot zu toasten.<br />
Brötchenaufsatz<br />
· Der <strong>Toaster</strong> verfügt über einen integrierten Brötchenaufsatz.<br />
Er wird aufgestellt indem der Drehknopf im Uhrzeigersinn<br />
gedreht wird.<br />
· Zwei Brötchen können von beiden Seiten bei jeweils mittlerer<br />
Einstellung aufgebacken werden. Zu trockene Brötchen<br />
vorher etwas anfeuchten, so gelingen sie besser.<br />
Krümelschublade<br />
· Beim Toasten herabfallende Krümel sammeln sich in der<br />
Krümelschublade. Zum Entleeren ist diese aus dem Gerät<br />
zu ziehen.<br />
Reinigung und Pflege<br />
· Vor dem Reinigen Netzstecker ziehen und Gerät abkühlen<br />
lassen. Im Röstschlitz an den Gittern und der Heizung festgebackene<br />
Krumen mit einem harten Pinsel entfernen. Dabei<br />
das Gerät nicht kippen, sonst entleert sich die Krümelschublade<br />
in das Geräteinnere. Die Schublade anschließend<br />
herausziehen, reinigen und danach wieder einschieben.<br />
· Den <strong>Toaster</strong> keinesfalls in Wasser tauchen. Das Geräteäußere<br />
nur mit einem feuchten Tuch und etwas Spülmittel<br />
reinigen. Keine scharfen oder scheuernden Reinigungsmittel<br />
verwenden.<br />
Garantie-Information<br />
Für unsere Geräte übernehmen wir gegenüber dem Endkunden<br />
eine 24-monatige gesetzliche Gewährleistung. Sie beginnt mit<br />
dem Kauf des Gerätes durch den Endkunden und gilt im Gebiet<br />
der Bundesrepublik Deutschland.<br />
4 5<br />
BAL_<strong>Toaster</strong>_BrandLoyalty_148x210_RZ.indd 4-5 20.04.11 16:02<br />
DE<br />
GB<br />
FR
Bitte wenden Sie sich bei einer Reklamation während des<br />
Aktionszeitraumes an Ihren Verkäufermarkt. Nach Aktions-<br />
ende bitten wir Sie, sich an folgende Telefonnummer zu wenden:<br />
01802-569 258*.<br />
*(0,06 Euro pro Anruf aus dem Festnetz; maximal 0,42 Euro pro Minute aus den Mobilfunknetzen)<br />
Von der gesetzlichen Gewährleistung ausgeschlossen sind<br />
Schäden durch normalen Verschleiß, unsachgemäßen Gebrauch,<br />
Nichteinhaltung der Entkalkungsanweisung, unterbliebene<br />
Pflege sowie Glasbruch.<br />
Das Gerät entspricht den Europäischen Richtlinien 2006/95/EG,<br />
2004/108/EG und 2005/32/EG.<br />
Dieses Produkt darf am Ende seiner Lebensdauer nicht über<br />
den normalen Haushaltsabfall entsorgt werden, sondern muss<br />
an einem Sammelpunkt für das Recycling von elektrischen und<br />
elektronischen Geräten abgegeben werden.<br />
Die Werkstoffe sind gemäß ihrer Kennzeichnung wiederverwertbar.<br />
Mit der Wiederverwendung, der stofflichen Verwertung<br />
oder anderen Formen der Verwertung von Altgeräten leisten Sie<br />
einen wichtigen Beitrag zum Schutze unserer Umwelt.<br />
Bitte erfragen Sie bei der Gemeindeverwaltung die zuständige<br />
Entsorgungsstelle.<br />
Änderungen vorbehalten<br />
6 7<br />
BAL_<strong>Toaster</strong>_BrandLoyalty_148x210_RZ.indd 6-7 20.04.11 16:02<br />
DE<br />
GB<br />
FR
Prior to use<br />
Read these instructions carefully. They contain important<br />
notes for the use, safety and maintenance of the appliance.<br />
Keep them in a safe place and pass them on to any future user.<br />
Only use the appliance for the purpose mentioned in these<br />
instructions.<br />
Be sure to follow the safety information when using<br />
the appliance.<br />
Technical data<br />
Rated voltage: 220-240 V 50/60 Hz<br />
Power consumption: 800W<br />
Protection class: I<br />
Safety information<br />
· Connect the appliance only to a shockproof socket that has<br />
been installed according to regulations. The power cable<br />
and power plug must be dry.<br />
· Never activate the appliance with an external timer or<br />
remote control.<br />
· Never leave the toaster to run unattended.<br />
· Do not pull the power cable over sharp edges, pinch it or let<br />
it hang down. Protect from heat and oil.<br />
· Do not place the appliance on hot surfaces such as stove<br />
tops, and do not operate near open flames.<br />
· Never use the toaster if the crumb tray is not inserted.<br />
· Do not pull out the plug by the cable or touch it with wet<br />
hands.<br />
· This appliance is not intended to be used by persons (including<br />
children) with limited physical, sensory or intellectual<br />
faculties or who lack experience and/or knowledge, unless<br />
they are supervised by a person responsible for their safety<br />
or have received instructions on how to use the appliance.<br />
· Please make sure that children do not have an opportunity<br />
to play with the appliance.<br />
· If the following happens do not use the appliance and<br />
unplug it immediately:<br />
· the appliance or power cable are damaged<br />
· a defect is suspected after a fall or similar occurrence<br />
In these cases, have the appliance repaired.<br />
· When inserting the toast, make sure that the bread slices<br />
do not get jammed. Should this happen, pull out the power<br />
plug first and then eliminate the fault.<br />
· Important: Bread can catch fire in toasters. For this reason,<br />
do not use the appliance in the vicinity of or beneath combustible<br />
objects (for example curtains, wall cabinets) and do<br />
not leave unattended.<br />
· Caution: Risk of burning! The accessible surfaces of the<br />
appliance can become very hot.<br />
· Do not reach into the toasting slots with your fingers or<br />
with objects such as forks, knives or similar.<br />
· Only use the toaster in an upright position and standing<br />
free.<br />
· Do not cover the toasting slots during the toasting process.<br />
Do not place any bread slices or bread rolls onto the housing,<br />
as this may cause the appliance to overheat.<br />
· Pull the power plug:<br />
· if faults arise during operation<br />
· each time before cleaning and servicing<br />
after use.<br />
· Never immerse the toaster in water.<br />
· In the case of misuse, wrong handling or incorrect repair,<br />
no liability will be taken for possible damages. Guarantee<br />
services are also excluded in such cases.<br />
· The appliance is not intended for commercial use.<br />
· If the cable of the appliance is damaged, it must be<br />
replaced by the manufacturer’s authorised service agent<br />
or a qualified technician. Incorrect repairs may result in<br />
considerable hazards for the user.<br />
Start-up<br />
· The section of the power cable not in use can be wound up<br />
and stored on the base of the appliance. Connect the power<br />
plug to a shockproof socket.<br />
· Prior to using the appliance for the first time, carry out at<br />
least three toasting cycles without bread and at maximum<br />
power in order to remove the surface protection on the<br />
heating elements. The smell released during this process is<br />
harmless, but you should ensure good ventilation nevertheless.<br />
Always allow the appliance to cool down a little before<br />
switching it on.<br />
· Insert the toast slices into the toasting slots. To avoid slices<br />
becoming jammed, they should not be thicker than 22 mm.<br />
Insert small slices upright and side by side in one toasting<br />
slot; this will make it easier to remove them after toasting.<br />
· Set the slide control for the browning degree to level 3.<br />
Press the loading handle down. The appliance will switch<br />
on and the bread will be held down until the toaster stops<br />
toasting automatically after the toasting cycle time has<br />
elapsed. The finished toast will pop up out of the toasting<br />
slot for removal.<br />
8 9<br />
BAL_<strong>Toaster</strong>_BrandLoyalty_148x210_RZ.indd 8-9 20.04.11 16:02<br />
DE<br />
GB<br />
FR
STOP<br />
Removing the toast<br />
· Pushing the loading handle upwards will raise the bread lift<br />
and make it easier to remove the toast.<br />
Browning level<br />
· If the toast is too light in colour, select a higher browning<br />
level. If the toast is too dark, set the slide control for the<br />
browning degree to a lower level. The figures 1 to 7 are for<br />
guidance purposes only. The higher the selected level, the<br />
browner the toast.<br />
· The toasting results may vary depending on the type of<br />
bread, size, moisture content and thickness of the slices.<br />
Therefore, select a lower setting for less moist bread, for<br />
smaller slices, or if only toasting one slice.<br />
· When toasting only one slice, the browning on the inwards<br />
facing side will become somewhat darker.<br />
Acrylamide is generated during excessive browning. Excessive<br />
browning of the toast should therefore be avoided.<br />
Cancelling the toasting process<br />
· Press the illuminated button to cancel the toasting process<br />
prematurely.<br />
Reheating / Retoasting<br />
· If the reheating button is pressed directly after the appliance<br />
is switched on, toast that has already cooled down<br />
will be made warm and crisp independent of the selected<br />
browning level and bread which is too light in colour will be<br />
retoasted.<br />
Defrosting<br />
· If this button is pressed directly after the appliance is switched<br />
on, the toasting cycle will be extended automatically<br />
to toast frozen bread.<br />
Bread roll holder<br />
· The toaster is supplied with an integrated bread roll holder.<br />
It is set up by turning the control knob in clockwise direction.<br />
· Two bread rolls can be made warm and crisp from both<br />
sides, each at a medium setting level. Bread rolls which are<br />
too dry can be moistened slightly to achieve better results.<br />
Crumb tray<br />
· Crumbs which drop during the toasting process will collect<br />
in the crumb tray. Pull the crumb tray out of the appliance<br />
for emptying.<br />
Cleaning and service<br />
· Before cleaning, disconnect the appliance from the mains<br />
and allow it to cool down. Use a hard brush to remove<br />
crumbs sticking to the grids and the heater. Do not tilt the<br />
appliance while you do this, or crumbs will spill from the<br />
crumb tray into the inside of the toaster. Then pull out the<br />
crumb tray, clean it and reinsert.<br />
· Never immerse the toaster in water. Clean the exterior only<br />
with a damp cloth and a little washing-up liquid. Do not<br />
use harsh or abrasive cleaning agents.<br />
For UK use only<br />
· This product is supplied with a 13 A plug conforming to BS<br />
1363 fitted to the mains lead. If the plug is unsuitable for<br />
your socket outlets or needs to be replaced, please note the<br />
following. If the plug is a non-rewireable one, cut it from<br />
the mains lead and immediately dispose of it. Never insert<br />
it into a socket outlet as there is a very great risk of an<br />
electric shock.<br />
· The replacement of the plug at the mains lead has to be<br />
done according to the following instructions:<br />
Warning - This appliance must be earthed<br />
· Important: The wires in this mains lead are coloured in<br />
accordance with the following code:<br />
· green/yellow Earth<br />
· blue Neutral<br />
· brown Live<br />
As the colours of the wires in the mains lead of this appliance<br />
may not correspond with the coloured markings identifying the<br />
terminals in your plug, proceed as follows:<br />
· the wire which is coloured green and yellow must be<br />
connected to the terminal which is marked with the letter<br />
E or by the earth symbol<br />
yellow,<br />
or coloured green or green and<br />
· the wire which is coloured blue must be connected to the<br />
terminal which is marked the letter N or coloured black,<br />
· the wire which is coloured brown must be connected to the<br />
terminal which is marked with the letter L or coloured red.<br />
· If a 13 A (BS 1363) plug is used it must be fitted with a 13<br />
A fuse conforming to BS 1362 and be ASTA approved. If any<br />
other type of plug is used, the appliance must be protected<br />
by a 10 A fuse either in the plug or adapter or at the<br />
distribution board.<br />
If in doubt - consult a qualified electrician.<br />
· Never use the plug without closing the fuse cover.<br />
10 11<br />
BAL_<strong>Toaster</strong>_BrandLoyalty_148x210_RZ.indd 10-11 20.04.11 16:02<br />
DE<br />
GB<br />
FR
· The appliance complies with the European directives<br />
2006/95/EC,2004/108/EC and 2005/32/EC.<br />
· This product may not be disposed of with the normal<br />
household waste at the end of its service life but must be<br />
delivered to a collecting point for recycling electrical and<br />
electronic appliances. The materials are reusable in accordance<br />
with their identification. You will make an important<br />
contribution to the protection of our environment by<br />
recycling used appliances.<br />
· Please ask about the responsible disposal point at your<br />
community offices.<br />
Subject to change<br />
12 13<br />
BAL_<strong>Toaster</strong>_BrandLoyalty_148x210_RZ.indd 12-13 20.04.11 16:02<br />
DE<br />
GB<br />
FR
Avant utilisation<br />
Lire attentivement le mode d‘emploi. Il contient des indications<br />
importantes pour l‘emploi, la sécurité et la maintenance de<br />
l‘appareil. Il doit être conservé soigneusement et redonné le cas<br />
échéant à l‘utilisateur ultérieur. L‘appareil ne pourra être utilisé<br />
que pour les besoins prévus conformément au mode d‘emploi. À<br />
l‘emploi, respecter les consignes de sécurité.<br />
Caractéristiques techniques<br />
Tension nominale: 220-240 V 50/60 Hz<br />
Consommation en courant: 800 W<br />
Classe de protection: I<br />
Consignes de sécurité<br />
· Ne raccorder l‘appareil qu‘à une prise de contact de sécurité<br />
installée conformément aux prescriptions. Le cordon<br />
d‘alimentation et la fiche doivent être secs.<br />
· L‘appareil ne doit pas être utilisé via une minuterie externe<br />
ou une télécommande.<br />
· Ne jamais laisser le grille-<strong>pain</strong> sans surveillance.<br />
· Ne pas tirer le cordon d‘alimentation sur des arêtes vives ou<br />
le coincer, ne pas le laisser pendre et le protéger contre la<br />
chaleur et l‘huile.<br />
· Ne pas placer l‘appareil sur des surfaces chaudes telles que<br />
des plaques de cuisson ou autres et ne pas l‘utiliser à proximité<br />
de flammes nues.<br />
· Ne pas utiliser le grille-<strong>pain</strong> sans tiroir ramasse-miettes<br />
inséré.<br />
· Ne pas retirer la fiche de la prise secteur en tirant sur le cordon<br />
d‘alimentation ou avec des mains humides.<br />
· Cet appareil n‘est pas conçu pour être utilisé par des personnes<br />
(y compris des enfants) dont les facultés physiques,<br />
sensorielles ou mentales sont restreintes ou manquant<br />
d‘expérience et/ou de connaissances, sauf si elles sont sous<br />
surveillance d‘une personne responsable de leur sécurité ou<br />
si elles ont reçu des instructions sur l‘emploi de l‘appareil.<br />
· Veillez à ce que les enfants n‘aient pas la possibilité de jouer<br />
avec l‘appareil.<br />
· Ne pas mettre l‘appareil en service voire retirer immédiatement<br />
la fiche secteur si :<br />
· l‘appareil ou le cordon d‘alimentation<br />
est endommagé<br />
· vous soupçonnez une défaillance après une<br />
chute ou autres.<br />
Dans ces cas, faire réparer l‘appareil.<br />
· En insérant le toast, veillez à ne pas coincer la tranche de<br />
<strong>pain</strong>. Si cela se produit malgré tout, retirer d‘abord la fiche<br />
secteur et éliminer ensuite le problème.<br />
· Attention: Les tranches de <strong>pain</strong> peuvent brûler dans le<br />
grille-<strong>pain</strong>. C‘est la raison pour laquelle il ne faut pas utiliser<br />
l‘appareil à proximité ou sous des objets inflammables<br />
(p. ex. rideaux, éléments suspendus) et qu‘il faut toujours le<br />
surveiller.<br />
· Prudence, Risque de brûlure: La température des surfaces de<br />
contact peut être très élevée.<br />
· Ne pas mettre les doigts ou des objets tels que fourchette,<br />
couteau ou autres dans les fentes du gril.<br />
· N‘utiliser le grille-<strong>pain</strong> qu‘en position verticale et libre.<br />
· Ne pas recouvrir les fentes pendant que le <strong>pain</strong> est dans le<br />
gril. Ne pas poser de tranche de <strong>pain</strong> ou de petit <strong>pain</strong> sur la<br />
carcasse, car ceci entraîne la surchauffe de l‘appareil.<br />
· Il faut retirer la fiche secteur:<br />
· en cas de dysfonctions pendant le fonctionnement<br />
· avant chaque nettoyage et entretien<br />
· après l‘emploi.<br />
· Ne pas plonger le grille-<strong>pain</strong> dans l‘eau.<br />
· En cas de détournement de sa destination, de fausse manipulation<br />
ou de réparation non conforme, aucune responsabilité<br />
pour d‘éventuels dommages ne sera prise. De même<br />
les prestations de garantie sont exclues dans de tels cas.<br />
· L‘appareil n‘est pas conçu pour un emploi commercial.<br />
· Si le cordon d‘alimentation de cet appareil est endommagé,<br />
il doit être remplacé par la centrale service client du fabricant<br />
ou une personne de qualification similaire. Les réparations<br />
incorrectes peuvent générer des dangers considérables<br />
pour l‘utilisateur.<br />
Mise en service<br />
· La longueur du cordon d‘alimentation qui n‘est pas utilisée<br />
peut être enroulée autour du fond. Raccorder la fiche<br />
secteur à une prise de courant de sécurité.<br />
· Avant le premier emploi, faire fonctionner le grille-<strong>pain</strong> au<br />
moins 3 fois sans <strong>pain</strong> au réglage maximum afin d‘éliminer<br />
la couche de protection de la surface des éléments chauffants.<br />
Les odeurs qui émanent alors ne sont pas dangereuses<br />
mais il vaut mieux bien aérer. Avant chaque branchement,<br />
laisser un peu refroidir l‘appareil.<br />
· Poser les tranches de toast dans la fente. Elles ne doivent<br />
pas être plus épaisses que 22 mm afin qu‘elles ne se coincent<br />
pas. Placer les petites tranches de chant l‘une à côté de<br />
l‘autre dans une fente, vous pourrez ainsi mieux les sortir du<br />
grille-<strong>pain</strong>.<br />
14 15<br />
BAL_<strong>Toaster</strong>_BrandLoyalty_148x210_RZ.indd 14-15 20.04.11 16:02<br />
DE<br />
GB<br />
FR
STOP<br />
· Placer d‘abord le coulisseau de réglage du degré de dorage<br />
au niveau 3. Presser la touche élévation vers le bas.<br />
L‘appareil se branche et l‘élévateur de <strong>pain</strong> est maintenu<br />
jusqu‘à ce que l‘appareil se débranche automatiquement à<br />
la fin du temps de dorage et que le toast doré sorte de la<br />
fente pour être repris.<br />
Sortir le toast<br />
· Pour pouvoir mieux saisir les tranches, l‘élévateur de <strong>pain</strong><br />
peut être soulevé. Il suffit de pousser la touche d‘élévation<br />
vers le haut.<br />
Remarques sur le degré de dorage<br />
· Si le toast est trop clair - choisir un réglage plus élevé. Si<br />
le toast est trop foncé, régler le régulateur à un niveau<br />
plus bas. Les chiffres 1 à 7 ne sont que des références<br />
d‘orientation. Plus le réglage est élevé, plus le dorage est<br />
foncé.<br />
· Le résultat peut être différent pour le même réglage en<br />
fonction de la sorte de <strong>pain</strong>, de sa taille, de sa teneur en humidité<br />
et de l‘épaisseur des tranches. C‘est pourquoi choisir<br />
un réglage plus faible pour du <strong>pain</strong> peu humide, de petites<br />
tranches et aussi pour ne griller qu‘une seule tranche.<br />
· Si vous ne grillez qu‘une seule tranche, le dorage sur la face<br />
intérieure sera un peu plus intensif.<br />
De l‘acrylamide se forme de façon plus intensive si le dorage<br />
est trop important. C‘est pourquoi il faut éviter un brunissage<br />
trop intensif en faisant son toast.<br />
Interruption de l‘opération<br />
· Pour interrompre l‘opération prématurément, on peut<br />
enfoncer la touche lumineuse.<br />
Réchauffer / griller encore plus<br />
· Si immédiatement après le branchement de l‘appareil, vous<br />
enfoncez la touche de réchauffement, le toast qui sera déjà<br />
refroidi sera à nouveau réchauffé et croustillant indépendamment<br />
du degré de dorage réglé et le <strong>pain</strong> trop clair sera<br />
grillé encore plus.<br />
Décongeler<br />
· Si vous enfoncez cette touche immédiatement après le<br />
branchement, l‘opération sera prolongée automatiquement<br />
pour griller du <strong>pain</strong> congelé.<br />
Support petits <strong>pain</strong>s<br />
· Le grille-<strong>pain</strong> est muni d‘un support petits <strong>pain</strong>s intégré.<br />
Pour le positionner, il faut tourner le bouton rotatif dans le<br />
sens des aiguilles d‘une montre.<br />
· Deux petits <strong>pain</strong>s peuvent être réchauffés des deux côtés<br />
à un réglage moyen à chaque fois. Humidifier un peu au<br />
préalable les petits <strong>pain</strong>s trop secs, ils seront alors bien<br />
croustillants.<br />
Tiroir ramasse-miettes<br />
· Les miettes qui se produisent durant la grillade, tombent<br />
dans le tiroir ramasse-miettes. Il faut le retirer de l‘appareil<br />
pour le vider.<br />
Nettoyage et entretien<br />
· Avant le nettoyage, retirer la fiche secteur et laisser refroidir<br />
l‘appareil. Enlever les miettes attachées aux grilles et au<br />
chauffage dans la fente à l‘aide d‘un pinceau dur. Ne pas<br />
incliner l‘appareil, sinon le tiroir ramasse-miettes se videra<br />
à l‘intérieur de l‘appareil. Sortir ensuite le tiroir, le nettoyer<br />
et le replacer. Ne jamais plonger le grille-<strong>pain</strong> dans l‘eau. Ne<br />
nettoyer l‘extérieur de l‘appareil qu‘avec un chiffon humide<br />
et un peu de produit vaisselle. Ne pas utiliser de nettoyant<br />
corrosif et abrasif.<br />
· Cet appareil est conforme aux directives européennes<br />
2006/95/CE, 2004/108/CE et 2005/32/CE.<br />
· À la fin de sa durée de vie, ce produit ne doit pas être<br />
éliminé par la voie des déchets ménagers normaux mais<br />
il doit être remis à un point de collecte pour le recyclage<br />
d‘appareils électriques et électroniques.<br />
· Les matériaux sont recyclables conformément à leu caractérisation.<br />
Vous fournissez une contribution importante au<br />
niveau de la protection de notre environnement grâce au<br />
recyclage, à l‘exploitation des substances ou d‘autres formes<br />
de récupération de vieux appareils.<br />
· Demandez à votre administration communale où se trouve<br />
le lieu d‘élimination adéquat.<br />
Sous réserve de modifications<br />
16 17<br />
BAL_<strong>Toaster</strong>_BrandLoyalty_148x210_RZ.indd 16-17 20.04.11 16:02<br />
DE<br />
GB<br />
FR
18 19<br />
BAL_<strong>Toaster</strong>_BrandLoyalty_148x210_RZ.indd 18-19 20.04.11 16:02
WMF is a registered trademark of WMF AG used<br />
under license by Brand Loyalty Sourcing B.V.<br />
WMF ist eine eingetragene Marke der WMF<br />
Württembergische Metallwarenfabrik AG, die<br />
unter Lizenz von Brand Loyalty B.V. genutzt wird.<br />
Brand Loyalty Sourcing B.V., Het Zuiderkruis 1,<br />
5215 MV, ‘s-Hertogenbosch, The Netherlands.<br />
www.brandloyalty-int.com<br />
printed 07/11 V2<br />
BAL_<strong>Toaster</strong>_BrandLoyalty_148x210_RZ.indd 20 20.04.11 16:02