manuel d'utilisation - Evolution Power Tools
manuel d'utilisation - Evolution Power Tools
manuel d'utilisation - Evolution Power Tools

You also want an ePaper? Increase the reach of your titles
YUMPU automatically turns print PDFs into web optimized ePapers that Google loves.
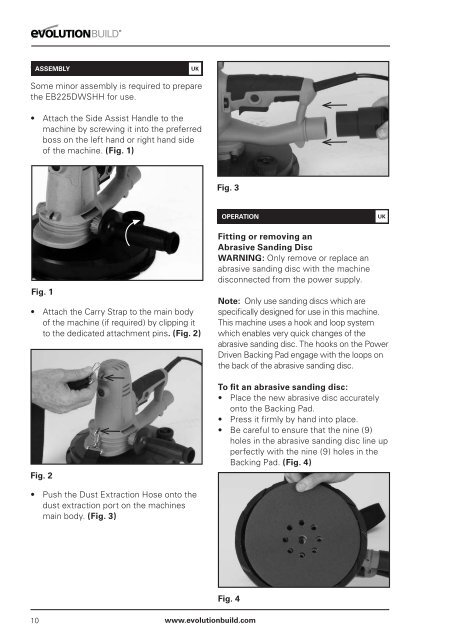
ASSEMBLY<br />
Some minor assembly is required to prepare<br />
the EB225DWSHH for use.<br />
• Attach the Side Assist Handle to the<br />
machine by screwing it into the preferred<br />
boss on the left hand or right hand side<br />
of the machine. (Fig. 1)<br />
Fig. 1<br />
• Attach the Carry Strap to the main body<br />
of the machine (if required) by clipping it<br />
to the dedicated attachment pins. (Fig. 2)<br />
Fig. 2<br />
• Push the Dust Extraction Hose onto the<br />
dust extraction port on the machines<br />
main body. (Fig. 3)<br />
10<br />
BUILD ®<br />
ASSEMBLY UK<br />
Fig. 3<br />
OPERATION<br />
www.evolutionbuild.com<br />
OPERATION UK<br />
Fitting or removing an<br />
Abrasive Sanding Disc<br />
WARNING: Only remove or replace an<br />
abrasive sanding disc with the machine<br />
disconnected from the power supply.<br />
Note: Only use sanding discs which are<br />
specifically designed for use in this machine.<br />
This machine uses a hook and loop system<br />
which enables very quick changes of the<br />
abrasive sanding disc. The hooks on the <strong>Power</strong><br />
Driven Backing Pad engage with the loops on<br />
the back of the abrasive sanding disc.<br />
To fit an abrasive sanding disc:<br />
• Place the new abrasive disc accurately<br />
onto the Backing Pad.<br />
• Press it firmly by hand into place.<br />
• Be careful to ensure that the nine (9)<br />
holes in the abrasive sanding disc line up<br />
perfectly with the nine (9) holes in the<br />
Backing Pad. (Fig. 4)<br />
Fig. 4