KL 1500 LCD
KL 1500 LCD
KL 1500 LCD

Create successful ePaper yourself
Turn your PDF publications into a flip-book with our unique Google optimized e-Paper software.
Titel_<strong>KL</strong><strong>1500</strong><strong>LCD</strong>_Gebrauch_RZ.fh8 28.06.2001 11:05 Uhr Seite 2<br />
BUSINESS GROUP OPTO-ELECTRONICS<br />
FIBER OPTICS DIVISION<br />
COLD LIGHT SOURCES<br />
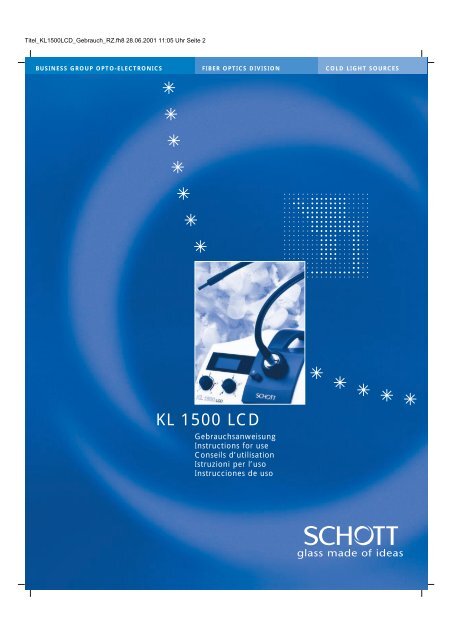
<strong>KL</strong> <strong>1500</strong> <strong>LCD</strong><br />
Gebrauchsanweisung<br />
Instructions for use<br />
Conseils d’utilisation<br />
Istruzioni per l’uso<br />
Instrucciones de uso
Blindtext<br />
<strong>KL</strong> <strong>1500</strong> <strong>LCD</strong><br />
2.1 Lichtleiteranschluß<br />
9<br />
Zunächst die Lichtleiteraufnahme (2)<br />
öffnen, indem der äußere, schwarze 5<br />
Ring gegen den Uhrzeigersinn gedreht<br />
wird. Den Lichtleiter bis zum Anschlag<br />
einschieben und Lichtleiteraufnahme<br />
schließen.<br />
4<br />
6<br />
14<br />
3<br />
2<br />
7<br />
13<br />
10<br />
8<br />
11<br />
1<br />
16<br />
15<br />
12<br />
3<br />
Übersicht <strong>LCD</strong>-Anzeige<br />
Overview of the <strong>LCD</strong> display<br />
Vue d’ensemble de l’affichage <strong>LCD</strong><br />
Display a cristalli liquidi<br />
Detalle de la visualización por cristal líquido<br />
17<br />
18<br />
19
SCHOTT GLAS<br />
Geschäftsbereich Faseroptik<br />
Otto-Schott-Straße 2<br />
D-55127 Mainz<br />
EG-Konformitätserklärung<br />
Die Kaltlichtquellen<br />
EC Declaration of Conformity<br />
The Cold Light Sources<br />
<strong>KL</strong> <strong>1500</strong> <strong>LCD</strong>, <strong>KL</strong> 2500 <strong>LCD</strong><br />
erfüllen die Bestimmungen folgender Richtlinien des<br />
Rates der Europäischen Gemeinschaft:<br />
●<br />
●<br />
EMV-Richtlinie 89/336/EWG<br />
Niederspannungs-Richtlinie 73/23/EWG<br />
Die Lichtquellen sind für den Betrieb mit Nennspannung<br />
230 V ausgelegt:<br />
Durch die technische Dokumentation und die vollständige<br />
Einhaltung folgender Normen wird die Übereinstimmung<br />
der Kaltlichtquellen mit den grundlegenden<br />
Anforderungen der Richtlinien nachgewiesen:<br />
● DIN EN 60601-1-2: 1994<br />
Abschnitt/Clause 36 (EMV/EMC)<br />
● DIN EN 61000-3-2: 1998<br />
● DIN EN 61000-3-3: 1996<br />
● EN 50082-1: 1997<br />
● EN 55011: 1991 + A1: 1997 + A2: 1996<br />
● ENV 50204: 1996<br />
Das VDE Prüf- und Zertifizierungsinstitut (EU-Kenn-Nr.<br />
0366), Merianstr. 28, D-63069 Offenbach, hat die Produkte<br />
geprüft und zertifiziert.<br />
Die Kaltlichtquellen tragen<br />
das CE-Konformitätskennzeichen<br />
sowie die geschützten Prüfzeichen<br />
conform with the following European Directives<br />
● EMC Directive 89/336/EEC<br />
● Low Voltage Directive 73/23/EEC<br />
The light sources are designed for use with a nominal<br />
voltage of 230 V<br />
The technical documentation and full compliance<br />
with the standards listed below proves the conformity<br />
with the essential requirements of the above-mentioned<br />
EC Directives:<br />
● DIN EN 60601-1: 1996<br />
(VDE 0750 Teil 1)<br />
● EN 60601-1: 1990 + A1:1993 + A2:1995<br />
● IEC 601-1: 1988 + A1: 1991 + A2: 1995<br />
● DIN EN 61010-1: 1994 + A2: 1996<br />
(VDE 0411 Teil 1 + A1)<br />
● IEC 1010-1: 1990 + A1: 1992 + A2: 1995<br />
The VDE Testing and Certification Institute (EU-Identification<br />
No. 0336), Merianstr. 28, D-63069 Offenbach, has tested<br />
and certified the products.<br />
The Cold Light Sources bear<br />
the CE Conformity Mark as well as<br />
the legally protected Certification Marks<br />
Wiesbaden, August 2000<br />
ppa.<br />
Dr. U. Pohl<br />
Geschäftsbereich Faseroptik<br />
Bereichsleiter/Vice President<br />
ppa.<br />
A. Hagemann<br />
Geschäftsbereich Faseroptik<br />
Bereichsleiter/Vice President<br />
3
Inhalt<br />
D<br />
Seite<br />
1 Wichtige Hinweise<br />
(Sicherheitshinweise) 6<br />
2 Betrieb 7<br />
2.1 Lichtleiteranschluß 7<br />
2.2 Inbetriebnahme 7<br />
2.3 Lichtstärkeeinstellung 7<br />
2.4 Zusatzoptik 9<br />
2.5 Filterschieber 9<br />
3 Lampenwechsel 10<br />
4 Wartung 10<br />
5 Beheben von Störungen 10<br />
6 Zubehör 11<br />
7 Technische Daten 11<br />
Contents<br />
GB<br />
F<br />
Table des matières<br />
Page<br />
1 Important information<br />
(Safety information) 14<br />
2 Operation 15<br />
2.1 Light guide connection 15<br />
2.2 Start-up procedure 15<br />
2.3 Light intensity setting 15<br />
2.4 Supplementary optics 17<br />
2.5 Filter slide 17<br />
3 Replacing the lamp 18<br />
4 Maintenance 18<br />
5 Troubleshooting 18<br />
6 Accessories 19<br />
7 Technical data 19<br />
Page<br />
1 Remarques importantes<br />
(Conseils de sécurité) 22<br />
2 Mode de fonctionnement 23<br />
2.1 Raccordement du conducteur 23<br />
de lumière<br />
2.2 Mise en service 23<br />
2.3 Réglage de l’intensité<br />
lumineuse 23<br />
2.4 Optique supplémentaire 25<br />
2.5 Coulisse porte-filtre 25<br />
3 Remplacement de la lampe 26<br />
4 Entretien 26<br />
5 Dépannage 26<br />
6 Accessoires 27<br />
7 Caractéristiques techniques 27<br />
I<br />
Indice<br />
Pagina<br />
1 Avvertenze importanti<br />
(Avvertenze per la sicurezza) 30<br />
2 Funzionamento 31<br />
2.1 Collegamento della guidaluce 31<br />
2.2 Messa in funzione 31<br />
2.3 Regolazione dell’intensità<br />
luminosa 31<br />
2.4 Ottica supplementare 33<br />
2.5 Portafiltro a cassetto 33<br />
3 Sostituzione della lampada 34<br />
4 Manutenzione 34<br />
5 Risoluzione di problemi 34<br />
6 Accessori 35<br />
7 Dati tecnici 35<br />
E<br />
Contenido Página<br />
1 Advertencias importantes<br />
(Advertencias de seguridad) 38<br />
2 Operación 39<br />
2.1 Conexión del conductor de luz 39<br />
2.2 Puesta en servicio 39<br />
2.3 Ajuste de la intensidad de luz 39<br />
2.4 Instrumentos opticos<br />
suplementarios 41<br />
2.5 Corredera de filtros 41<br />
3 Recambio de la lámpara 42<br />
4 Mantenimiento 42<br />
5 Eliminación de fallos 42<br />
6 Accesorios 43<br />
7 Datos técnicos 43<br />
D<br />
GB<br />
F<br />
I<br />
E<br />
3
Geräteübersicht<br />
1<br />
2<br />
3<br />
4<br />
5<br />
6<br />
7<br />
8<br />
9<br />
10<br />
11<br />
12<br />
13<br />
14<br />
15<br />
16<br />
17<br />
18<br />
19<br />
Netzschalter 2.2<br />
Lichtleiteraufnahme 2.1<br />
Elektronische Lichtstärkeeinstellung 2.3<br />
Mechanische Lichtstärkeeinstellung 2.3<br />
<strong>LCD</strong>-Anzeige<br />
Schwenkhebel für Zusatzoptik 2.4<br />
Filterschieber 2.5<br />
Netzkabel<br />
Tragegriff<br />
Lampenfach mit Halogen-Kaltlicht-Reflektorlampe 3<br />
Entriegelungsknopf für Lampenfach 3<br />
Belüftungsöffnungen (Gerätefrontseite) 1<br />
Belüftungsöffnungen (Geräteseitenteil) 1<br />
Abluftgitter (Geräterückseite) 1<br />
Sicherung (Geräteboden) 5<br />
Typenschild (Geräteboden)<br />
Farbtemperatur-Anzeige 2.3<br />
Fehlerstatus-Anzeige 5<br />
Hinweis auf maximale Lichtstärke 2.3<br />
5
1 Wichtige Hinweise<br />
Verwendete Symbole:<br />
Warnung vor einer Gefahrenstelle<br />
(Achtung, Dokumentation<br />
beachten)<br />
Warnung vor heißer Oberfläche<br />
Gerät der Schutzklasse II<br />
Aus (Trennung vom Netz)<br />
I Ein (Verbindung mit dem Netz)<br />
Hinweis auf maximale Lichtstärke<br />
Bestimmungsgemäßer Gebrauch:<br />
Die Kaltlichtquelle <strong>KL</strong> <strong>1500</strong> <strong>LCD</strong> ist<br />
für den Einsatz in Industrie und Labor<br />
vorgesehen.<br />
Kaltlichtquellen dienen der intensiven<br />
Beleuchtung von Objekten aller Art.<br />
Die Infrarotanteile der Lampenstrahlung<br />
werden ausgefiltert. Sichtbares<br />
Licht hoher Intensität wird durch flexible<br />
oder selbsttragende bewegliche<br />
Lichtleiter zum Objekt geführt.<br />
Das Gerät ist geprüft und zertifiziert<br />
nach den geltenden Normen über elektrische<br />
Laborgeräte (DIN EN 61010-1<br />
bzw. UL 3101-1), die 230V-Version zusätzlich<br />
nach der Norm über medizinische<br />
elektrische Geräte (DIN EN 60601-1).<br />
Sicherheitshinweise:<br />
Bitte lesen und beachten Sie diese<br />
Gebrauchsanweisung sorgfältig. Die<br />
Sicherheit des Gerätes ist bei Nichtbeachtung<br />
nicht gewährleistet.<br />
Vermeiden Sie bei eingeschalteter<br />
Lichtquelle den direkten Einblick in die<br />
offene Spannhülse oder den Lichtleiterausgang.<br />
Von der <strong>KL</strong> <strong>1500</strong> <strong>LCD</strong> geht sichtbares<br />
Licht hoher Intensität aus. Da lichtabsorbierende<br />
Materialien die physikalische<br />
Eigenschaft haben, auftreffendes<br />
Licht in Wärme umzuwandeln, können<br />
an wärmeempfindlichen oder entzündbaren<br />
lichtabsorbierenden Materialien<br />
Schädigungen auftreten. Zur Vermeidung<br />
solcher thermischer Schäden und<br />
möglicher Brand- bzw. Verbrennungsgefahr<br />
beachten Sie bitte folgende<br />
Hinweise:<br />
➧ Decken Sie die offene Spannhülse<br />
oder den Lichtleiterausgang nie ab<br />
(Brandgefahr)!<br />
➧ Bedecken Sie die offene Spannhülse<br />
oder den Lichtleiterausgang nie mit<br />
der Hand oder anderen Körperteilen<br />
(Verbrennungsgefahr)!<br />
➧ Bei der Beleuchtung wärmeempfindlicher<br />
oder entzündbarer lichtabsorbierender<br />
Objekte (z. B. in der Mikroskopie)<br />
ist besonders darauf zu<br />
achten, Lichtleiterabstand und Lampenhelligkeit<br />
so zu wählen, daß am<br />
Objekt keine thermischen Schädigungen<br />
auftreten.<br />
➧ Alle nicht im Arbeitsvorgang verwendeten<br />
Lichtleiterausgänge müssen<br />
sich bei eingeschalteter Lichtquelle<br />
stets in einem sicheren Abstand -<br />
mindestens 10 cm - von wärmeempfindlichen<br />
oder entzündbaren lichtabsorbierenden<br />
Materialien befinden<br />
(Vermeidung möglicher Brandgefahr).<br />
Achten Sie daher bei jenen Lichtleiterausgängen<br />
auf obigen sicheren<br />
Abstand von z. B. dunklen/farbigen<br />
Textilien und dunklen/farbigen Holzoder<br />
Kunststoffoberflächen.<br />
➧ Um eine unnötige Belastung biologischen<br />
Gewebes durch Beleuchtung<br />
mit sichtbarem Licht zu vermeiden,<br />
reduzieren Sie die Helligkeit und<br />
Dauer der Beleuchtung auf das unbedingt<br />
erforderliche Maß.<br />
Bitte achten Sie unbedingt darauf, daß:<br />
➧ Ihre Kaltlichtquelle <strong>KL</strong> <strong>1500</strong> <strong>LCD</strong> mit<br />
der auf dem Typenschild (16) angegebenen<br />
Spannung betrieben wird;<br />
➧ unbedingt alle Lüftungsöffnungen<br />
(12, 13, 14) freigehalten werden;<br />
bei unzureichender Kühlung schaltet<br />
ein integrierter Thermoschalter das<br />
Gerät vorübergehend aus (siehe<br />
Punkt 5 „Beheben von Störungen“);<br />
➧ die Lampe vor dem Austauschen<br />
abgekühlt ist; zu Ihrer Erinnerung<br />
ist in der Tür des Lampenfachs ein<br />
Warnzeichen angebracht:<br />
Warnung vor heißer Oberfläche;<br />
➧ Filterschieber und Einlegefilter vor<br />
der Entnahme des Einlegefilters<br />
abgekühlt sind; der Schieber ist<br />
mit dem Warnzeichen versehen;<br />
➧ sich der Filterschieber beim Betrieb<br />
der Lichtquelle grundsätzlich in<br />
einer der beiden Endpositionen oder<br />
der Raststellung befindet (siehe<br />
Punkt 2.5 „Filterschieber“)!<br />
■ Die Lichtquelle ist nur für den<br />
Betrieb in trockenen Räumen entwickelt<br />
worden (siehe Punkt 7 „Technische<br />
Daten“).<br />
■ Dieses Gerät ist nicht für den Betrieb<br />
in explosionsgefährdeten Bereichen<br />
geeignet.<br />
■ Eine sichere Trennung vom Stromversorgungsnetz<br />
erfolgt auch durch<br />
Ziehen des Netzsteckers.<br />
■ Das Gerät darf nicht geöffnet oder<br />
demontiert werden. Technische<br />
Änderungen am Gerät sind zu<br />
unterlassen. Reparaturen dürfen nur<br />
durch den Hersteller oder von ihm<br />
autorisierte Kundendienststellen<br />
durchgeführt werden.<br />
■ Bitte gewährleisten Sie jedem Bediener<br />
des Gerätes den raschen Zugriff<br />
auf diese Gebrauchsanweisung.<br />
■ Für Schäden, die durch Nichtbeachtung<br />
dieser Gebrauchsanweisung<br />
entstehen, haftet der Hersteller nicht.<br />
D<br />
6
2 Betrieb<br />
2.1 Lichtleiteranschluß<br />
Zunächst die Lichtleiteraufnahme (2)<br />
öffnen, indem der äußere, schwarze<br />
Ring gegen den Uhrzeigersinn gedreht<br />
wird. Den Lichtleiter bis zum Anschlag<br />
einschieben und Lichtleiteraufnahme<br />
schließen.<br />
▼<br />
2.2 Inbetriebnahme<br />
Ein-/Ausschalten durch Betätigung des<br />
Netzschalters (1).<br />
Stellung : Das Gerät ist ausgeschaltet.<br />
Stellung I : Das Gerät ist eingeschaltet.<br />
Die <strong>KL</strong> <strong>1500</strong> <strong>LCD</strong> ist zur Schonung der<br />
Halogenlampe mit einem Sanftanlauf<br />
ausgerüstet, der den sonst üblichen<br />
hohen Einschaltstrom reduziert.<br />
Zusätzlich sorgt eine elektronische<br />
Stabilisierung der Lampenspannung für<br />
stabile Lichtleistung, unabhängig von<br />
netzseitigen Schwankungen.<br />
▼<br />
2.3 Lichtstärkeeinstellung<br />
Die <strong>KL</strong> <strong>1500</strong> <strong>LCD</strong> ist mit zwei voneinander<br />
unabhängigen Lichtstärkeeinstellmöglichkeiten<br />
ausgestattet.<br />
Die stufenlose elektronische Einstellung<br />
ermöglicht Ihnen, die Lampenlebensdauer<br />
zu optimieren - durch die<br />
genaue Einstellung der von Ihnen<br />
benötigten Helligkeit erreichen Sie die<br />
für Ihre Anwendung größtmögliche<br />
Lebensdauer der Halogenlampe.<br />
Bei Veränderung der Lichtstärke ändert<br />
sich auch die Farbtemperatur des abgestrahlten<br />
Lichtes.<br />
Die mechanische Einstellung ermöglicht<br />
die stufenlose Änderung der Lichtstärke<br />
bei konstanter Farbtemperatur.<br />
Achtung:<br />
Beim Einsetzen von Lichtleitern mit<br />
Führungsstift ist darauf zu achten,<br />
daß dieser in einen der vier Spannzangenschlitze<br />
gesteckt wird.<br />
7
2.3.1 Elektronische Einstellung<br />
2.3.2 Mechanische Blende<br />
D<br />
Durch Drehen des Lichtstärkestellers<br />
(3) kann die Helligkeit stufenlos<br />
eingestellt werden.<br />
Zwischen den beiden Endstellungen<br />
des Einstellknopfes sind vier deutliche<br />
Rastpunkte angebracht.<br />
Diese markieren feste Positionen<br />
und gewährleisten so die Reproduzierbarkeit<br />
vorgewählter Helligkeitseinstellungen.<br />
▼<br />
In Position 6 wird die Halogenlampe<br />
mit Nennspannung betrieben, die<br />
Lampe erreicht etwa die vom Lampenhersteller<br />
angegebene Nennlebensdauer<br />
(typabhängig).<br />
Auf der <strong>LCD</strong>-Anzeige (5) wird die<br />
ungefähre Farbtemperatur des von der<br />
Halogenlampe abgestrahlten Lichtes<br />
angezeigt (17). Durch Drehen des<br />
Lichtstärkestellers (3) kann die Farbtemperatur<br />
des Lichtes eingestellt werden<br />
(Schrittweite 50 K).<br />
Nach Überschreiten der Barriere bei<br />
Position 5 erscheint auf der <strong>LCD</strong>-<br />
Anzeige ein Lampensymbol (19), das<br />
in den ersten Sekunden blinkt. Es dient<br />
als Maximallicht-Anzeige und weist<br />
darauf hin, daß die zu erwartende<br />
Lampenlebensdauer gegenüber der<br />
Stellung 5 herabgesetzt ist.<br />
Durch Drehen am Einstellknopf der<br />
mechanischen Blende (4) kann die<br />
Lichtstärke unter Beibehaltung der<br />
Farbtemperatur stufenlos verändert<br />
werden.<br />
Zwei feste Endanschläge und drei<br />
zusätzliche Rastpunkte (gekennzeichnet<br />
mit den Buchstaben A bis E) erlauben,<br />
definierte Blendenstellungen reproduzierbar<br />
anzuwählen.<br />
▼<br />
▼<br />
Die geringste Lichtstärke ergibt sich in<br />
Position 1, maximale Helligkeit wird in<br />
Position 6 erreicht. Die beiden<br />
Barrieren bei den Positionen 4 und 5<br />
werden durch Drücken des Einstellknopfes<br />
überwunden.<br />
Der Einstellknopf kann nicht über die<br />
Endanschläge 1 bzw. 6 hinausgedreht<br />
werden.<br />
Die Lebensdauer der Lampe beträgt in<br />
Position 4 etwa <strong>1500</strong> h und in<br />
Position 5 etwa 150 h.<br />
In Position A ergibt sich die geringste<br />
Helligkeit, in Position E (vollständig<br />
geöffnete Blende) wird die maximale<br />
Helligkeit erreicht. Das Drehen des<br />
Einstellknopfes von einem Rastpunkt<br />
zum nächsten bewirkt jeweils eine<br />
ungefähre Verdoppelung bzw. Halbierung<br />
der Lichtstärke.<br />
Der Einstellknopf kann nicht über die<br />
Endanschläge A bzw. E hinausgedreht<br />
werden.<br />
8
2.4 Zusatzoptik<br />
Das Einschwenken der Zusatzoptik<br />
gewährleistet, daß auch bei Verwendung<br />
von Lichtleitern geringeren<br />
Bündeldurchmessers eine gleichmäßige,<br />
lichtstarke Ausleuchtung erreicht<br />
wird.<br />
Wird die Beleuchtung mit abbildenden<br />
oder fokussierenden optischen Systemen<br />
am Lichtleiterausgang durchgeführt,<br />
so erhält man eine optimal<br />
gleichmäßige Ausleuchtung durch<br />
Ausschwenken der Zusatzoptik.<br />
Position - Zusatzoptik eingeschwenkt:<br />
gleichmäßige Beleuchtung ohne optische<br />
Systeme am Lichtleiterausgang.<br />
Position - Zusatzoptik ausgeschwenkt:<br />
gleichmäßige Beleuchtung mit optischen<br />
Systemen am Lichtleiterausgang.<br />
Die Zusatzoptik muß immer bis zum<br />
Endanschlag ein- bzw. ausgeschwenkt<br />
werden.<br />
2.5 Filterschieber<br />
Die <strong>KL</strong> <strong>1500</strong> <strong>LCD</strong> verfügt über einen<br />
Filterschieber (7), der mit einem Einlegefilter<br />
(als Zubehör erhältlich) bestückt<br />
werden kann.<br />
Das Warnzeichen auf dem Filterschieber<br />
erinnert Sie daran, daß sich<br />
der Schieber beim Betrieb der Lichtquelle<br />
grundsätzlich in einer der beiden<br />
Endpositionen oder der Raststellung<br />
befinden muß.<br />
Nur so ist die optimale Luftkühlung der<br />
Lichtquelle gewährleistet.<br />
Das Betreiben der Lichtquelle in einer<br />
Zwischenstellung des Filterschiebers<br />
kann zur Beschädigung desselben<br />
führen.<br />
▼<br />
2.5.1 Bestückung des Filterschiebers<br />
Bitte achten Sie darauf, daß der Filterschieber<br />
vor der Bestückung mit dem<br />
Einlegefilter abgekühlt ist.<br />
Zu Ihrer Erinnerung ist das Warnzeichen<br />
angebracht.<br />
Filterschieber (7) bis zum Endanschlag<br />
herausziehen und den gewünschten<br />
Filter einlegen. In dieser Position ist die<br />
Lichtquelle voll betriebsbereit.<br />
Beim Eindrücken des Filterschiebers<br />
bis zum Anschlag befindet sich der<br />
Filter im optischen Strahlengang.<br />
Möchten Sie die Lichtquelle kurzzeitig<br />
ohne Filter betreiben, so ziehen Sie den<br />
Schieber nur bis zum Rastpunkt heraus.<br />
Der Filter befindet sich in dieser Position<br />
noch in der Lichtquelle, jedoch nicht<br />
mehr im Strahlengang.<br />
▼<br />
9
3 Lampenwechsel<br />
4 Wartung<br />
5 Beheben von Störungen<br />
D<br />
Bitte achten Sie darauf, daß Lampe<br />
und Lampenfassung vor dem Austauschen<br />
abgekühlt sind.<br />
Zu Ihrer Erinnerung ist das entsprechende<br />
Warnzeichen angebracht.<br />
▼<br />
Ihre <strong>KL</strong> <strong>1500</strong> <strong>LCD</strong> ist wartungsfrei.<br />
Eine Desinfektion der Lichtquelle bei<br />
Anwendung im medizinischen Bereich<br />
ist nicht erforderlich und deshalb auch<br />
nicht vorgesehen.<br />
Zur äußerlichen Reinigung des Gerätes<br />
verwenden Sie ein weiches, trockenes<br />
Tuch oder handelsübliche Kunststoff-<br />
Reinigungstücher.<br />
Das Display verfügt über eine<br />
Fehlerstatus-Anzeige (18). Eventuelle<br />
Störungen können schnell und sicher<br />
erkannt werden.<br />
„Err 1“:<br />
„Err 2“:<br />
Lampenstromkreis unterbrochen.<br />
Temperaturwächter hat<br />
angesprochen.<br />
„Err 3“:<br />
Kurzschluß im Lampenstromkreis,<br />
elektronische Sicherung<br />
hat angesprochen.<br />
▼<br />
Zunächst die Lichtquelle ausschalten.<br />
Lampenfach (10) durch Drücken des<br />
Entriegelungsknopfes (11) öffnen und<br />
bis zum Anschlag herausziehen.<br />
Die beiden Hebel des Spezialsockels<br />
herunterdrücken und die defekte<br />
Lampe herausziehen.<br />
Beim Einsetzen der neuen Lampe<br />
müssen die beiden Hebel ebenfalls heruntergedrückt<br />
werden. Lampenfach bis<br />
zur Arretierung einschieben (hörbares<br />
Einrasten). Lichtquelle einschalten.<br />
Art der Störung Mögliche Ursache Behebung<br />
Lampe aus, Lüfter aus, Gerät nicht eingeschaltet Gerät einschalten<br />
keine <strong>LCD</strong>-Anzeige Stecker nicht in Steckdose Stecker einstecken<br />
Keine Netzspannung<br />
Netzspannung prüfen<br />
Lampenfach nicht geschlossen Lampenfach schließen<br />
Sicherung defekt<br />
Sicherung (15) austauschen<br />
Trafo überhitzt<br />
Ausreichende Kühlung<br />
sicherstellen, auf richtigen<br />
Lampentyp prüfen, Gerät<br />
nach längerer Abkühlung<br />
wieder in Betrieb nehmen<br />
Lampe aus, Lampe defekt Lampe austauschen (siehe Pkt. 3<br />
Lüfter in Betrieb,<br />
dieser Gebrauchsanweisung)<br />
Fehlerstatusanzeige Keine Lampe<br />
Bei ausgeschalteter Lichtquelle<br />
„Err1”<br />
Lampe aus, Kühlung nicht ausreichend<br />
Lampe einsetzen<br />
Lüftungsöffnungen freimachen,<br />
Lüfter in Betrieb,<br />
zu hohe Umgebungstempera-<br />
Fehlerstatusanzeige<br />
turen vermeiden, Gerät schaltet<br />
„Err 2“<br />
nach kurzer Zeit wieder ein<br />
Lampe aus, Kurzzeitiger Stromanstieg Gerät aus- und nach einigen<br />
Lüfter in Betrieb, im Lampenkreis Sekunden wieder einschalten<br />
Fehlerstatusanzeige Lampe verursacht Kurzschluß Lampe austauschen (siehe Pkt. 3<br />
„Err 3“<br />
dieser Gebrauchsanweisung)<br />
Sollten Sie die Störung durch die zuvor genannten Maßnahmen nicht beheben können, wenden<br />
Sie sich bitte an Ihren Fachhändler oder die nächste SCHOTT-Vertretung. Weitergehende<br />
Reparaturen müssen vom autorisierten Kundendienst durchgeführt werden.<br />
10
6 Zubehör<br />
Für Ihre <strong>KL</strong> <strong>1500</strong> <strong>LCD</strong> ist ein breites<br />
Zubehörprogramm lieferbar. Ein separater<br />
Prospekt informiert Sie ausführlich.<br />
Anforderungsmöglichkeit:<br />
Adressen siehe Rückseite.<br />
Nur SCHOTT-Lichtleiter und -Zubehör<br />
gewährleisten einwandfreie Funktion,<br />
Sicherheit und optimale Lichtausbeute.<br />
6.1 Lichtleiter<br />
Es stehen selbsttragende und flexible<br />
Lichtleiter verschiedener Längen und<br />
Durchmesser sowie Punkt- und<br />
Spaltbeleuchtungen zur Verfügung.<br />
6.2 Halogenlampe<br />
Bei Bestellung von Halogenlampen als<br />
Ersatzteil (siehe Punkt 6.4 dieser Gebrauchsanweisung)<br />
wird der Lampentyp<br />
geliefert, der optimale Lichtausbeute<br />
und Ausleuchtung ermöglicht.<br />
6.3 Filter<br />
Optische Filter können entweder in<br />
den Filterschieber (7) eingelegt oder als<br />
Einschraub- bzw. Aufsteckfilter in Verbindung<br />
mit einem Fokussiervorsatz<br />
(Zubehör) vor den Lichtleiterausgang<br />
gesetzt werden.<br />
Details zum Fokussiervorsatz und zu<br />
den standardmäßig erhältlichen Filtertypen<br />
entnehmen Sie bitte dem Zubehörprospekt.<br />
6.4 Ersatzteile<br />
Art<br />
Bestellnummer<br />
Halogenlampe 15 V/150 W 153 000<br />
Philips, Typ 6423<br />
Philips, Typ 6423 XHP<br />
Osram, Typ HLX 64634<br />
Sicherung für 230 V (primär) 150 101<br />
T 2 H, 250V nach IEC 127-3/5<br />
Sicherung für 120 V (primär) 153 103<br />
T 4 A nach UL 198 G<br />
Nur bei Verwendung der angegebenen Ersatzteiltypen wird für einwandfreie<br />
Funktion, Sicherheit und optimale Lichtausbeute Gewährleistung übernommen.<br />
7 Technische Daten<br />
Eigenschaften<br />
Werte<br />
Allgemeine Angaben<br />
Typenbezeichnung - <strong>KL</strong> <strong>1500</strong> <strong>LCD</strong><br />
Maße (B x T x H) mm ca. 200 x 265 x 170<br />
Gewicht kg ca. 5<br />
Kühlung - Axiallüfter<br />
Umgebungstemperatur* °C + 5 ... + 40<br />
Relative Luftfeuchte* % bis 31 °C Umgebungstemperatur: 85 %<br />
ab 31 °C bis 40 °C Umgebungstemperatur:<br />
linear abnehmend auf 75 %<br />
Luftdruck* hPa 700 ... 1060<br />
Transport und Lagerung<br />
Temperatur °C - 40 ... + 70<br />
Rel. Luftfeuchte % 10 ... 95 (nicht kondensierend)<br />
Luftdruck hPa 500 ... 1200<br />
Verschmutzungsgrad - 2<br />
* Prüfbedingungen der Normen DIN EN 61010-1, DIN EN 60601-1 und UL 3101-1<br />
Fortsetzung auf Seite 12<br />
11
D<br />
Eigenschaften<br />
Elektrische Angaben<br />
Werte<br />
Betriebsspannung, Frequenz<br />
230 V-Version 220 ... 240 V ~ 50 / 60 Hz<br />
120 V-Version 100 V ~ 50 / 60 Hz und<br />
120 V ~ 60 Hz<br />
Leistungsaufnahme max. W 200<br />
Sicherungen, primär<br />
230 V-Version - T 2 H, 250 V nach IEC 127-3/5<br />
120 V-Version - T 4 A nach UL 198 G<br />
Schutzklasse - II<br />
Überspannungskategorie - II<br />
Lampen - Halogenreflektorlampen:<br />
Philips, Typ 6423<br />
Philips, Typ 6423 XHP<br />
Osram, Typ HLX 64634<br />
Lampennennspannung V 15<br />
Lampennennleistung W 150<br />
Mittlere Lampenlebensdauer<br />
Stufe 4 h <strong>1500</strong><br />
Stufe 5 h 150<br />
Stufe 6 h 50<br />
Lichttechnische Angaben<br />
Maximal lichttechnisch nutzbarer<br />
Bündeldurchmesser des Lichtleiters mm 9<br />
Gesamtlichtstrom am Lichtleiterausgang<br />
(SCHOTT-Lichtleiter Ø 8 mm, typ. Werte)<br />
Stufe 4 lm 250<br />
Stufe 5 lm 500<br />
Stufe 6 (max. Lichtstrom) lm 600<br />
Lichteintrittswinkel (2α eff )<br />
Zusatzoptik ausgeschwenkt Grad ca. 53<br />
Wärmeschutzfilter - SCHOTT KG 2, 45 x 45,<br />
d = 2,0 mm, gehärtet<br />
Prüfzeichen -<br />
230 V-Version EMV, VDE<br />
120 V-Version<br />
C<br />
US<br />
Die <strong>KL</strong> <strong>1500</strong> <strong>LCD</strong> ist u. a. geprüft und zertifiziert nach den geltenden Normen über elektrische<br />
Laborgeräte (DIN EN 61010-1 bzw. UL 3101-1) sowie elektromedizinisches Gerät nach<br />
DIN EN 60601-1 bzw. UL 2601-1. Dies ermöglicht Herstellern eine einfache Zulassung bei<br />
Integration der <strong>KL</strong> <strong>1500</strong> <strong>LCD</strong> in ihr Medizinprodukt.<br />
Die 230V-Version ist gekennzeichnet mit .<br />
Änderungen in Ausführung und Lieferumfang im Rahmen der technischen Weiterentwicklung vorbehalten.<br />
12
Instrument overview<br />
1<br />
2<br />
3<br />
4<br />
5<br />
6<br />
7<br />
8<br />
9<br />
10<br />
11<br />
12<br />
13<br />
14<br />
15<br />
16<br />
17<br />
18<br />
19<br />
Mains electricity switch 2.2<br />
Light guide connection 2.1<br />
Electronic light intensity setting 2.3<br />
Mechanical light intensity setting 2.3<br />
<strong>LCD</strong> display<br />
Lever for supplementary optics 2.4<br />
Filter slide 2.5<br />
Mains cable<br />
Carrying handle<br />
Lamp compartment with halogen cold light reflector lamp 3<br />
Lamp compartment button 3<br />
Ventilation opening (front of instrument) 1<br />
Ventilation opening (side of instrument) 1<br />
Air outlet grill (back of instrument) 1<br />
Fuse (base of instrument) 5<br />
Model plate (base of instrument)<br />
Colour temperature display 2.3<br />
Fault status display 5<br />
Indication of maximum light intensity 2.3<br />
13
1 Important information<br />
Symbols used:<br />
I<br />
Warning of danger<br />
(Caution, obey documentation)<br />
Warning of a hot surface<br />
Instrument of Protection Class II<br />
Off (disconnected from mains)<br />
On (connected to mains)<br />
Indication of maximum light<br />
intensity<br />
Intended use:<br />
The <strong>KL</strong> <strong>1500</strong> <strong>LCD</strong> is intended for<br />
industrial and laboratory applications.<br />
Cold light sources are used for the<br />
intensive illumination of all types of<br />
objects. The infrared components in<br />
the lamp radiation are filtered out.<br />
High intensity visible light is guided to<br />
the object through flexible or selfsupporting,<br />
movable light guides. The<br />
unit is tested and certificated to the<br />
applicable standards on electrical laboratory<br />
equipment (DIN EN 61010-1 and<br />
UL 3101-1). The 230 V version also<br />
conforms to the standard on medical<br />
electrical equipment (DIN EN 60601-1).<br />
Safety information:<br />
Please read and obey these instructions<br />
carefully. The instrument’s<br />
safety cannot be guaranteed if they<br />
are not obeyed.<br />
Avoid looking directly into the open<br />
clamping sleeve or the light guide exit<br />
when the light source is switched on.<br />
The <strong>KL</strong> <strong>1500</strong> <strong>LCD</strong> emits high-intensity<br />
visible light. Because light-absorbing<br />
materials have the physical property<br />
of converting incident light into heat,<br />
damage can occur to heat-sensitive or<br />
flammable light-absorbing materials.<br />
To avoid such thermal damage and the<br />
potential danger of fire or burns, plea-<br />
se obey the following instructions:<br />
➧ Never cover up the open clamping<br />
sleeve or the light guide exit<br />
(danger of fire).<br />
➧ Never cover up the open clamping<br />
sleeve or the light guide exit with<br />
your hand or other part of the body<br />
(danger of burns).<br />
➧ When illuminating heat-sensitive or<br />
flammable light-absorbing objects<br />
(e.g. in microscopy), special care<br />
must be taken to ensure that a suitable<br />
light guide separation distance<br />
and lamp brightness are chosen so<br />
that no thermal damage occurs.<br />
➧ When the light source is switched<br />
on, all light guide exits not being<br />
used in the working procedure must<br />
always be at a safe distance - at least<br />
10 cm - from heat-sensitive or<br />
flammable light-absorbing materials<br />
(prevention of possible danger of<br />
fire). Therefore take care that each<br />
light guide exit is at the above safe<br />
distance from, for example, dark/<br />
coloured textiles and dark/coloured<br />
wood or plastics surfaces.<br />
➧ To avoid unnecessary stressing of<br />
biological tissue by illumination with<br />
visible light, reduce the brightness<br />
and duration of illumination to<br />
the absolute minimum required<br />
level.<br />
It is absolutely essential that you<br />
ensure that:<br />
➧ your <strong>KL</strong> <strong>1500</strong> <strong>LCD</strong> light source is<br />
operated at the voltage stated on<br />
the model plate (16),<br />
➧ all ventilation openings (12, 13, 14)<br />
are kept free; in the event of insufficient<br />
cooling, a built-in thermostatic<br />
switch switches the instrument off<br />
temporarily (see point 5 “Troubleshooting”),<br />
➧ the lamp has cooled down before<br />
it is changed; to remind you, a<br />
warning symbol is attached to<br />
the lamp compartment door:<br />
(warning of hot surface),<br />
➧ the filter slide and filter insert have<br />
cooled down before removing the<br />
filter insert; the slide carries the<br />
warning symbol .<br />
➧ the filter slide is in one of the<br />
two end positions or the latched<br />
position when the light source is<br />
being operated (see point 2.5 “Filter<br />
slide”).<br />
■ The light source has been developed<br />
only for operation in dry rooms (see<br />
point 7 “Technical data”).<br />
■ This instrument is not suitable for<br />
operation in areas where there is an<br />
explosion hazard.<br />
■ Safe disconnection from the power<br />
supply takes place also by pulling<br />
out the mains plug.<br />
■ The instrument must not be opened<br />
or dismantled. Technical modifications<br />
to the instrument are forbidden.<br />
Repairs must be carried out<br />
only by the manufacturer or by its<br />
authorised customer service agencies.<br />
■ Please ensure that every user of the<br />
instrument has quick access to these<br />
instructions.<br />
■ The manufacturer is not liable for<br />
damage caused by failure to obey<br />
these instructions.<br />
GB<br />
14
2 Operation<br />
2.1 Light guide connection<br />
First open the light guide socket (2) by<br />
turning the outer black ring in a counter-clockwise<br />
direction. Push the light<br />
guide in as far as the stop and close<br />
the light guide socket.<br />
▼<br />
2.2 Start-up procedure<br />
Switch on/off by operating the mains<br />
switch (1).<br />
Position :<br />
The instrument is switched off.<br />
Position I :<br />
The instrument is switched on.<br />
To protect the halogen lamp the<br />
<strong>KL</strong> <strong>1500</strong> <strong>LCD</strong> is fitted with a gentle<br />
start-up device that reduces the high<br />
switch-on current that would otherwise<br />
occur. In addition, electronic stabilisation<br />
of the lamp voltage ensures stable<br />
light power regardless of fluctuations in<br />
the mains voltage.<br />
2.3 Light intensity setting<br />
The <strong>KL</strong> <strong>1500</strong> <strong>LCD</strong> is fitted with two<br />
independent alternative means to adjust<br />
the light intensity.<br />
The stepless electronic adjustment enables<br />
you to optimise the lamp lifetime -<br />
by precisely setting the brightness you<br />
require, you will achieve the longest<br />
halogen lamp lifetime that is possible<br />
for your application. This also varies the<br />
color temperature of the emitted light.<br />
The mechanical adjustment enables<br />
stepless variation of the light intensity<br />
at a constant color temperature.<br />
▼<br />
Caution:<br />
When inserting light guides with a<br />
location pin, care must be taken to<br />
ensure that the latter fits into one of<br />
the four clamping clip slots.<br />
15
2.3.1 Electronic adjustment<br />
2.3.2 Mechanical aperture<br />
The brightness can be adjusted steplessly<br />
by turning the light intensity setting<br />
knob (3).<br />
There are four distinct notched positions<br />
between the two end positions of<br />
the adjusting knob. These fixed positions<br />
thus ensure the reproducibility of<br />
pre-selected brightness settings.<br />
▼<br />
In position 6 the halogen lamp is operated<br />
at its nominal voltage and the<br />
lamp will achieve approximately the<br />
rated lifetime stated by the lamp<br />
manufacturer (depends upon the type).<br />
The approximate color temperature<br />
of the light emitted by the halogen<br />
lamp (17) is indicated on the <strong>LCD</strong><br />
display (5). The color temperature of<br />
the light can be set by turning the<br />
light intensity adjustment (3) (step<br />
width 50 K).<br />
The light intensity can be altered<br />
steplessly while retaining the color<br />
temperature by turning the adjustment<br />
knob of the mechanical aperture (4).<br />
Two fixed end-stops and three additional<br />
retention points (marked with the<br />
letters A to E) enable defined aperture<br />
settings to be selected reproducibly.<br />
▼<br />
GB<br />
After bypassing the barrier at position<br />
5, a lamp symbol (19) appears in the<br />
<strong>LCD</strong> display and flashes for the first<br />
few seconds. This acts as a maximum<br />
light indication and gives a warning<br />
that the expected lamp lifetime will be<br />
reduced compared to position 5.<br />
▼<br />
Position 1 gives the lowest light intensity,<br />
and maximum brightness is attained<br />
in position 6. The two barriers at<br />
positions 4 and 5 are bypassed by<br />
pressing in the adjustment knob.<br />
The adjustment knob cannot be turned<br />
beyond the end stops 1 and 6 respectively.<br />
The lamp lifetime in position 4 is about<br />
<strong>1500</strong> hours and in position 5 it is<br />
about 150 hours.<br />
Position A gives the lowest brightness,<br />
and maximum brightness is achieved<br />
in position E (aperture completely<br />
open). Turning the adjustment knob<br />
from one retention point to the next<br />
approximately doubles or halves the<br />
light intensity respectively each time.<br />
The adjustment knob cannot be turned<br />
beyond the end-stops A and E respectively.<br />
16
2.4 Supplementary optics<br />
Use of in the supplementary optics<br />
ensures that uniform, high-intensity<br />
illumination is achieved even when<br />
using light-guides with a smaller<br />
bundle diameter.<br />
If the illumination is carried out with<br />
imaging or focussing optical systems at<br />
the light guide exit, optimally uniform<br />
illumination is achieved by moving the<br />
supplementary optics out of the optical<br />
path.<br />
Position - Supplementary optics in<br />
optical path:<br />
uniform illumination with no optical<br />
systems at the light guide exit.<br />
Position - Supplementary optics out<br />
of optical path:<br />
uniform illumination with optical<br />
systems at the light guide exit.<br />
The supplementary optics must always<br />
be positioned at the end stop.<br />
2.5 Filter slide<br />
The <strong>KL</strong> <strong>1500</strong> <strong>LCD</strong> has a filter slide (7)<br />
that can be fitted with a filter insert<br />
(available as an accessory).<br />
The warning symbol on the filter<br />
slide reminds you that it is essential<br />
that the slide is in one of the two end<br />
positions or the latched position when<br />
the light source is being operated.<br />
This is the only way to ensure optimum<br />
air cooling of the light source.<br />
Operating the light source with the<br />
filter slide in an intermediate position<br />
can cause damage to the latter.<br />
▼<br />
2.5.1 Inserting filters into filter slide<br />
Please take care to ensure that the filter<br />
slide has cooled down before fitting<br />
the filter insert into it. It carries the<br />
warning symbol to remind you .<br />
Pull out the filter slide (7) as far as the<br />
end stop and insert the required filter.<br />
The light source is fully operational in<br />
this position.<br />
When the filter slide is pushed in up to<br />
the end stop, the filter is located in the<br />
optical beam path.<br />
If you want to operate the light source<br />
without a filter for a short time, pull<br />
out the slide only up to the latched<br />
position.<br />
In this position the filter is still in the<br />
light source but no longer in the path<br />
of the beam.<br />
▼<br />
17
3 Replacing the lamp<br />
4 Maintenance<br />
5 Troubleshooting<br />
Please ensure that the lamp and lampholder<br />
have cooled down before<br />
replacement. The corresponding<br />
warning symbol is attached to remind<br />
you.<br />
▼<br />
Your <strong>KL</strong> <strong>1500</strong> <strong>LCD</strong> is maintenance-free.<br />
There is no provision necessary for<br />
disinfecting the light source when<br />
using it in the medical field.<br />
To clean the outside of the instrument,<br />
use a soft dry cloth or commercially<br />
available plastic cleaning cloths.<br />
The display has a fault status indicator<br />
(18). Any possible breakdowns can be<br />
recognised quickly and easily.<br />
„Err 1“:<br />
„Err 2“:<br />
Lamp circuit interrupted.<br />
Temperature monitor has<br />
triggered.<br />
GB<br />
„Err 3“:<br />
Short-circuit in the lamp<br />
circuit, electronic fuse has<br />
triggered.<br />
▼<br />
First of all switch off the light source.<br />
Open the lamp compartment (10) by<br />
pressing the button (11) and pull it out<br />
as far as the stop.<br />
Press down the two levers of the special<br />
socket and pull out the faulty lamp.<br />
The two levers must be pressed down<br />
again while inserting the new lamp.<br />
Push the lamp compartment in until it<br />
latches (audible locking sound).<br />
Switch the light source on.<br />
Fault Possible causes Remedial action<br />
Lamp out,<br />
fan not running,<br />
no <strong>LCD</strong> display<br />
Lamp out,<br />
fan running,<br />
fault status indication<br />
„Err 1“<br />
Lamp out,<br />
fan running,<br />
fault status indication<br />
„Err 2“<br />
Lamp out,<br />
fan running,<br />
fault status indication<br />
„Err 3“<br />
Instrument not switched on.<br />
Plug not in socket.<br />
No mains electricity voltage.<br />
Lamp compartment not closed.<br />
Fuse faulty.<br />
Transformer overheated.<br />
Lamp defective<br />
No lamp<br />
Insufficient cooling<br />
Transient current increase<br />
in lamp circuit.<br />
Lamp causing short-circuit.<br />
Switch instrument on.<br />
Plug the plug in.<br />
Check mains voltage.<br />
Close lamp compartment.<br />
Replace fuse (15).<br />
Ensure adequate cooling, check<br />
that lamp type is correct, re-start<br />
instrument after cooling down<br />
for a prolonged time.<br />
Replace lamp (see point 3<br />
of these instructions).<br />
With light source switched<br />
off, install lamp.<br />
Ensure ventilation apertures are<br />
free, avoid excessive ambient<br />
temperatures, the instrument will<br />
switch back on again after a<br />
short time.<br />
Switch instrument off and, after<br />
a few seconds, back on again.<br />
Replace lamp (see point 3<br />
of these instructions).<br />
If you are unable to rectify the fault by the actions mentioned above, please contact<br />
your specialist dealer or the nearest SCHOTT agency. More extensive repairs must<br />
be carried out by the authorised customer service depot.<br />
18
6 Accessories<br />
A wide range of accessories is available<br />
for your <strong>KL</strong> <strong>1500</strong> <strong>LCD</strong>. A separate brochure<br />
gives you comprehensive information<br />
– to get it see addresses overleaf.<br />
Only SCHOTT light guides and<br />
accessories guarantee perfect operation,<br />
safety and optimum light yield.<br />
6.1 Light guides<br />
Self-supporting and flexible light guides<br />
in various lengths and diameters<br />
are available, as well as point and slit<br />
illuminators.<br />
6.2 Halogen lamps<br />
When ordering halogen lamps as spare<br />
parts (see point 6.4 of this instruction),<br />
the lamp type that enables optimum<br />
light yield and illumination will be supplied.<br />
6.3 Filters<br />
Optical filters can either be inserted<br />
into the filter slide (7) or placed in<br />
front of the light guide exit as a screwin<br />
or push-on filter in conjunction with<br />
an auxiliary focussing device<br />
(accessory).<br />
Details of the auxiliary focussing device<br />
and the filter types available as standard<br />
can be found in the accessories<br />
catalogue.<br />
6.4 Spare parts<br />
Spare part<br />
Catalogue No.<br />
Halogen lamp 15 V/150 W 153 000<br />
Philips, type 6423<br />
Philips, type 6423 XHP<br />
Osram, type HLX 64634<br />
Fuse for 230 V (primary) 150 101<br />
T 2 H, 250V acc. to IEC 127-3/5<br />
Fuse for 120 V (primary) 153 103<br />
T 4 A acc. to UL 198 G<br />
To ensure maximum performance, light yield and safety you must only use the<br />
spare parts stated above.<br />
7 Technical data<br />
Properties<br />
Values<br />
General information<br />
Type description - <strong>KL</strong> <strong>1500</strong> <strong>LCD</strong><br />
Dimensions (W x D x H) mm approx. 200 x 265 x 170<br />
Weight kg approx. 5<br />
Cooling - axial (fan cooled)<br />
Ambient temperature* °C + 5 ... + 40<br />
Relative air humidity* % at 31°C ambient temperature: 85 %<br />
from 31°C to 40°C ambient temperature:<br />
decreasing linearly to 75 %<br />
Air pressure* hPa 700 ... 1060<br />
Transport and storage<br />
Temperature °C - 40 ... + 70<br />
Rel. air humidity % 10 ... 95 (non-condensing)<br />
Air pressure hPa 500 ... 1200<br />
Contamination level - 2<br />
* Test conditions of Standards DIN EN 61010-1, DIN EN 60601-1 and UL 3101-1.<br />
continued on page 20<br />
19
Properties<br />
Values<br />
Electrical information<br />
Operating voltage,<br />
frequency<br />
230 V version 220 ... 240 V ~ 50 /60 Hz<br />
120 V version 100 V ~ 50 / 60 Hz and<br />
120 V ~ 60 Hz<br />
Power consumption, max. W 200<br />
Fuses, primary<br />
230 V version - T 2 H, 250 V in accordance with<br />
IEC 127-3/5<br />
120 V version - T 4 A in accordance with UL 198 G<br />
Protection class - II<br />
Overvoltage category - II<br />
Lamp type - Halogen reflector lamp<br />
Philips, Type 6423<br />
Philips, Type 6423 XHP<br />
Osram, Type HLX 64634<br />
Lamp rated voltage V 15<br />
Lamp rated power W 150<br />
Average lamp lifetime<br />
Level 4 h <strong>1500</strong><br />
Level 5 h 150<br />
Level 6 h 50<br />
GB<br />
Lighting information<br />
Maximum effective<br />
light guide bundle diameter mm 9<br />
Total light flux at light guide exit<br />
(SCHOTT light guide, Ø 8 mm, typ. values)<br />
Level 4 lm 250<br />
Level lm 500<br />
Level 6 (max. light flux) lm 600<br />
Light entry angle (2α eff )<br />
Without supplementary optics degrees approx. 53<br />
Heat protection filter - SCHOTT KG 2, 45 x 45<br />
thickness = 2,0 mm, toughened<br />
Approvals -<br />
230 V version EMV, VDE<br />
120 V version<br />
The <strong>KL</strong> <strong>1500</strong> <strong>LCD</strong> has been tested and certificated to the applicable standards on electrical<br />
laboratory equipment (DIN EN 61010-1 and UL 3101-1), and electrical medical equipment,<br />
DIN EN 60601-1 and/or UL 2601-1. This enables manufacturers to obtain easy approval with<br />
integration of the <strong>KL</strong> <strong>1500</strong> <strong>LCD</strong> into their medical products.<br />
The 230 V version features .<br />
The right is reserved to make changes in the design and supplied items within the scope of on-going technical development.<br />
C US<br />
20
Vue d’ensemble de l’appareil<br />
1<br />
2<br />
3<br />
4<br />
5<br />
6<br />
7<br />
8<br />
9<br />
10<br />
11<br />
12<br />
13<br />
14<br />
15<br />
16<br />
17<br />
18<br />
19<br />
Interrupteur principal 2.2<br />
Entrée du conducteur de lumière 2.1<br />
Réglage électronique de l’intensité lumineuse 2.3<br />
Réglage mécanique de l’intensité lumineuse 2.3<br />
Affichage <strong>LCD</strong><br />
Levier pour optique additionnelle 2.4<br />
Porte-filtre coulissant 2.5<br />
Câble secteur<br />
Poignée de transport<br />
Compartiment à lampe lumière froide avec lampe<br />
halogène à réflecteur 3<br />
Bouton de verrouillage du compartiment à lampe 3<br />
Ouïes d’aération (face avant de l’appareil) 1<br />
Ouïes d’aération (face latérale de l’appareil) 1<br />
Grille d’aération (dos de l’appareil) 1<br />
Fusible (sous l’appareil) 5<br />
Plaque d’identification (sous l’appareil)<br />
Indication de température de couleur 2.3<br />
Indication du type d’erreurs 5<br />
Indication d’intensité lumineuse maximale 2.3<br />
21
1 Remarques importantes<br />
Symboles utilisés:<br />
I<br />
présence d’une zone dangereuse<br />
(attention : il est indispensable de<br />
se référer à la documentation)<br />
présence d’une surface brûlante<br />
Appareil de la classe de<br />
protection II<br />
Arrêt (appareil hors tension)<br />
Marche (appareil sous tension)<br />
Indicateur d’intensité lumineuse<br />
maximale<br />
La <strong>KL</strong> <strong>1500</strong> <strong>LCD</strong> est prévue pour une<br />
utilisation dans l’industrie et en laboratoire.<br />
Les sources de lumière froide sont<br />
utilisées pour l’éclairage intensif d’objets<br />
de toutes sortes. Les rayonnements<br />
infrarouges des lampes sont filtrés.<br />
La lumière visible d’une haute intensité<br />
est dirigée sur l’objet au moyen<br />
d’un guide de lumière mobile souple<br />
ou autoportant.<br />
L’appareil est expertisé et homologué<br />
selon les normes en vigueur sur<br />
les appareils électriques de laboratoire<br />
(DIN EN 61010 – respectivement<br />
UL 3101-1), la version 230 V est en plus<br />
soumise à la norme DIN EN 60601-1<br />
sur les appareils électriques médicaux.<br />
Conseils de sécurité:<br />
➧ Ne couvrez jamais la bague de serrage<br />
ouverte ou la sortie de conducteur<br />
de lumière (risque d’incendie) !<br />
➧ Pour éclairer des objets thermosensibles<br />
ou inflammables absorbant la<br />
lumière (p. ex. en microscopie), vous<br />
devrez plus particulièrement veiller à<br />
ce que la distance entre le conducteur<br />
de lumière et l’objet à éclairer,<br />
ainsi que l’intensité lumineuse de la<br />
lampe, soient sélectionnées de sorte<br />
qu’aucune détérioration thermique<br />
n’apparaisse sur l’objet éclairé.<br />
➧ Toutes les sorties de conducteur de<br />
lumière inutilisées pendant la phase<br />
de travail (appareil sous tension)<br />
doivent toujours se trouver à une<br />
distance de sécurité, c’est-à-dire au<br />
moins éloignées de 10 cm des<br />
matériaux thermosensibles ou<br />
inflammables absorbant la lumière<br />
(pour éviter les risques d’incendie).<br />
Il est indispensable que, pour chaque<br />
sortie de conducteur de lumière, la<br />
distance de sécurité mentionnée cidessus<br />
soit respectée, par exemple,<br />
vis-à-vis de textiles sombres/de<br />
couleurs et de surfaces de bois ou de<br />
plastiques sombres/de couleurs.<br />
➧ Pour éviter une réaction indésirable<br />
des tissus biologiques due à la<br />
lumière visible, réduisez l’intensité<br />
lumineuse et la durée d’exposition<br />
au niveau vraiment nécessaire.<br />
insuffisant, un «thermorupteur»<br />
intégré mettra l’appareil provisoire<br />
ment hors circuit<br />
(cf. point 5 «Dépannage »).<br />
➧ Avant de remplacer la lampe, patientez<br />
jusqu’à ce qu’elle soit refroidie.<br />
Afin de vous souvenir de<br />
cette remarque importante,<br />
le symbole d’avertissement ÄÄÅÅest<br />
apposé dans la porte du compartiment<br />
de la lampe (Attention:<br />
présence de surface brûlante).<br />
➧ Le porte-filtre coulissant et le filtre<br />
d’insertion doivent être refroidis<br />
avant l’enlèvement du filtre d’insertion.<br />
Le porte-filtre coulissant est<br />
pourvu du symbole d’avertissement<br />
➧ Pendant l’utilisation de la source de<br />
lumière, le porte-filtre coulissant doit<br />
toujours se trouver sur l’une des<br />
deux positions de fin de course ou<br />
sur la position d’enclenchement<br />
(cf. point 2.5 «Coulisse porte-filtre»).<br />
■ La source de lumière a été conçue<br />
pour un fonctionnement exclusivement<br />
dans des locaux secs (cf. point<br />
7 «Caractéristiques techniques»).<br />
■ Cet appareil n’est pas adapté pour<br />
une utilisation dans des zones à<br />
risques d’explosions.<br />
F<br />
La sécurité de l’appareil n’est pas<br />
garantie dans le cas du non-respect<br />
de ces conseils. Lorsque la source de<br />
lumière est allumée, évitez de diriger<br />
votre regard directement vers<br />
l’ouverture de la source ou vers la<br />
sortie du conducteur de lumière.<br />
La <strong>KL</strong> <strong>1500</strong> <strong>LCD</strong> diffuse une lumière<br />
visible de forte intensité. Etant donné<br />
que les matériaux absorbant la lumière<br />
ont la propriété physique de transformer<br />
la lumière en chaleur, des détériorations<br />
sont susceptibles d’apparaître<br />
sur de tels matériaux thermosensibles<br />
ou inflammables. Pour éviter des<br />
détériorations thermiques ou pour éviter<br />
les risques d’incendie ou de brûlure,<br />
veuillez observer strictement les<br />
consignes suivantes :<br />
Conseils importants:<br />
➧ Veiller toujours à ce que votre source<br />
de lumière froide <strong>KL</strong> <strong>1500</strong> <strong>LCD</strong><br />
soit alimentée avec la tension indiquée<br />
sur la plaque d’identification (16)<br />
➧ Il est indispensable que toutes les<br />
ouïes d’aération (12,13,14) soient<br />
toujours entièrement dégagées. En<br />
effet, en cas de refroidissement<br />
■ Il est interdit d’ouvrir ou de démonter<br />
l’appareil, de même que d’y<br />
apporter des modifications. Les<br />
réparations doivent être exclusivement<br />
confiées au constructeur ou à<br />
des antennes de service après-vente<br />
qui ont été autorisées par ses soins.<br />
■ Veuillez vous assurer que ce manuel<br />
d’utilisation soit toujours à portée de<br />
chaque utilisateur.<br />
■ Le constructeur décline toute responsabilité<br />
en cas de dommages qui<br />
seraient dus à l’inobservation de ces<br />
conseils d’utilisation.<br />
22
2 Mode de fonctionnement<br />
2.1 Raccordement du conducteur<br />
de lumière<br />
Tout d’abord, ouvrez l’entrée du conducteur<br />
de lumière (2) en tournant<br />
l’anneau noir extérieur dans le sens<br />
contraire des aiguilles d’une montre.<br />
Poussez le conducteur de lumière jusqu’à<br />
la butée, puis refermez.<br />
▼<br />
2.2 Mise en service<br />
Marche / Arrêt par actionnement de<br />
l’interrupteur principal (1).<br />
Position : l’appareil est éteint<br />
Position I : l’appareil est allumé<br />
Pour ménager la lampe halogène, la<br />
<strong>KL</strong> <strong>1500</strong> <strong>LCD</strong> est équipée d’un dispositif<br />
de démarrage progressif qui réduit la<br />
puissance normalement plus élevée lors<br />
de la mise sous tension. En plus, un<br />
système de stabilisation électronique de<br />
la tension de la lampe assure une intensité<br />
lumineuse stable, indépendamment<br />
des variations du secteur.<br />
▼<br />
2.3 Réglage de l’intensité lumineuse<br />
La <strong>KL</strong> <strong>1500</strong> <strong>LCD</strong> dispose de deux possibilités<br />
de réglage de l’intensité lumineuse<br />
indépendante l’une de l’autre.<br />
Le système de réglage électronique<br />
progressif vous permet d’optimiser la<br />
durée de vie de la lampe. En effet, le<br />
réglage précis de la luminosité dont<br />
vous avez besoin vous permet d’obtenir<br />
la durée de vie la plus grande<br />
possible de la lampe halogène pour<br />
votre domaine d’application spécifique.<br />
Ce faisant, il y a également variation de<br />
la température de couleur de la lumière<br />
diffusée.<br />
Le réglage mécanique vous permet de<br />
modifier progressivement l’intensité<br />
lumineuse sans que la température de<br />
couleur change.<br />
Attention:<br />
Pour la mise en place de conducteurs<br />
de lumière avec tige de guidage, il faut<br />
veiller à ce que cette dernière s’ajuste<br />
dans l’une des quatre fentes de<br />
mâchoire de serrage.<br />
23
2.3.1 Système de réglage<br />
électronique<br />
Pour procéder à un réglage progressif<br />
de l’intensité lumineuse, il suffit de<br />
tourner l’indicateur d’intensité lumineuse<br />
(3).<br />
Entre les deux butées du bouton de<br />
réglage, vous trouverez quatre points<br />
d’enclenchement bien visibles. Ces<br />
positions fixes assurent la reproductibilité<br />
de réglages de l’intensité lumineuse<br />
présélectionnés.<br />
▼<br />
Sur la position 6, la lampe halogène<br />
fonctionne sous tension nominale et<br />
atteint alors approximativement (en<br />
fonction du type) la durée de vie<br />
moyenne indiquée par son fabricant.<br />
L’affichage <strong>LCD</strong> (5) visualise la<br />
température de couleur approximative<br />
de la lumière diffusée par la lampe<br />
halogène (17). En tournant l’indicateur<br />
d’intensité lumineuse (3), vous pouvez<br />
régler la température de couleur de la<br />
lumière (de 50 K en 50 K).<br />
2.3.2 Obturateur mécanique<br />
En tournant le bouton de réglage de<br />
l’obturateur mécanique (4), vous pouvez<br />
modifier progressivement l’intensité<br />
lumineuse tout en conservant la<br />
température de couleur.<br />
Deux butées fixes et trois points d’enclenchement<br />
supplémentaires (désignés<br />
par les lettres A et E) permettent<br />
de sélectionner des positions d’obturateur<br />
définies et reproductibles.<br />
▼<br />
F<br />
Après avoir dépassé la barrière de la<br />
position 5, un symbole représentant<br />
une lampe (19) est visualisé sur l’affichage<br />
<strong>LCD</strong>. Ce symbole clignote pendant<br />
les premières secondes. Il sert à<br />
indiquer l’intensité de lumière maximale<br />
et indique que la durée de vie<br />
théorique de la lampe sera diminuée<br />
par rapport à un fonctionnement sur la<br />
position 5.<br />
▼<br />
L’intensité lumineuse la plus faible est<br />
sur la position 1, l’intensité lumineuse<br />
maximale est obtenue sur la position 6.<br />
Les deux barrières au niveau des positions<br />
4 et 5 sont dépassées par pression<br />
du bouton de réglage.<br />
Le bouton de réglage ne peut pas être<br />
tourné au-delà des butées 1 ou 6.<br />
La durée de vie de la lampe est d’environ<br />
<strong>1500</strong> heures sur la position 4 et<br />
d’environ 150 heures sur la position 5.<br />
Sur la position A, l’intensité lumineuse<br />
est la plus faible, alors que sur la position<br />
E (obturateur entièrement ouvert),<br />
c’est l’intensité lumineuse maximale<br />
qui est obtenue. En tournant le bouton<br />
de réglage d’un point d’enclenchement<br />
au suivant, vous réglez, à chaque<br />
fois, une intensité lumineuse approximativement<br />
multipliée ou divisée par<br />
deux.<br />
Le bouton de réglage ne peut pas être<br />
tourné au-delà des butées A ou E.<br />
24
2.4 Optique supplémentaire<br />
La mise en œuvre de l’optique additionnelle<br />
par pivotement permet d’obtenir<br />
un éclairage de forte intensité<br />
lumineuse uniforme, même en utilisant<br />
des conducteurs de lumière présentant<br />
un faible diamètre de fibrage.<br />
Si l’éclairage est réalisé par des systèmes<br />
optiques focalisateurs en sortie<br />
du conducteur de lumière, il est alors<br />
possible d’obtenir un éclairage d’une<br />
uniformité optimale en éloignant<br />
l’optique additionnelle.<br />
Position - Optique additionnelle<br />
rapprochée:<br />
éclairage uniforme sans systèmes<br />
optiques en sortie de conducteur de<br />
lumière.<br />
Position - Optique additionnelle<br />
éloignée:<br />
éclairage uniforme avec systèmes<br />
optiques en sortie de conducteur de<br />
lumière.<br />
L’optique additionnelle doit toujours<br />
être approchée ou sortie jusqu’à la<br />
butée.<br />
2.5 Porte-filtre coulissant<br />
La <strong>KL</strong> <strong>1500</strong> <strong>LCD</strong> dispose d’un portefiltre<br />
coulissant (7) qui peut être équipé<br />
d’un filtre d’insertion (disponible en<br />
tant qu’accessoire).<br />
Le symbole d’avertissement ÄÄÅÅ sur<br />
le porte-filtre coulissant vous rappelle<br />
que lors de l’utilisation de la source de<br />
lumière, le porte-filtre doit toujours<br />
être placé sur l’une des deux positions<br />
de fin de course ou sur la position<br />
d’enclenchement.<br />
En effet, ce n’est qu’ainsi que le refroidissement<br />
optimal par air de la<br />
source de lumière est assuré.<br />
Le fonctionnement de la source de<br />
lumière avec porte-filtre coulissant sur<br />
une position intermédiaire peut provoquer<br />
la détérioration de celui-ci.<br />
▼<br />
2.5.1 Equipement du porte-filtre<br />
coulissant<br />
Avant d’insérer le filtre, veillez à ce que<br />
le porte filtre coulissant soit refroidi. Le<br />
symbole d’avertissement ÄÅÅ vous<br />
rappelle de ne pas oublier cette consigne<br />
importante.<br />
Sortez le porte-filtre coulissant (7) jusqu’à<br />
la butée, puis insérez le filtre souhaité.<br />
Dans cette position, la source de<br />
lumière est prête à fonctionner.<br />
Lors de l’introduction du porte-filtre<br />
coulissant jusqu’à la butée, le filtre se<br />
trouve dans le faisceau lumineux.<br />
Si vous désirez exploiter la source de<br />
lumière brièvement sans filtre, il vous<br />
suffit de retirer le porte-filtre, mais jusqu’au<br />
point d’enclenchement.<br />
Dans cette position, le filtre est encore<br />
dans la source de lumière, mais il n’est<br />
plus dans le faisceau lumineux.<br />
▼<br />
25
3 Remplacement de<br />
la lampe<br />
Avant de procéder à un remplacement,<br />
veillez à ce que la lampe et la douille<br />
soient refroidies. Pour vous souvenir, le<br />
symbole ÄÄÅ y est apposé.<br />
▼<br />
4 Entretien<br />
Votre <strong>KL</strong> <strong>1500</strong> <strong>LCD</strong> ne nécessite pas<br />
d’entretien.<br />
Une stérilisation de la source de lumière<br />
utilisée dans le domaine médical<br />
n’est pas prévue.<br />
Pour le nettoyage extérieur de l’appareil,<br />
utilisez un chiffon doux et sec.<br />
5 Dépannage<br />
L’affichage dispose d’un indicateur<br />
d’erreurs (18). Ainsi, les pannes éventuelles<br />
peuvent être détectées et localisées<br />
rapidement et en toute fiabilité.<br />
«Err 1»: Interruption de l’alimentation<br />
de la lampe.<br />
F<br />
«Err 2»: Le contrôleur de température<br />
s’est enclenché.<br />
▼<br />
«Err 3»: Court-circuit dans l’alimentation<br />
de la lampe, le fusible<br />
électronique s’est déclenché.<br />
Eteignez, tout d’abord, la source de<br />
lumière. Ouvrez le compartiment à<br />
lampe (10) en appuyant sur le bouton<br />
de déverrouillage (11) et retirez-le jusqu’à<br />
la butée. Abaissez les deux leviers<br />
du socle spécial, puis sortez la lampe<br />
défectueuse.<br />
Lors de la mise en place de la nouvelle<br />
lampe, les deux leviers doivent être<br />
également poussés vers le bas.<br />
Introduisez le compartiment à lampe<br />
jusqu’au verrouillage (enclenchement<br />
audible).<br />
Allumez la source de lumière.<br />
Nature de la panne Cause probable Remède<br />
Lampe éteinte, aérateur L’appareil n’est pas en marche Mettez l’appareil<br />
éteint, pas d’affichage <strong>LCD</strong><br />
en marche<br />
La fiche d’alimentation n’est pas Branchez la fiche d’alibranchée<br />
mentation<br />
Pas de tension secteur<br />
Vérifiez la tension secteur<br />
Le compartiment à lampe Fermez le compartiment<br />
n’est pas fermé<br />
à lampe<br />
Le fusible est défectueux Remplacez le fusible (15)<br />
Surchauffe du transformateur Assurez un refroidisse<br />
ment suffisant<br />
Vérifiez si le type de<br />
lampe utilisé est correct<br />
Remettez l’appareil en<br />
marche à la suite d’une<br />
phase de refroidissement<br />
prolongée<br />
Lampe éteinte, Lampe défectueuse Remplacez la lampe<br />
aérateur en marche, (cf. le point 3)<br />
indicateur d’erreur « Err1» Pas de lampe Mettez la lampe en place<br />
avec la source de lumière<br />
éteinte<br />
Lampe éteinte, Refroidissement insuffisant Dégager les ouïes d’aéraaérateur<br />
en marche,<br />
tion, évitez les tempéraindicateur<br />
d’erreur «Err2»<br />
tures ambiantes trop élevées,<br />
l’appareil se remet<br />
en marche au bout<br />
d’une brève période<br />
Lampe éteinte, Brève élévation du courant Eteignez l’appareil, puis<br />
aérateur en marche, dans le circuit de la lampe remettez-le en marche au<br />
indicateur d’erreur «Err3»<br />
bout de quelques<br />
secondes<br />
La lampe provoque un court- Remplacez la lampe<br />
circuit (cf. point 3)<br />
Au cas où vous ne pourriez pas réparer la panne en prenant les mesures mentionnées,<br />
ci-dessus, veuillez contacter votre revendeur ou l’agence Schott la plus<br />
proche. Au cas où des réparations plus conséquentes devraient être effectuées,<br />
veuillez confier l’appareil au SAV autorisé.<br />
26
6 Accessoires<br />
Une large gamme d’accessoires peut<br />
être fournie pour votre <strong>KL</strong> <strong>1500</strong> <strong>LCD</strong>.<br />
Un prospectus séparé vous fournit des<br />
renseignements exhaustifs – Celui-ci<br />
peut être commandé à une des adresses<br />
mentionées au verso.<br />
Seuls les conducteurs de lumière et les<br />
accessoires SCHOTT vous assurent un<br />
fonctionnement et une sécurité parfaits,<br />
ainsi qu’un éclairage optimum.<br />
6.1 Conducteurs de lumière<br />
Il existe des conducteurs de lumière<br />
semi-rigides et flexibles de différentes<br />
longueurs et diamètres, ainsi que des<br />
éclairages ponctuels et en fente.<br />
6.2 Lampe halogène<br />
En commandant des lampes halogènes<br />
en tant que pièces de rechange<br />
(cf. point 6.4), nous vous fournirons le<br />
type de lampe qui vous garantira un<br />
éclairement optimum.<br />
6.3 Filtres<br />
Les filtres optiques peuvent soit être<br />
déposés dans le porte-filtre (7), soit<br />
montés devant la sortie du conducteur<br />
de lumière sous forme de filtres à visser<br />
ou à fixer (élément focalisateur).<br />
Pour plus de détails concernant l’élément<br />
focalisateur et les types de filtres<br />
disponibles en standard, veuillez vous<br />
reporter au prospectus «Accessoires».<br />
6.4 Pièces de rechange<br />
Art<br />
N 0 de commande<br />
Lampe halogène 15V/150W 153 000<br />
Philips, type 6423<br />
Philips, type 6423 XHP<br />
Osram, type HLX 64634<br />
Fusible pour 230 V (primaire) 150 101<br />
T 2 H 250 V selon CEI 127-3/5<br />
Fusible pour 120 V (primaire) 153 103<br />
T 4 A selon UL 198 G<br />
Le bon fonctionnement, la sécurité et l’éclairement optimum ne sont garantis que<br />
si vous utilisez les pièces de rechange conseillées ci-dessus.<br />
7 Caractéristiques techniques<br />
Propriétés<br />
Informations générales<br />
Valeurs<br />
Désignation du type<br />
<strong>KL</strong> <strong>1500</strong> <strong>LCD</strong><br />
Dimensions (l x p x h) mm environ 200 x 265 x 170.<br />
Masse kg env. 5<br />
Refroidissement<br />
Ventilateur<br />
Température ambiante * °C + 5 … + 40<br />
Humidité relative de l’air * % jusqu’à la température ambiante<br />
de 31°C : 85 %<br />
pour température ambiante de<br />
31°C à 40°C à décroissance linéaire<br />
à 75 %<br />
Pression atmosphérique * hPa 700 … 1060<br />
Lors du transport et du stockage:<br />
Température °C - 40 … + 70<br />
Humidité relative de l’air % 10 … 95 (sans condensation)<br />
Pression atmosphérique hPa 500 … 1200<br />
Degré de pollution 2<br />
* Conditions d’essai des normes DIN EN 61010-1, DIN EN 60601-1 et UL 3101-1<br />
suite page 28<br />
27
Propriétés<br />
Valeurs<br />
Informations concernant les valeurs électriques<br />
Tension de service,<br />
fréquence<br />
version 230 V<br />
220 ... 240 V ~ 50 /60 Hz<br />
version 120 V<br />
100 V ~ 50 / 60 Hz et<br />
120 V ~ 60 Hz<br />
Consommation max. W 200<br />
Fusibles, primaires<br />
version 230 V - T 2 H, 250 V selon IEC 127-3/5<br />
version 120 V - T 4 A selon UL 198 G<br />
Classe de protection - II<br />
Catégorie de surtension - II<br />
Type de lampe - lampe à réflecteur halogène<br />
Philips, type 6423<br />
Philips, type 6423 XHP<br />
Osram, type HLX 64634<br />
Tension nominale de lampe V 15<br />
Puissance nominale de lampe W 150<br />
Durée de vie moyenne de<br />
la lampe<br />
niveau 4 h <strong>1500</strong><br />
niveau 5 h 150<br />
niveau 6 h 50<br />
F<br />
Informations concernant la technique de génération de lumière<br />
Diamètre maximal du faisceau<br />
du conducteur de lumière utilisable<br />
en éclairagisme mm 9<br />
Flux lumineux total en sortie<br />
du conducteur lumineux<br />
(conducteur lumineux SCHOTT de<br />
8 mm de diam., valeurs typiques)<br />
niveau 4 lm 250<br />
niveau 5 lm 500<br />
niveau 6 (flux lumineux max.) lm 600<br />
Angle d’entrée lumineuse (2α eff )<br />
Optique supplémentaire éloignée degrés 53 env.<br />
Filtre de protection thermique - SCHOTT KG 2, 45 x 45,<br />
d = 2,0 mm, trempé<br />
Sigle d’homologation -<br />
version 230 V<br />
EMV, VDE<br />
version 120 V<br />
C US<br />
La <strong>KL</strong> <strong>1500</strong> <strong>LCD</strong> est, entre autres, expertisée et homologuée selon les normes en vigueur sur les<br />
appareils électriques de laboratoires (DIN EN 61010-1, respectivement UL 3101-1), ainsi qu’au<br />
matérial électromédical selon la norme DIN EN 60601-1 ou, suivant le cas, UL 2601-1. Ceci<br />
permet aux constructeurs d’obtenir une homologation aisée de leurs produits pour la médecine<br />
en y intégrant la <strong>KL</strong> <strong>1500</strong> <strong>LCD</strong>.<br />
La version 230 V est dinstinguée par .<br />
Sous réserve de modifications au niveau du modèle et des conditions de livraison dues au développement technique.<br />
28
Strumentazione<br />
1<br />
2<br />
3<br />
4<br />
5<br />
6<br />
7<br />
8<br />
9<br />
10<br />
11<br />
12<br />
13<br />
14<br />
15<br />
16<br />
17<br />
18<br />
19<br />
Interruttore di rete 2.2<br />
Alloggiamento della guidaluce 2.1<br />
Regolazione elettronica dell’intensità di luce 2.3<br />
Regolazione meccanica dell’intensità di luce 2.3<br />
Display a cristalli liquidi<br />
Leva orientabile per l’ottica supplementare 2.4<br />
Portafiltro a cassetto 2.5<br />
Cavo di alimentazione<br />
Impugnatura per il trasporto 3<br />
Vano portalampada per lampada alogena a luce<br />
fredda con riflettore incorporato 3<br />
Pulsante di apertura del vano portalampada<br />
Bocchette di aerazione (lato anteriore dello strumento) 1<br />
Bocchette di aerazione (parte laterale dello strumento) 1<br />
Griglia per lo scarico dell’aria (lato posteriore dello strumento) 1<br />
Dispositivo di protezione (fondo dello strumento) 3<br />
Targhetta tipologica (fondo dello strumento)<br />
Indicatore della temperatura colore 2.3<br />
Indicatore di guasto 5<br />
Segnalazione di intensità massima di luce 2.3<br />
29
1 Avvertenze importanti<br />
Simboli utilizzati:<br />
I<br />
Simbolo di avvertimento che<br />
segnala un punto pericoloso<br />
(attenzione, occorre osservare<br />
quanto indicato nella<br />
documentazione)<br />
Simbolo di avvertimento che<br />
segnala una superficie calda<br />
Strumento con classe di<br />
protezione II<br />
Strumento spento (OFF)<br />
(strumento scollegato dalla rete)<br />
Strumento acceso (ON)<br />
(strumento collegato alla rete)<br />
Avviso di massima intensità<br />
luminosa<br />
Uso determinato:<br />
La <strong>KL</strong> <strong>1500</strong> <strong>LCD</strong> è destinata all’impiego<br />
in industria e in laboratorio.<br />
Le fonti di luce fredda servono ad illuminare<br />
con luce intensa oggetti di<br />
ogni tipo. Le quote di infrarossi dell’irraggiamento<br />
della lampada vengono<br />
filtrate e separate. Le luce visibile di<br />
elevata intensità viene portata all’oggetto<br />
mediante un fotoconduttore mobile<br />
flessibile od autoportante.<br />
La <strong>KL</strong> <strong>1500</strong> <strong>LCD</strong> è collaudata e certificata<br />
ai sensi delle vigenti norme sulle<br />
apparecchiature elettriche da laboratorio<br />
(rispettivamente DIN EN 61010-1 e<br />
UL 3101-1), e la versione 230 V anche<br />
ai sensi della Norma sui Dispositivi<br />
Elettrici Medici (DIN EN 60601-1).<br />
Avvertenze per la sicurezza<br />
Leggere con cura e rispettare accuratamente<br />
quanto indicato nelle<br />
presenti istruzioni. In caso di mancata<br />
osservanza delle istruzioni non<br />
viene garantita la sicurezza dello<br />
strumento. A sorgente luminosa<br />
accesa, evitare di guardare direttamente<br />
nella bussola di chiusura o<br />
nell’uscita della guidaluce.<br />
Alla <strong>KL</strong> <strong>1500</strong> <strong>LCD</strong> fuoriesce luce visibile<br />
di elevata intensità. Poichè i materiali<br />
ad assorbimento luminoso hanno la<br />
proprietà fisica di trasformare la luce<br />
che li colpisce in calore, è possibile che<br />
materiali ad assorbimento luminoso termosensibili<br />
o infiammabili subiscano dei<br />
danni. Per evitare danni di questo tipo<br />
dovuti al calore ed il possibile pericolo<br />
di combustione ed incendio occorre rispettare<br />
le avvertenze che seguono:<br />
➧ La bussola di chiusura aperta e<br />
l’uscita della guidaluce non vanno<br />
mai coperte (pericolo di incendio)!<br />
➧ La bussola di chiusura aperta e l’uscita<br />
della guidaluce non vanno mai<br />
coperte con le mani o con altre<br />
parti del corpo (pericolo di ustioni)!<br />
➧ Se vengono illuminati oggetti ad<br />
assorbimento luminoso termosensibili<br />
o infiammabili (per esempio nella<br />
microscopia), occorre fare particolare<br />
attenzione a scegliere una distanza<br />
per la guidaluce ed una luminosità<br />
della lampada tale da evitare la<br />
comparsa di danni sull’oggetto<br />
dovuti al calore.<br />
➧ Tutte le uscite della guidaluce che<br />
non vengono utilizzate durante<br />
il lavoro devono sempre trovarsi, a<br />
sorgente di luce accesa, a distanza di<br />
sicurezza – almeno 10 cm – da materiali<br />
ad assorbimento luminoso termosensibili<br />
o infiammabili (per evitare<br />
il possibile pericolo di incendio).<br />
Occorre prestare quindi molta attenzione<br />
a mantenere per dette estremità<br />
di uscita della luce una opportuna<br />
distanza di sicurezza per esempio<br />
da tessuti scuri/colorati, superfici<br />
di legno o plastica scure/colorate.<br />
➧ Per evitare di gravare inutilmente sui<br />
tessuti biologici illuminandoli con<br />
luce visibile, la luminosità e la durata<br />
dell’illuminazione degli stessi andranno<br />
ridotte al minimo indispensabile.<br />
■ Occorre poi assolutamente fare<br />
attenzione che:<br />
➧ la sorgente di luce fredda della<br />
<strong>KL</strong> <strong>1500</strong> <strong>LCD</strong> funzioni con la<br />
tensione indicata sulla targhetta (16);<br />
➧ le bocchette di aerazione (12, 13,<br />
14) vengano sempre lasciate tutte<br />
libere se il raffreddamento non è<br />
sufficiente scatta un interutorre termico<br />
che disattiva temporaneamente<br />
lo strumento (si veda il punto 5<br />
“Risoluzione di problemi”);<br />
➧ la lampada si sia raffreddata prima<br />
di procedere alla sua sostituzione;<br />
per ricordare di attendere il raffreddamento<br />
della lampada è stato<br />
applicato sullo sportello del vano<br />
portalampada un simbolo di<br />
avvertimento:<br />
superficie calda<br />
➧ il portafiltro a cassetto ed il filtro si<br />
siano raffreddati prima di procedere<br />
alla rimozione del filtro stesso.<br />
Il portafiltro è dotato di simbolo<br />
di avvertimento.<br />
➧ il portafiltro a cassetto, a sorgente di<br />
luce accesa, si trovi sempre in una<br />
delle due posizioni finali o nel punto<br />
di arresto intermedio! (si veda il<br />
punto 2.5 “Portafiltro a cassetto”)<br />
■ La sorgente luminosa è stata sviluppata<br />
unicamente per funzionare in<br />
ambienti asciutti (si veda il punto 7<br />
“Dati tecnici“).<br />
■ Lo strumento non è idoneo<br />
all’impiego in zone a rischio di<br />
esplosione.<br />
■ Una separazione sicura dalla rete<br />
elettrica si ha unicamente estraendo<br />
la spina per il collegamento dalla<br />
rete elettrica.<br />
■ Lo strumento non può essere aperto<br />
o smontato. Sono vietate modifiche<br />
tecniche allo strumento. Le riparazioni<br />
possono essere eseguite unicamente<br />
dalla casa costruttrice o da<br />
centri di assistenza autorizzati.<br />
■ Si prega di rendere facilmente<br />
accessibile il presente libretto di<br />
istruzioni a chiunque utilizzi lo<br />
strumento.<br />
■ La casa costruttrice non risponde<br />
per danni dovuti alla mancata osservanza<br />
di quanto indicato in questo<br />
libretto d’istruzioni.<br />
I<br />
30
2 Funzionamento<br />
2.1 Collegamento della guidaluce<br />
Per prima cosa aprire l’alloggiamento<br />
della guidaluce (2) girando l’anello più<br />
esterno nero in senso antiorario.<br />
Inserire la guidaluce fino all’arresto e<br />
chiudere l’alloggiamento.<br />
▼<br />
2.2 Messa in funzione<br />
Lo strumento viene acceso e spento<br />
azionando l’interruttore di rete (1).<br />
In posizione : lo strumento è spento.<br />
In posizione I : lo strumento è acceso.<br />
Per preservare la lampada alogena la<br />
<strong>KL</strong> <strong>1500</strong> <strong>LCD</strong> è dotata di un sistema di<br />
avviamento soft che riduce la corrente<br />
d’inserzione che di norma è alta.<br />
Inoltre uno stabilizzatore elettronico<br />
della tensione della lampada garantisce<br />
un flusso luminoso utile stabile, indipendentemente<br />
dalle oscillazioni che si<br />
verificano sulla rete.<br />
2.3 Regolazione dell’intensità luminosa<br />
La <strong>KL</strong> <strong>1500</strong> <strong>LCD</strong> è dotata di due possibilità<br />
indipendenti di regolazione dell’-<br />
intensità luminosa.<br />
La regolazione elettronica continua vi<br />
permette di ottimizzare la durata della<br />
lampada: grazie alla regolazione precisa<br />
della luminosità di cui avete bisogno<br />
otterrete la massima durata possibile<br />
della lampada alogena per il vostro<br />
scopo d’impiego. In questo caso varia<br />
anche la temperatura colore della<br />
luce irradiata.<br />
La regolazione meccanica permette la<br />
regolazione continua dell’intensità luminosa<br />
a temperatura colore costante.<br />
▼<br />
Attenzione:<br />
Quando inserite la guidaluce con il<br />
perno di guida occorre fare attenzione<br />
che questo venga inserito in una delle<br />
quattro fessure per il serraggio.<br />
31
2.3.1 Regolazione elettronica<br />
2.3.2 Diaframma meccanico<br />
Girando il regolatore dell’intensità<br />
luminosa (3) è possibile regolare in<br />
continuo la luminosità.<br />
Tra i due punti di arresto terminali del<br />
pulsante sono inseriti quattro punti di<br />
arresto intermedi chiaramente percepibili.<br />
Queste quattro posizioni fisse permettono<br />
quindi di riprodurre delle<br />
impostazioni preselezionate della luminosità.<br />
▼<br />
In posizione 6 la lampada alogena funziona<br />
alla tensione nominale; la lampada<br />
raggiunge all’incirca la sua durata<br />
nominale indicata dalla casa costruttrice<br />
(secondo il tipo).<br />
Sul display a cristalli liquidi (5) viene<br />
visualizzata approssimativamente la<br />
temperatura colore della luce irradiata<br />
dalla lampada alogena (17). Girando il<br />
regolatore dell’intensità luminosa (3) è<br />
possibile regolare la temperatura colore<br />
della luce (passo 50º K).<br />
Ruotando il pulsante di regolazione del<br />
diaframma meccanico (4) è possibile<br />
variare in continuo l’intensità luminosa<br />
mantenendo la temperatura del colore.<br />
Due punti di arresto terminali fissi e tre<br />
punti di arresto aggiuntivi (contrassegnati<br />
con le lettere da A ad E) permettono<br />
di scegliere delle regolazioni definite<br />
riproducibili del diaframma.<br />
▼<br />
I<br />
Dopo aver superato il fermo alla posizione<br />
5, sul display <strong>LCD</strong> comparirà il<br />
simbolo di una lampada (19) che lampeggerà<br />
per alcuni secondi. Serve a<br />
segnalare la luce massima e fa notare<br />
che la durata della lampada sarà inferiore<br />
a quanto previsto rispetto alla posizione<br />
5.<br />
▼<br />
L’intensità luminosa minima si ha<br />
quando il bottone è in posizione 1, la<br />
luminosità massimè in posizione 6.<br />
I due fermi alle posizioni 4 e 5 vengono<br />
superati premendo il bottone di<br />
regolazione.<br />
Il regolatore non può essere girato<br />
oltre le posizioni 1 e 6.<br />
Nella posizione A si ottiene la luminosità<br />
minima, in posizione E (diaframma<br />
completamente aperto) la luminosità<br />
massima.<br />
Quando si ruota il pulsante di regolazione<br />
da un punto di arresto al successivo<br />
si ottiene all’incirca il raddoppiamento<br />
o dimezzamento dell’intensità<br />
luminosa.<br />
La durata della lampada è pari a circa<br />
<strong>1500</strong> h in posizione 4 e 150 h circa in<br />
posizione 5.<br />
Il pulsante non può essere girato oltre<br />
i punti di arresto terminali A ed E.<br />
32
2.4 Ottica supplementare<br />
Quando il sistema ottico supplementare<br />
è in posizione rientrata, esso permette<br />
di garantire che, anche qualora vengano<br />
impiegate guide con diametro<br />
ridotto del fascio, si possa ottenere<br />
un’ illuminazione uniforme molto<br />
luminosa.<br />
Se l’illuminazione viene fatta con sistemi<br />
ottici a formazione d’immagine o a<br />
focalizzazione posti all’uscita della guidaluce,<br />
si otterrà una illuminazione uniforme<br />
ottimale facendo fuoriuscire<br />
l’ottica supplementare.<br />
Posizione – Ottica supplementare<br />
rientrata:<br />
illuminazione uniforme senza sistemi<br />
ottici all’uscita della guidaluce.<br />
Posizione – Ottica supplementare<br />
fuori:<br />
illuminazione uniforme con sistemi<br />
ottici all’uscita della guidaluce.<br />
L’ottica supplementare deve sempre<br />
fuoriuscire e rientrare fino al punto<br />
d’arresto.<br />
2.5 Portafiltro a cassetto<br />
La <strong>KL</strong> <strong>1500</strong> <strong>LCD</strong> dispone di un portafitro<br />
a cassetto (7) nel quale si può<br />
inserire un filtro (disponibile come<br />
accessorio).<br />
Il simbolo di avvertimento sul portafiltro<br />
ricorda che lo stesso deve<br />
sempre trovarsi, durante il funzionamento<br />
della sorgente luminosa, in una<br />
delle due posizioni terminali oppure nel<br />
punto di arresto intermedio.<br />
Solo così è possibile garantire il raffreddamento<br />
ottimale dello strumento.<br />
Se la sorgente luminosa viene azionata<br />
con il portafiltro in una posizione intermedia<br />
rispetto a quelle indicate<br />
quest’ultimo potrebbe subire dei danni.<br />
▼<br />
2.5.1 Inserimento del filtro<br />
Prima di procedere all’inserimento del<br />
filtro fate attenzione che il portafiltro si<br />
sia raffreddato. Il simbolo di avvertimento<br />
ve lo ricorda.<br />
Estrarre il portafiltro (7) fino al punto di<br />
arresto terminale ed inserire il filtro<br />
desiderato. In questa posizione la sorgente<br />
di luce è pronta per il<br />
funzionamento.<br />
Quando il portafiltro a cassetto è stato<br />
inserito fino al punto di arresto, il filtro<br />
si troverà nel percorso del raggio di<br />
luce.<br />
Se volete far funzionare la sorgente di<br />
luce per un breve periodo senza filtro,<br />
estraete il portafiltro solo fino al punto<br />
di arresto intermedio.<br />
Il filtro si troverà sempre all’interno<br />
della sorgente di luce, ma non sul<br />
percorso del raggio.<br />
▼<br />
33
3 Sostituzione della lampada<br />
4 Manutenzione<br />
5 Risoluzione di problemi<br />
Fate attenzione che la lampada ed il<br />
portalampada si siano raffreddati prima<br />
di procedere alla sostituzione.<br />
Come promemoria è stato applicato<br />
il simbolo di avvertimento.<br />
▼<br />
La <strong>KL</strong> <strong>1500</strong> <strong>LCD</strong> non ha bisogno di<br />
manutenzione. Non è prevista una<br />
disinfezione dello strumento se viene<br />
utilizzato in campo medico.<br />
Per pulire esternamente lo strumento<br />
utilizzare un panno asciutto e morbido<br />
o panni per la pulizia dei materiali plastici<br />
del tipo comunemente in commercio.<br />
Il display dispone di un indicatore per la<br />
segnalazione dei guasti (18). Eventuali<br />
guasti possono essere identificati velocemente<br />
e con sicurezza.<br />
„Err 1“:<br />
„Err 2“:<br />
„Err 3“:<br />
interrotto il circuito elettrico<br />
della lampada.<br />
è intervenuto il termostato.<br />
cortocircuito nel circuito<br />
elettrico della lampada, è<br />
intervenuta la protezione<br />
elettronica.<br />
I<br />
▼<br />
Per prima cosa spegnere la sorgente di<br />
luce. Aprire il vano portalampada (10)<br />
premendo il pulsante di apertura (11)<br />
e estrarlo fino all’arresto.<br />
Spingere verso il basso le due leve<br />
dello zoccolo speciale ed estrarre la<br />
lampada guasta.<br />
Le due leve dovranno essere premute<br />
anche quando inserirete la nuova<br />
lampada. Reinserire poi nuovamente il<br />
vano portalampada fino all’arresto<br />
(si sente lo scatto). Accendere la sorgente<br />
di luce.<br />
Tipo di quasto Possibile causa Rimedio<br />
Lampada spenta, Lo strumento non è acceso. Accendere lo strumento.<br />
ventola spenta, La spina non è inserita nella presa. Inserire la spina.<br />
display <strong>LCD</strong> spento non c’è tensione sulla rete Controllare la tensione di rete.<br />
Il vano portalampada non è chiuso. Chiudere il vano portalampada.<br />
La protezione è difettosa. sostituire la protezione (15).<br />
Il trasformatore è surriscaldato. Assicurare un raffreddamento<br />
adeguato, verificare che il tipo<br />
di lampada sia corretto, riavviare<br />
lo strumento dopo che si sia<br />
raffreddato per un periodo sufficientemente<br />
lungo.<br />
Lampada spenta, Lampada guasta. Sostituire la lampada (si veda<br />
ventola in funzione,<br />
il punto 3 del presente libretto<br />
segnalazione<br />
d´istruzioni)<br />
„Err1” Non c’è lampada. A sorgente di luce spenta<br />
inserire una lampada<br />
Lampada spenta, Il raffreddamento non è Liberare le bocchette di aerazione;<br />
ventola in funzione, sufficiente. evitare tempera - eccessive,<br />
segnalazione<br />
lo strumento si riaccenderà<br />
„Err 2“<br />
dopo poco tempo.<br />
Lampada spenta, Aumento temporaneo di Spegnere lo strumento e<br />
ventola in funzione, corrente nel circuito elettrico riavviarlo dopo pochi secondi.<br />
segnalazione<br />
della lampada.<br />
„Err 3“ La lampada ha provocato un Sostituire la lampada (Si veda<br />
cortocircuito.<br />
punto 3 delle istruzioni per<br />
l’uso).<br />
Se non fosse possibile rimuovere il guasto con le misure indicate sopra, rivolgetevi<br />
al negozio specializzato di vostra fiducia o alla rappresentanza SCHOTT più vicina.<br />
Riparazioni che vanno al di là dei rimedi indicati dovranno essere eseguite dai centri<br />
di assistenza autorizzati.<br />
34
6 Accessori<br />
Per la <strong>KL</strong> <strong>1500</strong> <strong>LCD</strong> è disponibile una<br />
vasta gamma di accessori. Un dépliant a<br />
parte fornisce ampie informazioni in<br />
merito – per ordinarlo: vedi indirizzi<br />
sulla pagina di dietro. Solo le guideluce<br />
SCHOTT e gli accessori SCHOTT garantiscono<br />
il perfetto funzionamento dello<br />
strumento, la sicurezza ed un coefficiente<br />
ottimale di efficienza luminosa.<br />
6.1 Guidaluce<br />
Sono disponibili guideluce autoportanti<br />
e flessibili di diversa lunghezza e con<br />
vari diametri, illuminazione puntiforme<br />
o a fessura.<br />
6.2 Lampada alogena<br />
Quando vengono ordinate lampade<br />
alogene di ricambio (si veda il punto<br />
6.4 del presente libretto d’istruzioni)<br />
viene fornito il tipo di lampada che permette<br />
un coefficiente di efficienza luminosa<br />
ed una illuminazione ottimale.<br />
6.3 Filtro<br />
I filtri ottici possono essere inseriti nel<br />
portafiltro a cassetto (7) oppure posizionati,<br />
ad innesto o avvitamento, uniti ad<br />
un elemento supplementare di focalizzazione<br />
(accessorio), davanti all’uscita<br />
della guida di luce.<br />
Dettagli riguardanti l’elemento di focalizzazione<br />
o i tipi di filtri standard disponibili<br />
vengono riportati nel prospetto<br />
degli accessori.<br />
6.4 Pezzi di ricambio<br />
Tipo<br />
N 0 d’ordine<br />
Lampada alogena 15V/150 W 153 000<br />
Philips, tipo 6423<br />
Philips, tipo 6423 XHP<br />
Osram, tipo HLX 64634<br />
Fusibile di protezione per 230V (primario) 150 101<br />
T2H 250V ai sensi della IEC 127-3/5<br />
Fusibile di protezione per 120 V (primario) 153 103<br />
T4A ai sensi della UL 198 G<br />
Solo se vengono utilizzati pezzi di ricambio del tipo indicato, viene assunta la<br />
garanzia per un perfetto funzionamento dello strumento, per la sua sicurezza e<br />
per un coefficiente ottimale di efficienza luminosa.<br />
7. Dati tecnici<br />
Caratteristiche<br />
Valori<br />
Indicazioni di carattere generale<br />
Tipo<br />
<strong>KL</strong> <strong>1500</strong> <strong>LCD</strong><br />
Misure (largh x pr x h) mm circa 200 x 265 x 170<br />
Peso kg circa 5<br />
Raffreddamento - Ventola assiale<br />
Temperatura ambiente* °C + 5 ... + 40<br />
Umidità relativa dell’aria* % Con temp. ambiente fino a 31°C: 85%;<br />
da 31°Cia 40°C a diminuzione lineare<br />
fino al 75%<br />
Pressione atmosferica* hPa 700 ... 1060<br />
Trasporto e stoccaggio<br />
Temperatura °C - 40 ... + 70<br />
Umidità relativa dell’aria % 10 ... 95 (non condensante)<br />
Pressione atmosferica hPa 500 ... 1200<br />
Grado di sporco - 2<br />
*Condizioni di prova previste dalle norme DIN EN 61010-1, DIN EN 60601-1 ed UL 3101-1<br />
Continuazione pagina 36<br />
35
Blindtext<br />
Caratteristiche<br />
Valori<br />
Caratteristiche elettriche<br />
Tensione d’esercizio,<br />
frequenza<br />
Modello 230 V<br />
220 ... 240 V ~ 50 /60 Hz<br />
Modello 120 V<br />
100 V ~ 50 / 60 Hz e<br />
120 V ~ 60 Hz<br />
Potenza assorbita max. W 200<br />
Protezione, primario<br />
Modello 230 V - T 2 H, 250 V secondo IEC 127-3/5<br />
Modello 120 V - T 4 A secondo UL 198 G<br />
Classe di protezione<br />
II<br />
Categoria di sovratensione<br />
II<br />
Tipo di lampada - lampada alogena con riflettore incorporato<br />
Philips, tipo 6423<br />
Philips, tipo 6423 XHP<br />
Osram, tipo HLX 64634<br />
Tensione nominale lampada V 15<br />
Resa nominale lampada W 150<br />
Durata media lampada<br />
Posizione 4 h <strong>1500</strong><br />
Posizione 5 h 150<br />
Posizione 6 h 50<br />
I<br />
Caratteristiche ottiche<br />
Diametro massimo utile del<br />
fascio della guidaluce mm 9<br />
Flusso luminoso complessivo<br />
all’uscita della guidaluce<br />
(guidaluce SCHOTT Ø 8 mm,<br />
valori tipici)<br />
Posizione 4 lm 250<br />
Posizione 5 lm 500<br />
Posizione 6 (flusso luminoso massimo) lm 600<br />
Angolo di entrata della luce<br />
con ottica supplementare<br />
estraita (2α eff ) gradi circa 53<br />
Filtro contro il calore - SCHOTT KG 2, 45 x 45<br />
d = 2,0 mm temprato<br />
Omologalioni -<br />
Modello 230 V<br />
VDE, EMV<br />
Modello 120 V<br />
C US<br />
La <strong>KL</strong> <strong>1500</strong> <strong>LCD</strong> è fra l’altro collaudata e certificata ai sensi delle vigenti norme sulle apparecchiature<br />
elettriche da laboratorio (rispettivamente DIN EN 61010-1 e UL 3101-1), nonché<br />
sugli apparecchi elettro-medicali secondo la DIN EN 60601-1 o UL 2601-1.<br />
Ciò consente ai produttori una agevole omologazione in caso di integrazione della <strong>KL</strong> <strong>1500</strong><br />
<strong>LCD</strong> nel proprio dispositivo medico.<br />
La versione 230 V è marcata con .<br />
La società si riserva la facoltà di apportare modifiche nell’esecuzione e nell’entità di fornitura nel quadro<br />
dell’ulteriore sviluppo tecnologico.<br />
36
Vista del aparato<br />
1<br />
2<br />
3<br />
4<br />
5<br />
6<br />
7<br />
8<br />
9<br />
10<br />
11<br />
12<br />
13<br />
14<br />
15<br />
16<br />
17<br />
18<br />
19<br />
Conmutador de alimentación 2.2<br />
Alojamiento del conductor de luz 2.1<br />
Ajuste electrónico de la intensidad de luz 2.3<br />
Ajuste mecánico de la intensidad de luz 2.3<br />
Visualización por cristal líquido<br />
Palanca basculable para elementos ópticos suplementarios 2.4<br />
Corredera de filtros 2.5<br />
Cable de entrada a la red<br />
Manija<br />
Compartimiento para lámpara con lámpara halógena<br />
de reflexión de luz fría 3<br />
Botón de desbloqueo del compartimiento para lámpara 3<br />
Orificios de ventilación (lado frontal del aparato) 1<br />
Orificios de ventilación (lado lateral del aparato) 1<br />
Rejilla de escape de aire (lado posterior del aparato) 1<br />
Dispositivo de seguridad (base del aparato) 5<br />
Placa de características (base del aparato)<br />
Indicación del color de la temperatura 2.3<br />
Indicación de fallos 5<br />
Advertencia sobre intensidad de luz máxima 2.3<br />
37
1 Advertencias importantes<br />
Símbolos empleados:<br />
Advierte sobre un sitio peligroso<br />
(Atención, observar las indicaciones<br />
en la documentación)<br />
Advierte sobre una superficiecaliente<br />
Aparato de la clase de protección<br />
II<br />
No (separación de la red de<br />
alimentación)<br />
Sí (conexión con la red de<br />
I alimentación)<br />
Advertencia sobre intensidad de<br />
luz máxima<br />
La lámpara <strong>KL</strong> <strong>1500</strong> <strong>LCD</strong> está prevista<br />
para su aplicación en la industria y el<br />
laboratorio.<br />
Las fuentes de luz fría tienen la función<br />
de iluminar intensamente objetos de<br />
todo tipo. Los elementos infrarrojos<br />
de los rayos emitidos por la lámpara se<br />
extraen mediante filtración. La luz<br />
visible de alta intensidad es dirigida al<br />
objeto a través de conductores de luz<br />
flexibles o autoportantes móviles.<br />
La lámpara ha sido probada y certificada<br />
según las normativas vigentes sobre<br />
instrumentos eléctricos de laboratorio<br />
(DIN EN 61010-1 y UL 3101-1); la versión<br />
de 230 V ha sido sometida adicionalmente<br />
a prueba según la normativa<br />
para instrumentos médicos eléctricos<br />
(DIN EN 60601-1).<br />
Advertencias de seguridad:<br />
Sírvase leer detenidamente y observar<br />
cuidadosamente estas instrucciones<br />
para el uso. En caso de no siguimiento<br />
de las mismas, la seguridad<br />
de su aparato no está garantizada.<br />
Cuando la fuente de luz se encuentre<br />
conectada, evite mirar directamente<br />
dentro del casquillo de fijación o la salida<br />
del conductor de luz.<br />
La <strong>KL</strong> <strong>1500</strong> <strong>LCD</strong> emite luz visible de<br />
alta intensidad. Dado que los materiales<br />
que absorben luz poseen la propiedad<br />
física de convertir la luz incidente en<br />
calor, se pueden producir deterioros en<br />
materiales absorbentes de luz sensibles<br />
al calor o inflamables. Para evitar este<br />
tipo de daños térmicos y el posible riesgo<br />
de incendio o de quemaduras, sírvase<br />
observar las advertencias siguientes:<br />
➧ Nunca cubra el casquillo de fijación<br />
o la salida del conductor de luz<br />
(peligro de incendio).<br />
➧ Nunca cubra el casquillo de fijación<br />
abierto o la salida del conductor de<br />
luz con la mano u otras partes del<br />
cuerpo (peligro de quemaduras).<br />
➧ Al iluminar objetos que absorben la<br />
luz sensibles al calor o inflamables<br />
(por ejemplo en la microscopía), se<br />
deberá cuidar especialmente de elegir<br />
la distancia del conductor de luz<br />
y la luminosidad de manera tal que<br />
en el objeto no se produzcan deterioros<br />
térmicos.<br />
➧ Cuando la fuente de luz está encendida,<br />
todas las salidas del conductor<br />
de luz que no se utilicen durante el<br />
proceso de trabajo deberán encontrarse<br />
a una distancia segura – por lo<br />
menos 10 cm – de materiales absorbentes<br />
de luz o inflamables (para<br />
evitar posibles riesgos de incendio).<br />
Por lo tanto, preste atención a que<br />
dichas salidas de luz se encuentren a<br />
una distancia segura, por ejemplo,<br />
de textiles oscuros/de color o de<br />
superficies de madera y material<br />
plástico oscuros/de color.<br />
➧ Para evitar una carga innecesaria de<br />
tejido biológico con luz visible,<br />
reduzca a la medida estrictamente<br />
necesaria la luminosidad y la duración<br />
de la iluminación del mismo.<br />
Por favor tenga siempre en cuenta:<br />
➧ que su fuente de luz fría <strong>KL</strong> <strong>1500</strong> <strong>LCD</strong><br />
sea utilizada con la tensión indicada<br />
en la placa de características (16).<br />
➧ que todos los orificios de ventilación<br />
(12, 13, 14) siempre se encuentren<br />
libres. En caso de refrigeración insuficiente,<br />
un interruptor térmico<br />
integrado desconecta el aparato<br />
temporalmente (véase el punto 5<br />
“Eliminación de fallos“).<br />
➧ que antes de recambiar la lámpara<br />
ésta se haya enfriado. Para que no lo<br />
olvide, en la puerta del compartimiento<br />
para lámpara se encuentra<br />
un símbolo de advertencia:<br />
Atención! Superficie caliente.<br />
➧ que antes de extraer la corredera de<br />
filtros y los filtros insertados éstos se<br />
hayan enfriado. La corredera está<br />
provista del símbolo de advertencia.<br />
Atención! Superficie caliente.<br />
➧ que durante la operación de la fuente<br />
de luz la corredera de filtros básicamente<br />
se encuentre en una de las<br />
dos posiciones extremas o en la posición<br />
de encastre (véase el punto 2.5<br />
“corredera de filtros“).<br />
!<br />
!<br />
■ La fuente de luz ha sido desarrollada<br />
para uso exclusivo en ambientes<br />
secos (véase punto 7 “Datos técnicos“).<br />
■ Este aparato no es adecuado para<br />
el uso en zonas con peligro de<br />
explosión.<br />
■ Solamente descenectando el enchufe<br />
se logra una separación segura de la<br />
red de alimentación de corriente.<br />
■ El aparato no se debe abrir ni desmontar.<br />
Evitar cualquier modificación<br />
técnica en el aparato. Cualquier reparación<br />
solamente deberá ser efectuada<br />
por el fabricante o por servicios<br />
de posventa autorizados por éste.<br />
■ Sírvase garantizar a cualquier usuario<br />
de este aparato el acceso rápido a<br />
estas instrucciones para el uso.<br />
■ El fabricante no responde por los<br />
daños ocasionados a raíz del no siguimiento<br />
de estas instrucciones de uso.<br />
E<br />
38
2 Operación<br />
2.1 Conexión del conductor de luz<br />
En primer lugar se debe abrir el alojamiento<br />
del conductor de luz (2) girando<br />
el anillo negro externo en sentido<br />
antihorario. Insertar el conductor de<br />
luz hasta el tope y cerrar el alojamiento<br />
del conductor de luz.<br />
▼<br />
2.2 Puesta en servicio<br />
Conectar y desconectar accionando el<br />
conmutador de alimentación (1).<br />
Posición : El aparato está desconectado.<br />
Posición I : El aparato está conectado.<br />
Para proteger la lámpara de halógeno,<br />
la <strong>KL</strong> <strong>1500</strong> <strong>LCD</strong> está equipada con un<br />
arranque suave que reduce la corriente<br />
de conexión usual en otros casos.<br />
Además, una estabilización electrónica<br />
de la tensión de la lámpara garantiza<br />
una potencia luminosa estable, independiente<br />
de fluctuaciones de la red.<br />
▼<br />
2.3 Ajuste de la intensidad de luz<br />
La <strong>KL</strong> <strong>1500</strong> <strong>LCD</strong> dispone de dos posibilidades<br />
de ajuste de la intensidad de<br />
la luz independientes.<br />
El ajuste electrónico continuo le permite<br />
optimizar la vida útil de la lámpara; ajustando<br />
la luminosidad necesaria exactamente<br />
para la aplicación que Ud. dé a<br />
la lámpara de halógeno, logrará la máxima<br />
vida útil posible de la misma.<br />
Al variar la intensidad de la luz, también<br />
se modifica la temperatura de color de<br />
la luz emitida.<br />
El ajuste mecánico permite la variación<br />
continua de la intensidad de la luz a<br />
temperatura de color constante.<br />
Atención:<br />
Al insertar los conductores de luz con<br />
pasador de guía, se deberá tener en<br />
cuenta que éste encaje en<br />
una de las cuatro ranuras de la pinza<br />
de sujeción.<br />
39
2.3.1 Ajuste electrónico<br />
2.3.2 Diafragma mecánico<br />
Girando el ajustador de la intensidad<br />
de luz (3) es posible ajustar la luminosidad<br />
en forma continua.<br />
Entre ambas posiciones extremas del<br />
botón de ajuste hay cuatro puntos de<br />
encastre bien visibles.<br />
Estos marcan posiciones fijas y garantizan<br />
la posibilidad de reproducir los<br />
ajustes de luminosidad preseleccionados.<br />
▼<br />
En la posición 6 la lámpara halógena<br />
se utiliza con tensión nominal y alcanza<br />
aproximadamente la vida útil nominal<br />
indicada por su fabricante (en función<br />
del tipo de lámpara).<br />
En la visualización por cristal líquido (5)<br />
se indica la temperatura de color<br />
aproximada de la luz emitida (17) por<br />
la lámpara halógena. Girando el ajustador<br />
de intensidad luminosa (3) es posible<br />
ajustar la temperatura de color de<br />
la luz (de a 50 K).<br />
Girando el botón de ajuste del diafragma<br />
mecánico (4) es posible modificar<br />
la intensidad de la luz en forma continua,<br />
manteniendo invariable la temperatura<br />
de color.<br />
Dos topes fijos y tres puntos de encastre<br />
suplementarios (indicados con las<br />
letras A hasta E) permiten seleccionar<br />
de manera reproducible posiciones de<br />
diafragma definidas.<br />
▼<br />
E<br />
Una vez superada la barrera en la posición<br />
5, en la visualización por cristal<br />
líquido aparece un símbolo de lámpara<br />
(19) que durante los primeros segundos<br />
es intermitente. Sirve como indicador<br />
de la luz máxima y advierte que<br />
la vida útil esperada de la lámpara se<br />
reduce con respecto a la de la<br />
posición 5.<br />
▼<br />
En la posición 1 se da la menor intensidad<br />
de luz, la mayor luminosidad se<br />
alcanza en posición la 6. Las dos<br />
barreras que se encuentran en las<br />
posiciones 4 y 5 se superan apretando<br />
el botón de ajuste.<br />
El botón de ajuste no puede ser girado<br />
más allá de los topes 1 o 6.<br />
En posición la 4 la vida útil de la<br />
lámpara es de unas <strong>1500</strong> horas y en la<br />
posición 5 de unas 150 horas.<br />
En la posición A se da la menor luminosidad,<br />
en la posición E (diafragma<br />
totalmente abierto) se obtiene la<br />
mayor luminosidad. Al girar el botón<br />
de ajuste de un punto de encastre<br />
hacia el próximo, se produce prácticamente<br />
una duplicación o bien una división<br />
por la mitad de la intensidad luminosa.<br />
El botón de ajuste no puede ser girado<br />
más allá de los topes finales A o E.<br />
40
2.4 Instrumentos ópticos suplementarios<br />
El basculamiento de instrumentos ópticos<br />
suplementarios garantiza la obtención<br />
de una iluminación uniforme e<br />
intensa, aún empleando conductores<br />
de luz con un diámetro de haz reducido.<br />
Si la iluminación se efectúa con<br />
sistemas ópticos de proyección o enfoque<br />
en la salida del conductor de luz,<br />
mediante el basculamiento hacia afuera<br />
de los instrumentos ópticos<br />
suplementarios se obtiene una iluminación<br />
uniforme óptima.<br />
Posición – Instrumentos ópticos<br />
suplementarios basculados hacia<br />
adentro: Iluminación uniforme sin sistemas<br />
ópticos a la salida del conductor<br />
de luz.<br />
Posición – Instrumentos ópticos<br />
suplementarios basculados hacia<br />
afuera: Iluminación uniforme con sistemas<br />
ópticos a la salida del conductor<br />
de luz.<br />
En cualquier caso, los instrumentos<br />
deben estar basculados hacia adentro<br />
o hacia afuera hasta el tope.<br />
2.5 Corredera de filtros<br />
La <strong>KL</strong> <strong>1500</strong> <strong>LCD</strong> dispone de una corredera<br />
de filtros (7) equipable con un filtro<br />
insertable (adquirible como accesorio).<br />
El símbolo de advertencia en<br />
la corredera de filtros le indica quedurante<br />
el servicio de la fuente de luz,<br />
la corredera básicamente se debe<br />
encontrar en una de las dos posiciones<br />
extremas o en la posición de encastre.<br />
Solamente así queda garantizada la<br />
refrigeración óptima de la fuente de luz.<br />
La operación de la fuente de luz en<br />
una posición intermedia de la corredera<br />
de filtros puede conducir a un<br />
deterioro de la misma.<br />
▼<br />
2.5.1 Equipamiento de la corredera<br />
de filtros<br />
Asegúrese que antes de equipar la corredera<br />
de filtros con el filtro insertable<br />
ésta se haya enfriado. Para que no lo<br />
olvide, encontrará un símbolo<br />
de advertencia:<br />
Atención! Superficie caliente.<br />
!<br />
Extraer la corredera de filtros (7) hasta<br />
el tope e insertar el filtro deseado.<br />
En esta posición la fuente de luz está<br />
lista para el servicio.<br />
Cuando se aprieta la corredera de filtros<br />
hasta el tope, el filtro se encuentra<br />
en la trayectoria óptica de los rayos.<br />
Si desea operar brevemente la fuente<br />
de luz sin filtro, extraiga la corredera<br />
solamente hasta el punto de encastre.<br />
En dicha posición el filtro aún se encuentra<br />
en la fuente de luz, pero no<br />
ya en la trayectoria de los rayos.<br />
▼<br />
41
3 Recambio de la lámpara<br />
Antes de efectuar el recambio de la<br />
lámpara, cerciórese que ésta y el portalámparas<br />
se hayan enfriado.<br />
Para que no lo olvide, encontrará unsímbolo<br />
de advertencia:<br />
Atención! Superficie caliente.<br />
!<br />
4 Mantenimiento<br />
Su <strong>KL</strong> <strong>1500</strong> <strong>LCD</strong> no requiere mantenimiento.<br />
Una desinfección de la fuente de luz<br />
para su uso en el sector de la medicina<br />
no está prevista.<br />
Para la limpieza exterior del aparato,<br />
utilice un trapo suave seco o trapos de<br />
material sintético de uso comercial.<br />
5 Eliminación de fallos<br />
El visualizador dispone de una indicación<br />
de fallos (18). Cualquier fallo puede ser<br />
reconocido rápida y seguramente.<br />
„Err 1“:<br />
„Err 2“:<br />
El circuito de corriente de la<br />
lámpara está interrumpido<br />
El controlador de temperatura<br />
ha reaccionado.<br />
▼<br />
„Err 3“: Cortocircuito en el circuito<br />
de corriente de la lámpara;<br />
el dispositivo de seguridad<br />
electrónico ha reaccionado.<br />
E<br />
Fallo Causa posible Eliminación<br />
En primer lugar se debe desconectar la<br />
fuente de luz. Abrir el compartimiento<br />
para la lámpara (10) oprimiendo el<br />
botón de desbloqueo (11) y extraer<br />
hasta el tope.<br />
Apretar hacia abajo la dos palancas del<br />
zócalo especial y extraer la lámpara<br />
defectuosa.<br />
Al insertar la nueva lámpara, las dos<br />
palancas también se deben apretar<br />
hacia abajo. Insertar el compartimiento<br />
para lámpara hasta que se enclave<br />
(el encastre es audible).<br />
Conectar la fuente de luz.<br />
Lámpara apagada,<br />
ventilación apagada,<br />
no hay visualización<br />
por cristal líquido<br />
Lámpara apagada,<br />
ventilador en servicio,<br />
indicación de fallo<br />
„Err 1“<br />
Lámpara apagada,<br />
ventilador en servicio,<br />
indicación de fallo<br />
„Err 2“<br />
Lámpara apagada,<br />
ventilador en servicio,<br />
indicación de fallo<br />
„Err 3“<br />
El aparato no está conectado<br />
El enchufe no está enchufado<br />
No hay tensión<br />
El compartimiento para la lámpara<br />
no está cerrado<br />
El dispositivo de seguridad<br />
está defectuoso<br />
El transformador está recalentado<br />
Lámpara defectuosa<br />
No hay lámpara<br />
Refrigeración insuficiente<br />
Breve aumento de la intensidad<br />
de corriente en el circuito de la<br />
lámpara<br />
La lámpara produce un<br />
cortocircuito<br />
Conectar el aparato<br />
Enchufar el enchufe<br />
Comprobar la tensión<br />
Cerrar el compartimiento para<br />
la lámpara<br />
Recambiar el dispositivo de<br />
seguridad (15)<br />
Asegurar una refrigeración suficiente,<br />
controlar si se está utilizando<br />
el tipo de lámpara adecuado,<br />
una vez que se haya enfriado,<br />
volver a poner en servicio el<br />
aparato<br />
Recambiar la lámpara<br />
(véase el punto 3 de estas instrucciones<br />
para el uso).<br />
Con el aparato desconectado,<br />
insertar una lámpara<br />
Despejar los orificios de ventilación,<br />
temperatura ambiente<br />
demasiado elevada, después de<br />
un tiempo corto el aparato vuelve<br />
a conectarse<br />
Desconectar el aparato y volver<br />
a conectarlo a los pocos<br />
segundos<br />
Recambiar la lámpara (véase el<br />
punto 3 de estas instrucciones<br />
para el uso)<br />
Si no fuera posible eliminar los fallos mediante las medidas indicadas a continuación,<br />
diríjase a su comerciante autorizado o a la representación de SCHOTT más cercana.<br />
Cualquier reparación que vaya más allá deberá ser efectuada por el servicio posventa<br />
autorizado.<br />
42
6 Accesorios<br />
Para su <strong>KL</strong> <strong>1500</strong> <strong>LCD</strong> existe un amplio<br />
programa de accesorios. Un folleto<br />
separado le ofrece informaciones detalladas<br />
– Posibilidades de petición:<br />
véanse las direcciones al dorso.<br />
Solamente los conductores de luz y<br />
accesorios SCHOTT garantizan un<br />
funcionamiento perfecto, máxima<br />
seguridad y aprovechamiento óptimo<br />
de la luz.<br />
6.3 Filtros<br />
Los filtros ópticos se pueden colocar en<br />
la corredera de filtros (7) o bien delante<br />
de la salida del conductor de luz<br />
como filtros atornillables o insertables,<br />
en combinación con un dispositivo de<br />
enfoque (accesorio).<br />
Sírvase veren folleto de accesorios los<br />
detalles sobre el dispositivo de enfoque<br />
y los tipos de filtros estándael.<br />
6.1 Conductor de luz<br />
Se encuentran disponibles conductores<br />
de luz autoportantes y flexibles de diferentes<br />
longitudes y diámetros así como<br />
también iluminaciones puntuales y de<br />
ranuras.<br />
6.2 Lámpara halógena<br />
Cuando se encargan lámparas halógenas<br />
como repuesto (véase el punto 6.4<br />
de estas instrucciones para el uso) se<br />
suministrará el tipo de lámpara que<br />
permita un aprovechamiento y una<br />
iluminación óptimos.<br />
6.4 Repuestos<br />
Repuestos Ref N 0<br />
Lámpara halógena 15 V/150 W 153 000<br />
Philips tipo 6423<br />
Philips tipo 6423 HXP<br />
Osram tipo HLX 64634<br />
Dispositivo de seguridad para 230 V (primario) 150 101<br />
T 2 H 250 V según IEC 127-3/5<br />
Dispositivo de seguridad para 120 V (primario) 153 103<br />
T4 A según UL 198 G<br />
Solamente si se utilizan los tipos de accesorios indicados, se asume la prestación<br />
de garantía para un funcionamiento sin contratiempos, máxima seguridad y un<br />
aprovechamiento de luz óptimo.<br />
7 Datos técnicos<br />
Propiedades<br />
Indicaziones generales<br />
Valores<br />
Denominación del tipo - <strong>KL</strong> <strong>1500</strong> <strong>LCD</strong><br />
Medidas mm aprox. 200 x 265 x 170<br />
(anchura x profundidad x altura)<br />
Masa kg aprox. 5<br />
Ventilación - ventilador axial<br />
Temperatura ambiente* °C + 5 ... + 40<br />
Humedad ambiente relativa* % una temperatura ambiente de hasta 31°C: 85 %<br />
desde 31°C hasta 40°C de temperatura ambiente:<br />
disminución lineal a 75%<br />
Presión atmosférica* hPa 700 ... 1060<br />
Transporte y almacenamiento<br />
Temperatura °C - 40 ... + 70<br />
Humedad ambiente relativa % 10 ... 95 (no condensante)<br />
Presión atmosférica hPa 500 ... 1200<br />
Grado de ensuciamiento - 2<br />
* Condiciones de ensayo de las normas DIN EN 61010-1, DIN EN 60601-1 y UL 3101-1<br />
Continúa en la página 44<br />
43
Propiedades<br />
Datos eléctricos<br />
Tensión de servicio<br />
frecuencia<br />
Version 230 V<br />
Version 120 V<br />
Valores<br />
220 ... 240 V ~ 50 /60 Hz<br />
100 V ~ 50 / 60 Hz y<br />
120 V ~ 60 Hz<br />
Consumo de potencia máx. W 200<br />
Dispositivos de seguridad<br />
primarios<br />
Version 230 V - T 2 H, 250 V según IEC 127-3/5<br />
Version 120 V - T 4 A según UL 198 G<br />
Clase de protección - II<br />
Categoría de sobretensión - II<br />
Tipo de lámpara - reflector halógeno<br />
Philips, tipo 6423<br />
Philips, tipo 6423 XHP<br />
Osram, tipo HLX 64634<br />
E<br />
Tensión nominal de la<br />
lámpara V 15<br />
Potencia nominal de la<br />
lámpara W 150<br />
Vida útil promedio de la<br />
lámpara<br />
Nivel 4 h <strong>1500</strong><br />
Nivel 5 h 150<br />
Nivel 6 h 50<br />
Datos luminotécnicos<br />
Diámetro del haz del conductor<br />
de luz máximo utilizable<br />
luminotécnicamente mm 9<br />
Corriente fotoeléctrica total en<br />
la salida del conductor de luz<br />
(conductor de luz<br />
SCHOTT Ø 8 mm, valores típicos)<br />
Nivel 4 lm 250<br />
Nivel 5 lm 500<br />
Nivel 6 (corriente fotoeléctrica máx.) lm 600<br />
Ángulo de incidencia de<br />
la luz (2α eff )<br />
Elementos ópticos suplementarios<br />
basculados hacia afuera grados aprox. 53<br />
Filtro termoprotector - SCHOTT KG 2, 45 x 45<br />
d = 2,0 mm, templado<br />
Marca de verificación -<br />
Version 230 V<br />
Version 120 V<br />
EMV, VDE<br />
C<br />
US<br />
La lámpara <strong>KL</strong> <strong>1500</strong> <strong>LCD</strong> ha sido probada y certificada según las normativas vigentes para<br />
instrumentos eléctricos de laboratorio (DIN EN 61010-1 y UL 3101-1), así como para<br />
equipos médicos eléctricos según DIN EN 60601-1 respectivamente UL 2601-1. Lo que<br />
posibilita al fabricante una autorización fácil al integrarla en sus productos.<br />
La versión de 230 V está marcada con .<br />
Reservados los derechos de modificaciones de diseño y dimensión de suministro en el marco del perfeccionamiento<br />
técnico.<br />
44
Titel_<strong>KL</strong><strong>1500</strong><strong>LCD</strong>_Gebrauch_RZ.fh8 28.06.2001 11:05 Uhr Seite 1<br />
SCHOTT GLAS<br />
Fiber Optics Division<br />
P.O. Box 2480<br />
55014 Mainz<br />
Germany<br />
Phone: +49 (0) 61 31 / 66 -77 00<br />
Fax: +49 (0) 61 31 / 66 -77 05<br />
E-mail: faseroptik@schott.de<br />
www.schott-fiberoptics.com<br />
Schott Fibre Optics (UK) Ltd.<br />
Shaw Lane Industrial Estate<br />
Ogden Road<br />
Doncaster DN2 4SQ<br />
England<br />
Phone: +44 (0) 13 02 / 36 15 74<br />
Fax: +44 (0) 13 02 / 34 08 03<br />
E-mail: enquiries@schott.co.uk<br />
SCHOTT-FOSTEC, LLC<br />
62 Columbus Street<br />
Auburn, NY 13021<br />
USA<br />
Phone: +1 315 / 2 55-27 91<br />
Fax: +1 315 / 2 55-26 95<br />
E-mail: info@schott-fostec.com<br />
Hoya-Schott Corporation<br />
Shinjuku Daiei Building 7F<br />
3-23-7 Shinjuku, Shinjuku-ku<br />
Tokyo 160-0022<br />
Japan<br />
Phone: +8135360/1851<br />
Fax: +8135360/1860<br />
E-mail: info@hoya-schott.co.jp<br />
XXXXX Printed in Germany