CR 18DV - Hitachi Koki Co., Ltd.
CR 18DV - Hitachi Koki Co., Ltd.
CR 18DV - Hitachi Koki Co., Ltd.

Create successful ePaper yourself
Turn your PDF publications into a flip-book with our unique Google optimized e-Paper software.
English<br />
MAINTENANCE AND INSPECTION<br />
WARNING: Be sure to turned off the switch and remove the battery before<br />
maintenance and inspection.<br />
1. Inspecting the blade<br />
<strong>Co</strong>ntinued use of a dull or damaged blade will result in reduced cutting efficiency and<br />
may cause overloading of the motor. Replace the blade with a new one as soon as<br />
excessive abrasion is noted.<br />
2. Inspecting the screws<br />
Regularly inspect all screws and ensure that they are fully tightened. Should any of the<br />
screws be loosened, retighten them immediately.<br />
WARNING: Using this <strong>Co</strong>rdless Reciprocating Saw with loosened screws is<br />
extremely dangerous.<br />
3. Maintenance of the motor<br />
The motor unit winding is the very “heart”’ of the power tool. Exercise due care to<br />
ensure the winding does not become damaged and/or wet with oil or water.<br />
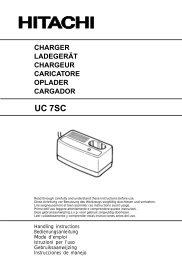
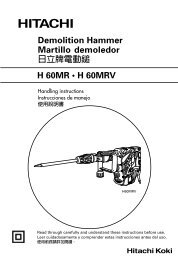
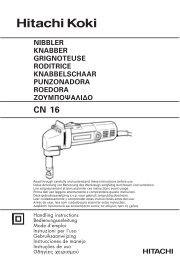
Wear limit<br />
4. Inspecting the carbon brushes (Fig. 28)<br />
The motor employs carbon brushes which are<br />
consumable parts. Since and excessively worn<br />
carbon brush can result in motor trouble, replace<br />
the carbon brush with new ones when it becomes<br />
worn to or near the “wear limit”. In addition, always<br />
keep carbon brushes clean and ensure that they slide<br />
freely within the brush holders.<br />
NOTE:<br />
When replacing the carbon brush with a new one,<br />
be sure to use the <strong>Hitachi</strong> Carbon Brush <strong>Co</strong>de No.<br />
999058.<br />
0.45"<br />
(11.5 mm)<br />
0.12" (3 mm)<br />
Fig. 28<br />
Nail ofcarbon brush<br />
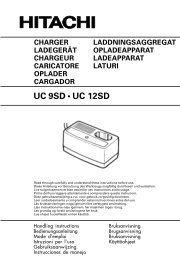
5. Replacing carbon brushes<br />
Take out the carbon brush by first removing the<br />
brush cap and then hooking the protrusion of the<br />
carbon brush with a slotted-head screw driver, etc.,<br />
as shown in Fig. 29, Fig. 30.<br />
When installing the carbon brush, choose the<br />
direction so that the nail of the carbon brush (Fig.<br />
29) agrees with the contact portion outside the brush<br />
tube (Fig. 31). Then push it in with a finger.<br />
Lastly, install the brush cap.<br />
Fig. 29<br />
Protrusion of<br />
carbon brush<br />
22