
You also want an ePaper? Increase the reach of your titles
YUMPU automatically turns print PDFs into web optimized ePapers that Google loves.
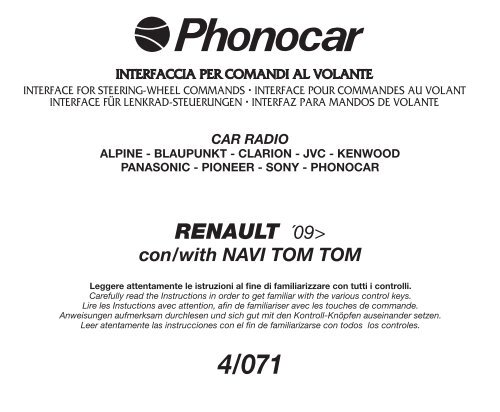
INTERFACCIA PER COMANDI AL VOLANTE<br />
INTERFACE FOR STEERING-WHEEL COMMANDS • INTERFACE POUR COMMANDES AU VOLANT<br />
INTERFACE FÜR LENKRAD-STEUERUNGEN • INTERFAZ PARA MANDOS DE VOLANTE<br />
CAR RADIO<br />
ALPINE - BLAUPUNKT - CLARION - JVC - KENWOOD<br />
PANASONIC - PIONEER - SONY - PHONOCAR<br />
RENAULT ´09><br />
con/with NAVI TOM TOM<br />
Leggere attentamente le istruzioni al fine di familiarizzare con tutti i controlli.<br />
Carefully read the Instructions in order to get familiar with the various control keys.<br />
Lire les Instuctions avec attention, afin de familiariser avec les touches de commande.<br />
Anweisungen aufmerksam durchlesen und sich gut mit den Kontroll-Knöpfen auseinander setzen.<br />
Leer atentamente las instrucciones con el fin de familiarizarse con todos los controles.<br />
4/<strong>071</strong>
2<br />
COLLEGAMENTI • CONNECTIONs • CONNEXIONs • ANsChLüssE • CONEXIóNEs<br />
I - Il dispositivo 4/<strong>071</strong> è un adattatore universale, per comandi al volante originali, con protocollo CAN-BUS. La sua caratteristica<br />
principale è la compatibilità con diversi tipi di autoradio quali:<br />
ALPINE-BLAUPUNKT-CLARION-KENWOOD-JVC-PANASONIC-PHONOCAR-PIONEER-SONY purchè abbiano l’ingresso del controllo<br />
remote con cavo.<br />
Il modulo fornisce anche altri servizi quali: accensione sotto-chiave, luci consolle, navigatore originale TOM TOM, segnale odometrico.<br />
GB - The Universal CAN-BUS Adapter 4/<strong>071</strong> is suitable for Original Steering-Wheel Commands.It is compatible with various carradios,<br />
such as:<br />
ALPINE-BLAUPUNKT-CLARION-KENWOOD-JVC-PANASONIC-PHONOCAR-PIONEER-SONY, on condition that the remotecontrol<br />
Input is governed by a cable.<br />
The module 4/<strong>071</strong> also provides for: under-key switch-on, console-lights, Original TOM-TOM Navigator, odometer-signal.<br />
F - Le 4/<strong>071</strong> est un adaptateur universel pour commandes au volant originaux avec protocole CAN-BUS. Il est caractérisé principalement<br />
par la compatibilité avec différents types d’autoradios. Exemple:<br />
ALPINE – BLAUPUNKT – CLARION – KENWOOD – JVC – PANASONIC – PHONOCAR – PIONEER – SONY à condition que ceux ci<br />
aient l’entrée du contrôle remote avec câble.<br />
Le module fournit aussi d’autres services tels que: allumage après contact, lumière pour console, navigateur original TOM TOM,<br />
signal de l’odomètre.<br />
D - Der Universal-CAN-BUS-Adapter 4/<strong>071</strong> eignet sich spezifisch für Original-Lenkrad-Steuerungen. Kennzeichnend ist vor allem<br />
seine Kompatibilität mit verschiedenen Autoradio-Marken:<br />
ALPINE-BLAUPUNKT-CLARION-KENWOOD-JVC-PANASONIC-PHONOCAR-PIONEER-SONY, solange ein Kabel für den Remote-Kontroll-Eingang<br />
zuständig ist.<br />
Das Modul 4/<strong>071</strong> liefert gleichzeitig auch folgende Zusatz-Funktionen: Einschalten durch Zündplus, Konsolen-Beleuchtung, Original<br />
TOM-TOM-Navigator, Tacho-Signal<br />
E - El dispositivo 4/<strong>071</strong> es un adaptador universal, para mandos de volante originales, con protocolo CAN-BUS. Su principal característica<br />
es la compatibilidad con diferentes marcas de autoradio como:<br />
ALPINE-BLAUPUNKT-CLARION-KENWOOD-JVC-PANASONIC-PHONOCAR-PIONEER-SONY, con tal que tenga la entrada del<br />
control de remoto por cable.<br />
El modulo dispone también de otros servicios como: encendido bajo-llave, luz consola, navegador original TOM TOM, señal<br />
odómetrica.
3<br />
CAR RADIO<br />
OUTPUT +12 V<br />
Illuminazione +12<br />
Car light<br />
Odometro<br />
Distancer-meter signal<br />
Accensione NAVI TOM TOM<br />
Power Navi TOM TOM<br />
Negativo freno a mano<br />
Negative brake<br />
Cavo adattatore<br />
Adapter cable<br />
OUT<br />
ROsA•PINK•ROSE•ROSA•ROSA<br />
ARANCIO•ORANGE•ORANGIER<br />
ORANGE•ANARANJADO<br />
GRIGIO•GREY•GRIS•GRAU•GRIS<br />
BLU•BLUE•BLUE•BLAU•AZUL<br />
BIANCO/GIALLO•WHITE/YELLOW•BLANC/JAUNE<br />
WEISS/GELB•BLANCO/AMARILLO<br />
4/<strong>071</strong><br />
RENAULT<br />
con/with Navi TOM TOM<br />
IN<br />
ROssO•RED•ROUGE•ROT•ROJO<br />
+12 V<br />
NERO•BLACK•NOIR•SCHWARZ•NEGRO<br />
VERDE•GREEN•VERT•GRUN•VERDE<br />
BIANCO•WHITE•BLANC•WEISS•BLANCO<br />
CAN-HIGH<br />
CAN-LOW<br />
K-BUS
4<br />
COLLEGAMENTI • CONNECTIONs • CONNEXIONs • ANsChLüssE • CONEXIóNEs<br />
BIANCO•WHITE<br />
VERDE•GREEN CAN HIGH<br />
ROsA•PINK<br />
SCENIC<br />
BLU•BLUE ACCENSIONE/POWER TOM TOM<br />
GRIGIO•GREY<br />
GIALLO•YELLOW<br />
ARANCIO•ORANGE<br />
AMPLY<br />
NERO•BLACK<br />
ROssO•RED<br />
4/<strong>071</strong>
5<br />
BLU•BLUE<br />
BIANCO•WHITE<br />
VERDE•GREEN<br />
NERO•BLACK<br />
ROssO•RED<br />
CLIO<br />
AMPLY<br />
GRIGIO•GREY<br />
GIALLO•YELLOW<br />
ARANCIO•ORANGE<br />
USCITA SOTTOCHIAVE / UNDERKEY OUTPUT ROsA•PINK<br />
ROssO•RED<br />
NERO•BLACK<br />
4/<strong>071</strong>
6<br />
ALPINE - CLARION - JVC - PIONEER - SONY - PHONOCAR VM040-VM041<br />
CAR RADIO<br />
Uscita Comandi al volante / Remote<br />
Exit Steering-Wheel Comands / Remote<br />
Sorti des commandes au volant / Remote<br />
Ausgang Lenkrad-Steuerungen / Remote<br />
Salida Mandos de volante / Remoto<br />
Connettore personalizzato marchio autoradio<br />
Personalized Connector per Radio-Model<br />
Connecteur personnalisé marque autoradio<br />
Radio-spezifischer Verbinder<br />
Conector personalizado marca autoradio<br />
CAR RADIO<br />
SONY<br />
PIONEER<br />
PHONOCAR VM040-VM041<br />
ALPINE<br />
4/<strong>071</strong><br />
RENAULT<br />
con/with Navi TOM TOM<br />
CLARION<br />
JVC<br />
Connettore originale dell’auto.<br />
Original Car-Connector<br />
Connecteur original du véhicule<br />
Original-Verbinder des Wagens<br />
Conector original del coche<br />
BLAUPUNKT - PANASONIC - PHONOCAR - KENWOOD ‘06><br />
Uscita Comandi al volante / Remote<br />
Exit Steering-Wheel Comands / Remote<br />
Sorti des commandes au volant / Remote<br />
Ausgang Lenkrad-Steuerungen / Remote<br />
Salida Mandos de volante / Remoto<br />
Connettore personalizzato marchio autoradio<br />
Personalized Connector per Radio-Model<br />
Connecteur personnalisé marque autoradio<br />
Radio-spezifischer Verbinder<br />
Conector personalizado marca autoradio<br />
PANASONIC<br />
KENWOOD<br />
PHONOCAR<br />
(escluso VM040-VM041)<br />
Non collegare<br />
Do NOT connect.<br />
Ne connectez pas.<br />
NICHT anschließen<br />
No xconectar<br />
BLAUKPUNKT<br />
4/<strong>071</strong><br />
RENAULT<br />
con/with Navi TOM TOM<br />
Connettore originale dell’auto.<br />
Original Car-Connector<br />
Connecteur original du véhicule<br />
Original-Verbinder des Wagens<br />
Conector original del coche
7<br />
FUNZIONE<br />
TASTI<br />
I - La seguente tabella indica le funzioni memorizzate nel dispositivo secondo i diversi modelli di autoradio.<br />
Nella colonna Funct. si possono individuare i tasti corrispondenti dei comandi al volante.<br />
Nota: secondo i modelli di autoradio alcuni tasti dei comandi non corrisponderanno alle funzioni originali.<br />
GB - The following table indicates the functions memorized on the device, in relation to the various radio-models.<br />
The column “ref.” indicated the key on the steering-wheel-command. You will notice that the keys do not have a universal function,<br />
but that the function depends on the car-radio. Please see subsequent schemes.<br />
F - Le tableau suivant donne les fonctions mémorisées sur le dispositif, selon les différents modèles d’autoradio.<br />
Dans la colonne “RÉF.” vous trouvez la touche des commandes à volant à utiliser.<br />
Comme il est évident, les fonctions de la touche ne restent pas constants, mais changent en relation avec le modèle de voiture. (voir<br />
les schémas successifs).<br />
D - Die nachfolgende Tabelle weist die Funktionen auf, die, je nach Radiomodell, auf dem Universal-Adapter 4/070 eingespeichert<br />
sind.<br />
In der Spalte RIF. sind die Tasten der Lenkradfernbedienung angegeben.<br />
Aus dieser Aufzeichnung geht klar hervor, dass eine bestimmte Taste nicht durchgehend immer dieselbe Funktion ausübt, sondern<br />
sich die Funktion je nach Radiomodell ändert. Siehe nachfolgende Schemen.<br />
E - La siguiente tabla indica las funciones memorizadas en el dispositivo según los diversos modelos de autoradio.<br />
En la columna RIF. Se pueden detectar las correspondientes teclas, para utilizar en el mando de volante y se notará, que cambiando<br />
modelo de autoradio las funciones descritas sobre las teclas no sean correspondientes. Ver esquemas sucesivos.<br />
RENAULT<br />
BUTTON<br />
FUNCTION<br />
FONCTIONS<br />
TOUCHES<br />
Funct. BLK CLARION KENWOOD JVC ALPINE PANASONIC PIONEER SONY<br />
FUNKTION<br />
DER TASTEN<br />
PHONOCAR<br />
VM<br />
020-021-022-023<br />
030-031-032 VM017<br />
FUNCIONES<br />
TECLAS<br />
1 VOL+ VOL+ VOL+ VOL+ VOL+ VOL+ VOL+ VOL+ VOL- VOL- VOL-<br />
2 VOL- VOL- VOL- VOL- VOL- VOL- VOL- VOL- VOL+ VOL+ VOL+<br />
3 SEEK+ MEM+/SKIP TRACK SEEK+ SEEK+ SEEK+ SEEK+ SKIP TRACK SKIP TRACK SEEK- SEEK- SEEK-<br />
4 SEEK- MEM-/PREVIOUS TRACK SEEK- SEEK- SEEK- SEEK- SKIP TRACK SKIP TRACK SEEK+ SEEK+ SEEK+<br />
7 SRC MUTE SOURCE SOURCE SOURCE SRC SOURCE SOURCE SRC SOURCE SOURCE<br />
8 MUTE \ MUTE MUTE MUTE MUTE MUTE MUTE BAND MUTE MUTE<br />
VM040<br />
VM041
8<br />
PRG<br />
1 2 3<br />
A<br />
B<br />
C<br />
D<br />
E<br />
AUTORADIO<br />
CAR-RADIO<br />
FRENO A MANO<br />
HAND-BRAKE<br />
FREIN STATIONNEMENT<br />
HANDBREMSE<br />
FRENO DE MANO<br />
IMPOsTAZIONI sERVIZI • sELECTION OF FUNCTIONs • PROGRAMMATION sERVICEs<br />
FUNKTIONs- PROGRAMMIERUNG • CONFIGURACIóN DE LOs sERVICIOs<br />
I - Per selezionare le funzioni è indispensabile aprire il dispositivo e inserire i “JUMPERS” nelle giuste posizioni.<br />
GB - To select the functions, it is necessary to open the device and to insert the “JUMPERS” into the correct positions.<br />
F - Pour sélectionner les fonctions, il est nécessaire d’ouvrir le dispositif et y introduire le “JUMPERS” dans la position<br />
prévue.<br />
D - Um die Funktionen zu programmieren, muss man den Universal-Adapter 4/070 öffnen und die “JUMPERS” in die<br />
notwendige Position geben.<br />
E - Para seleccionar las funciones es indispensable abrir el dispositivo e introducir los “JUMPERS” (puentes) en la posición<br />
adecuada.<br />
POSITION 1 2 3<br />
JUMPER<br />
Clarion-Kenwood-Jvc-Alpine-Sony-Panasonic - <strong>Phonocar</strong> ............................ A (1-2)<br />
Pioneer .............................................................................................................. A (2-3)<br />
Blaupunkt ........................................................................................... A (2-3) - D (1-2)<br />
Il cavo bianco/giallo può fare 2 funzioni: Positivo (+12V) oppure negativo<br />
The white/yellow cable can carry out 2 functions: Positive +12V or negative<br />
Le câble blanc/jaune peut effectuer 2 fonctions: Positif (+12V) ou Négatif<br />
Das Kabel Weiss/Gelb kann zweierlei Funktionen ausüben: Positiv+12V bzw. Negativ<br />
El cable blanco /amarillo puede hacer dos funciones: Positivo (+12V) o negativo<br />
Positive +12v .................................................................................................... B (2-3)<br />
Negative ........................................................................................................... B (1-2)
9<br />
PROGRAMMAZIONE MARCHIO AUTORADIO IT<br />
I - Collegando il cavo alimentazione del dispositivo il led lampeggerà con colore rosso Un programma ad auto apprendimento, eseguirà<br />
in automatico la sincronizzazione e la selezione del corretto protocollo.A sincronizzazione avvenuta, il led lampeggerà con colore<br />
verde e continuerà a lampeggiare fino a quando non si selezionerà il marchio dell’ autoradio da programmare.<br />
SELEZIONE MARCHIO AUTORADIO<br />
Per effettuare la selezionare agire sui comandi al volante: premendo VOLUME+ si seleziona il marchio autoradio. Premendo SEEK si<br />
memorizza.<br />
Es.: per memorizzare Alpine, premere 3 volte il tasto Volume+, il Led verde eseguirà cicli di 4 lampeggi rapidi e una pausa, premere<br />
SEEK per memorizzare.<br />
Clarion non premere Led verde 1 lampeggio premere SEEK+<br />
Kenwood premere 1 volta Vol+ Led verde 2 lampeggi premere SEEK+<br />
Jvc premere 2 volte Vol+ Led verde 3 lampeggi premere SEEK+<br />
Alpine premere 3 volte Vol+ Led verde 4 lampeggi premere SEEK+<br />
Pioneer premere 5 volte Vol+ Led verde 6 lampeggi premere SEEK+<br />
Sony - <strong>Phonocar</strong> VM040-VM041 premere 6 volte Vol+ Led verde 7 lampeggi premere SEEK+<br />
Panasonic premere 8 volte Vol+ Led verde 9 lampeggi premere SEEK+<br />
Blaupunkt premere 9 volte Vol+ Led verde 10 lampeggi premere SEEK+<br />
<strong>Phonocar</strong> VM020•VM021•VM022•VM023 premere 12 volte Vol+ Led verde 13 lampeggi premere SEEK+<br />
<strong>Phonocar</strong> VM016 premere 13 volte Vol+ Led verde 14 lampeggi premere SEEK+<br />
<strong>Phonocar</strong> VM030•VM031•VM032 premere 14 volte Vol+ Led verde 15 lampeggi premere SEEK+<br />
<strong>Phonocar</strong> VM017 premere 17 volte Vol+ Led verde 18 lampeggi premere SEEK+<br />
Nel caso che la selezione non sia corretta, verificare il numero di lampeggi corrispondenti al marchio e variarli, utilizzando i tasti<br />
VOLUME+ per aumentarli e VOLUME- per diminuirli.<br />
A memorizzazione ultimata, il Led s’illuminerà di verde.<br />
RESET DISPOSITIVO:<br />
Senza togliere il circuito dall’alimentazione, premere il tasto PRG fino a quando led verde non si spegne.<br />
Il led lampeggerà di color Rosso per pochi secondi, poi diventerà colore verde in attesa della selezione del nuovo modello di radio.
10<br />
PROGRAMMING PER RADIO-BRAND<br />
GB - When the current-supply-cable is connected, the Led will flash red. A self-learning programme will automatically effect the synchronization<br />
and selection of the related protocol. As soon as the synchronization has been completed, the Led will flash green and continue<br />
flashing until the car-radio make is selected for programming.<br />
CAR-RADIO SELECTION<br />
To select the radio-model installed in the car, act on the steering-wheel commands:<br />
press VOLUME+ to select the radio-model; press SEEK to memorize.<br />
Clarion do not press Led green 1 blinking press SEEK+<br />
Kenwood press Vol+ 1 time. Green Led blinks 2 times press SEEK+<br />
Jvc press Vol.+ 2 times. Green Led blinks 3 times press SEEK+<br />
Alpine press Vol.+ 3 times. Green Led blinks 4 times press SEEK+<br />
Pioneer press Vol.+ 5 times. Green Led blinks 6 times press SEEK+<br />
Sony - <strong>Phonocar</strong> VM040-VM041 press Vol.+ 6 times. Green Led blinks 7 times press SEEK+<br />
Panasonic press Vol.+ 8 times. Green Led blinks 9 times press SEEK+<br />
Blaupunkt press Vol.+ 9 times. Green Led blinks 10 times press SEEK+<br />
<strong>Phonocar</strong> VM020•VM021•VM022•VM023 press Vol.+ 12 times. Green Led blinks 13 times press SEEK+<br />
<strong>Phonocar</strong> VM016 press Vol.+ 13 times. Green Led blinks 14 times press SEEK+<br />
<strong>Phonocar</strong> VM030•VM031•VM032 press Vol.+ 14 times. Green Led blinks 15 times press SEEK+<br />
<strong>Phonocar</strong> VM017 press Vol.+ 17 times. Green Led blinks 18 times press SEEK+<br />
Should the selection not be correct, please check the number of blinkings indicated for the radio-model and, if necessary, rectify by<br />
pressing VOLUME+ (to increase) or VOLUME- (to reduce).<br />
When memorization has ben completed, the Led will turn green.<br />
RE-SETTING OF DEVICE: Without interrupting the power-supply to the circuit, press the PRG-key until the green Led goes off.<br />
The Led will flash red, for some seconds, and then turn green, until a different radio-model is selected.<br />
GB
11<br />
PROGRAMMATION PAR MARQUE D’AUTORADIO FR<br />
F - Quand on branche le câble d’alimentation du dispositif, le Led commence à clignoter rouge. La synchronisation et la sélection du<br />
protocole se font automatiquement à travers une procédure d’auto apprentissage. Dès que la synchronisation est terminée, le Led<br />
commence à clignoter Vert et continuera jusqu’à la sélection de la marque d’autoradio à programmer.<br />
SELECTION AUTORADIO<br />
Pour sélectionner le modèle d’autoradio installée dans la voiture, utiliser les commandes au volant:<br />
Appuyer sur la touche VOLUME+ pour sélectionner la marque d’autoradio.Appuyer sur la touche SEEK pour mémoriser.<br />
Exemple: pour mémoriser Alpine, appuyer 3 fois sur la touche Volume+. Le Led commence à clignoter en cycles de 4 clignotements<br />
rapids et une pause. Appuyer sur SEEK pour mémoriser.<br />
Clarion ne pas appuyer Led vert 1 clignotement appuyer SEEK+<br />
Kenwood appuyer une fois VOLUME+ Led vert clignote 2 fois appuyer SEEK+<br />
JVC appuyer 2 fois VOLUME+ Led vert clignote 3 fois appuyer SEEK+<br />
Alpine appuyer 3 fois VOLUME+ Led vert clignote 4 fois appuyer SEEK+<br />
Pioneer appuyer 5 fois VOLUME+ Led vert clignote 6 fois appuyer SEEK+<br />
Sony - <strong>Phonocar</strong> VM040-VM041-VM041 appuyer 6 fois VOLUME+ Led vert clignote 7 fois appuyer SEEK+<br />
Panasonic appuyer 8 fois VOLUME+ Led vert clignote 9 fois appuyer SEEK+<br />
Blaupunkt appuyer 9 fois VOLUME+ Led vert clignote 10 fois appuyer SEEK+<br />
<strong>Phonocar</strong> VM020•VM021•VM022•VM023 appuyer 12 fois VOLUME+ Led vert clignote 13 fois appuyer SEEK+<br />
<strong>Phonocar</strong> VM016 appuyer 13 fois VOLUME+ Led vert clignote 14 fois appuyer SEEK+<br />
<strong>Phonocar</strong> VM030•VM031•VM032 appuyer 14 fois VOLUME+ Led vert clignote 15 fois appuyer SEEK+<br />
<strong>Phonocar</strong> VM017 appuyer 17 fois VOLUME+ Led vert clignote 18 fois appuyer SEEK+<br />
Dans le cas où la sélection ne résulte pas correcte, vérifier les clignotements selon la marque autoradio et, si nécessaire, modifier.<br />
Appuyer VOLUME+ (pour augmenter) ou VOLUME- (pour réduire).<br />
Quand la mémorisation a été complètée, le Led tourne vert.<br />
RE-PROGRAMMATION (RESET): Sans interrompre l’alimentation du circuit, appuyer sur la touche PRG jusqu’à ce que le Led Vert<br />
s’éteint. Le Led clignotera Rouge pour quelques secondes, puis il retournera Vert jusqu’au moment où on sélectionnera un autre<br />
modèle d’autoradio.
12<br />
EINSTELLUNG NACH RADIO-MARKE<br />
D - Nachdem das Stromkabel der Vorrichtung angeschlossen worden ist, leuchtet das Led rot auf.<br />
Durch ein Selbst-Lern-Programm wird die Synchronisierung und Wahl des notwendigen Protokolls automatisch vorgenommen.<br />
Sobald die Synchronisierung stattgefunden hat, beginnt das Led grün zu blinken und hält so lange an, bis die Marke des zu programmierenden<br />
Autoradios eingegeben wird.<br />
AUTORADIO-WAHL<br />
Um das Modell des installierten Autoradios zu wählen, Lenkradfernbedienung wie folgt verwenden:<br />
VOLUME+ so oft drücken, wie für das in Frage kommende Autoradio vorgesehen.<br />
Dann SEEK drücken, um die Eingabe zu bestätigen.<br />
Clarion nicht dücken Led grün 1 Aufblinken SEEK+ drücken<br />
Kenwood 1 Mal Vol+ drücken. Grünes Led blinkt 2 mal SEEK+ drücken<br />
Jvc 2 Mal Vol+ drücken. Grunes Led blinkt 3 mal SEEK+ drücken<br />
Alpine 3 Mal Vol+ drücken. Grunes Led blinkt 4 mal SEEK+ drücken<br />
Pioneer 5 Mal Vol+ drücken. Grünes Led blinkt 6 mal SEEK+ drücken<br />
Sony - <strong>Phonocar</strong> VM040-VM041 6 Mal Vol+ drücken. Grünes Led blinkt 7 mal SEEK+ drücken<br />
Panasonic 8 Mal Vol+ drücken. Grünes Led blinkt 9 mal SEEK+ drücken<br />
Blaupunkt 9 Mal Vol+ drücken. Grünes Led blinkt 10 mal SEEK+ drücken<br />
<strong>Phonocar</strong> VM020•VM021•VM022•VM023 12 Mal Vol+ drücken. Grünes Led blinkt 13 mal SEEK+ drücken<br />
<strong>Phonocar</strong> VM016 13 Mal Vol+ drücken. Grünes Led blinkt 14 mal SEEK+ drücken<br />
<strong>Phonocar</strong> VM030•VM031•VM032 14 Mal Vol+ drücken. Grünes Led blinkt 15 mal SEEK+ drücken<br />
<strong>Phonocar</strong> VM017 17 Mal Vol+ drücken. Grünes Led blinkt 18 mal SEEK+ drücken<br />
Wurde die Wahl falsch getroffen, Blink-Anzahl nach Radio-Tabelle kontrollien und nach Bedarf korrigieren: zum Erhöhen VOLUME+<br />
drücken; zum Verringern VOLUME- drücken.<br />
Nach positiv abgeschlossener Einspeicherung leuchtet das Led grün auf.<br />
RE-SET DER VORRICHTUNG: Vorrichtung weiterhin am Strom angeschlossen halten. Taste PRG drücken, bis das grüne Led erlischt.<br />
Das Led wird einige Sekunden lang rot blinken, dann auf Grün umschalten, bis ein anderes Radiomodell gewählt wird.<br />
D
13<br />
PROGRAMACION PAR MARCA AUTORADIO E<br />
E - Conectando el cable de alimentación del dispositivo ,el Led parpadeará en color rojo<br />
Un programa de auto aprendizaje, ejecutará automáticamente la sincronización y la selección de la correcta señal. A sincronización<br />
acaecida, el Led parpadeara en color verde y continuará a parpadear hasta cuando no se seleccione la marca del autoradio para<br />
programar.<br />
sELECCIóN AUTORADIO<br />
Para seleccionar el modelo de autoradio instalado accionar los mandos del volante:<br />
VOLUMEN+ para seleccionar el autoradio, en base al número de veces que viene pulsado y SEEK para la memorización.<br />
Clarión no presionar Led verde 1 parpadeo pulsar SEEK+<br />
Kenwood pulsar 1 vez. Vol+ Led verde 2 impulsos pulsar SEEK+<br />
Jvc pulsar 2 veces. Vol+ Led verde 3 impulsos pulsar SEEK+<br />
Alpine pulsar 3 veces Vol+ Led verde 4 impulsos pulsar SEEK+<br />
Pioneer pulsar 5 veces Vol+ Led verde 6 impulsos pulsar SEEK+<br />
Sony - <strong>Phonocar</strong> VM040-VM041 pulsar 6 veces Vol+ Led verde 7 impulsos pulsar SEEK+<br />
Panasonic pulsar 8 veces Vol+ Led verde 9 impulsos pulsar SEEK+<br />
Blaupunkt pulsar 9 veces Vol+ Led verde 10 impulsos pulsar SEEK+<br />
<strong>Phonocar</strong> VM020•VM021•VM022•VM023 pulsar 12 veces Vol+ Led verde 13 impulsos pulsar SEEK+<br />
<strong>Phonocar</strong> VM016 pulsar 13 veces Vol+ Led verde 14 impulsos pulsar SEEK+<br />
<strong>Phonocar</strong> VM030•VM031•VM032 pulsar 14 veces Vol+ Led verde 15 impulsos pulsar SEEK+<br />
<strong>Phonocar</strong> VM017 pulsar 17 veces Vol+ Led verde 18 impulsos pulsar SEEK+<br />
En el caso de que la selección no sea correcta, verificar el número de impulsos correspondientes y variarlos, utilizando las teclas<br />
VOLUMEN + para aumentarlos y VOLUMEN - para disminuirlos.<br />
Una vez memorizado, el Led se iluminará de color verde.<br />
RESET DISPOSITIVO: Sin quitar la alimentación del circuito, pulsar la tecla PRG hasta que el Led verde no se apague.<br />
El Led parpadeará en color rojo durante unos segundos, después cambiará a verde en espera de la selección del nuevo modelo<br />
de radio.
14<br />
ACCENsIONE NAVIGATORE TOM TOM … sWITChING-ON ThE TOM-TOM NAVIGATOR • ALLUMAGE NAVIGATION TOM TOM<br />
EINsChALTEN DEs TOM-TOM-NAVIGATORs • ENCENDIDO NAVEGADOR TOM TOM<br />
SCENIC CLIO<br />
I - Una volta acceso il quadro strumenti basta premere per 2 secondi il tasto MUTE del comando al volante e il navigatore si metterà<br />
in funzione, si spegnerà automaticamente all’arresto della macchina.<br />
GB - After having turned on the switch-board, simply press MUTE-key of steering-wheel controls for 2 seconds so that the navigator<br />
will promptly start working. It will automatically switch-off, when the car is stopped.<br />
FR - Une fois allumé le cadre des instruments, appuyer pour 2 secondes la touche MUTE de la commande au volant et la navigation<br />
entrera en fonction; elle s’éteindra automatiquement à l’arrêt de la voiture.<br />
D - Bei eingeschalteter Instrumententafel, MUTE-Taste der Lenkrad-Steuerungen 2 Sekunden lang drücken. Der Navigator schaltet<br />
sich somit prompt ein und wird dann automatisch, beim Anhalten des Wagens, wieder ausschalten.<br />
E - Una vez encendido el cuadro de instrumentos es suficiente presionar durante 2 segundos la tecla MUTE del mando de volante<br />
y a continuación el navegador se pondrá´ en función, se apagará automáticamente al parar el coche.
15<br />
1 2 3 4 5<br />
I<br />
1) Ingresso audio navigatore<br />
2) Controllo sensibilità<br />
3) Connettore alimentazione<br />
4) Controllo tempo di spegnimento navigatore<br />
5) Led di accensione<br />
GB<br />
1) Navigator Input<br />
2) Sensitivity Control<br />
3) Current-Supply<br />
Connector<br />
4) Navigator Shut-down<br />
Time-control<br />
5) Switch-on Led<br />
REGOLAZIONI • sET-UP • RéGLAGEs • EINsTELLUNGEN • AJUsTEs<br />
F<br />
1) Entrée Navigateur<br />
2) Contrôl Navigateur<br />
3) Connecteur<br />
d’alimentation<br />
4) Contrôl temps d’éteint<br />
navigateur<br />
5) Led d’allumage<br />
D<br />
1) Navigator-Eingang<br />
2) Sensibilitäts-Kontrolle<br />
3) Stromzufuhr-Verbinder<br />
4) Kontrolle der Navigations-Ausschaltzeit<br />
5) Einschalt-Led<br />
E<br />
1) Entrada navegador<br />
2) Control de sensibilidad<br />
3) Conector de<br />
alimentación<br />
4) Control del tiempo de<br />
apagado del navegador<br />
5) Led de encendido
16<br />
ATTENZIONE: I collegamenti e l’installazione devono essere effettuati da personale formato e informato. • Sistemare i cavi in modo che non vengano<br />
piegati o compressi da parti metalliche taglienti. • Non installare in luoghi umidi o polverosi.<br />
IMPORTANT: Installation and Connections need to be carried out by trained and well-informed personnel. • Place the cables in such a way to avoid that they get<br />
folded or compressed by sharp metal pieces. • Do not install in humid or dusty locations.<br />
IMPORTANT: L’Installation et les Connexions doivent être effectuées par du personnel spécialisé et bien informé sur le produit. • Placer les câbles de<br />
manière à éviter leur plissement ou tranchement par des parties métalliques. • Ne pas installer dans des endroits humides ou poussiéreux.<br />
WICHTIG: Installation und Verbindungen müssen vom gut informierten Fachmann vorgenommen werden. • Kabel fernhalten von scharfkantigen Metall-Teilen, um<br />
ihr Verknicken oder Abtrennen zu vermeiden. • Nicht an feuchten oder staubigen Montagestellen installieren.<br />
ATENCION: Las instalaciones y las conexiones tienen que ser efectuadas por personal especializado y formado. Colocar los cables con especial cuidado evitando<br />
de doblarlos, o comprimirlos.<br />
AVVERTIMENTI: Non smontare o modificare l’apparecchio. • Utilizzare il prodotto in veicoli con batteria da 12V. • Usare fusibili di ricambio dell’amperaggio corretto.<br />
• Eseguire correttamente i collegamenti. • Evitare che i cavi si impiglino agli oggetti circostanti.<br />
ATTENTION: Do NOT open or modify the appliance. • Use the product only on vehicles having a 12V-battery. • Make sure replacement fuses have the correct<br />
Amp.-value. • Make sure the connections are carried out correctly. • Avoid that the cables get imprisoned by nearby objects.<br />
AVERTISSEMENTS: Ne pas ouvrir ou modifier l’appareil. • Utiliser le produit exclusivement sur des véhicules avec une batterie à 12V. • Utiliser des fusibles de<br />
rechange avec les Ampères corrects. • Effectuer les connexions de manière correcte. • Eviter que les câbles puissent s’accrocher aux object voisins.<br />
BESONDERE HINWEISE: Das Gerät niemals auseinander nehmen oder Änderungen vornehmen. • Das Produkt nur auf Fahrzeugen verwenden, die über eine 12V-<br />
Batterie verfügen. • Beim Austauschen der Sicherungen immer auf den korrekten Ampere-Wert achten. • Elektro-Verbindungen korrekt vornehmen und kontrollieren.<br />
• Sicherstellen, dass sich die Kabel nicht an naheliegenden Gegenständen verhängen können.<br />
SE ADVIERTE DE: No desmontar o modificar el aparato. • Utilizar este aparato en vehículos con batería de 12 Voltios. • Usar fusibles de recambios con el amperaje<br />
correcto. • Ejecutar correctamente las conexiones. • Evitar que los cables se enganchen con los objetos cercanos.<br />
S.p.A. - Via F.lli Cervi, 167/C - 42124 Reggio Emilia (Italy) - Tel. ++39 0522 941621 - Fax ++39 0522 942452<br />
www.phonocar.com - e-mail:info@phonocar.it